Neon filters are all the new rage on social media websites. They help make mundane photos interesting all the while helping your subject pop out from the background much more easily. A few years ago, getting neon filters to work required complex desktop tools like Photoshop and after effects depending on the type of content at hand. But thanks to modern-day smartphones that have the exceptional processing power, we can achieve the same effect right on your phone itself.
Instead of using long exposure photography to create neon outlines on your photos, we will be using dedicated apps that come with built-in filters. These apps use complex algorithms to differentiate between your subjects and background in order to take away the hassle of separating the two yourself. For this guide, we will be using the famous mobile photo editor: Picsart Studio.
Picsart has been around for a few years now and has been at the forefront of free, easy and beginner-friendly photo editing for mobile platforms. It is a comprehensive app that is packed to the brim with creative filters and frames that can enhance your photos exquisitely. Here is a quick step by step guide that will help you get a neon sketch effect on your photos using Picsart.
RELATED: Get Neon effect on your photo with the Android apps
How to get Neon effect on a photo

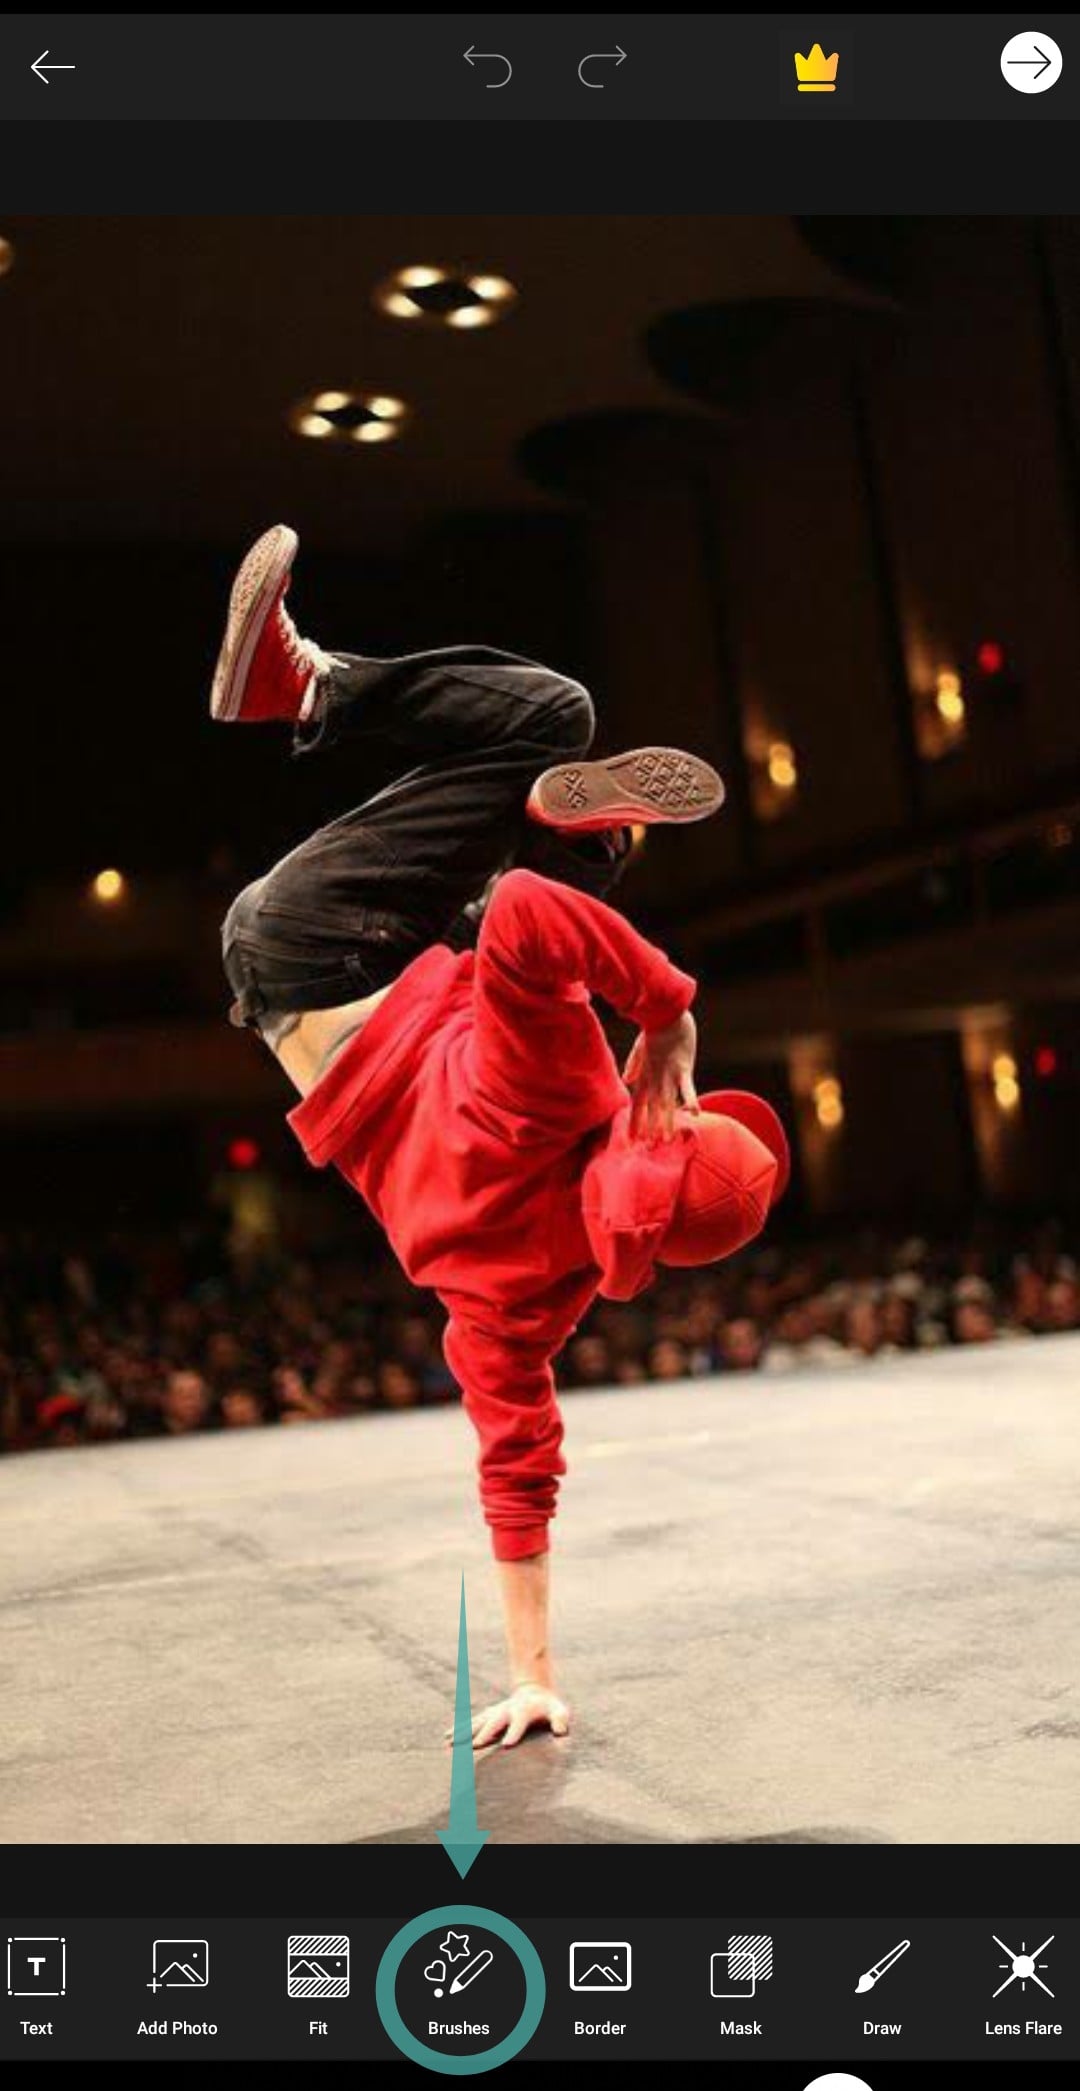
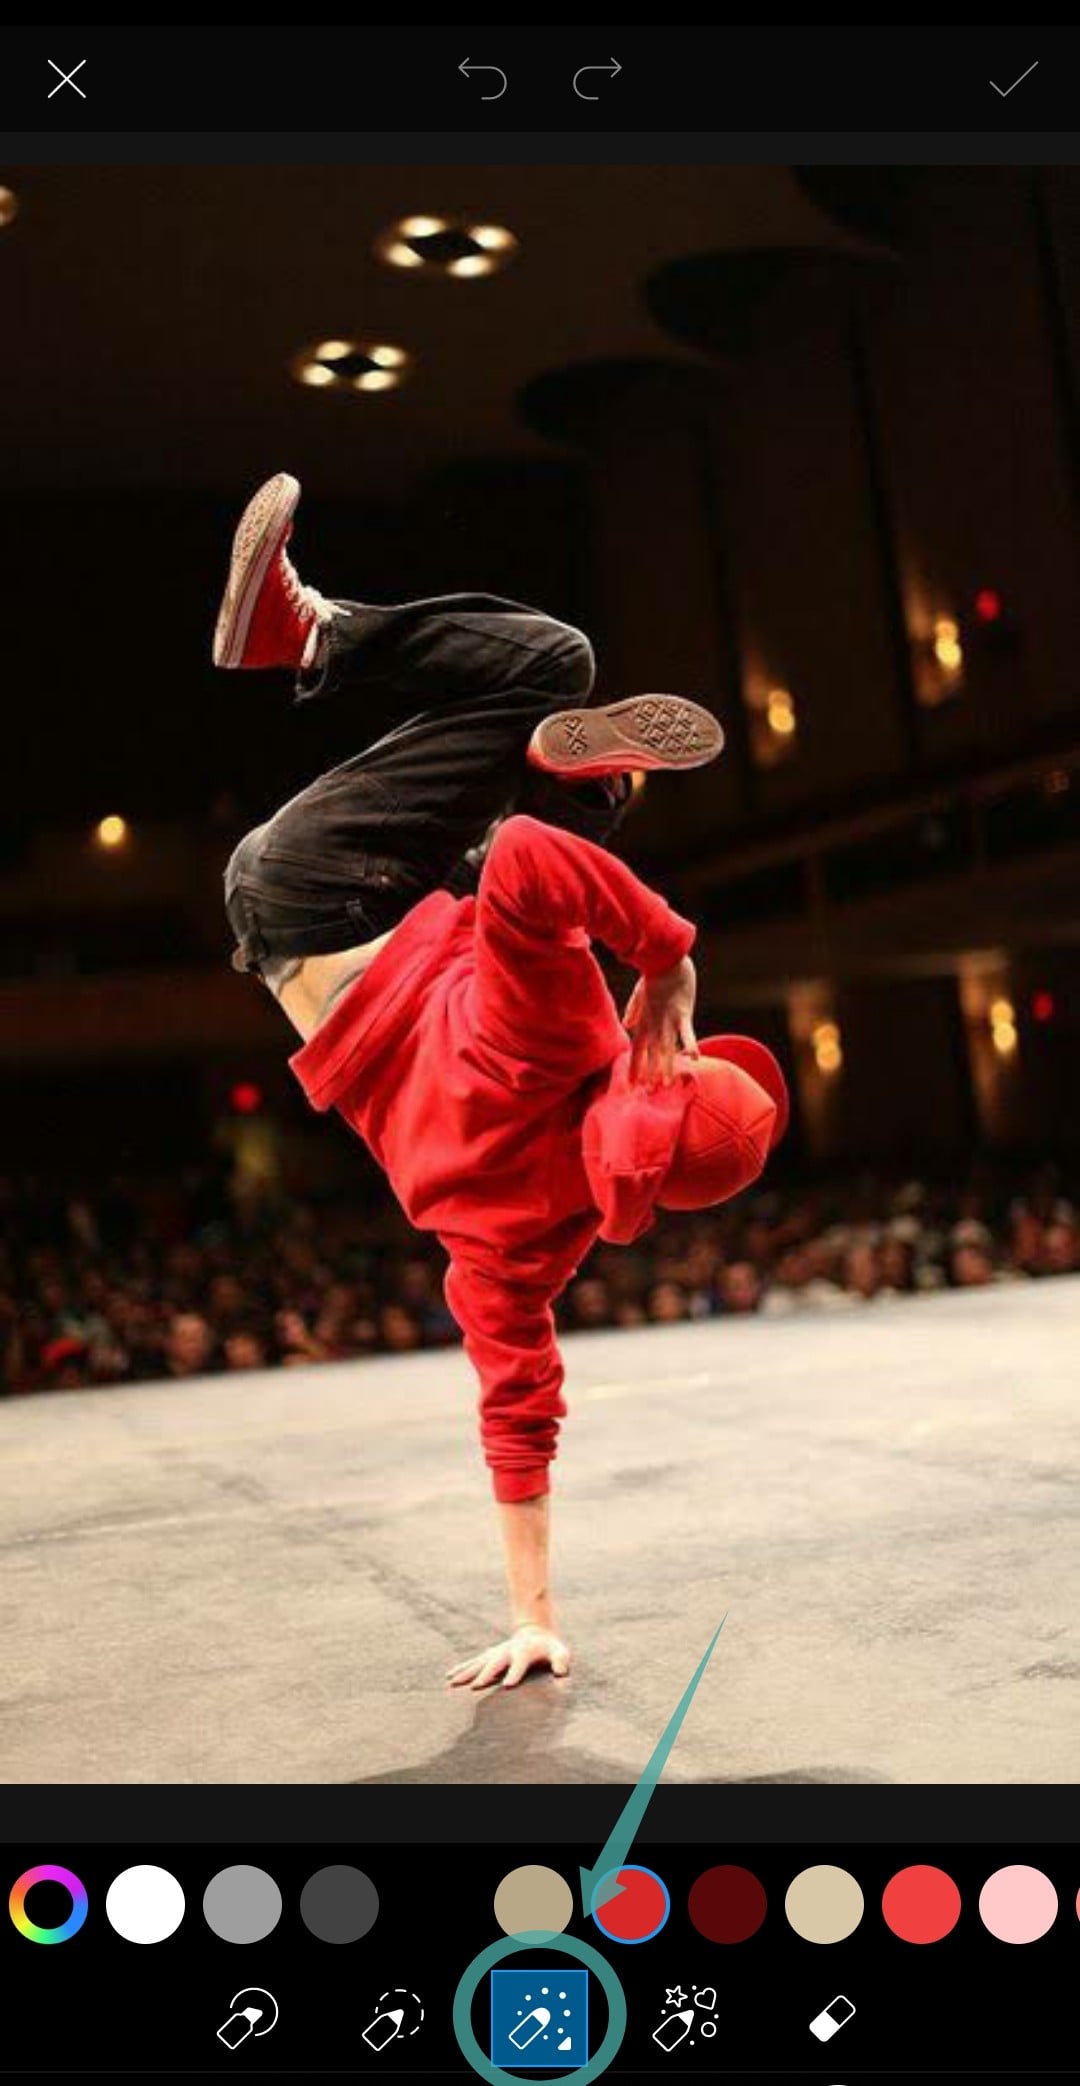
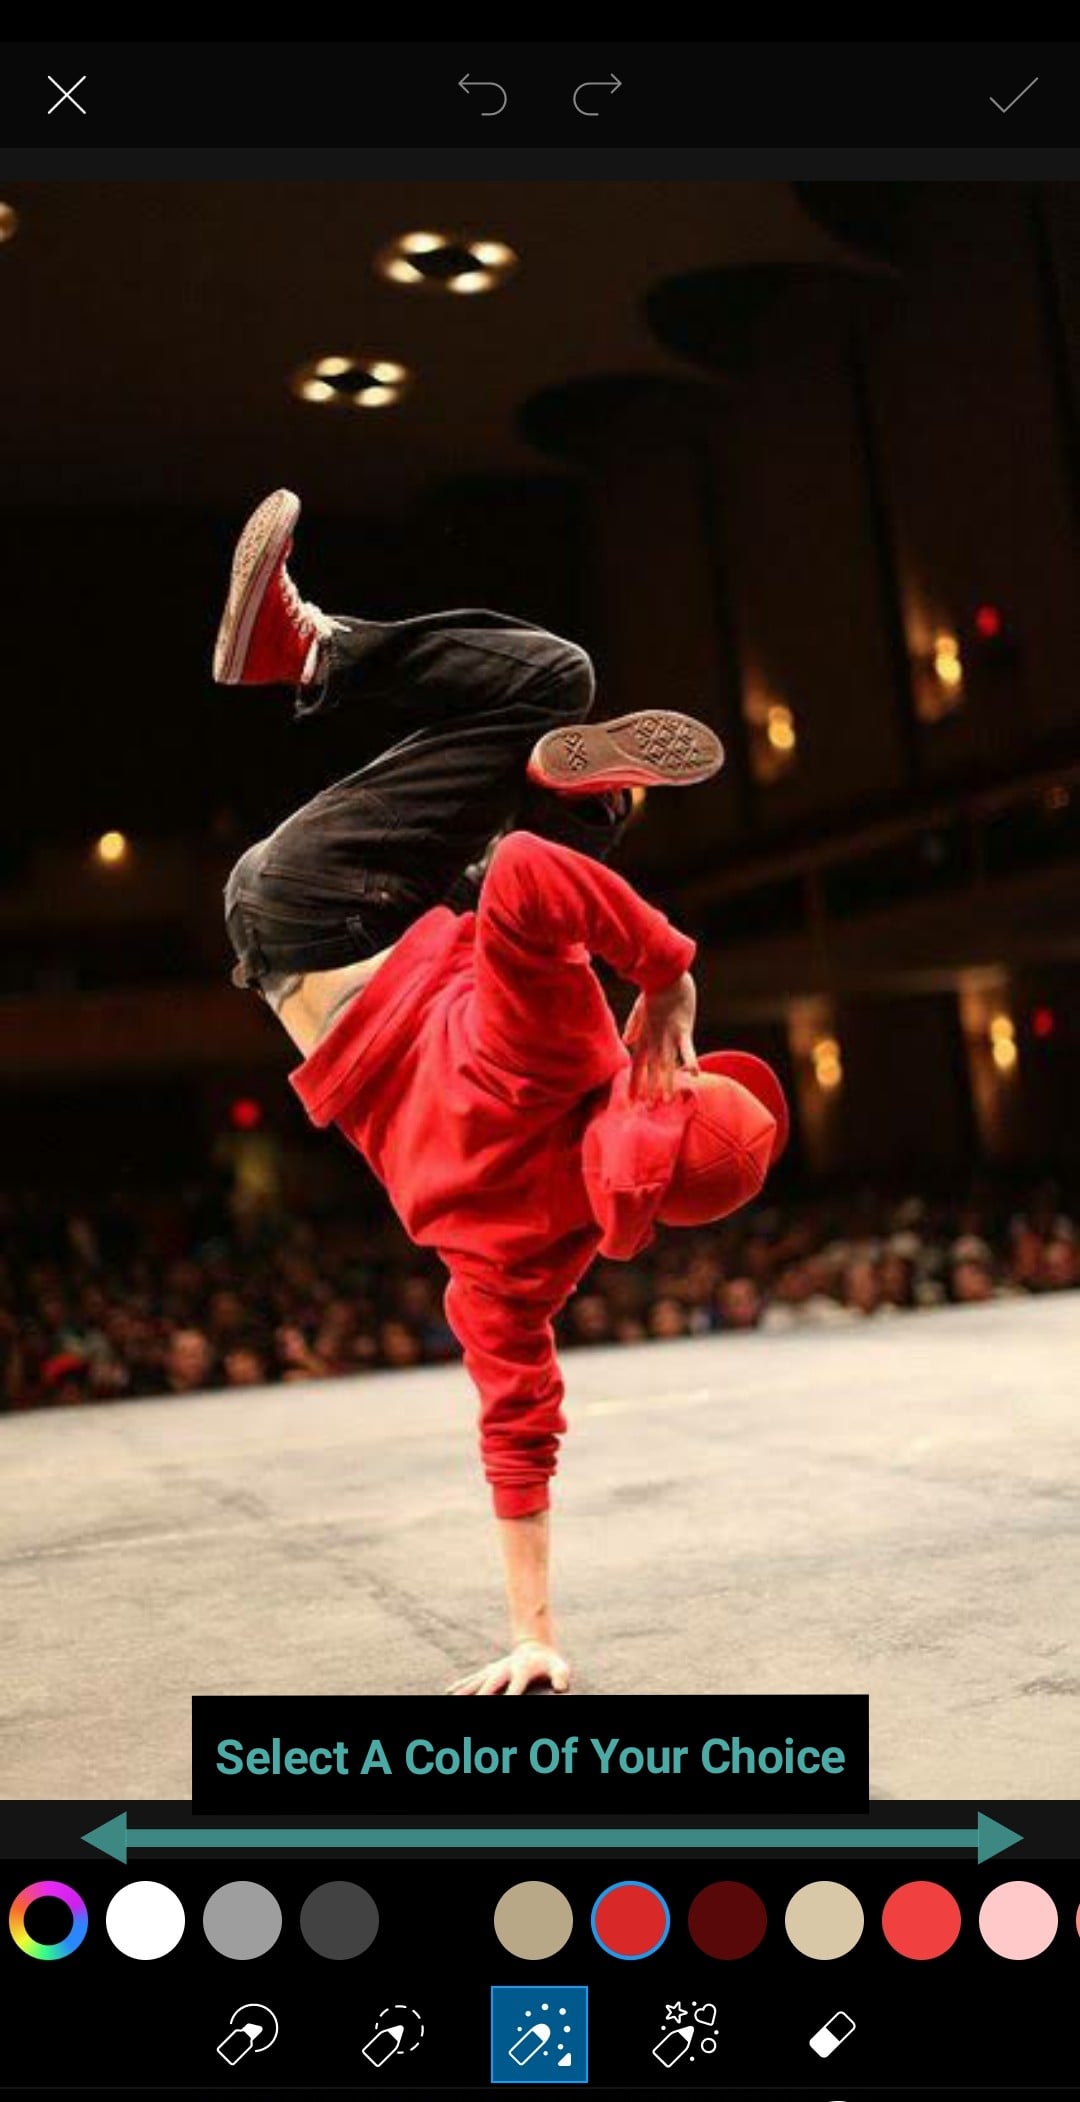
Note: You can pinch to zoom in and use two fingers to move the picture around for a more refined drawing experience.
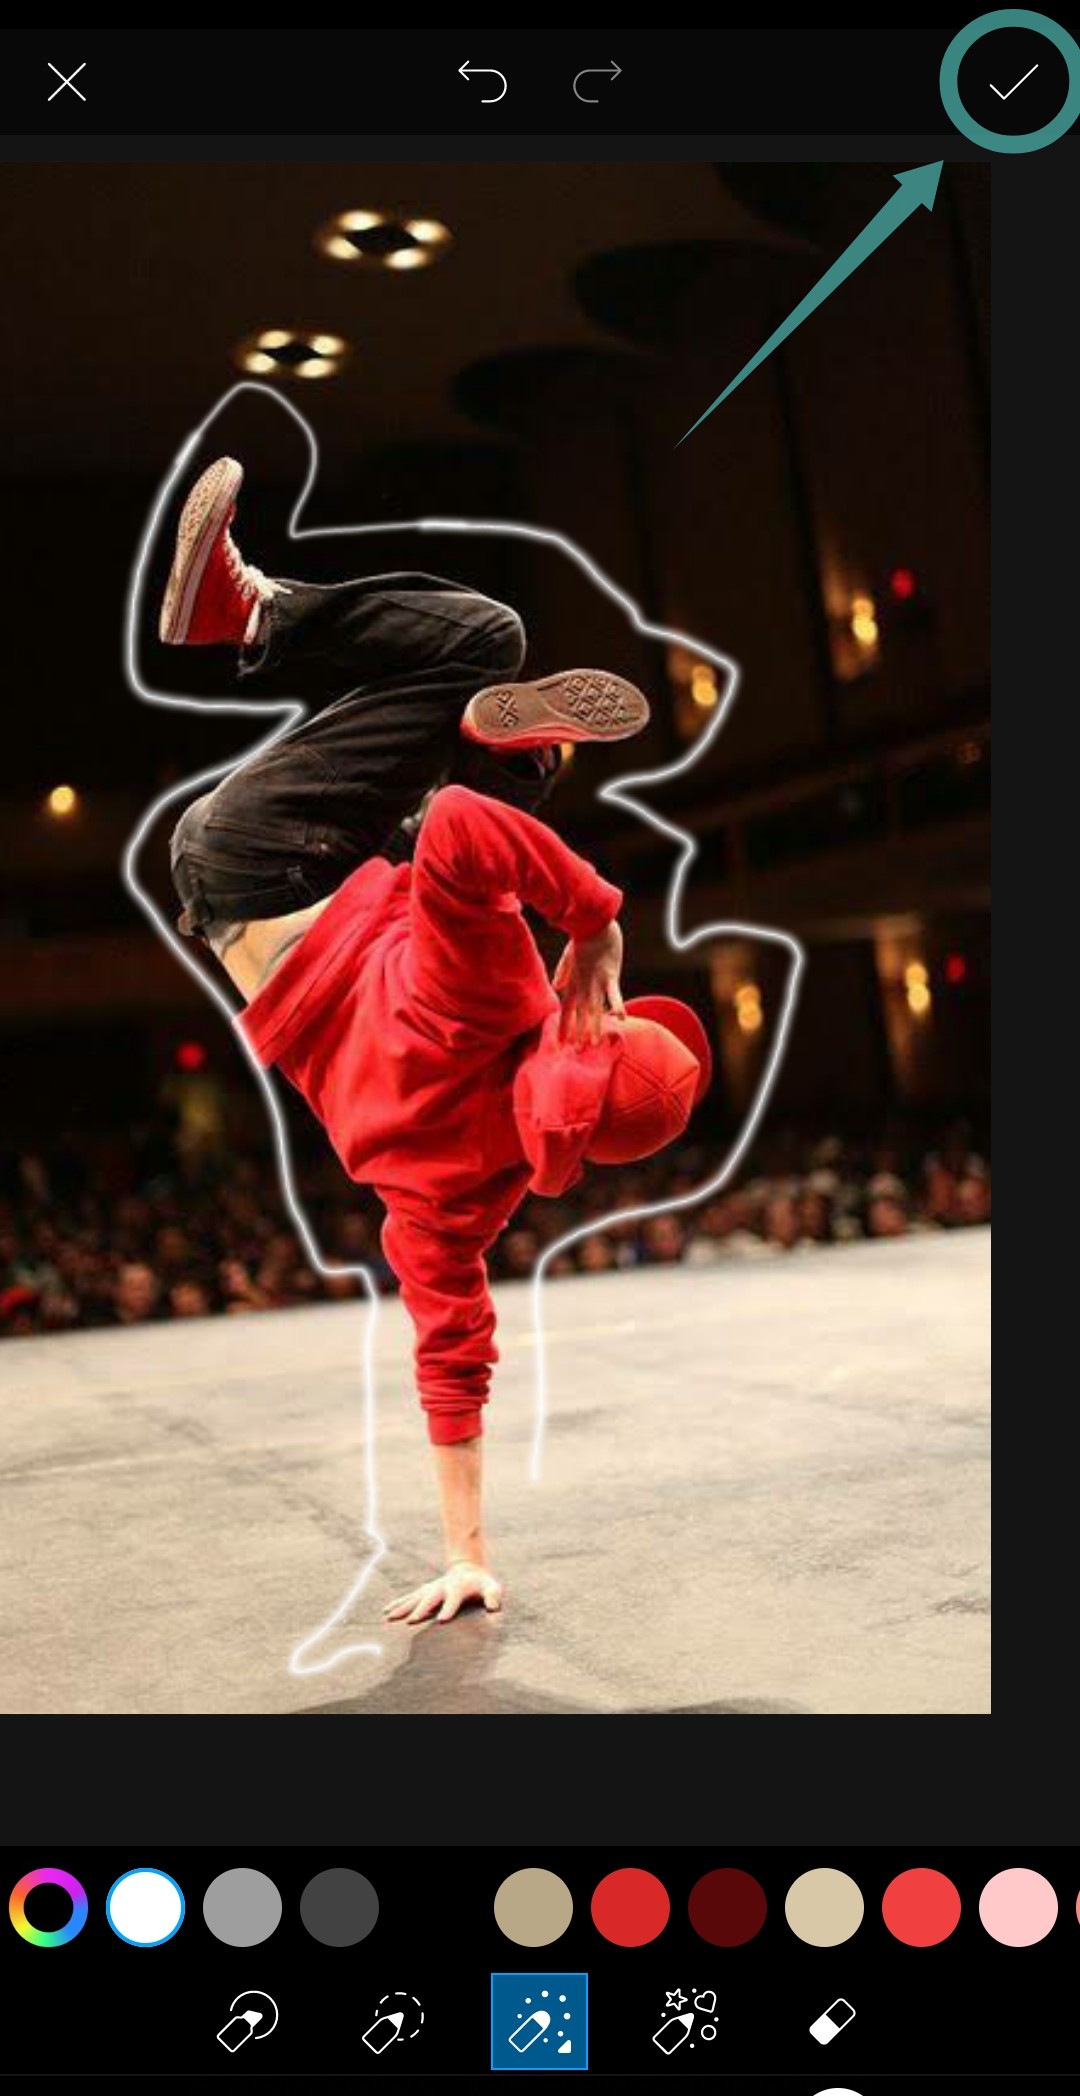
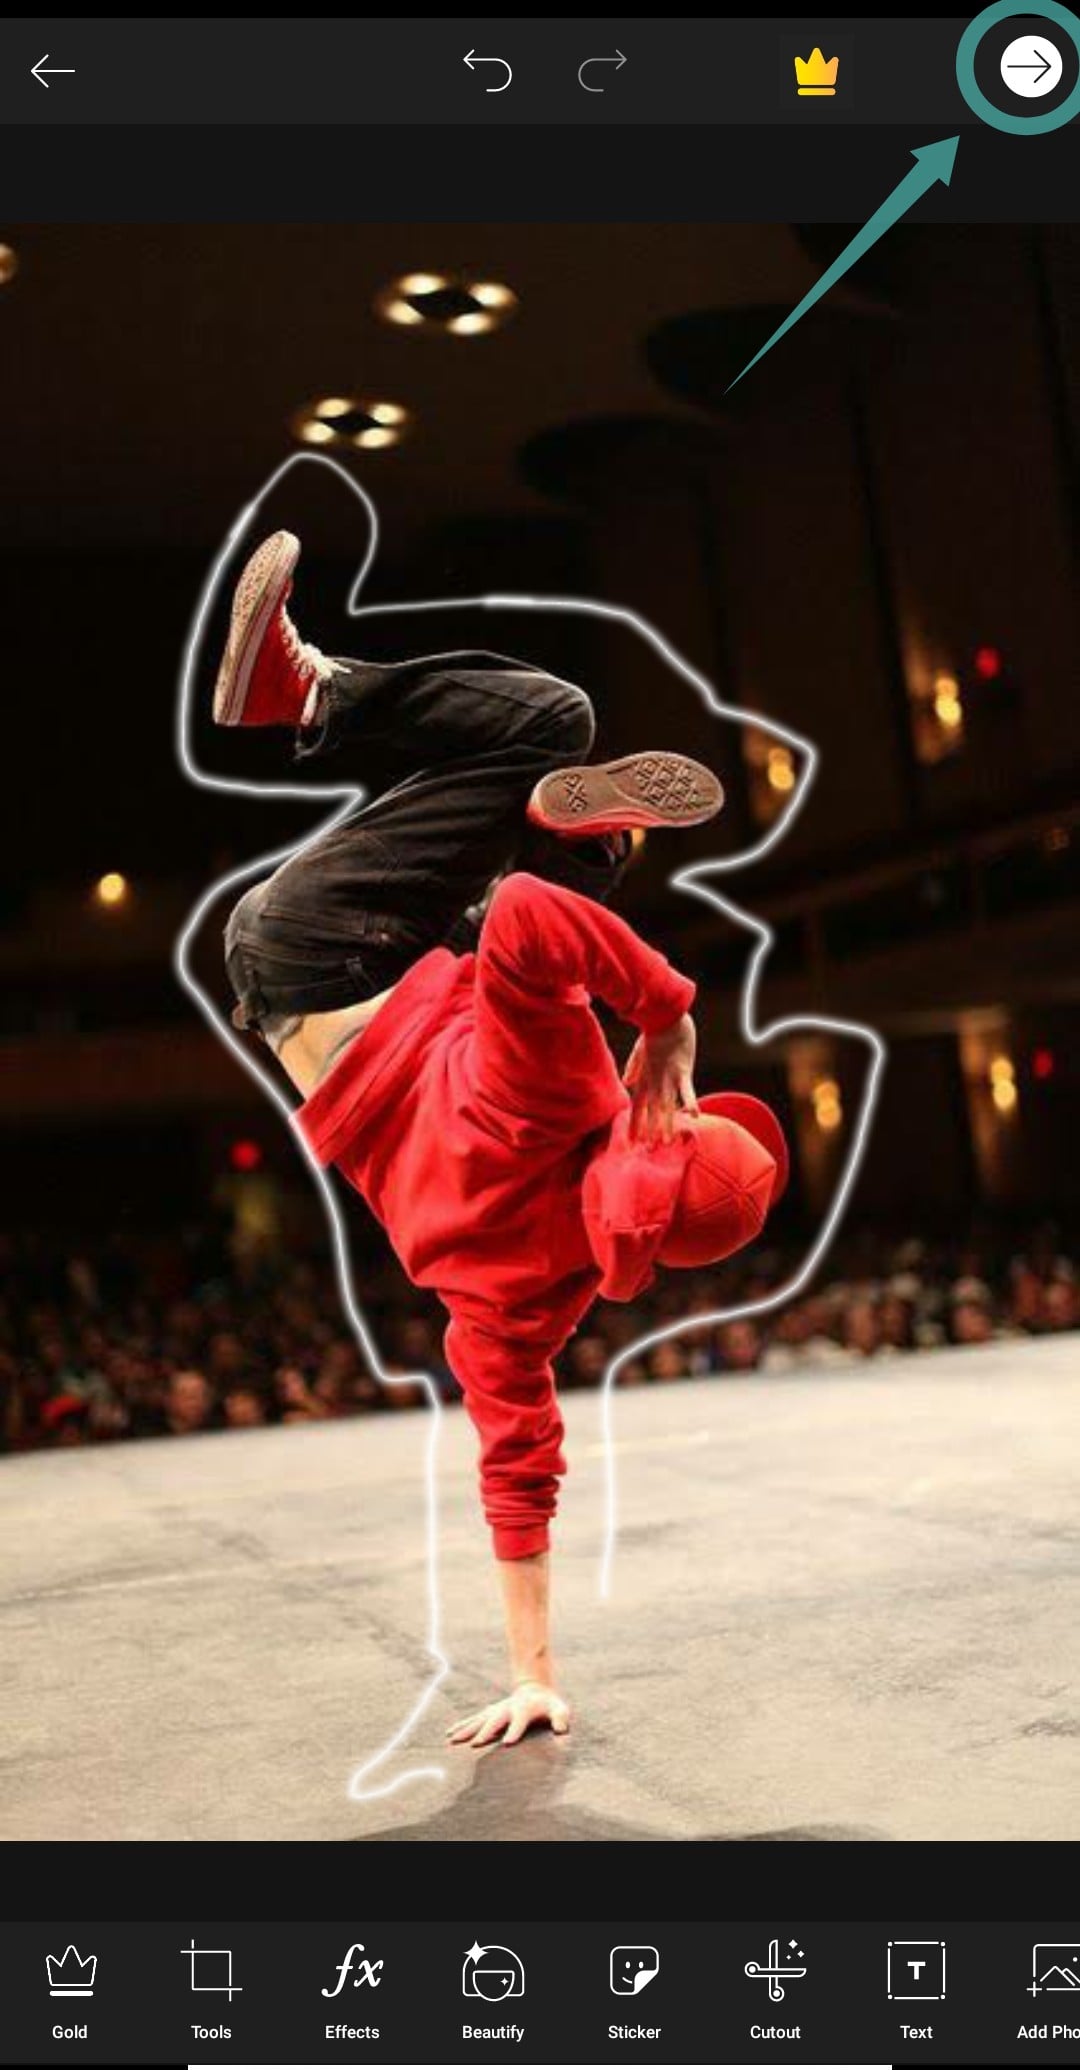
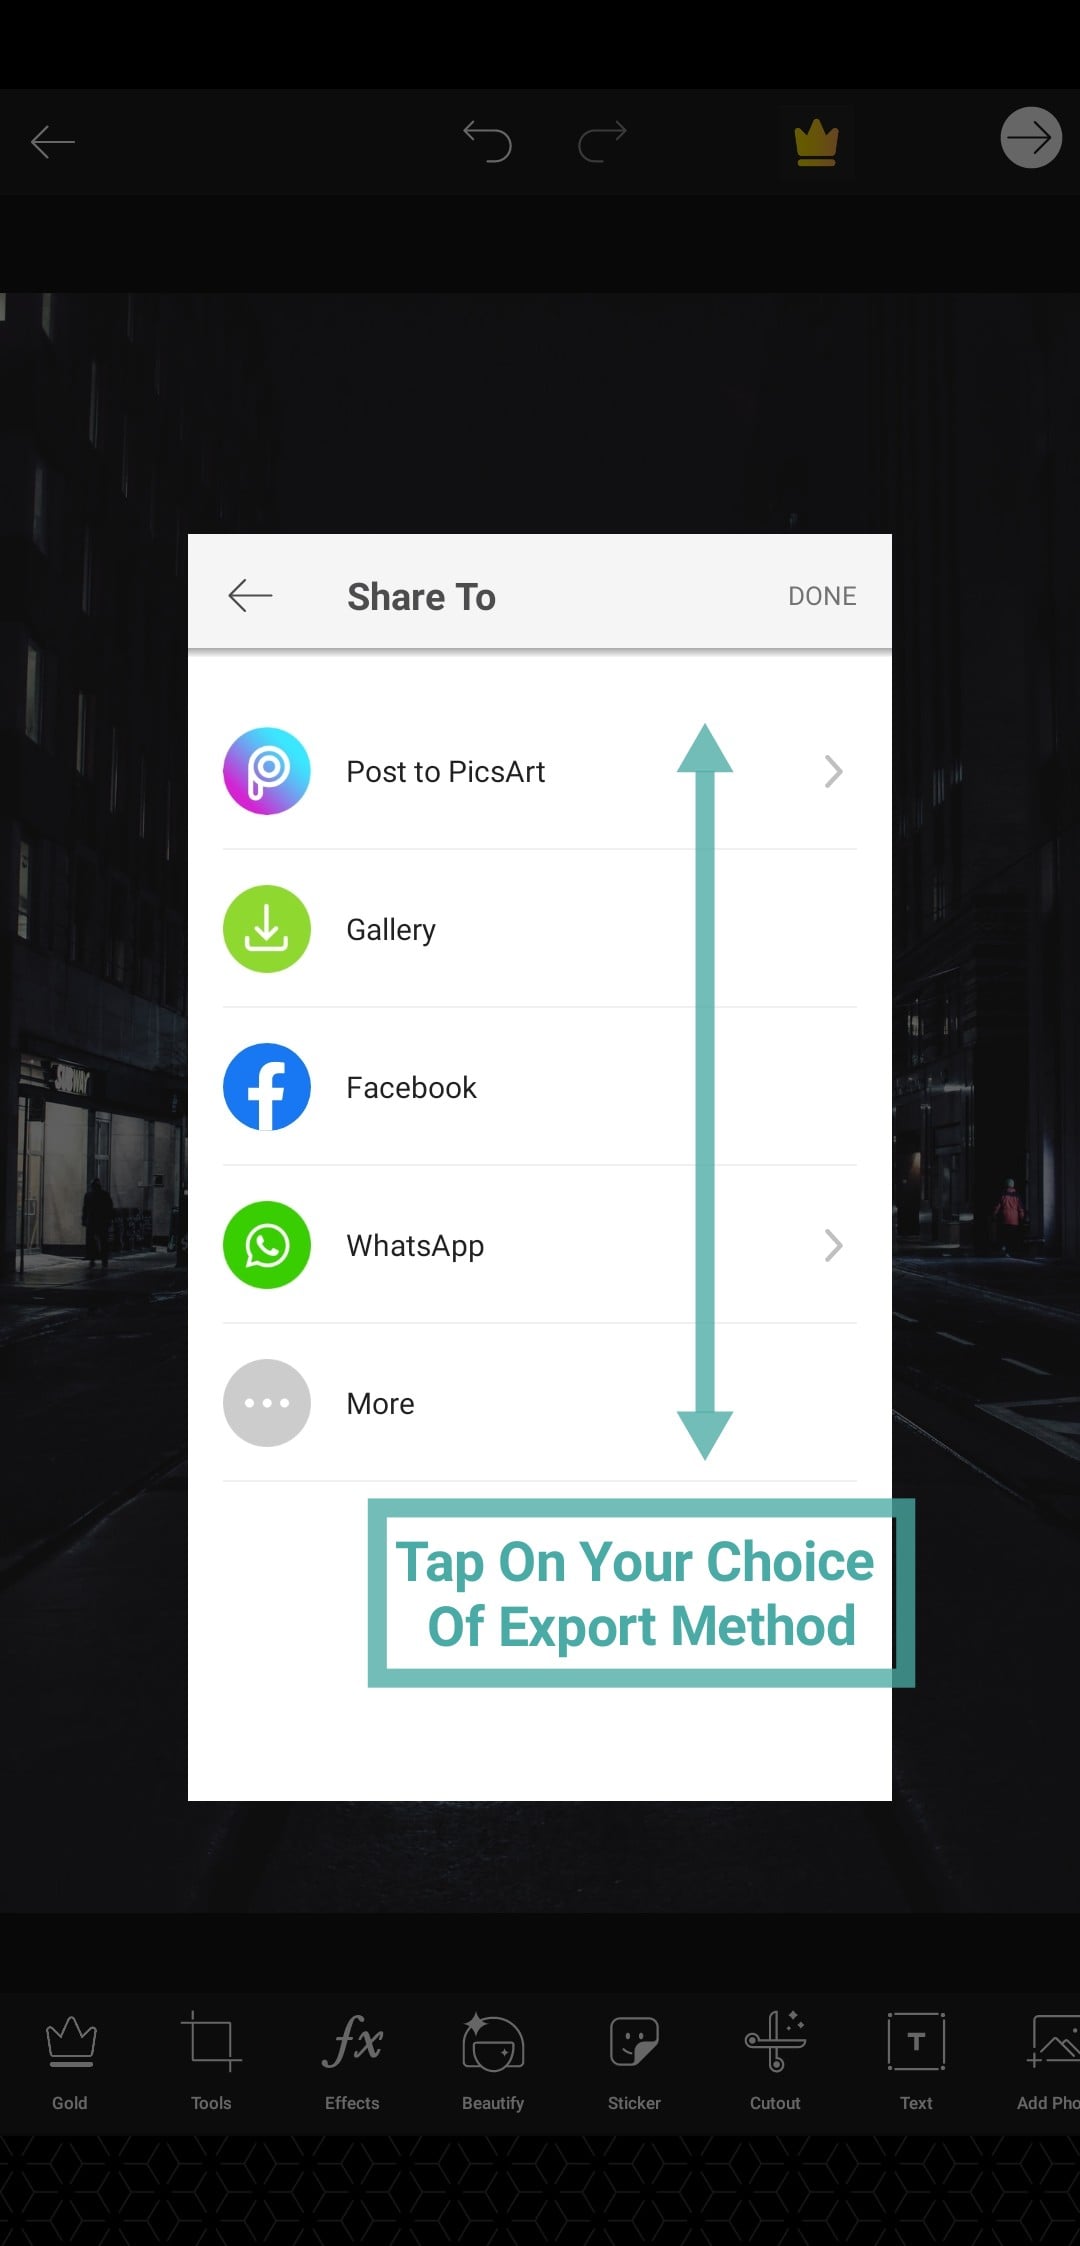
You should now have the neon sketch effect on your photo. If you were only looking for neon sketch effects, then your search ends here but in case you want to get rid of the background and only keep the rest of the image then follow the steps mentioned below.
RELATED: How to remove and change the background in a photo
We hope this guide helps you get the desired effect that you were looking for. What did you think about Picsart? Did we miss out on anything? Feel free to share your opinions and views with us in the comments section below.
RELATED: