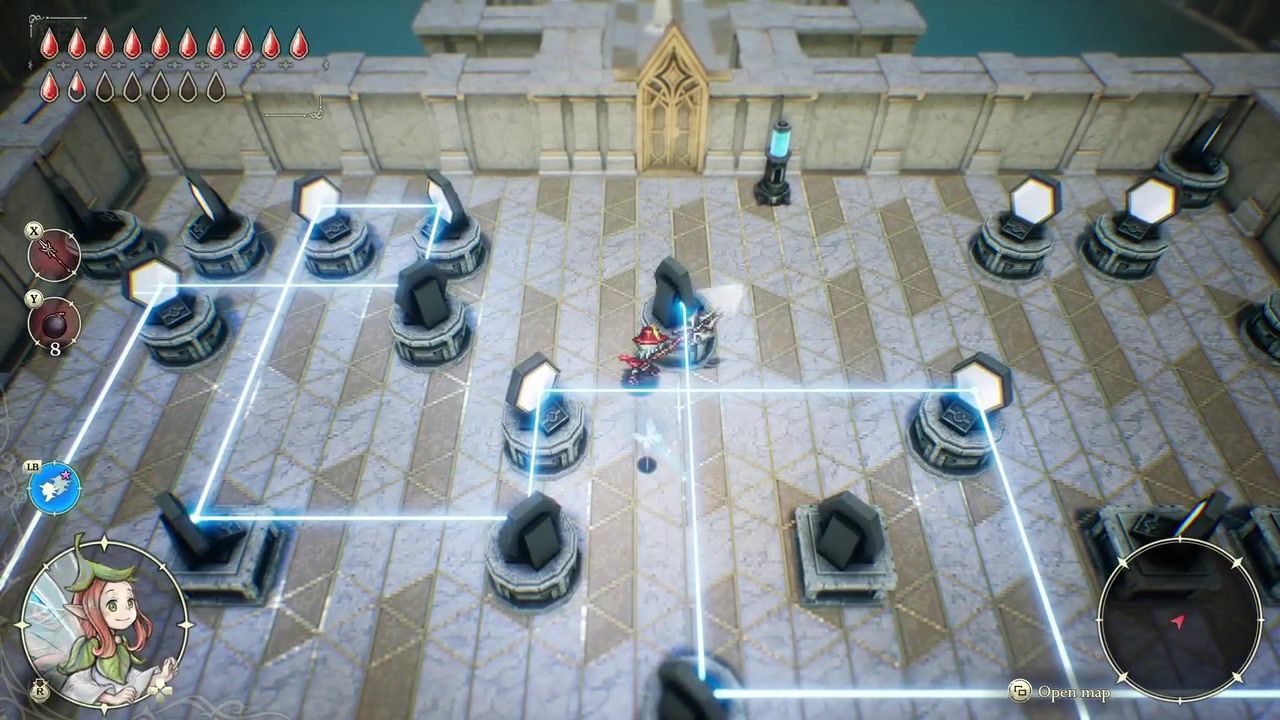
To clear Shrine of Life 23, rotate the room’s mirrors so the lasers reflect onto the blue target poles — once every pole is lit the shrine opens and rewards a Shard of Life.
Shrine of Life 23 in The Adventures of Elliot: The Millennium Tales is a mirror-and-laser room, not a combat or platforming challenge. The whole thing comes down to one idea: turn the reflectors until the beams land on the glowing blue poles. Below is how the solve plays out, plus the practical habits that keep these puzzles from getting scrambled.
What the Shrine of Life 23 puzzle asks of you
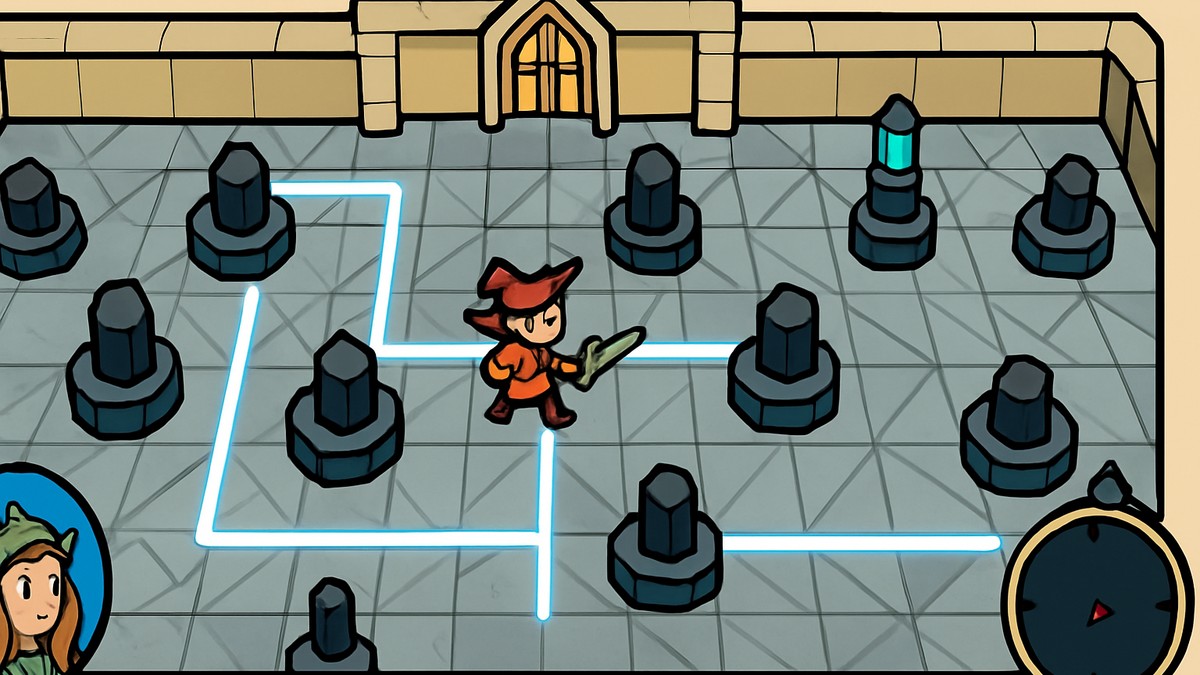
The room hands you a set of rotatable mirrors and one or more laser sources. Your job is to redirect those beams so they strike the blue poles scattered around the shrine. When the lasers are reflecting onto the poles correctly, the circuit is satisfied and the shrine powers up.
The first instinct in the room is the right one — you hit the poles by rotating the mirrors, working one reflector at a time until the path lines up. The puzzle doesn’t ask for speed or timing; it asks for the correct angles. Note that the exact rotation of each mirror isn’t something to memorize as a fixed number — the beams either reach the poles or they don’t, so treat each mirror as a small adjustment rather than a precise dial setting.
Walking the mirrors into their final positions
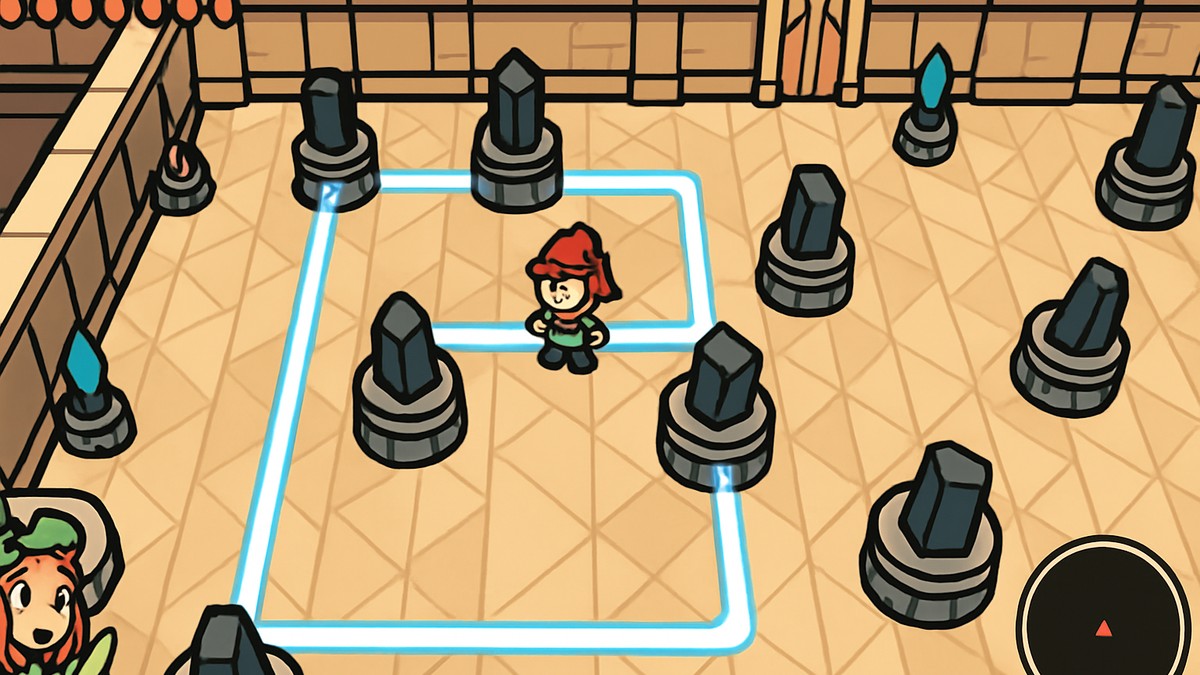
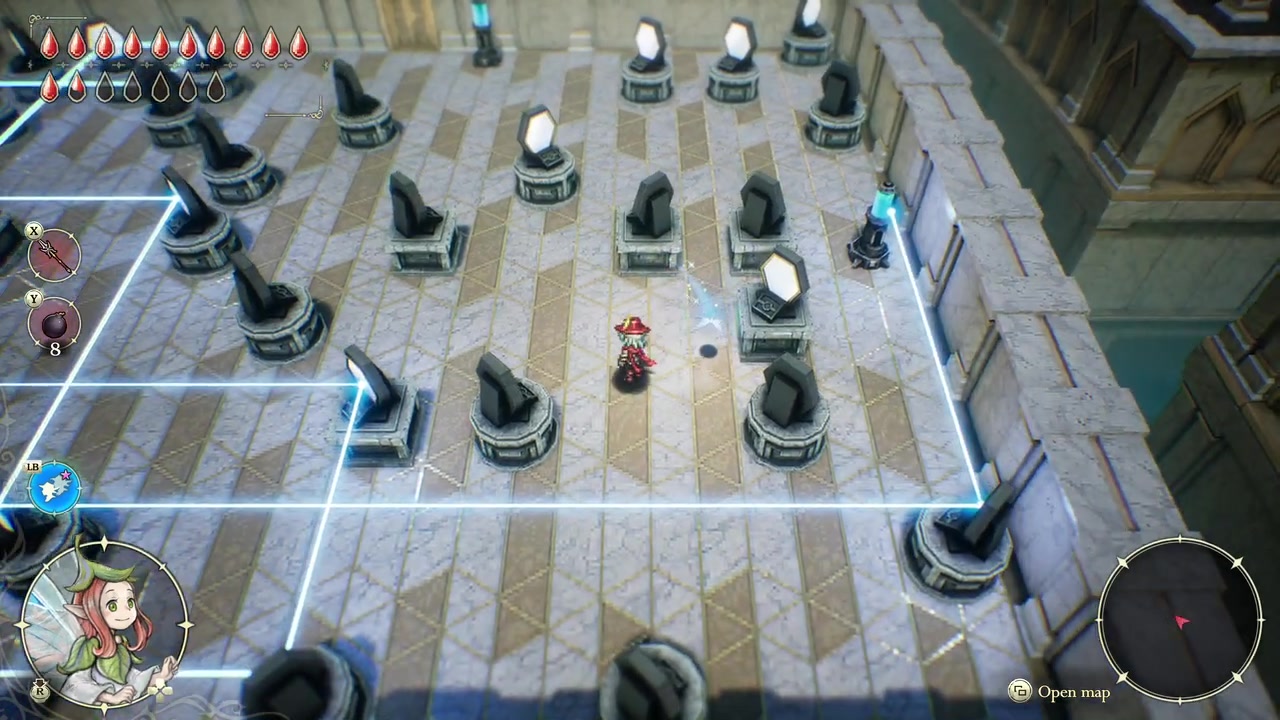
The orientations below come from a single recorded solve, and the in-game directions are deliberately loose — “this one down,” “the other one right-top.” Read each step alongside its screenshot, which captures the actual mirror angle at that moment. The order and the actions match what the playthrough showed; the frames carry the real detail.
How to solve the Shrine of Life 23 mirror puzzle in The Adventures of Elliot
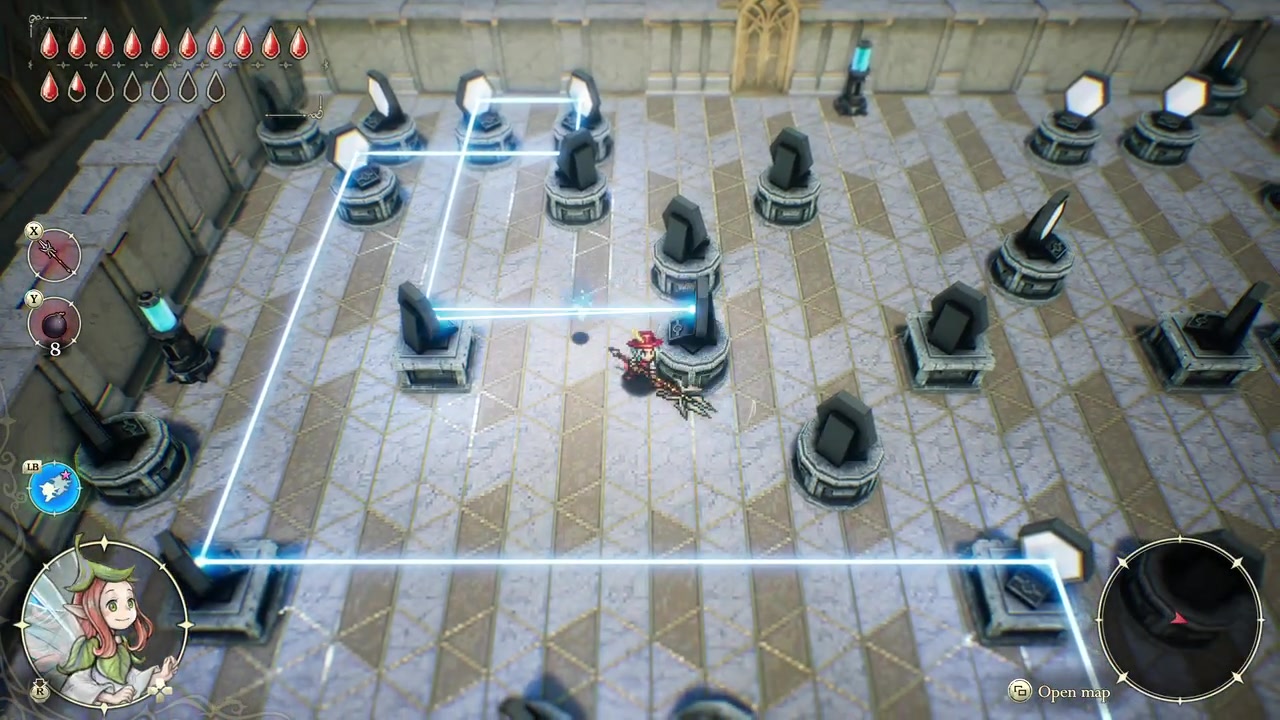
STEP 1/9
Find the blue target poles
Locate every blue pole in the room first, since those are what the lasers have to reflect onto.
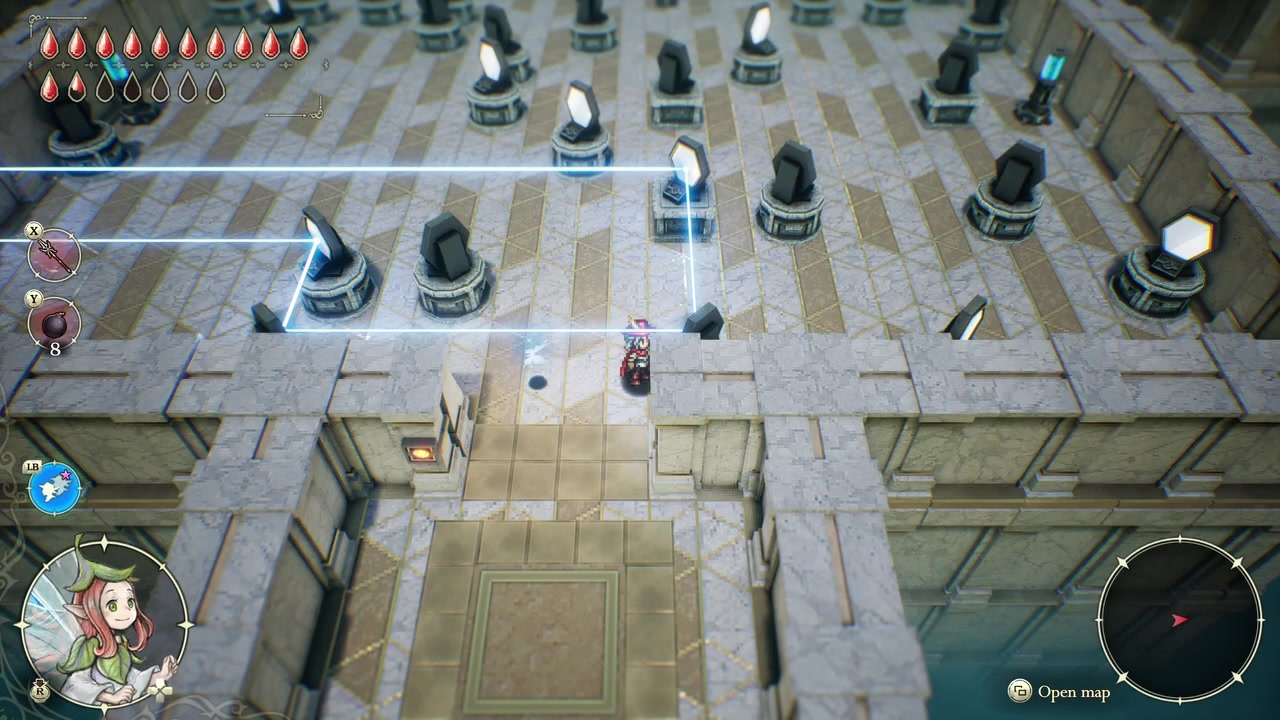
STEP 2/9
Set the first mirror
With most of the room sorted, angle this mirror so its beam carries toward the next reflector in the chain.
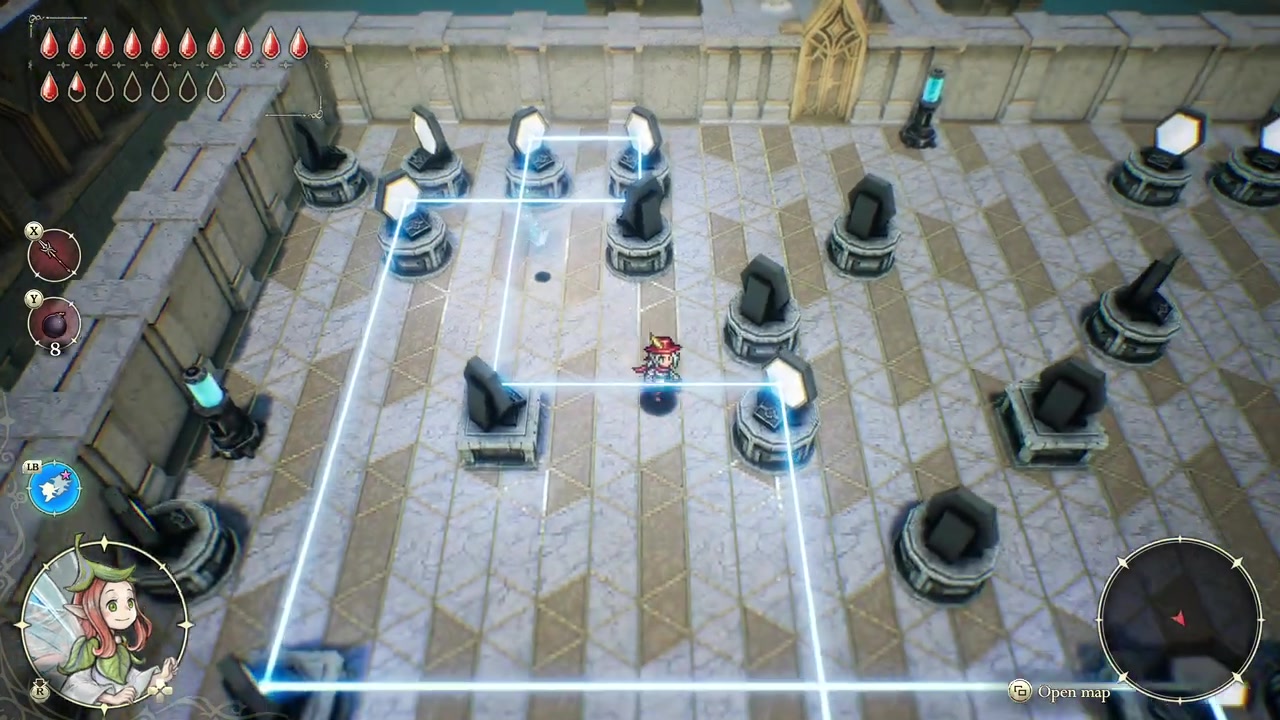
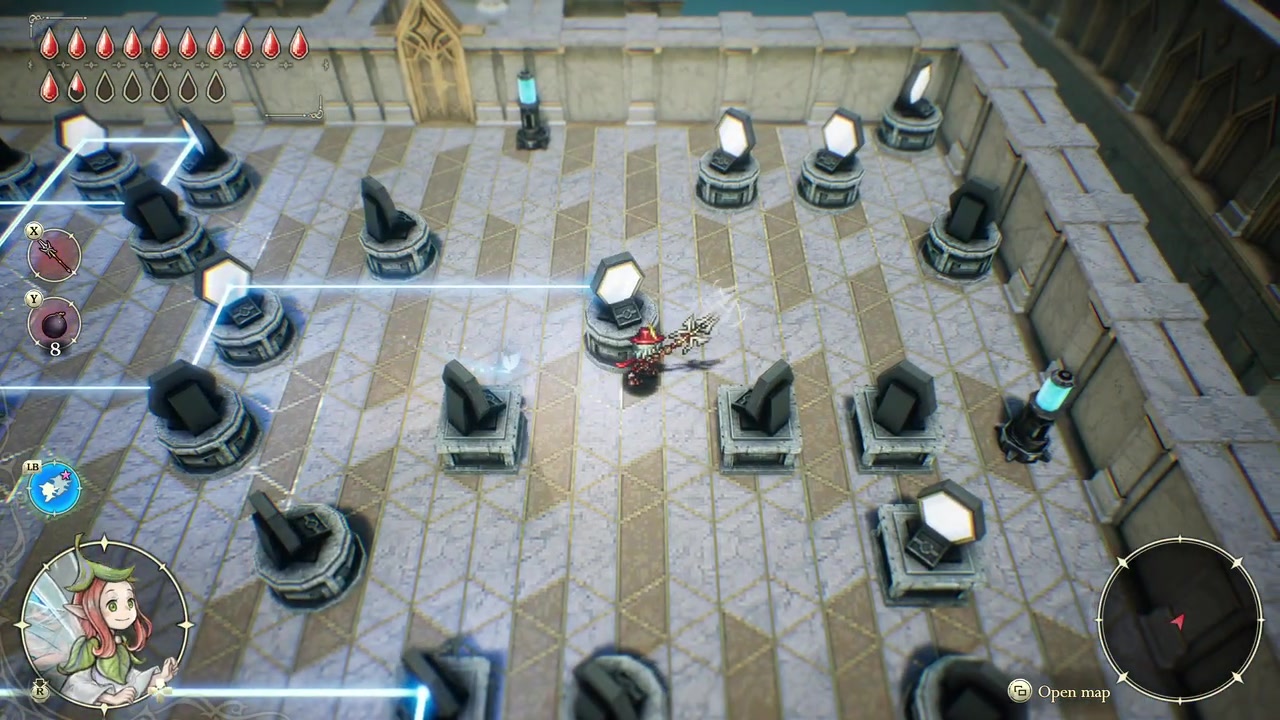
STEP 3/9
Adjust the last mirror
Turn the final mirror so the beam continues along the path shown in the frame.
STEP 4/9
Move to the middle mirror
The middle mirror ties the sequence together, so line it up against the screenshot before fine-tuning.
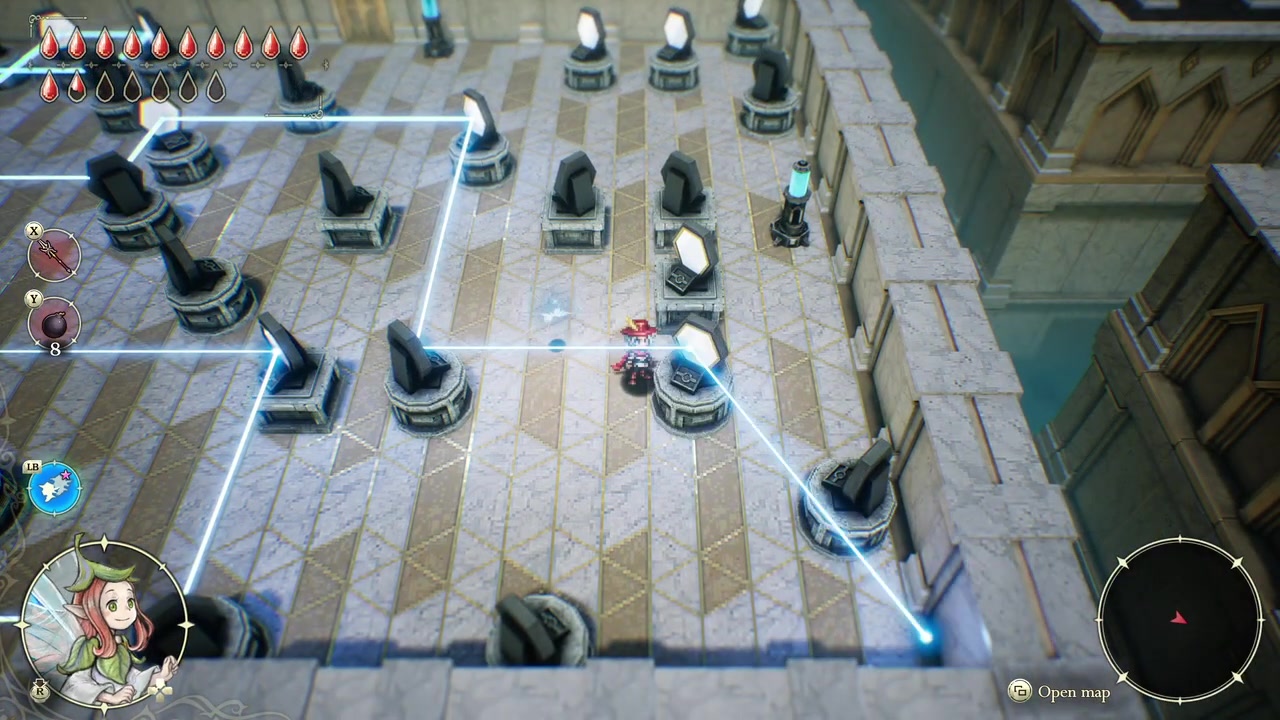
STEP 5/9
Rotate the middle mirror down
Point it downward so the beam drops onto the reflector below it.
STEP 6/9
Turn the next mirror up
Bring this mirror up to send the laser back across the room.
STEP 7/9
Angle one mirror to the right
Turn it right so the beam feeds into the final reflector.
STEP 8/9
Set the last mirror to the right-top
A right-top angle closes the circuit so the lasers reach the poles.
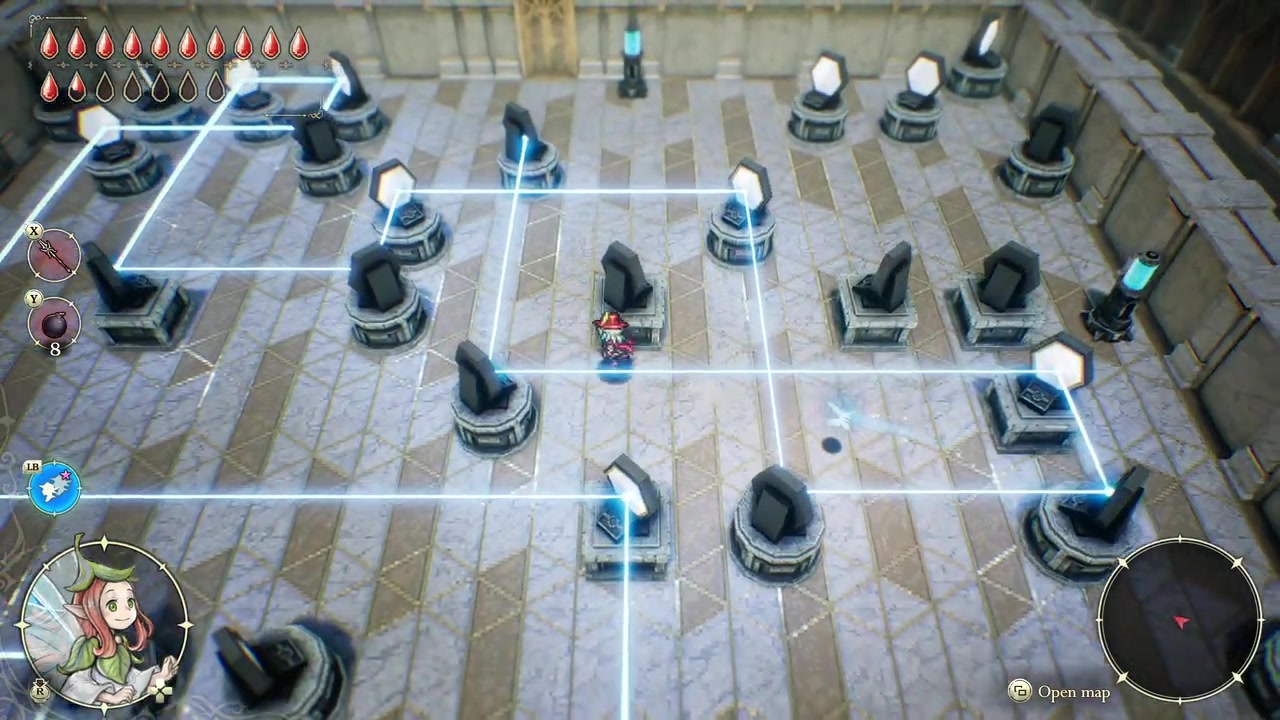
STEP 9/9
Watch the shrine open
With the poles lit and the circuit complete, the shrine unlocks and hands over the reward.
Work downstream from the laser source — fix the mirror nearest the beam first and follow the light across the room, instead of starting at a target pole and guessing backward.
Video help
Mirror puzzle mistakes that stall the solve
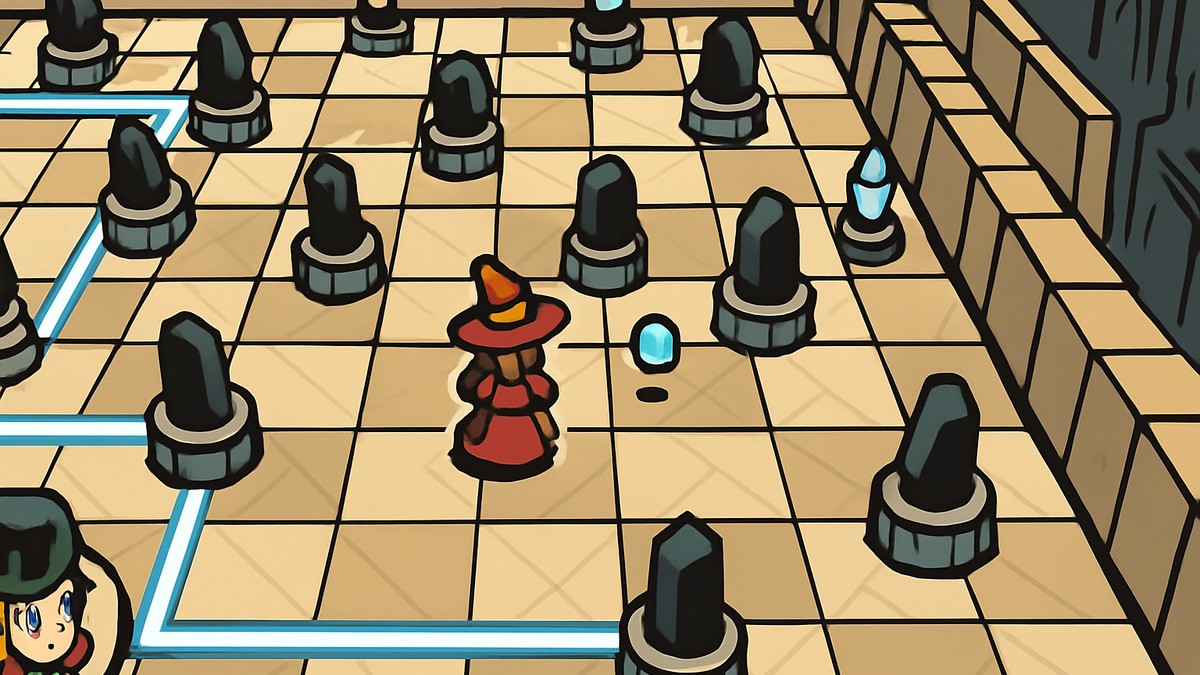
The most common trap is rotating the wrong mirror first. These puzzles untangle far more easily when you start at the laser source and adjust reflectors in the order the beam travels, rather than trying to force the final pole to light before the path even reaches it.
Two other things are worth a glance. Check the height and alignment of each beam — a laser can look slightly off from where you’re standing but actually be on target when you account for elevation. And make sure every pole is lit, not just the obvious ones; leaving a single target dark can keep the shrine closed even when the main beam looks correct.
If the path gets badly scrambled, look for a reset — a lever or button that returns the mirrors to their default positions, or simply leaving and re-entering the room — so you can start the solve clean instead of fighting a half-broken layout.
Where to find the Shrine of Life 7 and 13 solutions
Shrine 23 isn’t the only mirror-style room in the Shrine of Life set. If you’re working through them in sequence, Shrine of Life 7 and Shrine of Life 13 are separate puzzles with their own layouts and their own solutions — they don’t share the same mirror order as Shrine 23.
Treat each one as its own room: the core idea of redirecting beams onto targets carries over, but the specific reflector positions are different, so the solve you used here won’t transfer directly to either of those shrines.
Frequently Asked Questions
Is the Shrine of Life 23 puzzle part of Grow a Garden 2?
No. Despite how it sometimes gets searched, this puzzle is from The Adventures of Elliot: The Millennium Tales, a narrative adventure — not Grow a Garden 2. Any Sheckles costs, multipliers, or pet and gear requirements you see attached to the name belong to a different game and don’t apply here.
What do you get for completing Shrine of Life 23?
Opening the shrine rewards a Shard, or piece, of Life. That’s the payoff for getting the lasers onto every blue pole and completing the circuit.
Do the mirrors snap to set angles or rotate freely?
It isn’t confirmed whether the mirrors lock to fixed increments or turn freely. Rather than assume a set angle, read each rotation against the screenshots and adjust until the beam actually reaches the next mirror or pole.
Where are the Shrine of Life 7 and 13 solutions?
Both are separate Shrine of Life puzzles with their own mirror layouts. Solve them as standalone rooms — the redirect-the-beam concept is the same, but the exact reflector positions differ from Shrine 23.