Google Meet is the new remote collaboration tool in town that offers video and audio conferencing capabilities along with compelling features like end-to-end encryption, HD audio, HD video, and much more. Google Meet is completely free to use during the pandemic which means that it is already being used by a lot of organizations and users, including teachers, around the world.
If you are new to Google Meet and are facing issues with your microphone then you are not alone. Many users have reported being unable to use their microphones due to various reasons and we have compiled a list of some of the most common fixes that you can use to solve your issue. Let’s take a look at them.
Related: How to change your name on Google Meet on iPhone, Android, and PC
- Ensure that Microphone isn’t Muted
- Check your hardware connection if you have an external microphone
- Make sure the Input device is selected on Google Chrome
- Ensure Microphone access is allowed (Windows & Mac)
- Check Microphone Volume levels (Windows & Mac)
- Restart Google Chrome
- Restart your System
- Restart your Microphone using CLI (Mac only)
- Troubleshoot your Microphone on Windows
- Restart Windows Audio Service
- Switch to a Wired Headset
- Free Up System Memory
- Ensure that your Microphone is selected in Windows Settings
- Update your Microphone drivers (Windows only)
- Disable Audio Enhancements
- Clear Google Chrome’s Cache
- Close FaceTime from the background
- Sign OUT, then back IN into your Google account
- Disable Experimental Flags on Google Chrome
- Update Google Chrome
- Manually Update Google Meet extension
Ensure that Microphone isn’t Muted

Sometimes the issue could end up being a quite simple one, you might be simply muted during a Google Meet meeting and not know about it. Check the microphone icon at the bottom of your screen in the calling bar. If it is red, then you are muted on Google Meet. Simply click on the icon to unmute yourself. This will allow your meeting members to hear you loudly and clearly.
Check your hardware connection if you have an external microphone
If you are using an external microphone be it attached to your headset or separately, you should first check the physical connections of the headset/mic to your system. Start by checking the wire for any cuts or unusual bends. Any bumps in the wire could also indicate internal bends in the wire which might be causing damage to the microphone and preventing it from functioning properly.
If everything seems normal, try to disconnect the headset/mic from your system and then reconnect it again. This will not only reset the connection on your system’s end but also get rid of any hardware connectivity issues that might be preventing your microphone from working properly.
Related: How to block anonymous users on Google Meet
Make sure the Input device is selected on Google Chrome
Chrome also has the functionality to select which microphone will be used to provide audio input to different devices. If you are getting microphone issues with Google Meet then chances are that the correct microphone input has not been selected in Chrome. You can select your desired input device by following the guide below.
Open Chrome, click on the ‘3-dot’ menu icon in the top right corner of the browser.

Select ‘Settings’.

Now select ‘Privacy and Security‘ from the left sidebar.

Select ‘Site Settings‘.

Now click on the ‘Microphone‘ on the next screen.

If the toggle at the top is greyed out and it says ‘Blocked’ beside it, turn on the toggle to ensure that it says ‘Ask before accessing (recommended)’.

Now click on the drop-down menu at the top of it and select the desired mic you wish to use in Google Meet.

Close the ‘Settings’ tab to save your settings.
You will now be able to use your selected microphone during Google Meet meetings which should solve your microphone issue.
Related: Google Meet Virtual background: Latest News, Chrome Extension and everything we know so far
Ensure Microphone access is allowed (Windows & Mac)
If you’re still unable to use your microphone inside Google Meet, chances are that Chrome or the browser you use has been denied microphone access.
On Windows
Windows introduced a new feature to control the apps that use your microphone to increase privacy options. If you are unable to use a microphone in Google Meet then you should check your microphone permissions in Windows. Let’s take a look at how you can do this.
Open your Start menu by clicking the Start icon in the bottom left corner and type and search for ‘Microphone privacy settings’. Click on the first setting option that appears on the screen.

Ensure that the toggle at the top for ‘Allow apps to access your microphone’ is enabled on your device. If not, turn on the toggle to enable it.

Note: Under the ‘Choose which apps can access your microphone’ search for Chrome and ensure that the toggle beside it is turned on. If not then turn it on by simply clicking on it.
On Mac
Like on Windows, you will have to give an app/browser permission to use your microphone. You can access the Microphone permissions by first opening the System Preferences app on your Mac by either clicking on the app from the Dock or by clicking the Apple icon from the Menu bar and then selecting ‘System Preferences’.

Inside System Preferences, select the Security and Privacy option.

If the Lock icon at the bottom left corner is locked, you’ll need to unlock it to make changes to your permissions. For this, click on the Lock icon and enter your Mac’s password/PIN.

Select the Privacy tab on top and then, click the Microphone option from the left sidebar.
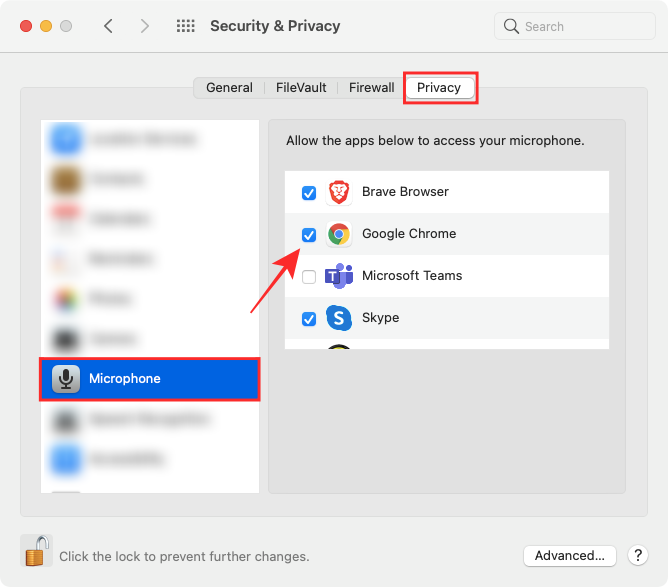
Check the box adjacent to the browser application that you want to enable the microphone on. After doing this, quit the browser and launch it again.
You should now be able to easily use your microphone during meetings on Google Meet.
Check Microphone Volume levels (Windows & Mac)
Both Windows and macOS allow users to set a volume level for their systems’ microphones just like they would on their audio output devices. If your microphone levels are low, then others in a Google Meet call won’t be able to hear you properly. It’s thus advised that you check the levels of your Microphone when you face such a situation.
On Windows
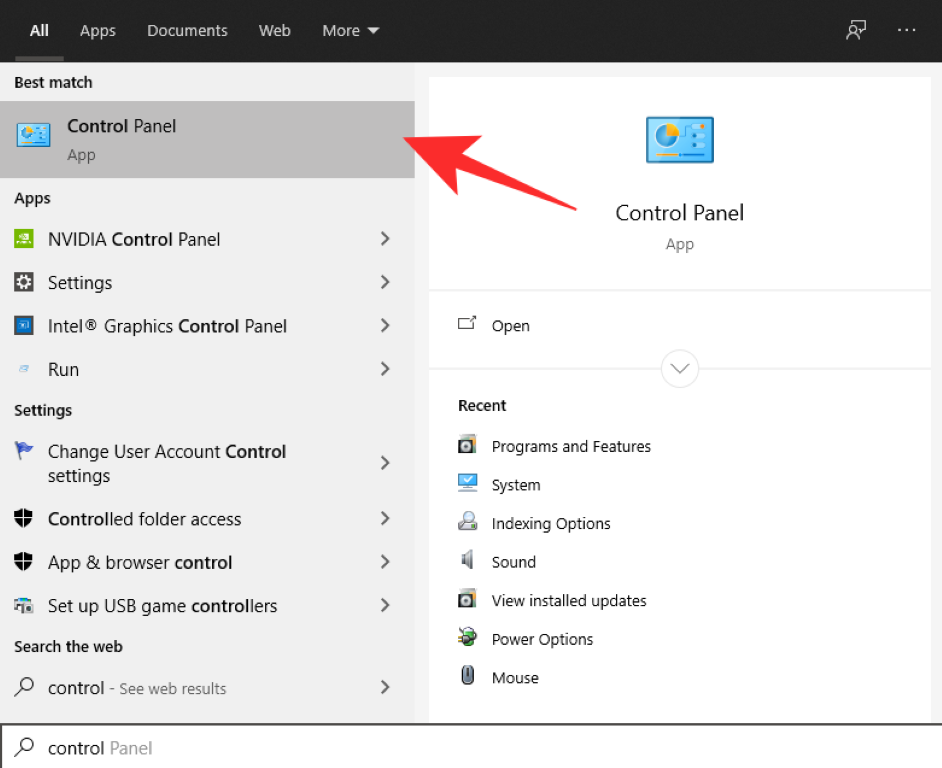
You can check your microphone levels on Windows 10 by opening the Control Panel on your computer using the Start menu.
Inside the Control Panel, go to ‘Hardware and Sound’ from the left sidebar and select the ‘Sound’ option from the panel on the right.

When the Sound window pops up, select the ‘Recording’ tab at the top. Here, you will see a list of all input devices that are connected to your system.
Inside the Recording tab, select the microphone you use for Google Meet calls and then click on the ‘Properties’ button at the bottom of this window.

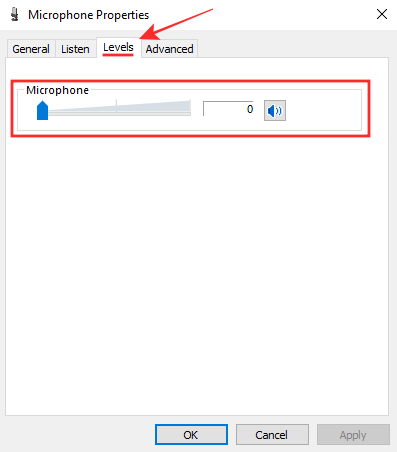
When the Microphone Properties window appears on the screen, click on the ‘Levels’ tab at the top.
Under this tab, you should see a slider inside the ‘Microphone’ section. Drag this slider towards the right depending on how high you want your mic sensitivity to be. The more you drag the Microphone slider to the right, the higher will be the volume level of your microphone and this should help others listen to you better on Google Meet.
Once you’ve made the necessary changes, click on the ‘Apply’ button, then ‘OK’ to confirm it. Start/join a call on Google Meet to see if your microphone is working properly.
on Mac
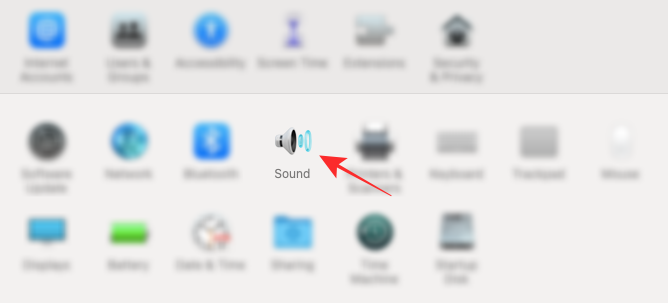
To check your microphone volume on the Mac, you can open ‘System Preferences’ from the Menu bar, Dock, or Launchpad.
Inside System Preferences, click on the ‘Sound’ tile.
When the Sound screen loads up, click on the ‘Input’ tab at the top, select the microphone you use for Google Meet calls and drag the ‘Input volume’ slider towards the right to increase its volume.
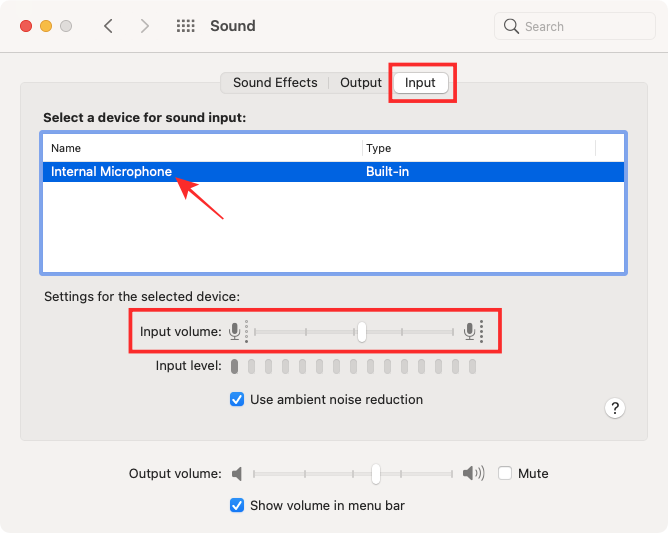
Make sure the volume level is adequate by speaking something and then checking whether your voice is heard on the ‘Input level’ indicator on the same screen.
Restart Google Chrome
A simple restart of your browser can also fix microphone issues. This can clear the cache, restart extensions in the background and more importantly free up any extra space that could be causing issues with your microphone. While restarting might simply close and reopen the app, it doesn’t always get rid of all the background processes and extensions running for chrome.

To properly restart your browser, open a new tab and type ‘chrome://restart’ in your URL bar. This will restart chrome completely which should get rid of any conflicting background processes that might be interfering with the functioning of your microphone.
Related: How to remove Meet Tab from Gmail completely
Restart your System
If restarting your browser does not help solve your microphone issues then you can try restarting your system. This will get rid of your system’s cache files and background processes that might be interfering with the functioning of your microphone. It will also release charge from the capacitors of your system which should take care of any conflicting electronics that might be preventing your microphone from working (only external mics).
If you have an external microphone, then turn off your system, wait for 20 seconds and then start your system again. If you have an in-built microphone or a headset then simply use the restart command from your Power Menu.
Restart your Microphone using CLI (Mac only)
Mac systems use an integrated optimization system that helps microphones work seamlessly across different devices. If you are unable to use your microphone on your Mac then you can try restarting the microphone using CLI. Use the guide below to restart your microphone.
Note: You will need administrator privileges to complete this process.
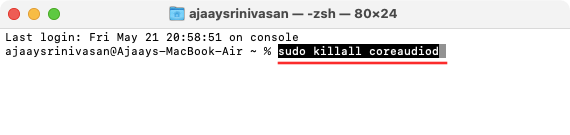
On your Mac system, open the Application folder in your Launchpad, select ‘Utilities’ and launch ‘Terminal’. You can also open the Terminal app from the Launchpad or Spotlight.

Enter the following command in Terminal:
sudo killall coreaudiod
… and hit Enter to execute it.
Now enter your credentials in the dialog box to restart the service and press Enter.
You should try joining your meeting on Google Meet again and your microphone issues should now be resolved.
Troubleshoot your Microphone on Windows
If something goes wrong with your computer’s microphone, Windows will be able to tell what might be the issue you’re facing and might even fix it for you, if possible. This is done using the native Troubleshoot tool that’s available on Windows 10 which you can use to solve problems related to your computer’s microphone.
For this, open the Windows Settings app from the Start menu or Action Center.
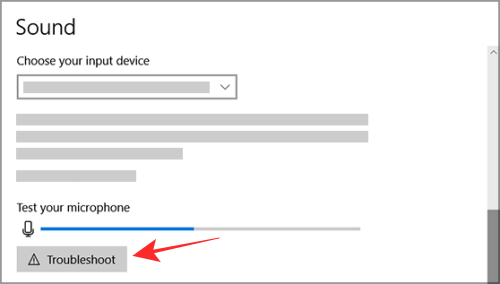
Inside Windows Settings, go to System and click on the ‘Sound’ tab from the left sidebar.
On this screen, click on the ‘Troubleshoot’ button under the ‘Test your microphone’ section.
If there’s a problem with your microphone, the tool should be able to detect it and you can then follow the on-screen instructions to get it resolved.
Restart Windows Audio Service
If you have a Windows PC, you can try restarting the Windows audio service to fix the microphone issues that you are facing in Google Meet. Follow the guide below to help you get started.
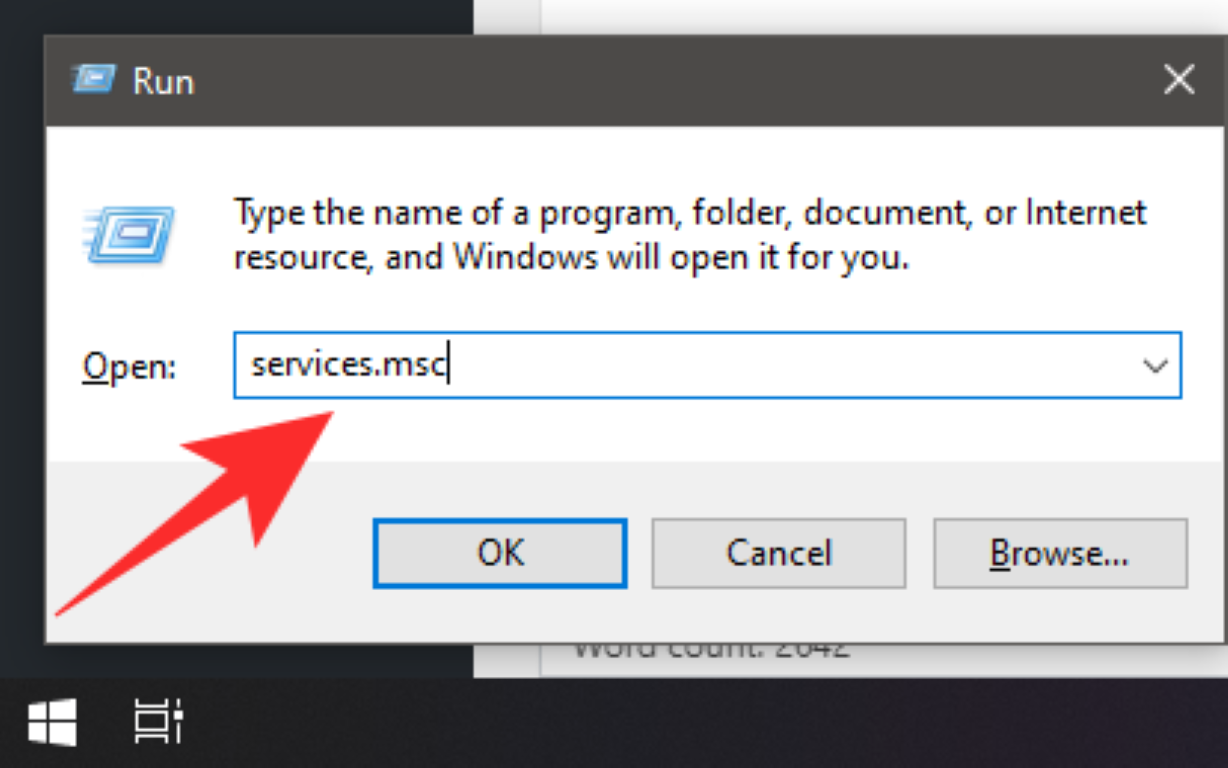
Press the key combination ‘Windows+R’ on your keyboard simultaneously. This should bring up your ‘Run’ dialog box.

Now type ‘services.msc’ in the Run dialog box and hit Enter on your keyboard to execute the command. This will open the services window on your PC.
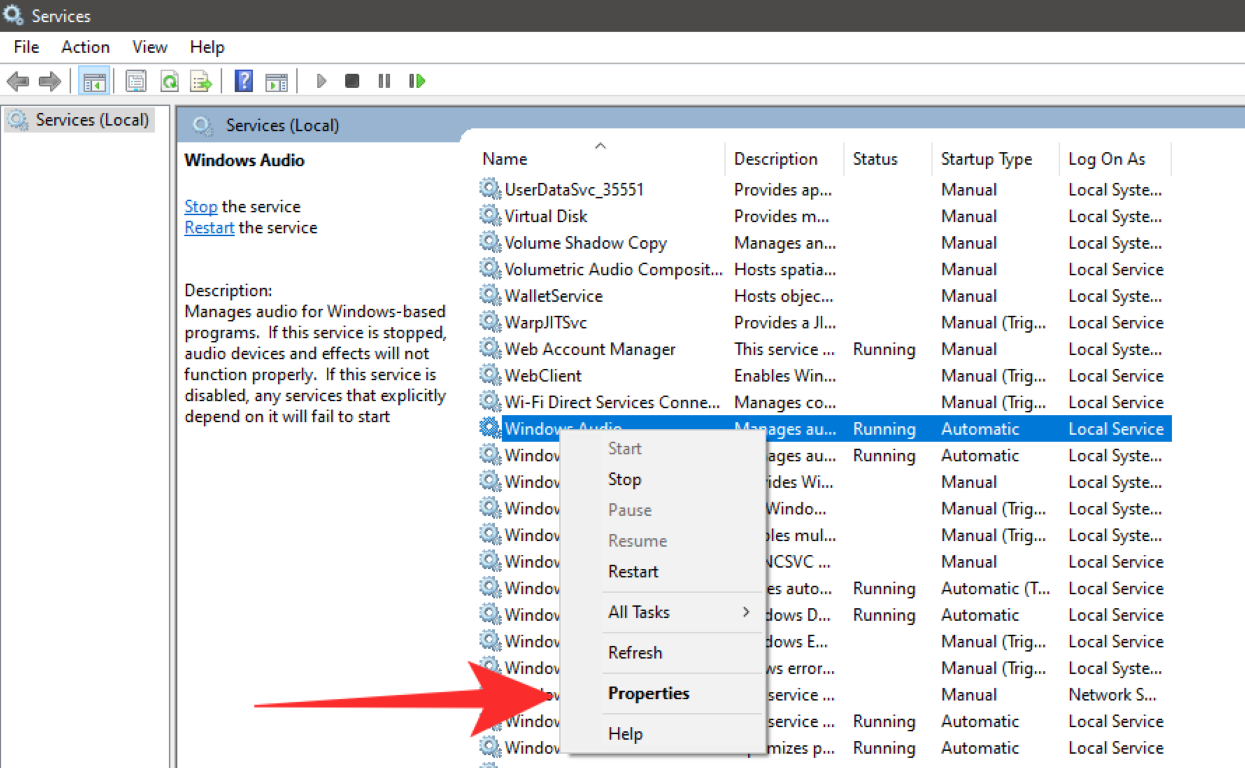
Now find ‘Windows Audio‘ in the list.

Right-click on the service and click on ‘Properties’ from the sub-menu that appears.
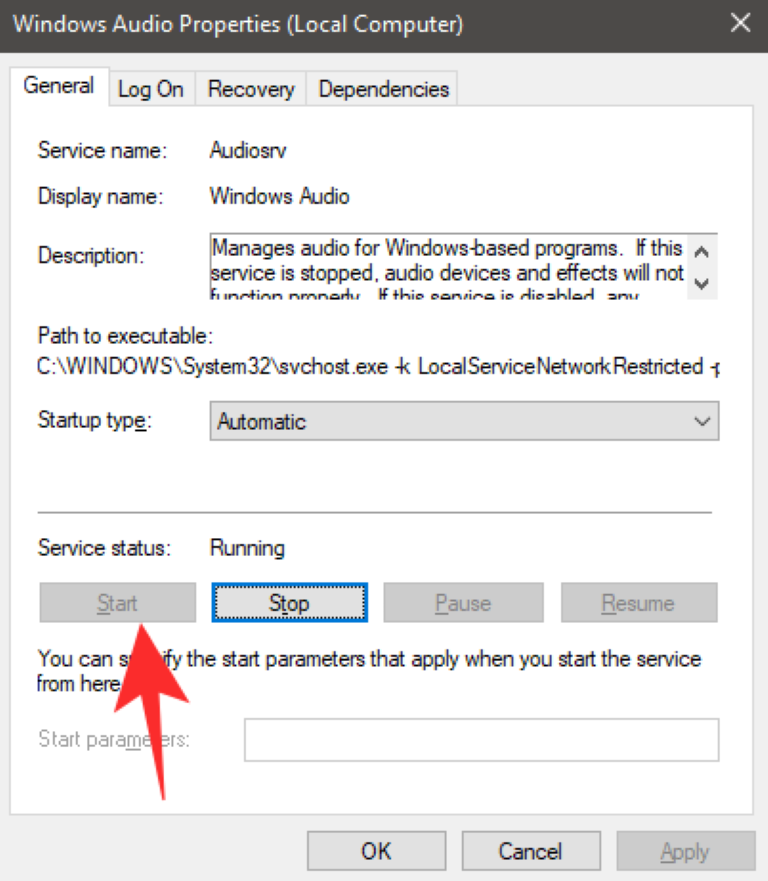
Click on ‘Stop’. This will stop the service.

Once stopped, wait for a few seconds and then click on ‘Start‘ again.
Note: In the properties window, under the ‘General’ tab, click on the drop-down menu beside the ‘Startup Type’ option and select ‘Automatic’ if not selected. Click on ‘Apply’ in the bottom right corner to apply your changes.
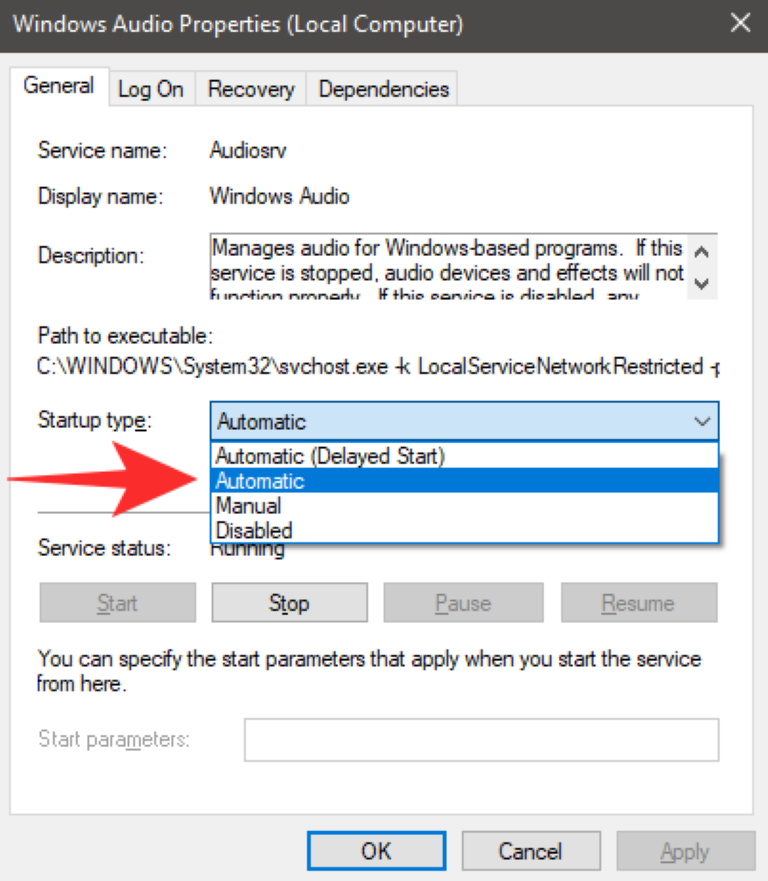
Restart your system.
The Windows audio service will now be automatically restarted on your system’s next bootup which should solve any microphone issues that you were having with Google Meet.
Switch to a Wired Headset
If you are using a Bluetooth headset with an in-built microphone then chances are that Meet services are conflicting with the wireless tech required for your headset to function properly. This is a known issue and many people trying to use a Bluetooth headset with Google Meet around the world are facing the same issue.
Google is expected to fix the issue with future updates, but for now, the only workaround seems to be to use a wired headset with an in-built microphone or to use an external microphone. This will solve all your audio issues with Google Meet and allow you to use the microphone properly.
Free Up System Memory
Real-time audio streaming and input require a decent amount of memory and processing power. If you are on a low-powered system and intermittently face microphone issues now and then, it could be there is not enough free memory for the microphone to work properly with Google Meet.
Google Chrome also uses a significant amount of your RAM and processing power which could also be interfering with your Google Meet experience. To fix these issues, you should start by closing any background applications that could be using the resources of your system.
You should also close any background tabs in Chrome other than Google Meet. This should solve your microphone issues with Google Meet.
Ensure that your Microphone is selected in Windows Settings
Windows also give you the ability to select your default microphone. If a different microphone has been selected in Windows audio settings than the one that you wish to use with Google Meet then it could be conflicting with the background services which could be the cause of your microphone issues. Follow the simple guide below to select your desired microphone as your default audio input device.
Open the Control Panel.
Click on the ‘Hardware and Sound’ category and select ‘Sound’ to open up your sound settings.
Now select the ‘Recording’ tab at the top.
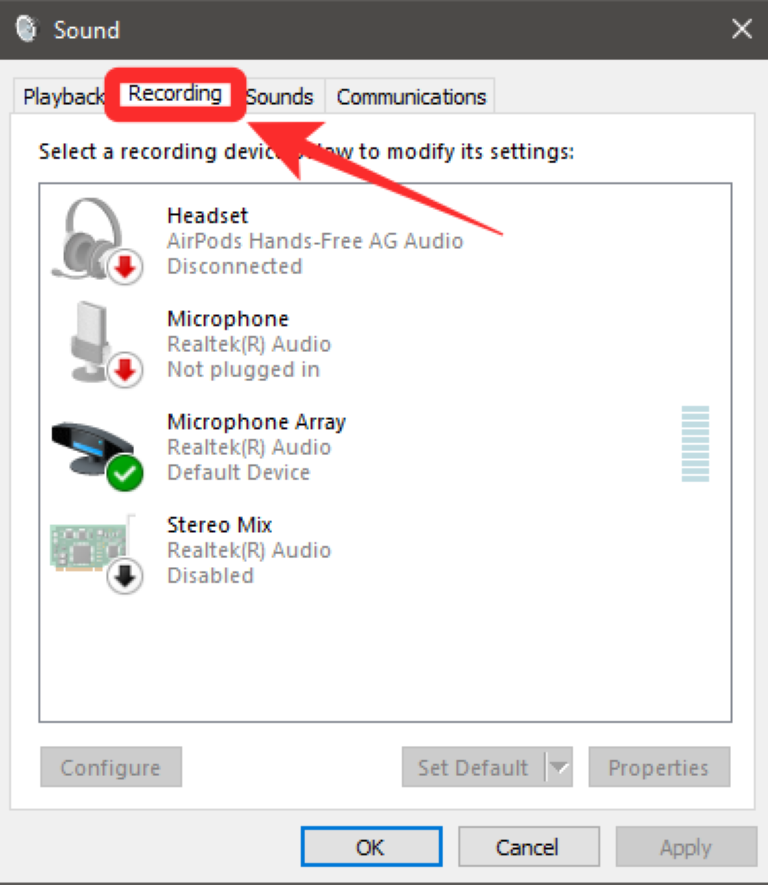
You will now be able to see a list of all the audio input devices connected to your system. Select the microphone that you want to use as your default audio input device and right-click on it.
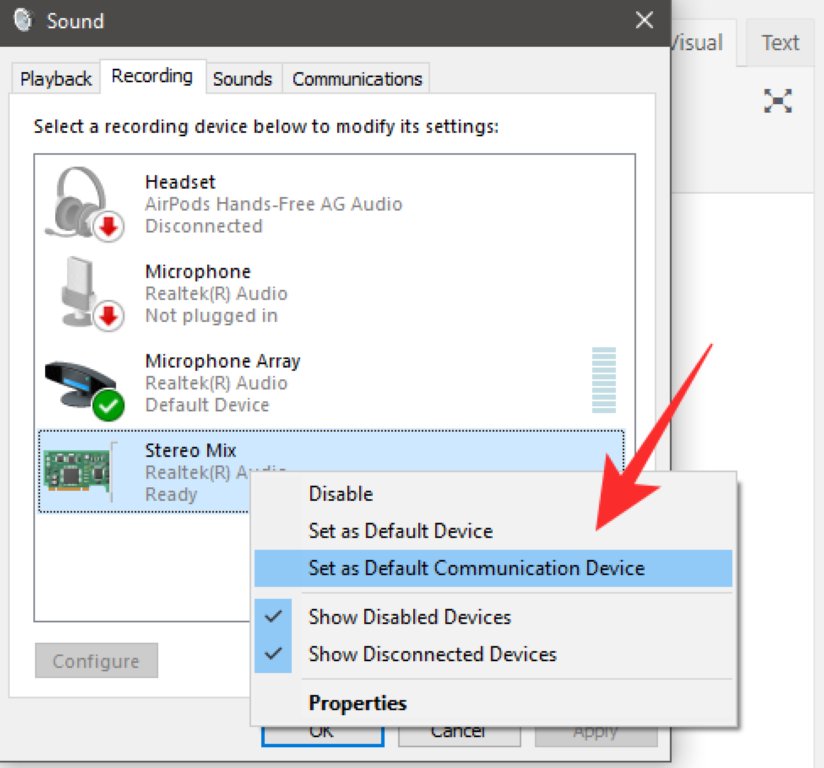
Select ‘Set as default communication device’ from the submenu that appears to start using that microphone as your default audio input device.

Once done, click on ‘Ok’ at the bottom right corner and close the window.
Your microphone should now be able to work without any issues during meetings on Google Meet.
Update your Microphone drivers (Windows only)
Sometimes your microphone drivers on your Windows system could be outdated which might be preventing your microphone to work properly in Google Meet. You should try to update your microphone drivers to fix these issues. Follow the guide below to help you easily update or reinstall your microphone drivers on Windows 10.
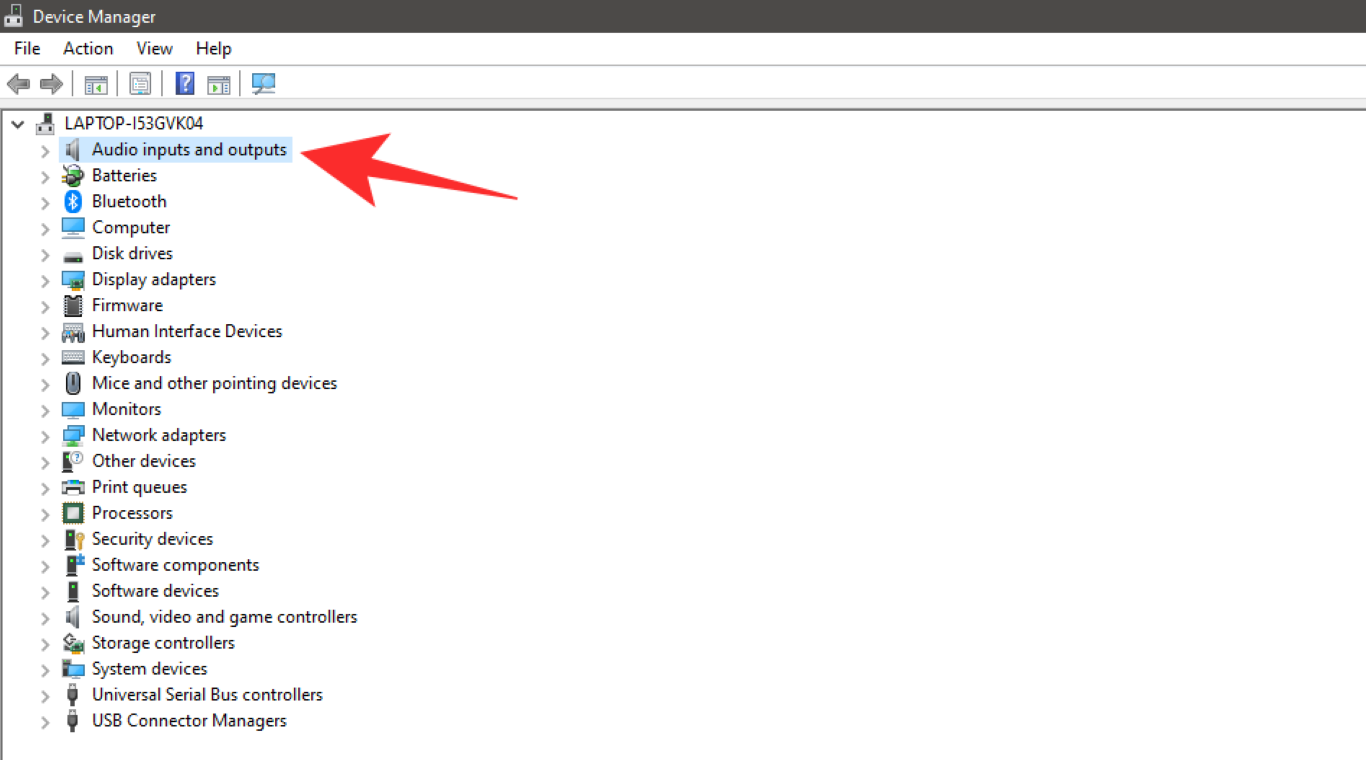
Type ‘Device Manager’ in your taskbar search bar and open the first application that shows up in the search results with the same name.

Now click on the drop-down menu beside ‘Audio Inputs and outputs’
Select the microphone that you wish to use with Google Meet.
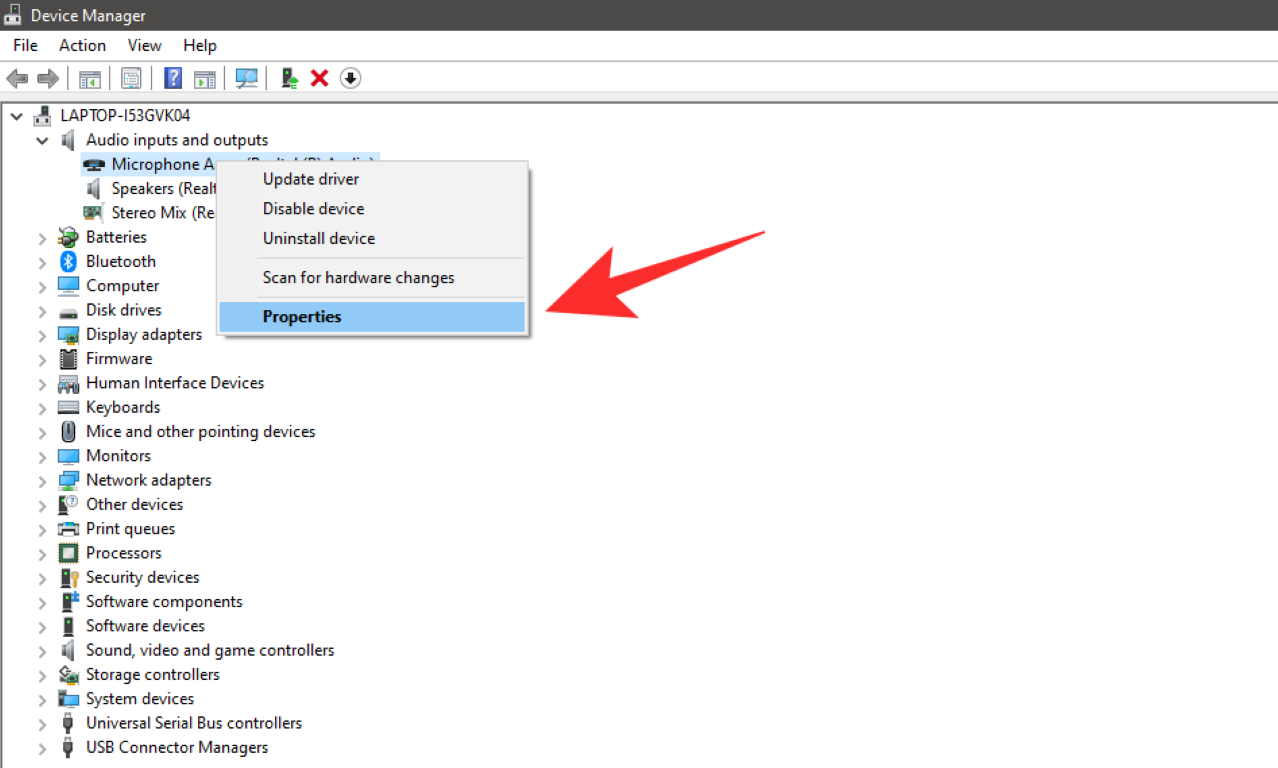
Right-click on the microphone and select ‘Properties’.
Now click on the ‘Driver’ tab at the top to open up driver options for your device. Now if the option for ‘Update Driver’ is not greyed out, click on it to update the drivers for your device.

Your microphone drivers will now be updated and you should now be able to use the concerned microphone with Google Meet. Although most microphones are plug-and-play in today’s day and age, this could still help solve your issue depending on your microphone.
Disable Audio Enhancements
There is an option to enable audio enhancements for the microphone on Windows. While this helps improve audio quality for your microphone, this setting is known to interfere with the functioning of Microsoft Meet.
If you are having issues with your microphone, then chances are that audio enhancements have been enabled for your microphone in Windows. Follow the guide below to help you disable audio enhancements for your microphone.
Open the control panel on your Windows PC, click on ‘Hardware and Sound’, and select Sound. This will open the sound settings for your Windows system.
Click on the ‘Recording’ tab at the top of your screen, select the microphone you wish to use during Google Meet meetings from the list, right-click on it, and select ‘Properties’.

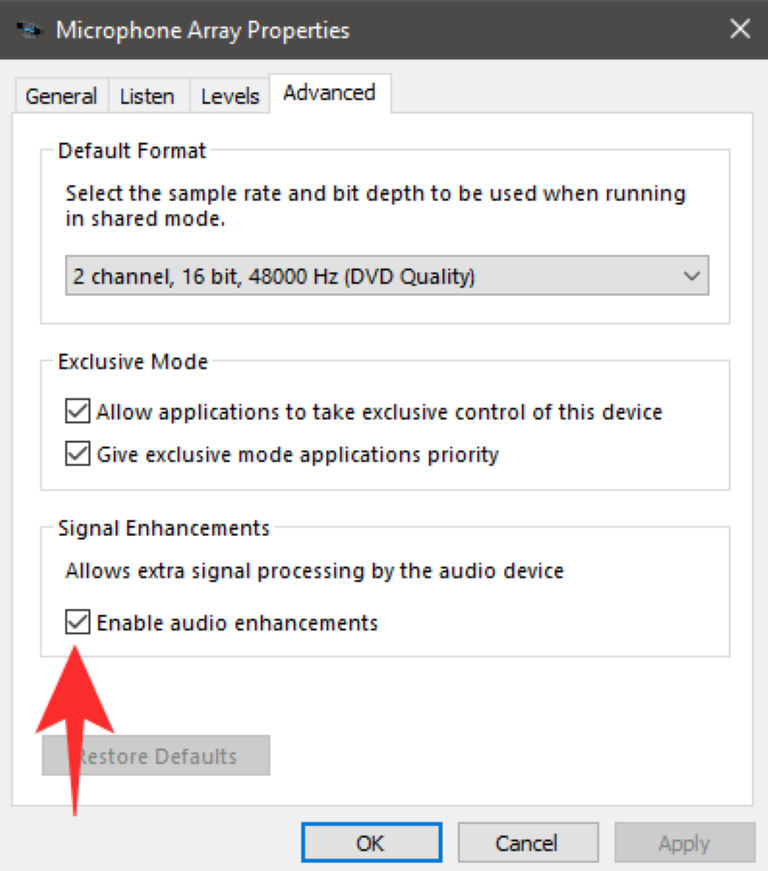
Now in the Microphone Properties window, select the ‘Advanced’ tab from the list at the top. Under the ‘Single Enhancements’ option, uncheck the box beside ‘Enable audio enhancements’.
Audio enhancements will now be disabled for the microphone in question. You should now be able to use your microphone during Google Meet meetings.
Clear Google Chrome’s Cache
You can try to clear the cache on Google Chrome to fix your microphone settings. This will get rid of any stored temporary files that might be interfering with the Google Meet extension. Follow the guide below to clear the cache on Google Chrome.
Open Google Chrome, click on the ‘3-dot’ menu icon in the top right corner.
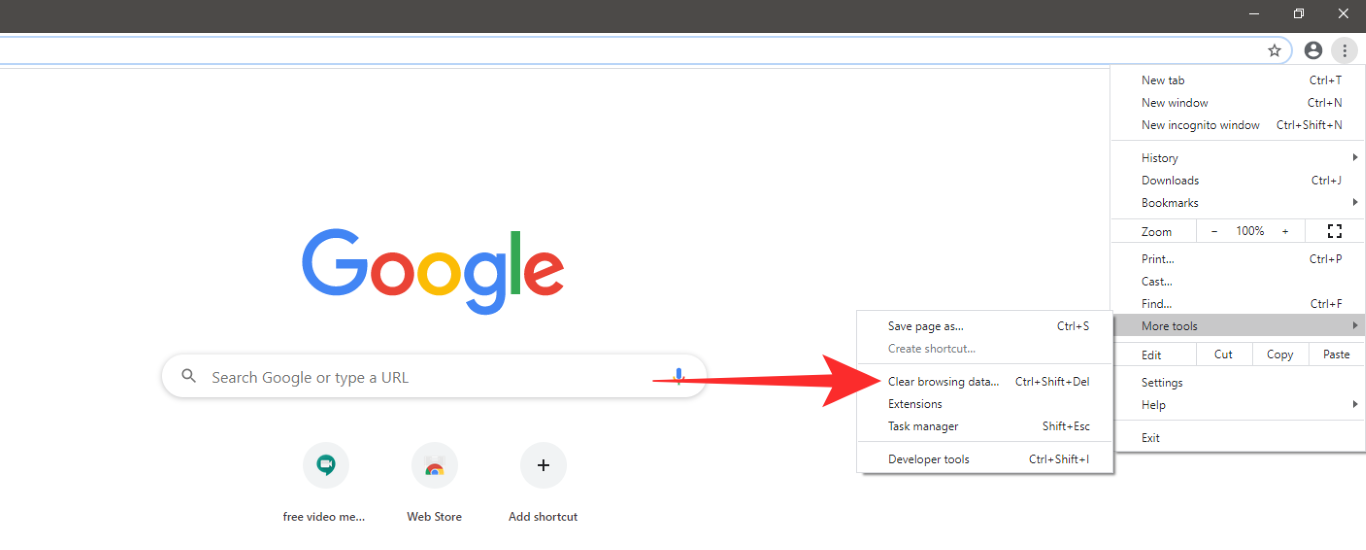
Select ‘More Tools’.
Now select ‘Clear browsing data’.
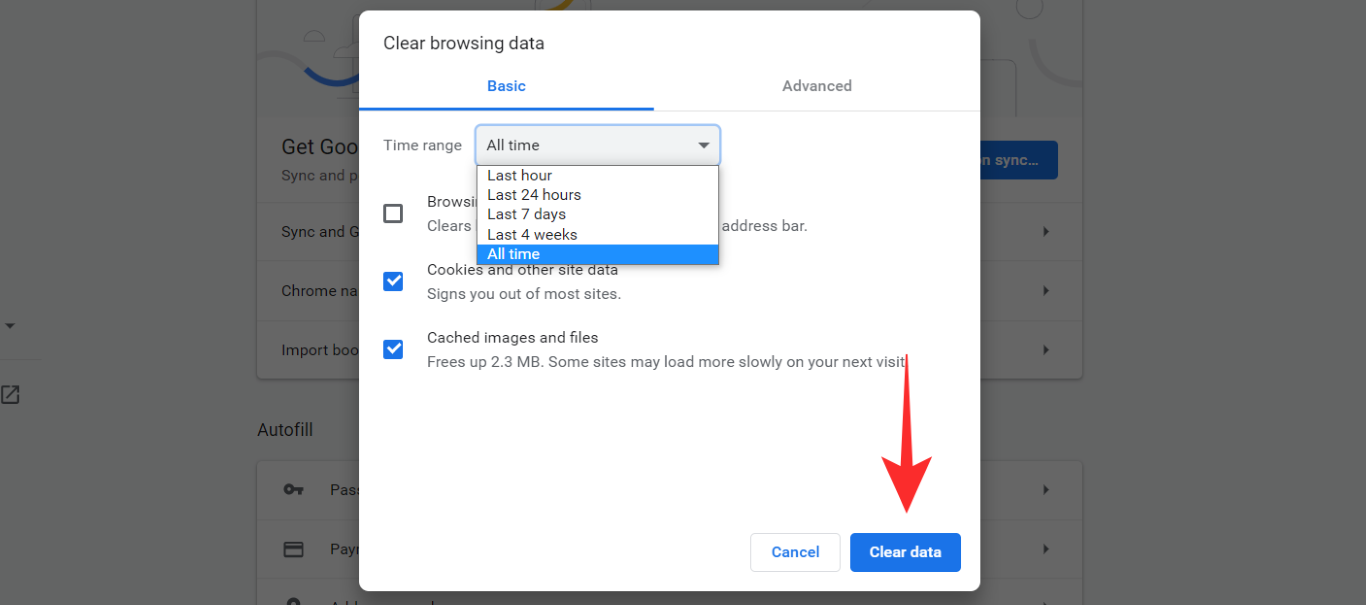
In the next window, select ‘All-time’ in the time range drop-down menu.
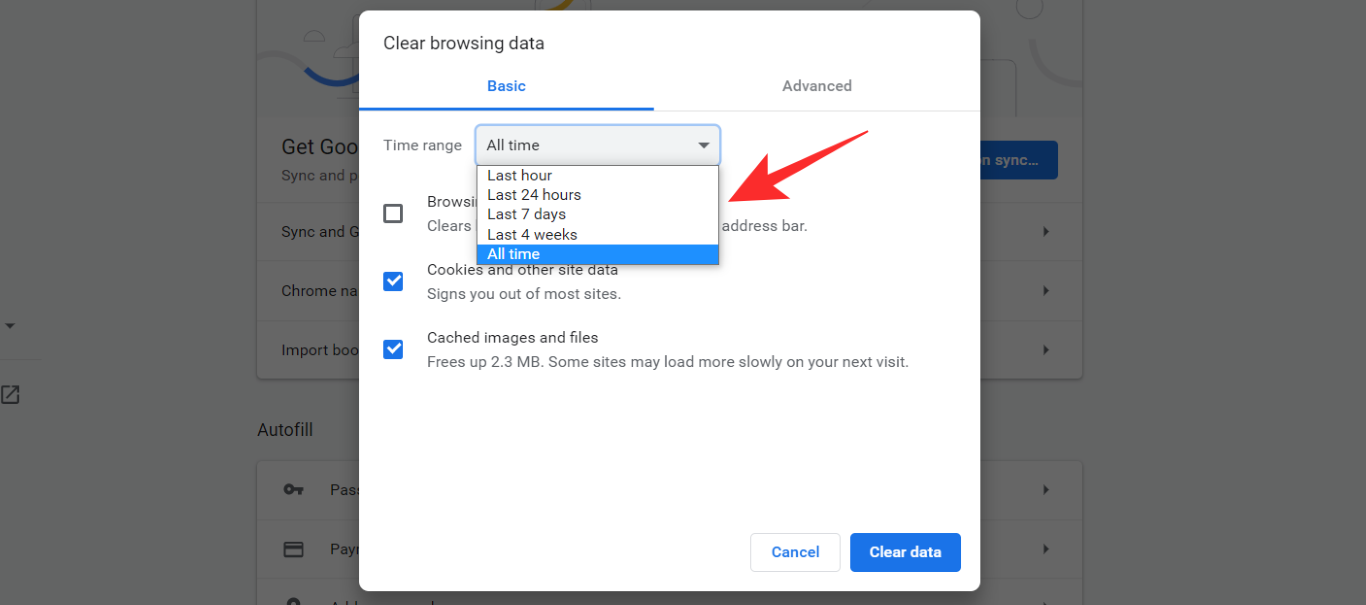
Uncheck the box for ‘Browsing History‘.

Lastly, click on ‘Clear data’ to clear all the cache files.
Your cache files will now be cleared and you should now be able to use the microphone in Google Meet.
Close FaceTime from the background
Many users on Mac systems have reported Facetime interfering with Google Meet which causes the microphone to malfunction. If you use Facetime regularly then you should try closing the application in the background before joining a meeting in Google Meet. This should help solve any audio input issues that you were facing with the Google Meet extension.
Sign OUT, then back IN into your Google account
Some users having issues with microphones in Google Meet have reported that signing out of your Google account and signing in again has helped solve this issue. You can try this method to see if it fixes your issue.
To sign out, simply click on your profile icon in the top right corner of your browser and click on Sign out. Simply sign in to your account again now and try to join a meeting on Google Meet. You should now be able to use your microphone during Google Meet meetings.
Disable Experimental Flags on Google Chrome
If you have enabled any experimental flags in Google Chrome then chances are that they are preventing your microphone from working properly in Google Chrome. You should disable any experimental flags and try to use your microphone again.
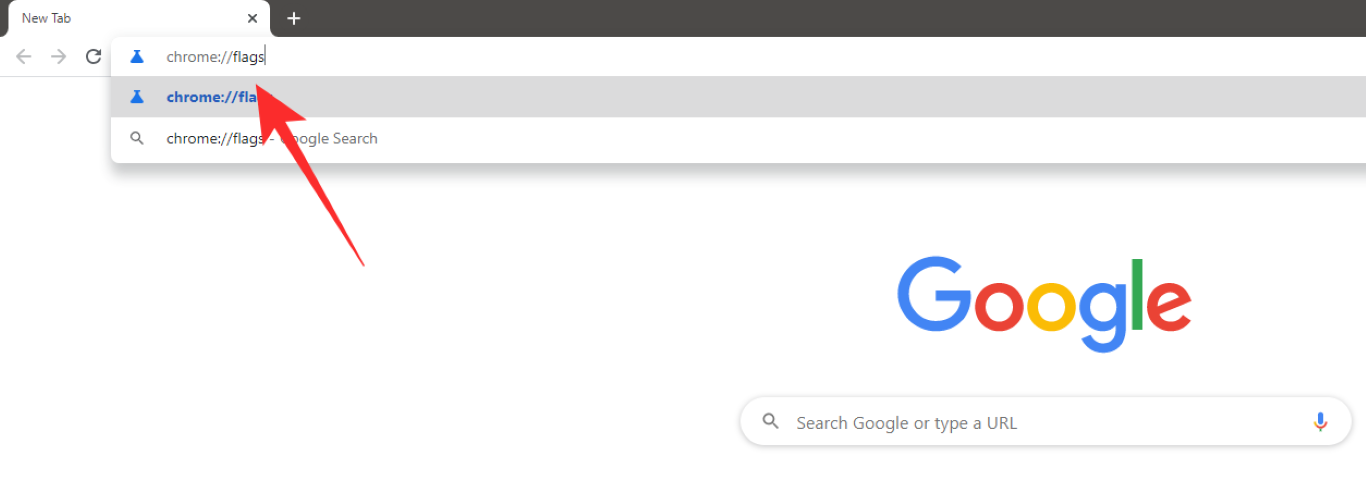

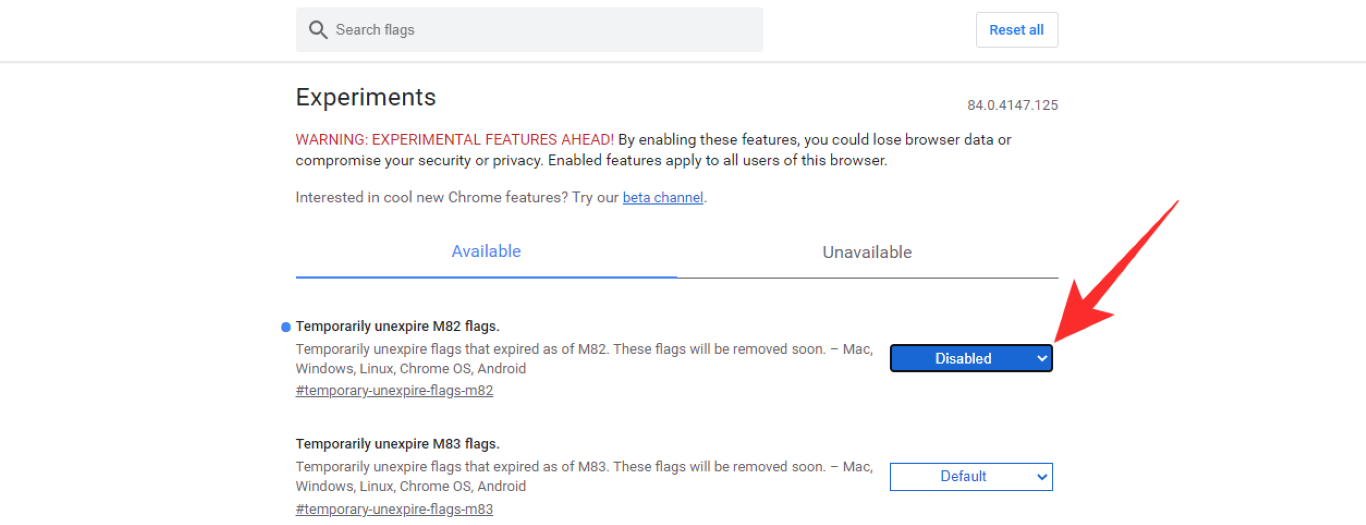

Simply type ‘chrome://flags’ in your URL bar and hit enter to access the flags page. Now scroll through the options and disable any enabled tabs by click on the drop-down menu beside it and select ‘Disable’.
Update Google Chrome
Google Meet and its corresponding extension for Chrome was recently given a new overhaul by Google chrome to support the recent influx of users. If you are using an older version of Google Chrome then chances are that it is incompatible with the latest version of Google Meet and the Google Meet extension.
Download the latest stable build of Google Chrome from this link and install it on your system. You should then be able to use your microphone in Google Meet without any issues.
Manually Update Google Meet extension
If nothing seems to work, you can try updating your Google Chrome extensions manually. Simply follow the guide below to help you get started.
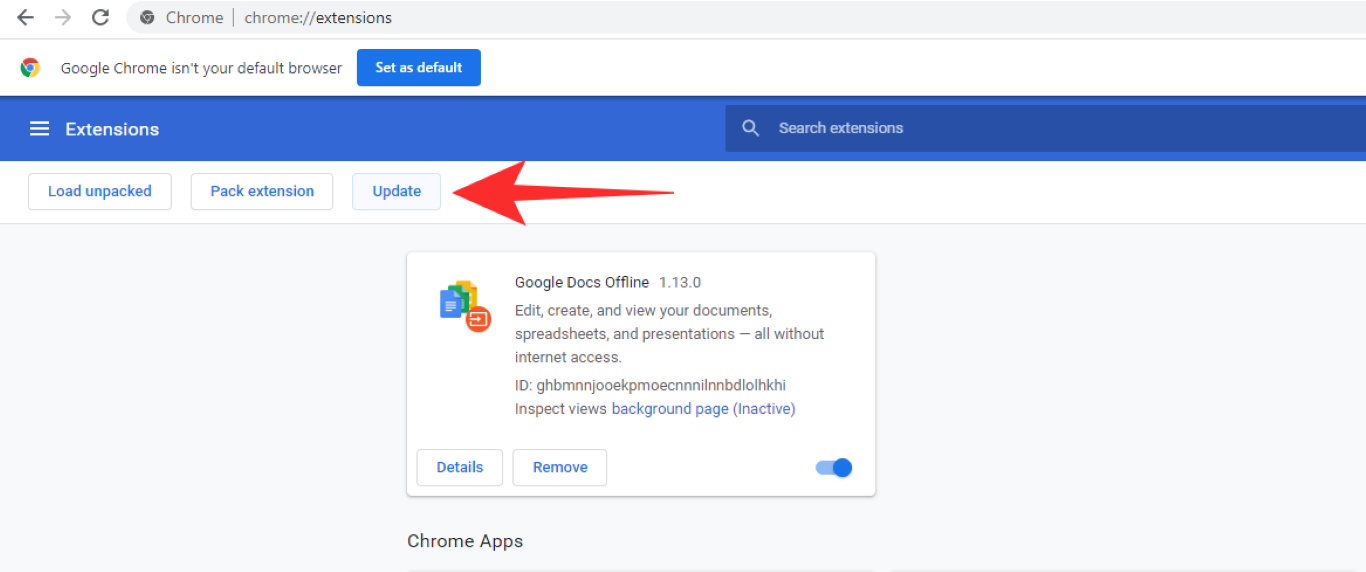
Open Google Chrome on your system and type ‘chrome://extensions’ in your URL bar and hit Enter.
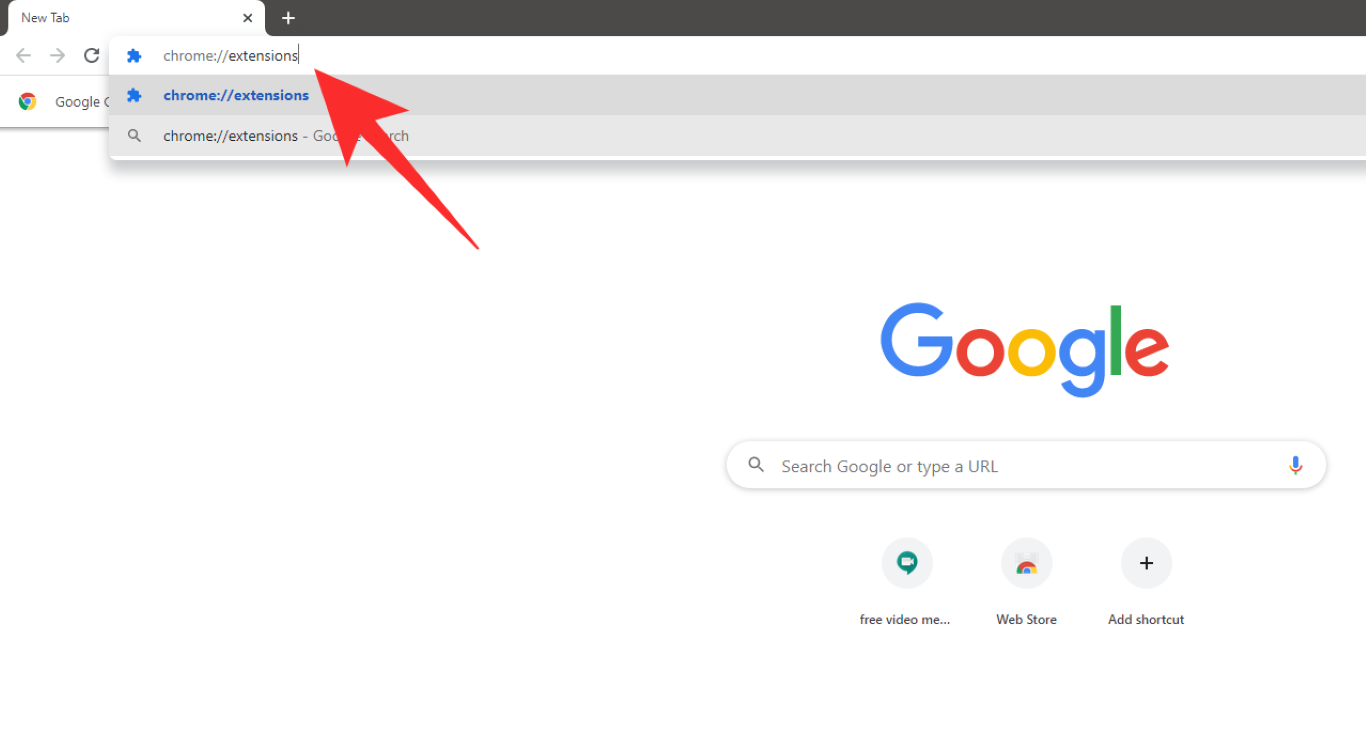
The extensions settings page will now open up. In the top right corner, turn on the toggle for ‘Developer Mode’.
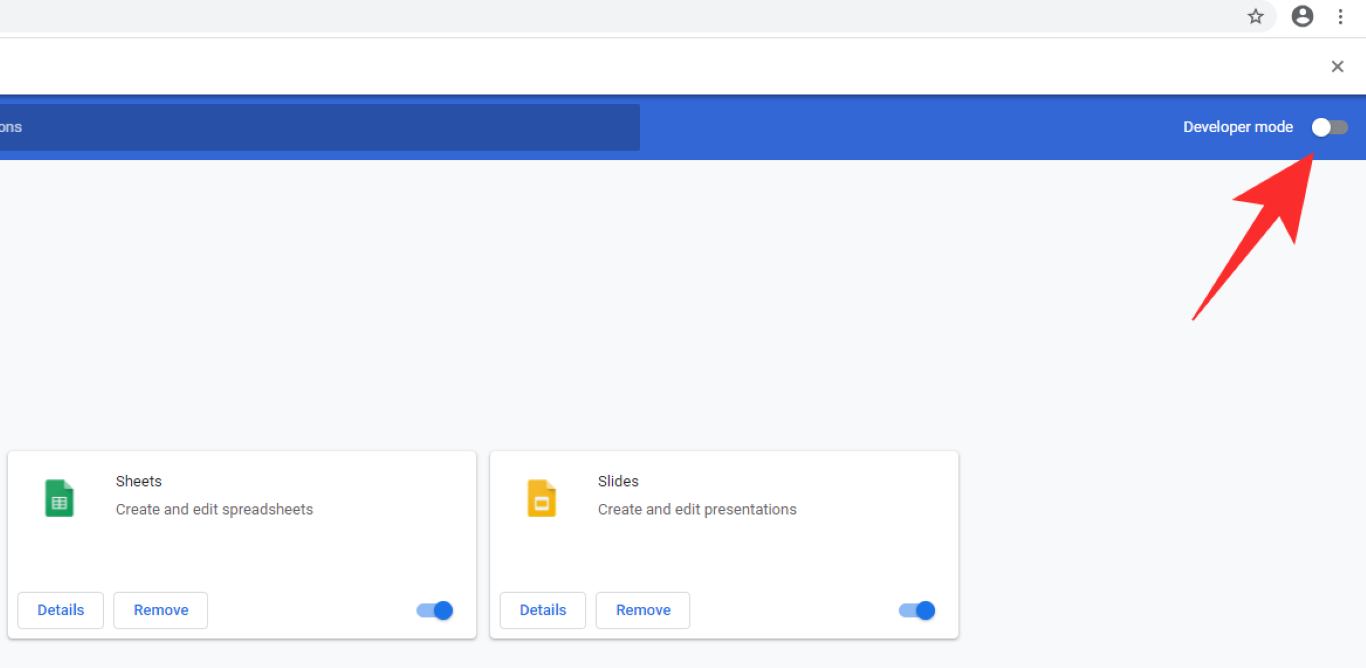
Now simply click on ‘Update’ and chrome will manually update all the extensions installed on your system including Google Meet.
You should now be able to use the microphone freely in Google Meet without any persistent issues.
We hope these fixes helped you solve your microphone issues with Google Meet. If you have any suggestions for us, feel free to get in touch with us using the comments section below.
RELATED:


One response to “Microphone Not Working In Google Meet? Try These Common Fixes”
i don’t thing anything is missing in these article. Full fill with complete knowledge. Informative. Thank’s for sharing information.