
All 10 Batcave Minikits in LEGO Batman: Legacy of the Dark Knight are found around the hub by grappling, gliding, unlocking Batcave expansions, using Catwoman’s safe-cracking, and interacting with hidden props like a fishing rod, especially near the Garage, Shop, Lab roof, Clean Slate area, and waterfall.
Batcave minikits and requirements
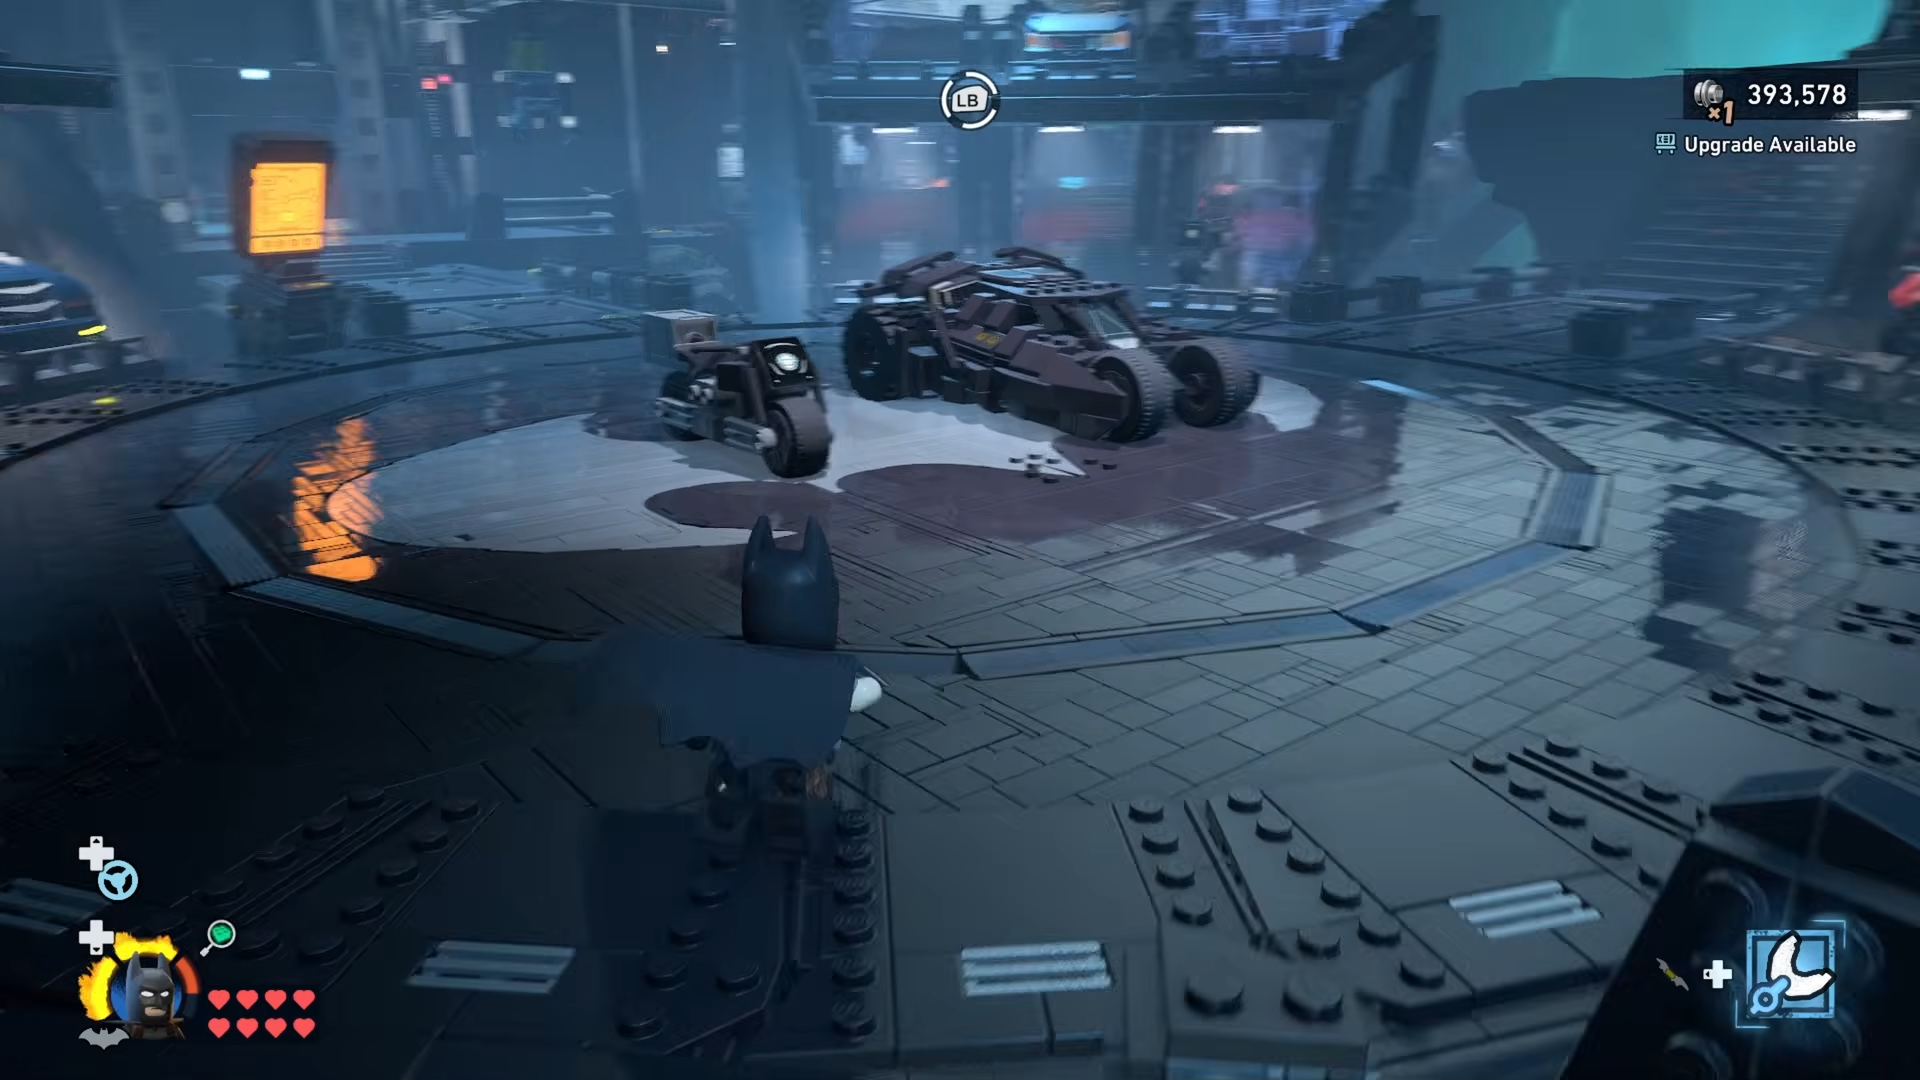
Batcave Minikits are hub collectibles that sit alongside WayneTech Caches and Batcave Trophies as part of your overall completion percentage in LEGO Batman: Legacy of the Dark Knight. There are 10 Batcave Minikits total, all available within the cave once you have every expansion and key character ability unlocked.
Several Minikits are out in the open but require precise grappling and gliding, while others are locked behind Batcave expansions such as the Lab and Clean Slate area that must be purchased with Studs. At least one Minikit also requires Catwoman for safe-cracking, so these are mid- to late-game pickups rather than early hub freebies.
How to unlock Batcave access for all 10 Minikits
Before chasing the full Batcave Minikit set, it helps to have your hub properly opened up. Several Minikits only become reachable once you have all four major Batcave expansions online.
Key Batcave expansions you need
-
Training Area (50,000 Studs) – Opens up one side of the cave, good for movement practice and some vertical paths.
-
Display Area (75,000 Studs) – Houses mission Minikit displays and extends your walkable space.
-
Science Area / Lab (100,000 Studs) – Required for the Lab roof Minikit and some higher grapple points.
-
Clean Slate Area (100,000 Studs) – Key for the bat-symbol Minikit and waterfall-side collectibles.
Once all expansions are built and Catwoman is unlocked from story progress, every Batcave Minikit becomes obtainable in a single sweep.
How to get every Batcave Minikit in LEGO Batman: Legacy of the Dark Knight
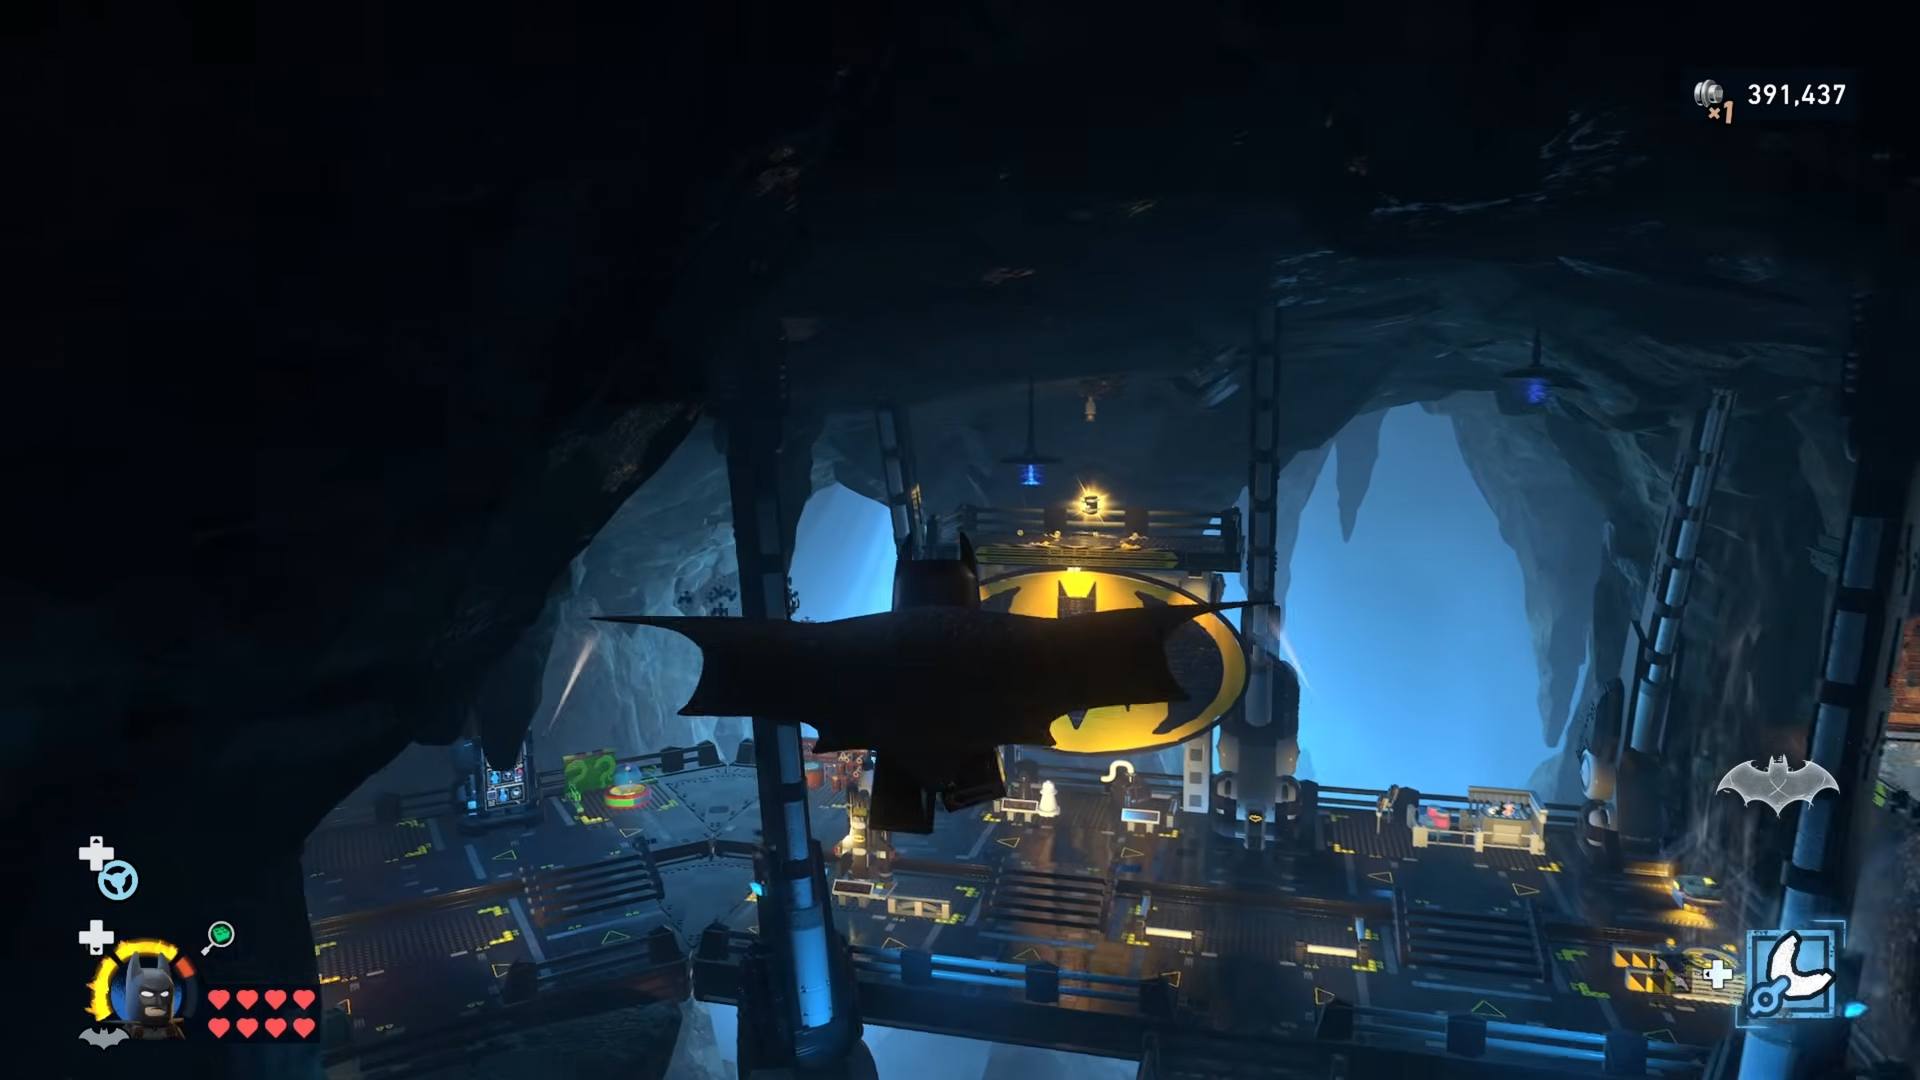
Step 1: Grab the Garage roof Minikit
Stand in front of the Batmobile Garage in the central lower section of the cave and look up to spot a Minikit on a ledge above.
Use Batman’s Grapple to reach a higher lip, then glide off toward the ledge to snag Minikit 1 hovering above the garage roofline.
Step 2: Collect the Minikit near the Shop
Head to the Shop entrance (Bat-Mite’s store / in-cave shop) and face outward toward the main cavern.
Tilt the camera up and to the upper-right, where you can see a Minikit resting on some wooden planks.
Use a short grapple then glide or a careful jump-glide from the nearby ledge to reach it.
Step 3: Snatch the Minikit hidden behind the Shop elevator
Still near the Shop, locate the elevator that runs up the side of the wall next to the entrance.

Move behind this lift — either by walking around the side or gliding down into the gap — to find a Minikit tucked directly behind the elevator shaft.

Grab it and then climb back out to the main walkway.
Step 4: Unlock the Lab and climb to its rooftop Minikit
Purchase the Science Lab expansion in the northeast corner of the Batcave, then enter this area and look up at the roof.
From the surrounding walkways, use Batman’s Grapple points to climb to the outer edge of the Lab’s roof.
And walk to the Minikit sitting along the rim.
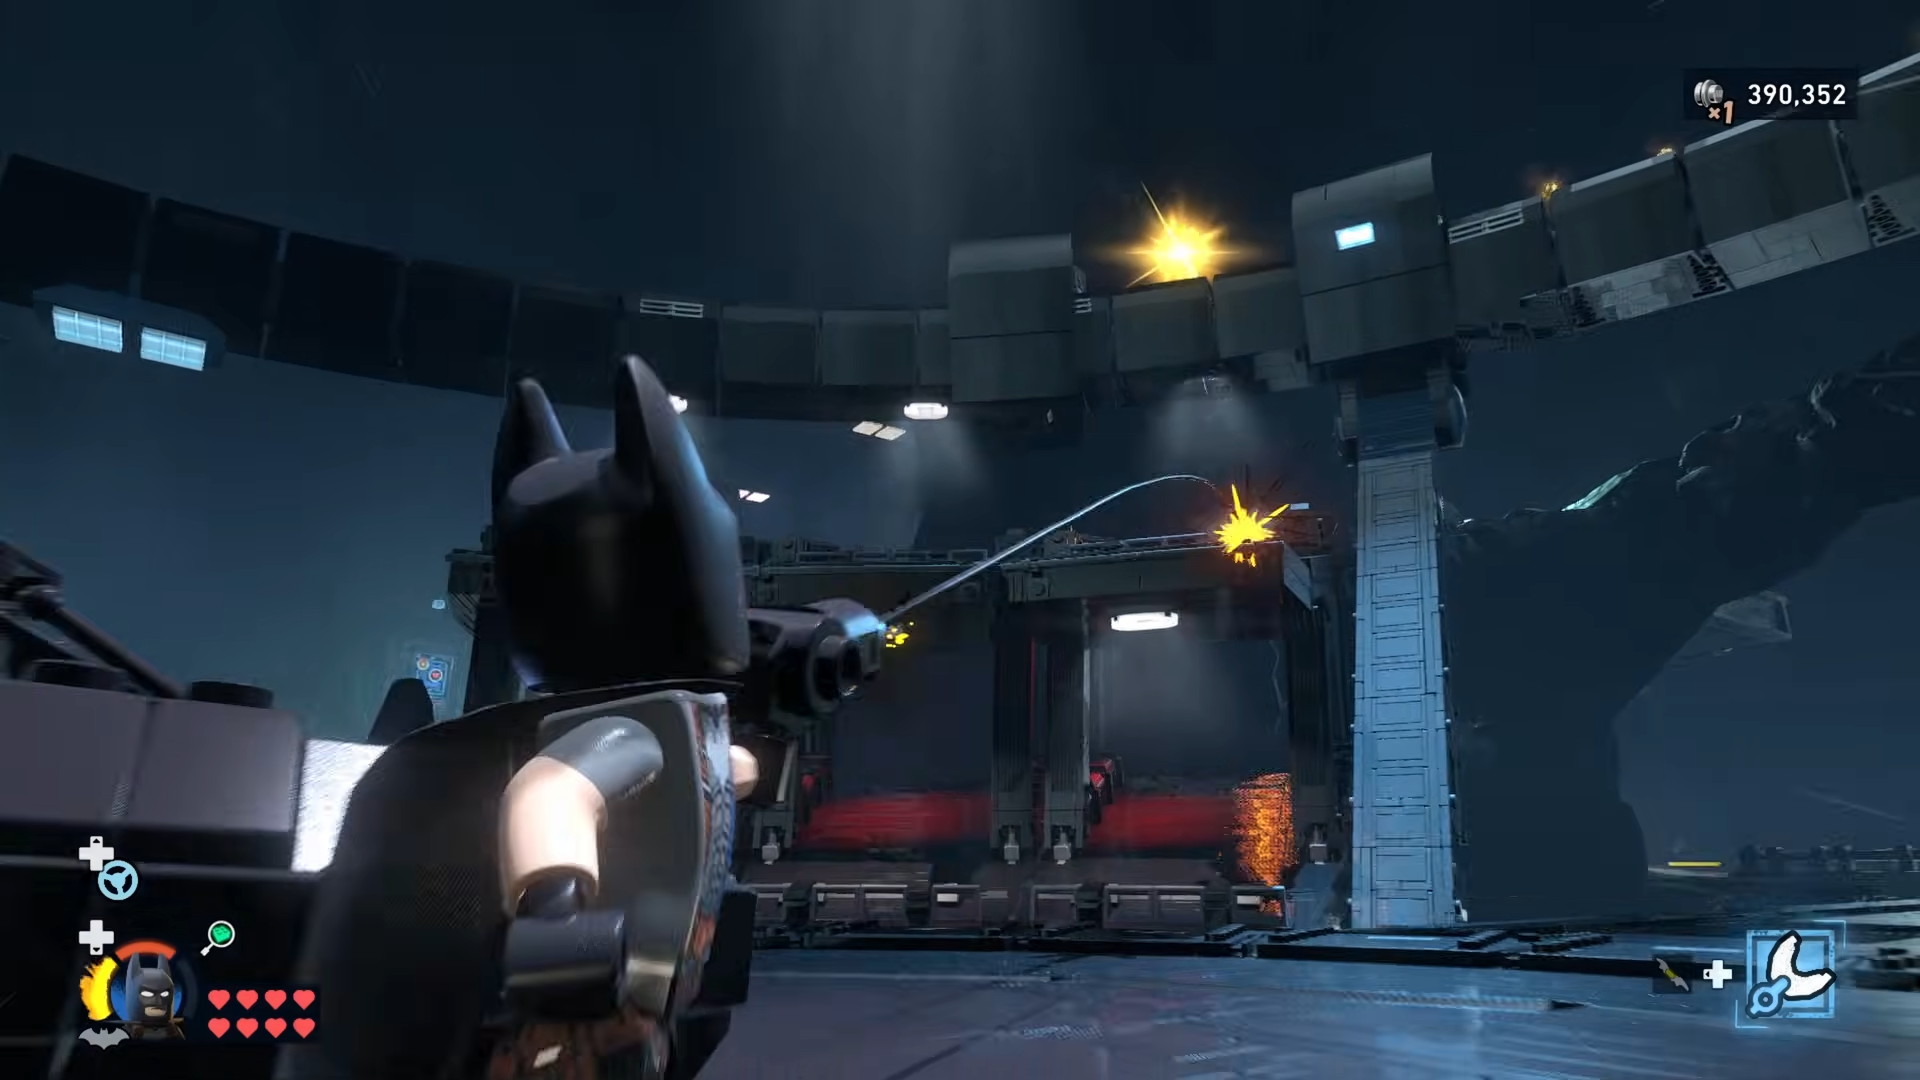
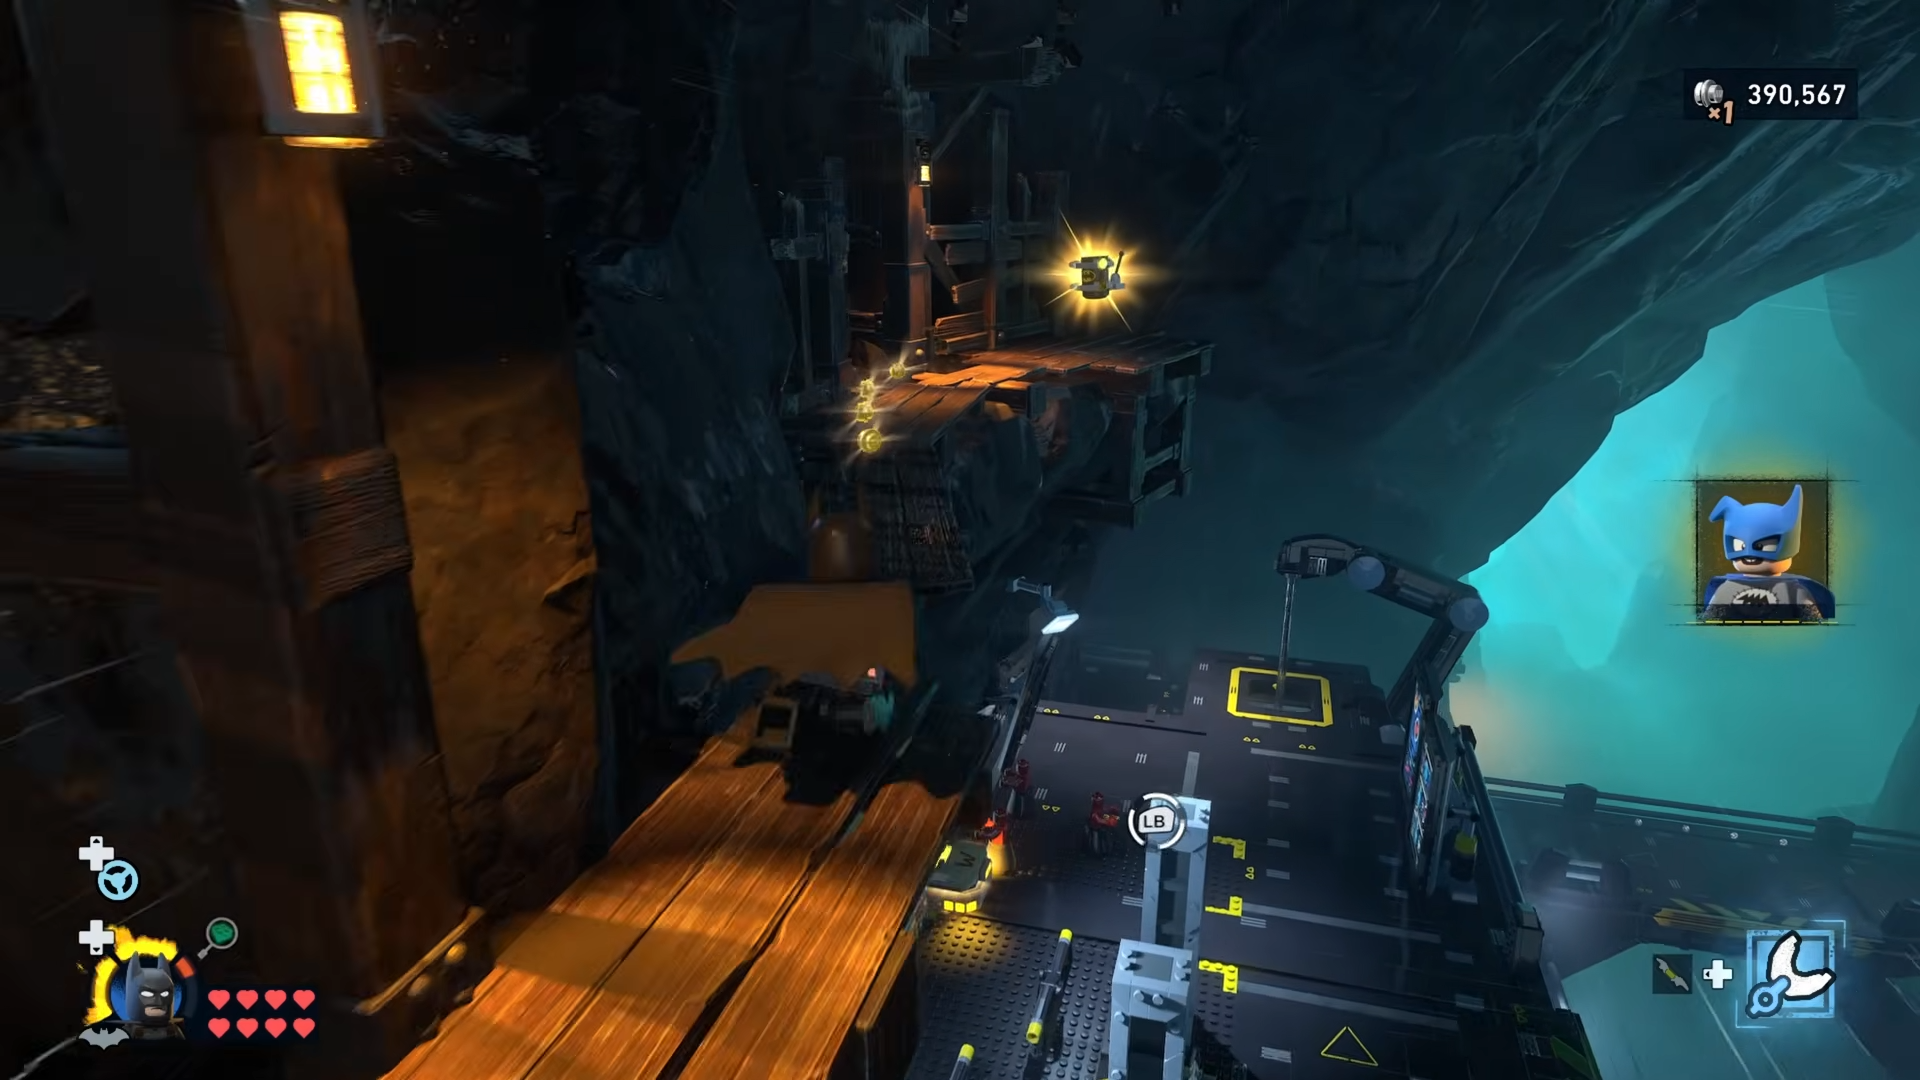
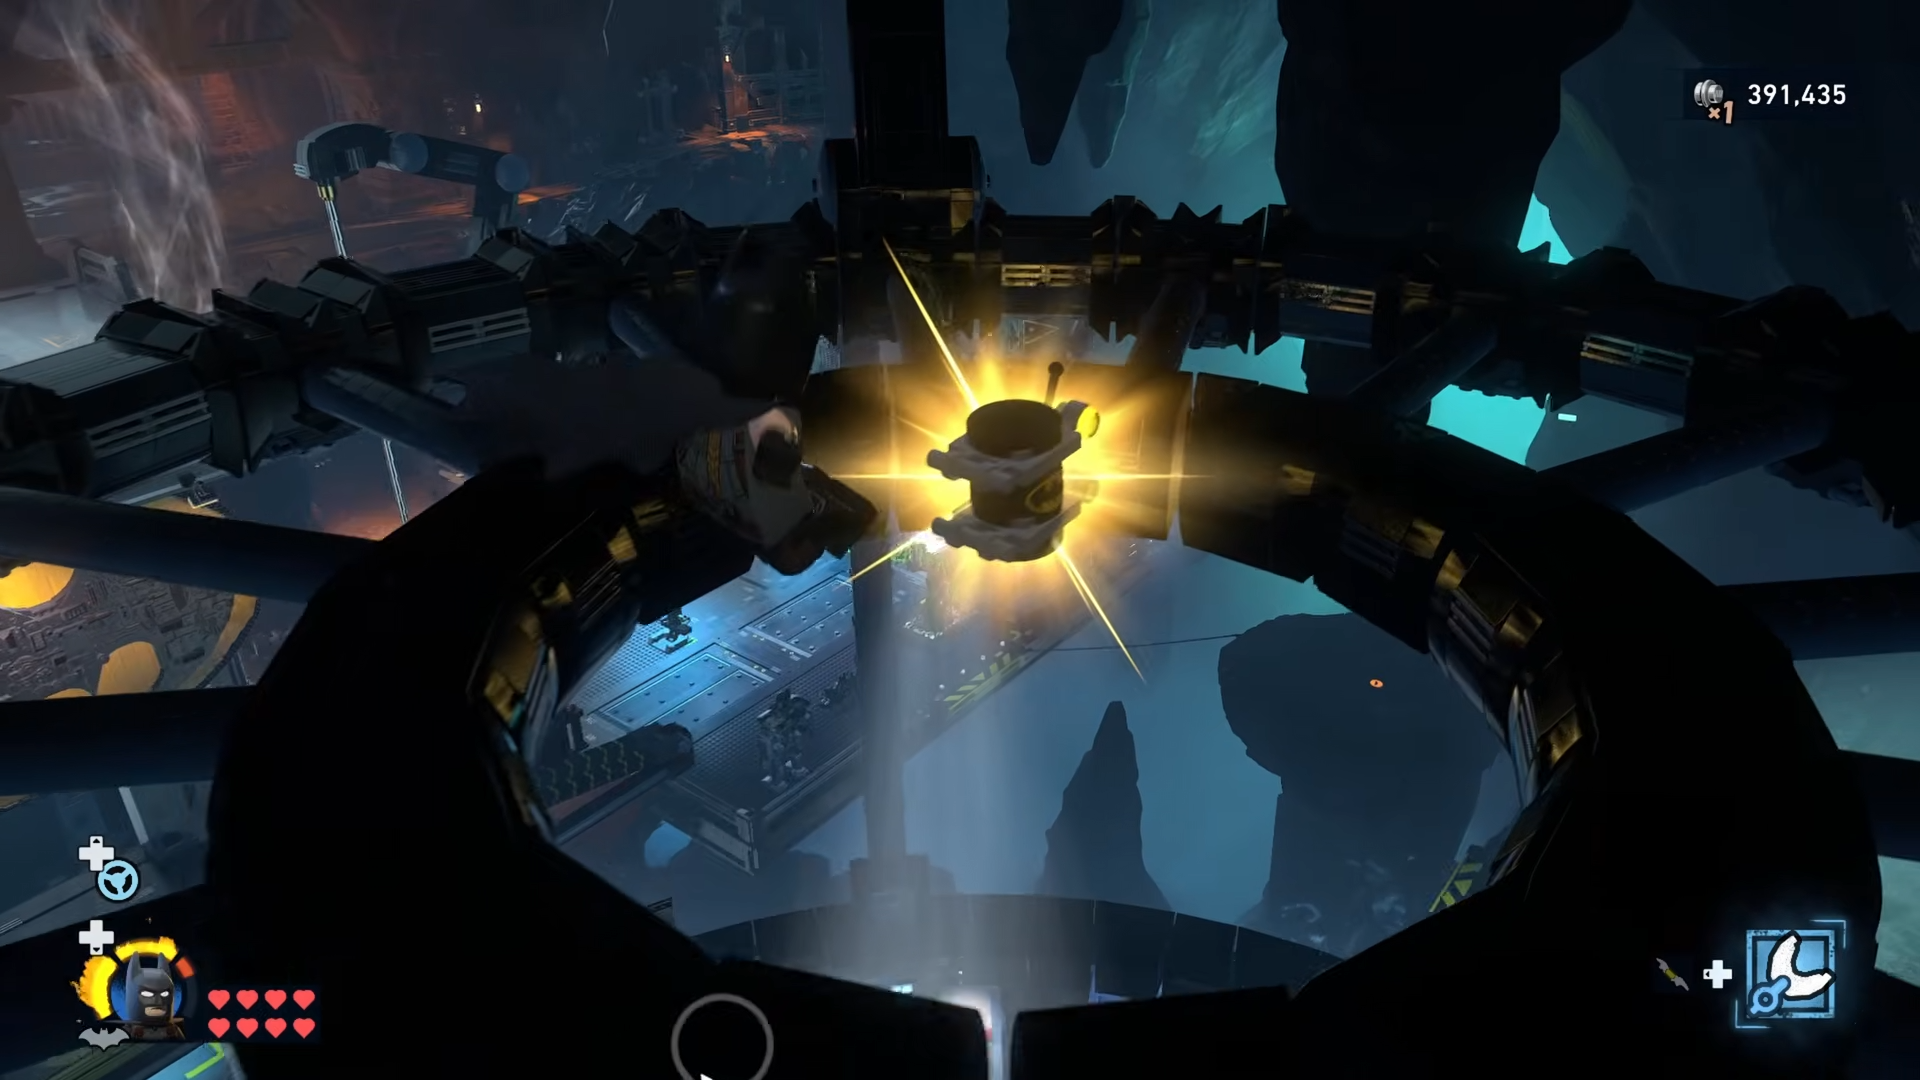
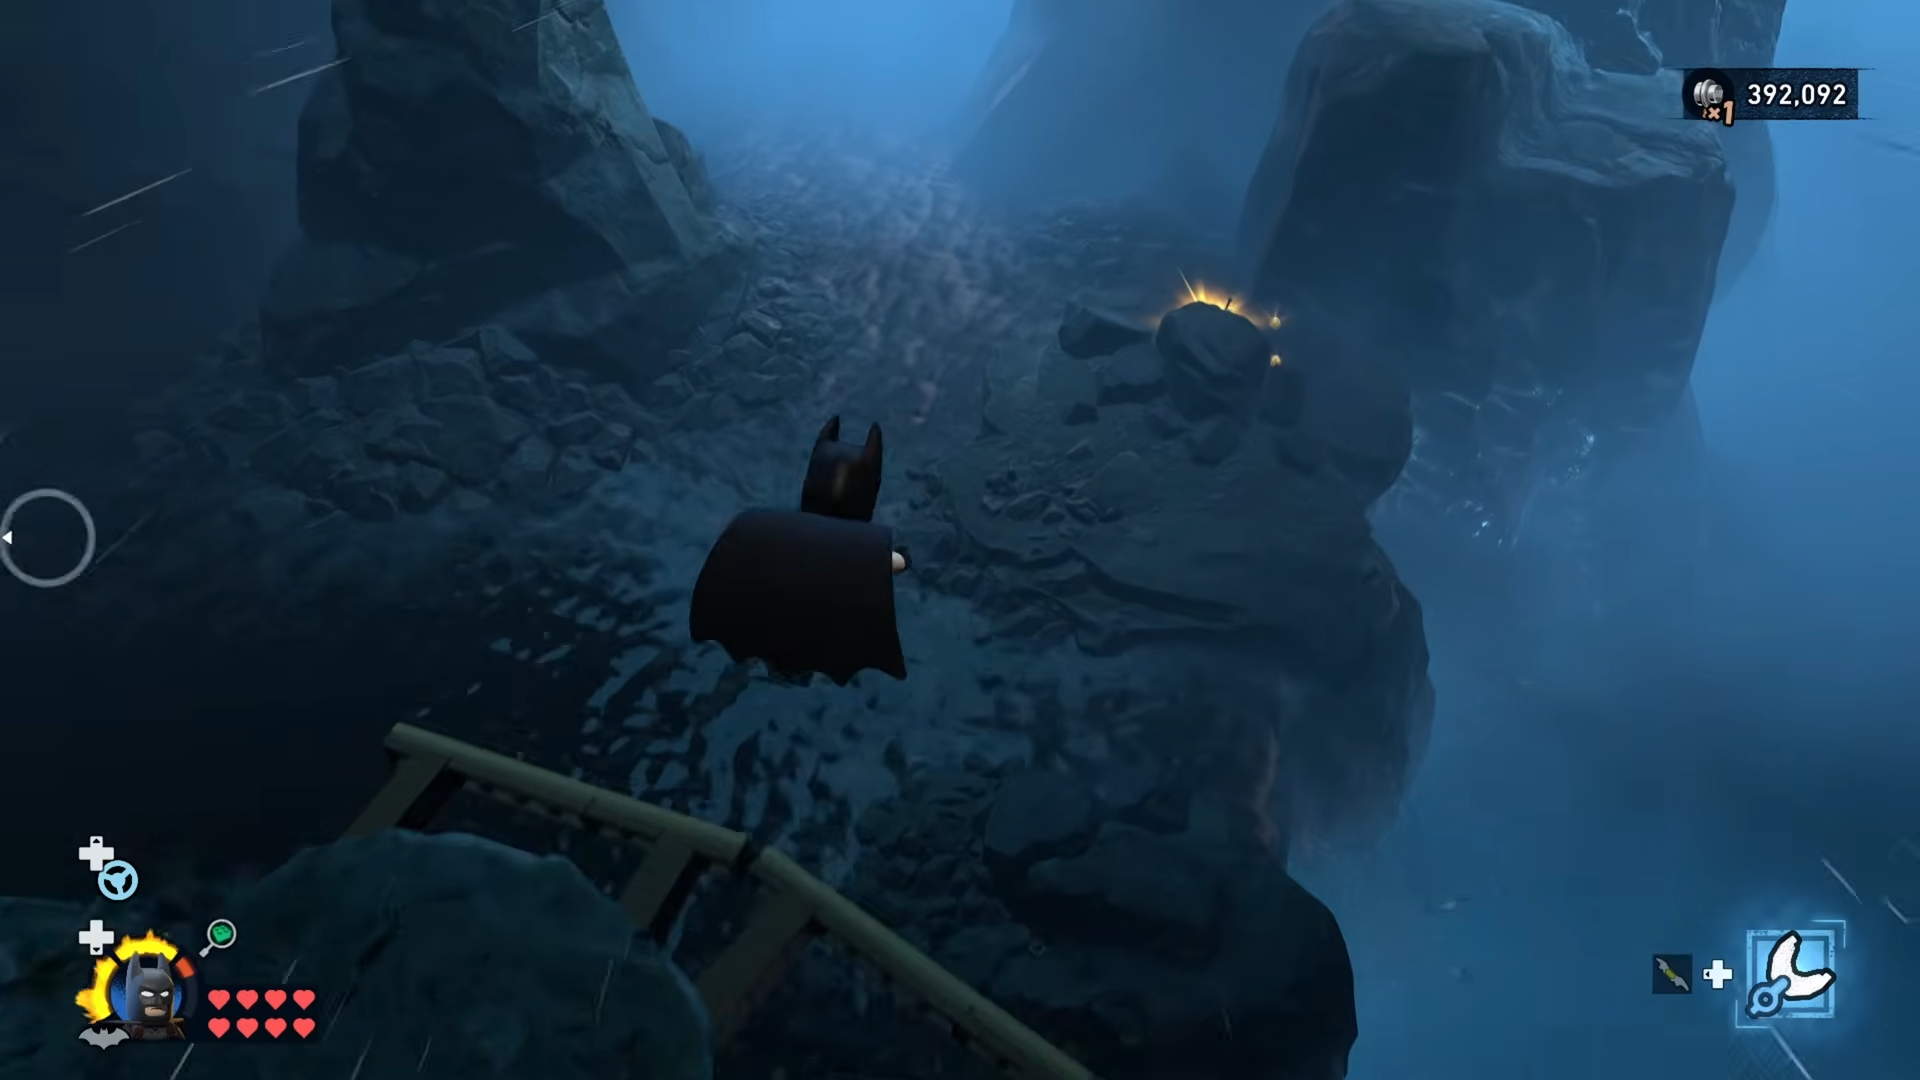
Step 5: Use the vents to glide into the central cave Minikit
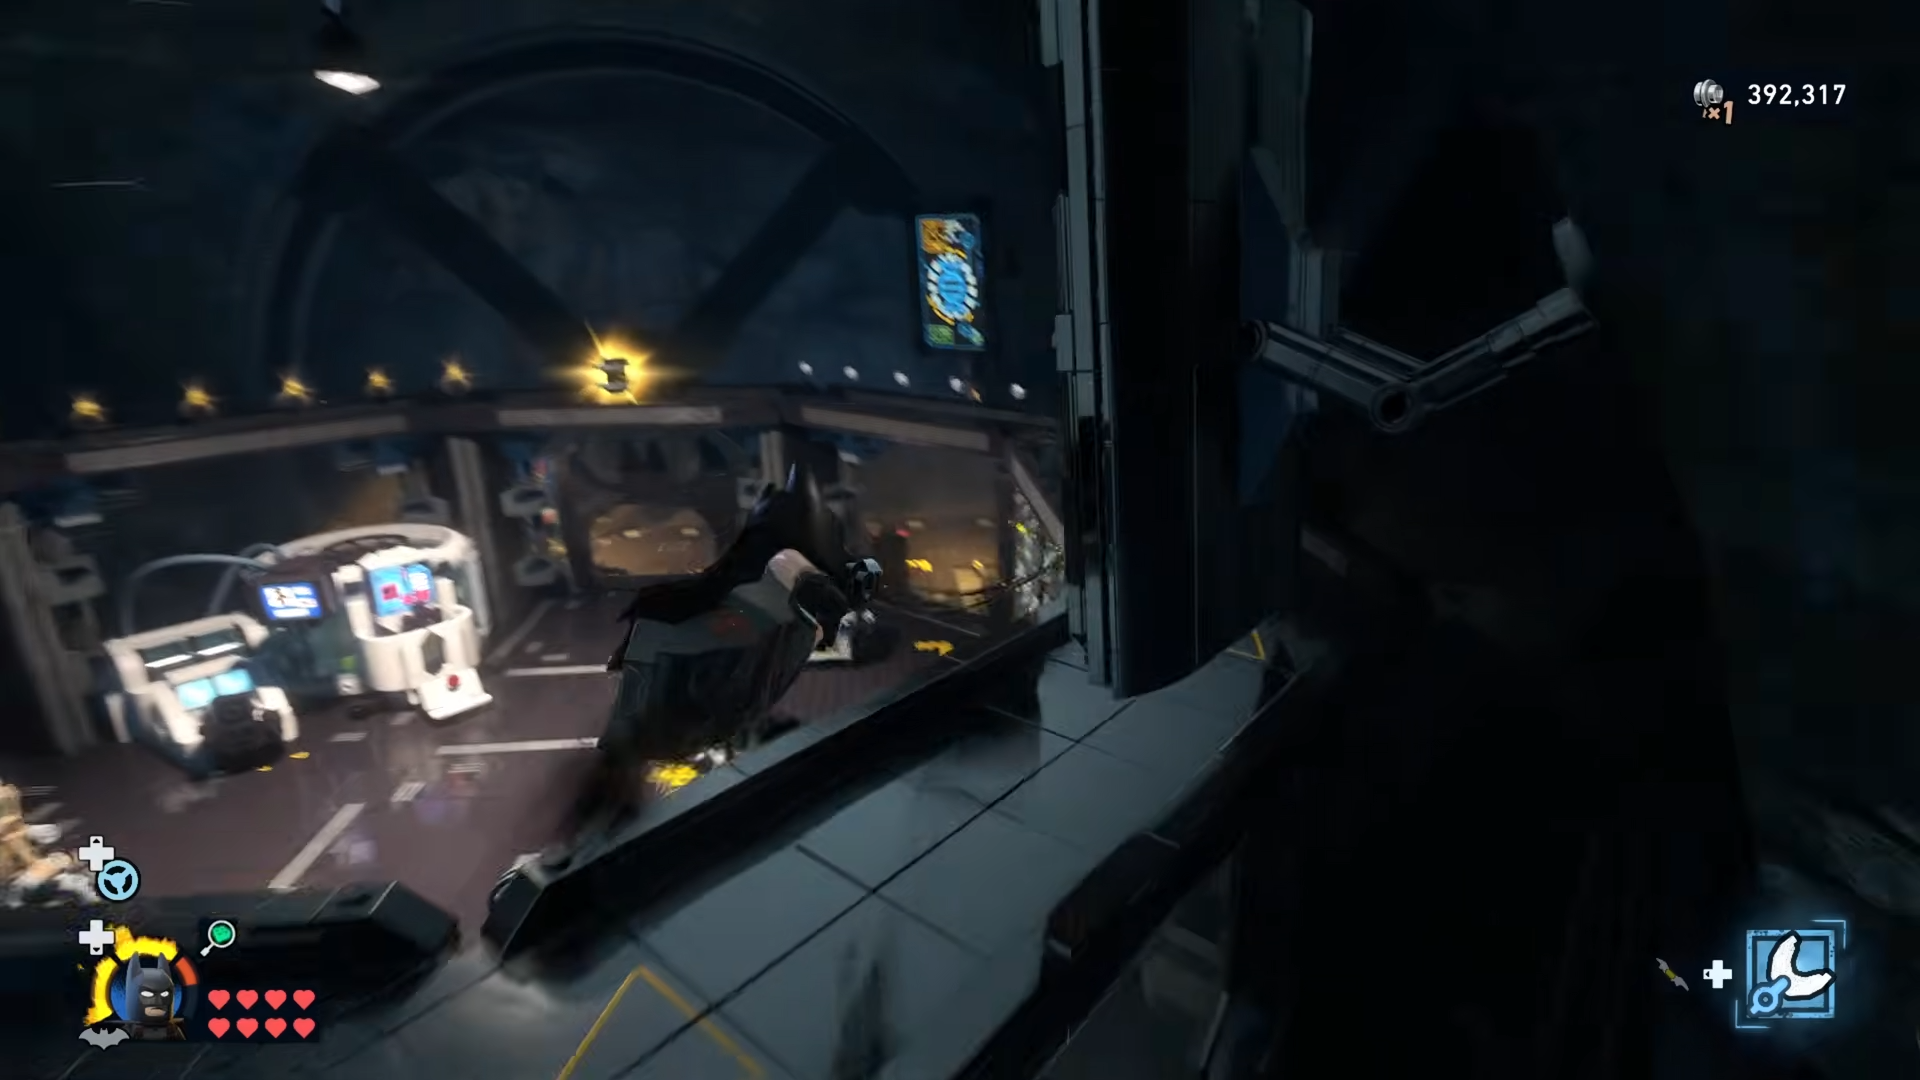
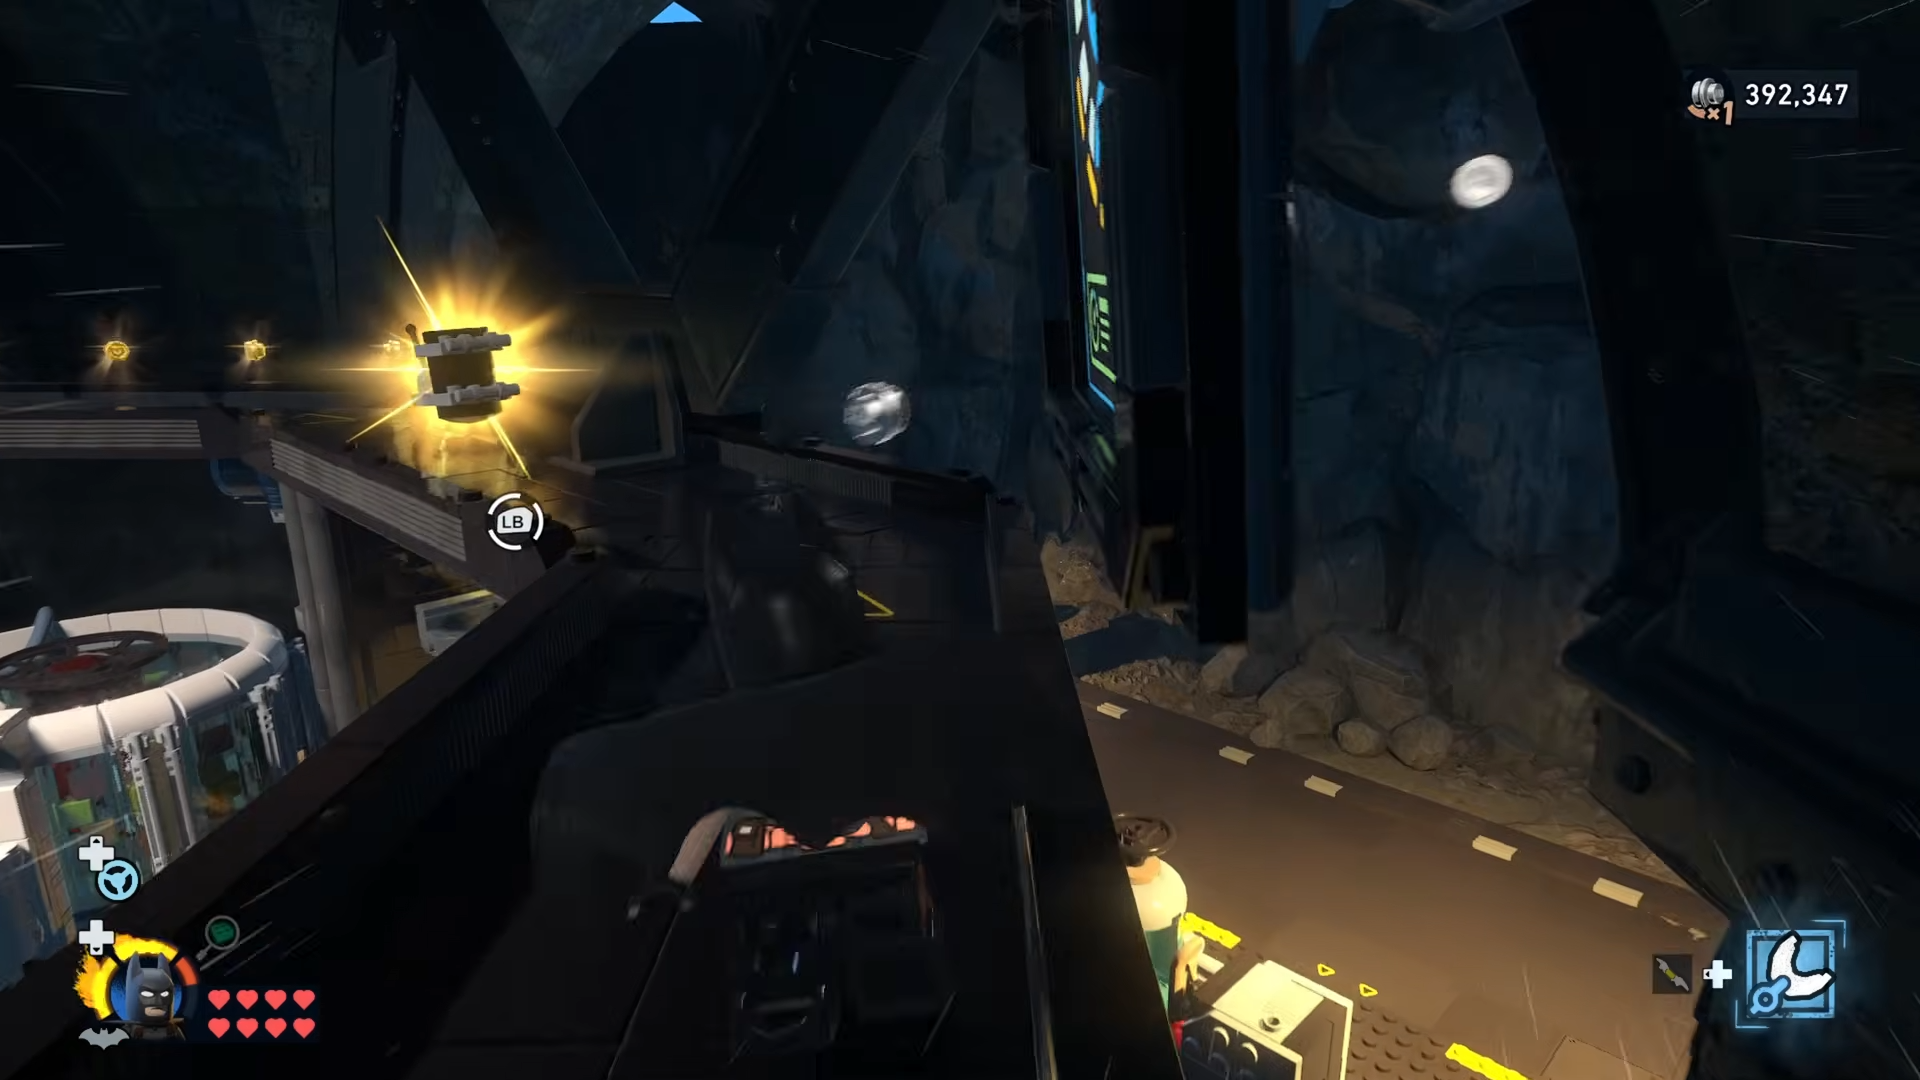
From the level with Bat-Mite’s shop and nearby platforms, find the two vents along the edge that blast Batman upward when you stand on them.
Stand on a vent, let it boost you high, then immediately glide out into the middle of the cave, steering carefully to intercept the Minikit floating in open air above the central void.
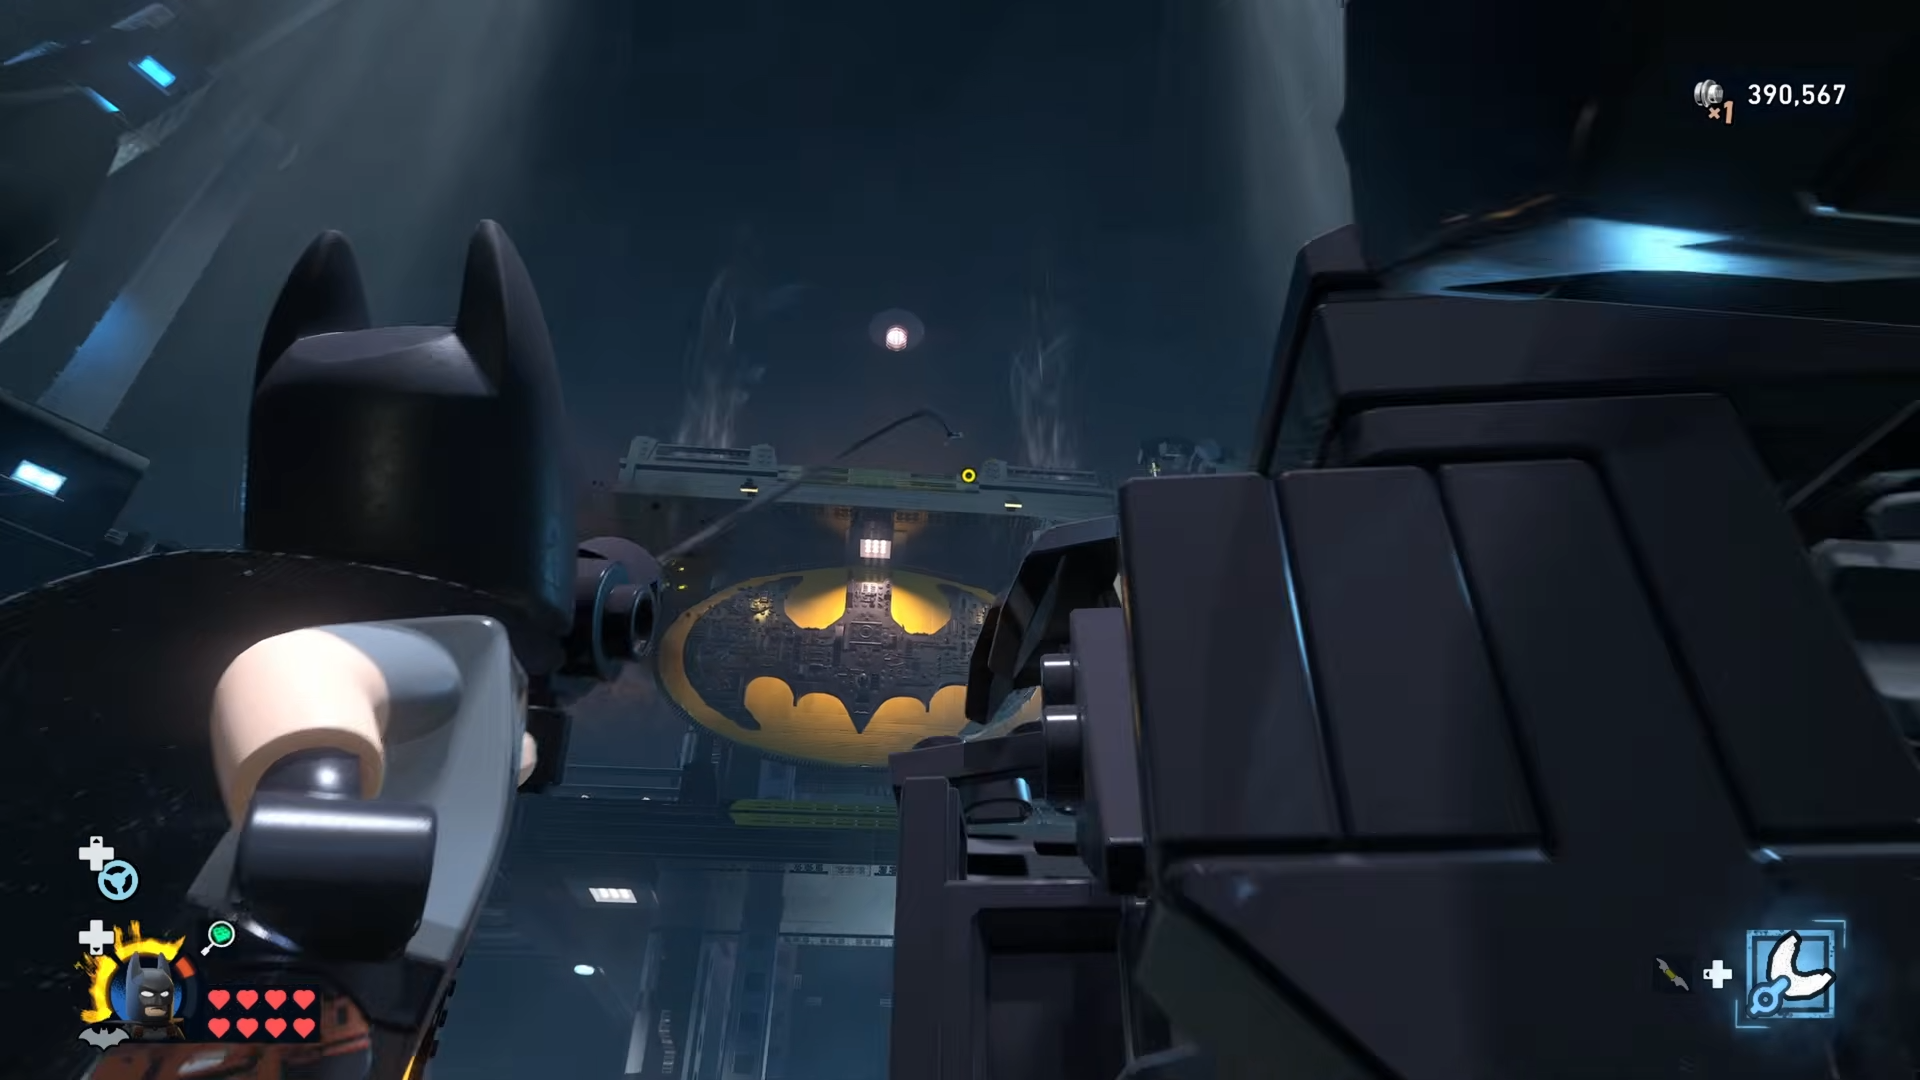
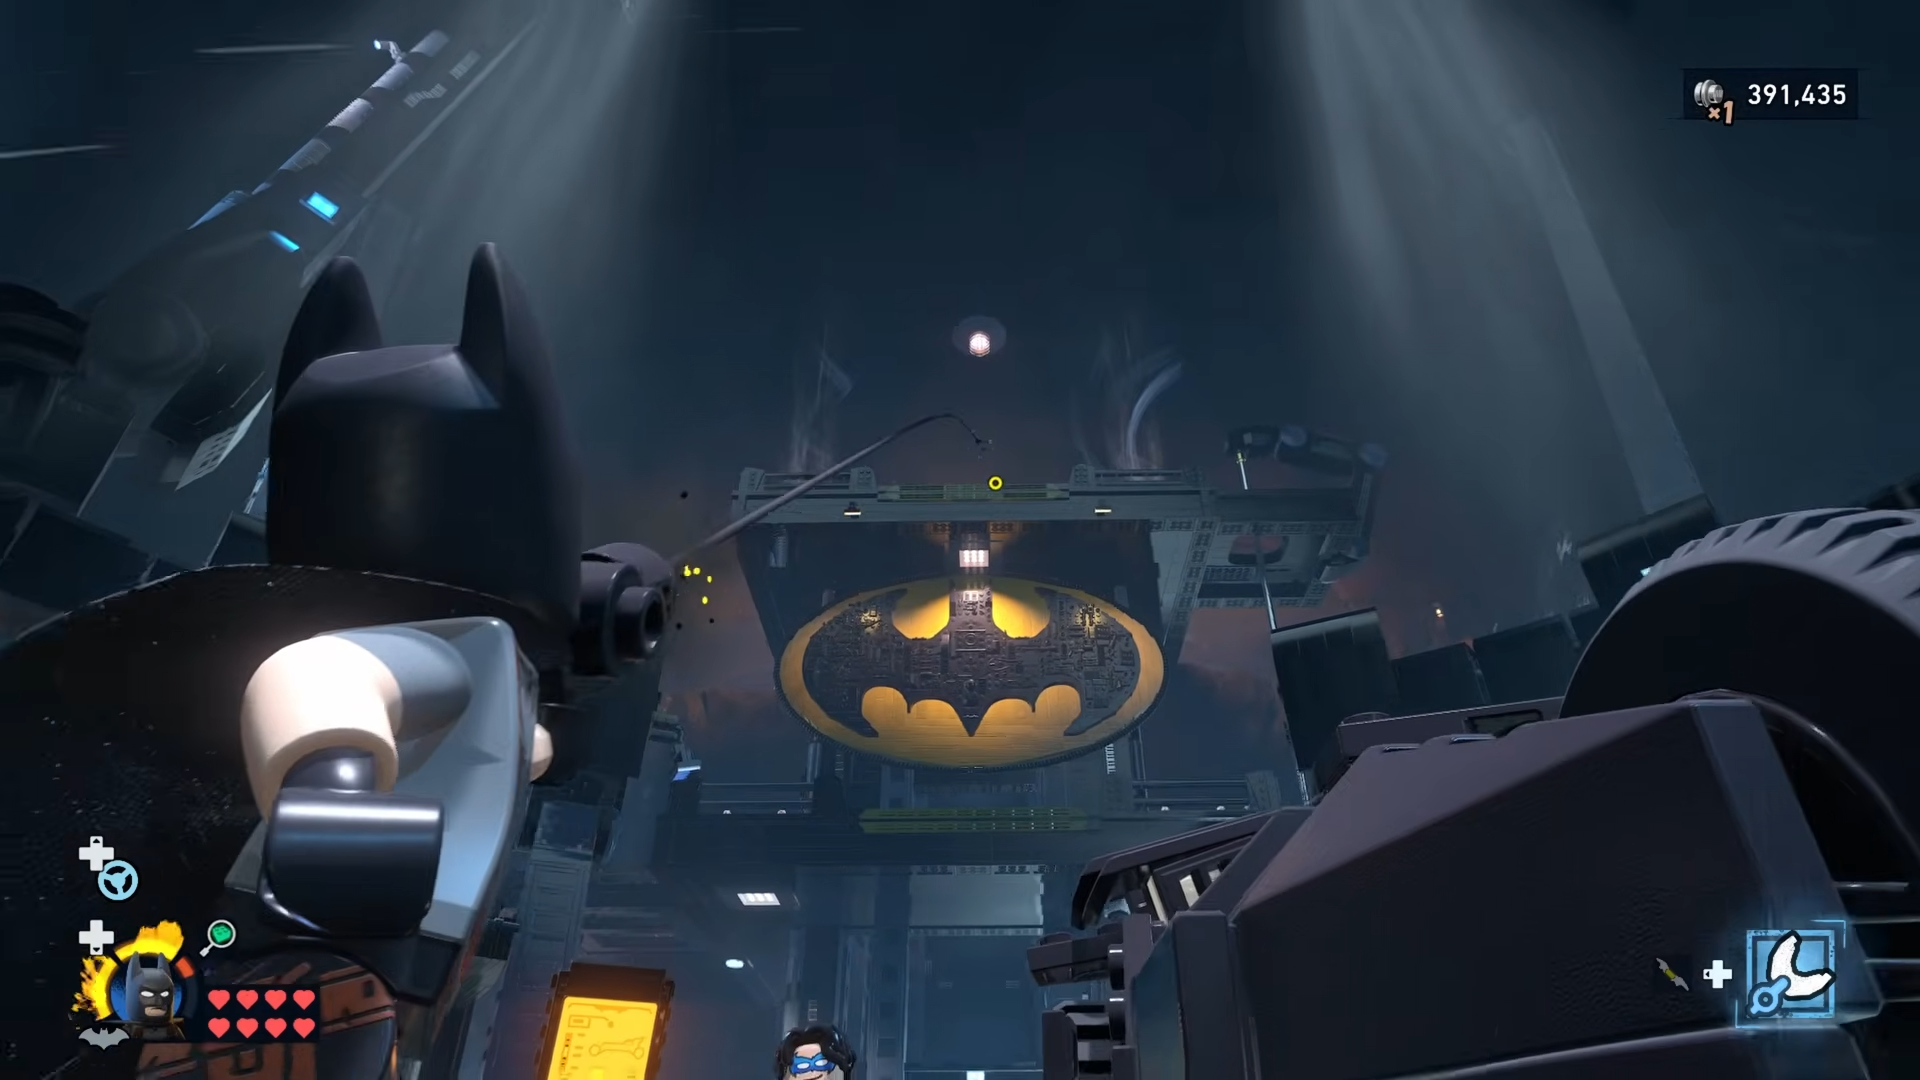
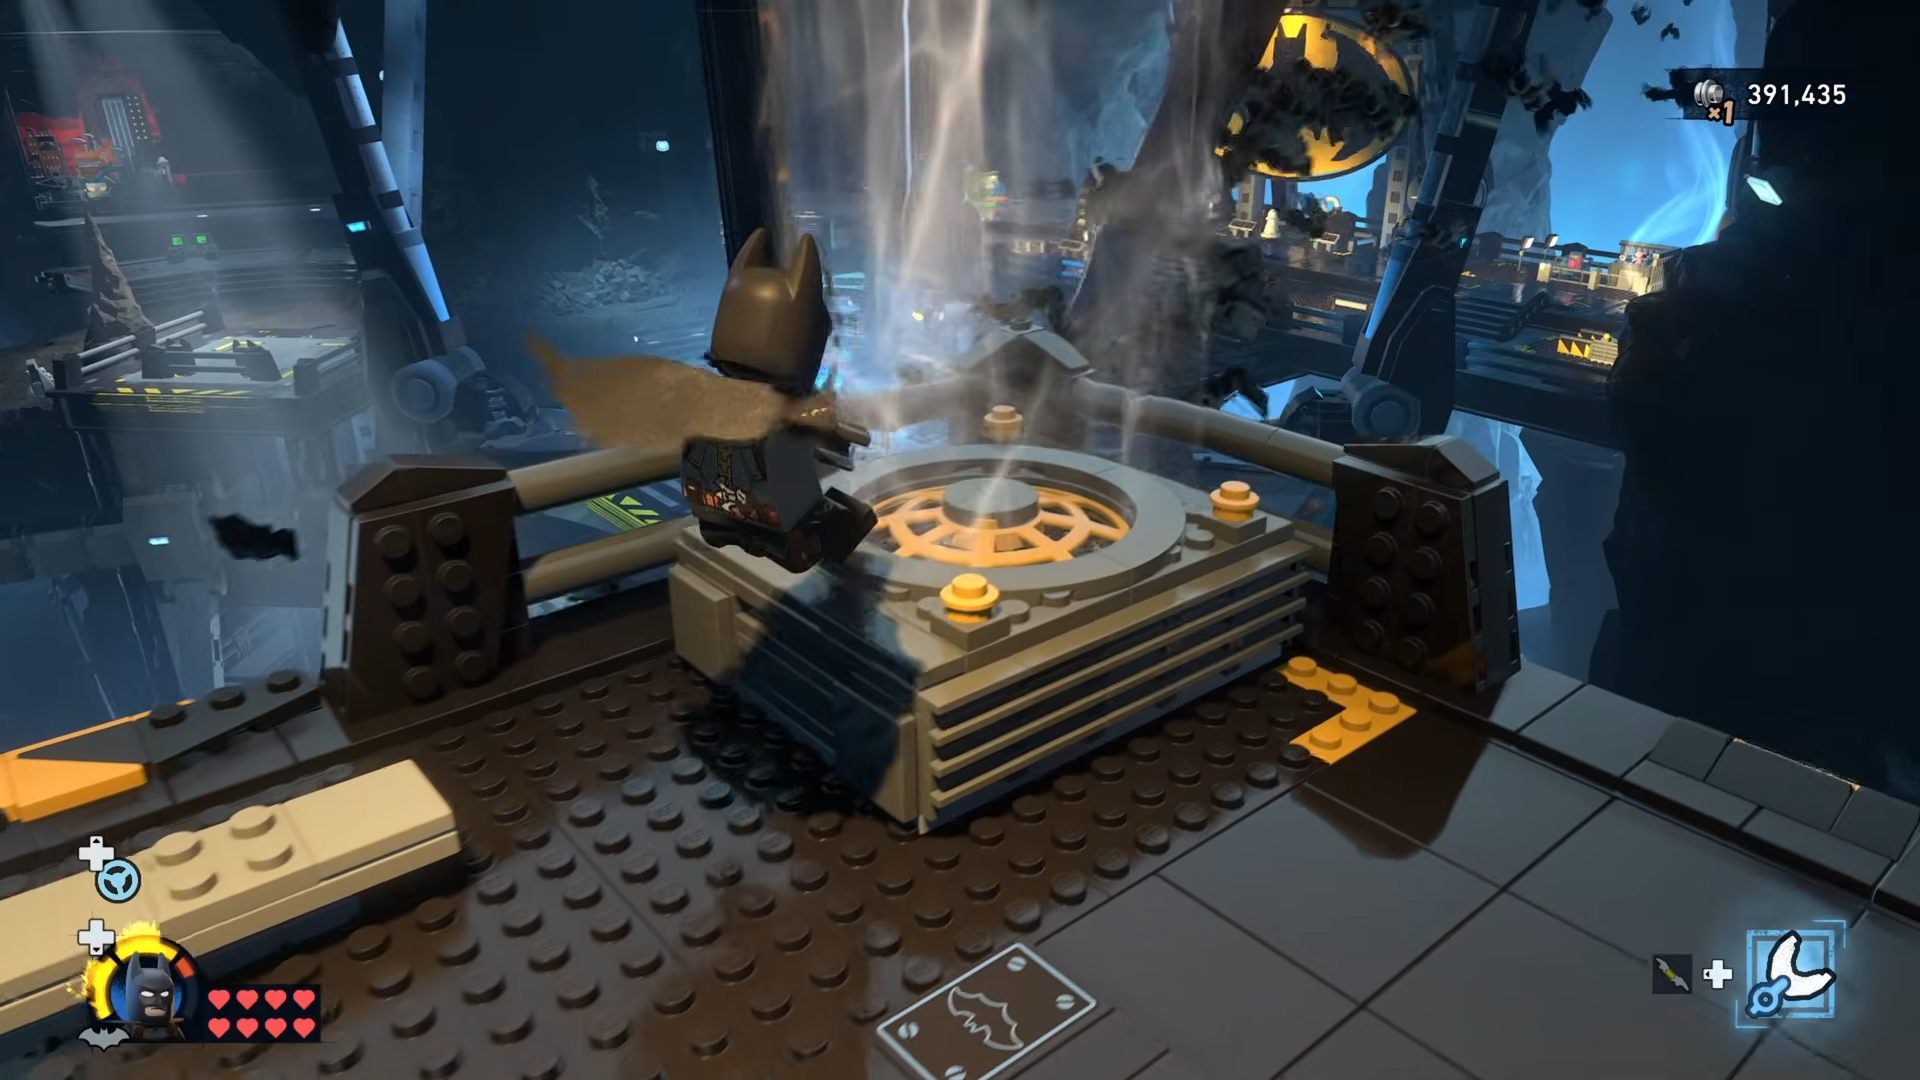
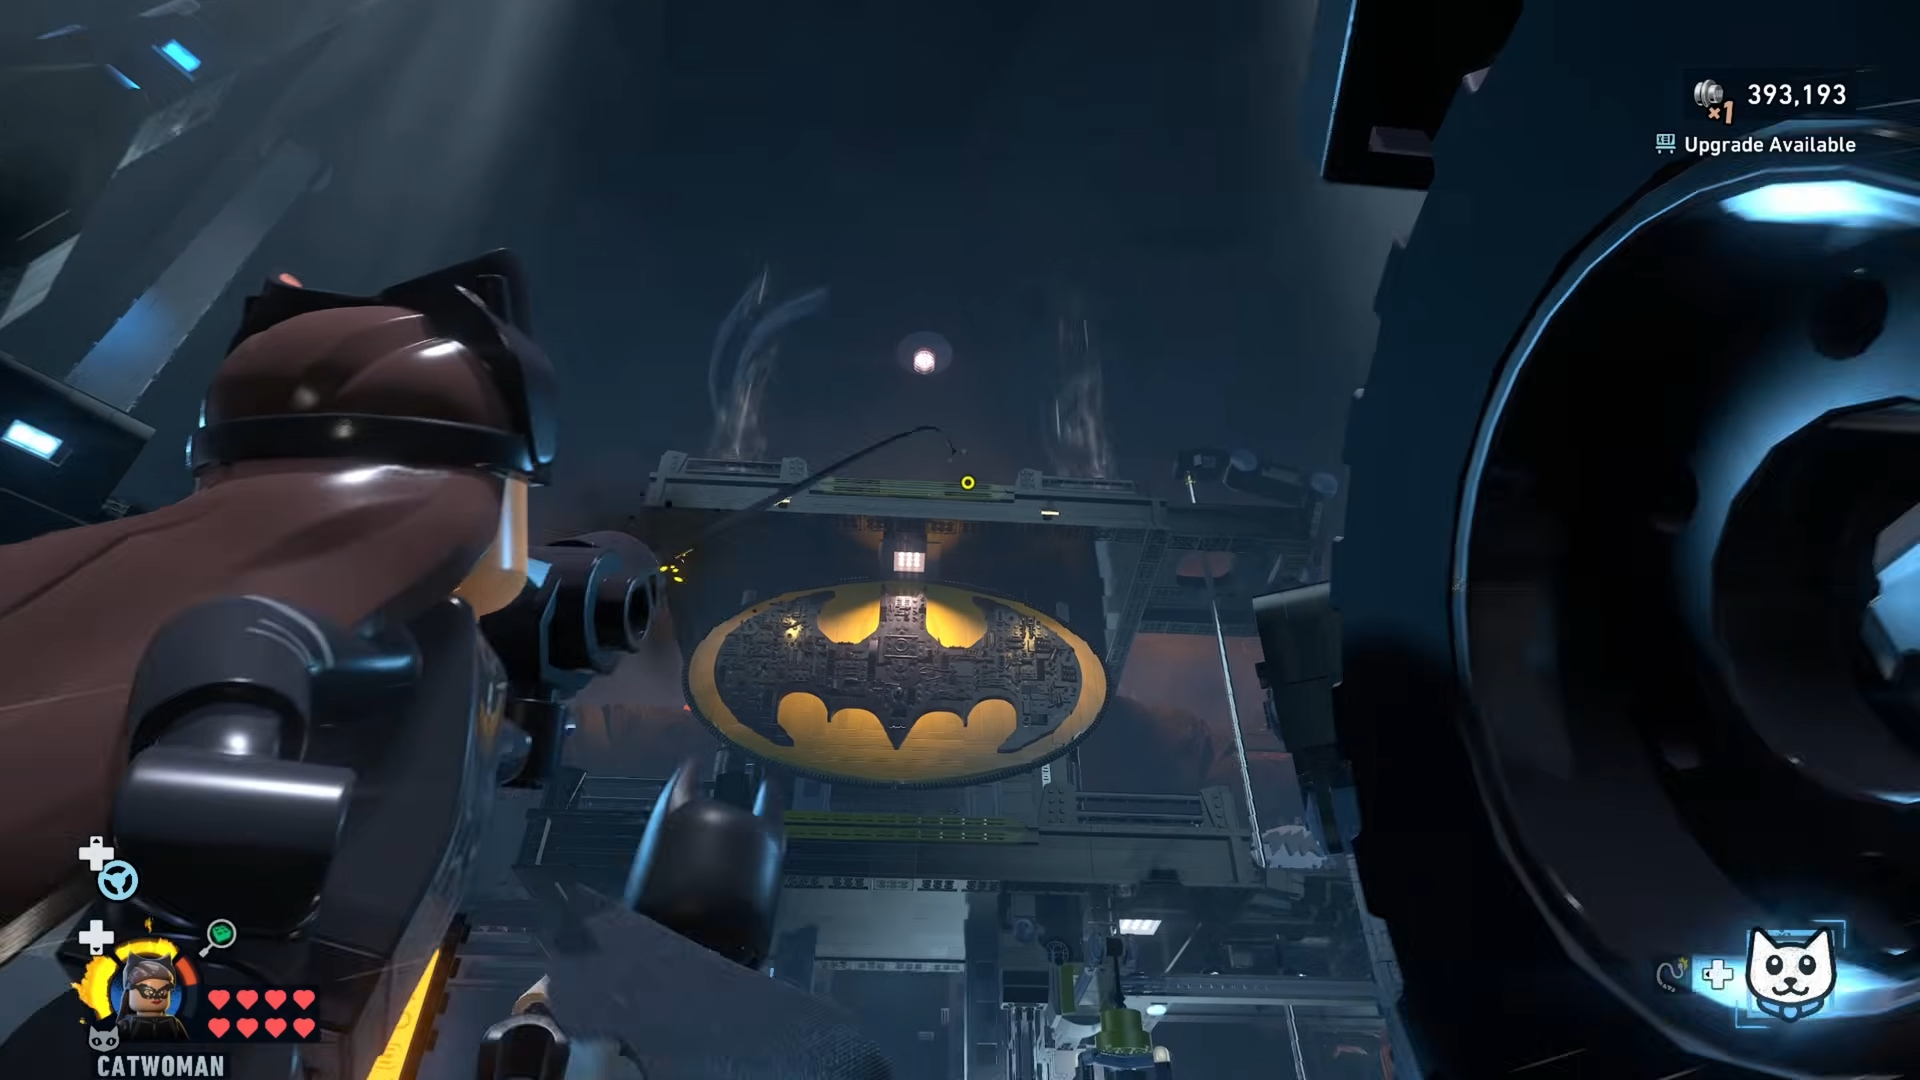
Step 6: Glide onto the bat symbol in the Clean Slate area
Make sure the Clean Slate expansion in the northern part of the cave is unlocked so the customizable platform appears with a giant bat symbol in the middle.
From a higher perch, ideally from Minikit 5’s vent launch, glide toward this area and land directly on top of the bat emblem to collect Minikit 6.

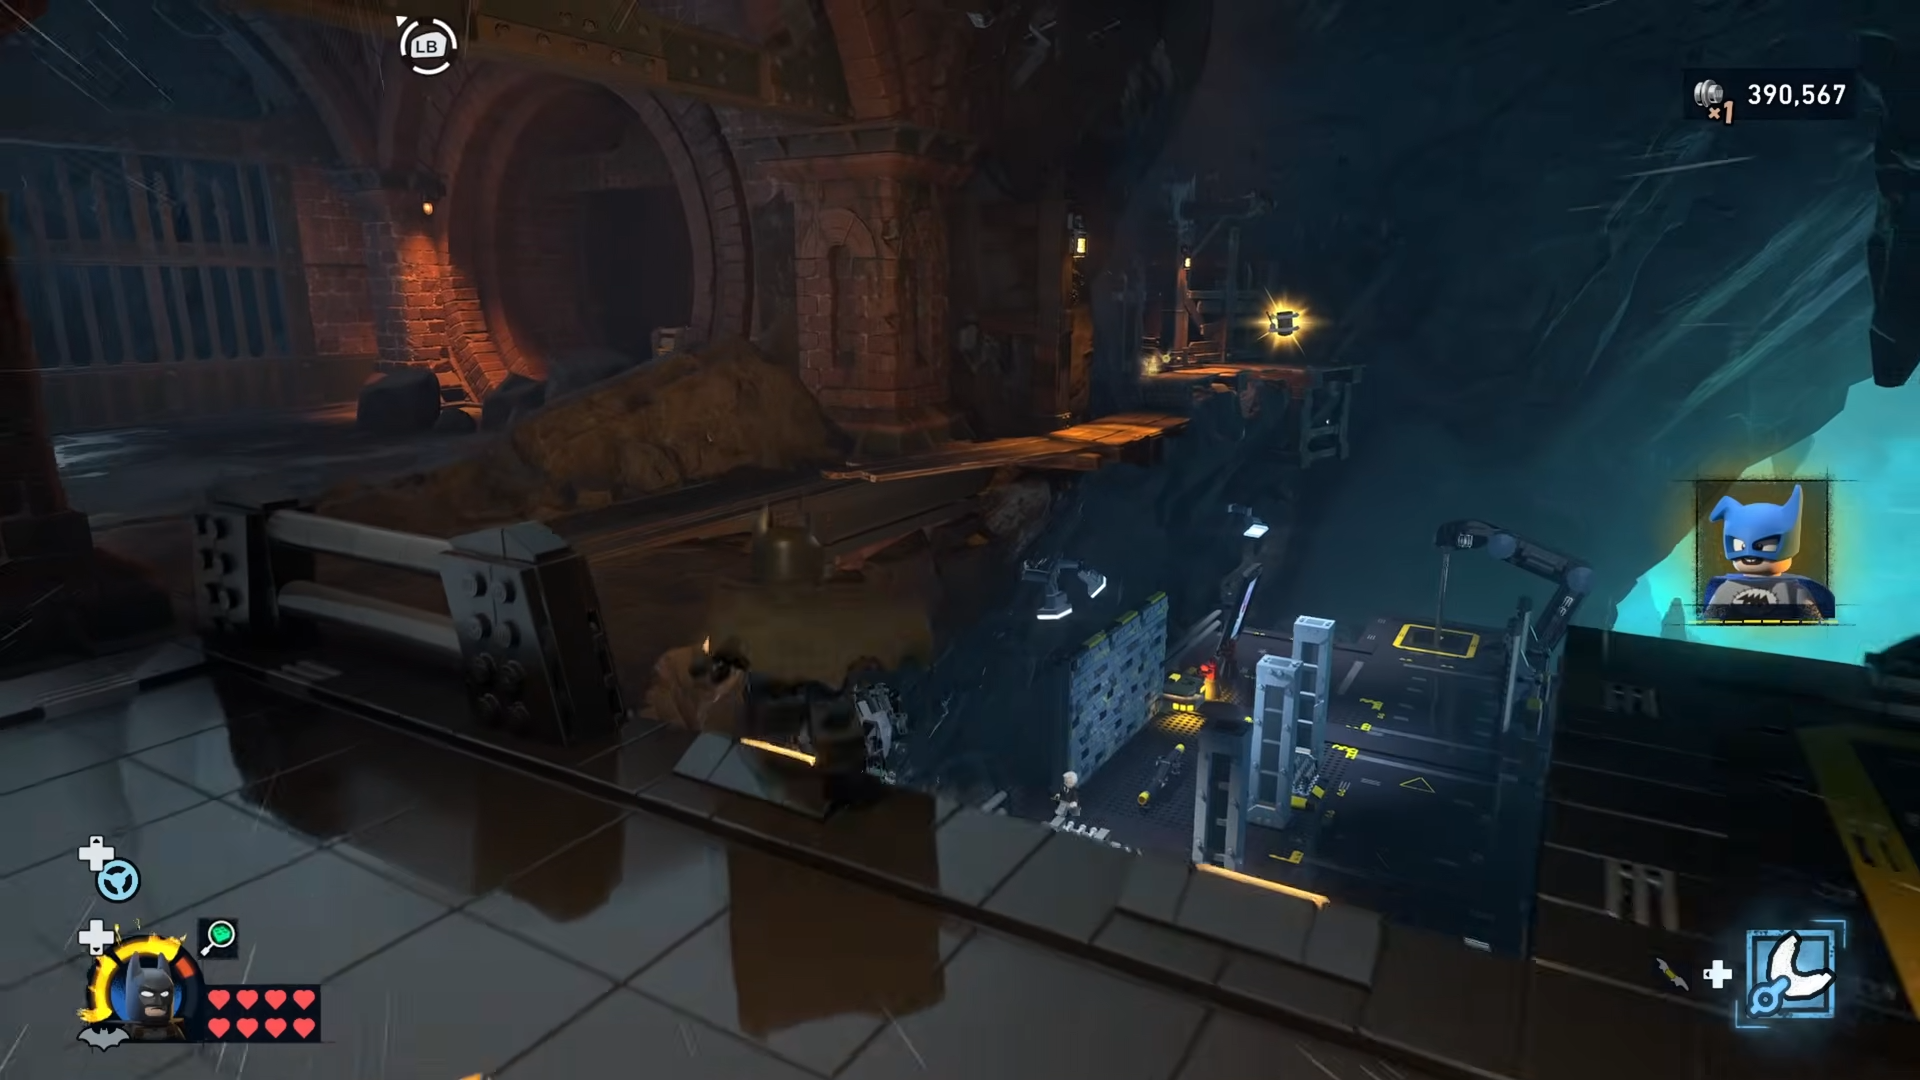
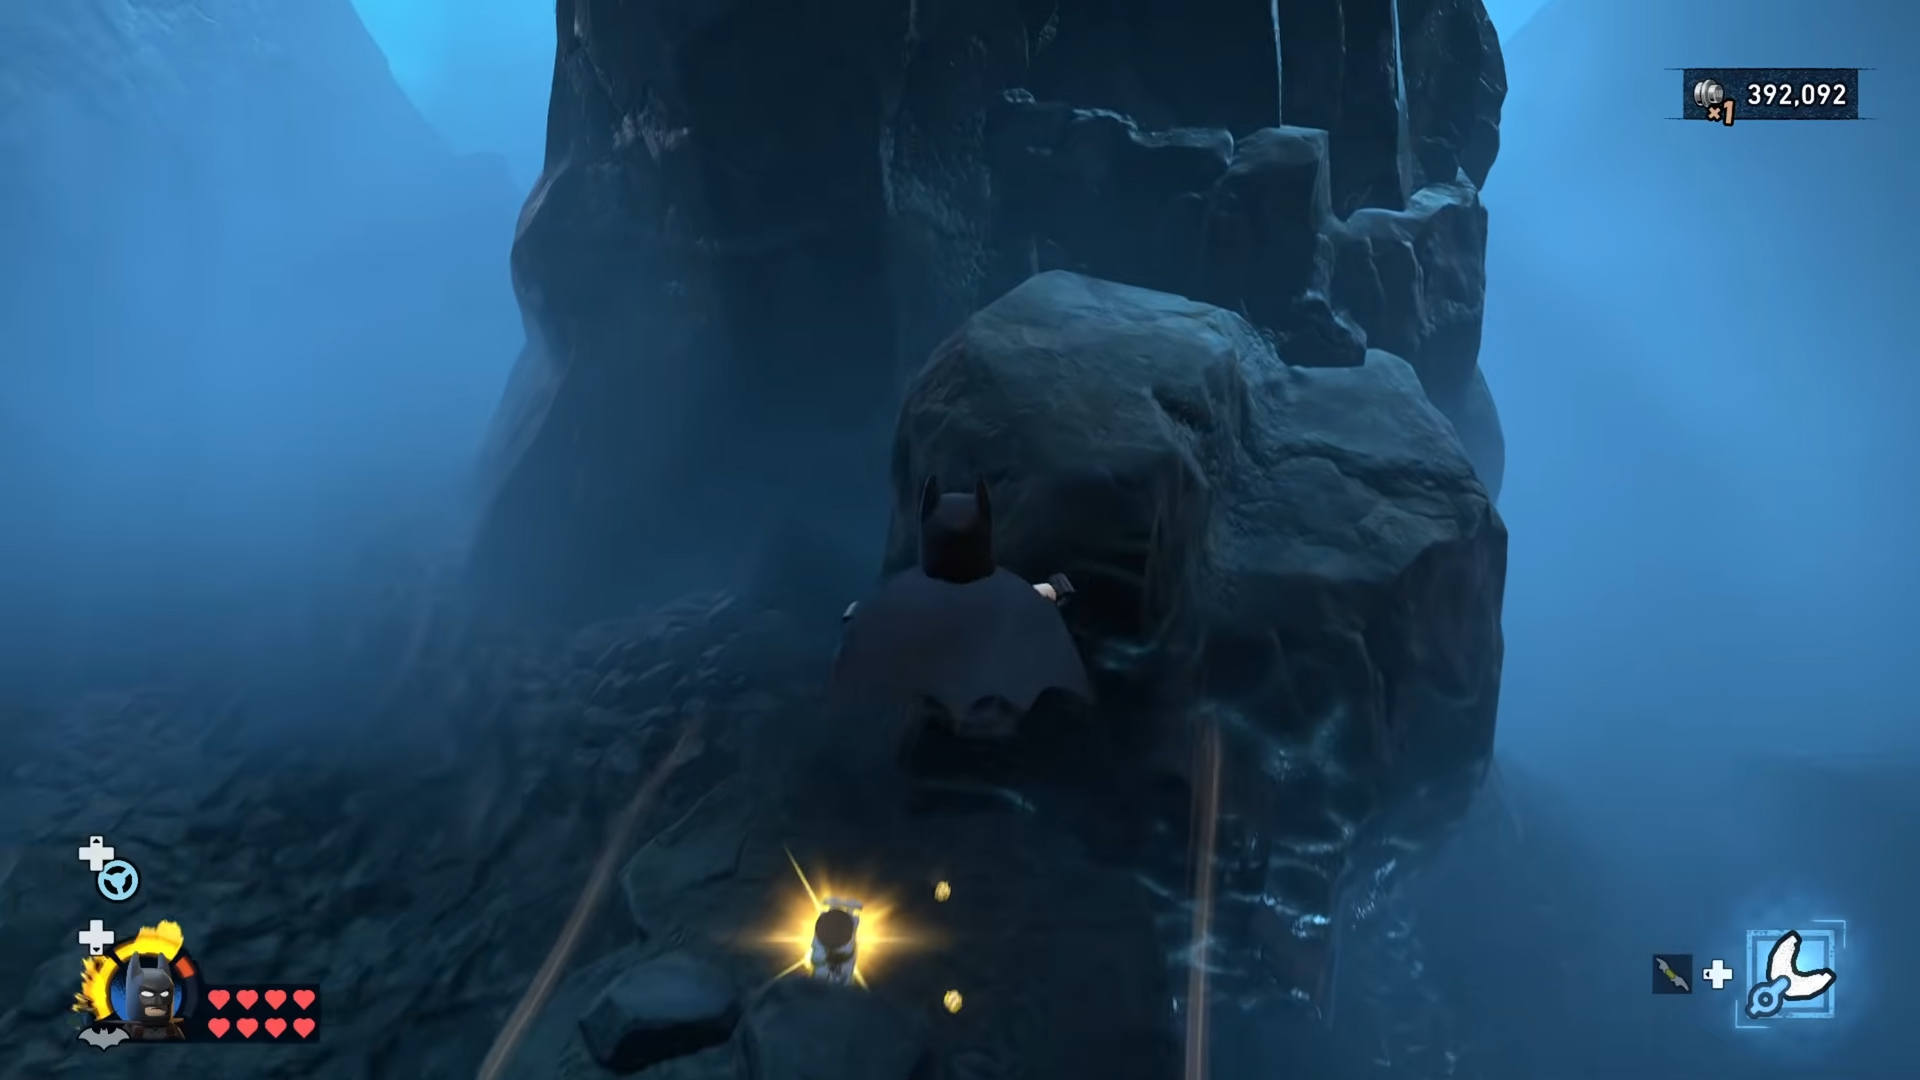
Step 7: Look under the Garage from the crane platform
Unlock and approach the crane used by Jim Gordon, typically placed on the upper level overlooking the Garage.

Stand at the crane controls and look toward the northwest, then down, to spot a Minikit sitting on a platform beneath the Garage.

Drop down from a safe point and glide toward it to avoid falling into the abyss.
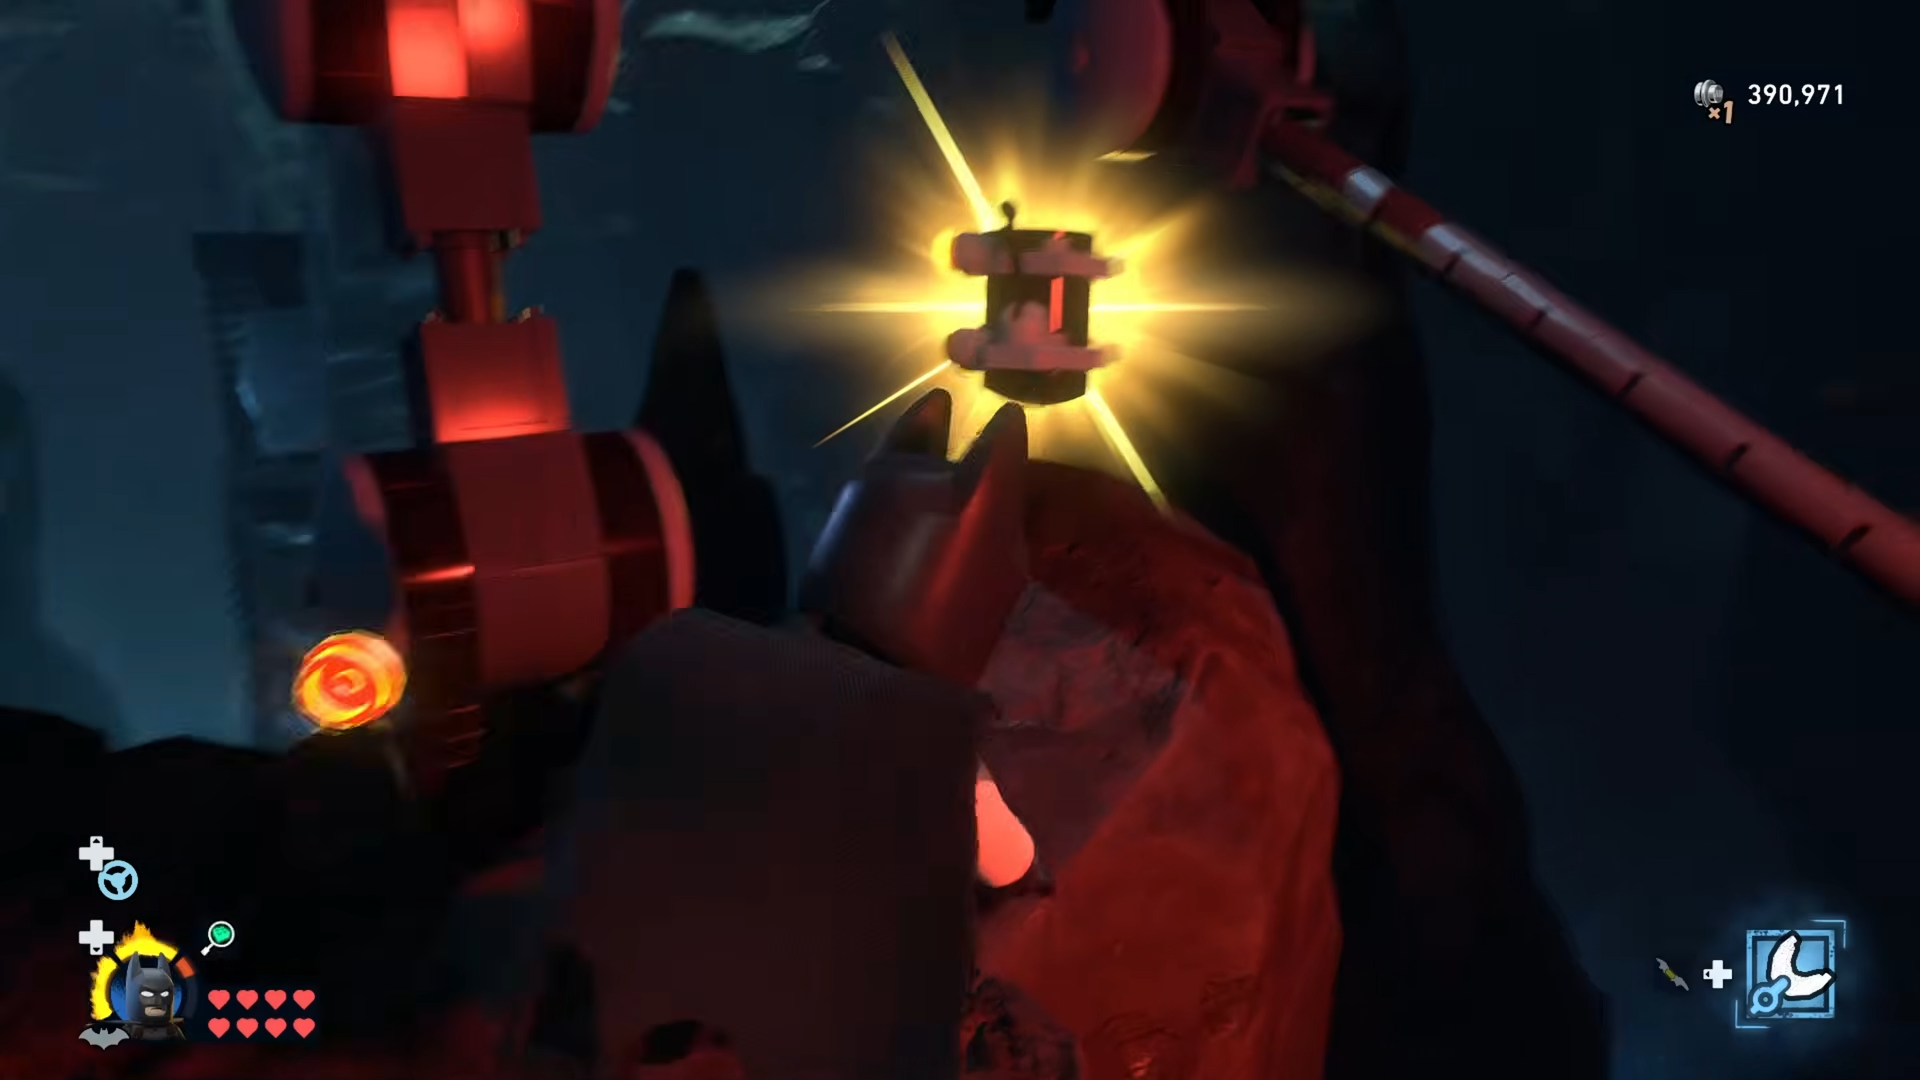
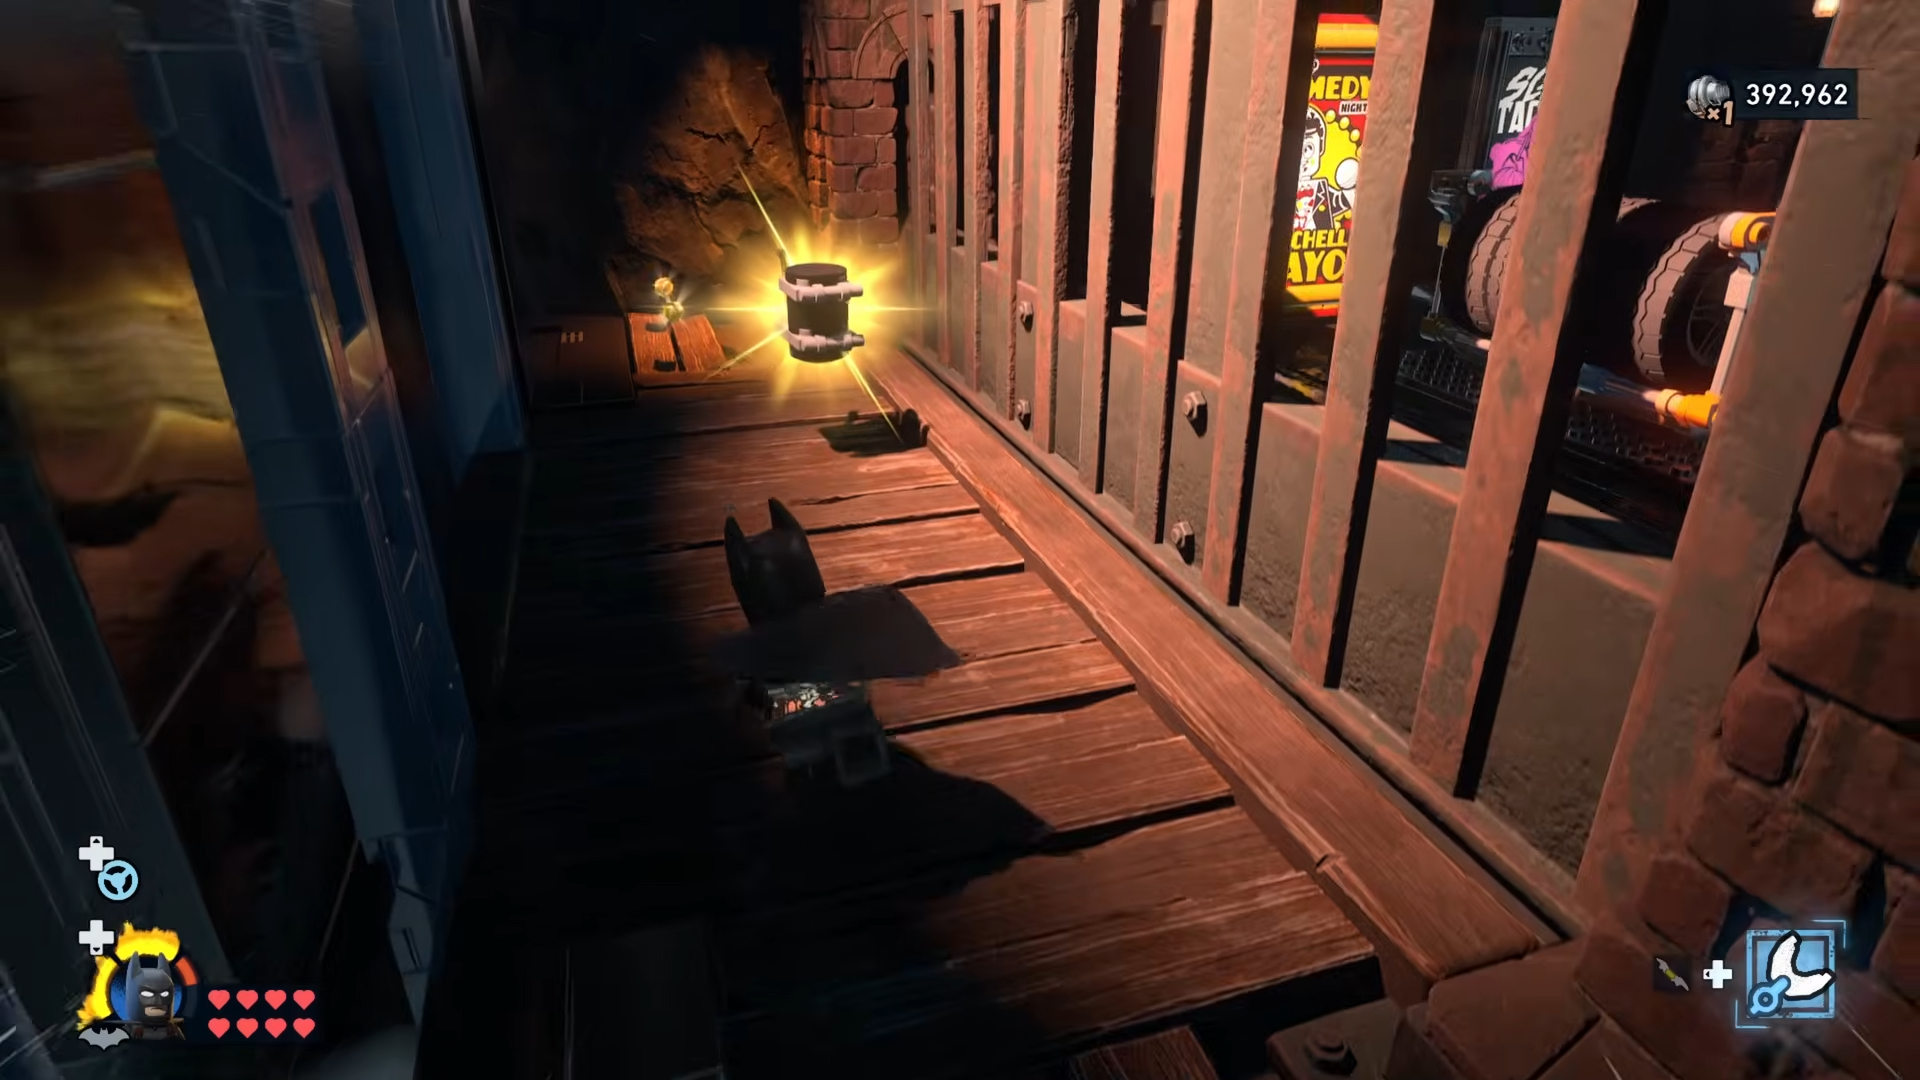
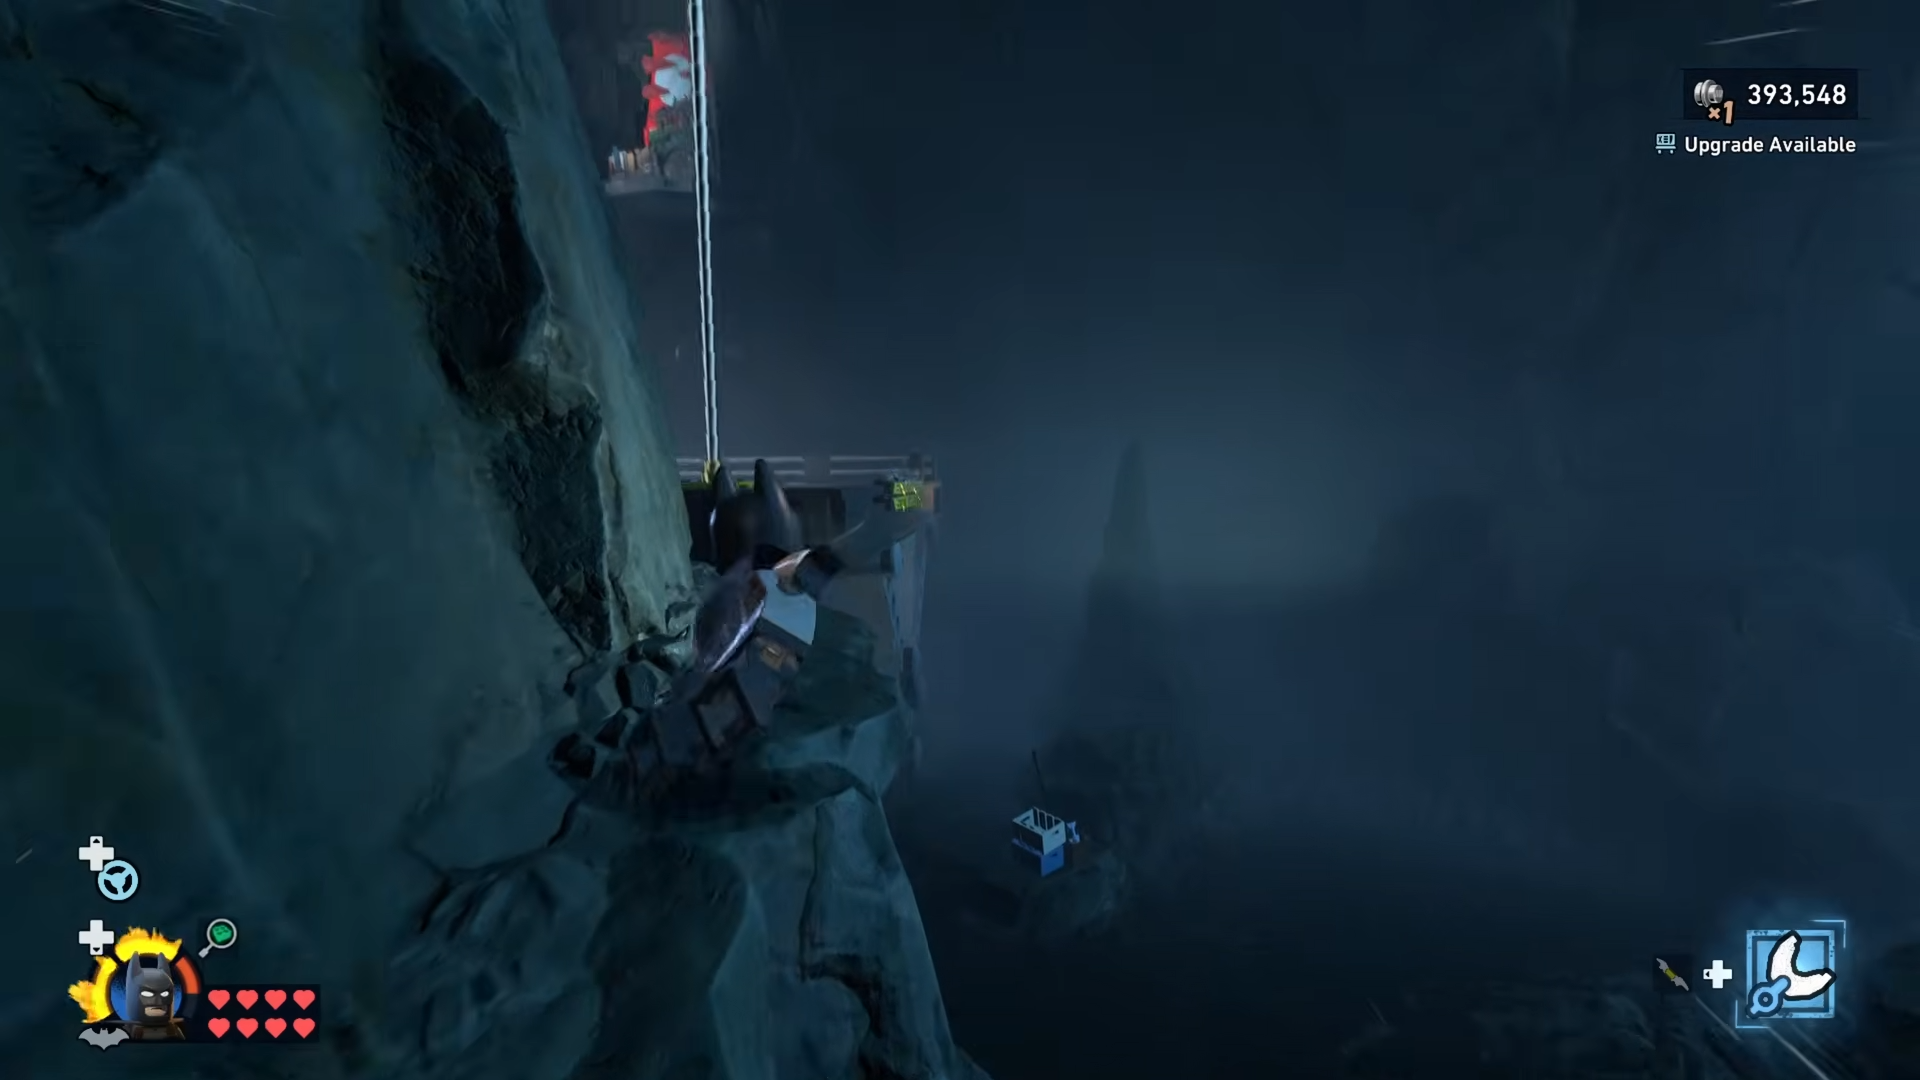
Step 8: Walk the waterfall edge near Clean Slate
Head to the northwest corner of the Batcave where the Clean Slate entrance sits, then turn to face outward and rotate the camera to the right.
You’ll see a Minikit balancing on the edge of the waterfall behind a rock.
Carefully walk or sidestep along the cliff’s lip, hugging the wall, and collect it without slipping off.
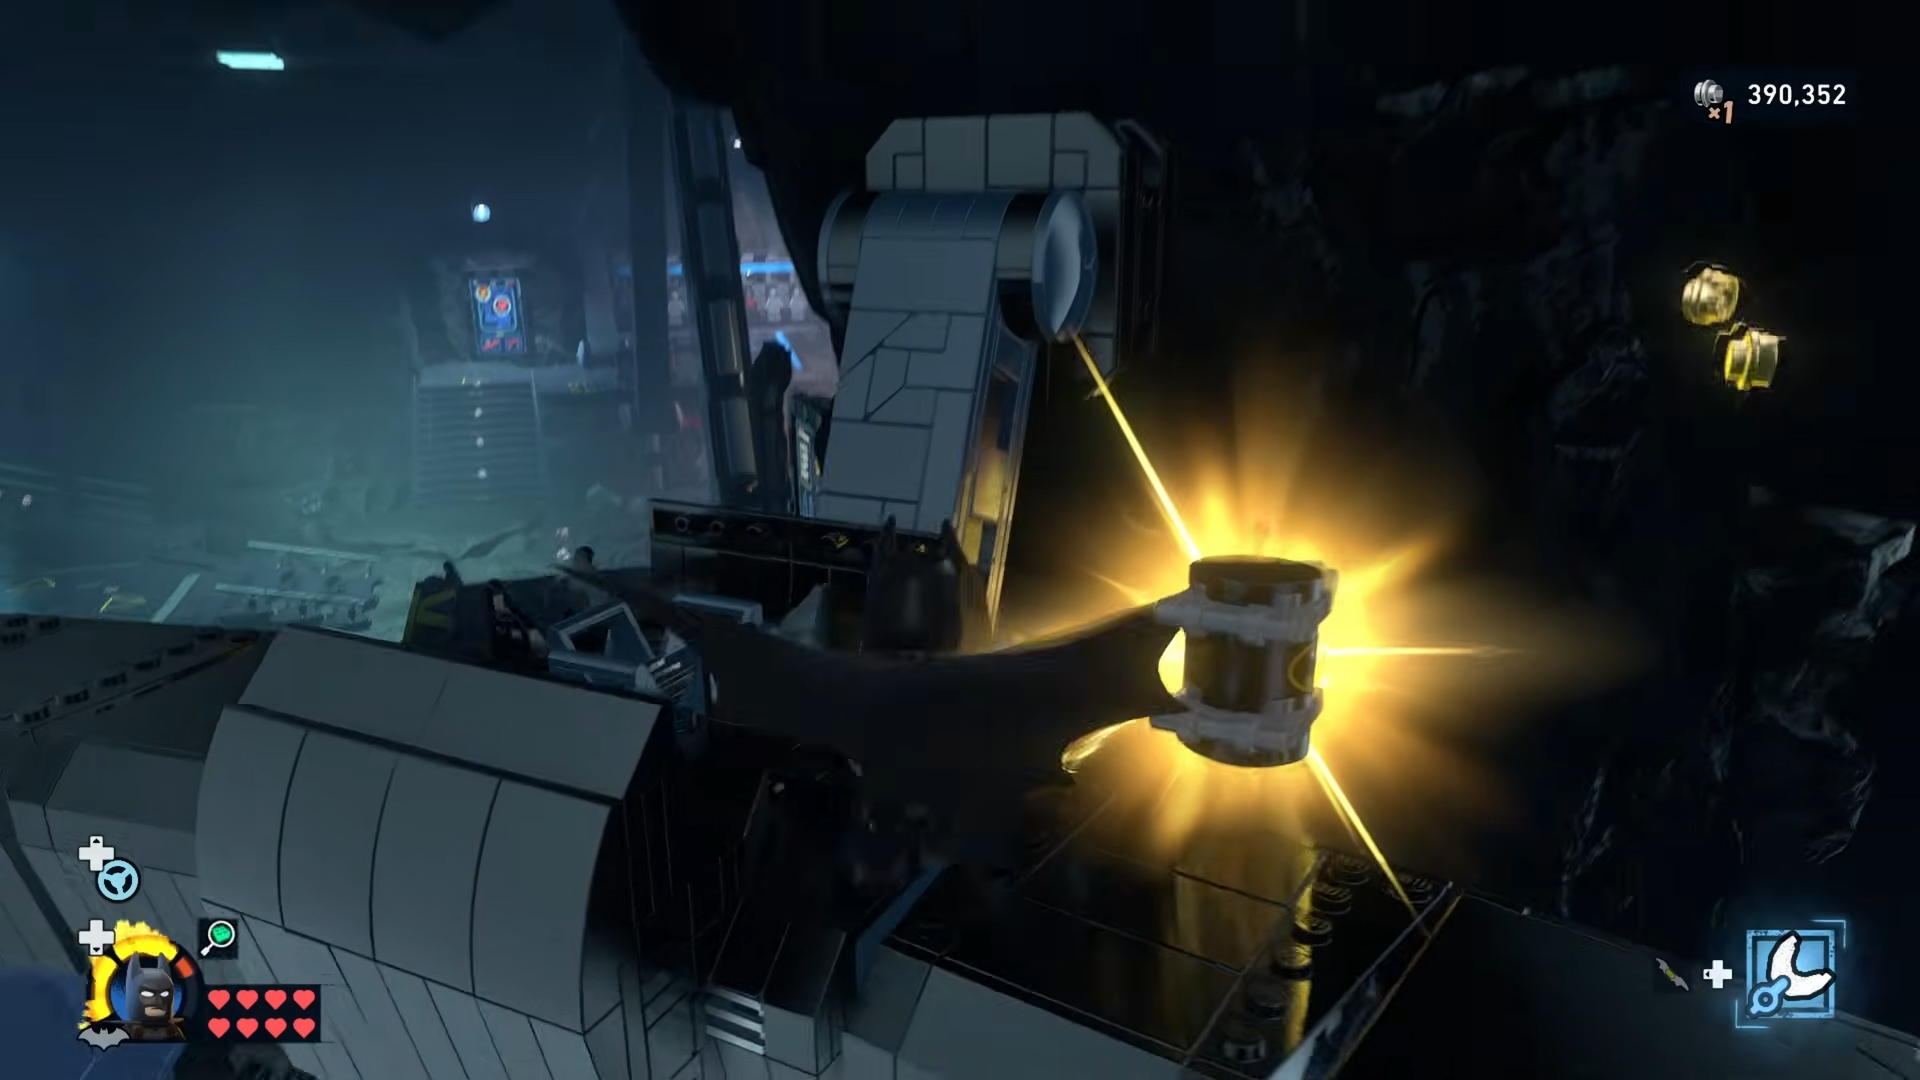
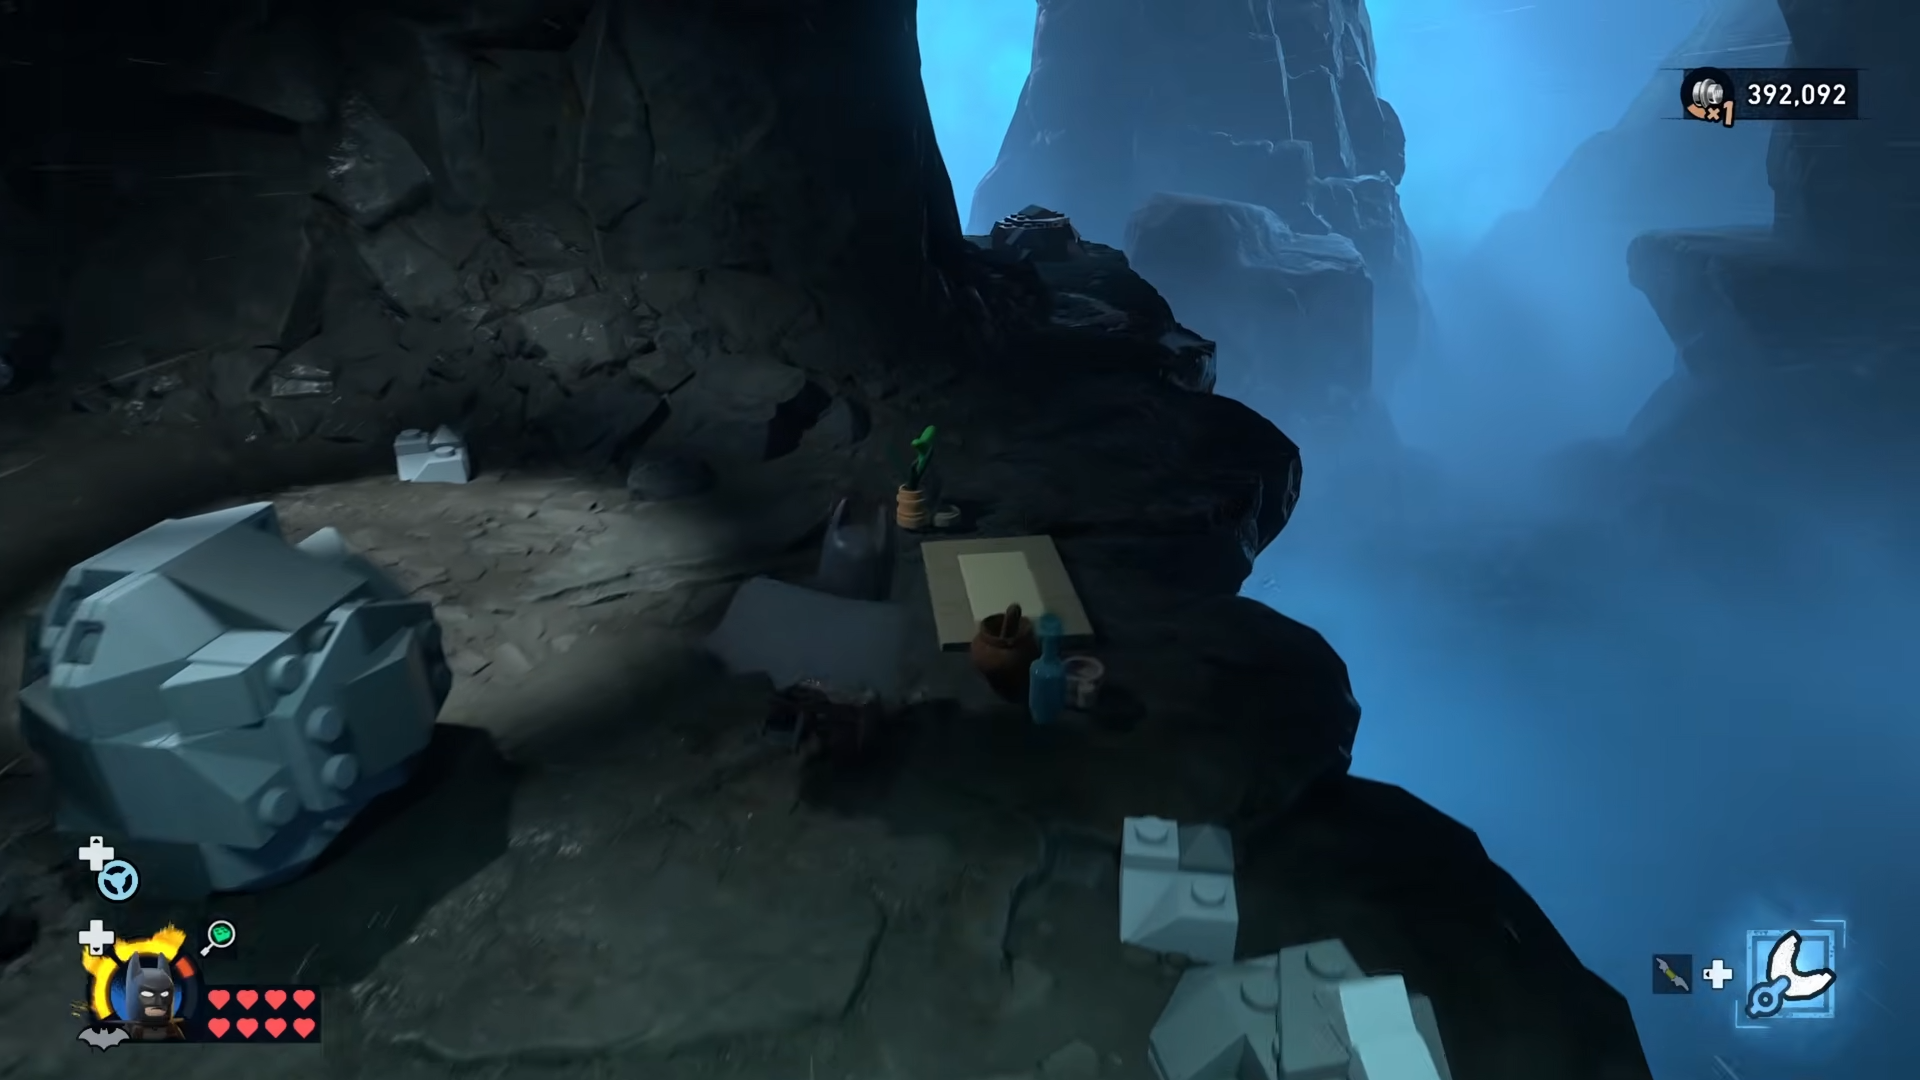
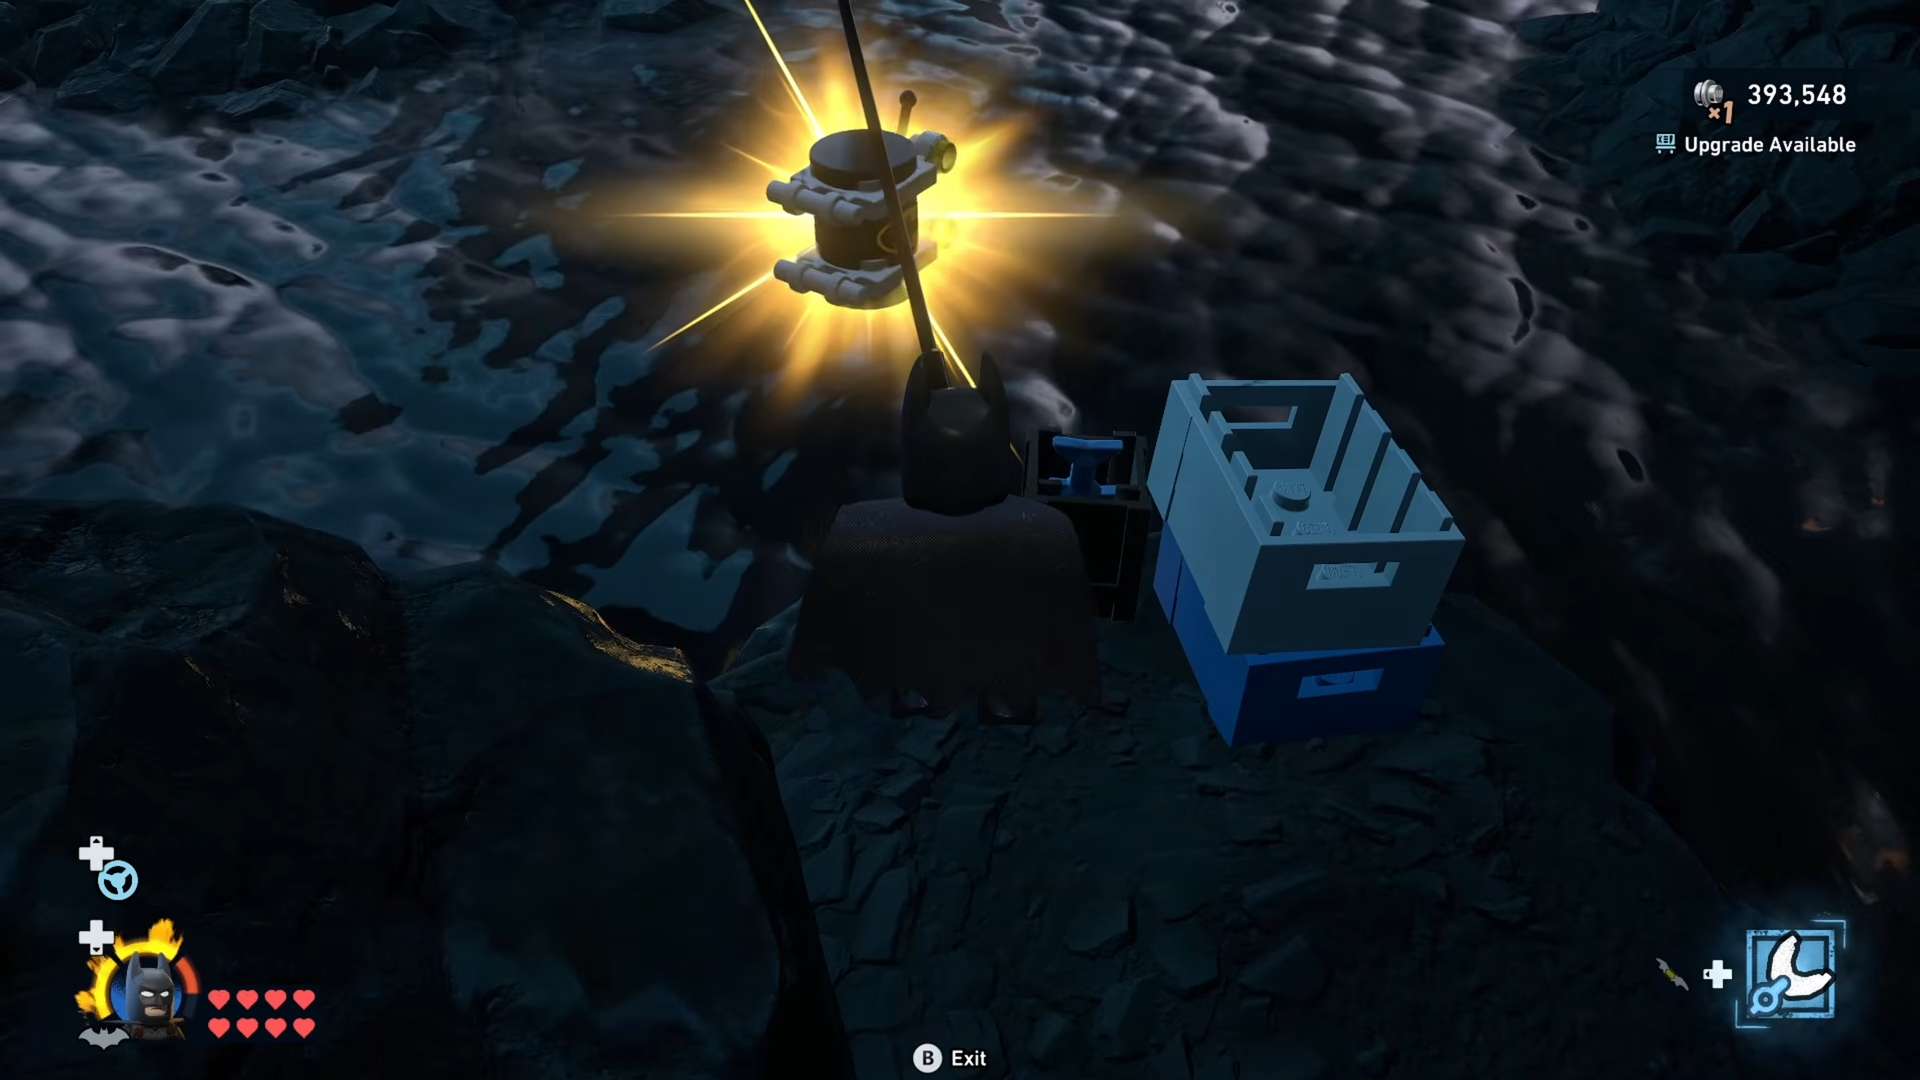
Step 9: Use the Fishing Rod to reel in a hidden Minikit
Near the waterfall / Clean Slate area, look for a Fishing Rod propped against some crates on a small platform. Interact with the rod to trigger a short fishing animation.
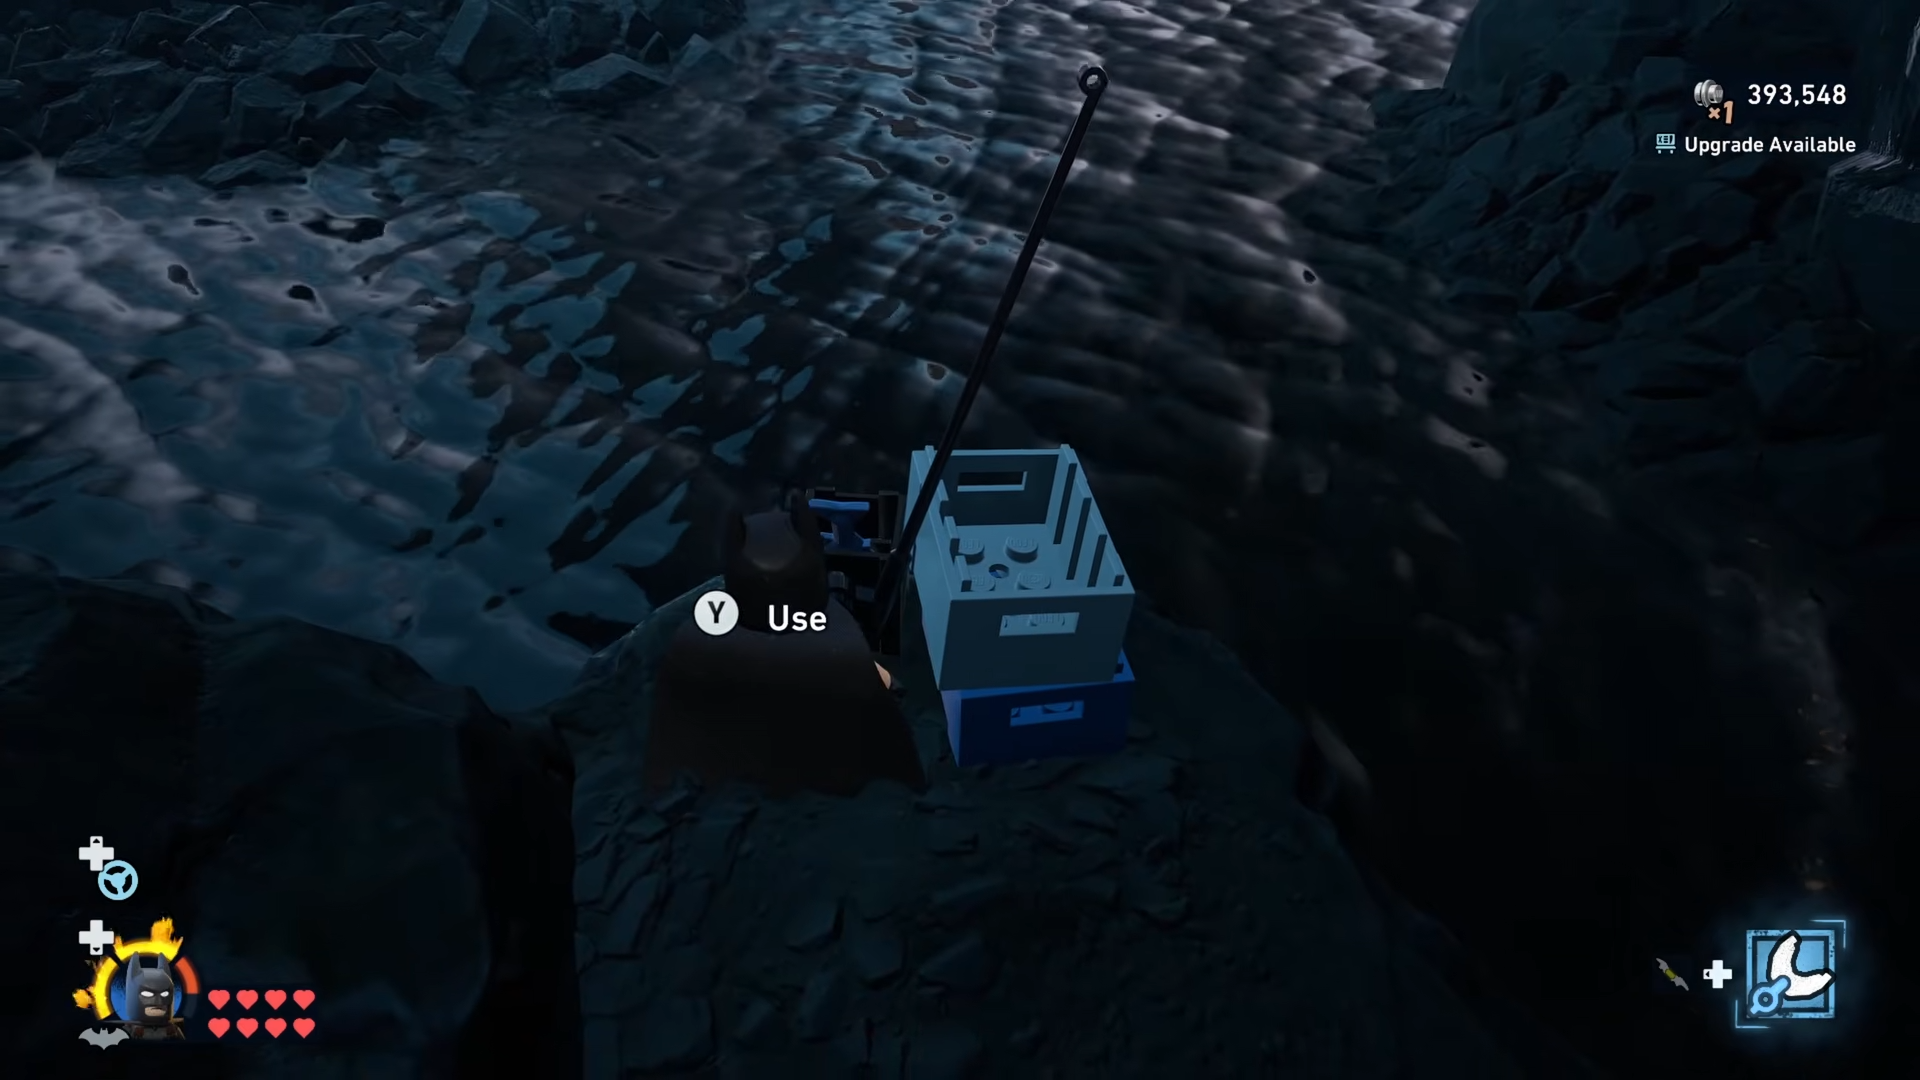
Batman will automatically reel up a Minikit from below the water and it will fly into your inventory.
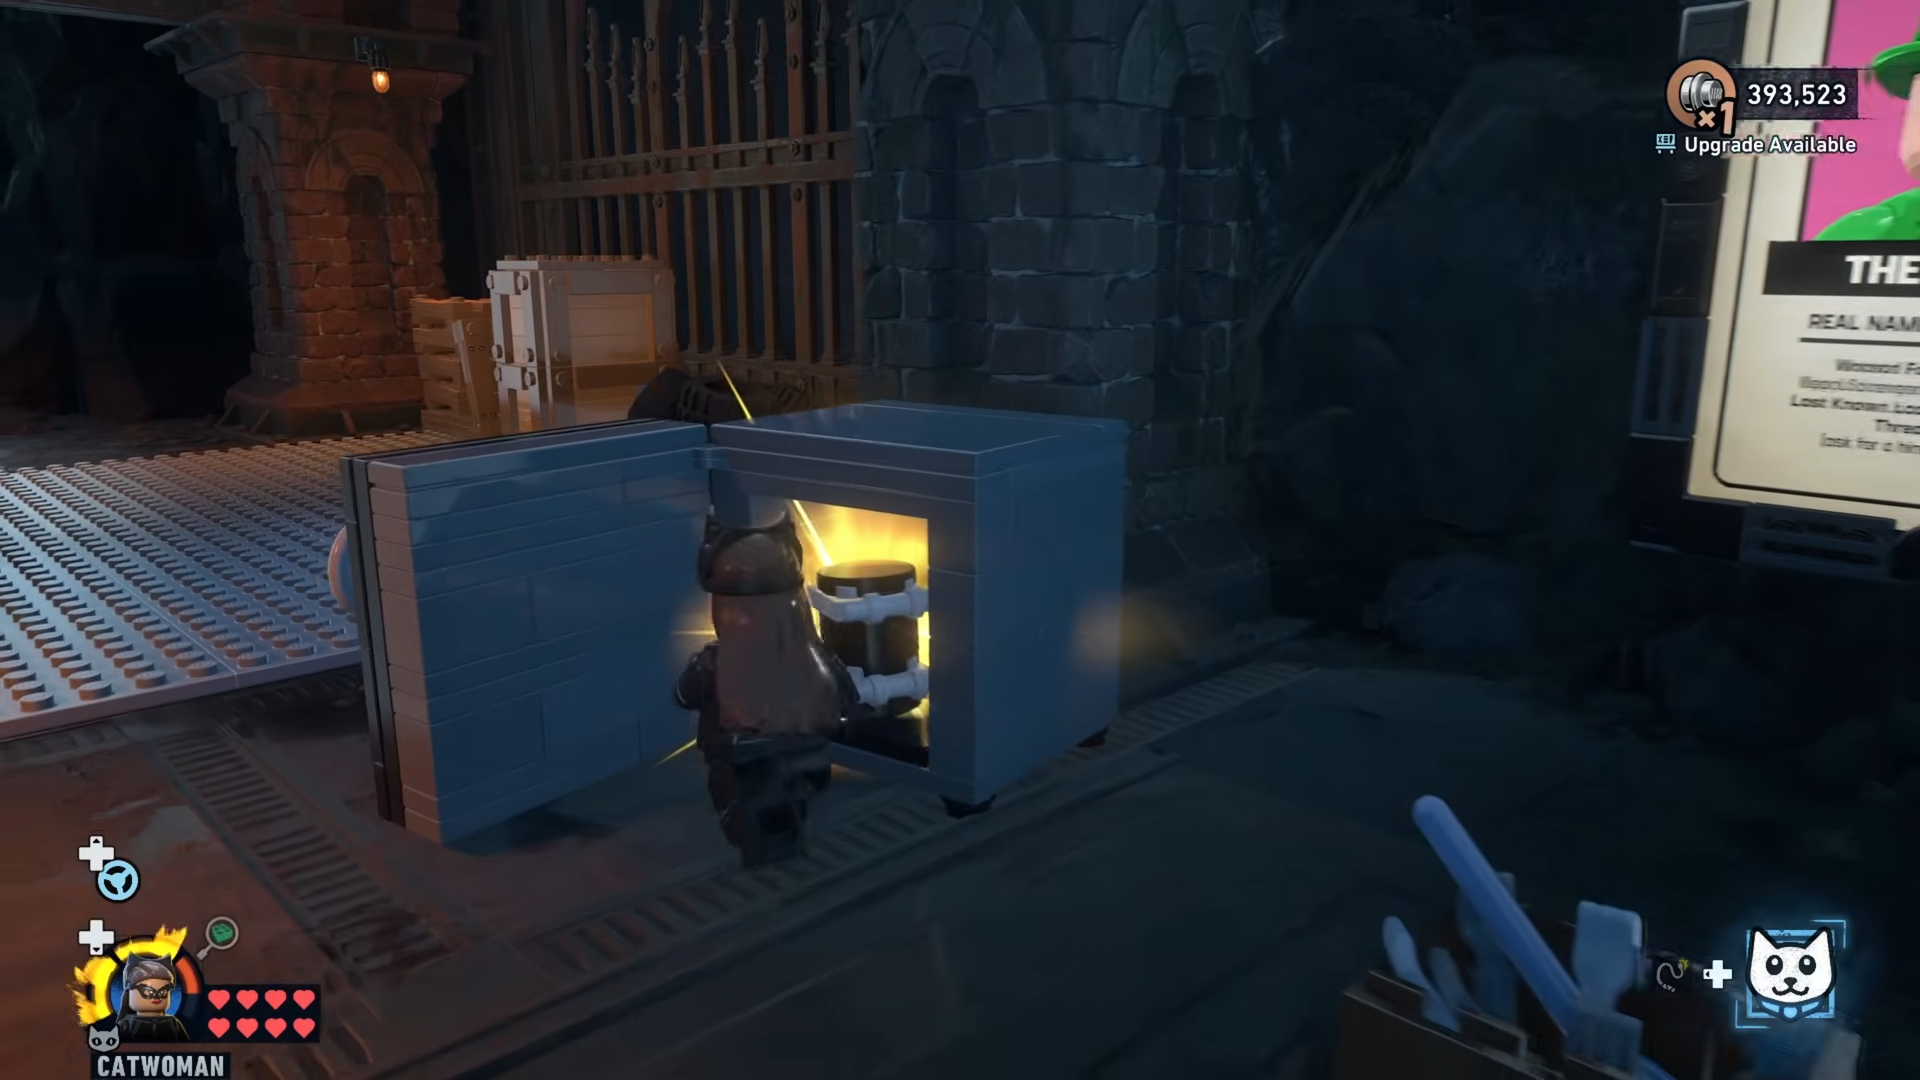
Step 10: Crack the Safe in the Wanted posters area with Catwoman
Head over to the Wanted posters section of the Batcave, near the area tracking Gotham’s criminals.
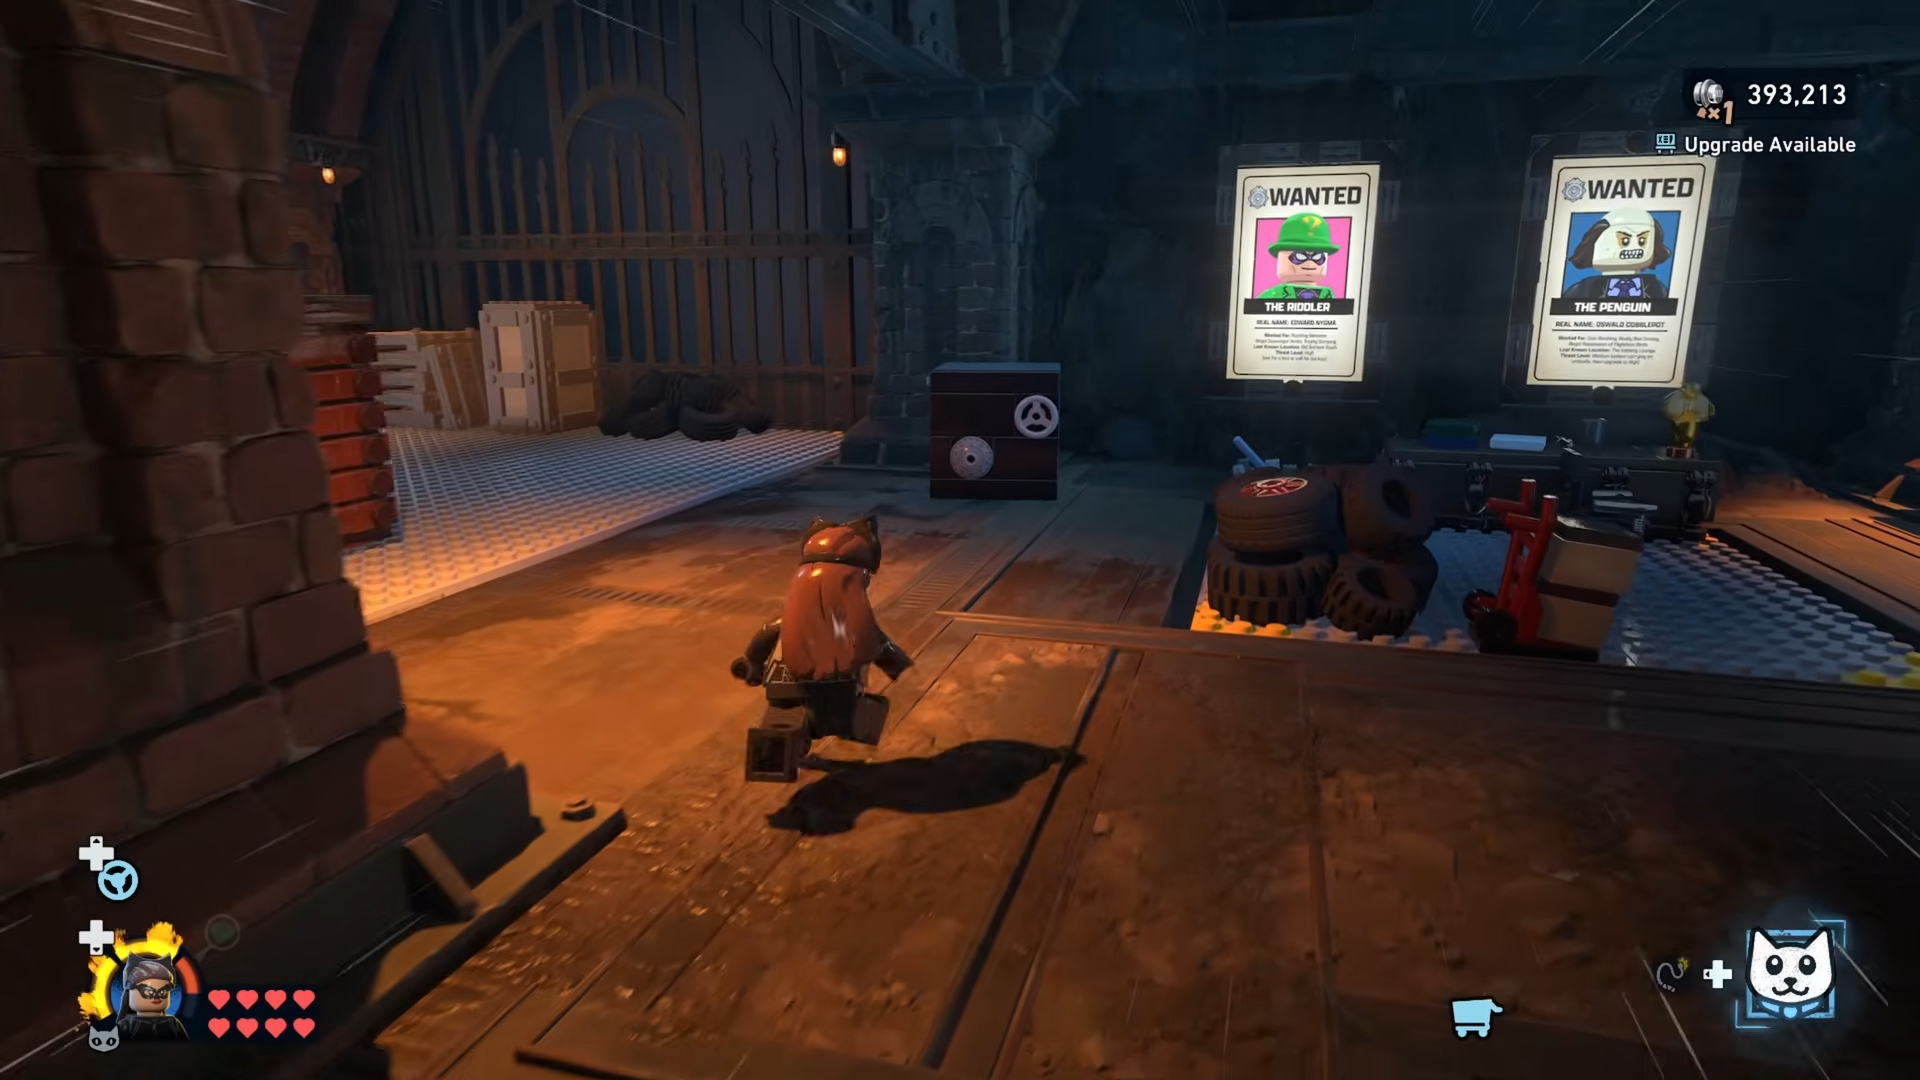
Here you’ll find a Safe that standard characters cannot open; switch to Catwoman, use her safe-cracking interaction to open it.
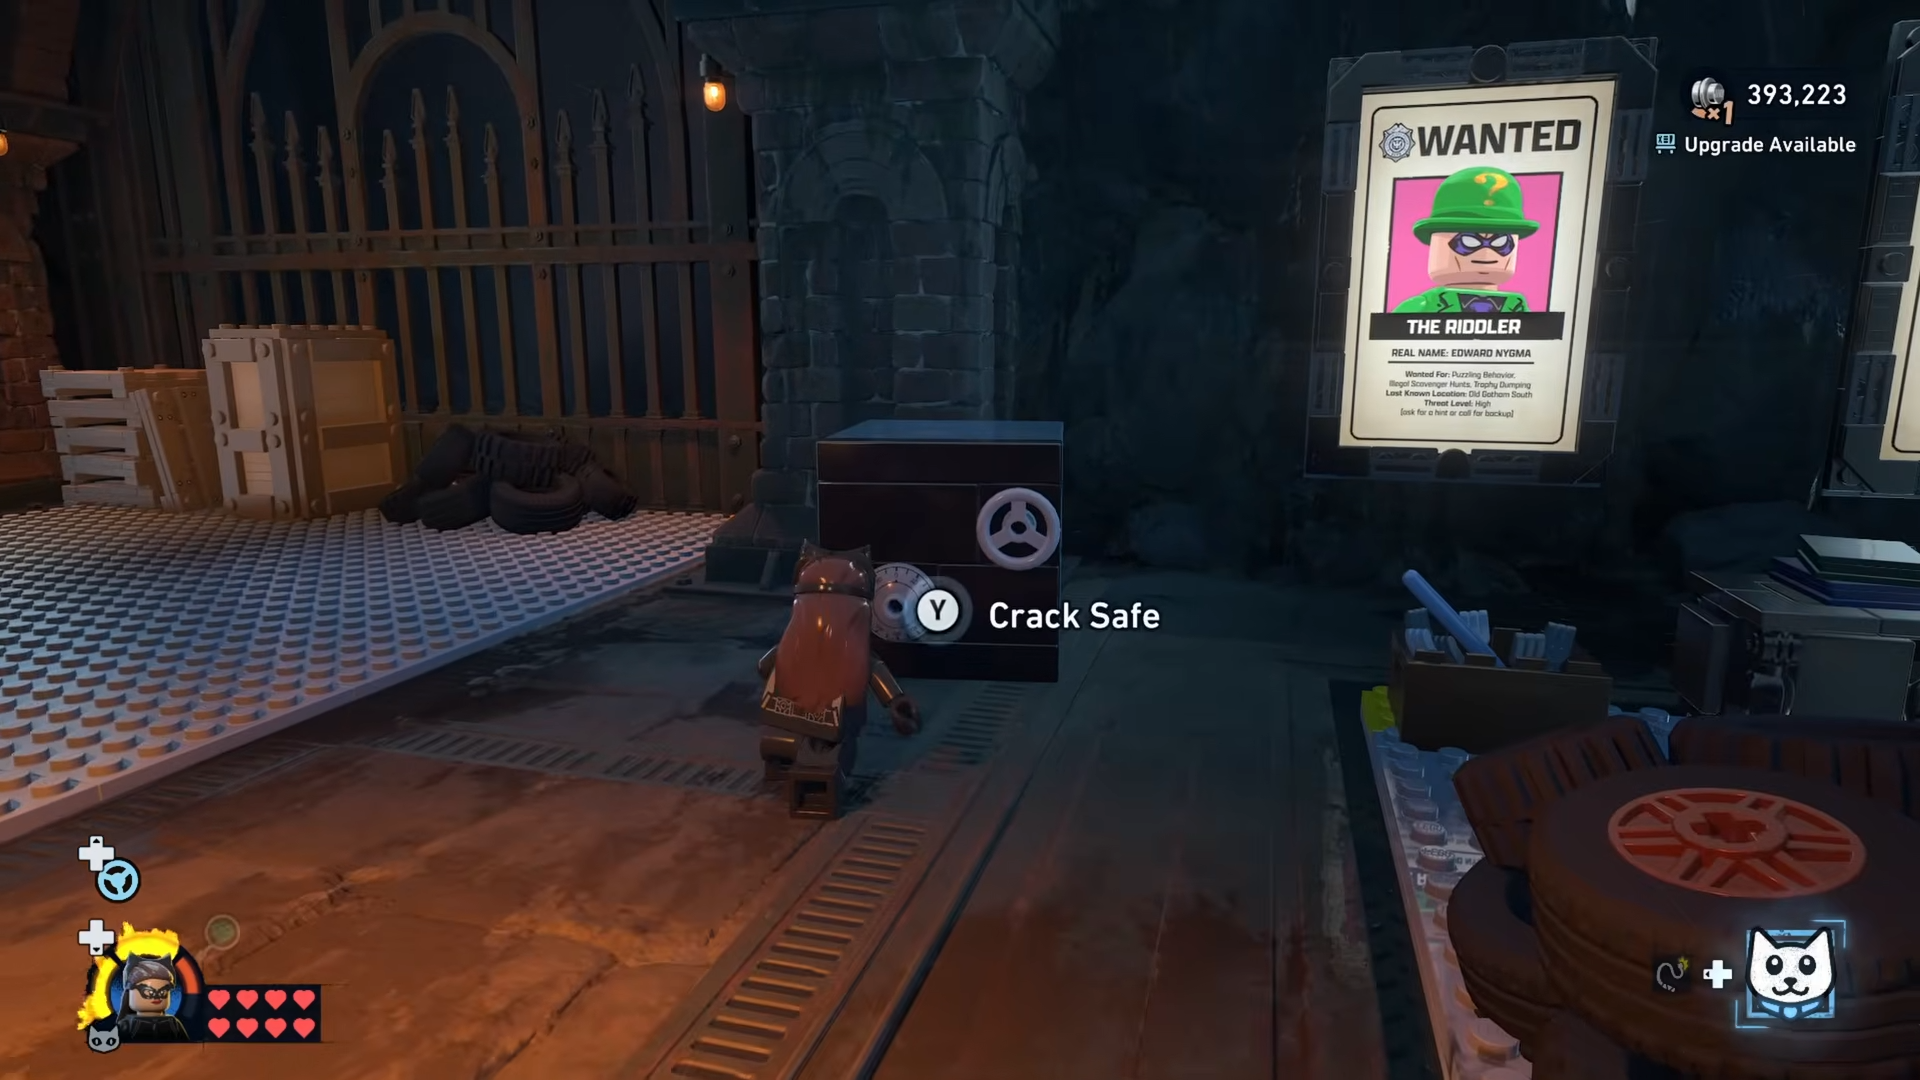
And claim the final Batcave Minikit from inside the vault.
Critical mistakes to avoid when hunting Batcave minikits
-
Ignoring expansions – Several Minikits are completely inaccessible until you unlock the Lab and Clean Slate areas with Studs, so don’t waste time trying awkward jumps before paying for expansions.
-
Not using vents for height – The central airspace Minikit is virtually impossible without the vent launch; if glides keep coming up short, go back and use the two vents by the Shop level.
-
Camera fighting you near the waterfall – The waterfall Minikit is easy to misjudge; rotate the camera slowly and stick close to the rock wall to stop Batman walking off the edge.
-
Forgetting Catwoman for the Safe – The Wanted posters Safe cannot be brute-forced; return once Catwoman is unlocked rather than trying every gadget in your roster.
-
Jumping blind under the Garage – When going for the crane-side Minikit, always line up your glide from a platform edge instead of dropping straight down or you risk repeated falls and Stud loss.
Batcave Minikit rewards and progression impact
Collecting all 10 Batcave Minikits doesn’t just tick a checklist; it feeds into the game’s wider completion percentage and Batcave display systems. Mission-based Minikits show up as physical trophies in the Display Area, while Batcave Minikits contribute to your hub’s collectible stats and overall profile completion.


Leave a Reply