Windows Accessibility features have been slowly growing in capability and features. The Windows 11 22H2 update brings along a few new features and among these is the ability to use system-wide Live Captions on your system. This has been a much-requested feature especially since other platforms started including it last year. Let’s find out more about it.
What are system-wide Live Captions in Windows 11?
System-wide Live Captions as the name suggests, help you generate captions for any audio currently playing on your system.
This is a vital accessibility feature for hearing impaired users and can also be used to generate subtitles in unsupported applications.
You can also use Live Captions to transcript audio files and make out inaudible audio as well. System-wide Live Captions are bundled with Windows 11 22H2 out of the box and you can start using them if the update is currently installed on your system.
Live captions process your voice data and other audio files locally. Your data is never shared with Microsoft servers and is never uploaded to the cloud. You can read more about Live Captions’ privacy statement at this link.
Related: What’s New in the Task Manager on Windows 11 22H2 Update
How to enable system-wide Live Captions
Here’s how you can enable system-wide Live Captions on Windows 11.
Requirements:
- An Internet Connection
- Windows 11 22H2 update
Guide:
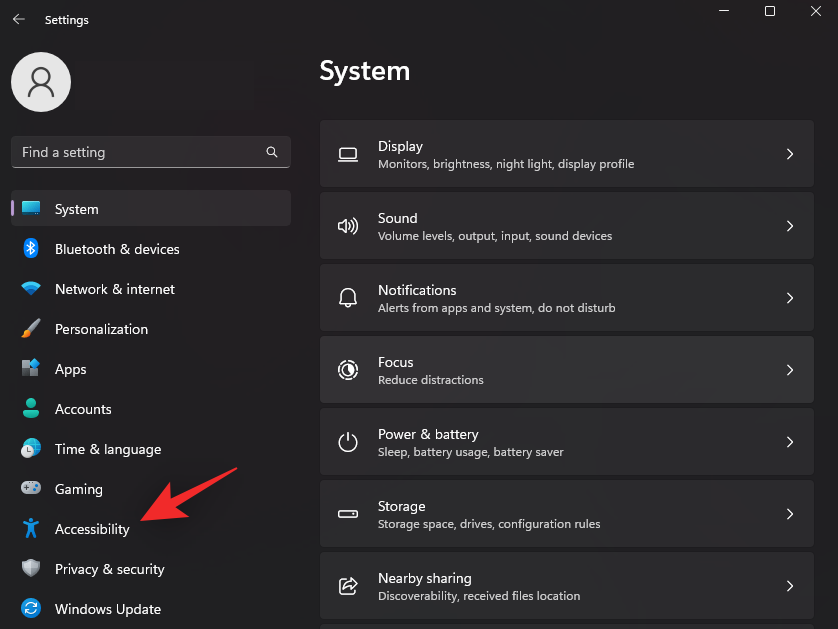
Press Windows + i and click Accessibility.
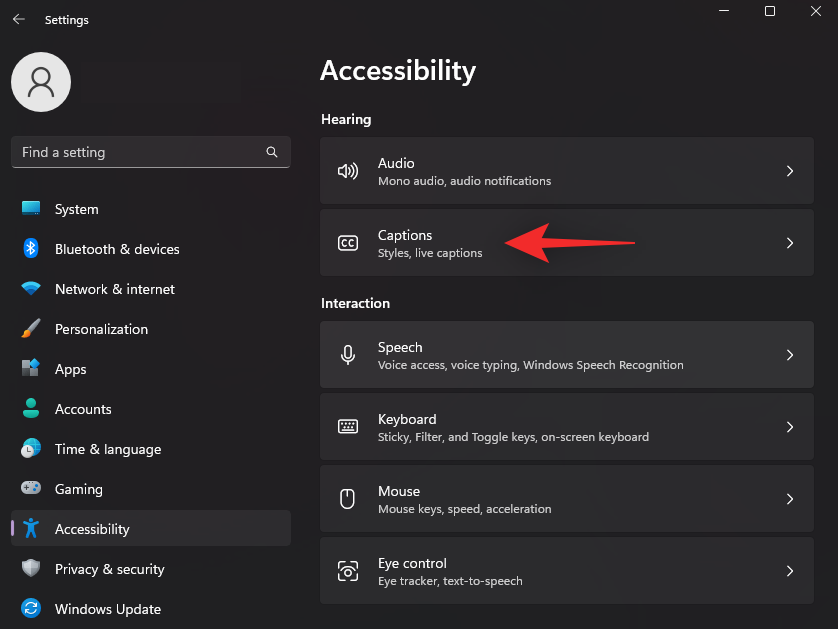
Click Captions under Hearing.
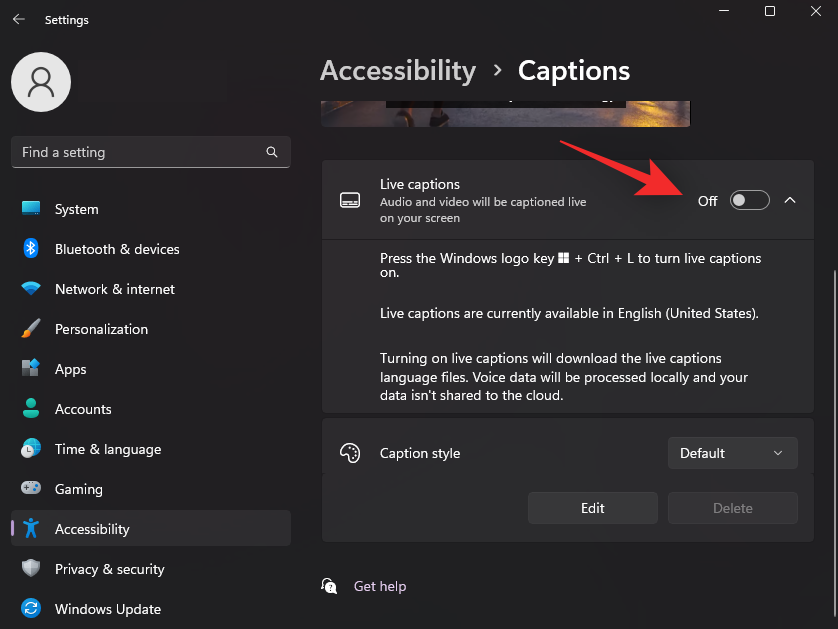
Now turn on the toggle for Live Captions.
Click Download at the top. This will allow Windows to download the necessary language files needed for Live Captions on your system.

Once the necessary files have been downloaded, the top of your screen will read Ready to caption.

You can now customize and use Live Captions on your system using the sections below.
Related: How to turn on or off the Efficiency Mode on Windows 11
How to access system-wide Live captions
You can access system-wide Live Captions on Windows 11 in 2 ways. Follow either of the methods below depending on your current requirements.
Method 1: Using a keyboard shortcut
Press Windows + Ctrl + L on your keyboard to turn on Live Captions anywhere in Windows.
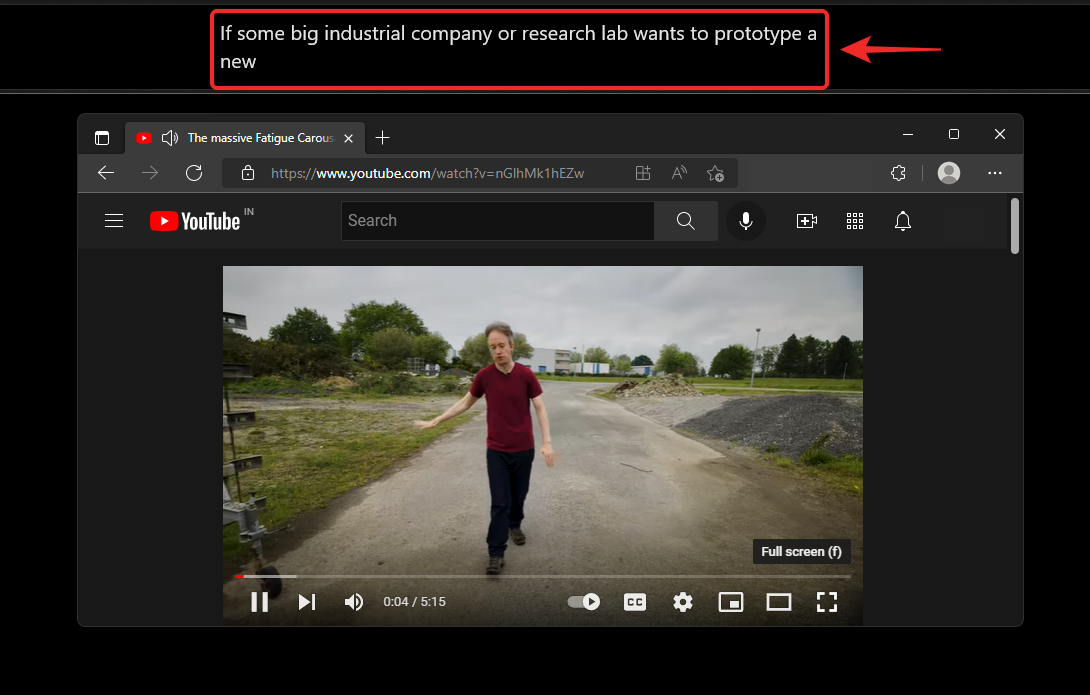
Windows should automatically start captioning the currently playing audio on your system.
Method 2: Using Quick access settings
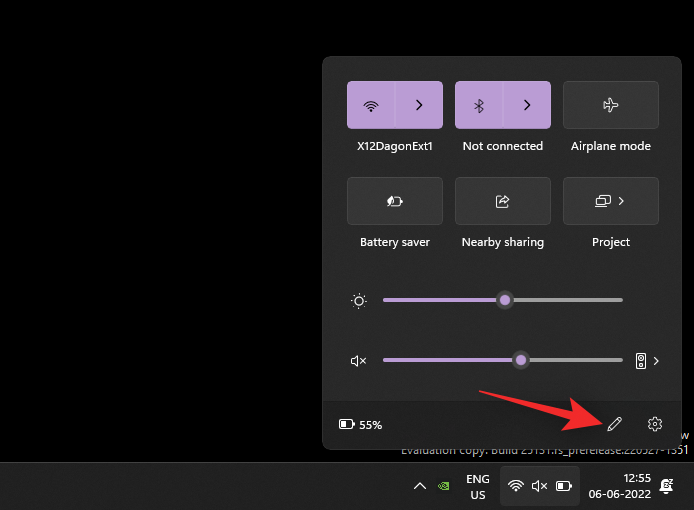
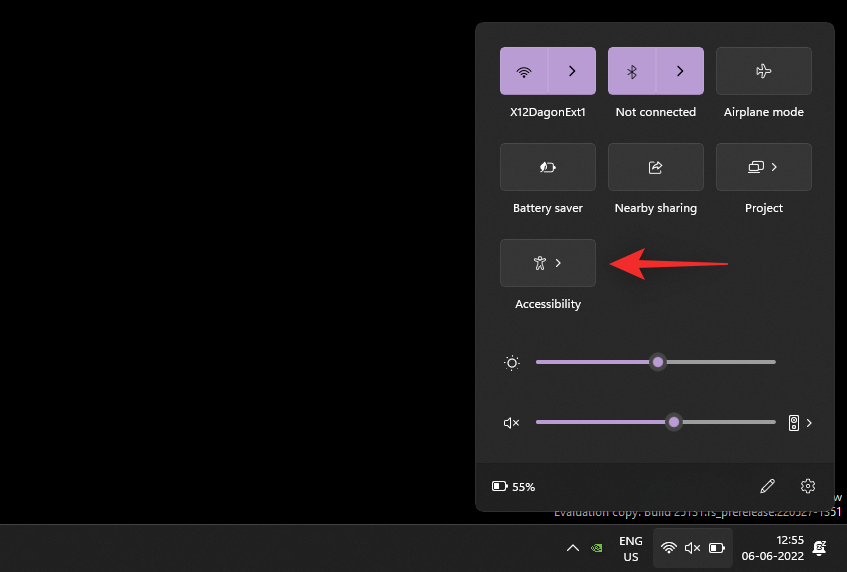
Press Windows + A to access Quick Settings on your system. Click the Edit icon.
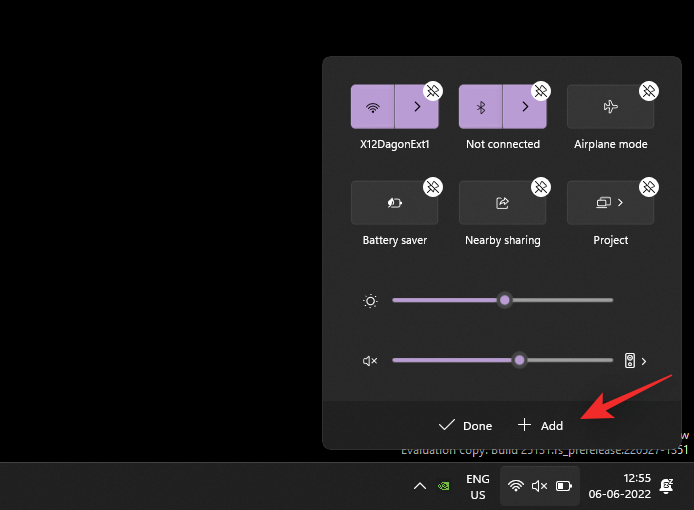
Click Add.
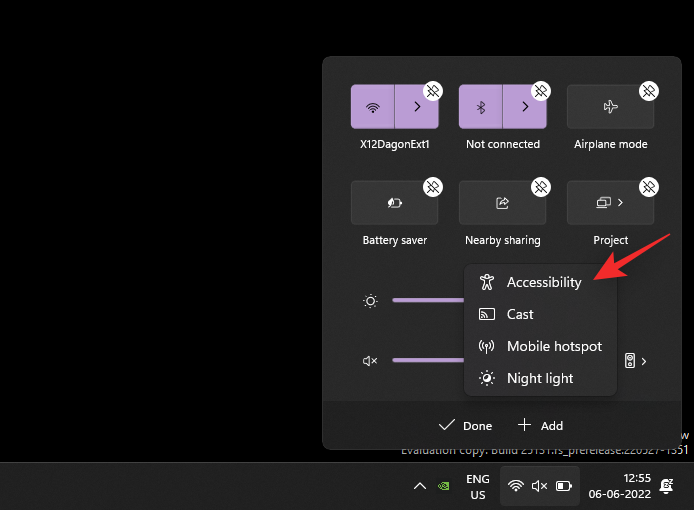
Select Accessibility.
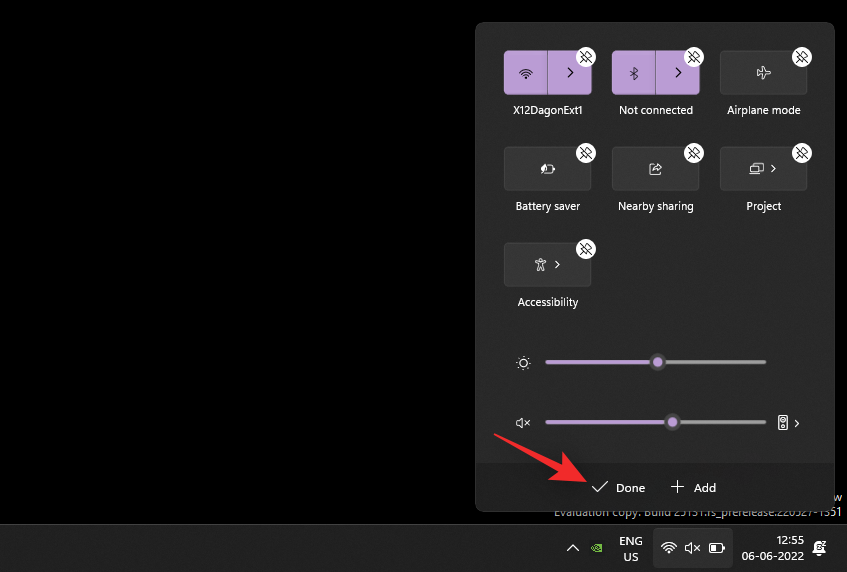
Click Done once Accessibility has been added to your Quick Settings.
Now click Accessibility.
Turn on the toggle for Live Captions.
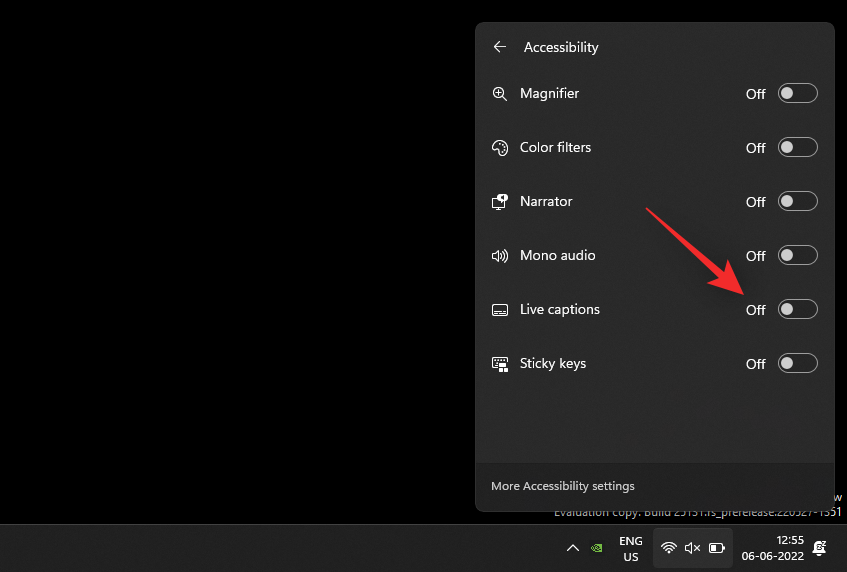
And that’s it! You can now always access Live Captions from your Quick Settings.
How to customize the Live Captions
Let’s customize your Live Captions to fit your preferences. Follow the steps below to help you along with the process.
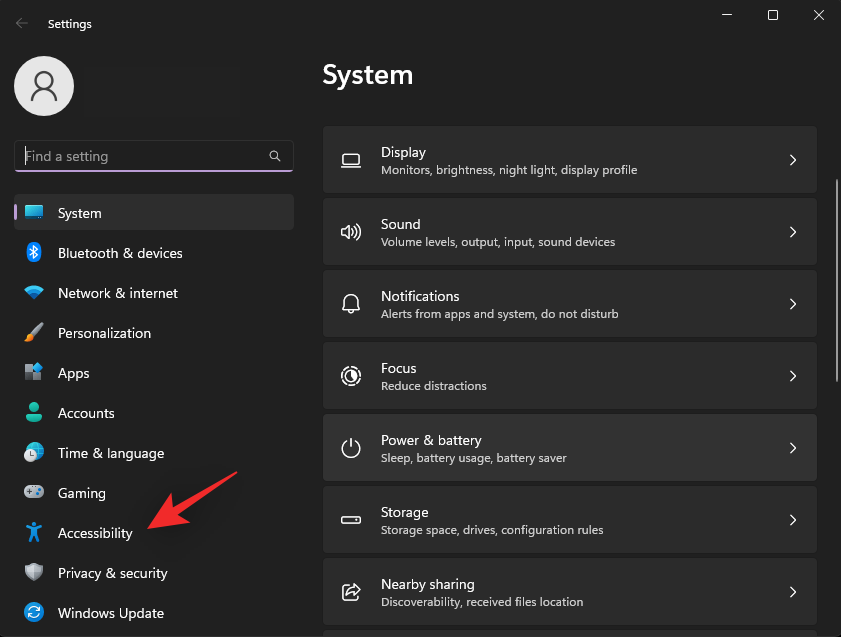
Press Windows + i on your keyboard and click Accessibility.
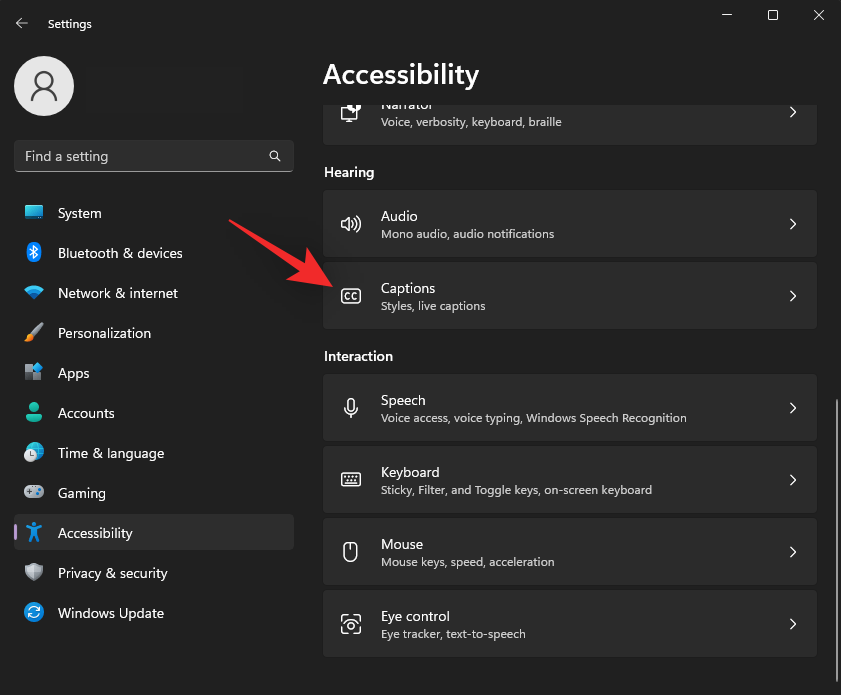
Click Captions under Hearing.
Click the drop-down menu for Caption style and select your desired style.
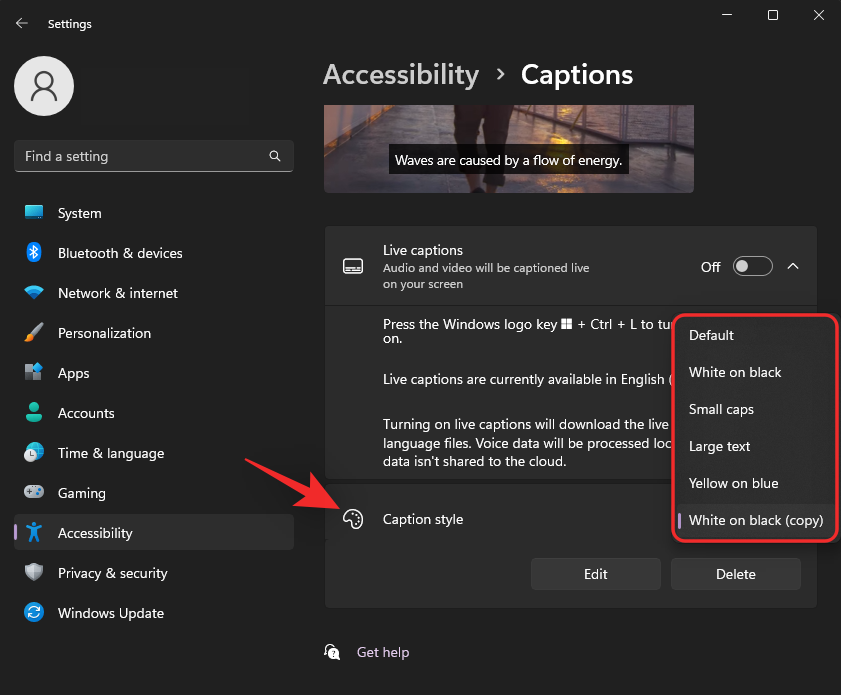
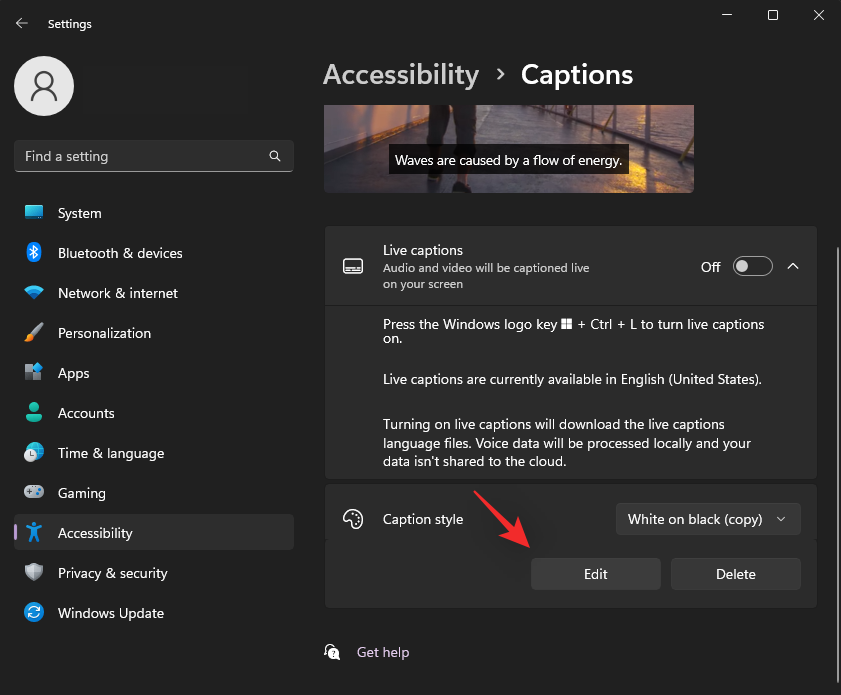
Click Edit if you wish to further customize your Caption style.
Rename your new style at the top.
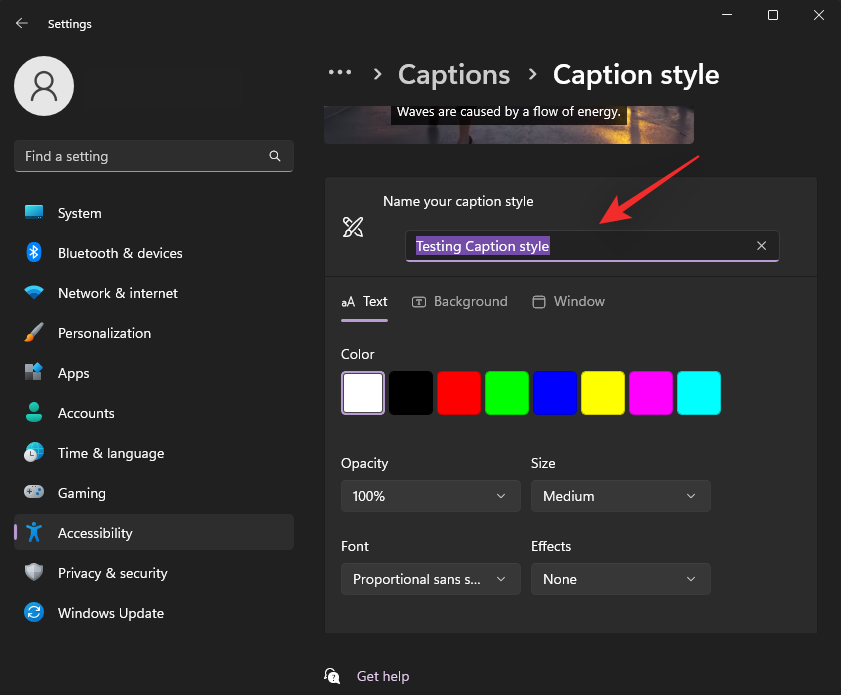
Text will be selected by default. You can now customize the following variables based on your preferences.
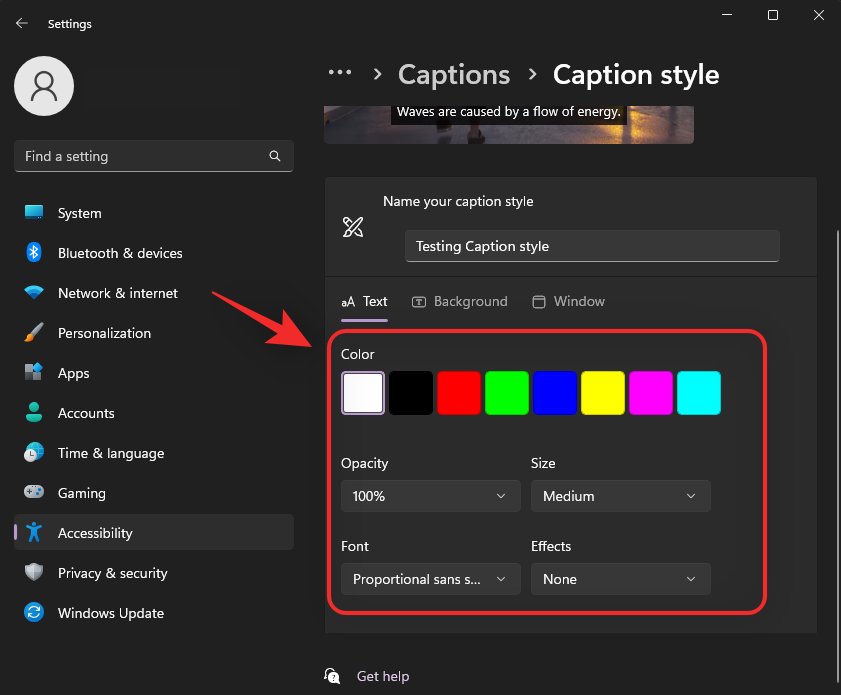
- Color: Click and choose the desired color.
- Opacity: Click and choose how opaque you want your text to be using the drop-down menu.
- Size: Choose your text size using this drop-down menu.
- Font: Choose your font using this drop-down menu. You currently have the following options at your disposal.
- Mono serif
- Proportional serif
- Mono sans serif
- Proportional sans serif
- Casual
- Cursive
- Small caps
- Effect: If you wish to make your text more prominent with additional effects then use this drop-down menu. You have the following options at your disposal.
- Raised
- Depressed
- Uniform
- Drop shadow
Click Background at the top. We will now customize the background for your Live Captions.
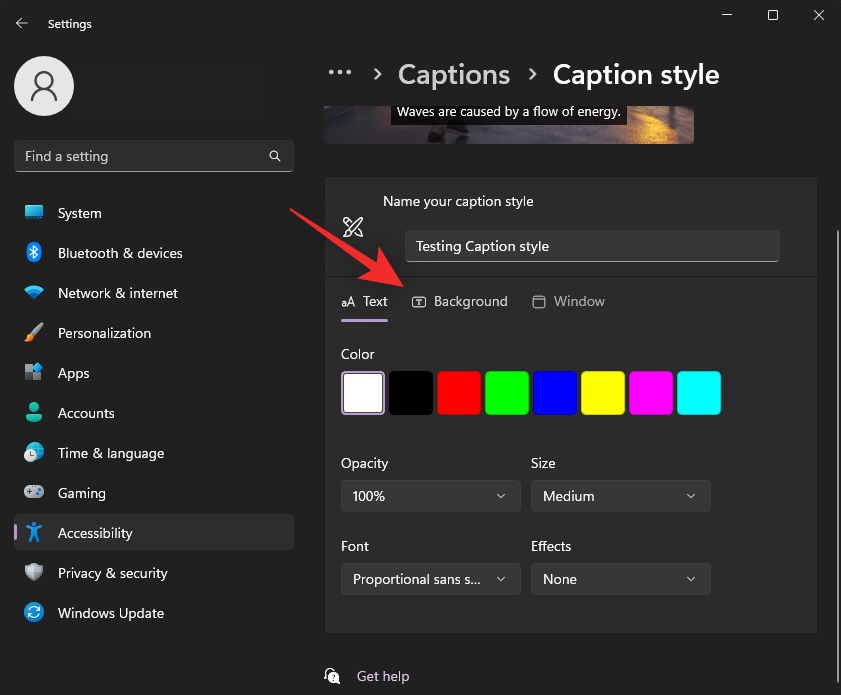
Use the following options at your disposal to customize your Captions background.
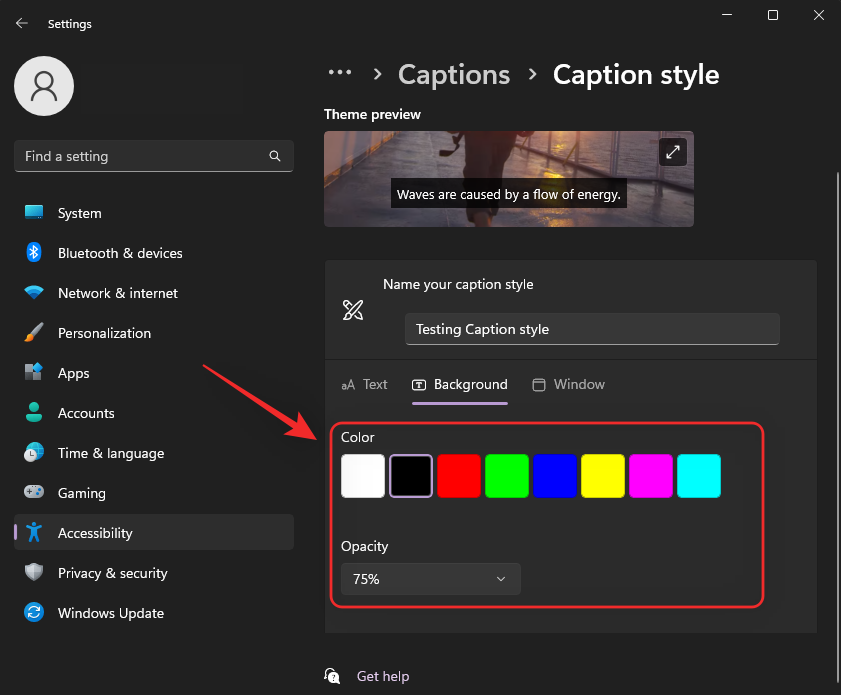
- Color: Click and choose a color you like for your background.
- Opacity: Choose how opaque you wish your background to be using this drop-down menu.
Now click Window at the top to customize the Captions window.
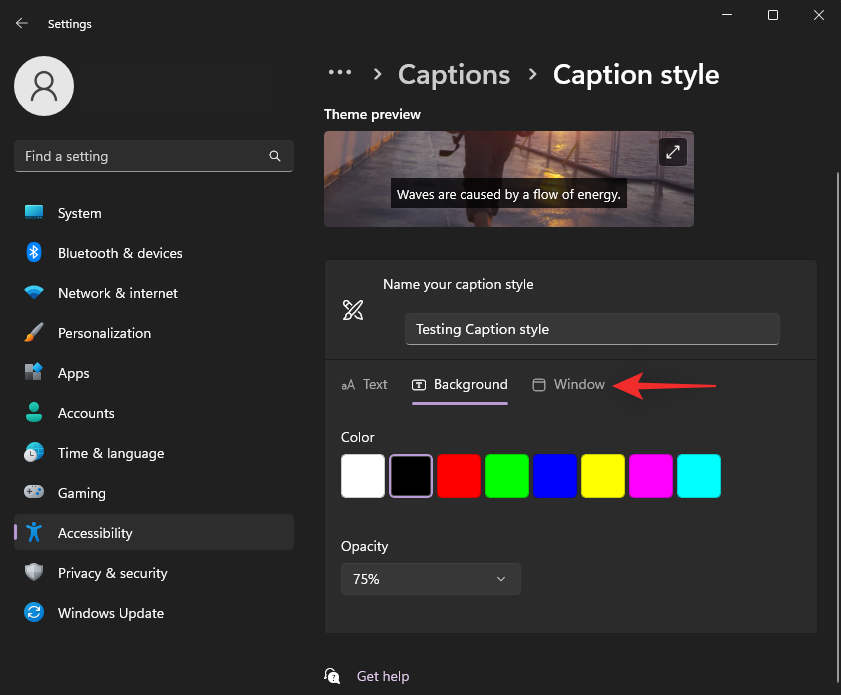
You have the same options as your Live Captions background to customize your Captions window.
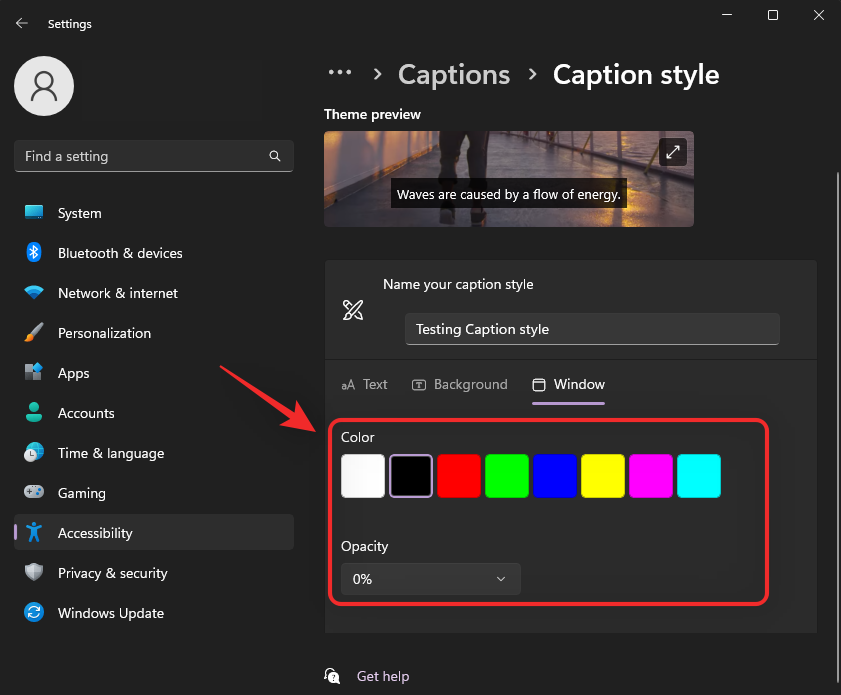
- Color: Click and choose a color for your Captions window using this option.
- Opacity: Click and choose the opacity for your Captions window using this drop-down menu.
Once you’re done close the Settings app. There are a few more options to customize your experience in the Live Captions window. Launch the same on your PC using one of the methods discussed above. We recommend you use the keyboard shortcut Windows + Ctrl + L. Now click the Gear () icon in the top right corner.

Hover over Position and choose a position for your Live Captions window.

You have the following options at your disposal for the Position option.

- Top
- Bottom
- Floating screen
Similarly hover over Caption Options to customize what kind of captions are shown on your PC.

You have the following options at your disposal for Caption Options.

- Filter profanity
- Include microphone audio
And that’s it! You will now have customized Live Captions according to your preferences on your system.
FAQs
Here are a few commonly asked questions about Live Captions in Windows 11 that should help you get up to date with the latest information.
Does Microsoft use my voice data?
Yes, Microsoft does process your voice data if included for Live Captioning. Although this process happens completely locally. Any audio used by Windows for Live Captioning is never sent to the cloud or even Microsoft servers.
Which languages are supported by system-wide Live Captions?
Currently, Live Captions only support English (United States) as a supported language. Microsoft is expected to include more languages in future updates but there is no official word on the same yet.
Why do I need Internet when enabling Live Captions?
You only need an Internet connection when you enable Live Captions for the first time. Once the necessary language files have been downloaded on your PC, you will no longer need an internet connection to use Live Captions on Windows 11.
We hope this post helped you get familiar with Live captions in Windows 11. If you face any issues or have any more questions, feel free to drop them in the comments below.
RELATED:


Discussion