iOS 16 and its custom lock screens have been all the rage since the OS was released. iOS 16 now allows you to set up customized lock screens with custom widgets, clock styles, wallpapers, and much more.
In addition to this, you get to set up multiple lock screens just like Apple Watch faces so that you can switch between them seamlessly. If you’ve been looking to do the same on your device, then here’s how you can get started.
How to set up multiple lock screens on an iPhone or iPad
- Required: iOS 16 update
Here’s how you can set up multiple lock screens if your device is running iOS 16.
Step 1: Create your first lock screen
Unlock your device and then tap and hold anywhere on the lock screen to enter the editing mode. You can now swipe right to view all your custom lock screens currently set up on your device.

Tap the Plus (+) icon to create a new lock screen.

Alternatively, you can also tap the Plus (+) icon at the last dummy lock screen on your extreme right.

You now have the following options to choose from. Choose either to create a new lock screen based on your preferences.
- Featured lock screens: These are the latest selection of curated lock screens with free wallpapers from the Apple servers.
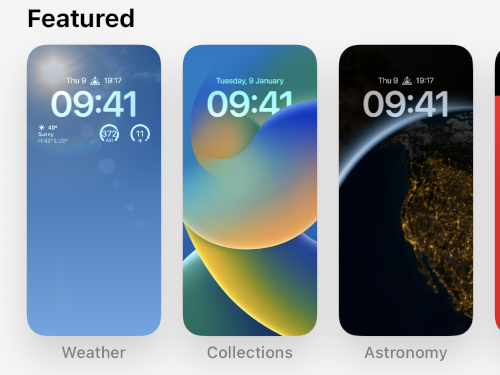
- Weather & Astronomy lock screens: These lock screens are weather and astronomy focused from Apple. They use widgets to display the weather data while using wallpapers related to space and astronomy.

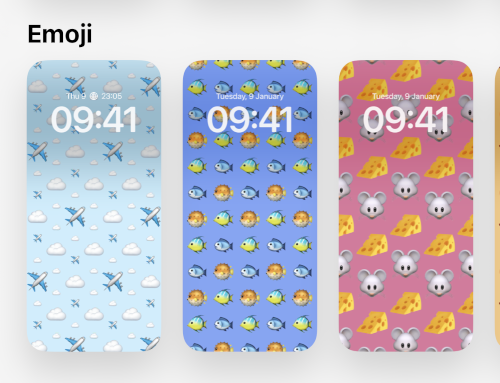
- Emoji lock screens: These are pre-made emoji lock screens with different clock, widget, and background pattern combinations.
- Collections lock screen: These are curated lock screens that have been made to match Apple’s curated wallpaper collections.
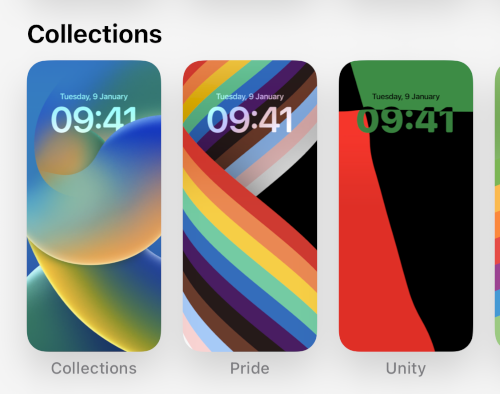
- Color lock screens: These are simple color-based lock screens with subtle gradients and matching clocks to help compliment their aesthetic.

In addition to this, you can also create a custom lock screen from scratch using the following options at the top.

- People: This option will allow you to access the People category in the Photos app and choose a background accordingly.
- Photos: This option will allow you to access all your photos and choose a background accordingly.
- Photo Shuffle: This option gives you the ability to shuffle between your set of chosen photos from the Photos app.
- Emoji: This option allows you to create a custom emoji background where you can dictate the pattern as well as which emojis are used in the background.
- Weather: This option allows you to choose an animated weather background that will reflect the current conditions in your default city set in the weather app. If you have location services enabled, the lock screen will automatically reflect the weather of your current location.
- Astronomy: This option allows you to choose from various astronomical wallpapers to set as your background.
- Colors: You can use this option to create custom color backgrounds for your lock screen where you get to choose the color as well as the gradient for your background.
We will be using the Emoji option for this guide to better showcase all the ways to customize your lock screen. You can customize all other lock screen options similarly regardless of your choice.
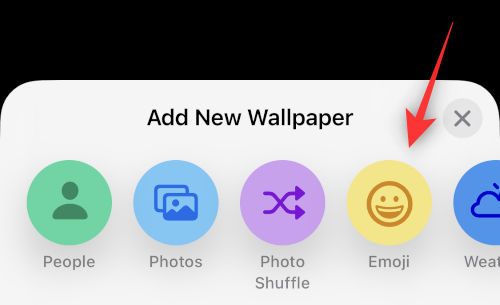
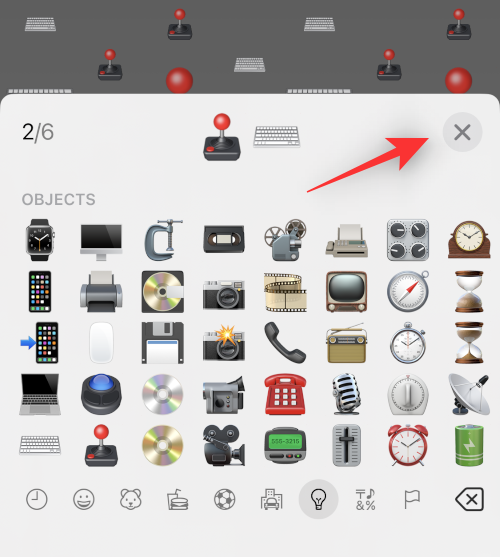
Once you make your choice the background will be added to your new lock screen with further options to customize the same. In the case of the emoji background, we can dictate which emojis we wish to use on the lock screen. Simply type in the emojis you wish to use in your background.

Tap the X once you’re done adding emojis.
The emojis or your custom background should now be available to you. Swipe right on the screen to view all background styles. In the case of the image background, this will help you access different filters.

Once you’ve made your choice tap the 3-dot () icon.
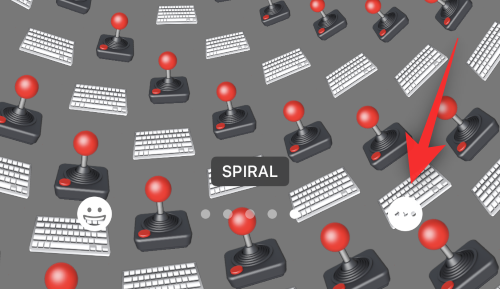
This will allow you to toggle Perspective Zoom and Depth Effects in case of images. In the case of the emoji background, we can choose a different background color.

Tap and choose the color of your choice.
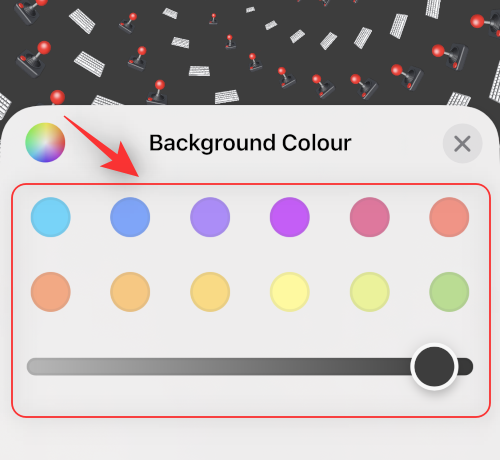
You can also tap the color wheel to view Color Grid, Spectrum, and Sliders.
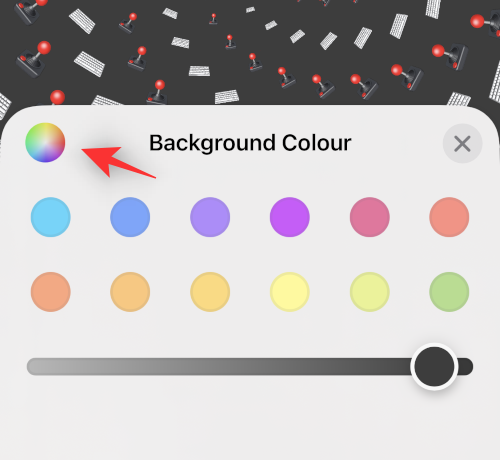
This will allow you to choose any custom color you have in mind.

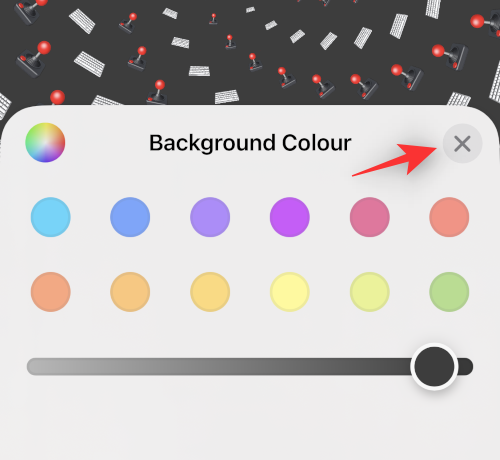
Tap the X once you’re done.
Now tap the empty box at the top to add widgets.
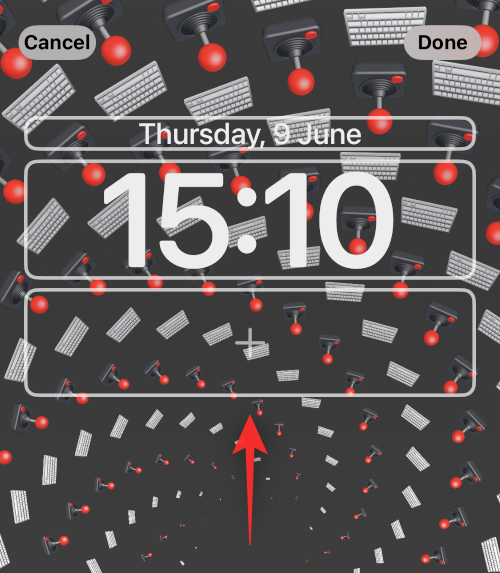
You will now be shown widget suggestions at the top. Tap and choose the one you wish to add to your lock screen.

You can also tap an app from the app list to view all its available widgets.

Once you find a widget you like, tap on it. You can also drag the same to your lock screen.

Continue adding widgets as you see fit. You can add two medium-sized widgets or four small-sized widgets in the box. You can mix and match these sizes to create the perfect widget group for your lock screen.
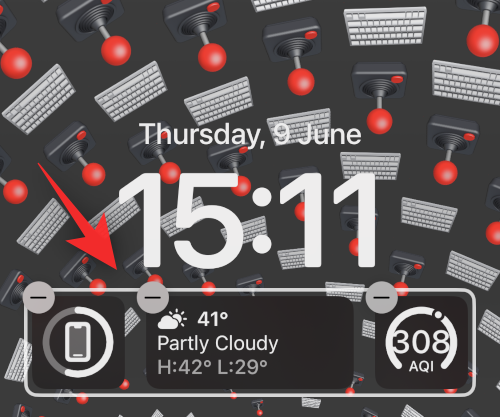
Now tap the Clock to customize your clock.
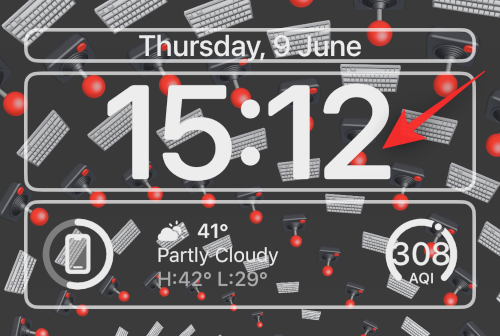
Choose your preferred font by tapping on the same.
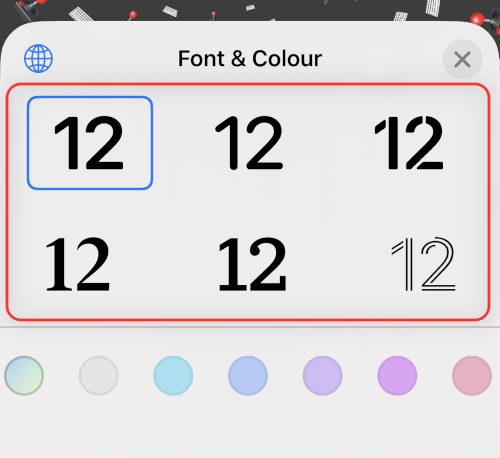
Swipe and choose a color you like from the selection at the bottom of your screen.

You can also tap the Color Wheel to choose a custom color as we did before.

Tap the Globe if you wish to change the script used in your font.

Tap the script you wish to use on your lock screen.
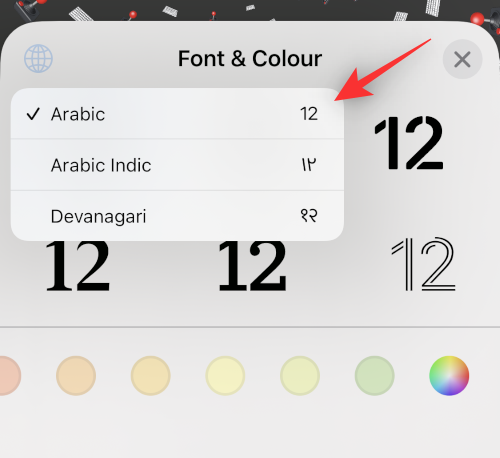
Tap the X once you’re done.

Tap the date at the top.

This is another place where you can view mini widgets for some quick information depending on the app you choose. Tap and choose either of the widgets from the list to add them to the date placeholder.

Tap Done if you’re happy with your new lock screen or tap Cancel if you wish to discard your changes.

Your new lock screen will now be created.
Related: How to Remove Widgets From Lock Screen on iPhone on iOS 16
Step 2: Create more lock screens
You need to create more lock screens. We recommend you create distinctive lock screens for work, home, workout, and such, as it suits you. Using the guides given below, you will be able to even activate your desired lock screen automatically based on the time and place.
So, once again, follow the guide above to create more lock screens. Basically, tap the plus icon (+) again to add a new lock screen.

Repeat the steps above to customize your new lock screen as needed. Continue repeating till you have added all the custom lock screens you wish to add.

And that’s how you can add multiple lock screens on your iOS 16 device.
Related: iOS 16 Lock Screen: How to Show Full Clock in Front or Let Subject Come in Front
How to switch between multiple lock screens manually
Switching between multiple lock screens is a fairly easy process. Follow the steps below to help you switch between lock screens on your iOS 16 device.
Unlock your device first. Then tap and hold anywhere on the lock screen. This will take you to editing mode.
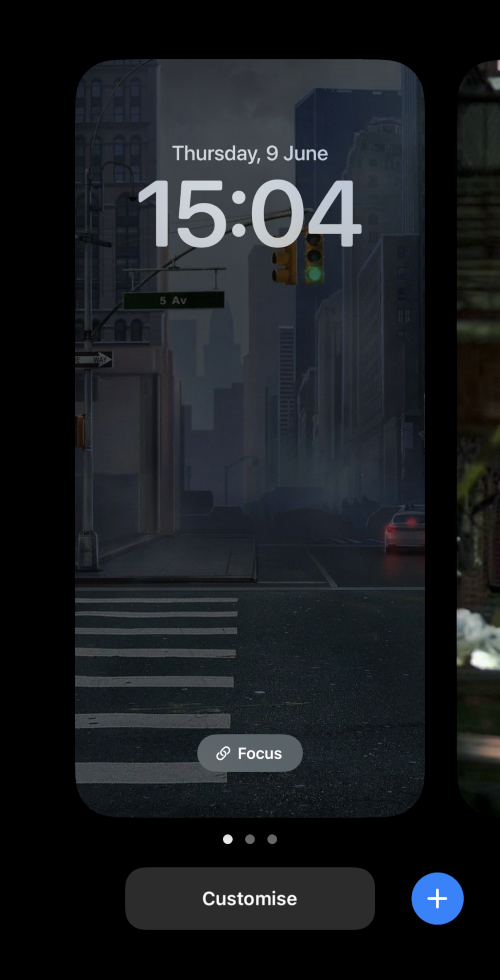
Use left and right swipe gestures to view all your custom lock screens and find the one you would like to use right now.
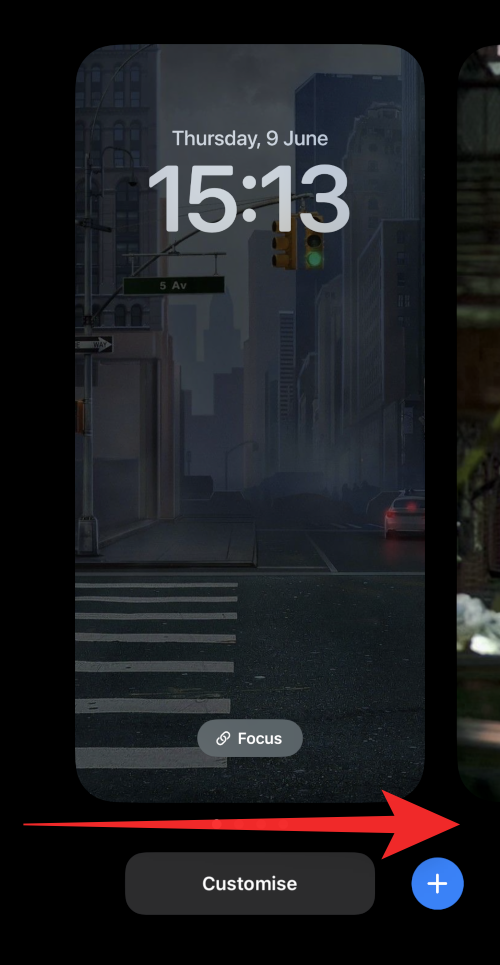
Once found, tap on that lock screen to set it as your new lock screen.

And that’s how you can manually switch between multiple lock screens on your iOS 16 device.
How to switch between multiple lock screens automatically based on time and place
You can use Focus modes to your advantage and activate them based on a place or time. When you link a lock screen to a Focus mode, the lock screen too gets activated automatically when that Focus is activated. Thus, what we need to do here is first link the lock screen to a Focus, and then schedule that Focus mode based on time and place so that both the Focus and the lock screen linked to it gets activated automatically.
Step 1: Link a Focus mode to each of the lock screens you want to activate automatically
You can link focus modes to specific lock screens that you have created for certain scenarios. This takes away the hassle of continuously switching between lock screens when you switch between focus modes.
Previously you could use custom home screens with Focus modes which allowed you to focus more easily on the task at hand while keeping distractions at bay. You can now take these setups a step further by tying in custom lock screens to a focus mode.
Use our guide on linking a Focus mode to a lock screen for this.
Related: How to Link Your Lock Screen to a Focus mode
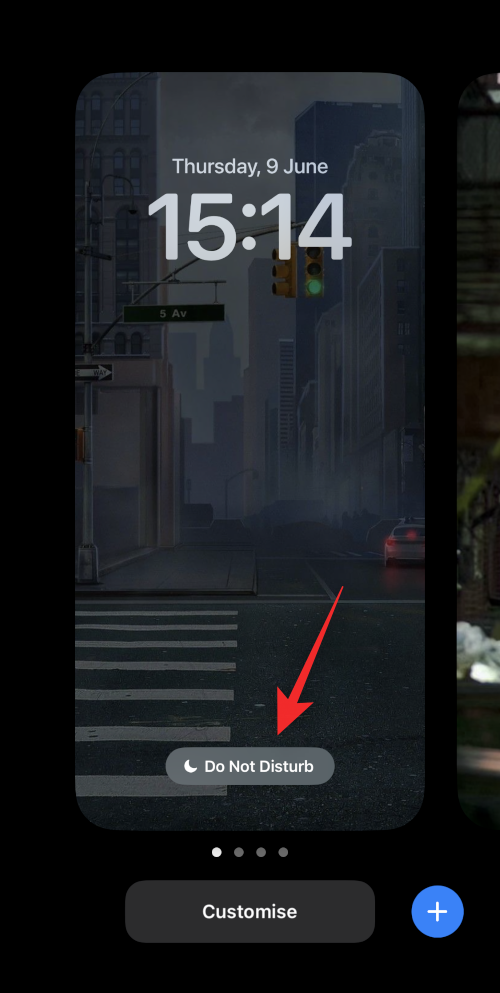
Using Focus modes with lock screens also allows you to seamlessly switch setups if you have automation enabled for focus modes on your device. This means that every time automation triggers a focus mode, not only will your home screen setup will change, but your lock screen will also use the custom lock screen tied to your Focus mode.
Step 2: Activate Focus (and the lock screen linked to it) based on time and place
Open the Settings app.
![]()
Tap Focus.

Tap on the Focus mode linked to the lock screen that you wish to activate based on a time or place. If you only wish to change your lock screen we recommend you create a new Focus mode without any rules to do so. This won’t affect other aspects of your device and only change your lock screen.

Now scroll down to find CUSTOMISE SCREENS. Tap Choose under your lock screen preview.

Choose a lock screen you wish to apply automatically.
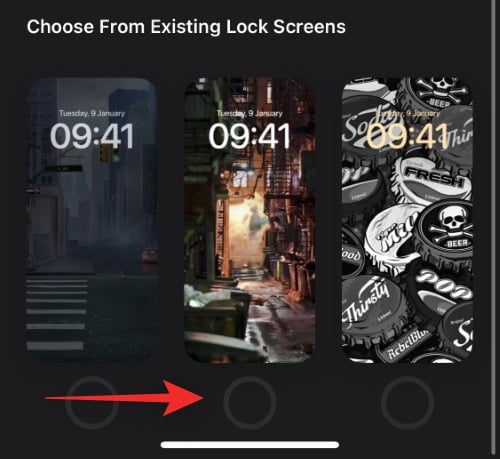
Tap Done.
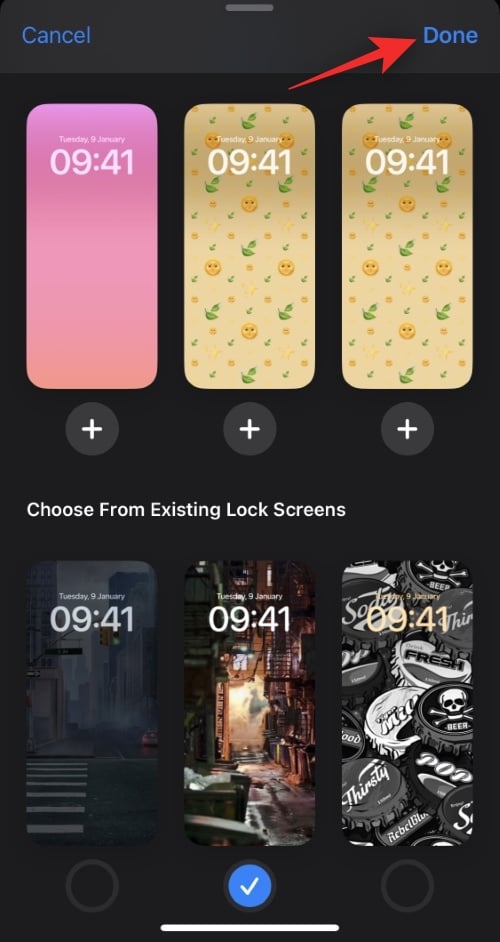
Now tap Add Automation under TURN ON AUTOMATICALLY.

Choose one of the following options: time and location. Let’s explore them in detail below.
Option 1: Time
This will allow you to schedule your focus mode and apply the custom lock screen at specific times.
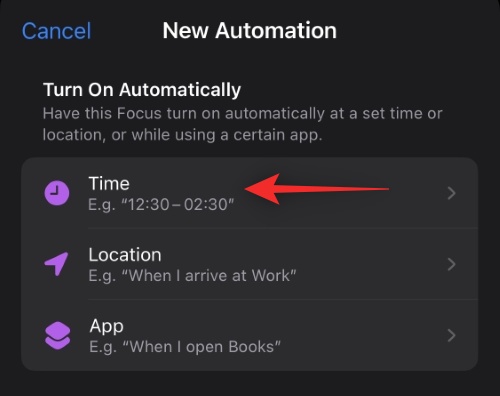
Tap the time beside the From option.
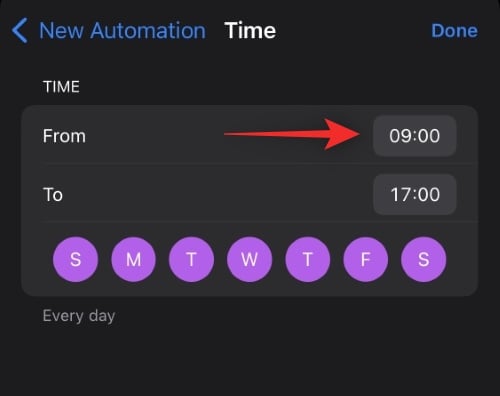
Scroll up and down and set the time at which you wish to change your lock screen.
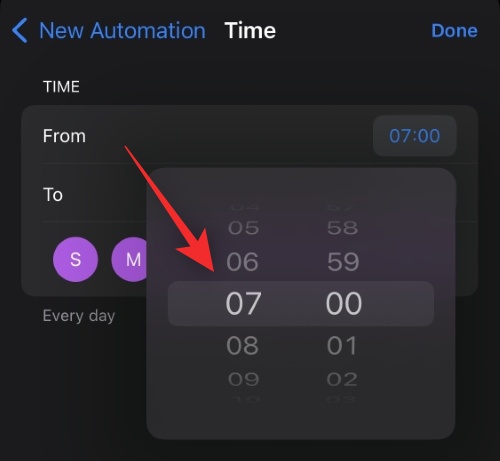
Now similarly, tap the time beside the To option.
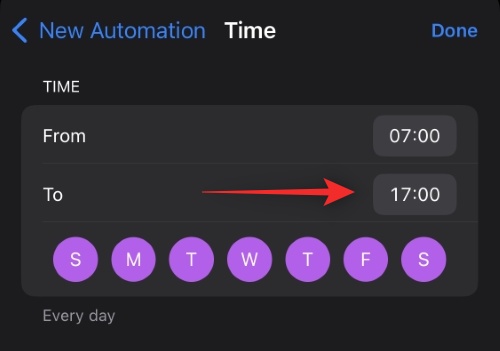
Choose the time when the focus mode will be deactivated and your custom lock screen will be removed.
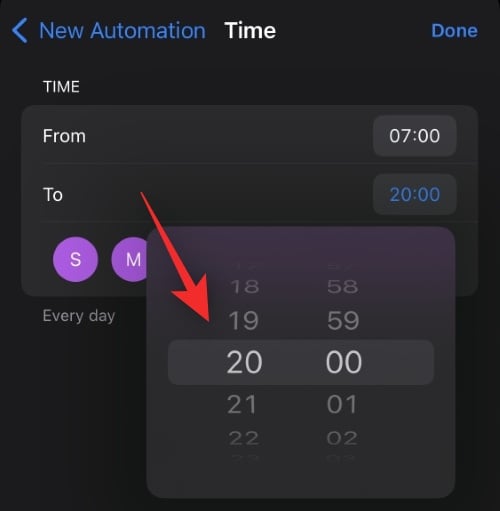
Tap and choose the days for which you wish to apply this rule. By default, all days of the week will be selected. Tapping them once will remove them from the selection.

Tap Done.

And that’s it! The selected Focus mode and its linked lock screen will now be activated and deactivated on your set schedule.
Option 2: Location
Use this option if you want to activate the Focus and the lock screen linked to it based on a location.

Now follow either of the sections below depending on your choice.
Tap the search bar at the top and type in the location where you wish to apply your custom lock screen and linked Focus mode.
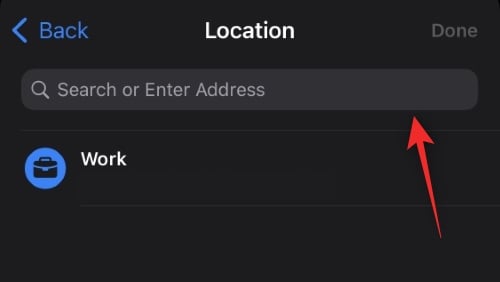
Now type in the address or name of the location and it should show up in your search results. Tap on the same.

You can also choose one of your favorite locations which should show up at the top.

Now use the slider at the bottom to dictate the radius within which you wish to apply the custom lock screen.

Once you’re happy with your settings, tap Done.

And that’s it! The selected Focus mode and its linked custom lock screen will now be automatically activated each time you are in the selected location.
How to change your phone settings using a lock screen
Focus modes allow you to define custom phone settings that get activated as soon as you start using the Focus mode. You can use this to your advantage and create Focus modes that only change phone settings.
These focus modes can then be tied to your custom lock screens for easy switching between them.
A Focus mode gets activated as soon as you choose a custom lock screen tied to the same. So to change your phone settings from the lock screen simply switch to a lock screen as discussed above that has a Focus mode with the appropriate phone settings tied to it.
How to activate a Focus mode using a lock screen
Similar to the method above, you can activate a Focus mode by simply switching to a lock screen tied to the Focus mode. You can do this from your lock screen itself by entering the editing mode and then swiping and choosing the lock screen that best fits your current needs.
How many custom lock screens can you create?
For now, it seems that there is no limit on the number of lock screens you can create in iOS 16. We managed to create 25 lock screens on our device with the ability to create even more available to us.
How to delete a custom lock screen
Here’s how you can delete custom lock screens that you no longer need on your device.
Unlock your device and tap and hold on the lock screen. Swipe right to find the lock screen you wish to delete.

Once found, tap and hold on the same.

Select Delete Wallpaper.
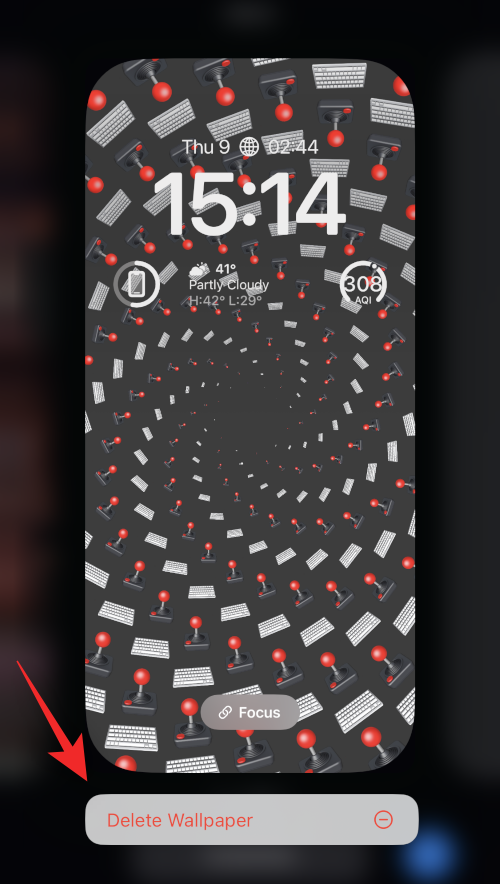
The custom lock screen will now be deleted from your iOS 16 device.
FAQs
Here are a few commonly asked questions about custom lock screens on iOS 16 that should help you get up to speed with the latest information.
Do multiple lock screens impact battery life?
Yes, during these initial releases of iOS 16, it seems that custom lock screens take a huge hit on the phone’s battery. This has been reported by multiple users and it seems that weather and other real-time widgets are to blame.
These widgets do not seem to be well optimized for now and continuously keep fetching data in the background. This not only consumes more data but also leads to shorter battery life on iOS 16 devices.
We recommend you file feedback with Apple for the same using the Feedback app on your device.
Why is my phone overheating?
Overheating of devices is another reported issue caused by multiple lock screens on iOS 16 devices during these initial releases. It seems that excessive battery usage along with background and foreground tasks leads to a sharp rise in temperature which the current iPhone body is unable to manage as intended.
In such cases, your phone will stop charging itself, disable the torch, and in some cases reduce the performance to keep the temperature in check. If you’re facing this issue, we recommend you remove widgets and only keep the custom lock screens you wish to regularly use on your device.
Will activating a focus change the lock screen?
Yes, activating a focus mode will change your lock screen if you have a custom lock screen tied to the selected focus mode. This also works in reverse where selecting a custom lock screen with a focus mode tied to it will activate that focus mode.
We hope this post helped shed some light on multiple lock screens on iOS 16. If you face any issues, feel free to reach out using the comments below.


