Ever since the Mountain View giant started rolling it out for free for everyone, Google Meet has quickly gained quite an audience for being one of the more streamlined services that can be used to get things done during the pandemic. Not just corporate organizations but also educational institutions, and teachers are now gradually switching to Google Meet for its ease of access and interactive features.
If you’re an educator or if you’re someone who wants to present your topic on a whiteboard as you would in an office, you can use Google Jamboard with others in a Google Meet session. The following post will guide you into creating a Jam and then sharing it with participants of your meeting on Google Meet.
Related: How to see everyone on Google Meet
What is Google Jamboard?
Jamboard was launched by Google in 2017 as an interactive tool that allowed workers and enterprise users to interact using a whiteboard with features like sticky notes, the ability to add images from Drive and the web, handwriting and shape recognition. Initially released as a competitor to the Microsoft Surface Hub, Jamboard featured a 55-inch 4K display with touch functionality that supported up to 16 touches at once.
The device also came with a Full HD webcam, a couple of styluses, and different connectivity options like USB-C, micro-USB, and HDMI ports. In terms of collaboration, Jamboard came with sharing capability with up to 50 participants and 20 pages per jam.
Do you need Jamboard hardware for Google Meet?
No. While Google launched Jamboard as a hardware tool, the service has since been made available as a mobile app (Android | iOS) as well as a web app for anyone to use with a Google account. You can use the Jamboard app on your smartphone or tablet and use its web app on PCs.
The only feature that you will be missing out on by using Jamboard without its hardware is the shape and handwriting recognition which isn’t much of a deal-breaker. You still get access to Jamboard’s other collaboration tools like markup, sticky notes, and more.
How to use Google Jamboard with Google Meet
So, here is everything you need right from creating your first Jam to additional tips you should know already.
How to create a new Jam on Google Jamboard
Step 1: Head over to Google Jamboard on your web browser (for best results, use Google Chrome).
Step 2: Create a new Jam by clicking on the ‘+’ icon at the bottom right. You can also select an existing Jam from your screen to share it with a meeting session on Google Meet.
How to add a Jam to a meeting on Meet
Step 1: Open Google Meet on the web on your PC, start, and join a meeting by clicking ‘Start a meeting’ and then clicking ‘Join now’.
Note: If you own an actual Jamboard display, you can tap on the ‘Join or start a meeting’ option from the top right corner of your Jamboard screen. You can learn more about Google Meet on Jamboard from this Google support page.
Step 2: Inside the meeting, click on the Present now button at the bottom right and select ‘A Chrome tab’ from the list of options. 
Note: If you’re presenting from an actual Jamboard hardware, you need to select ‘Your entire screen’ or ‘A window’ and then click Share.
Step 3: In the new window that appears, select the tab with Google Jamboard open and click on the Share button at the bottom right corner of the window.
That’s it! Your Jamboard window is now visible for all participants of your meeting on Google Meet. You can move over to your Google Jamboard tab to start teaching or presenting your topic.
How to allow everyone to collaborate on Jamboard in Meet
Now that you have created and started allowing participants to view your Jam on Google Jamboard, you can proceed to let them also interact with your Jam. You can do so by following the steps below.
Step 1: Head over to the Google Jamboard tab inside your browser.
Step 2: Click on the ‘Share’ button at the top right corner.
You can now see different ways to share your Jam. Google keeps all of your Jam sessions private unless you manually make them public so that they can be accessed by anyone with a link.
Step 3: If your meeting has a large number of participants, you can switch your Jam to the public mode by clicking on the ‘Change to anyone with the link’ under the ‘Get link’ section.
Alternatively, you can also do this by first clicking on the ‘Get link’ box and then selecting ‘Anyone with the link’ from the drop-down menu.
Step 4: If you want to give the participants the ability to interact on your Jam, you can select the ‘Editor’ option from the options as shown in the image.
Step 5: Now that you have successfully created a share link, click on the ‘Copy link’ button, and then click on Done.
Step 6: Move over to the Google Meet tab on your browser and tap on the Chat icon at the top right corner (the one between the People icon and Time).
Step 7: Paste the link that you copied from Step 5 onto the Chatbox and press on the Send button (or hit the Enter key on your keyboard).
The link to your Jamboard session will now be available for anyone who’s present in the Google Meet meeting. You can head over to your Jamboard page to doodle, present, and interact with other participants.
4 Google Jamboard tips to know
Now that you have started interacting with participants from your Google Meet session on Jamboard, you can take it a step further by following the tips mentioned below.
Keep your Jam private and share to a limited number of participants
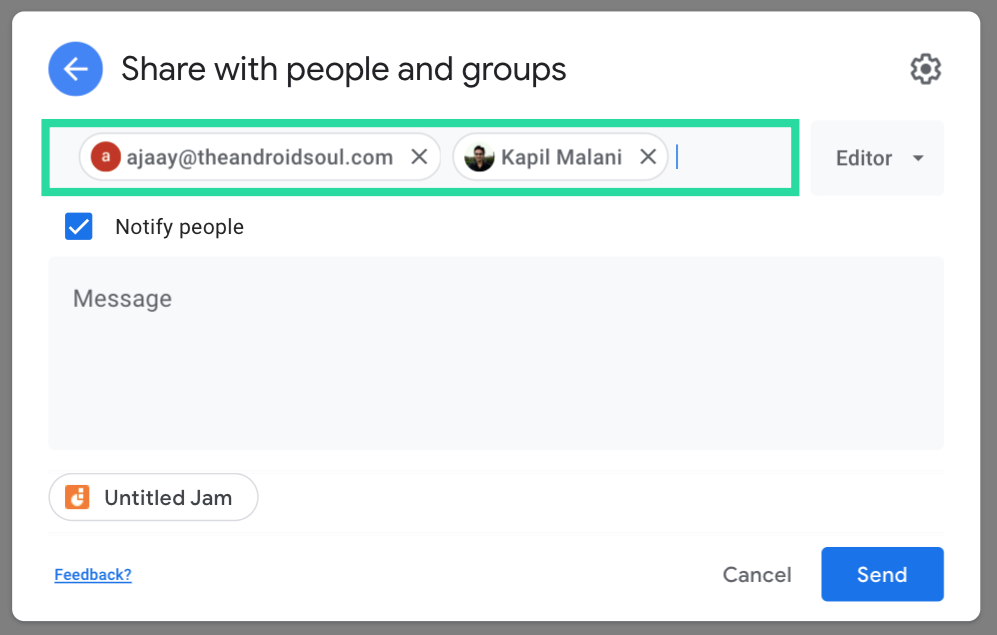
If you’re presenting to a handful number of participants, we suggest you keep the Jam link private and allow collaboration by adding the names or email addresses of people you want to give access under the ‘Share with people and groups’ section.
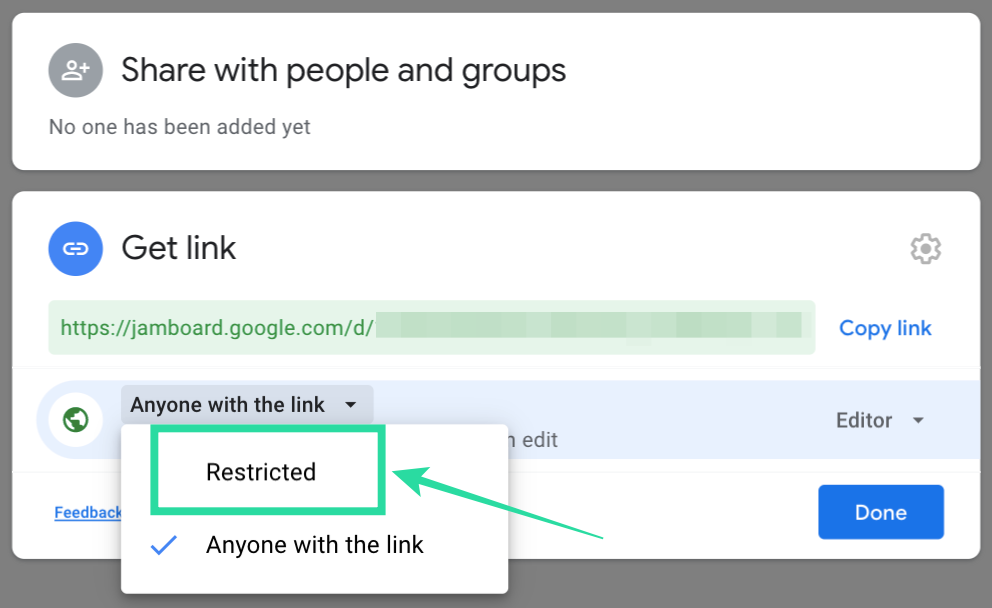
Also, make sure the Jam link is not set to public by clicking on the Get Link box and selecting the ‘Restricted’ option from the list.
Give editing privileges to users with Restricted access
When adding users manually to share a restricted Jam, you can enable the added participants to access to editing your Jam. After adding the names or email addresses of the users, click on the drop-down box on the right side, and select Editor.
Allow participants to share a Jam and change permissions
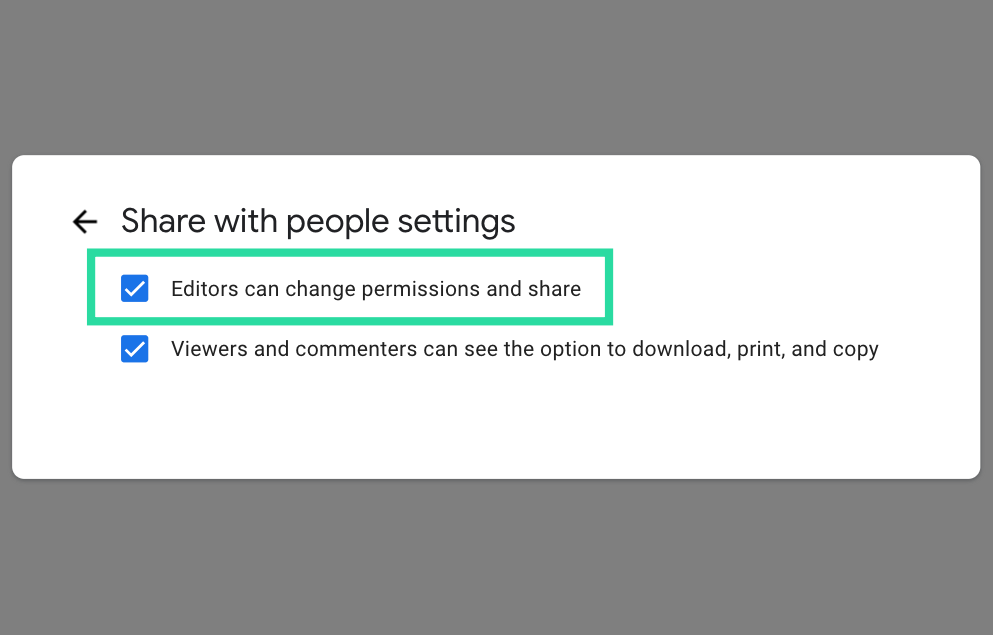
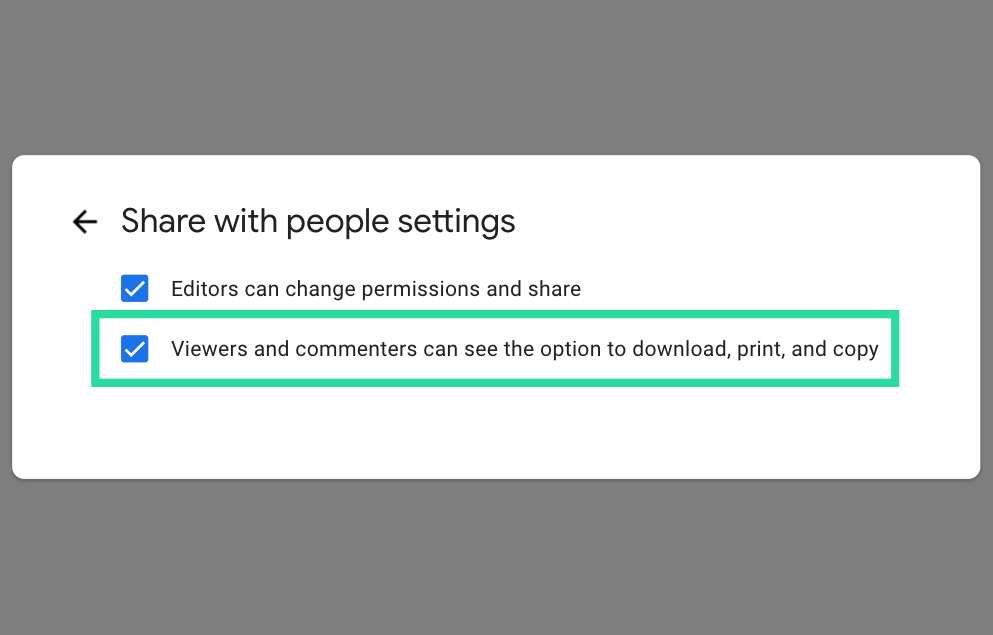
Besides letting other participants change the contents of your Jam, you can allow them to share your Jam with other users as well as change its permissions. You can do so by clicking on the cogwheel icon at the top right of the ‘Share with people and groups’ box and checking the box that reads ‘Editors can change permissions and share’.
Choose whether viewers can download or copy a Jam
You can already select who can be viewers and editors of your Jam on Jamboard. But you can also control if viewers of your Jam can download a copy of your session or copy its contents when viewing it.
To allow viewers to download or copy a Jamboard page, click on the cogwheel icon at the top right of the ‘Share with people and groups’ box and check the box that reads ‘Viewers and commenters can see the option to download, print or copy’. If you want to prevent viewers from copying a Jam content, uncheck the box.
What do you have to say about using Jamboard inside Google Meet? Do you think it will be helpful for you if you’re an educator? Let us know in the comments below.