Taking a screenshot on an iPhone is pretty easy, you hold the Volume Up and Side buttons together until you see a preview of what’s on your screen. But what do you do when you want to capture something beyond the size of your screen – maybe a webpage that you’re scrolling through or a document that you’re reading?
Fortunately, Apple offers a native tool on iOS to take scrolling screenshots and you can trigger it the same way you would take a normal screenshot on your iPhone. In this post, we’ll explain how you can capture scrolling screenshots on an iPhone and where you can access them.
When and where can you take scrolling screenshots?
You can take scrolling screenshots on an iPhone when you’re viewing a webpage, document, or email on your screen. You can take screenshots of webpages on both Safari and Google Chrome, but this functionality is yet to support Firefox and other web browsers.
Similarly, you can take scrolling screenshots for emails in Apple Mail but it doesn’t work inside Gmail or other mail apps. As for documents, scrolling screenshots can be taken on any vertical loading files and graphics including Pages, Numbers, Keynote, and other natively supported apps from Apple. You cannot take scrolling screenshots within the Settings app on iOS.
Related: How to Make iPhone Keyboard Bigger: 5 Ways Explained
How to take scrolling screenshots on an iPhone
Apple lets you take screenshots longer than the screen size of your iPhone in the same manner as you’d take any other screenshot on the device. Before you start, go to the screen or page where you want to capture a scrolling screenshot.
- To take scrolling screenshots, first trigger a normal screenshot by following these instructions:

On iPhone with Face ID: Press the Side button and Volume Up button simultaneously and release until you see the screenshot thumbnail appear in the bottom left corner.
On iPhone with Touch ID: Press the Side button and Home button simultaneously and release until you see the screenshot thumbnail appear in the bottom left corner. - When the preview of the screenshot appears at the bottom left corner, tap on it.

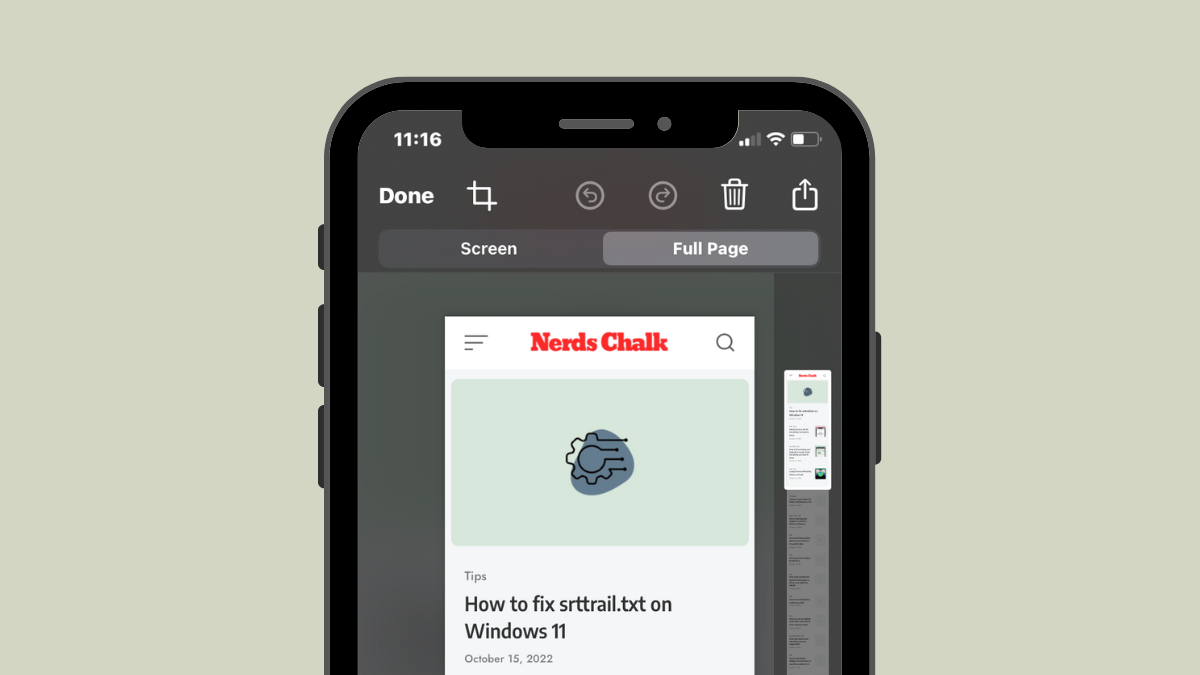
- The screenshot will now open up in fullscreen view. On this screen, tap on the Full Page tab at the top.

- When you do that, the screenshot will expand to the entire page or document you were viewing on the screen. On the right-hand side, you will see a vertical seek bar, a part of which will be highlighted to show you the visible portion of the entire page.

- You can drag around this highlighted box to scroll through the long screenshot and view the parts that are available in the screenshot.

- If you wish to save the entire page or document in a single screenshot, you can skip this step. If you wish to include only some portion of the screenshot, you can crop it by tapping on the Crop icon at the top left corner.

- When you use the Crop tool, you will now only see the elongated preview of the scrolling screenshot.

- Unfortunately, you cannot zoom into the page when cropping it, so you must make sure you have located your desired crop area before using the Crop tool.
- You can use the Crop tool to cut portions of the page both vertically and horizontally. To crop the screenshot vertically, drag the top and bottom edges (marked by square brackets) of the screens. To crop it horizontally, drag the left and right edges (marked by small white bars in the middle).

- When you drag it to the desired size, the preview will resize to the cropped area. If you wish to make adjustments to the cropped portion, you can tap on Reset at the top right corner to crop the image again using the above step.

- If you’re satisfied with the cropped screenshot, tap on Done at the top left corner.

- The cropped version of the scrolling screenshot will now be visible on the main preview with a smaller vertical seek bar on the right since the unwanted portions of the screenshot have been removed.

- From here, you can use the Markup tools to highlight or annotate the screenshot as desired.

- Once you’re done making all changes, tap on Done at the top left corner.

- You will now see a popup menu at the bottom portion of the screen. Here, tap on Save PDF to Files.

- On the next screen, go to the location where you want to save the screenshot. You can also rename the screenshot by tapping on the name bar at the bottom. After you’re done naming and selecting the destination inside Files, tap on Save at the top right corner.

The screenshot will be saved at your chosen location inside the Files app.
Related: What is Safety Check on iPhone
How to access scrolling screenshots on an iPhone
While the mechanism of taking normal and scrolling screenshots remains the same, they’re not saved in the same location on your iPhone. Normal screenshots get saved in PNG format and are accessible inside your Camera roll when you open the Photos app on your iPhone. Scrolling screenshots, on the other hand, are saved as PDFs because PNG format doesn’t support lengthy images. Since PDF files are accessible inside the Photos app, the only way you can access scrolling screenshots on your iPhone is by opening them inside the Files app.
- To open the scrolling screenshot you just took, open the Files app on your iPhone.

- Inside Files, go to the location where you saved this screenshot. Once you’ve found the PDF file of your screenshot, tap on it to open it.

- The scrolling screenshot will now open in fullscreen from where you can edit it using the native Markup tool or you can share it with other apps on your device.

That’s all you need to know about taking scrolling screenshots on an iPhone.
RELATED


