Any avid Gacha fan can vouch for the kind of emotional and mental investment that goes into creating one’s own Gacha world. This app is not linear in its approach, like games that focus majorly on game-play. Rather, there’s more to it with a special focus on being able to design your own Original Character or OCs as they’re called. In Gacha Club, you can design ten or more of these, depending on which level you’re on as well as how far you want to extend your character base for Gacha Life Mini-Movies if you’re inclined to create those.
But we’re sure that these characters that you designed so painstakingly, with so much love and creativity, using the major roster of edits and customizations offered by the app, are works of art that you want to make sure will never be lost. Basically, you need to safeguard your cool chibi art so that the characters don’t get lost in the din and hum of the game.
Related: How to get Gacha Club

For lack of a better word, the Gacha interface can only be described as….overwhelming.
It takes some getting used to with so many buttons bombarding the screens and so much call to action happening for everything everywhere. If you’re new to the game and still figuring out how to navigate the application, then continue on unless you want to focus on simply saving your Gacha OC directly in which case you can skip the next part.
Related: Cool Gacha Life Backgrounds
Gacha Club basics
If you’ve begun exploring the app, then you have realized that your Gacha Club home page will resemble something similar to the image under this text. The bottom strip is divided into various sections indicating the many aspects and features of the game. We’ve also provided brief descriptions below.

Home
The home section is the heart of the game where you will be able to see a roster of Gacha characters that you’ve either customized as per your own tastes or will be able to should you choose to. There are ten slots for beginners and as you collect enough points and level up, you will be able to add more additional slots.
Studio
The Studio is where Gacha fans create settings and scenes for GLMMs. It has a life of its own with major customization and edit options. Here too, you will be able to play with your characters to your heart’s content.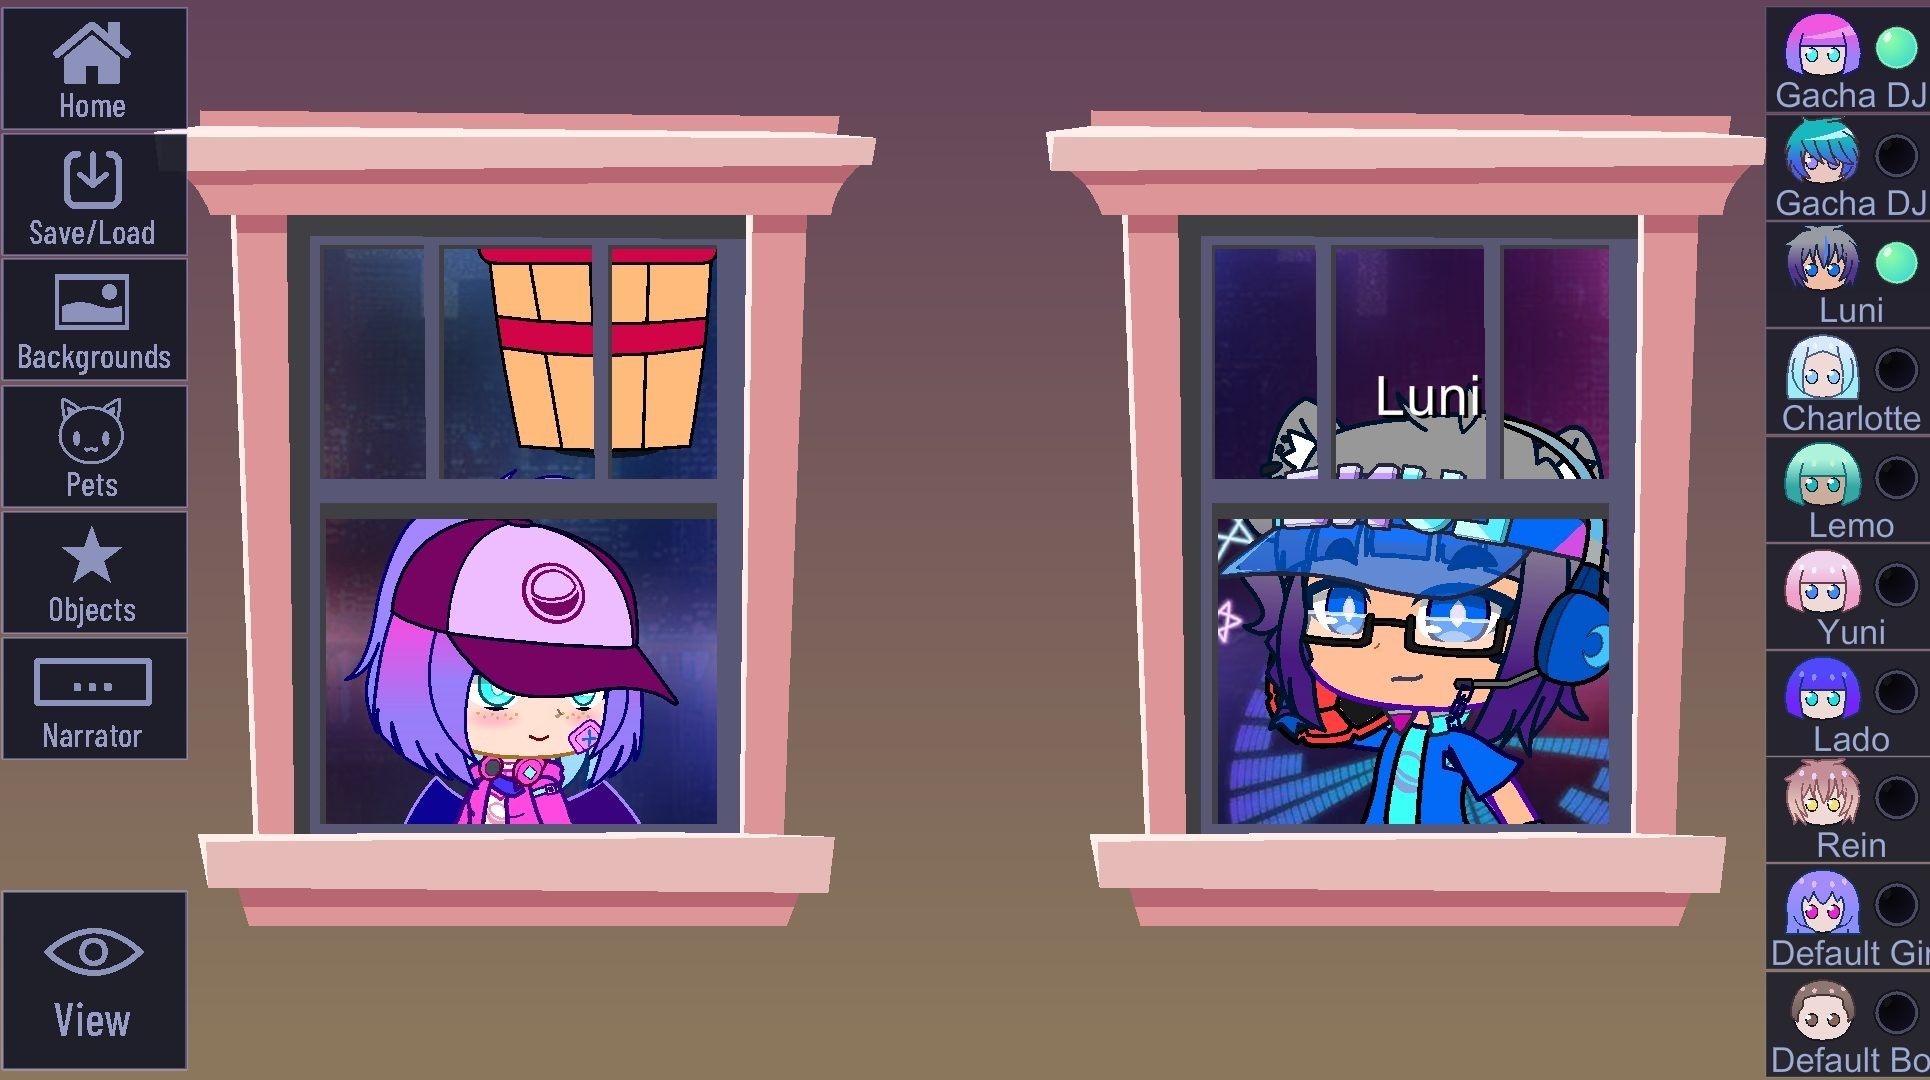
Units- Basically, your Gacha warriors should you choose to go into battle, this is where you upgrade your Gacha’s abilities and powers.
Gacha
This is the section where you can shop for Gacha powers and features. To be able to acquire anything cool here, you’ll need to make sure that you have enough diamonds and have leveled up decently.
Battle
As the name suggests, this is where all the battle gameplay happens. Going into battle is also the most effective way to earn points and level-up.
Mini-Games
Finally, the more relaxed and chilled-out section where you can play fun stress busters and earn those few 10 pointers that are holding back your level-ups.
Related: What is Gacha Club OC? | Gacha Club OC Ideas
How to save your Gacha character
Using the default back-up option is the simplest way possible to save your character. In the Home section, you will see a profile icon towards the top right half of the icons that are next to your Gacha character like so:

Once you click on it, the back-up menu will open up. There will be 90 slots available here. You can select the slot in which you want to save the Gacha character profile by tapping on any of the available default slots.
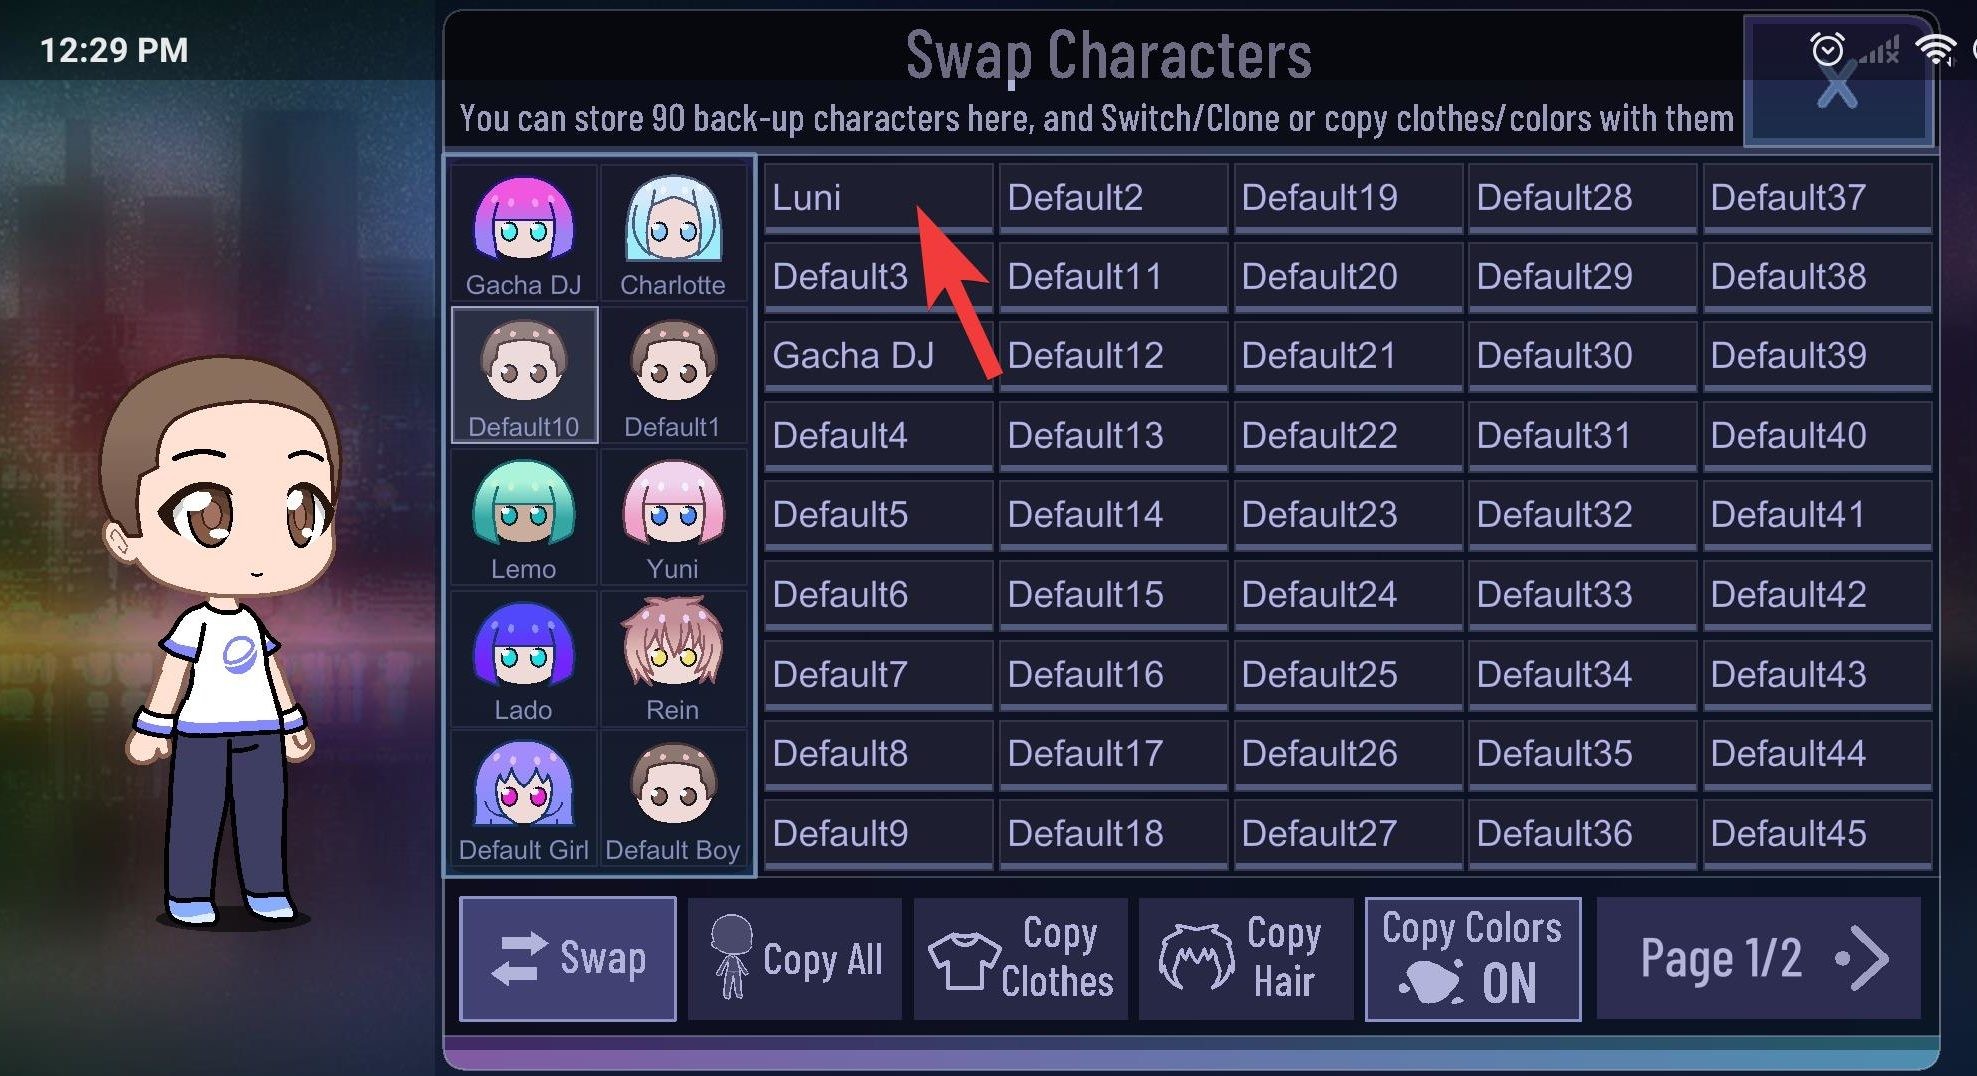
Besides the 10 Gacha slots available, you will be able to create and save Gacha characters in 90 of these backup slots. Unlike the 10 slots though, these backup slots have to be specifically loaded and then you need to swap out a character from a pre-existing slot in order to access this one.
Another cool aspect of the backup slots is that you can copy the clothes or styles of any of your backed up OCs to other OCs as well, creating scope for mixing and matching Gacha teams should you like to do so.
While this is the more immediate method to save your Gacha characters, there are two major problems with this back-up that Gacha users tend to run into. Firstly, the app, for whatever reason, does not ask for an extra ‘Are you sure’ kind of confirmation when you’re looking to backup your Gacha OC, so if you will accidentally tap on an occupied slot, then your new OC character will replace the one that was originally saved in it, consequently making you lose a character forever.
The second problem that you will run into is that your Gacha characters will only be saved in the app and there is no additional backup which means that when the first problem occurs, the second one will only exacerbate it. So you need to have a back-up for your saved characters in a different location other than the app.
This is where the export/import function comes into play.
Related: Is Gacha Club available on iOS?
How to Import/Export Gacha characters
Gacha Club has an option that allows the user to export the code for their OC characters so that they can save it outside the app. The whole premise around Import/Export is that every Gacha OC has an original code that can be used for certain purposes. There is a certain catch to the Import/Export function though.
You need to be on level 5 and have enough diamonds to be able to generate the shortcode that can be shared directly across different platforms like Discord and Amino. If you don’t have enough levels, then there is an option called offline export and offline import that you will be able to use to perform the same functions but with a much longer code.
Before we delve into how the Import function works it’s important to understand how to Export the OC’s code first. Let’s see how to export the OC’s code.
How to export a Gacha OC
First, select the Gacha character whose details you want to export. Towards the right, along with all the editing options, you will also be able to see an option called ‘Profile’. Click on it.

In the Profile section, you will see the Import/Export option. Click on Export.

Now, if you have enough points and are at a sufficient level, the Gacha app will share a small little code that can be easily copied and used during the import process. If you don’t meet the necessary criteria, though, you will see an extremely long code like this:

Tap on Copy all and then you can do one of the following things:
- Paste the code to a word file and then name it accordingly and save it.
- Mail it to your Gmail id and keep it on your mail at all times.
- Or copy the code and import the character features for another character in your Gacha life app.
For the third point, which uses the code to replace the original features of another character with features of the character that represents the code, is where the Import button comes into play. It does not necessarily have much to do with the saving aspect of the article, but rather to understand the benefits of saving a character that goes beyond maintaining a collection of cool Gacha figures.
How to import a Gacha character
Retrace the previous process to arrive at the Profile section where you will see the Import button. Once you tap on Import, you will be taken to a page that looks like this:
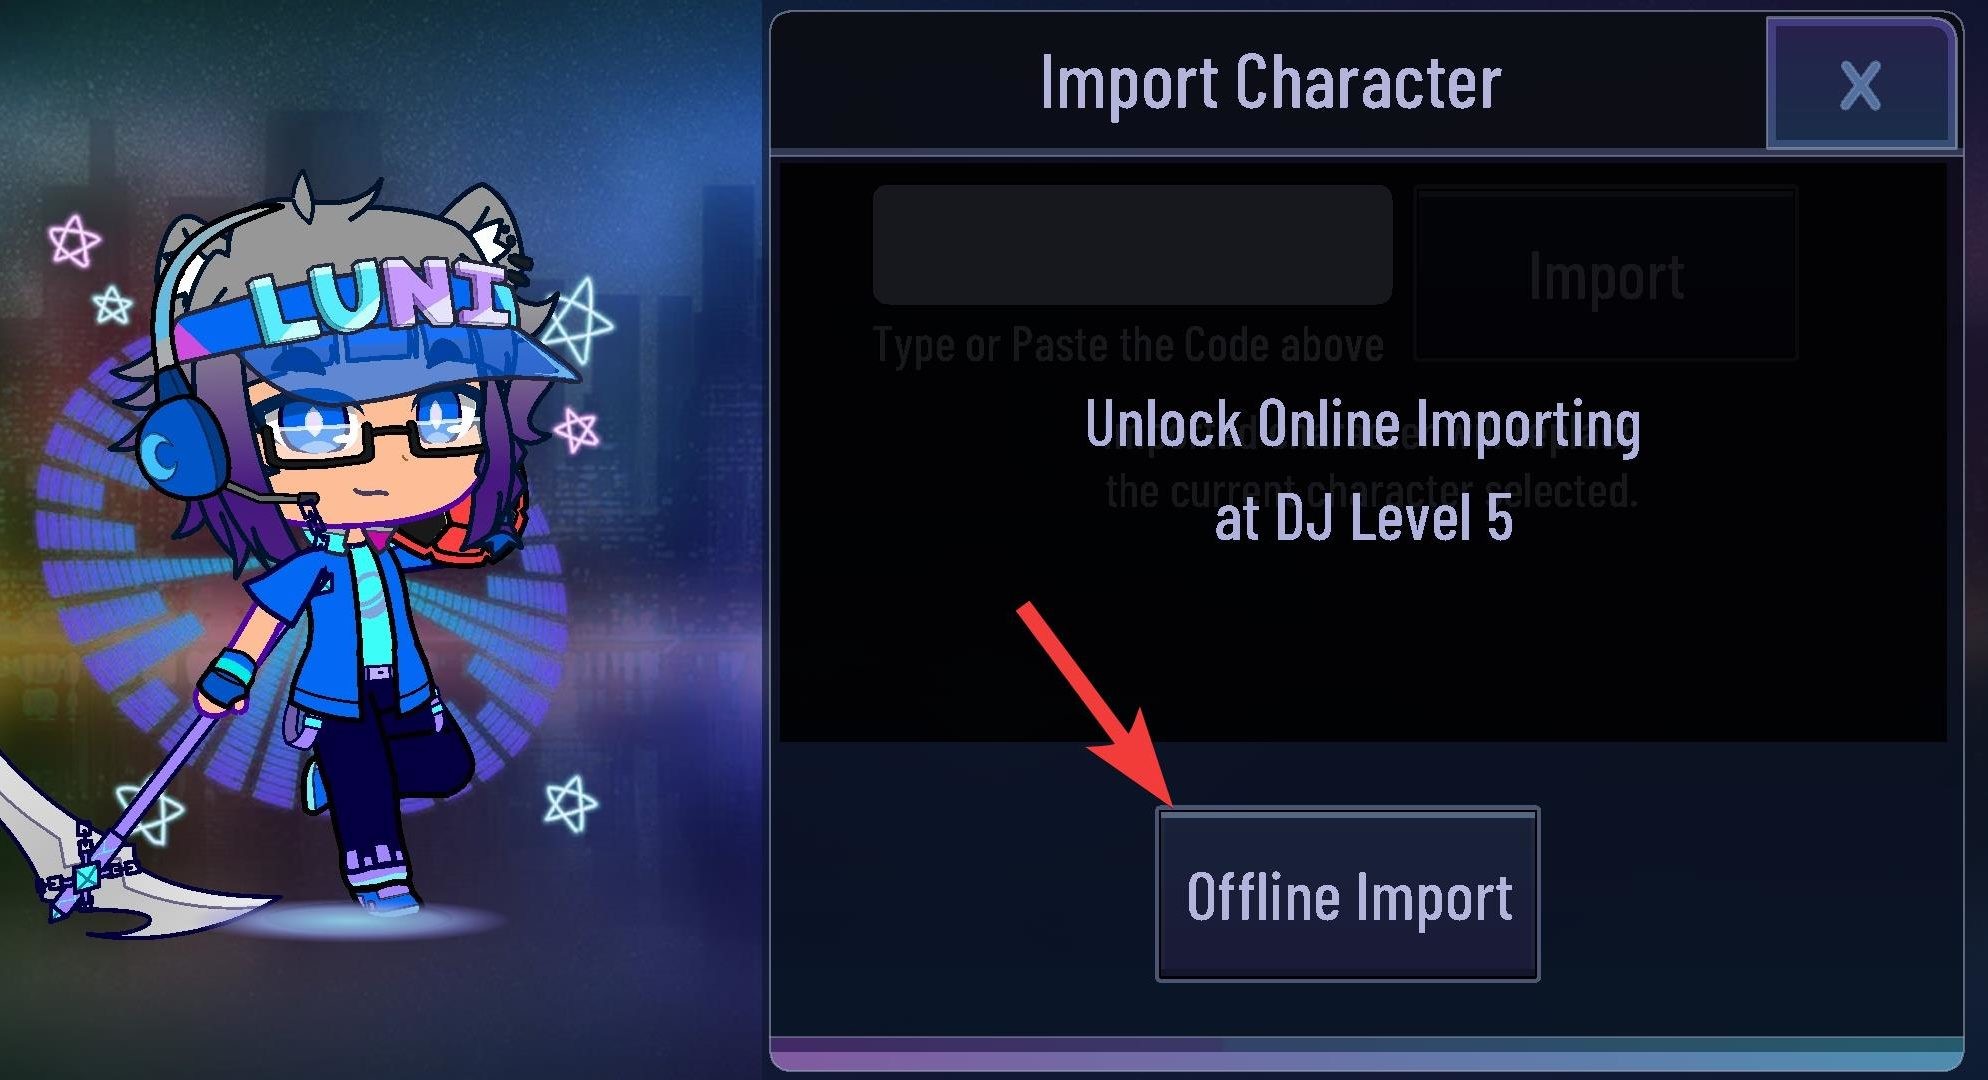
If you qualify for the shortcode, then it would have been a simple matter of inserting it in the little paste box. However, since that is not the case for our Gacha OC, we are going ahead with the Offline Import option.
Once you tap on the Offline Import option, you will see a much bigger box in which you will be able to paste the code that you learned to copy as part of the how-to export tutorial.
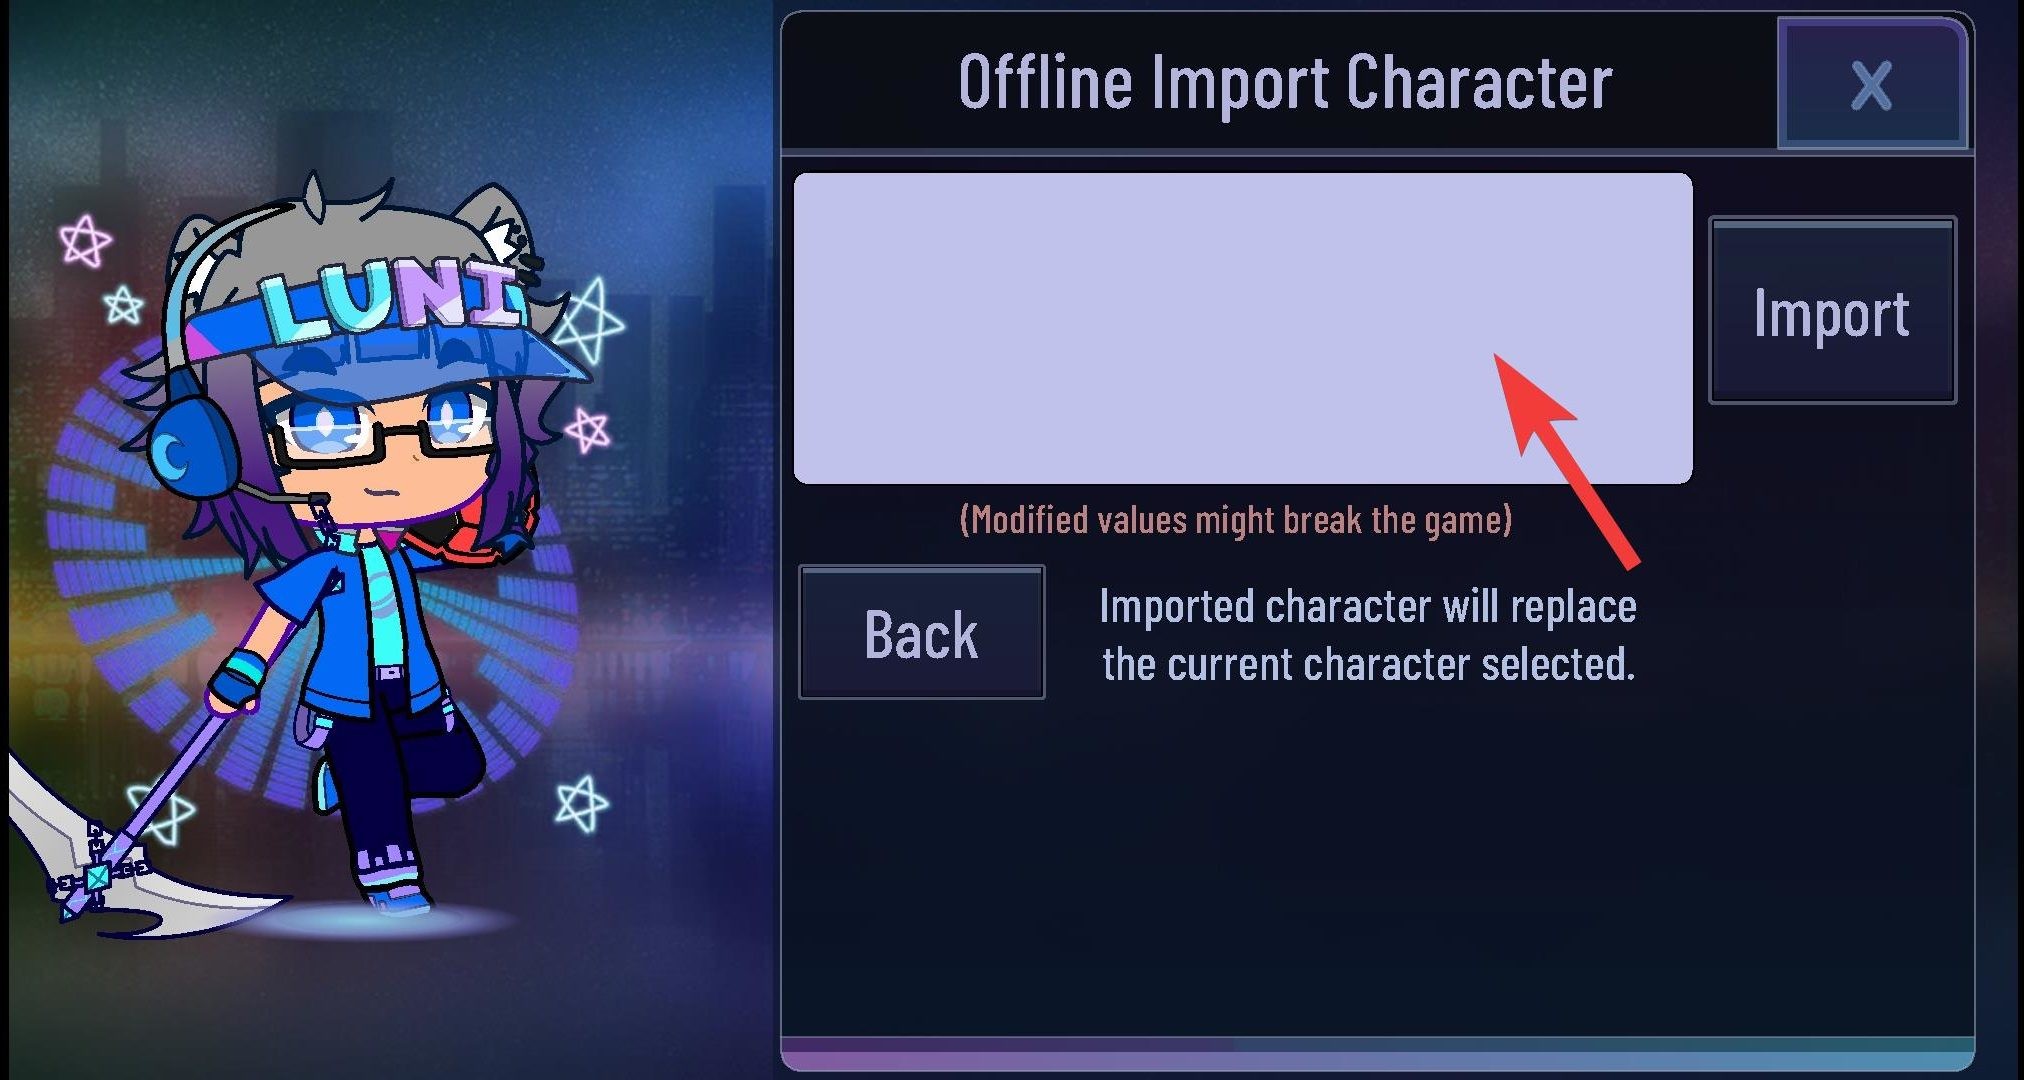
Awesome! You now know how to preserve your amazing Gacha collection as well as how to use your Gachas to customize each other.
If you want to learn more about aspects of the Gacha app, do let us know in the comments. Take care and stay safe!




Is there a limit to how many characters you can import on gacha club? Because when I got 5 characters imported, I tried to import a 6th character but it’s not letting me.
all man this app is so cool that i wish i can download it but my school chromebook does not want me to 🙁
Hello thank you for all the tips thats all what i wanted to say-.
Thank You for all the time and trouble that you put into writing this article. However, even tho this article was very educational on learning how to save your OC’s, individually, how can I save/transfer, my whole experience of GL, so that I can open up my GL App on another device, other than the one I originally created my OC on? Basically, what im trying to say is, I’m considering getting a new phone. How can I transfer my whole GL experience onto my new phone, without loosing any of my data? Please help,Desperate abd Despair!
*and
Plz tell me how to save a imge of it idk how
So how do I actually access the image of my gacha character now that the code is saved?
If I log out the account because I have a new phone cell, will I get all my saved character if I login again to my account in my new phone cell?