Only the creator of the presentation knows how many days and hours worth of effort goes into creating a 30-minute presentation. While a chunk of the time goes into prepping the presentation, the time that goes into beautifying the presentation cannot exactly be downplayed either.
Thanks to all the cool features available in PowerPoint, a lot of the process becomes super easy to manage and execute. One very useful trick that PowerPoint offers is the ability to remove the background from a picture, which is actually a Photoshop skill but executed easier and quicker on PowerPoint. So how do you go about removing the background from a picture using PowerPoint? Here’s everything you need to know.
Related: How to remove and change the background from a photo on Android
How does the Remove Background feature in PowerPoint work?
There is a very handy Remove Background feature in PowerPoint by virtue of which you can remove the background of an image that you have inserted in a slide. Oftentimes, when you want to use the subject from a picture or only a part of the picture, this tool comes in handy. While the tool is not as sophisticated as a Photoshop tool, it gets the job done if you are in a hurry or need a quick fix.
There are two ways to take advantage of the Remove Background feature in PowerPoint. Both ways depend on the kind of image that you’re working with. If the image has a solid distinguishable background, then you can simply make the background transparent and you’ll get your desired result.
On the other hand, if the image you’re working with has a gradient background with a lot of noise, then you will have to use the Remove Background function which has a slight learning curve. Nevertheless, the results are good and you will thank yourself for learning how to use this PowerPoint feature.
Related: How to change the video background on TikTok
How to remove the background of a picture using PowerPoint
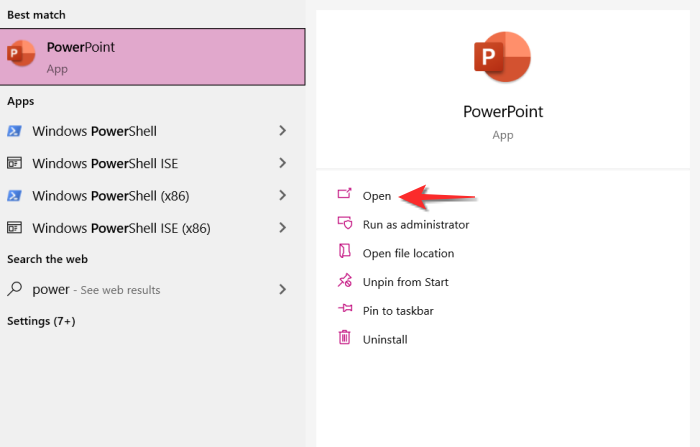
Launch Microsoft PowerPoint on your system from the Start Menu.
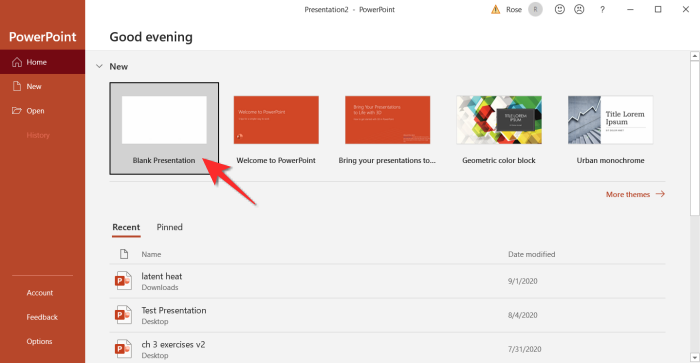
Open a Blank PowerPoint so that you can execute the next steps.
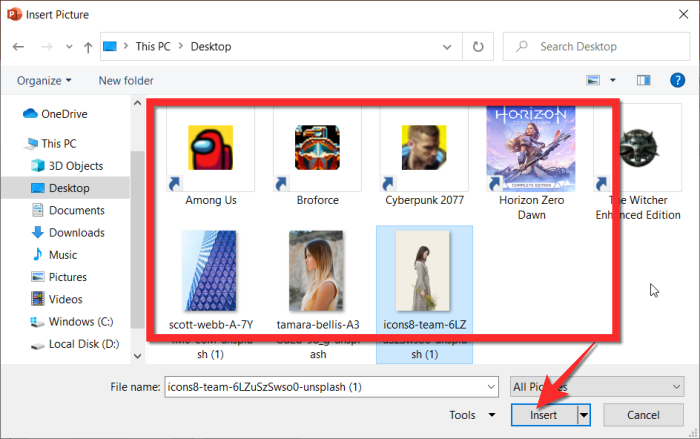
Click on Insert from the edit ribbon present at the top of the presentation. Click on Pictures and then choose This Device from the Insert Picture From section.

Now select the image that you want to edit and place it on a blank slide.
Once the image is placed on the slide, click on it to select it.

You will now see a new section on the edit ribbon on top called Format. Click on it.

Towards the left, locate the Remove Background option and click on it.

When you do this, the background of the image will become magenta. The magenta color indicates the area that PowerPoint wants to remove.
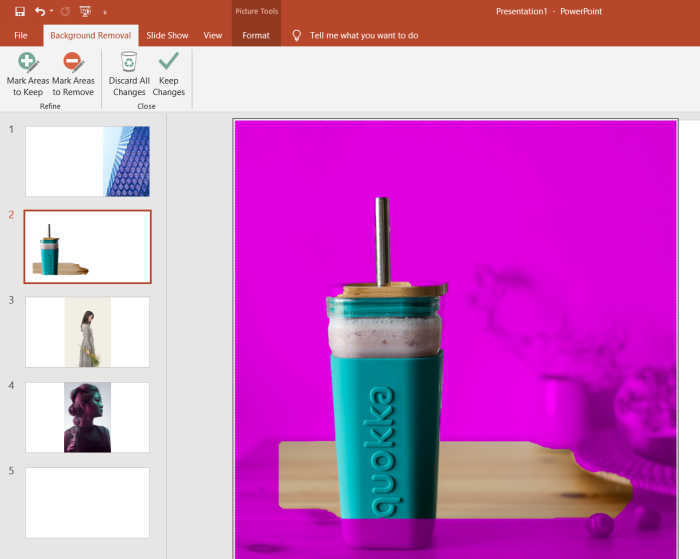
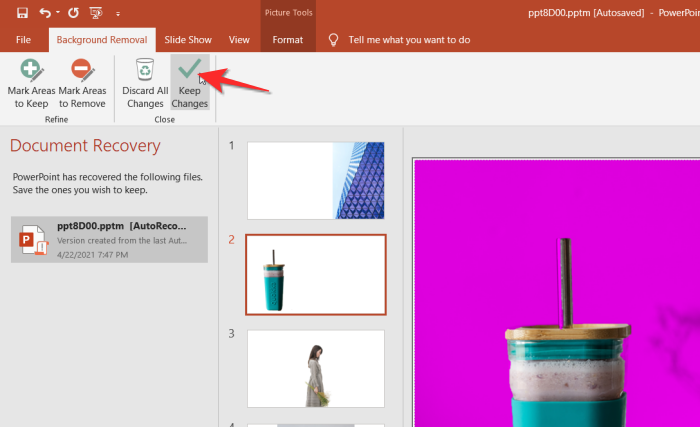
There will be four options that appear in the Remove Background section when you click on it. Mark Areas to Keep, Mark Areas to Remove, Discard All Changes and Keep Changes. We will focus on the former two functions of Remove Background.

Observe the image that you are cleaning up. If any area that’s part of the image that you want to keep is magenta, then you will need to use the Mark Areas to Keep function. So click on the Mark Areas to Keep button.

Now gently draw over the areas that you want to keep in the final image using the mouse.

You will also note certain parts of the background that are unwanted, this is when the Mark Areas to Remove function comes in handy. Click on the Mark Areas to Remove button.

Then using your mouse mark the areas that you want to remove carefully.

Once you are satisfied with the way your image looks, click the Keep Changes button and that’s it, you’re done removing the background of your image!
How to make a picture background transparent using PowerPoint?
Follow the first six steps from the above section and continue with the next steps. Make sure to choose an image with a solid background as this method only works effectively when the background is absolutely discernable like this one.

In the Format section, click the Color menu. Towards the bottom of the menu, you will see the Set Transparent Color option. Click on it.

After clicking, drag your mouse on the background and click on it, the background will immediately disappear.

How to save the image with transparent background
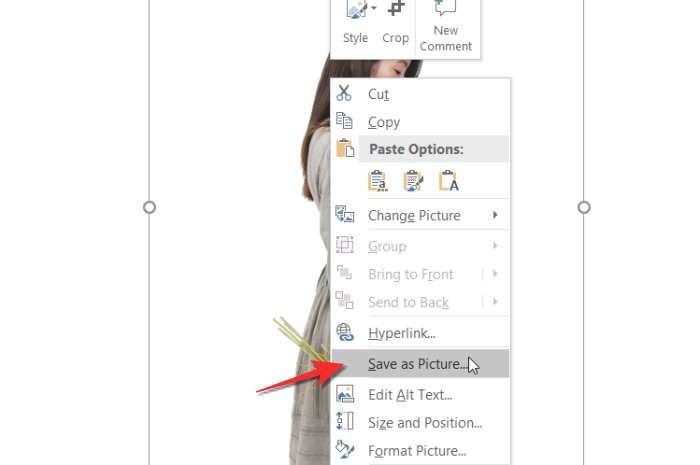
A cool benefit of this feature is that you can also save the image in JPEG or PNG format and use it in other places. All you need to do is right-click the image and click on Save As from the menu.
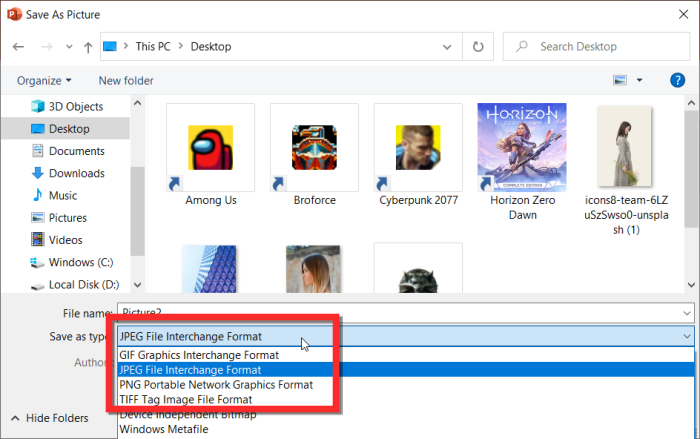
When you do this, PowerPoint will prompt you to save the file in the location of your choice. At this point, you can also choose whether the image should be JPEG or PNG.
While this is quite a handy feature, do keep in mind that PowerPoint does not replace a professional photo editor under any circumstances. Depending on how complicated the image is, the result may not be as great as you would expect. So as reliable as the feature is, it also depends on the kind of image that you are editing so proceed accordingly. Take care and stay safe!
RELATED
- How To Add Bullets and Numbers on Microsoft Powerpoint
- How To Add a Chart or Graph To Your Powerpoint Presentation


