Mobile payments have become ubiquitous lately but you can also use your smartwatch to make contactless payments with ease. Like Apple’s Watch Series, smartwatches running on Google’s Wear OS also support NFC-based contact-less payments, meaning you can use your watch to make transactions without needing to enter your payment info or taking out your phone every time.
In the following post, we’ll guide you through the process of setting up Google Pay on your Wear OS watch, explain things you should know before using it, and how you can make contactless payments with it.
What do you need?
Before you set up Google Pay on your smartwatch, you may want to know all the things you will need to use Wear OS to make a payment. For this to work, you should have the following things with you:
- Your smartwatch runs on Wear OS, has NFC connectivity and supports Google Pay.
- You reside in any of the supported regions – UK, US, Australia, Canada, France, Germany, Switzerland, Italy, Poland, Russia, and Spain
- You own a card from a supported bank in your region. Check here for a list of supported banks.
Does my Wear OS watch support Google Pay?
While there are a ton of Wear OS smartwatches in the market, only a handful of them currently support payments via Google Pay. If you’re in the market for a smartwatch that lets you make contacts payments or if you already own a smartwatch and want to know whether or not your watch supports it, take a lot at the list below:
- Armani Exchange
- Citizen CZ Smart
- Diesel On Axial
- Diesel On Fadelite
- Emporio Armani Smartwatch 3
- Fossil Gen 5E
- Fossil Gen 5 Julianna
- Fossil Gen 5 Carlyle
- Fossil Gen 5 Garrett
- Fossil Explorist HR
- Fossil Venture HR
- Fossil Sport
- Huawei Watch 2
- Hublot Big Bang e
- Kate Spade Scallop 2
- Michael Kors Access Sofie Heart Rate
- Michael Kors Access Runway
- Michael Kors Access MKGO
- Michael Kors Bradshaw 2
- Misfit Vapor 2
- Misfit Vapor X
- Montblanc Summit 2
- Montblanc Summit 2+
- Montblanc Summit Lite
- Moto 360 2019
- Movado Connect 2.0
- Puma Smartwatch
- Skagen Falster 3
- Skagen Falster 2
- TAG Heuer Connected Modular 45
- Tag Heuer Modular Connected 41
- TicWatch Pro
- TicWatch Pro 3
- TicWatch Pro 4G/LTE
- TicWatch Pro 2020
- TicWatch C2
- TicWatch C2+
How to add a card to your Wear OS watch
If you can confirm that you’re eligible for using Google Pay on your Wear OS device, then it’s time you start setting it up for the first time.
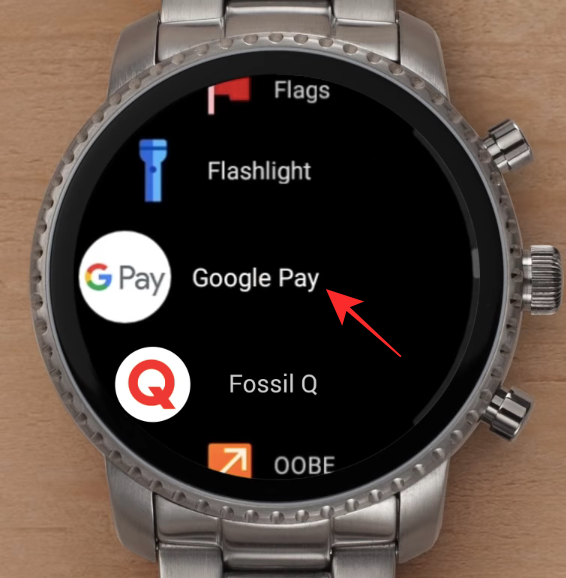
To add a card to your Wear OS smartwatch, unlock your watch’s screen and launch Google Pay on it.
On the app’s main screen, tap on the ‘Get started’ option.

If you haven’t already created a screen lock for your smartwatch, you will be asked to create one.

This is necessary to authenticate your contactless payments and to make sure that no-one else is misusing your watch to make transactions.
Once a screen lock has been set, you will be asked to proceed to the setup process on your phone. This is the phone you used to set up the Wear OS watch and the one you connect for getting your activity details.

On your phone, follow the on-screen instructions for adding your credit or debit card number and other details to your watch. It’s important to know that adding a card to the Google Pay on your watch doesn’t add it to the Google Pay on your phone.

Depending on your card type and bank, you might have to verify the card addition with your bank. This generally happens with the help of a verification code that’s sent to you as text or email. On other occasions, you might be charged a meager amount like $1 as a token of verification.

Once the card has been added, it will be visible inside your Google Pay on your watch.

You can add more cards to your Google Pay by repeating this process.
How to make a payment using your smartwatch
When you’re at a POS (Point of Sale) system that supports contactless payments, you can go ahead and send your payment to the merchant right from your Wear OS smartwatch.
To do this, open the Google Pay app on your watch and hover your watch above the payment terminal. If your connection with the payment terminal is successful, you will feel a vibration or hear a sound from your watch.
Google says if you’re asked, select the ‘Credit’ option on your screen, regardless of your card type.
You might have to enter your card PIN if you’re making a payment using your debit card.
You will be shown a confirmation screen on the Google Pay app on your watch to indicate that the payment was successful.
For higher chances of success with Google Pay on your Wear OS watch, we suggest you follow these tips:
- Unlock your smartwatch before holding it above the payment terminal.
- Keep the Google Pay on your watch open and check if the card you want to use is visible inside the app.
- For a seamless pairing with a contactless terminal, try holding your watch at different angles over the terminal. That’s because the position of the NFC antennas is different on various watches; so holding one of your watches the same way as another might not work for you.
- This is probably the most important point – you HAVE to make sure that the merchant’s payment terminal supports contactless payments.
How to Manage your cards on Wear OS
If you have started using Google Pay on Wear OS, then this is just the start. You can do a whole bunch of other things on the app right within your watch.
Make a card your default for all payments
If you’re someone who uses multiple cards daily, then chances are that you might have added a bunch of them to your Google Pay app on your watch. Of the multiple cards you would have added, you might want to set one of them as your default options for most of your payments.
By default, the first card you add to the Google Pay app on your watch is the one that’s set as default.
If you added multiple cards to the app, you can still set another credit/debit card as your preferred option.
To get that done, open the Google Pay app on your watch, scroll down to the card that you want to choose as your default option, and tap it.
When the card loads up on your watch’s screen, swipe from the 3-dots icon and then select the ‘Set as default card’ option.
Pay using a card not set as default
Users of multiple cards can still make payments from ones that aren’t set as default. The only downside is the extra step of scrolling and locating the card you want to pay with.
To make a payment with a card you haven’t set as default, open the Google Pay app on your watch, scroll down and find the card you want to purchase with.
Once the card has been loaded onto your watch screen, it should show the “Hold to terminal” message. When it does, hover your watch over the payment terminal until you hear a sound or feel the watch vibrate.
If the selected option is a debit card, you might have to select ‘Credit’ from the options that appear and enter your pin for verification.
Check your previous purchases
Google Pay on Wear OS allows you to check all of your previous purchases on every card. For this, open the Google Pay app on your watch and select a card whose past transactions you want to view.
Once the card loads up on the watch screen, swipe up from the bottom to view the transactions you made with the selected card.
Remove a card from your account
If you no longer wish to use a card you once added to Google Pay on your watch or if the card details have expired, then you can remove it from your Wear OS device.
For this, open the Google Pay app on your watch, scroll down to the card you want to remove, and tap on it.
When the card screen pops up, swipe up from the bottom of the screen to load up ‘More’ options. Select the ‘Remove’ option on your screen to delete the card and all its details from your Wear OS smartwatch.
Having problems with Google Pay on your watch? Here’s how to fix them
As easy as it may be to set up Google Pay on your smartwatch, you might still encounter problems for several reasons. The following are a handful of issues that you may face when setting up or making payments through Google Pay on Wear OS and solutions for them if there are any.
Can’t add your card
This problem will show up only when setting up a card on Google Pay for the first time. As for why this error pops up, it’s because you entered an unsupported bank or card. There’s no way to solve this issue but you just have to add another card that supports Google Pay in your region.
You can check the list of participating banks and supported cards here. If you own a card that supports contactless payments through Google Pay but you still can’t add it, you will need to contact your bank.
Your card was removed automatically
For using Google Pay on your watch, you must set up a screen lock on Wear OS so that your card details are safe and no one other than you can make purchases without your approval. If, after adding your card to Google Pay, you removed your screen lock, all the cards you added to Google Pay will be deleted from your watch.
The only way to get them back is by creating a screen lock again to your watch and then repeating the process of adding a card for all of your cards. You can create a screen lock on Wear OS by going to Settings > Personalization > Screen lock.

“Network error” pops up when adding a card
If you see this error when adding a card, it’s because your watch isn’t able to establish a connection to the internet. To solve this, make sure your watch and phone are paired and there’s an internet connection (cellular or WiFi) on your phone.

“Can’t connect” error
The “Can’t connect” error appears when you’re adding a card to Google Pay and your watch screen freezes. To solve this, switch ON the Bluetooth connection on your phone and open the Google Pay app on your mobile device.

If the dialog at the top says “Connected” under your watch name, then you can go ahead and add your card details on your watch.
If it shows as “Disconnected”, follow the steps mentioned in this Google Support page to fix the connection between your watch and phone.
Your Wear OS device says “Can’t check accounts”
This error pops up when your watch isn’t able to connect to your Google account. To fix this, open the Play Store app on your watch, swipe down from the top, and tap on the ‘My Apps’ option.
On the next screen, scroll down and select the ‘Google Pay’ app from the list.
If there’s an update for the Google Pay app, it will show up on your screen. Tap on the ‘Update’ button and wait for it to get installed on your watch.
Once that’s done, re-open the Google Pay app on Wear OS and check if you’re getting the same problem.
Loading circle keeps looping
If the Google Pay app’s main screen shows a loading circle going round and round, close the app and re-open it. If that doesn’t fix things, you can restart your watch by pressing and holding the power button and then tapping on ‘Restart’.
Google Pay asks you to restart your phone

If Google Pay prompts you to restart your phone, then go ahead and restart your mobile device but not your Wear OS watch. After your phone restarts, wait for a minute so that your phone installs all the updates for you to use your watch.
Now, re-open the Google Pay app on your watch and tap on the ‘Retry’ option.
That’s all we can tell you about using Google Pay on Wear OS.
RELATED