
The stable Android 10 update topped with One UI 2 is now available for the Samsung Galaxy S9 and S9 Plus handsets. We have added the download links of the stable firmware for the devices, as also the installation guides to help you install the updates. The stable Android 10 update is available as builds DTAA in Europe and DTA5 in the US, with full software version being G960FXXU7DTAA and G965FXXU7DTAA for S9 and S9 Plus respectively in Europe, and G960USQU7DTA5 and G965USQU7DTA5 for S9 and S9 Plus respectively in the US.
Before you download the Android 10 update, make sure you carefully read the warning and compatibility sections given below.
→ Find the new features in One UI 2 here
How to install One Android 10 One UI 2 update on Galaxy S9, S9 Plus
Warning!
Do not try anything given on this page if you do not completely know what you are doing. In case any damage occurs, we won’t be held responsible. make sure you match the model no. of your device with the model no. of the download file.
Compatibility
This guide is compatible only for the Galaxy S9 and Galaxy S9 Plus handsets. Do not try this on any other device as you might end up damaging your device and permanently brick it.
Backup!
Ensure that you back up all the important data (including photos and videos, contacts, music, videos, files, etc.) on your Galaxy S9.
- How to take a full backup on Android
- How to sync a device folder online
- How to force backup Android data to Google Drive
Downloads
Below are the download links of the stable Android 10 update for the Galaxy S9 and S9+ devices, both for the US and Europe.
Galaxy S9 Android 10 firmware
- For Europe/Asia/Australia, unlocked model SM-G960F:
- Version DTAA (For Germany, but works fine for all the regions in Europe, Asia, Australia, and more)
- For carrier locked US model SM-G960U:
- Version DTA5 (Xfinity Mobile firmware, should work for all the carriers including T-Mobile, Verizon, Sprint, etc. but you may lose carrier-specific features if any))
- For unlocked US models SM-G960U1:
- Not released yet
Galaxy S9 Plus Android 10 firmware
- For Europe/Asia/Australia, unlocked model SM-G965F:
- Version DTAA (For Germany, but works fine for all the regions in Europe, Asia, Australia, and more)
- For carrier locked US model SM-G965U:
- Version DTA5 (Xfinity Mobile firmware, should work for all the carriers including T-Mobile, Verizon, Sprint, etc. but you may lose carrier-specific features if any))
- For unlocked US models SM-G965U1:
- Not released yet
Instructions
- Power off your device. Wait for 6-7 seconds after the screen goes off.
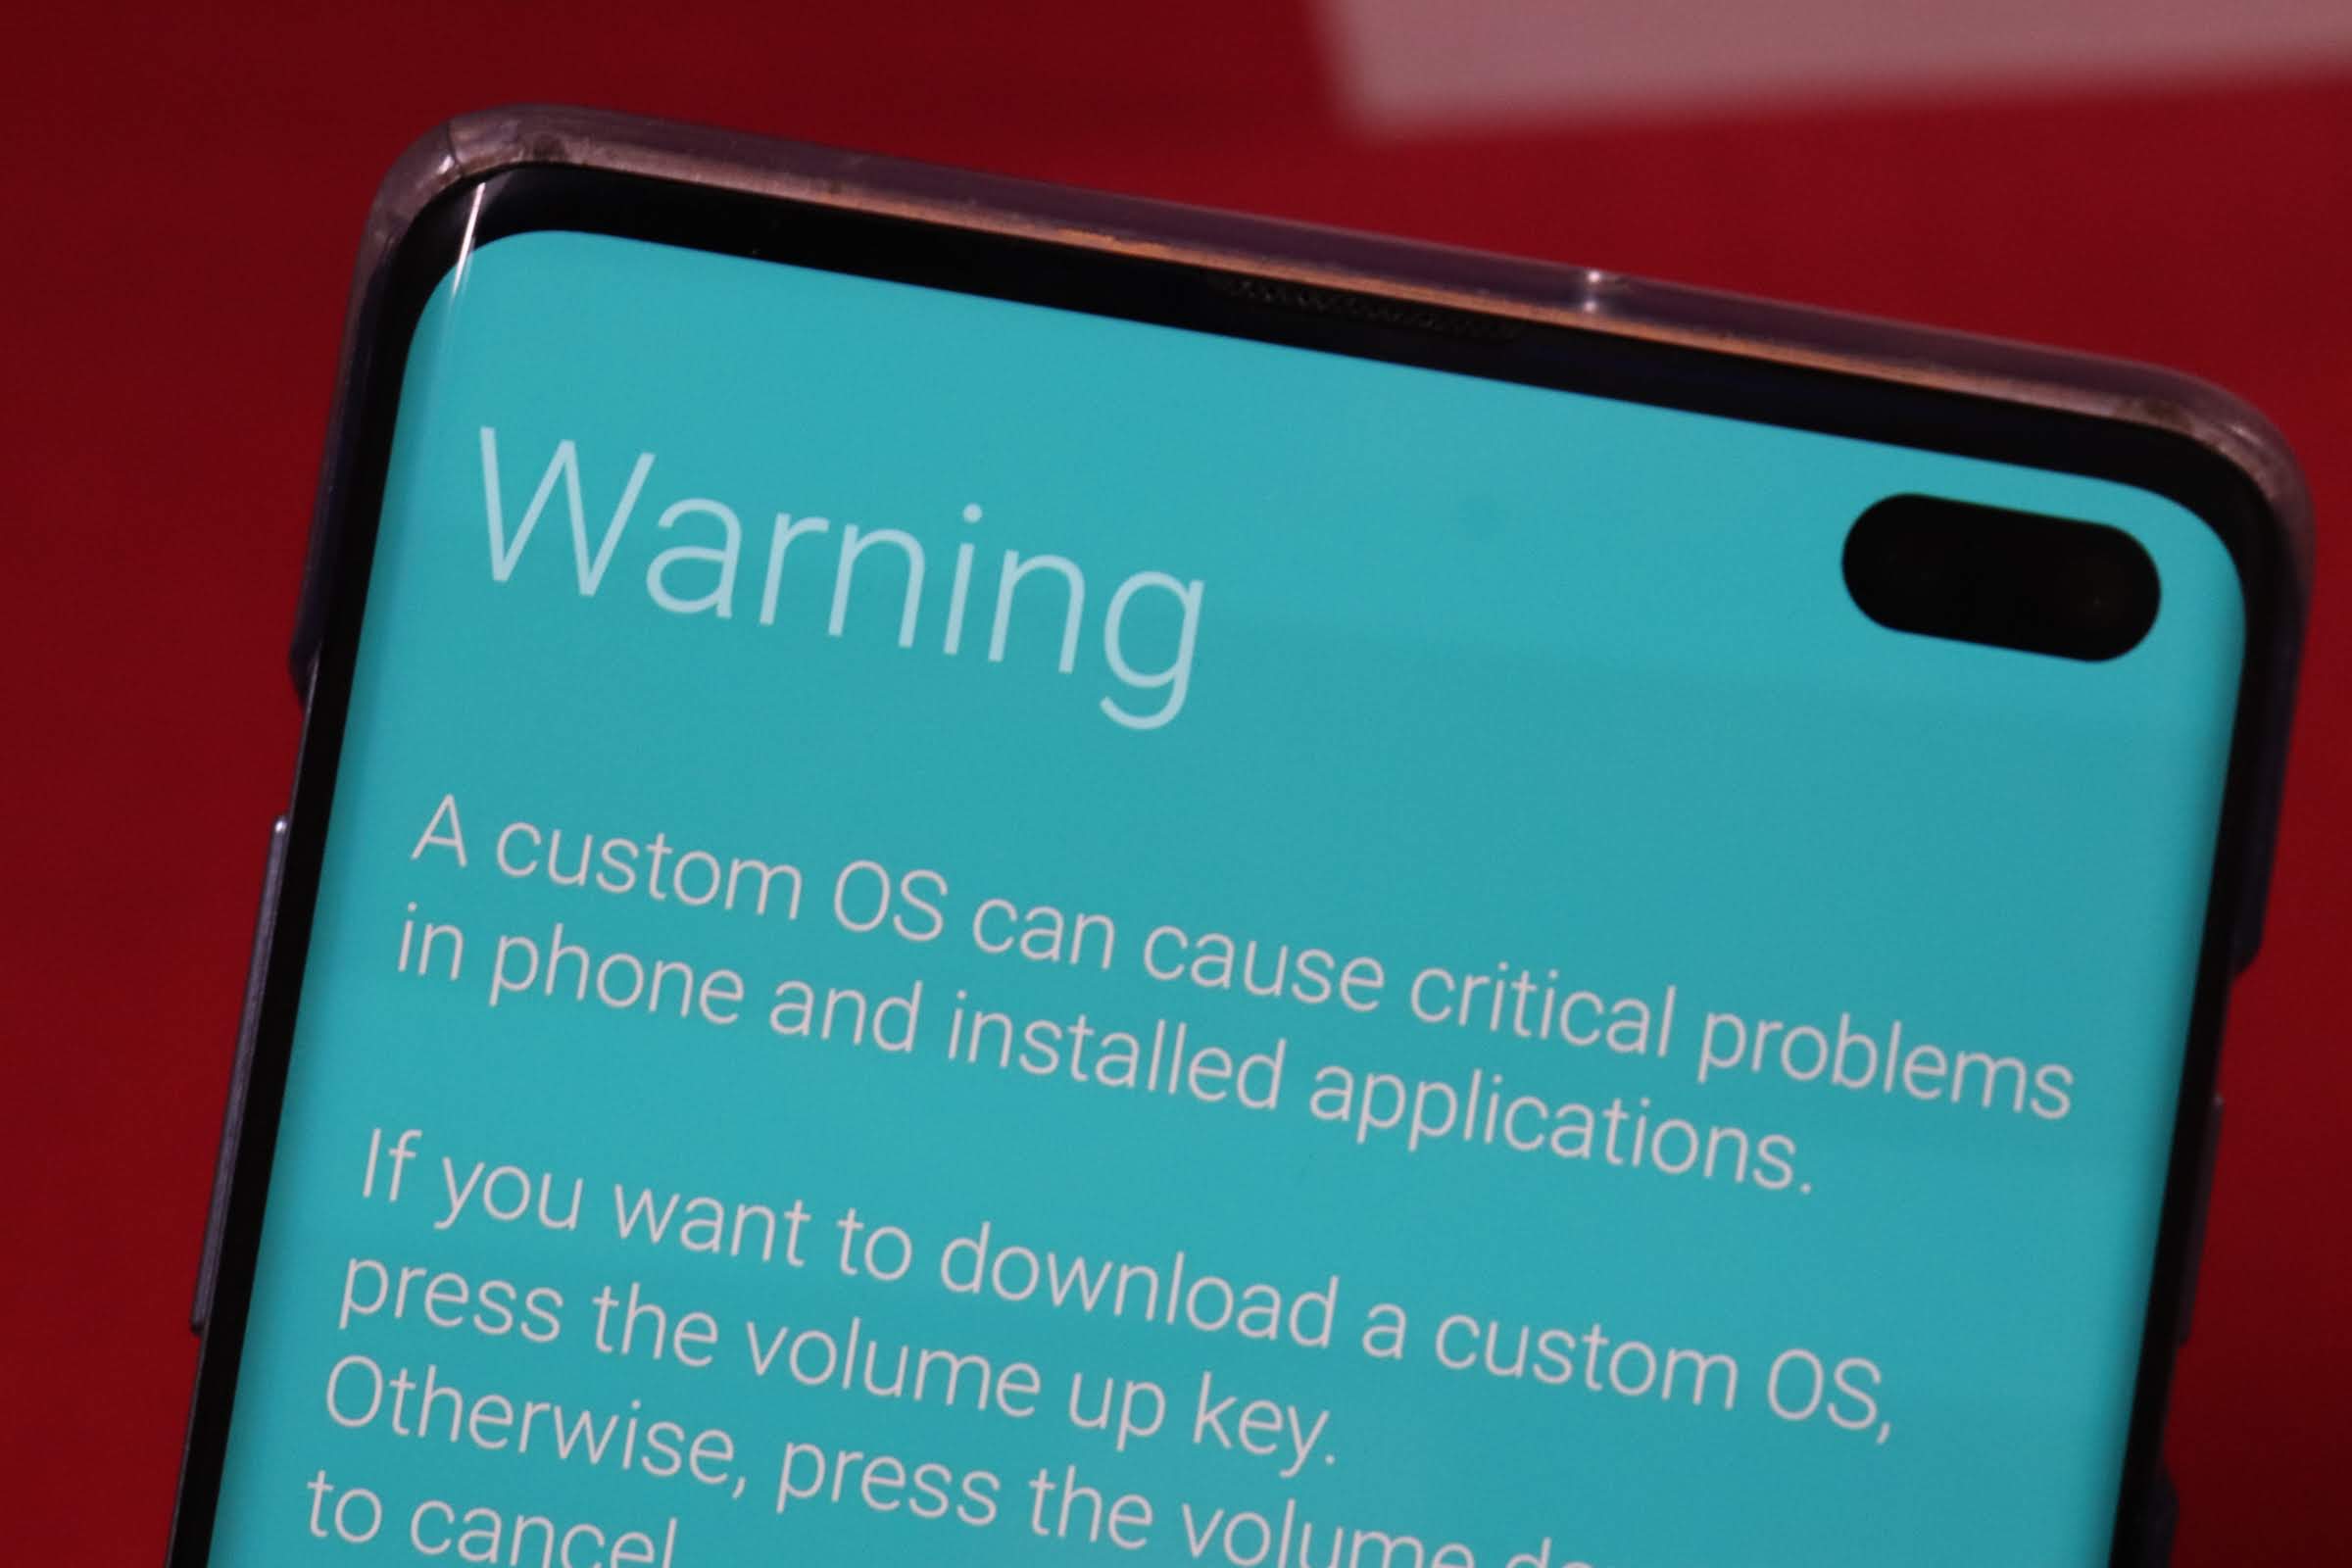
- Connect the device to PC using the USB cable while pressing and holding Volume down + Bixby buttons together until you see the Warning screen (image).
- Press Volume Up to continue to download mode.


- You cannot proceed until you get the Added!! message, which confirms that Odin has recognized your device.
- If you don’t get Added!! message, you need to install/re-install drivers again and use the original cable that came with the device. Mostly, drivers are the problem (look at step 2 above).
- You can try different USB ports on your PC too.
- Click on the BL tab, and select the file beginning with BL text.
- Click on the AP tab, and select the file beginning with AP text.
- Click on the CP tab, and select the file beginning with CP text.
- [Different!] Click on the CSC tab, and select the file beginning with HOME_CSC text. If HOME_CSC file isn’t available, then select the file beginning with CSC text.
Info: When you load files, Odin checks the md5 sum of the firmware file, which takes time. So, simply wait until that’s done and the firmware file is loaded. Don’t worry if Odin gets unresponsive for a while, it’s normal. Binary size will also show up in Odin.
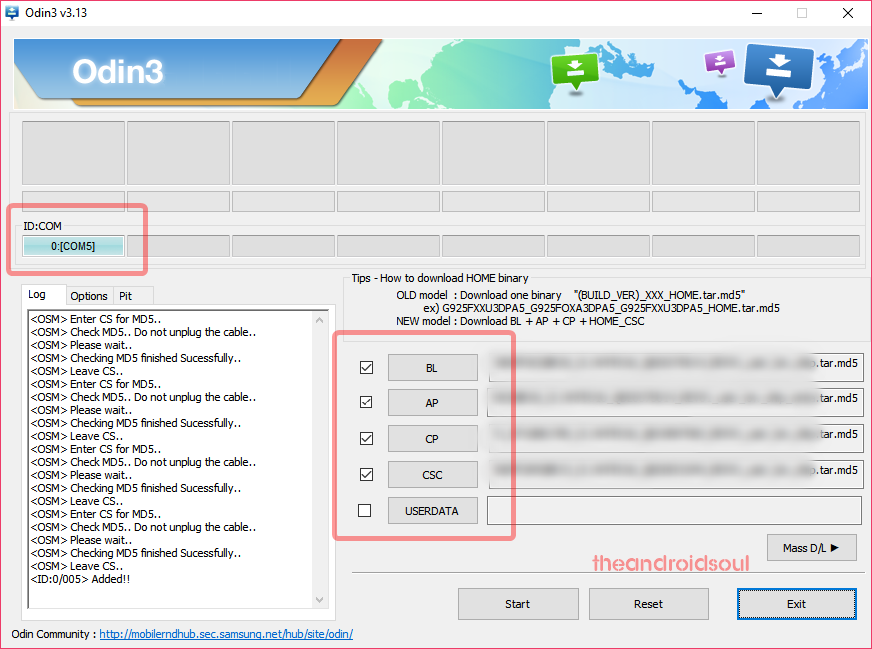
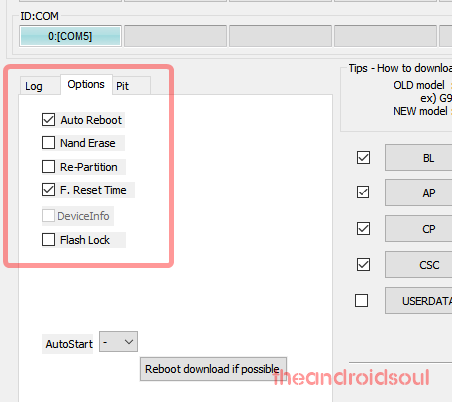
Go back to the Log tab now, as it will show the progress of the firmware installation when you hit the start button in the next step.
Wait till the installation is finished, after which your device will reboot automatically. You’ll get the PASS message as shown below upon successful installation from Odin.

Some errors you may run into, and with the respective solution.
- If Odin gets stuck at setup connection, then you need to do this all again. Disconnect your device, close Odin, boot device into download mode again, open Odin, and then select the file and flash it again as said above.
- If you get FAIL in the top left box, then also you need to flash the file again as stated just above.
Done!
Need help? Sure, let us know in the comments section below.
Once you install the Android 10 firmware on your S9/S9+, it will reboot. It will take it time restarting, so be patient, and when it’s done, it will start optimizing apps, after which you will have Android 10 running on your device.
RELATED:


12 responses to “How to install stable Android 10 update on Galaxy S9 and S9+ [One UI 2, DTAA and DTA5 firmware added]”
Bro Plz Do upload link oF G960F
Does this work with AT&T?
It won’t, most probably. Because, AT&T handsets are locked as you can’t enable the OEM Unlock option. So, Odin won’t work.
It should work. I did it yesterday on my Verizon S9+ and worked fine
Do we still receive OTA updates if we force update like that ?
how do i get the oem unlock for s9 plus on att? is it at all possible?
Is it possible to install this update on the Snapdragon, American variant of the G960U even if there is no OEM unlock? I was also wondering if Odin had a son who wielded a hammer?
Can I install this update on my Samsung S9+? (G965FXXU2CRLI) I’m form México, my phone is unlocked.
Can i use the SD card Method in installing this?
Can install beta 6 directly or do I need to install updates as they follow, 1, 2, 3 ….?
Follow 1, 2, 3and like that.
How come the link for G960F is nowhere to be found on any website or forum?