
By the end of October, Samsung started pushing the One UI 2 beta update with Android 10 to its latest flagships – the Galaxy Note 10 and Note 10 Plus handsets. The One UI 2 beta first in South Korea, then the US and then to arrived on Note 10 series in Europe. If you’re one of those who missed out on registering your device for OneUI 2 beta testing, there’s now a way to install Android 10 on your Galaxy Note 10 and Note 10+. But now, the stable Android 10 update is rolling out for the Note 10 users around the world. If the OTA hasn’t reached you yet, you can simply download the firmware of the stable Android 10 update given below, and install it yourself.
Here’s a guide to help you download and install the stable Android 10 One UI 2 update manually on your Galaxy Note 10 and Note 10+.
Related:
- When will Samsung release the stable Android 10 update?
- Android 10 release date: Note 10 | Note 9 | S10 | S9
Before you download the Android 10 update, make sure you carefully read the warning and compatibility sections given below.
How to install Android 10 update on Galaxy Note 10 and Note 10 Plus
Warning!
Do not try anything given on this page if you do not completely know what you are doing. In case any damage occurs, we won’t be held responsible. make sure you match the model no. of your device with the model no. of the download file.
Disclaimer
Installing an official firmware through Odin doesn’t void your device’s warranty, but it remains an unofficial process and thus you need to be cautious of it. In any case, you only are responsible for your device. We won’t be liable if any damage occurs to your device and/or its components.
Compatibility
This guide is compatible only for the Galaxy Note 10 and Note 10+ handsets. Do not try this on any other device as you might end up damaging your device and permanently brick it.
Backup!
Ensure that you back up all the important data (including photos and videos, contacts, music, videos, files, etc.) on your Galaxy Note 10.
- How to take a full backup on Android
- How to sync device folder online
- Force backup Android data to Google Drive
Downloads
Note: These links are originally meant for Germany only.
- Galaxy Note10
- For Europe/Asia/Australia, unlocked model SM-N970F: Stable update BSL7
- For US models (SM-N970U/U1): Coming soon
- Galaxy Note10 Plus
- For Europe/Asia/Australia, unlocked model SM-N975F: Stable update BSL7
- For US models (SM-N975U/U1): Coming soon
Instructions
- Power off your device. Wait for 6-7 seconds after the screen goes off.
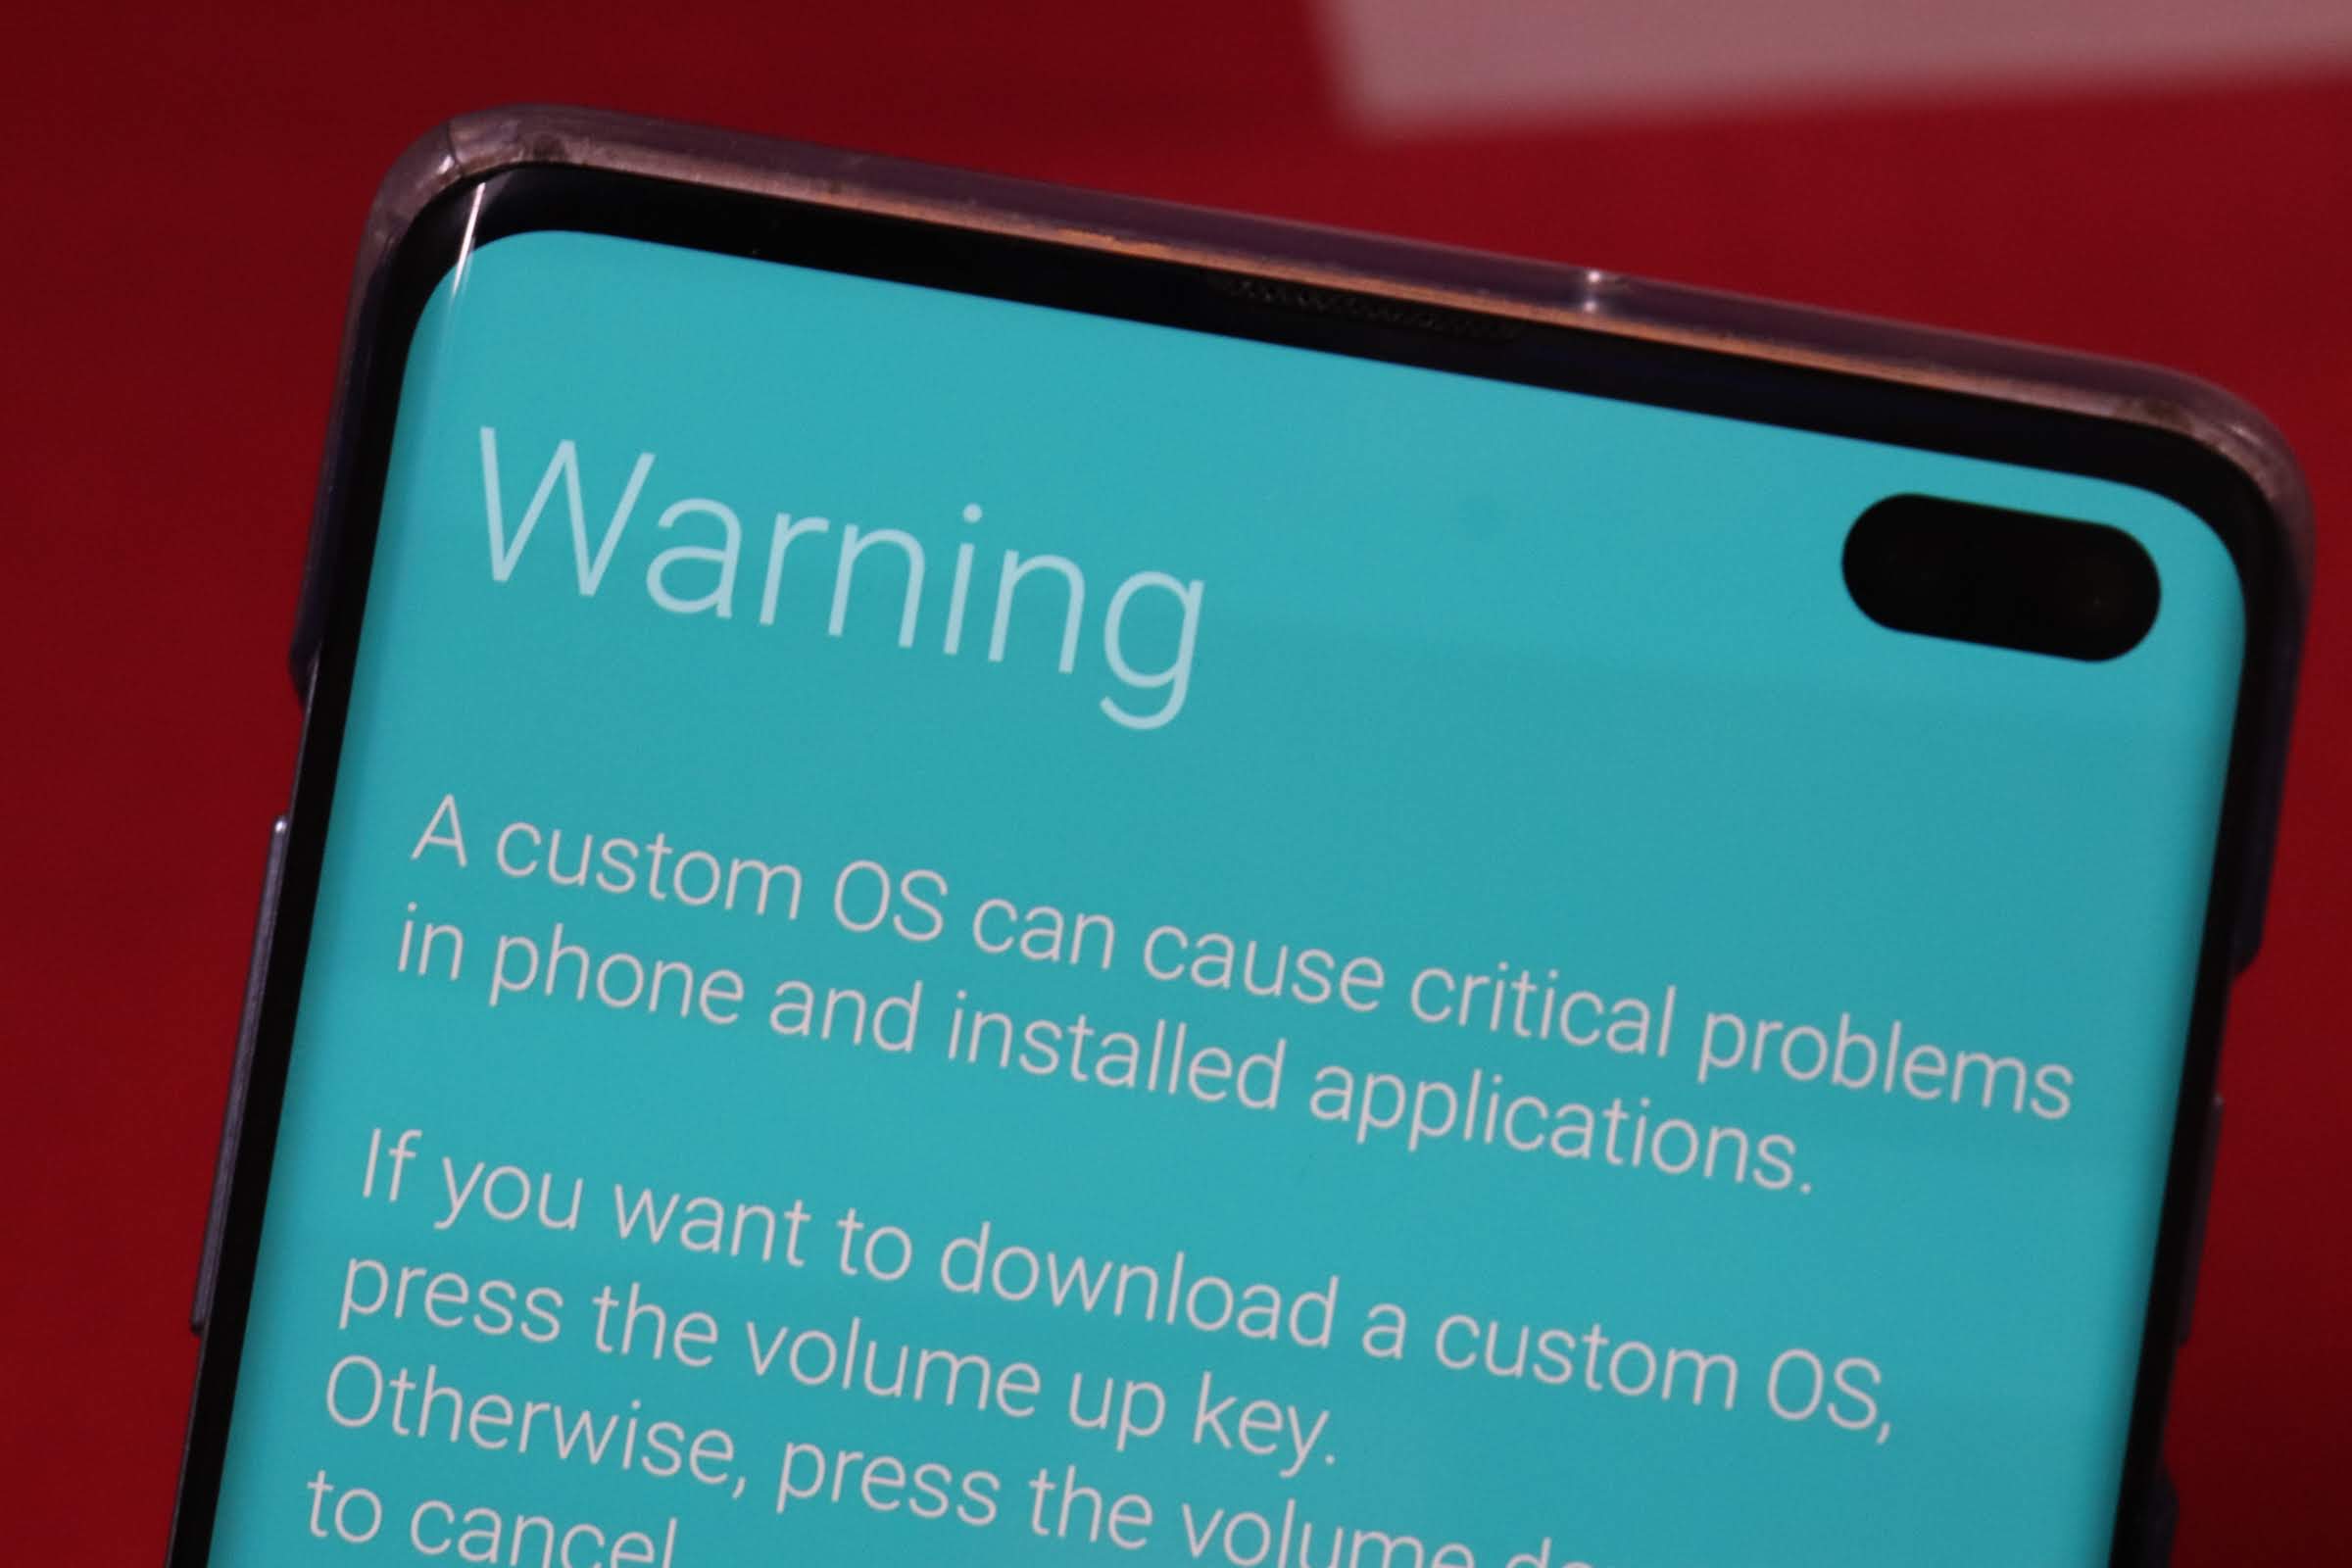
- Connect the device to PC using the USB cable while pressing and holding Volume down + Bixby buttons together until you see the Warning screen (image).
- Press Volume Up to continue to download mode.


- You cannot proceed until you get the Added!! message, which confirms that Odin has recognized your device.
- If you don’t get the Added!! message, you need to install/re-install drivers again and use the original cable that came with the device. Mostly, drivers are the problem (look at step 2 above).
- You can try different USB ports on your PC too.
- Click on the BL tab, and select the file beginning with BL text.
- Click on the AP tab, and select the file beginning with AP text.
- Click on the CP tab, and select the file beginning with CP text.
- [Different!] Click on the CSC tab, and select the file beginning with HOME_CSC text. If the HOME_CSC file isn’t available, then select the file beginning with CSC text.
Info: When you load files, Odin checks the md5 sum of the firmware file, which takes time. So, simply wait until that’s done and the firmware file is loaded. Don’t worry if Odin gets unresponsive for a while, it’s normal. Binary size will also show up in Odin.
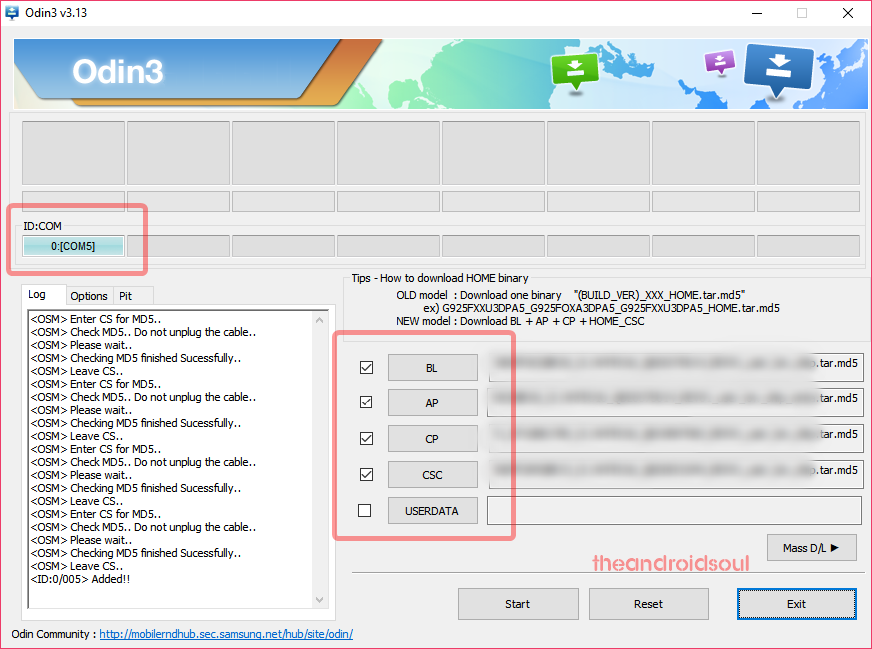
Go back to the Log tab now, as it will show the progress of the firmware installation when you hit the start button in the next step.
Wait till the installation is finished, after which your device will reboot automatically. You’ll get the PASS message as shown below upon successful installation from Odin.

Some errors you may run into, and with the respective solution.
- If Odin gets stuck at setup connection, then you need to do this all again. Disconnect your device, close Odin, boot device into download mode again, open Odin, and then select the file and flash it again as said above.
- If you get FAIL in the top left box, then also you need to flash the file again as stated just above.
Done!
Need help? Sure, let us know in the comments section below.
Once you install the Android 10 firmware on your Note 10, the device will reboot. It will take it time restarting, so be patient, and when it’s done, your Note 10 will start optimizing apps for some time (much more than you would like, frankly), but once that is also done, you will have the goodness of Android 10 to play with, topped with One UI 2.


5 responses to “How to install stable Android 10 update on Galaxy Note 10 and Note 10 Plus [One UI 2 | Firmware]”
My Note 10+ build number is ASJ7, can this firmware you’ve discussed work on my model?
Hello, I have Note 10+, I did Flashed the Required Android 9 Pie update: Version ASJ2, and I did updated via adb update with (Beta 1) for Version ASJ2: Version ZSJF, and rebooted successfully to android 10, but when I try to install the Beta 2 update I face: failed to mount /sdcard by sdcard update method and when I try adb method the cmd don’t find me connected device with the command adb devices!!! PLEASE help.
Do we have to go through each update one by one or can we update to the latest beta straight from android 9
I’m not in the german firmware.
Can I flash the stable version?
No one seems to be answering this question clearly, the question is can I flush firmware for the N975F to the N9750/DS?