Several Samsung Galaxy users are having a hard time using the Facebook app when on Wi-Fi. The users have reported that the Facebook app doesn’t load visual content when connected to any wifi network. The issue persists only on some devices and is completed unrelated with the network speed. Even a high-speed wifi network (around 600 Mbps) couldn’t be concluded as a solution for this issue. Surprisingly, the app works fine with the cellular network.
The users have tried to come up with a possible solution that includes clearing cache, deleting app data, uninstalling and reinstalling the app, restarting the device in safe mode, even resetting the router settings and even a factory reset of the device, but nothing seems to resolve the issue.
Samsung hasn’t acknowledged the issue yet. So, there is no official solution is available for the Wi-Fi problem that Galaxy S10 users are facing with the Facebook app.
But do not worry if this problem is bugging you too because there is a solution that may fix the problem right away. All you need to do is to download the version a specific version of the Facebook app and install that after removing the current version installed on your Galaxy S10. Here is how you can do it.
Disable Facebook app currently installed
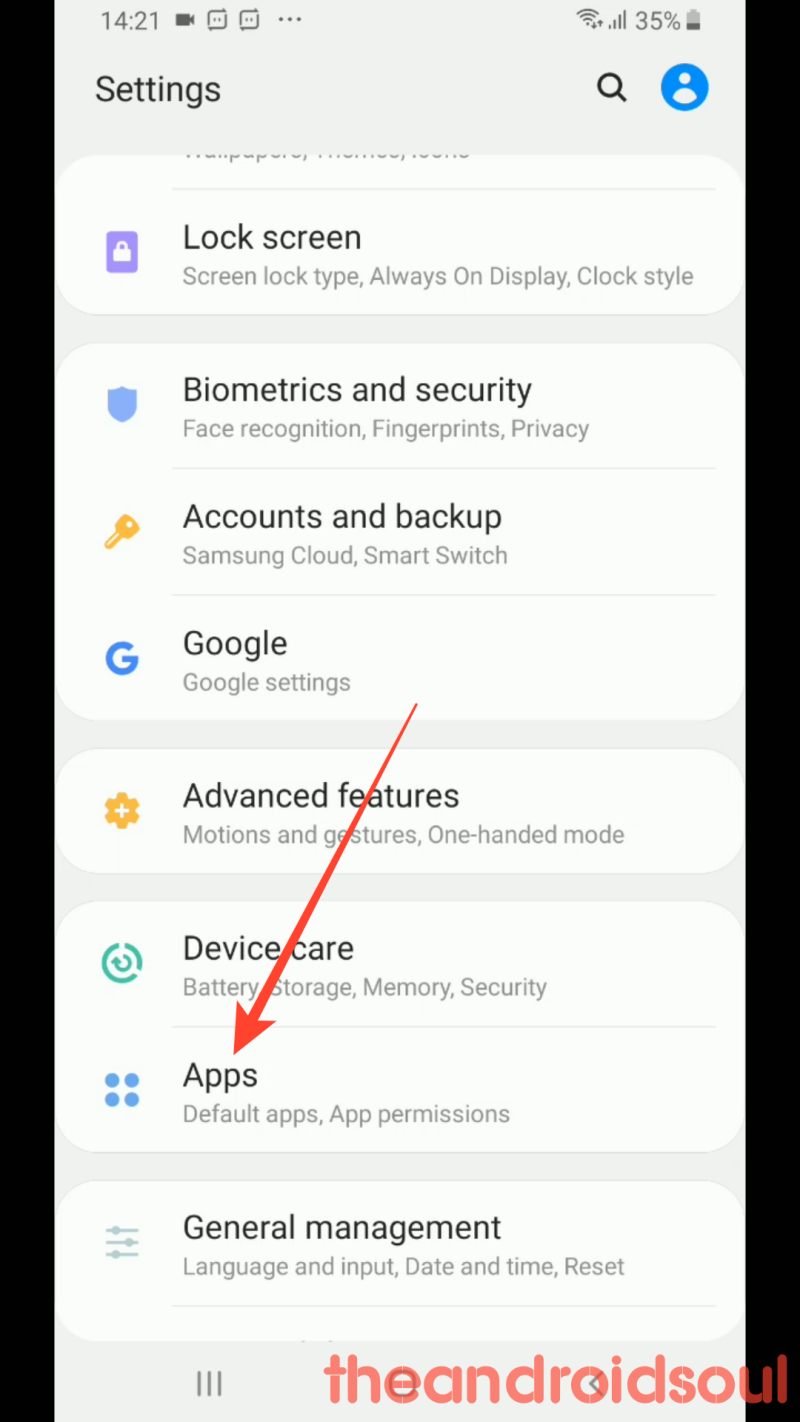
- Open the Settings app from your home screen or app drawer.
- Scroll down and tap on Apps from the settings list.
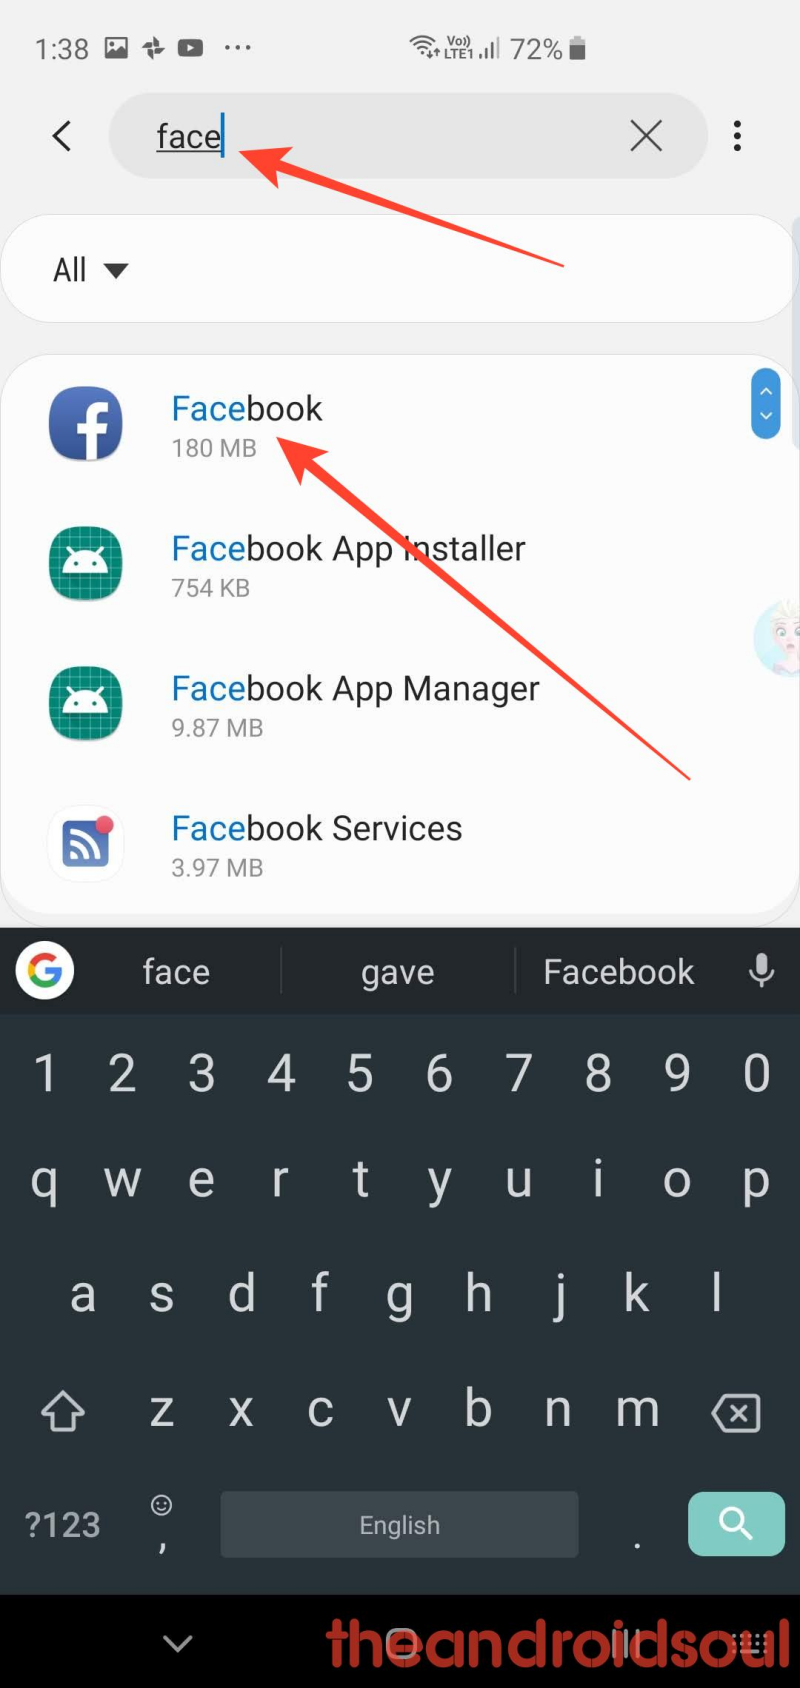
- Type facebook in the search bar
- Tap on the Facebook app when it appears in the search result.
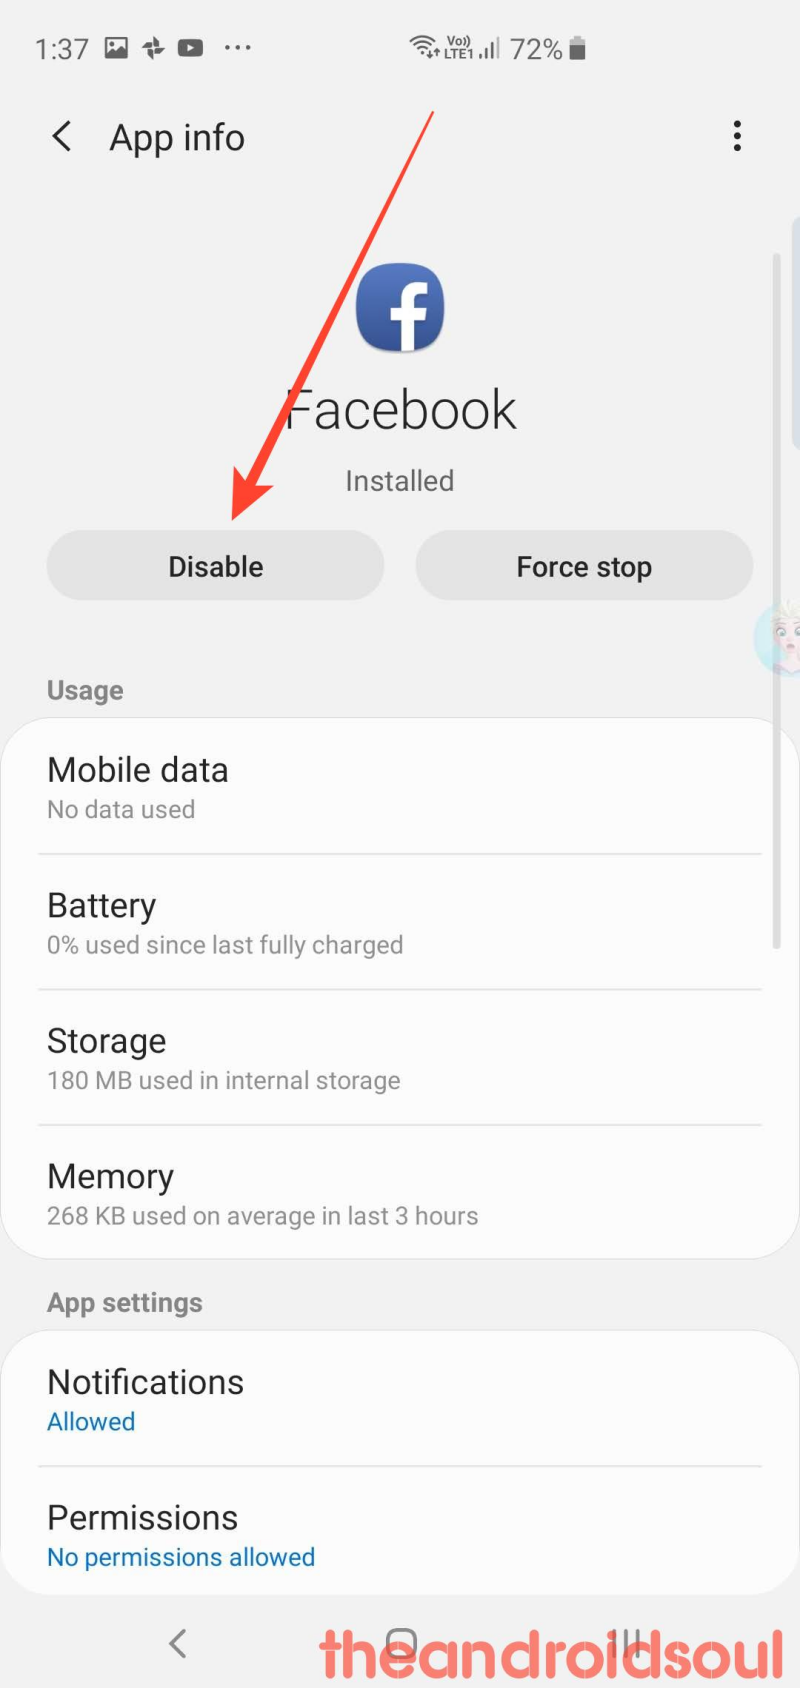
- Tap on the disable button as shown above.
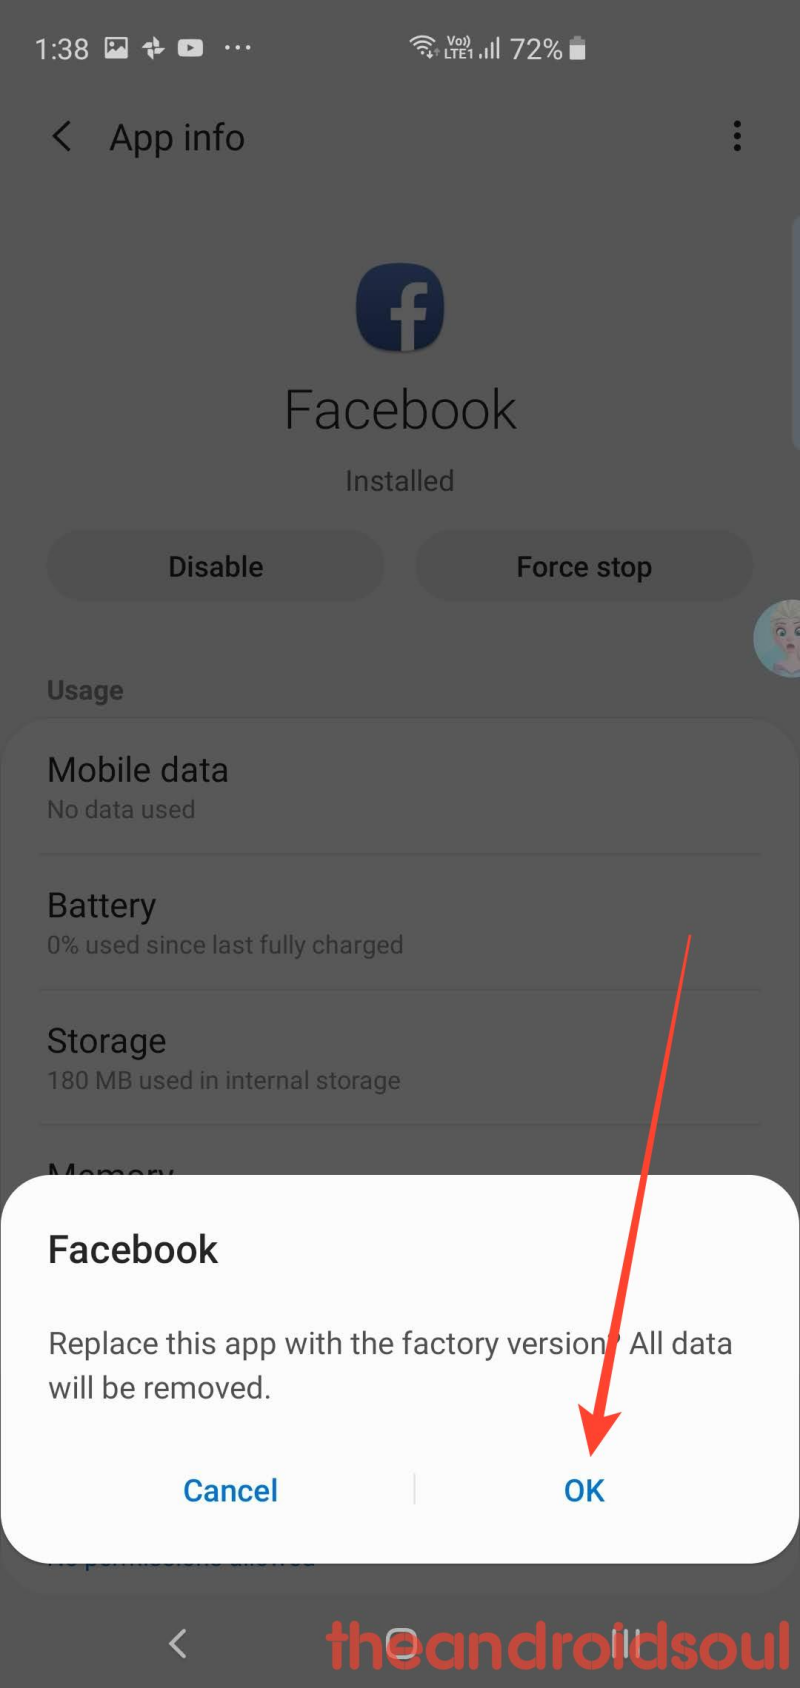
- Tap on the disable button again on the newly appeared popup.
- Tap on the OK to disable the Facebook app.

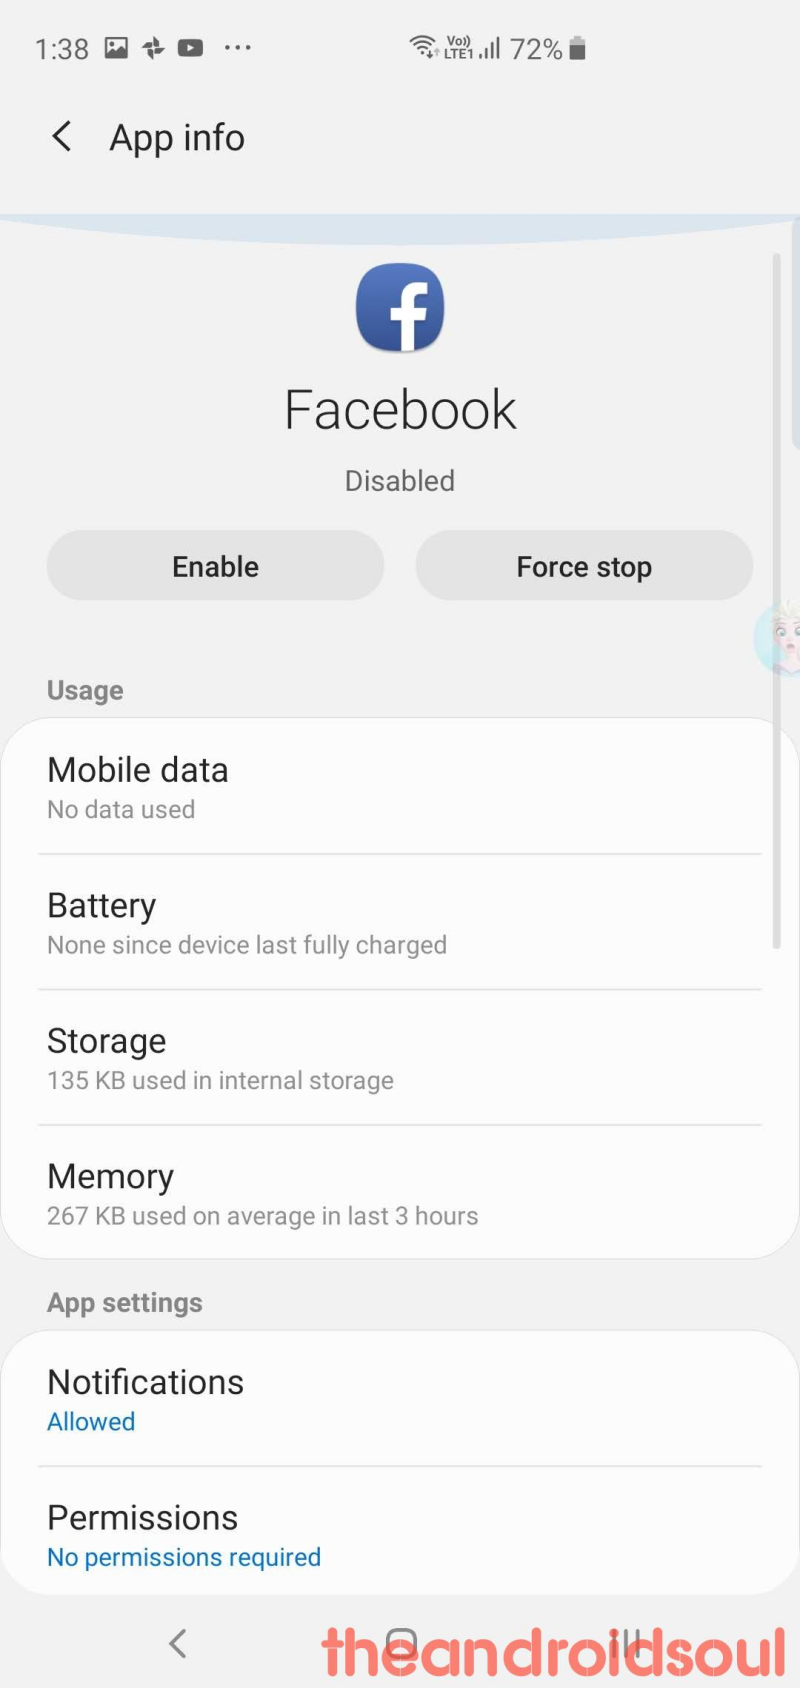
- It will now read ‘Disabled‘ right below the app’s name now. We’re good here. Now, let’s install the version that works with Wi-Fi.
Install the suggested Facebook version
Download the Apk file from the link given above and begin with the following steps:
- Download version 218.0.0.46.109 of the Facebook app from > here.
- Tap on the file download notification, or pop-up, or on the file name to begin the installation. Or, follow these steps to begin installation:
- Open a file manager app.
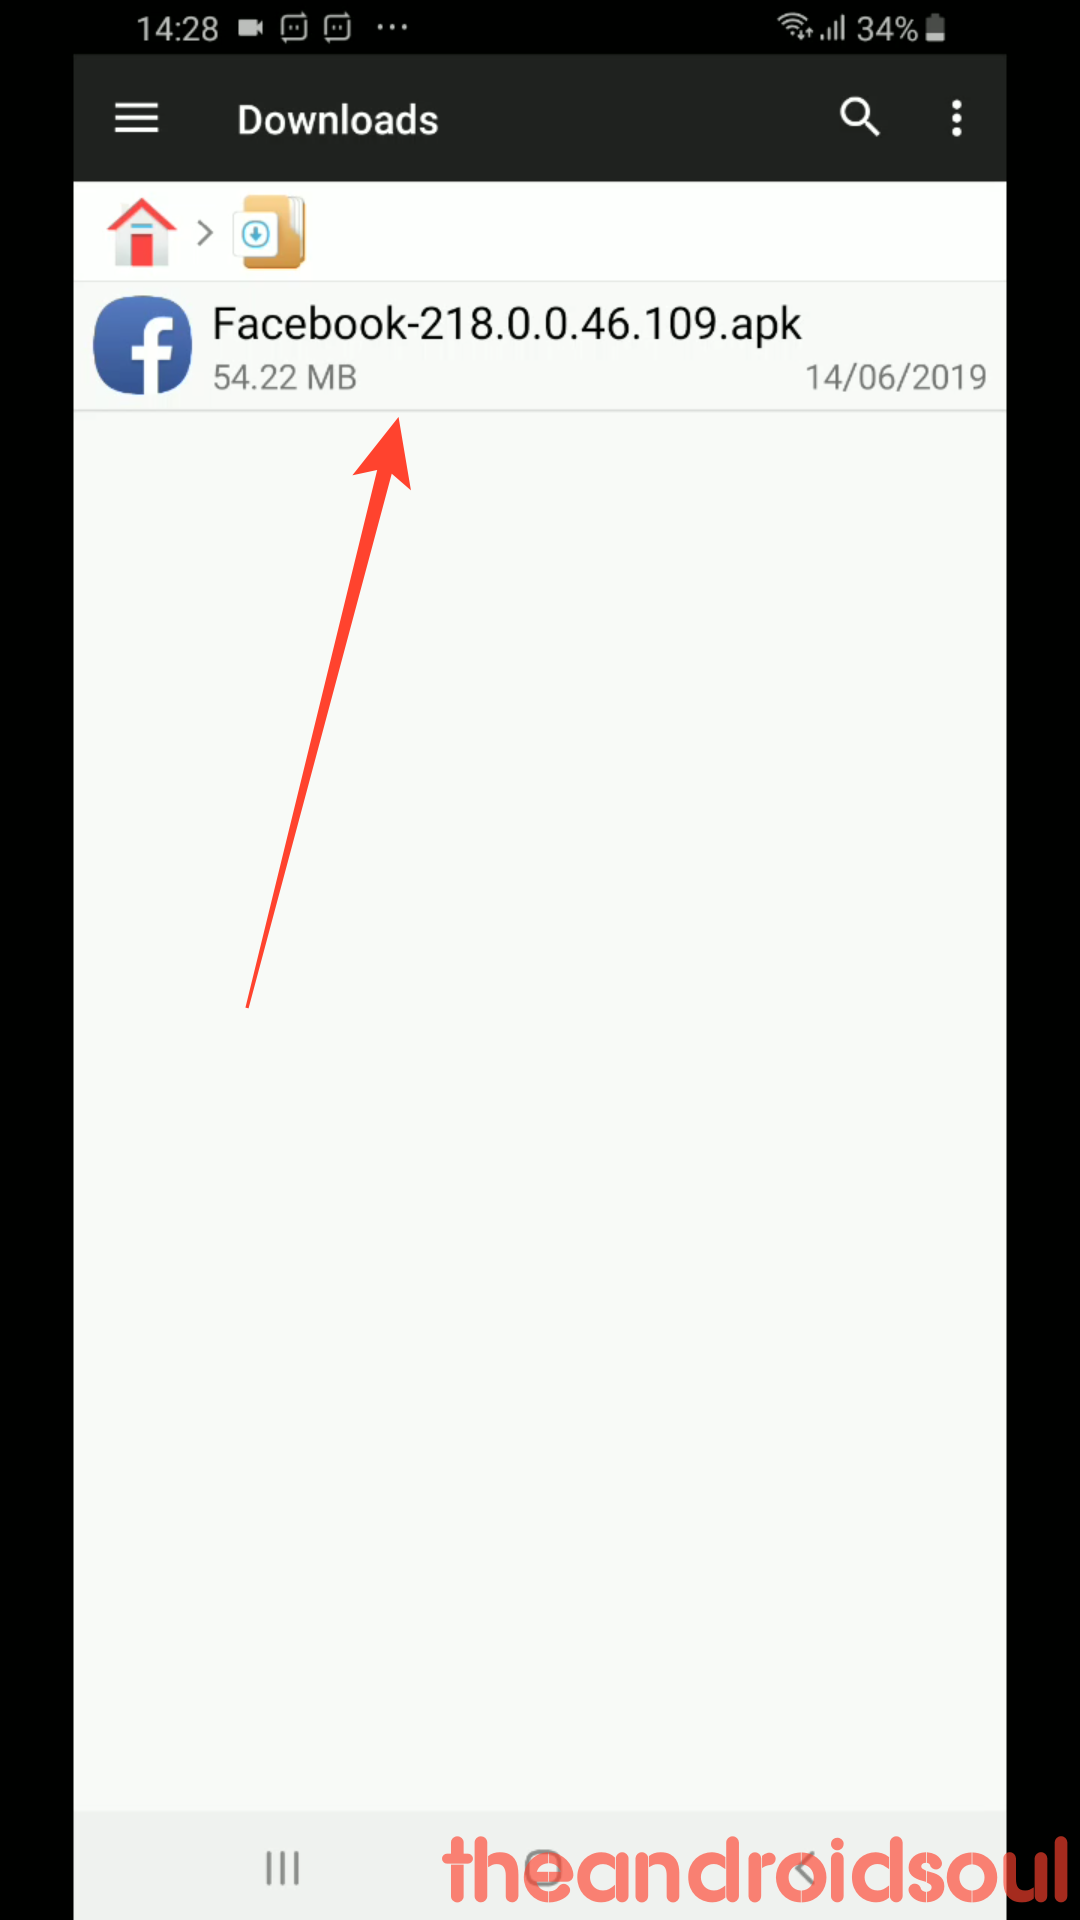
- Tap on the downloads folder. (Go to the folder where the APK file is saved.)
- Once there, tap on the APK file (Facebook-218.0.0.46.109.apk) to begin the installation.
- Tap settings from the newly appeared popup.

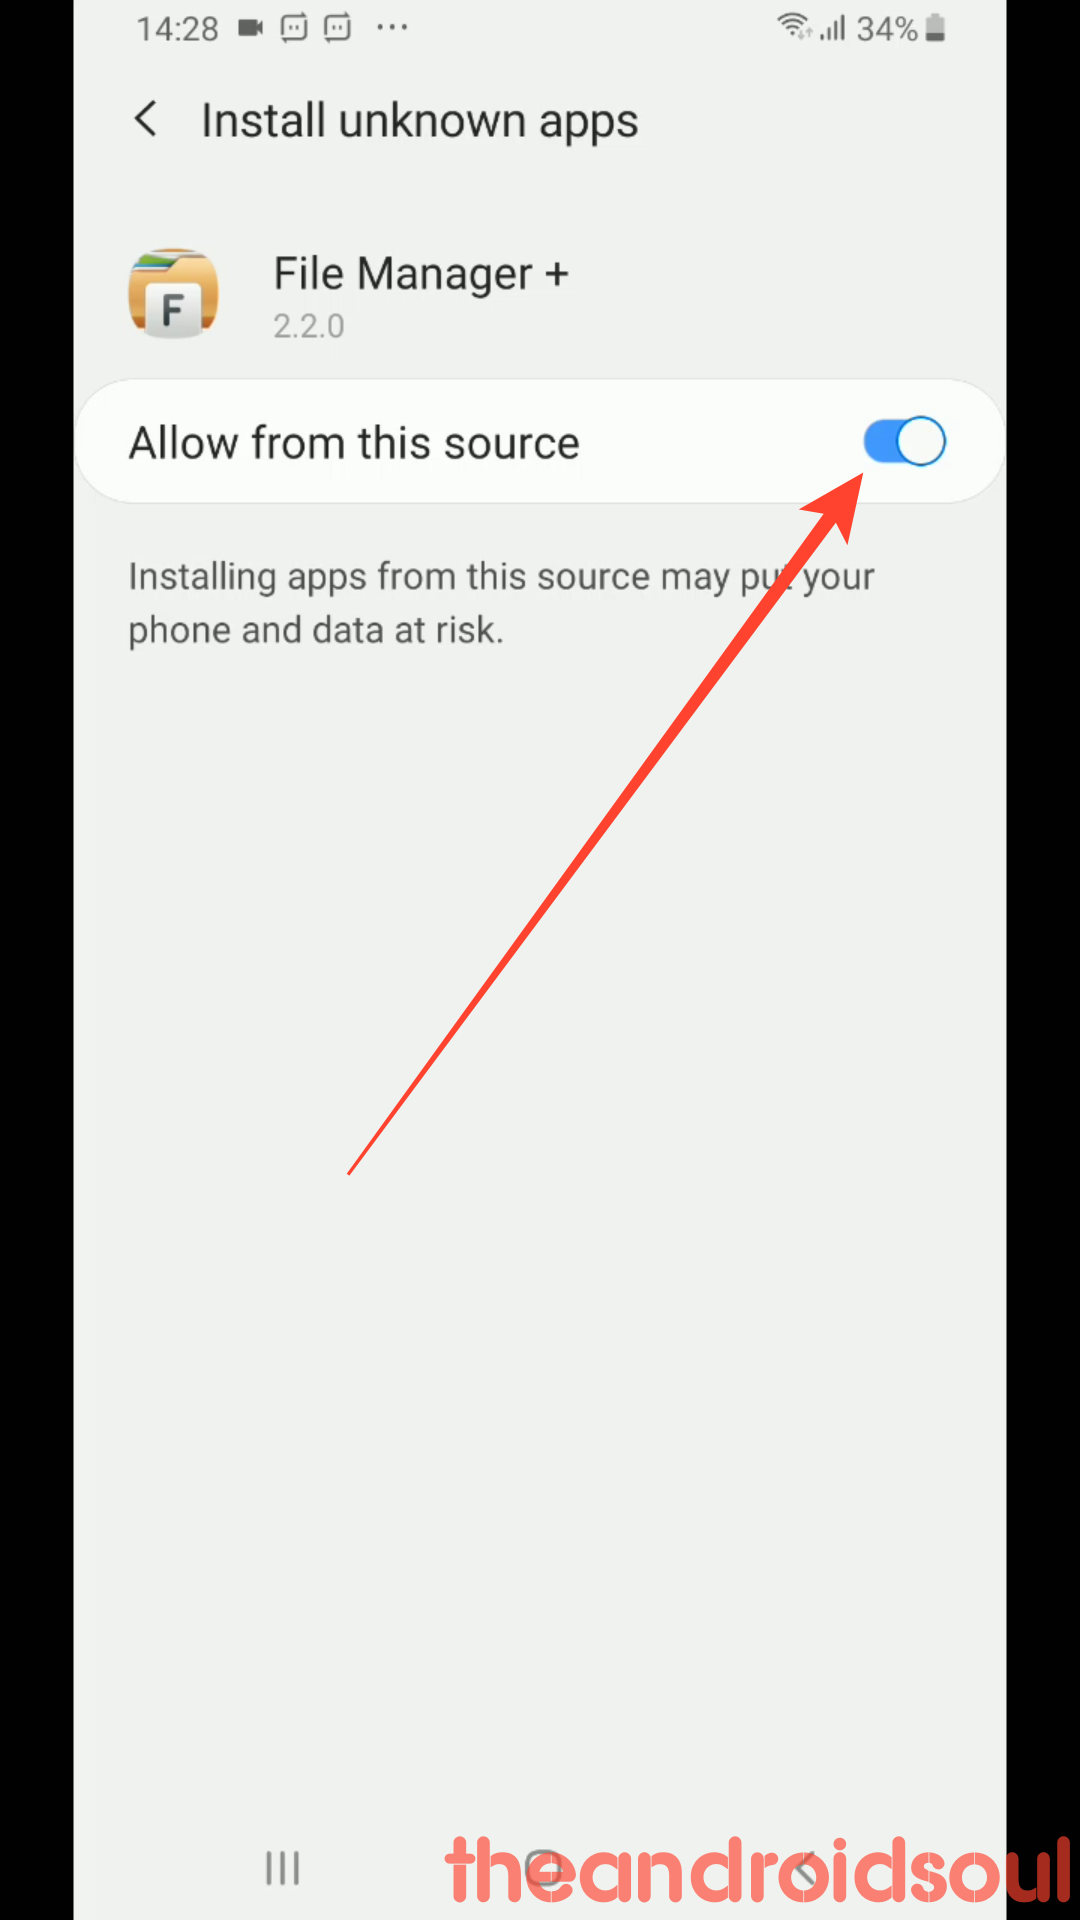
- Tap on allow from this source to allow the system to let the File Manager app install an app using the APK file.
- Tap the back arrow at the bottom of the screen.
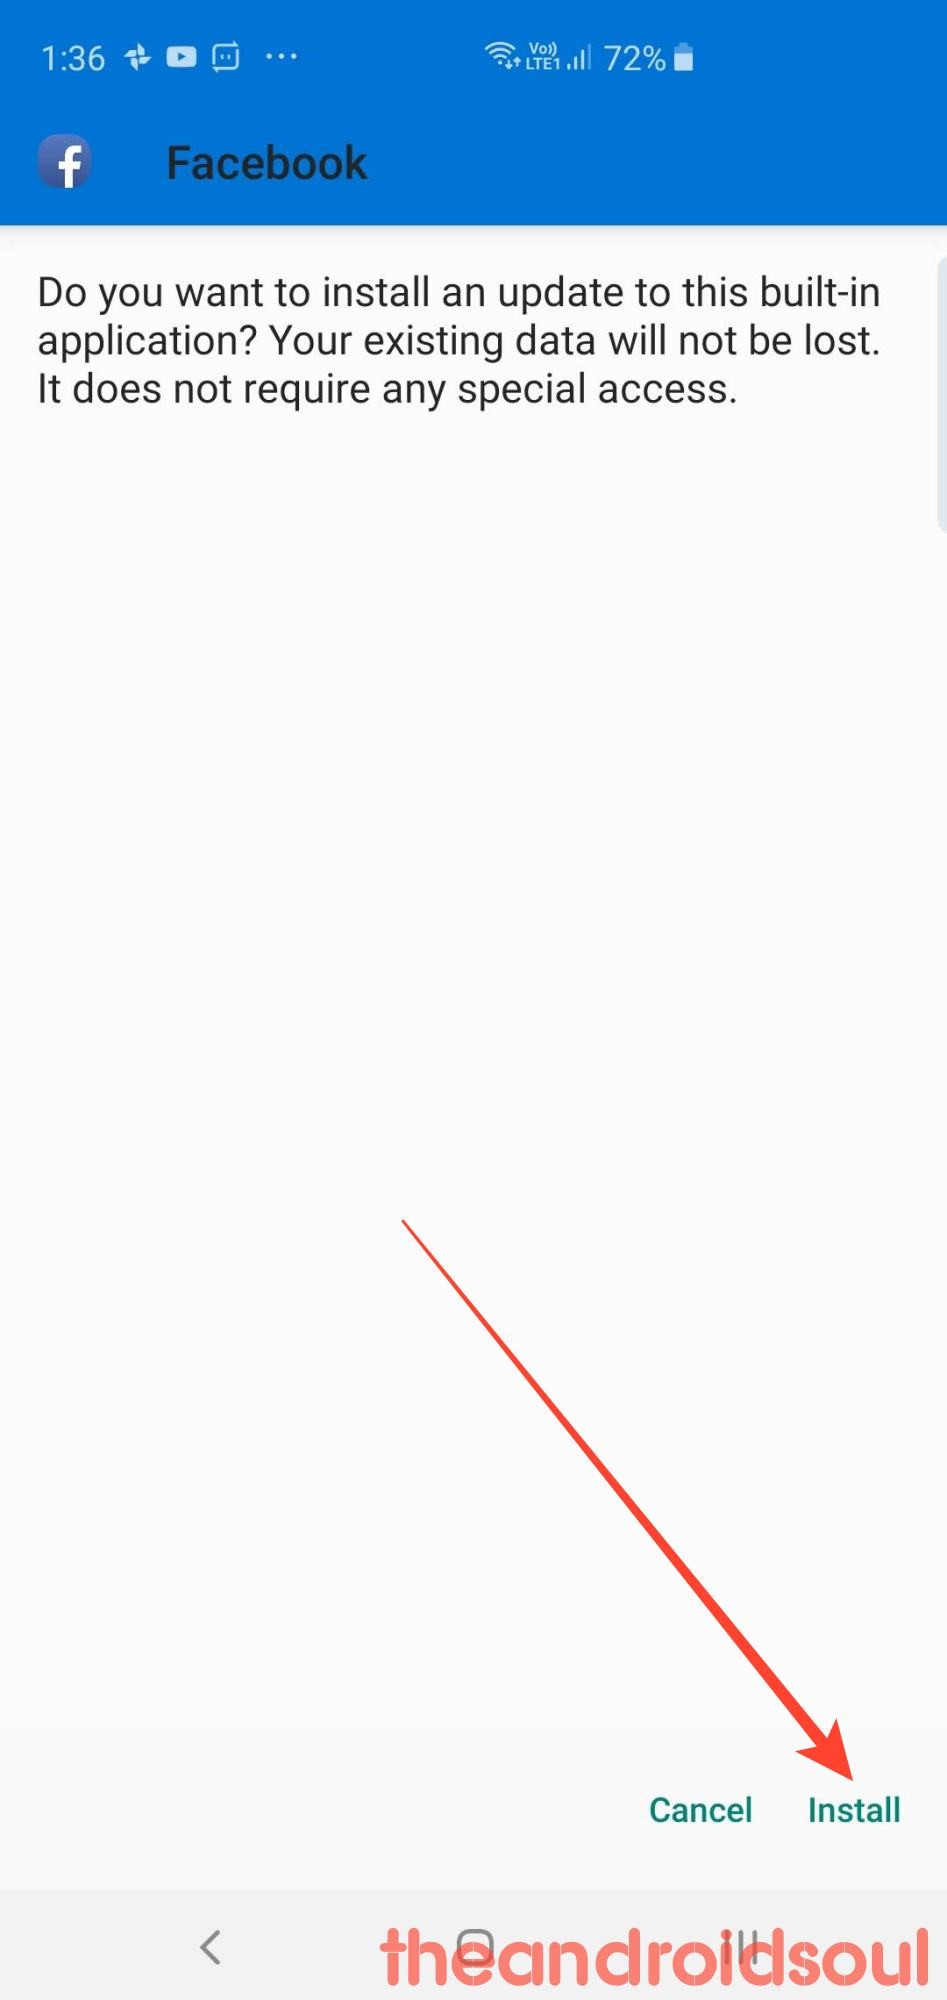
- Tap on the Install button at the bottom right corner of the screen.
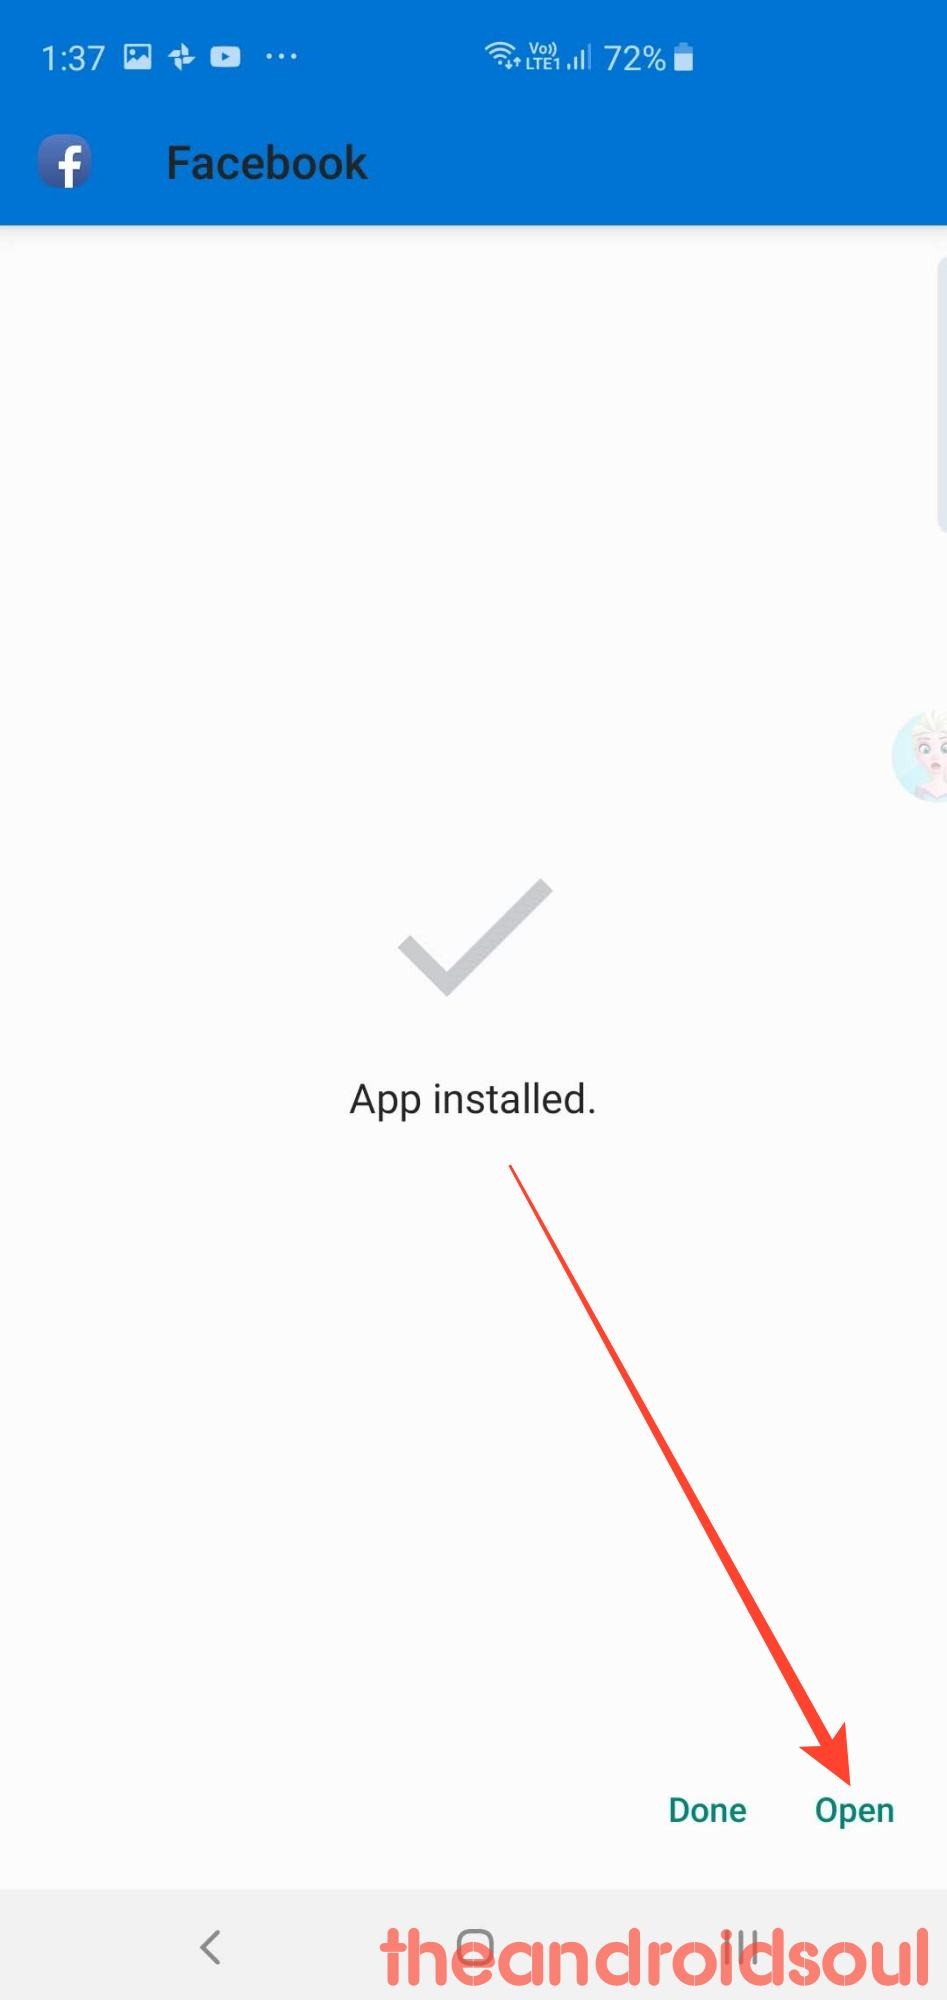
- Once the update installs, Tap Open to start using Facebook.

This is a tested solution to the problem so go ahead and give it a try. If face any difficulty with the steps of installation, you can refer to your installation guide here.
And do let us know if this doesn’t solve the problem for you in the comments section.