Apple has made WidgetKit publically available to third-party developers which allows them to create widgets for their own apps. But with the release of widgets back in iOS 14 this also meant that third-party apps can take advantage of the WidgetKit to make custom widgets. This feature is now available for the lock screen in iOS 16. Here’s how you can add a custom widget to your iPhone’s lock screen running iOS 16 (or newer).
How to add custom widgets to your iPhone’s lock screen with iOS 16
Custom Widgets for your lock screen or home screen can only be created using third-party apps. We recommend using the three apps we have chosen below. However, depending on your preferences you can opt for Alternatives that have been mentioned subsequently. Here’s how you can add custom widgets to your iOS 16 lock screen.
Step 1: Create a widget
We will first need to create our custom widget before we can add it to our lock screen. We recommend using either Widgetsmith, Color Widgets, or Widgy. These apps offer a lot of control over your custom widgets and have exclusive features to further customize them as per your needs. Use either of the section below depending on the app you choose to help you with the process.
Method 1: For basic widgets (Widgetsmith)
- Widgetsmith | Download Link
Download and install Widgetsmith on your iPhone using the link above. Once done, launch the app and tap and ensure Widgets is selected at the bottom.

Tap Lock Screen at the top to switch to Lock Screen widgets.

You now have the option to create three types of lock screen widgets as mentioned below.
- Text Widget
- Circular Widget
- Rectangular Widget
The Circular Widget and the Rectangular Widget can be added to the dedicated widget area on your lock screen. The Text Widget can be added to your lock screen date. We will create a circular widget in this example. The process will be similar when creating a text or rectangular widget. Tap Add Circular Widget to get you started.

Scroll the list and choose a Widget type you will be creating. We will create a Moon Phase widget for this guide. Tap and choose the Moon Phase widget at the bottom of your screen.

Now tap Theme at the top and choose the theme you like.

Tap Location at the top.

Now tap Add or Edit Locations at the bottom.

Use the search bar at the top to search your current city. Tap and select the same once it shows up in your search results.

Swipe left on the Apple Park location and tap Delete.

Now tap Back at the top.

Tap the last Type section.

Note: This option will only be available for certain widgets.
Tap and select your preferred widget type.

Once you’re happy with your widget, tap Save.

You will now have created your first lock screen widget. You can create more widgets and switch between them as needed.
Method 2: For colorful and aesthetic widgets (Color Widgets)
Color Widgets is another popular app that focuses more on Aesthetics and also offers a curated selection of themes and icons. Here’s how you can create lock screen widgets using Color Widgets.
- Color Widgets | Download Link
Download and install Color Widgets on your iPhone. Now launch the app Continue.

Tap Skip.

Tap Continue again.

Now tap the X in the top right corner.

You will now be shown previews for the three sizes of lock screen widgets you can customize under Your Lock Screen Widget. Tap on either choice to customize and use it on your lock screen. Let’s customize the rectangular widget for this guide.

Tap and choose your preferred background using the options at the top under Background.

Now choose your preferred font using the Font section.

You can now scroll the Style section to select a preferred style.

Use the Image icon to set a custom image as your background.

Some style options will allow you to use symbols in your widget. Tap and select the desired Symbol you like to add it to your widget.

The Countdown style will also allow you to choose a date to which your widget will countdown.

Once you’re happy with your creation, tap SET WIDGET at the bottom.

You will now have created your first widget.

Use the + icon on the Color Widgets homepage to create more lock screen widgets as needed.

And that’s you can create custom widgets in Color Widgets.
Method 3: For highly customized widgets (Widgy)
Widgy allows you to create some pretty cool widgets that offer a lot of customizable options. Use the guide below to help you create a custom widget in Widgy.
- Widgy | Download Link
Download Widgy using the link above and launch the app. Tap and switch to Lock using the pill at the bottom.

Tap Create at the top.

Tap and choose your preferred shape of the widget. Inline Widgets will be added to your date. Let’s create a rectangular widget for this example.

Tap Add New Layer.

Let’s add a background first. Select Image.

Now tap and switch to the Image tab.

Change your Aspect Fill to fill horizontally.

Now use the options on your left to choose a source for your image. You can source images from the following locations.
- API List
- RSS Feeds
- System Storage
- Weather app (Normal, White and Outline)
- Web and Maps
- Widgy

Use the Widgy category to force blurred backgrounds if you wish. Use the System option to choose a photo from your device. Let’s choose a pattern background for now. Use the right section to navigate to your desired source and select your image.

Tap and choose the pattern you like.

Now switch to the Frame panel. You can now use the pinch and drag gesture to resize your image. For more precise control, you can use the icons at the bottom of your screen. Ensure that your background fills the entire widget.

Now switch to the Effects panel.

Note: You can set a background but as the image fills the entire canvas, it doesn’t matter.
Now apply and adjust the appearance of your background to fit your preferences using the options on your screen.

Tap the back arrow to add a new layer.

Tap Add New Layer.

Tap and select the type of information or graphic you wish to add to your widget. Let’s add a Symbol for now.

Now tap the back arrow to adjust your layers and reposition them.

Tap Edit.

Tap and drag the Symbol layer above your Image layer.

Tap Done.

Now tap the Symbol layer to edit it.

Before we position or resize the symbol, let’s select the symbol we wish to use. Tap the Symbol icon at the top.

Tap and select your preferred Symbol category.

Now tap and select your preferred symbol.

Tap the Frame icon to adjust the size and position of the symbol.

You can adjust the size of your layer by using the pinch gesture. You can also adjust its position by dragging it around. If you’d like more precision, use the Position arrows to place your symbol. Adjust the Size using the + and – respectively.
If you wish to fine-tune these values, switch the step size by sliding on the options at the top.

Use Angle to rotate your symbol as needed.

Once you’re happy with the preview, tap the Palette icon.

Use the options at the top to choose your color palette. You have the following options at your disposal.
- System
- Material
- Palettes
- Dynamic Colors
- Gradients
- Custom

Now tap and choose your preferred color.

Switch to the Background tab if you wish to add a background.

Tap and choose your preferred background color.

Finally use the last panel to adjust Effects added to your symbol.

Adjust your Symbol’s effect based on your preferences.
Now tap the back arrow.

Add more layers to your widget as needed to create and customize it all you want. Once you’re happy with your widget, tap and switch to the Document tab.

Edit your widget’s name and other details as you prefer.

Now tap the back arrow in the top left corner of your screen.

Tap Confirm.

Your widget will now be saved.

Tap and switch to the Manage tab.

Now tap your first rectangular widget slot.

Tap and select the widget we created.

Your widget will now be assigned to the first slot. Only the first slot is free when using Widgy without a premium purchase. Widgy is a wonderful app for creating widgets. This guide only covers the basics. We recommend you explore all the options to create the perfect widget to fit your needs. You can now use the next section to add the widget to your lock screen.
Step 2: Add the custom widget to your lock screen
To add a custom widget to your home screen follow the instructions below.
Tap and hold on to your iPhone’s lock screen to enter the editing mode. Now tap Customize.

Tap and select your lock screen widget area or date area depending on the type you wish to add.

Now scroll through the app list and select your third-party app.

Tap and select the size of the widget you created.

Tap your widget and choose your custom widget if required by the app.

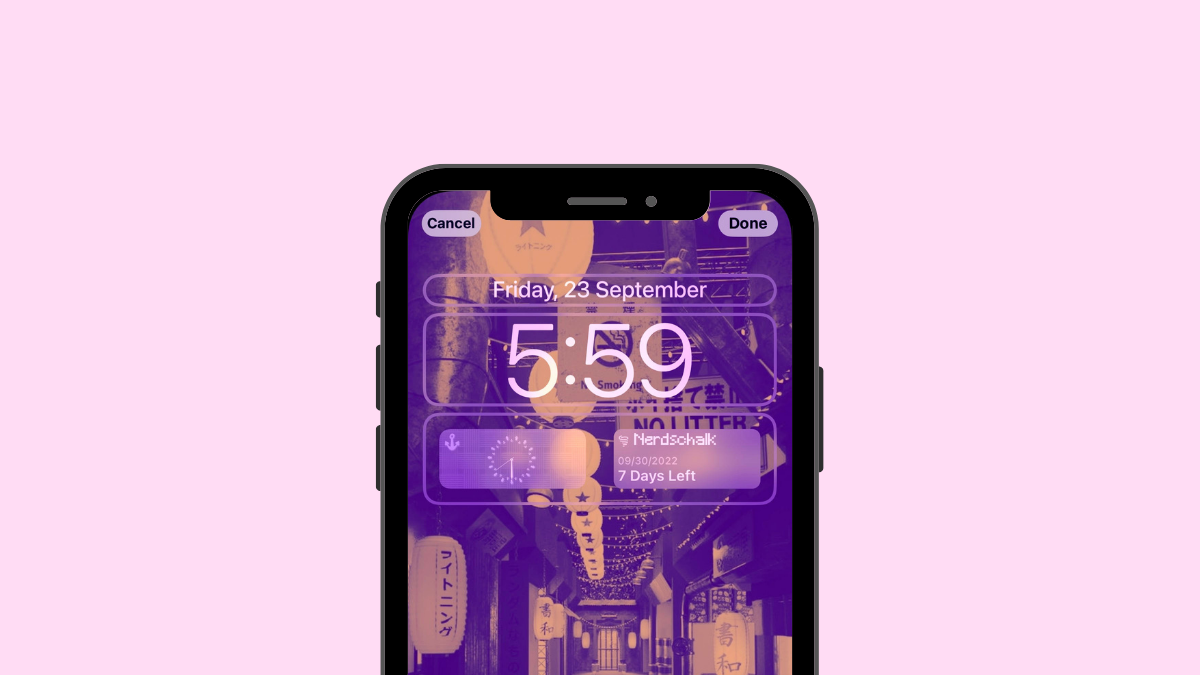
Tap Done to stop editing your lock screen.

And that’s it! Your custom widget will now be added to your lock screen.
Alternative apps to create custom widgets
Here are a few alternative custom widget apps that might match your preferred aesthetic better.
- Top Widgets: Download Link
- Photo Widget: Simple: Download Link
- Brass: Download Link
We hope this post helped you easily create and place a custom widget on your lock screen on iOS 16. If you face any issues feel free to reach out using the comments below.


