
What to know
- Enable ‘Show pointer location’ from Settings > Bluetooth & devices > Mouse > Additional mouse settings > Pointer options. Then press
Ctrlwhenever you need to highlight the mouse location. - Enable the ‘Pointer indicator’ effect from Settings > Accessibility > Mouse pointer and touch. Press
Win+Ctrl+Xto highlight the mouse location with crosshairs. The same effect is also available from the PowerToys app > Mouse utilities > Enable Mouse Pointer Crosshairs. - PowerToys also has a Find My Mouse option that can be enabled from Mouse Utilities > Enable Find My Mouse and use the ‘Activation shortcut’ to highlight the mouse location.
It’s not uncommon for users to lose sight of their mouse pointer for whatever reason. However, there are a few ways that you can be directed toward it. Here are all the ways that you can highlight your mouse location on Windows.
Related: How to Search in Windows 11 [4 Ways Explained]
How to highlight mouse location on Windows 11
Here are five different ways to highlight mouse location on Windows 11.
Method 1: Using Mouse Properties
- Press
Win+Ito open the Settings app. Then navigate to Bluetooth & devices > Mouse.
- Scroll down and select Additional mouse settings.

- In the ‘Mouse Properties’ window, go to the Pointer Options tab. Then check ‘Show location of pointer when I press the CTRL key’. Click ‘Apply’ to confirm.

- Now, whenever you need to find your mouse pointer, simply press the Ctrl key.

Method 2: Using Mouse Pointer Indicator
This is a new accessibility feature in the Settings app that lets you view your mouse pointer by adding the crosshair effect to it. Here’s how to use it:
- Press Win+I to open the Settings app. Then navigate to Accessibility > Mouse pointer and touch.

- Scroll down and toggle on Pointer indicator.

- You will see the crosshair effect on your mouse pointer.

- Change the color if required.

- To remove the crosshair effect, press
Win+Ctrl+X.
Method 3: Using PowerToys’ Find My Mouse
Among the various PowerToys utilities is Find My Mouse, a new tool that can highlight your mouse pointer, making it easier to find on your screen. Here’s how to go about using it:
Step 1: Enable Find My Mouse
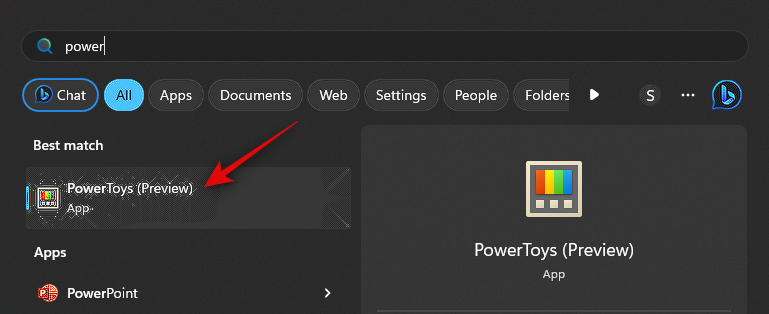
- Launch the Start menu and search for PowerToys. Click and launch the app once it shows up in your search results.
- Now click Mouse Utilities in the left sidebar.

- Next, enable the toggle for Enable Find My Mouse at the top if you wish to use this tool.

And that’s it! Find My Mouse will now be enabled on your PC. You can now use the next step to customize and use Find My Mouse on your PC.
Related: How to Extract Text From Images, PDF or Anything on Your Screen Using PowerToys From Microsoft
Step 2: Customize and use Find My Mouse
You can also customize the Find My Mouse utility to your liking. Here’s how:
- Click the drop-down menu for Activation method to choose the preferred way to activate Find My Mouse.

- Choose one of the following options depending on your preferences.
PressLeft Control twice
Shake mouse
- Next, check the box for Do not activate when Game Mode is on. This will prevent Find My Mouse from activating while you’re playing games.

- Next, click Appearance & behavior to choose how Find My Mouse appears on your PC.

- Use the first slider for Overlay opacity (%) to adjust the opacity or transparency of the overlay.

- Next, click the drop-down menu for Background color.

- Now choose your preferred background color. You can use the spectrum at the top to dial in your preferred color.

- You can also type in a HEX code for a preferred color if you like.

- Next, you can click the drop-down menu for RGB and choose either RGB or HSV and enter the values for the same to dial in your preferred color.

- Similarly, click the drop-down menu for Spotlight color and choose your preferred Spotlight color. You can use either of the options discussed above to dial in your preferred color.

- Next, choose your Spotlight radius (px) by entering the preferred value in the text box beside it.

- Now use the next slider to choose Spotlight initial zoom. This dictates the animation zoom factor at the start of the animation.

- Lastly, choose how long the animation should last by entering the preferred value beside Animation duration (ms).

- Next click Excluded apps. This will allow you to specify apps where you don’t wish to use Find My Mouse.

- Now type in the name of the .exe file for the desired app you wish to exclude from Find My Mouse.

- If you don’t know the .exe file name for the specific app, then search for the app in the Start menu and click Open file location.

- You will now be taken to the .exe file. You can now note down its name and enter it in Powertoys to exclude the app.

- We will now have customized Find My Mouse according to your needs. Use the activation method you set in the steps above to activate the same. Here’s what it should look like on your PC. Once activated, you can use the activation method again to turn it off.

Method 4: Using PowerToys’ Mouse Pointer Crosshairs
PowerToys too has a ‘Mouse Pointer Crosshairs’ effect, similar to what Windows offers natively. If you prefer using PowerToys, which allows more customization, here’s how to use it to highlight your mouse pointer with the crosshairs effect.
- Open ‘Mouse utilities’ from the PowerToys list of utilities. Then scroll down to ‘Mouse Pointer Crosshairs’ and make sure that it is enabled.

- Press the activation shortcut, which by default is
Win+Alt+P.
- If you wish to change the shortcut, click on ‘Edit’ (pencil icon) next to it.

- Change the ‘Appearance & behavior’ from the section below. Here, you can edit everything from the color of the crosshairs to opacity, its radius, thickness, and length.

Method 5: Using a third-party app (Mouse pointer highlight)
Several third-party apps also let you highlight your mouse pointer. We’ll take a look at the app called Mouse pointer highlight. Here’s how to use it:
- Open the Microsoft Store, search for ‘Mouse pointer highlight’, and click on Get to install it.

- Click Open once installed.

- As soon as the app opens, you’ll see the mouse pointer highlighted in yellow.

- If you need to change the size, opacity, and color, do so from the ‘Mouse Highlight’ section and then click on ‘Apply Setting’.

Note that the app doesn’t work in the background so you’ll need to open it every time you want to highlight your mouse or keep the app minimized. You can open the app without using your mouse at all by pressing the Start menu, typing ‘mouse highlight’, and pressing Enter to open it.
If you encounter any difficulties or have further inquiries, we encourage you to contact us through the comments section below. Our team is eager to assist you in any way possible.
Related: How to Edit Registry Files With Registry Preview in Windows PowerToys


