

Configure Grand Theft Auto VI by choosing readable text, subtitles, and HDR calibration, then reviewing controls, gameplay assists, display, HUD, and audio settings.
Your first launch starts with interface and display choices before you begin playing. Choose text that makes the HUD comfortable to read; you can change the default controls whenever you need to. This guide covers initial setup, the settings menus, and the available controller and gameplay adjustments.
The game launches on November 19, 2026. In India, the release time is 12:00 a.m. IST on November 19, equivalent to 6:30 p.m. UTC on November 18, 2026. Its Indian age rating is 18+.
How to configure beginner settings in Grand Theft Auto VI
Complete first-launch setup, review controls and presentation, then finish with controller response and gameplay preferences.
Part 1 – Complete first-launch setup
Work through the opening setup screens before entering the full settings menu.
Select your preferred navigation experience when the initial-launch prompt appears.
Set readable interface text
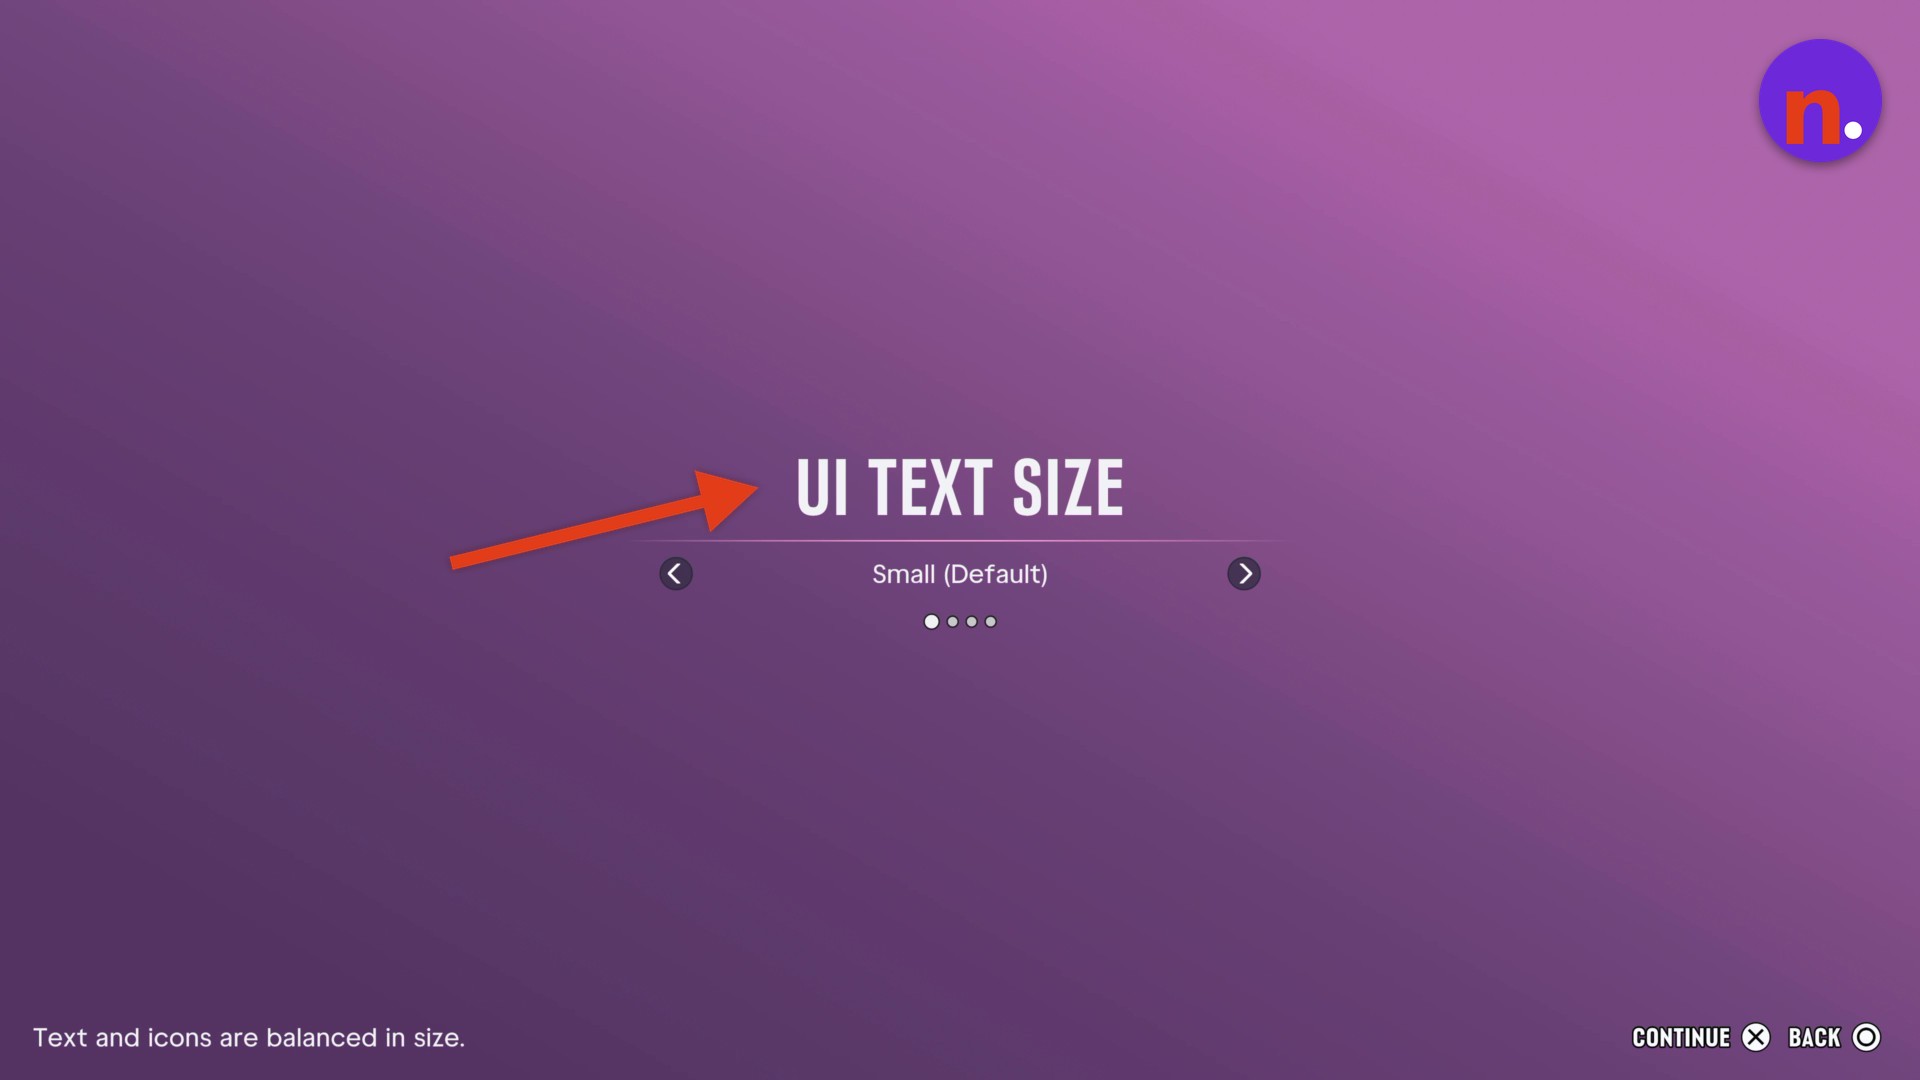
On UI TEXT SIZE, cycle through the choices until the interface is comfortable to read. Use CONTINUE to proceed or BACK to return.
Configure initial subtitles
Choose whether subtitles are on or off, then select your preferred subtitle size before starting the game.
Calibrate HDR
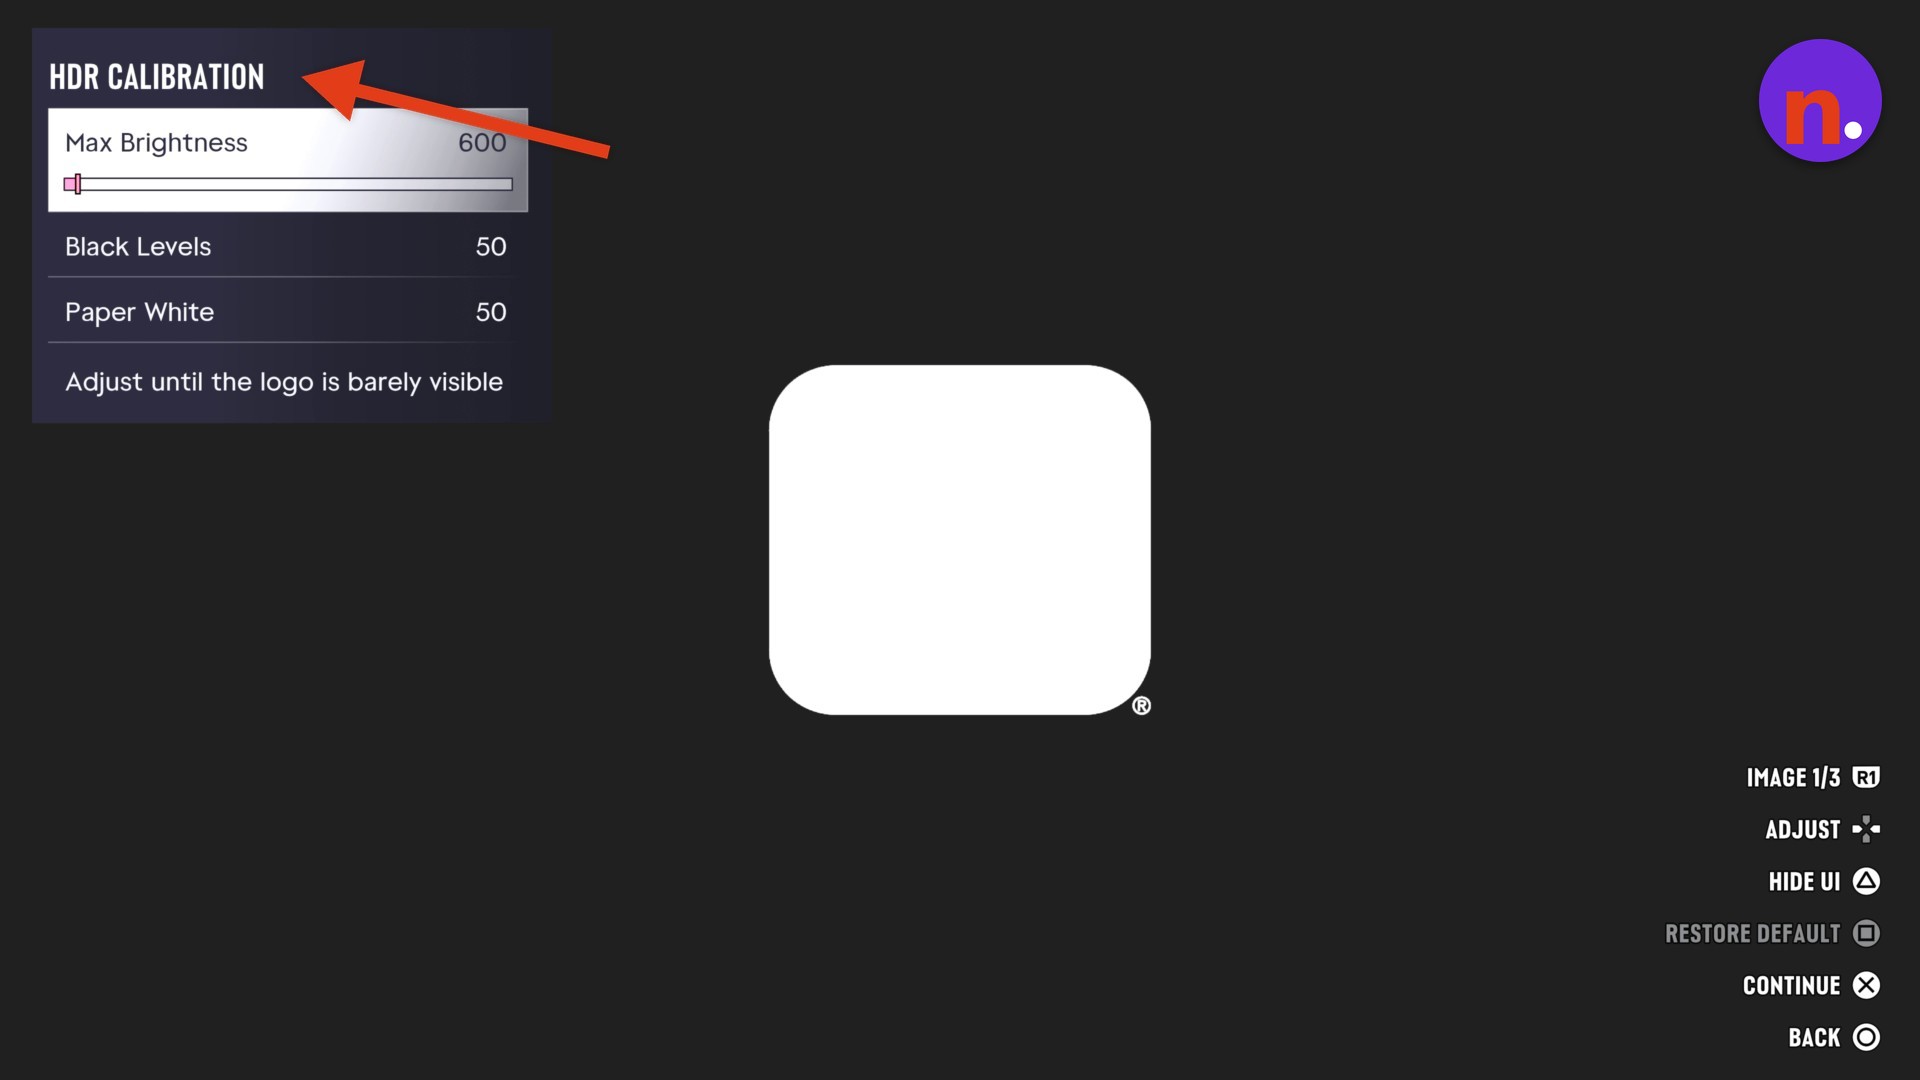
On HDR CALIBRATION, adjust Max Brightness, Black Levels, and Paper White. The screen includes an R1 prompt and the controls ADJUST, HIDE UI, RESTORE DEFAULT, CONTINUE, and BACK.
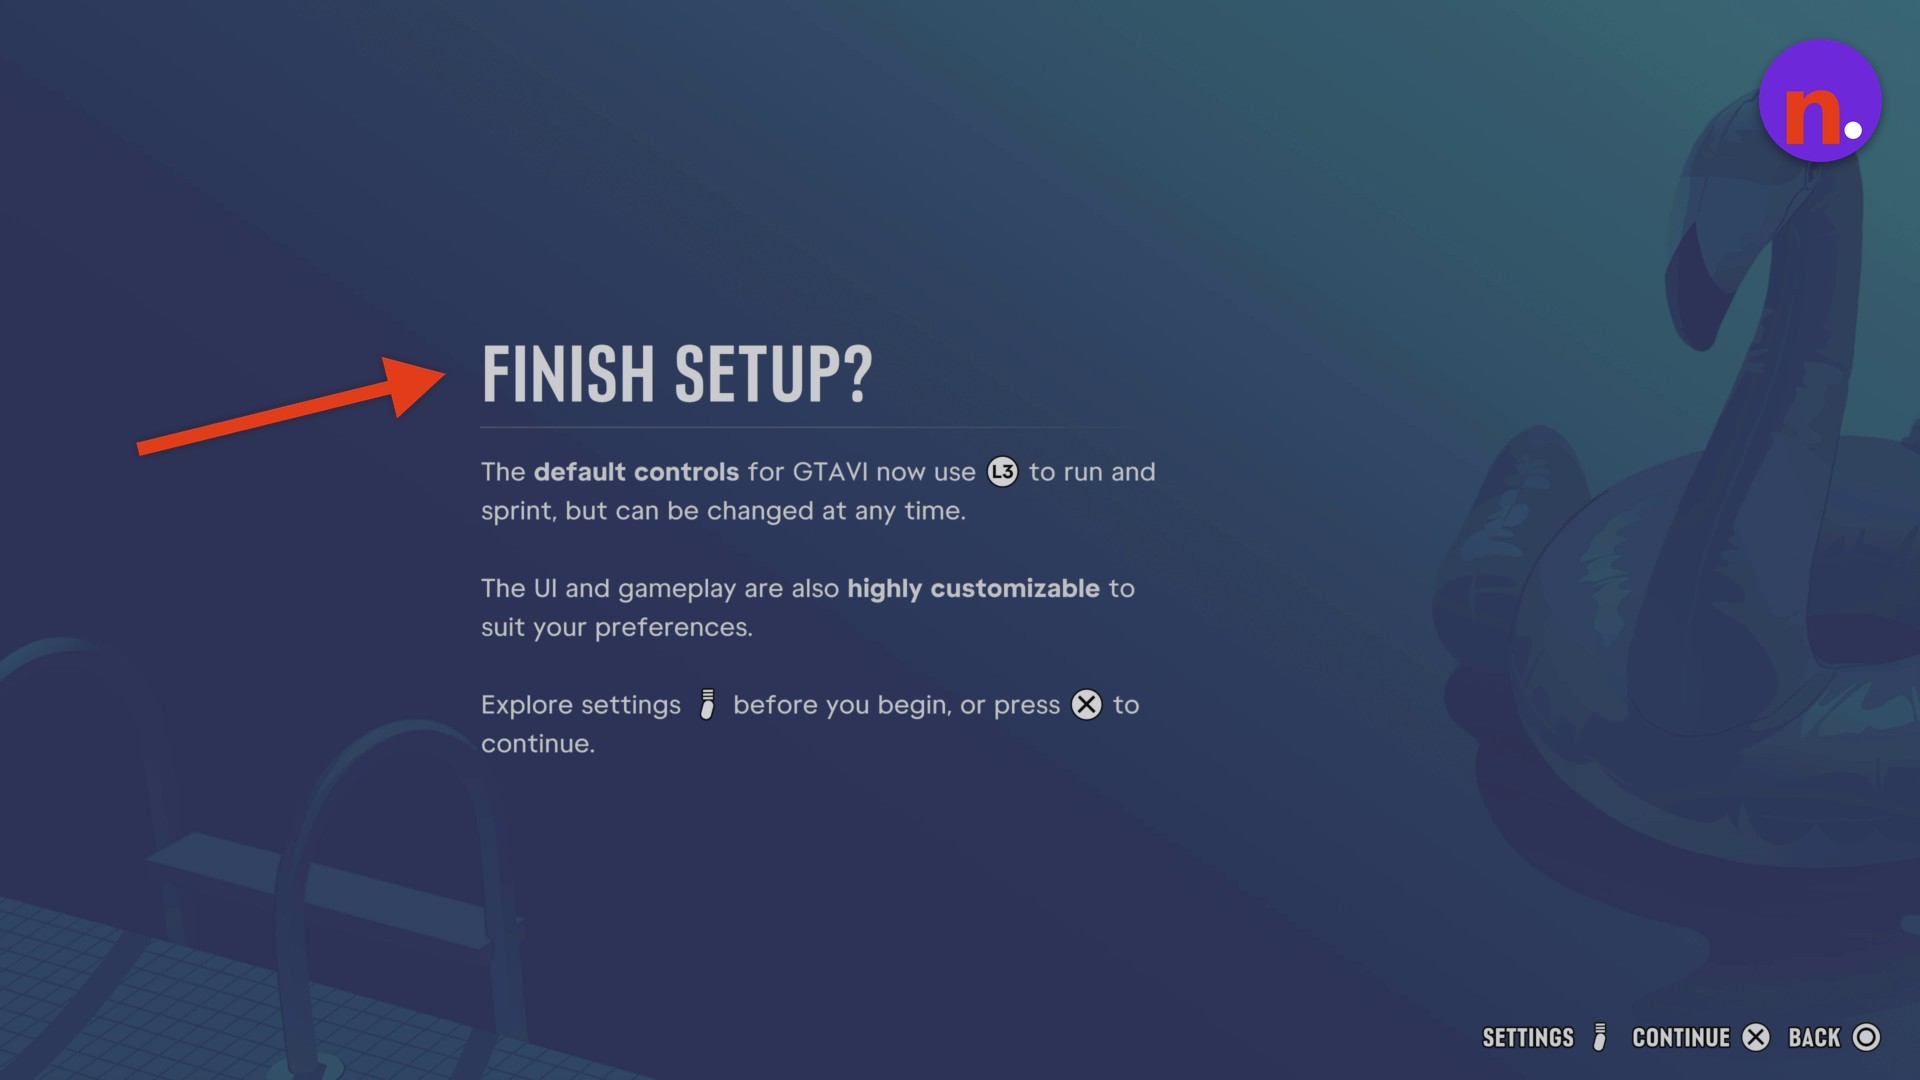
At FINISH SETUP?, choose SETTINGS to explore customization before beginning play. This screen also offers CONTINUE and BACK.
Part 2 – Review the control layout, display, HUD, and audio
Check the layout and presentation options before fine-tuning controller response.
Review your controller layout
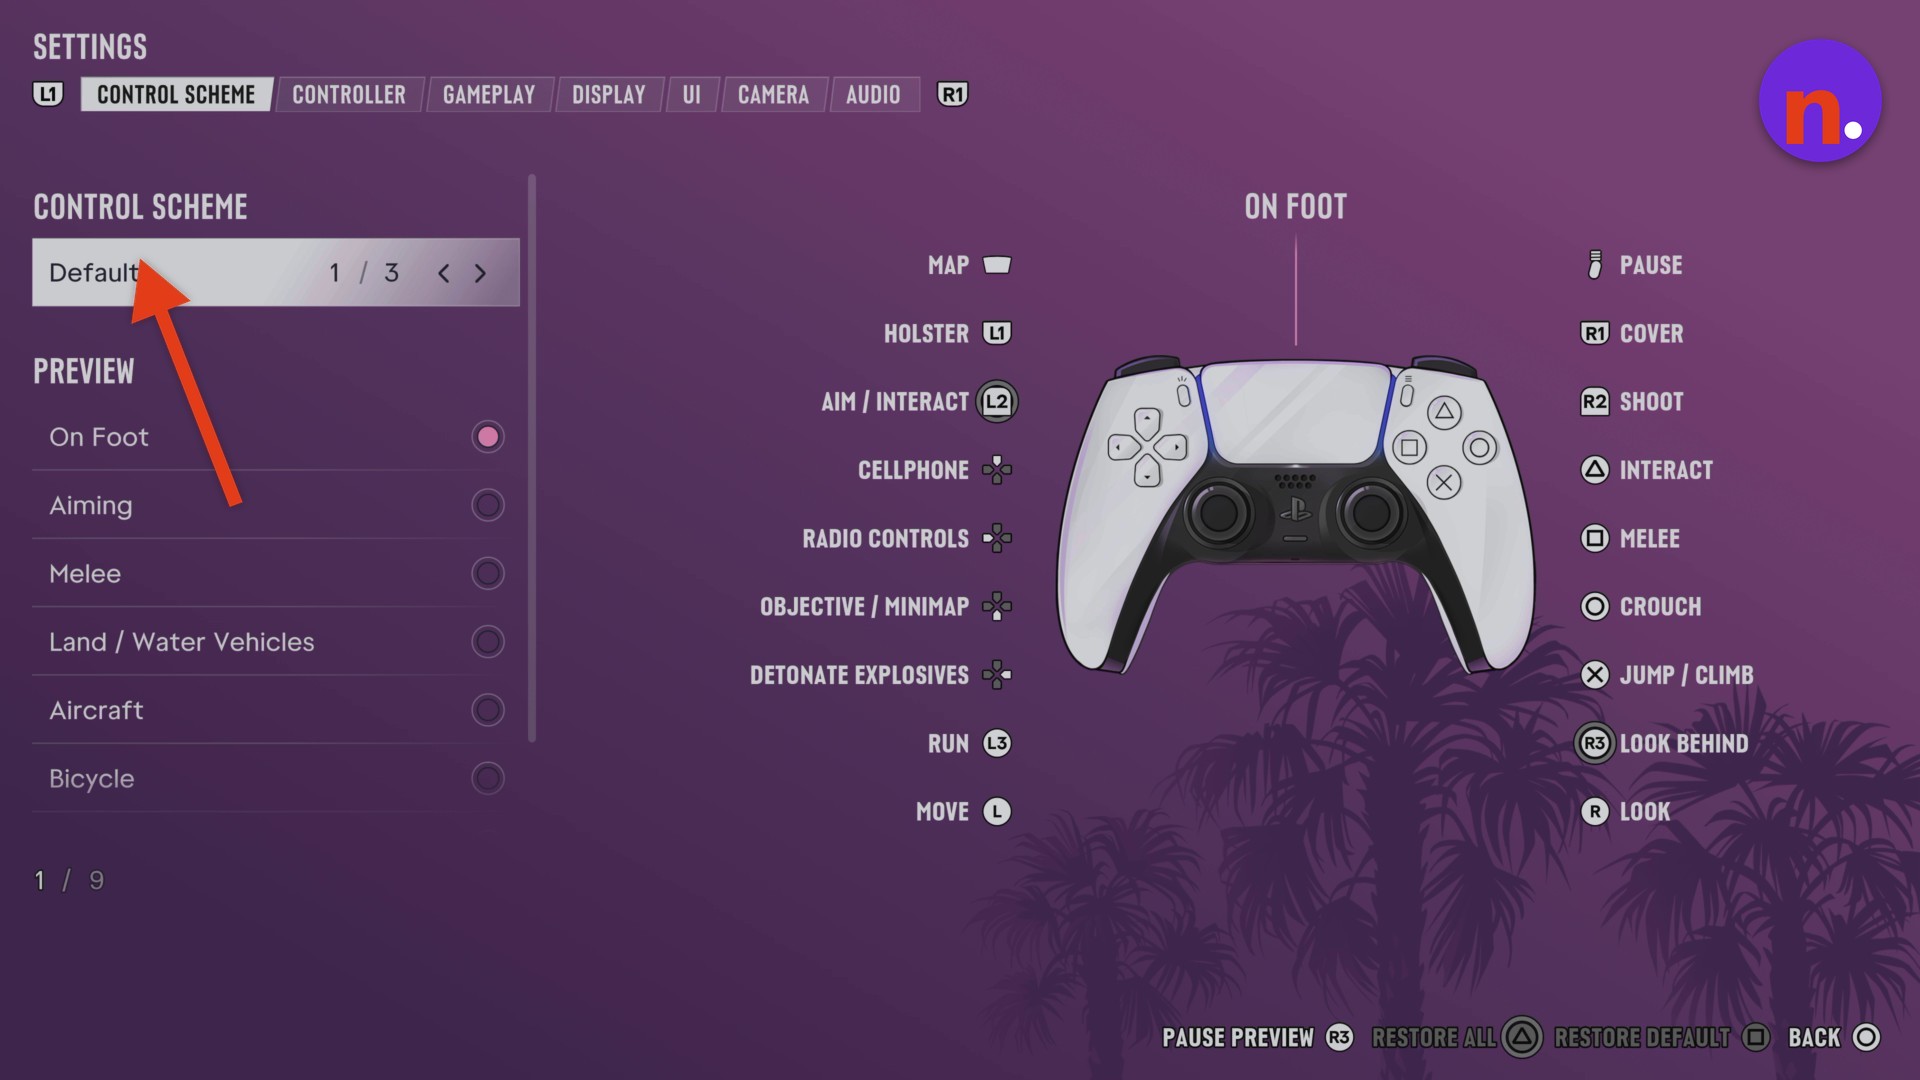
Open CONTROL SCHEME and browse the presets to choose your preferred layout. Review PREVIEW and the On Foot, Aiming, and Melee labels. The settings tabs are CONTROL SCHEME, CONTROLLER, GAMEPLAY, DISPLAY, UI, CAMERA, and AUDIO, with L1 and R1 prompts visible beside the tab row.
Adjust display and visual effects
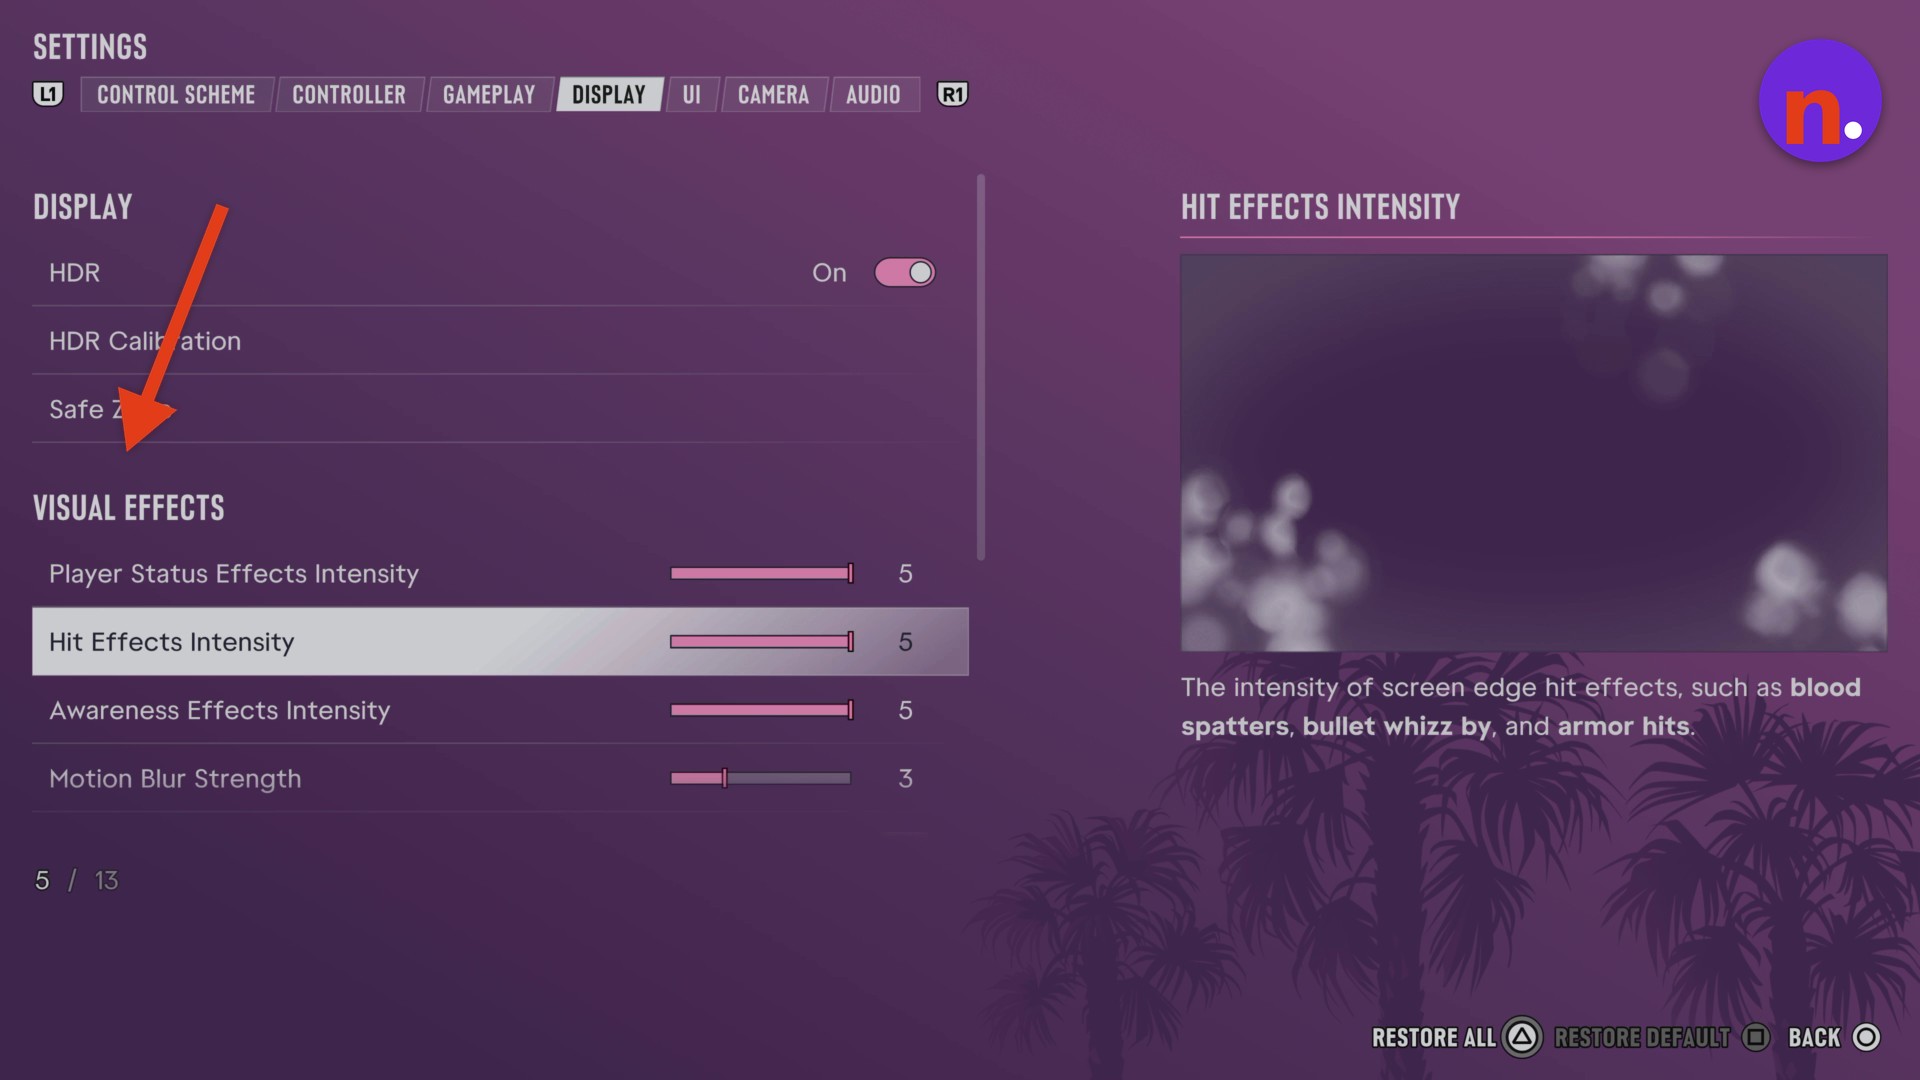
Open DISPLAY and review VISUAL EFFECTS. Adjust Motion Blur Strength, Dismemberment, Blood & Gore Intensity, and High Contrast Shaders to your preferences.
Configure UI and HUD preferences
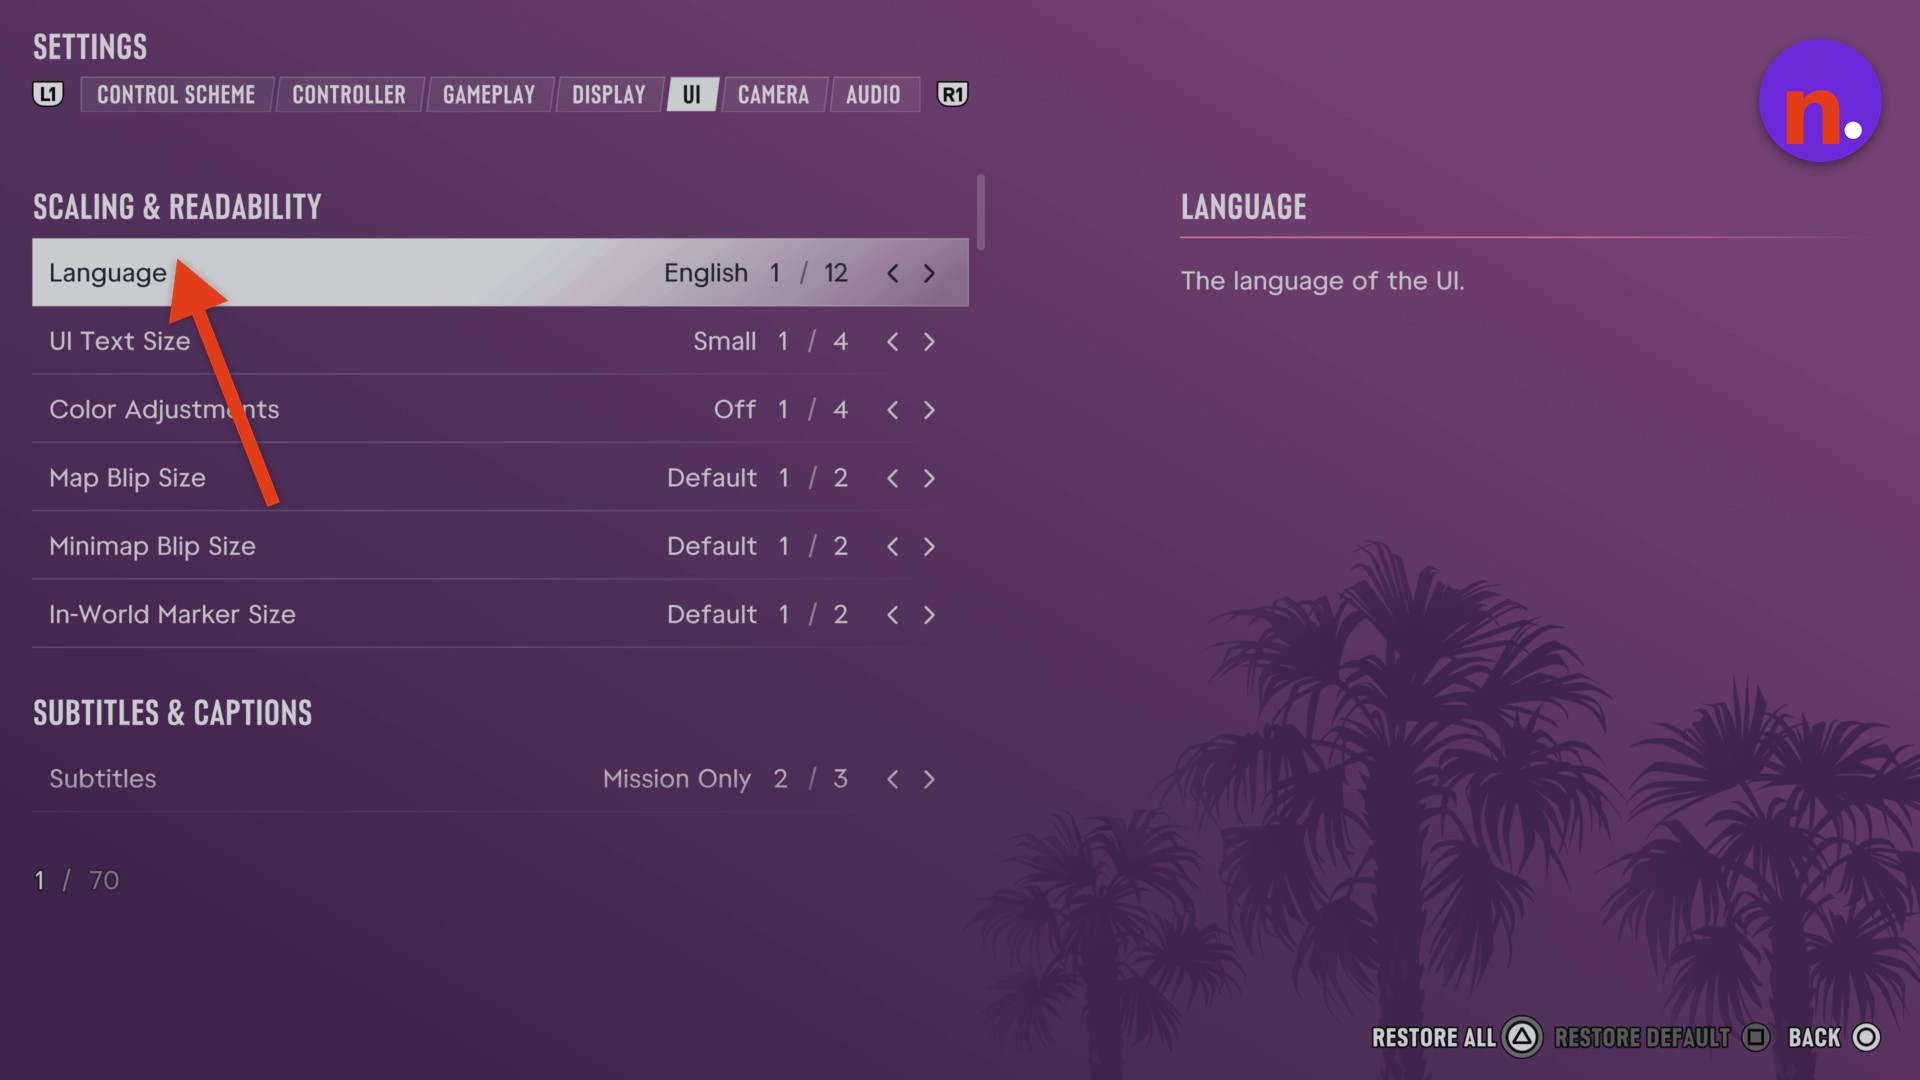
Review subtitle preferences under SUBTITLES & CAPTIONS, and distance, weight, and temperature preferences under UNITS OF MEASUREMENT. Review Clock Format in the UI settings.
Choose your audio preferences
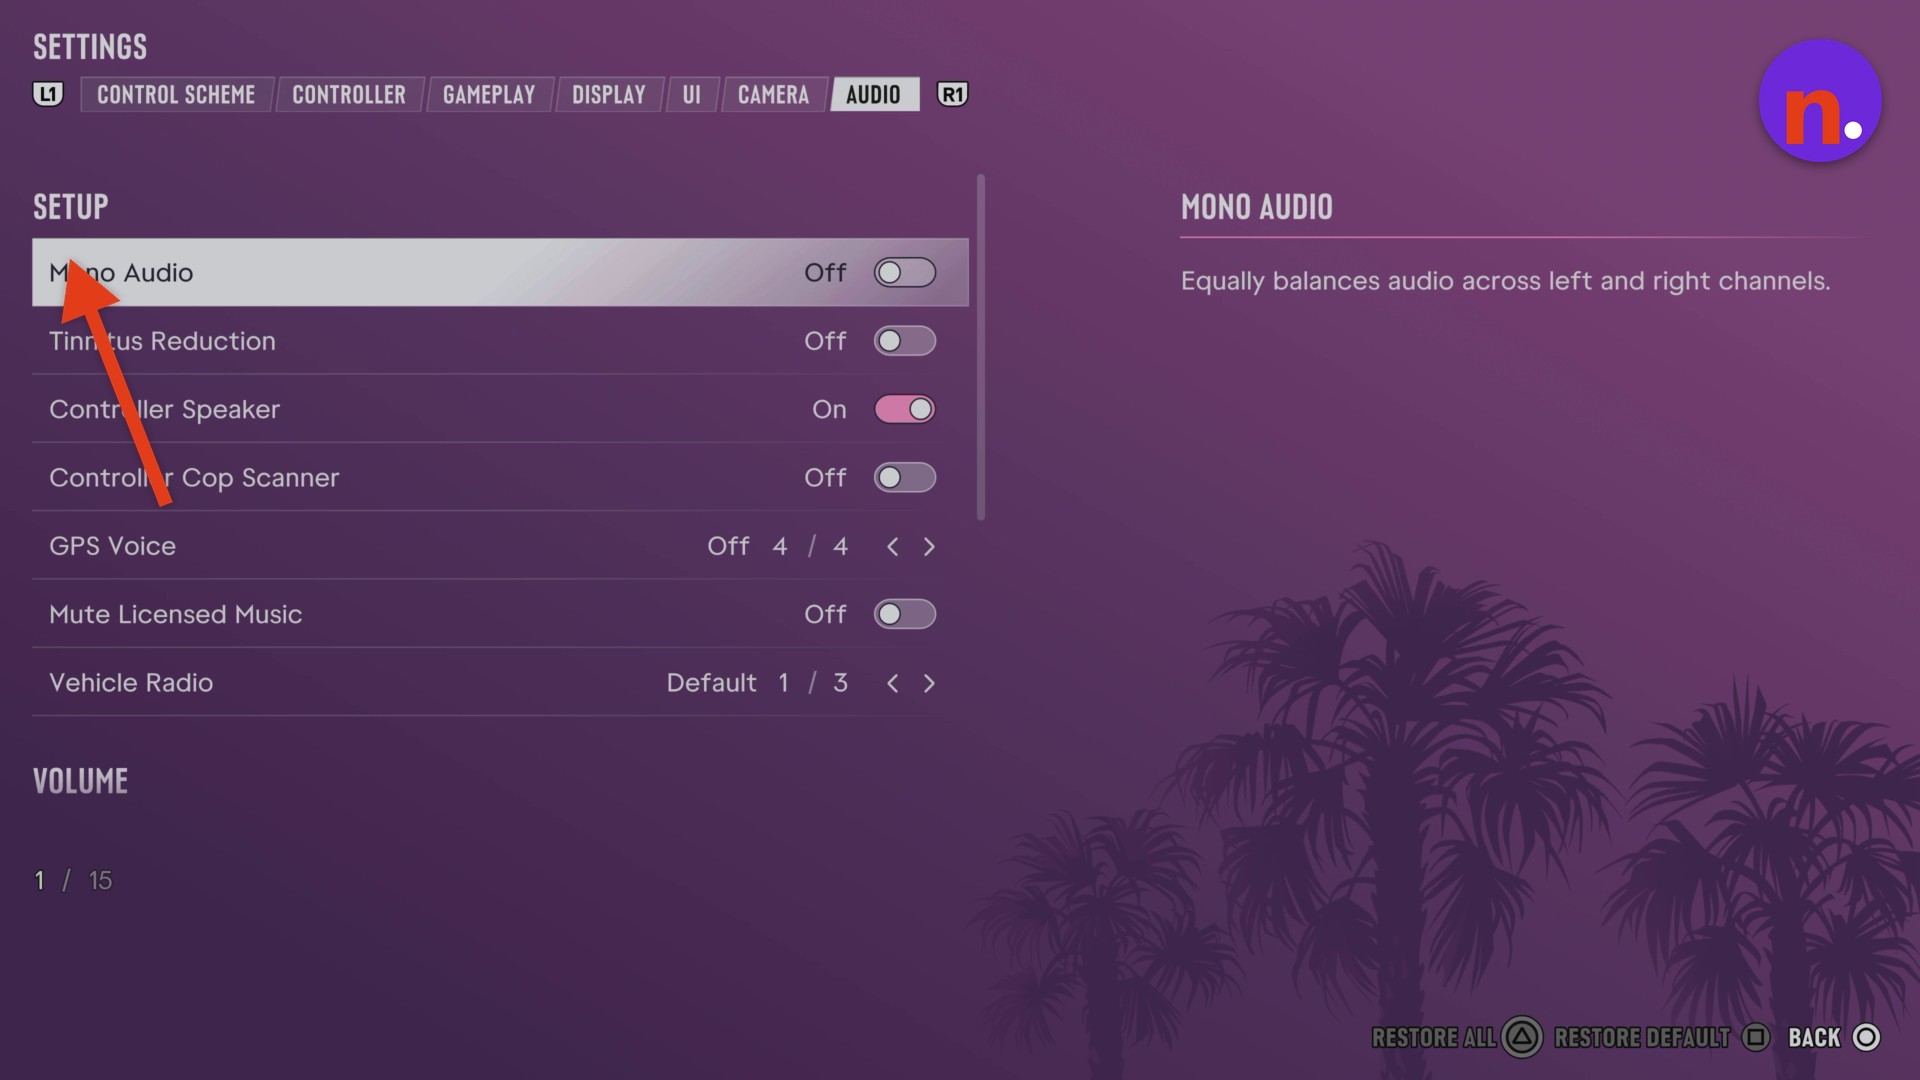
Open AUDIO > SETUP to review Mono Audio and Controller Cop Scanner, then select your preferred GPS Voice and Vehicle Radio playback options.
Part 3 – Fine-tune controller response and gameplay, then save
Finish with aiming, movement, and gameplay preferences.
Adjust controller response
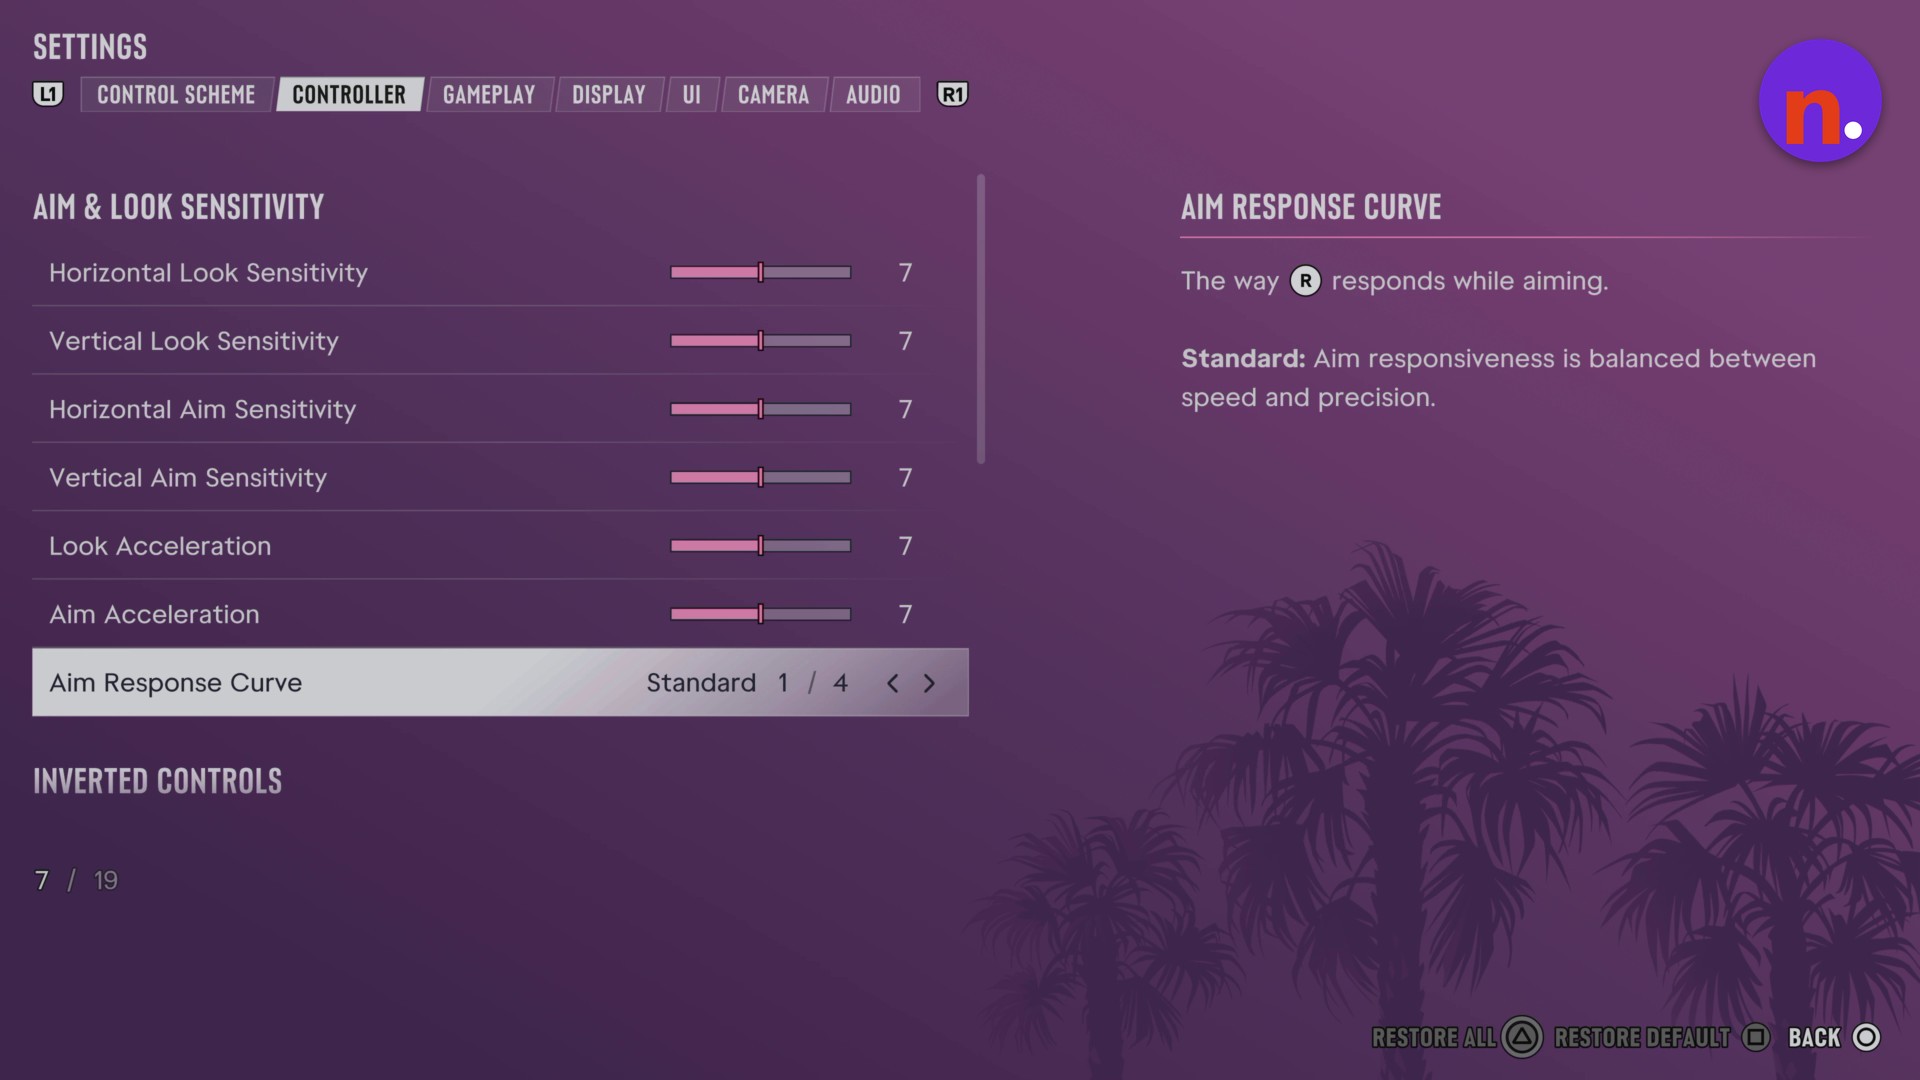
Open CONTROLLER > AIM & LOOK SENSITIVITY to review look and aim sensitivity and choose an Aim Response Curve. Review stick deadzones, adaptive trigger settings, and INVERTED CONTROLS before leaving the tab.
Configure gameplay and save your changes
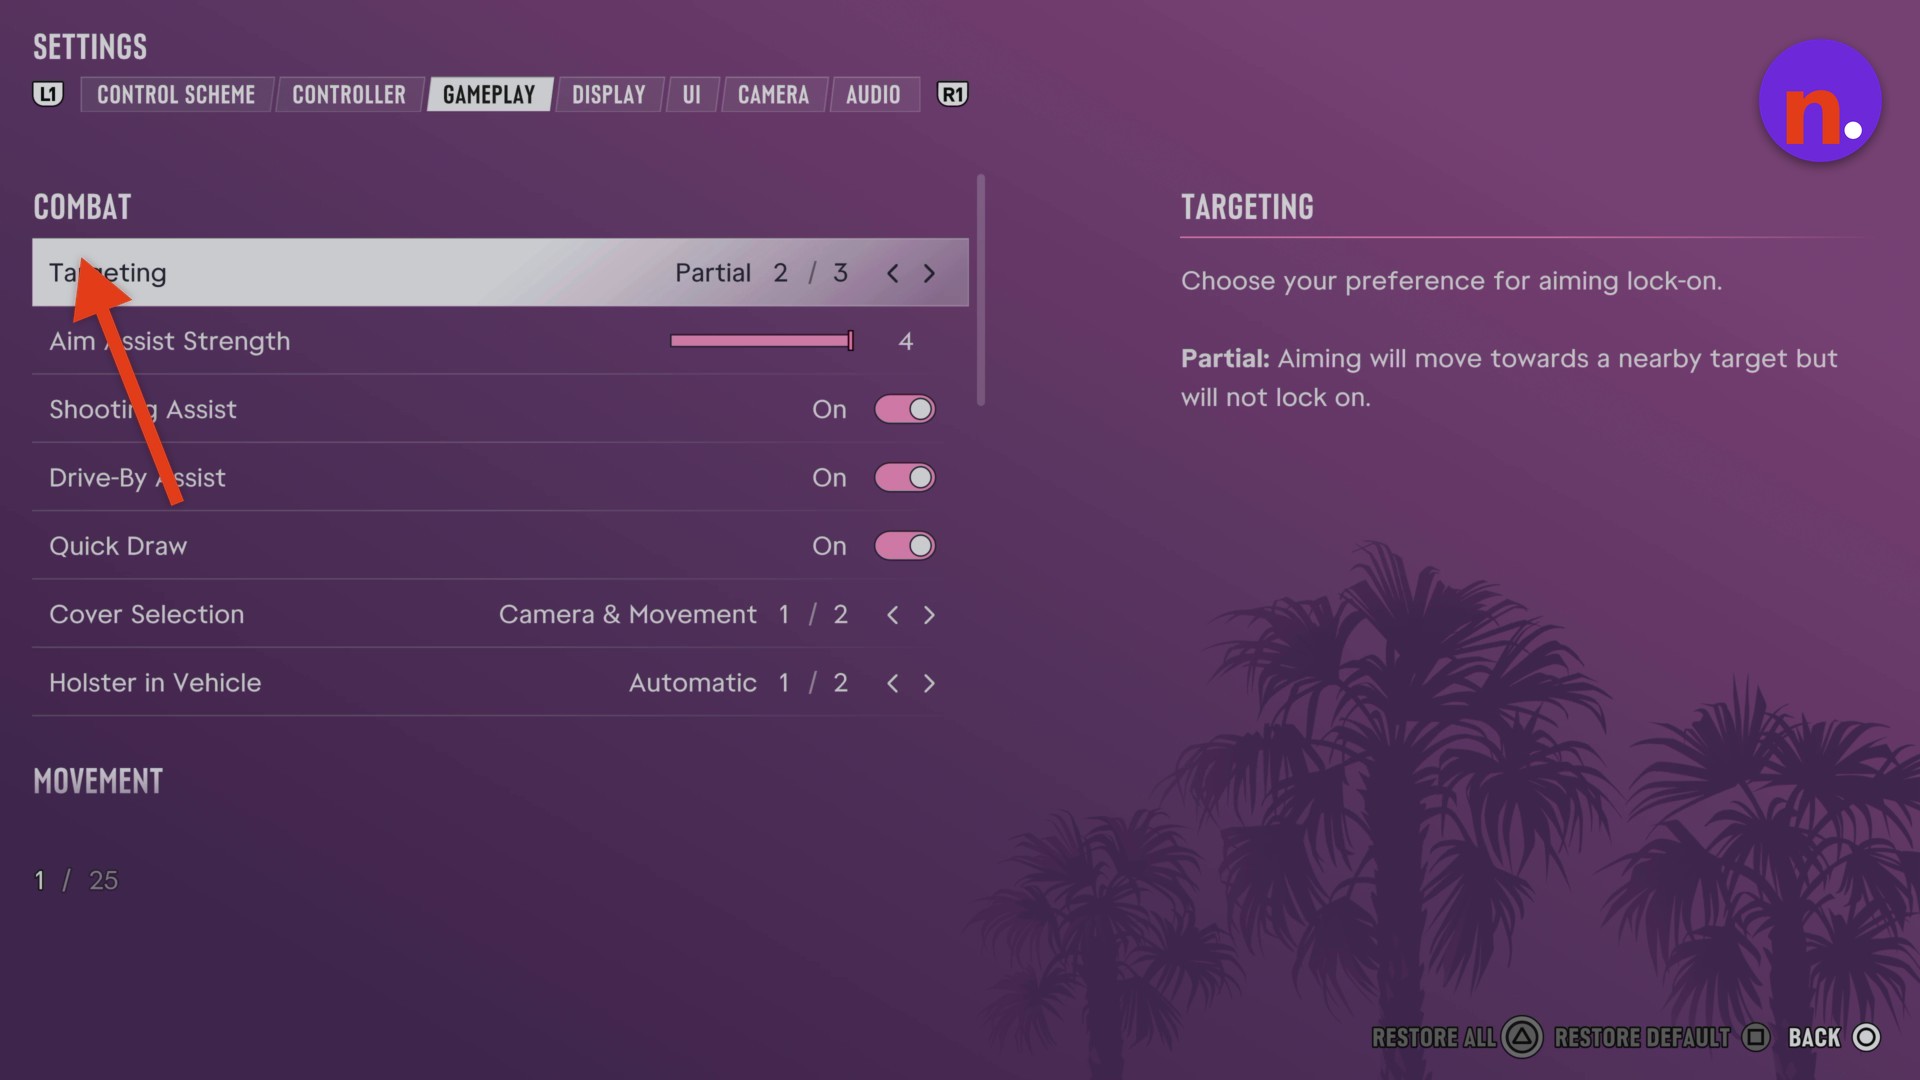
In GAMEPLAY, review COMBAT and MOVEMENT, including Targeting and Stand & Sprint. Continue through the gameplay and accessibility options for Simplified Mini Games, Auto Drive, Reduced Vehicle Damage, and auto equip helmet. Respond to the save-settings confirmation when it appears. The menus provide RESTORE ALL and RESTORE DEFAULT for restoring settings, plus BACK to return.
What do the beginner settings mean in Grand Theft Auto VI?
The initial setup includes explicit defaults for text size, subtitles, and HDR calibration. Other menu entries show their current selections, with indicators such as 1/3 identifying a choice within a set.
First-launch options
| Setup setting | Options and values |
|---|---|
| Navigation Experience | Minimap; Minimap & Compass; Minimap Always On |
| UI Text Size | 4 choices, including Small, Medium, and Large; Small (Default), shown at 1/4 |
| Initial subtitles | Off (Default) |
| Subtitle size | Selectable during initial setup |
| HDR Max Brightness | Default: 600 |
| HDR Black Levels | Default: 50 |
| HDR Paper White | Default: 50 |
| HDR preview indicator | IMAGE 1/3 |
Choose Small for balanced text and icon sizing.
Control scheme choices
| Control setting | Options and values |
|---|---|
| CONTROL SCHEME | Default selected at 1/3; Classic is another choice |
| Default run and sprint input | L3 |
Hit Effects Intensity controls the strength of screen-edge effects, including blood spatters, bullet whizz-by effects, and armor hits.
Display selections
| Display setting | Displayed value |
|---|---|
| HDR | On |
| HDR Calibration | Available |
| Safe Z | Present |
| Player Status Effects Intensity | 5 |
| Hit Effects Intensity | 5 |
| Awareness Effects Intensity | 5 |
| Motion Blur Strength | 3 |
Language determines the language used by the interface. For measurements, Imperial expresses distance and height in inches, feet, yards, and miles, while Clock Format determines how time is formatted.
UI selections and units
| UI setting | Options and values |
|---|---|
| Language | 12 choices; English shown at 1/12 |
| Color Adjustments | Off |
| Map Blip Size | Default, 1/2 |
| Minimap Blip Size | Default |
| In-World Marker Size | Available |
| Subtitles under SUBTITLES & CAPTIONS | Later selection: Mission Only, 2/3 |
| ACTIVITIES: Mini Scoreboard | On |
| ACTIVITIES: Central Messages | On |
| ACTIVITIES: Activity Timers & Stats | On |
| Distance | 2 choices; Imperial shown at 2/2 |
| Weight | 2 choices: Kilograms, 1/2; Pounds, 2/2 |
| Temperature | 2 choices: Celsius, 1/2; Fahrenheit, 2/2 |
| Clock Format | 2 choices; 12 Hour shown at 1/2 |
Mono Audio balances sound evenly across the left and right channels. The audio menu also includes a separate VOLUME section.
Audio selections
| Audio setting | Displayed value |
|---|---|
| Mono Audio | Off |
| Tinnitus Reduction | Off |
| Controller Speaker | On |
| Controller Cop Scanner | Off |
| GPS Voice | Off, 4/4 |
| Mute Licensed Music | Off |
| Vehicle Radio | Default, 1/3 |
Standard balances aiming speed and precision.
Controller response selections
| Controller setting | Displayed value |
|---|---|
| Horizontal Look Sensitivity | 7 |
| Vertical Look Sensitivity | 7 |
| Horizontal Aim Sensitivity | 7 |
| Vertical Aim Sensitivity | 7 |
| Look Acceleration | 7 |
| Aim Acceleration | 7 |
| Aim Response Curve | 4 choices; Standard shown at 1/4 |
Targeting sets your aiming lock-on preference. With Partial, your aim moves toward a nearby target without locking on.
Gameplay selections
| Gameplay setting | Options and values |
|---|---|
| Targeting | Partial, 2/3 |
| Aim Assist Strength | Default: 4 |
| Shooting Assist | On |
| Drive-By Assist | On |
| Quick Draw | On |
| Cover Selection | Camera & Movement, 1/2 |
| Holster in Vehicle | Automatic, 1/2 |
Both the UI and gameplay offer extensive customization, giving you room to shape the interface and play preferences around how you want to play.
Related Grand Theft Auto VI guides
Leave a Reply