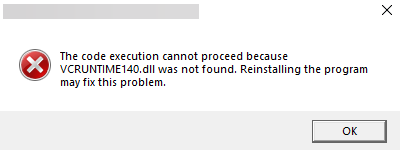
Missing DLL files are a computer user’s worst nightmare. They seemingly come out of nowhere and can stop your work dead in its track. There’s one error message that is quite common, unfortunately, for Windows users, which is the “VCRUNTIME140.dll is missing” error message.
The whole error message reads something like this: The code execution cannot proceed because VCRUNTlME140.dll was not found. Reinstalling the program may fix this problem.
Because a variety of applications depend on the runtime library of the Microsoft Visual Studio, getting the ‘Vcruntime140.dll is missing’ error can be problematic.
Here are a few methods that you can use to fix this error and get back to your program again.
Related: Can’t Turn on Developer Mode in Windows 11? How to Fix
What causes the ‘Vcruntime140.dll not found’ error?
Dynamic Link Libraries (DLL) files contain the code that programs require to run properly. If they go corrupt or go missing, they can cause more than a few problems. Applications developed in Visual Studio 2015-2019 need the runtime directory to access these codes.
Getting an error message means that the directory files are deleted accidentally, have become corrupt, or have failed to function for some other reason. Malware and viruses are common causes for this, but Windows update can also introduce bugs that cause the DLL files to fail.
Users have also reported getting a similar ‘Vcruntime140_1.dll is missing” error. This is for those who have installed the 2019 update. If your Visual C++ is still 2015, you may just get the ‘Vcruntime140.dll’ error.
Related: How to get Google Play Store and Gapps on Windows 11
How to fix the ‘Vcruntime140.dll not found’ error on your Windows PC
Here are some ways to fix the ‘Vcruntime140.dll not found’ error.
Method 1: Repair Microsoft Visual C++ 2015-2019 redistributable
- To repair Microsoft Visual C++ 2015-2019 redistributable, first press
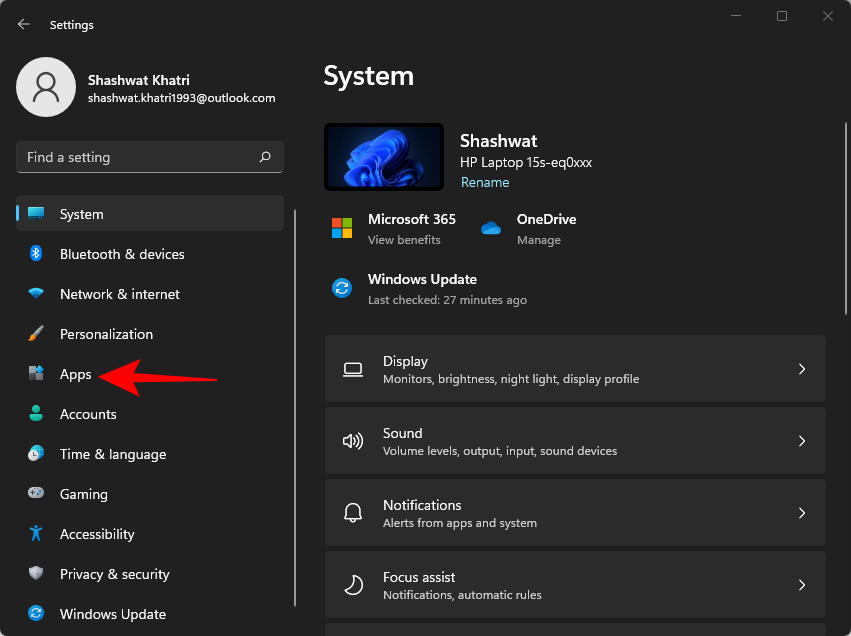
Win + Ito open the Settings menu. Then click on Apps in the left panel.
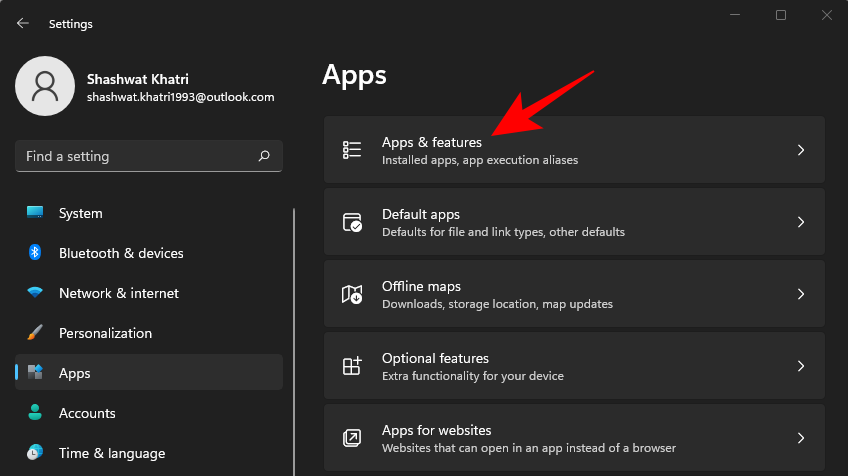
- Then click on Apps & features.
- Search for ‘Visual C++’.
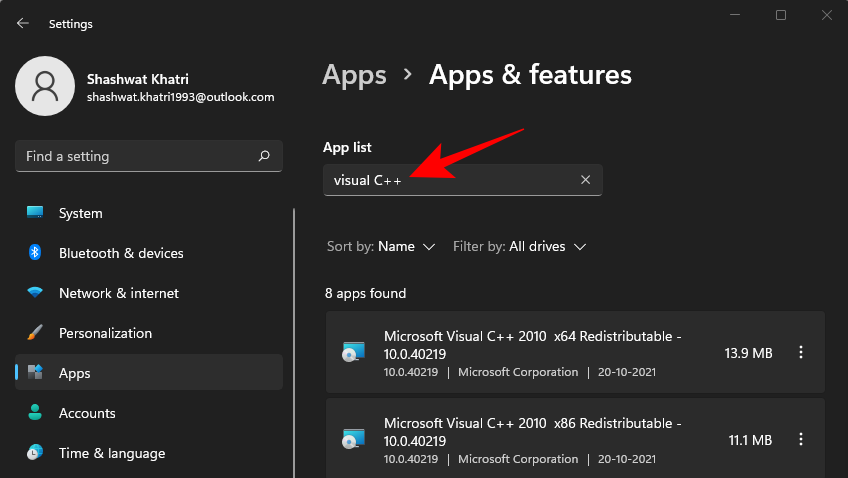
- You may get a number of Visual C++ versions. But we’re looking for Microsoft Visual C++ 2015-2019 Redistributable (x64) and (x86).
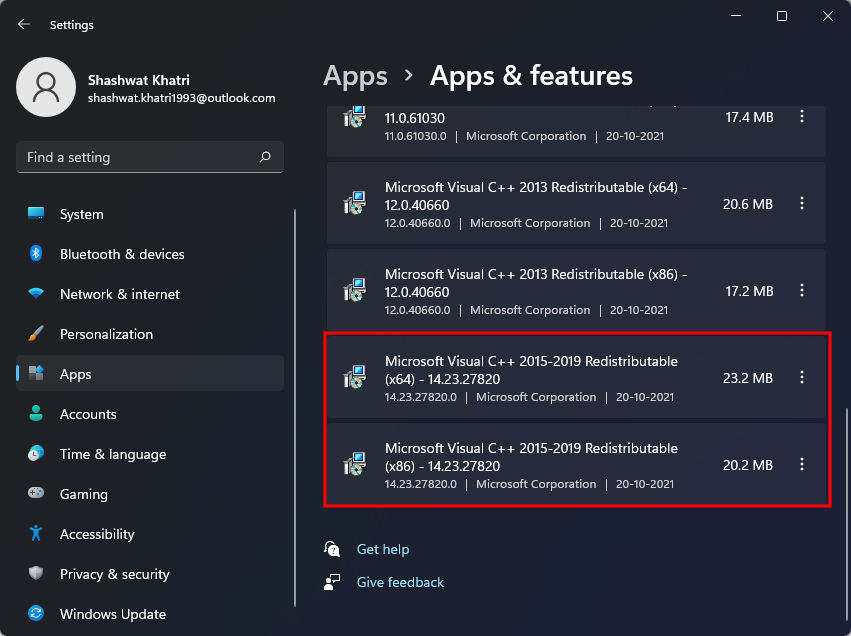
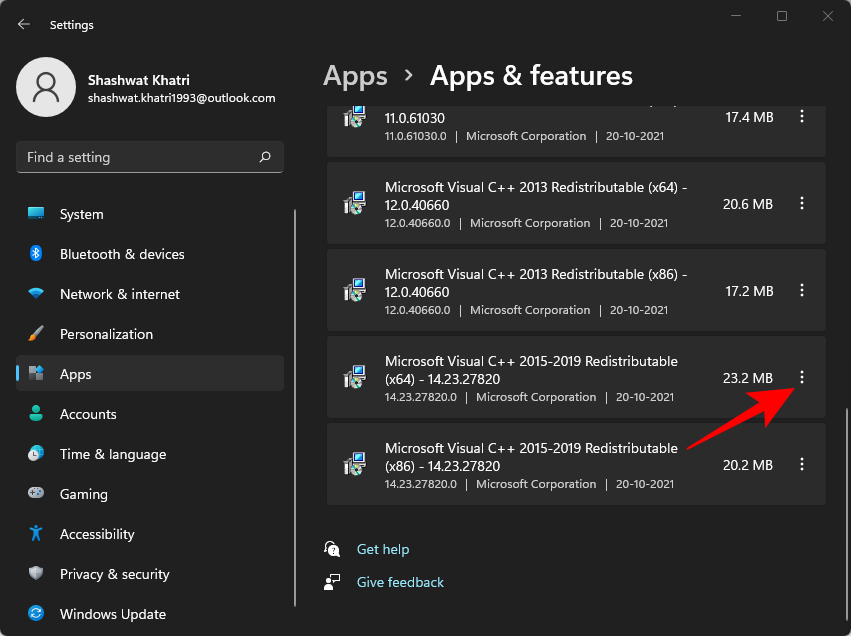
- We’re going to modify both of these. First, click on the three dots to the right of the x64 version.
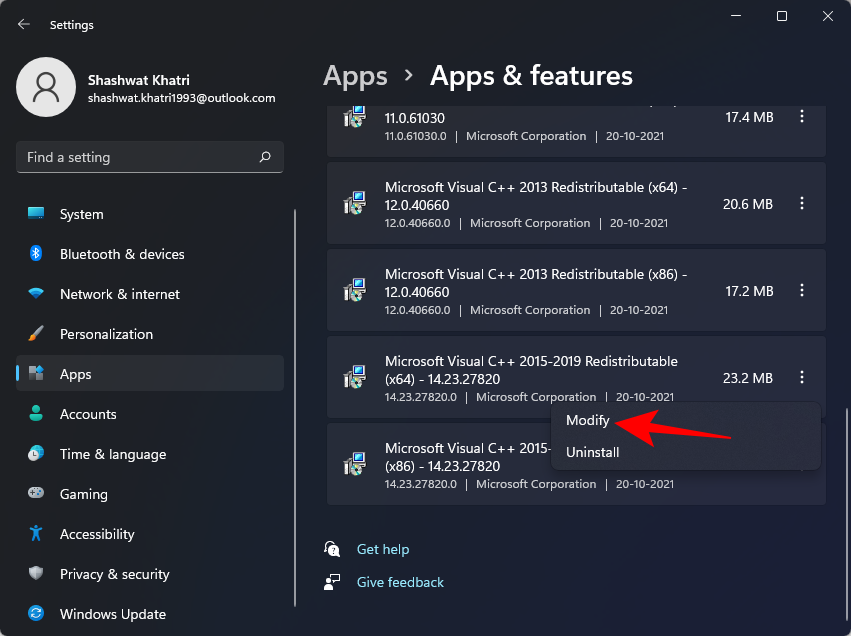
- Select Modify.
- Then click Repair.
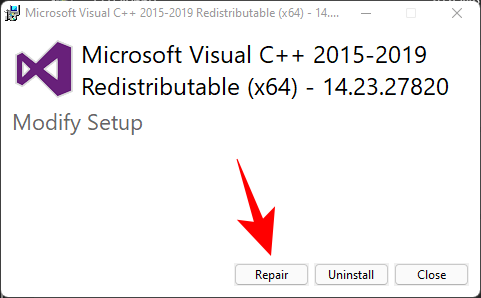
- Once the setup is completed, click on Close.
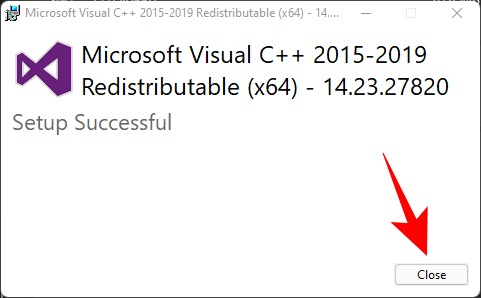
Now do the same for the x86 version. Once you’re done with the setup, restart your PC once and try running the program that was generating the error message.
Method 2: Reinstall Visual C++ Redistributable for Visual Studio 2015 (x64 and x86 both)
Another way out of the error message is to uninstall and reinstall the Visual C++ Redistributable for Visual Studio 2015-2019. Here’s how to do so:
- Go to the same Apps settings as shown before and search for Visual C++. Here too we’re looking for Visual C++ 2015-2019 redistributable (x64) and (x86) versions.
- Click on the three dots next to the (x64) version first.
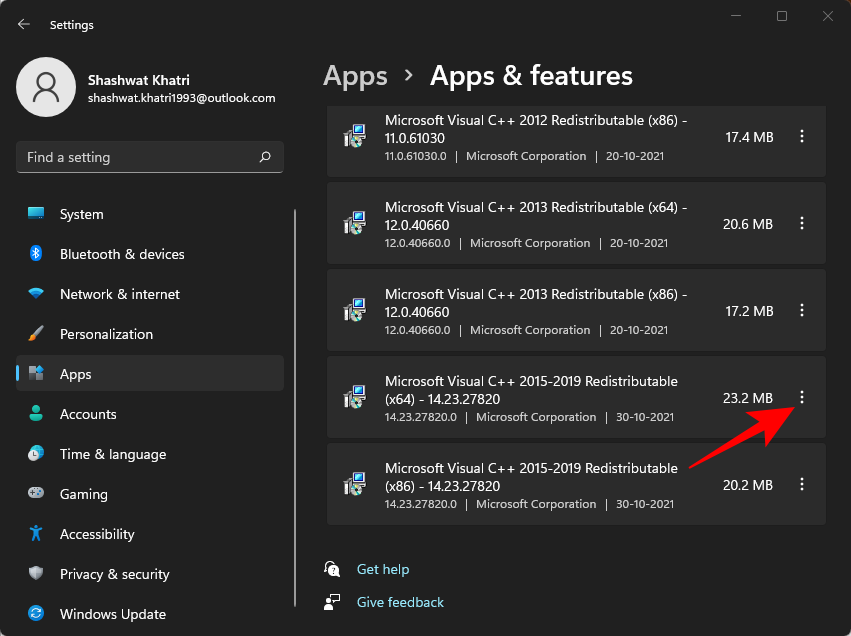
- Select Uninstall.
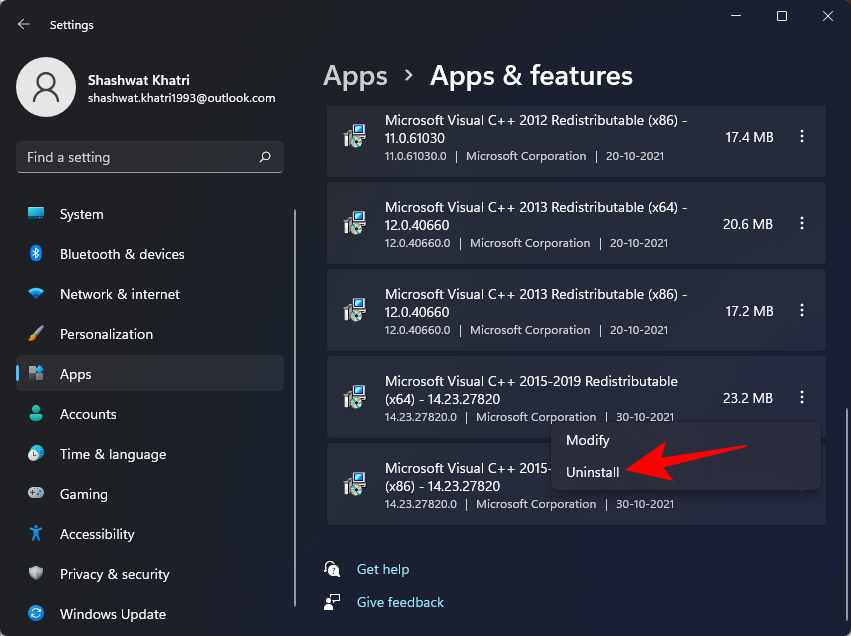
- Click on Uninstall again.
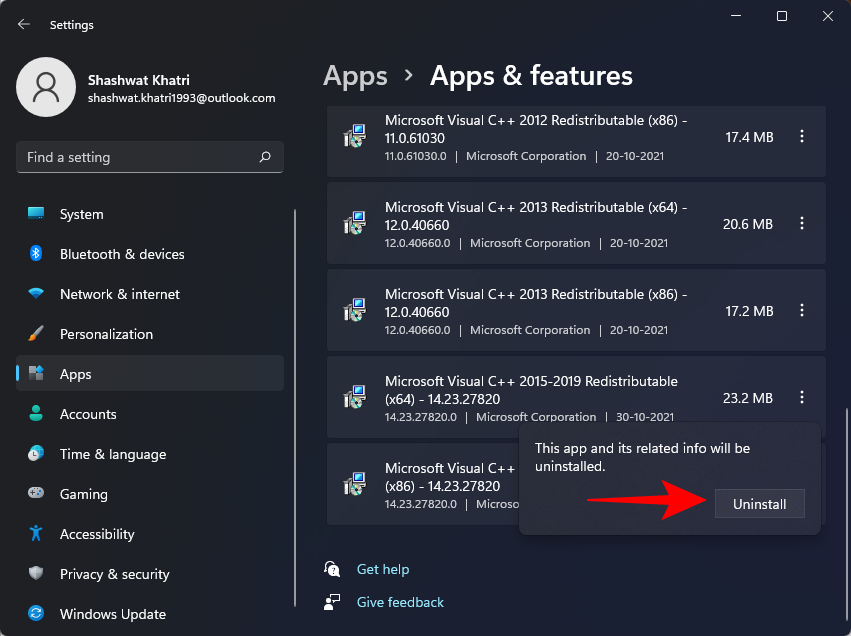
- When the setup opens up, click on Uninstall.
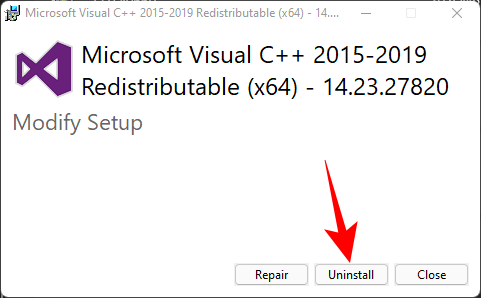
- Once uninstallation finishes, do the same for the Visual C++ 2015-2019 (x86) version.
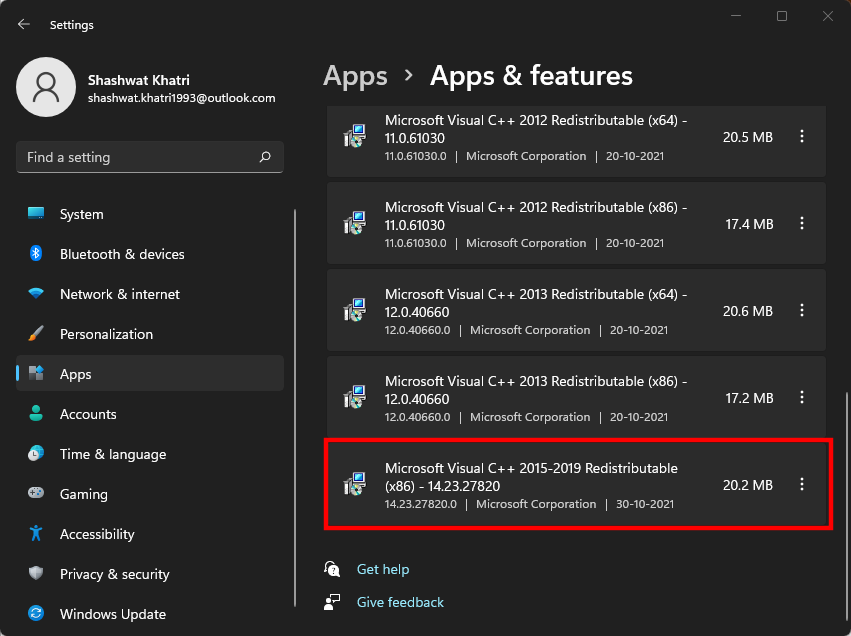
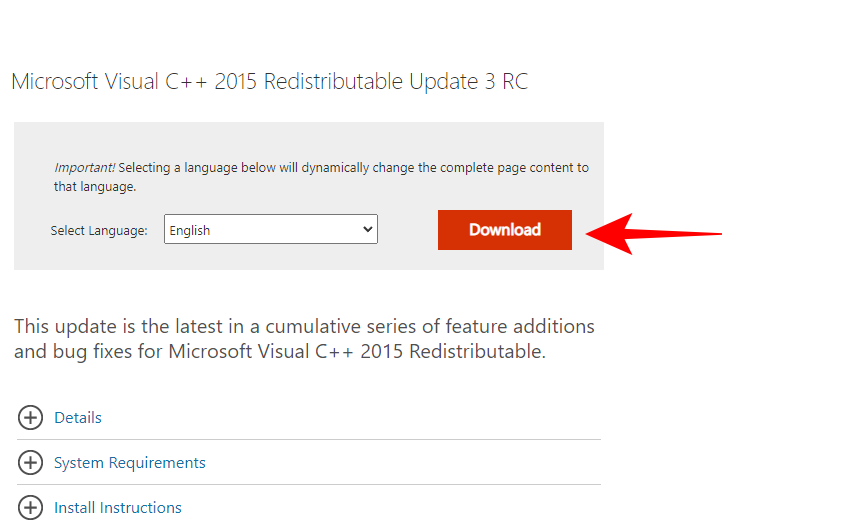
- Now, it’s time to install these two versions from Microsoft’s website. Follow the download link given below for the same.
Download: Microsoft Visual C++ 2015 Redistributable Update 3 RC - Click on the Download button on the page linked above.
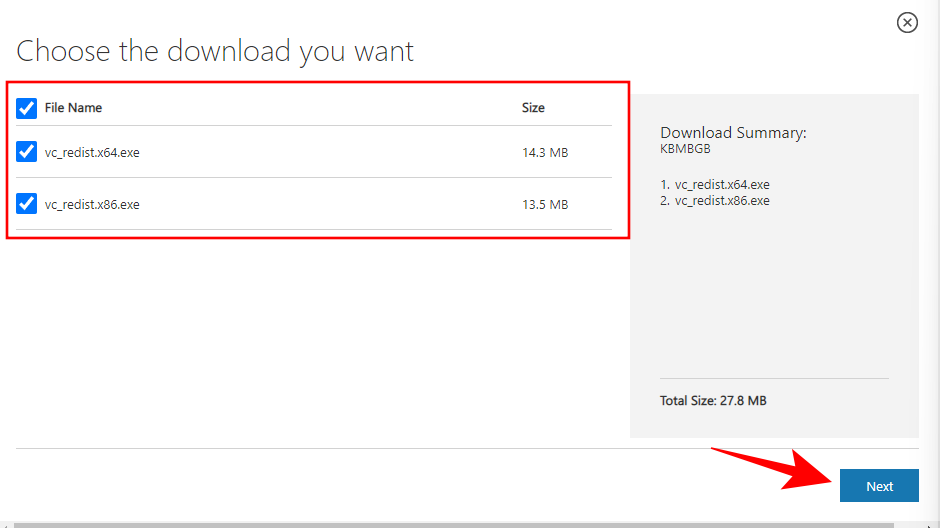
- Now, make sure you select both versions, x64 and x86. Then click Next.
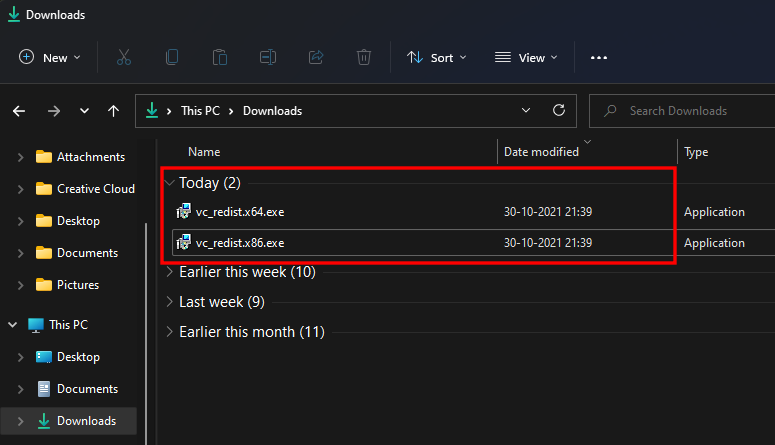
- Once the two files are downloaded, run them one by one.
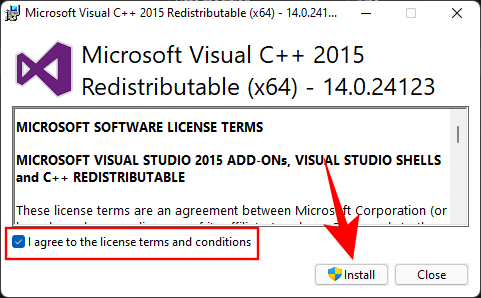
- In the setup, agree to the terms and conditions then click Install.
- Once the setup completes, restart your system and check to see if the error message goes away.
Method 3: Run the SFC scan
You can also use the system file checker command to fix the error. Here’s how to go about it:
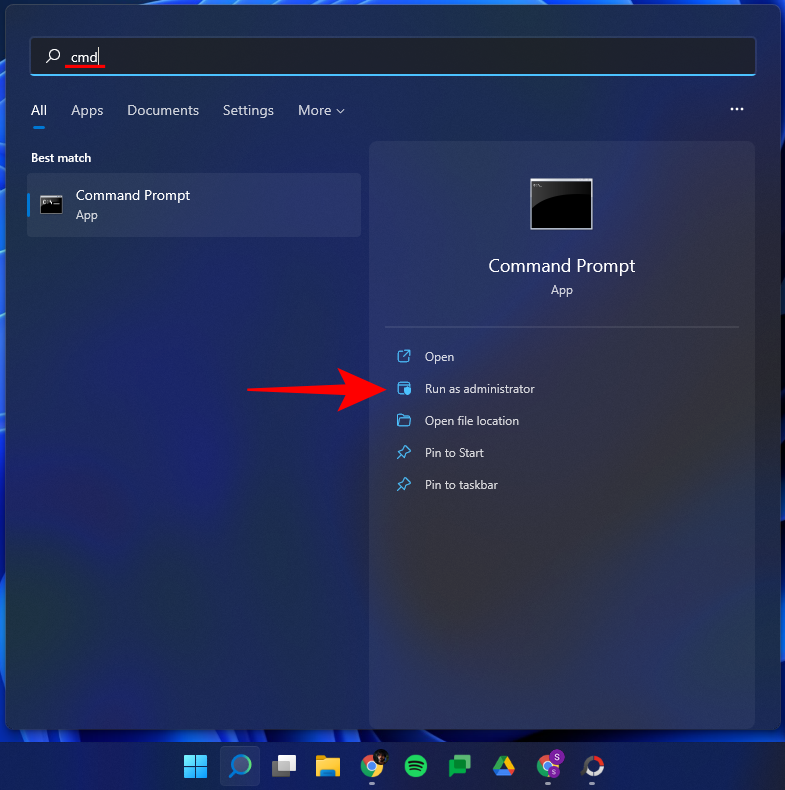
- Press Start, type cmd, and click on Run as administrator.
- Now type the following command:
sfc /scannow

- Then press Enter. Wait for the system scan to complete.

- All corrupt files will now be fixed. If the vcruntime140.dll file was corrupted before, it should now be fixed as well.
Method 4: Run the DISM scans
Apart from the SFC scan, you should also run three DISM scans to rule out problems caused by corrupt system files. Here’s how:
- Open the command prompt as administrator.
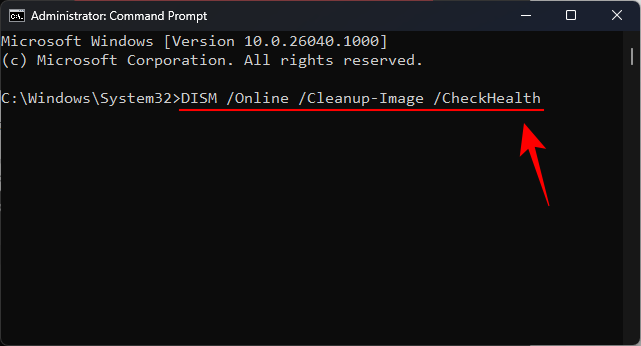
- Then enter the following command:
DISM /Online /Cleanup-Image /CheckHealth
- Next, enter this command:
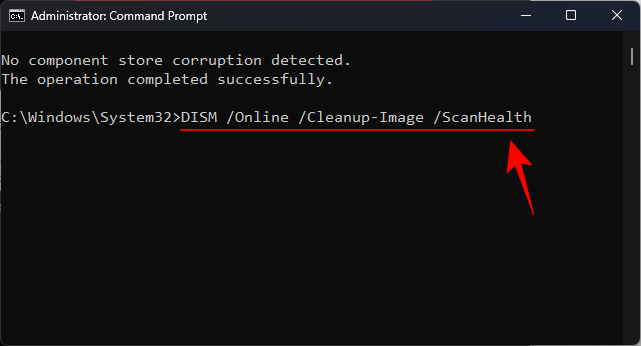
DISM /Online /Cleanup-Image /ScanHealth
- Finally, enter this command:
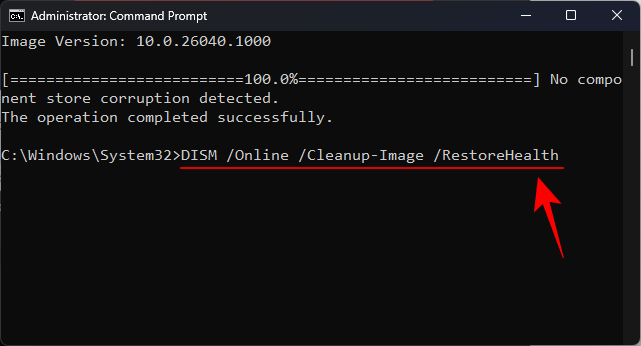
DISM /Online /Cleanup-Image /RestoreHealth
- Once the scans are complete, restart your computer and check if the issue is resolved.
Method 5: Reinstall the affected program
Sometimes, you may be required to uninstall and reinstall the affected program. It’s possible that the program wasn’t downloaded or installed properly. Programs tend to have their own copy of the Vcruntime140.dll files that can help solve the problem, as long as they are downloaded and installed properly.
- To uninstall, press
Win + Ito open Settings. Then click on Apps in the left panel.

- Click on Apps & features.

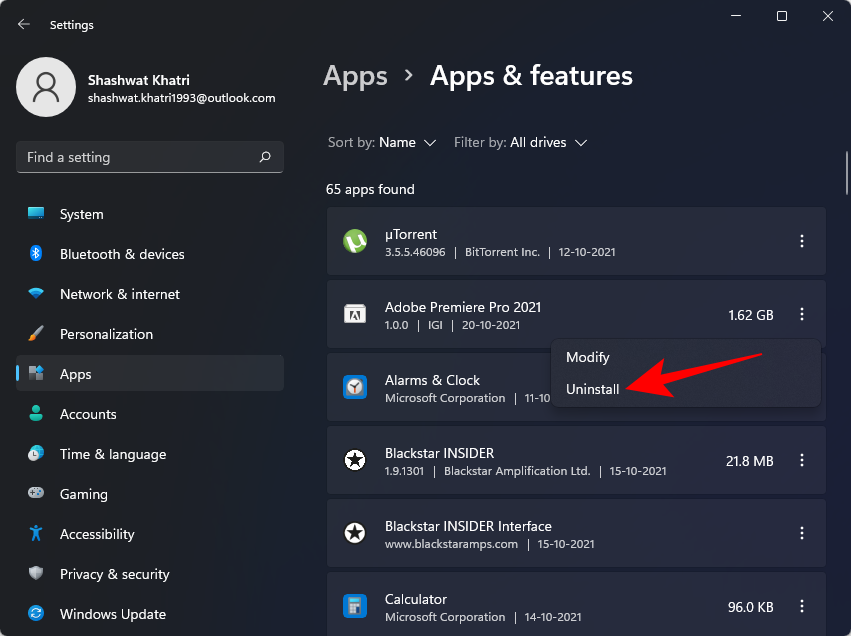
- Search for the app that was affected, then click on the three dots next to it and select Uninstall.
- Go through the uninstallation process, then re-download and re-install the program.
Method 6: Download the DLL file manually
For those unaware, you can straight-up download DLL files and fix most application errors.
- First, go to dll-files.com and look up “VCRUNTIME100.dll.” You can also click on this link to go to the page directly.
- Now, download the file for your 32-bit or 64-bit system. Click on ‘Download’ to save the file to your computer.

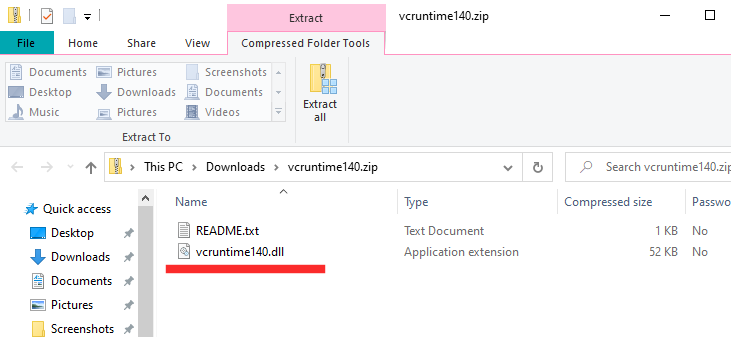
- It will download a Zip file. Inside the Zip archive, you will have a DLL file alongside a readme text file.
- Move the DLL file to the installation directory of the file that is encountering the DLL file error.
Method 7: Update your drivers
Not updating the drivers can throw a lot of curveballs at you, including random DLL file errors. In this case, you have to go to Device Manager and update all drivers manually.
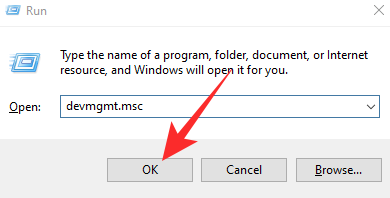
- First, hit
Windows + Rand run thedevmgmt.msccommand.
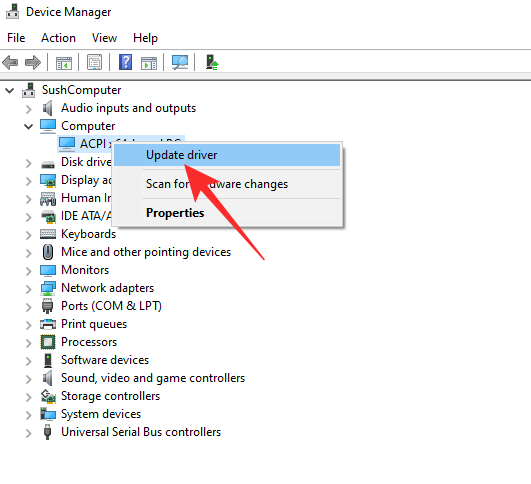
- This will take you to Device Manager. Now, expand any branch and right-click on the hardware component you wish to modify. Next, click on ‘Update driver.’
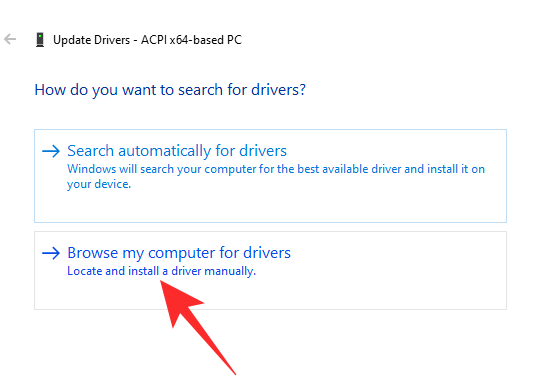
- Then, go to ‘Browse my computer for drivers.’
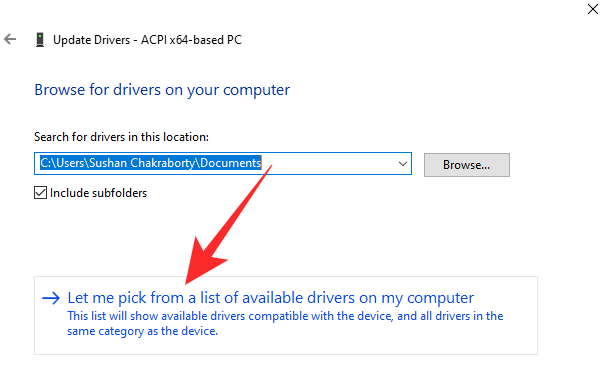
- On the next screen, click on ‘Let me pick from a list of available drivers on my computer.’
- Windows will look up the driver and give you a list. Click on the driver you want to install and click on ‘Next.’
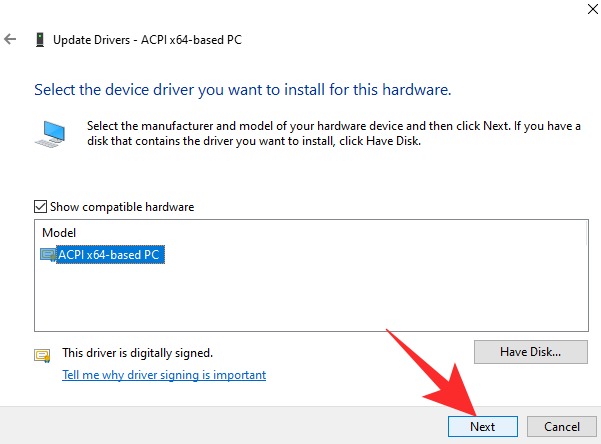
It will be installed right away. - Do this for all suspicious drivers and then try again.
Method 8: Check for quarantined items in Windows Defender
Windows Defender does its own system scanning for potentially harmful files, especially if there isn’t an anti-virus program on your system. It’s possible that windows defender has quarantined the Vcruntime140.dll file.
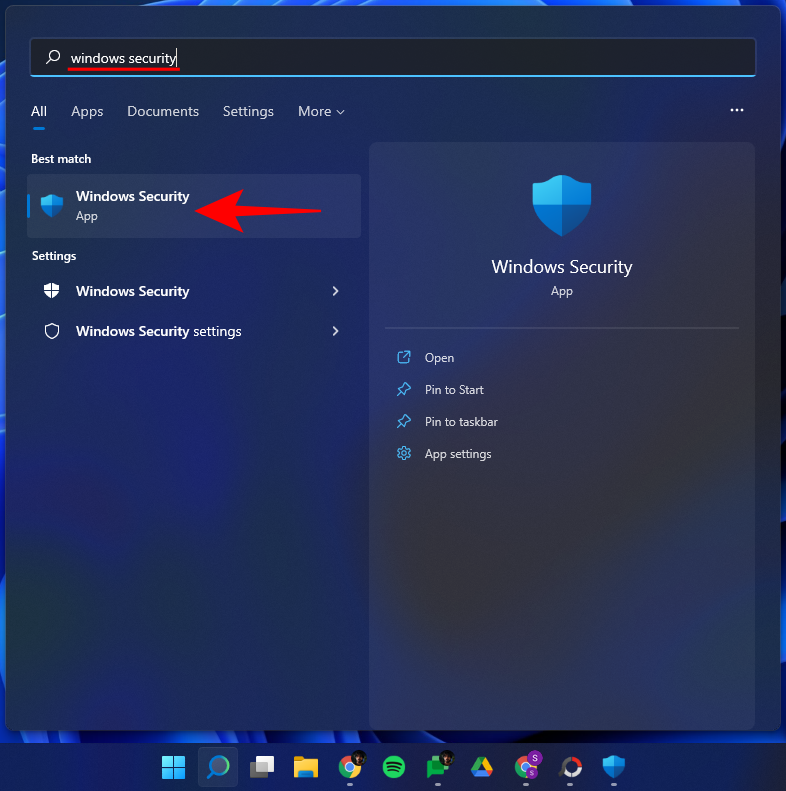
- To check if that’s the case, press Start, type “Windows Security”, then select the app.
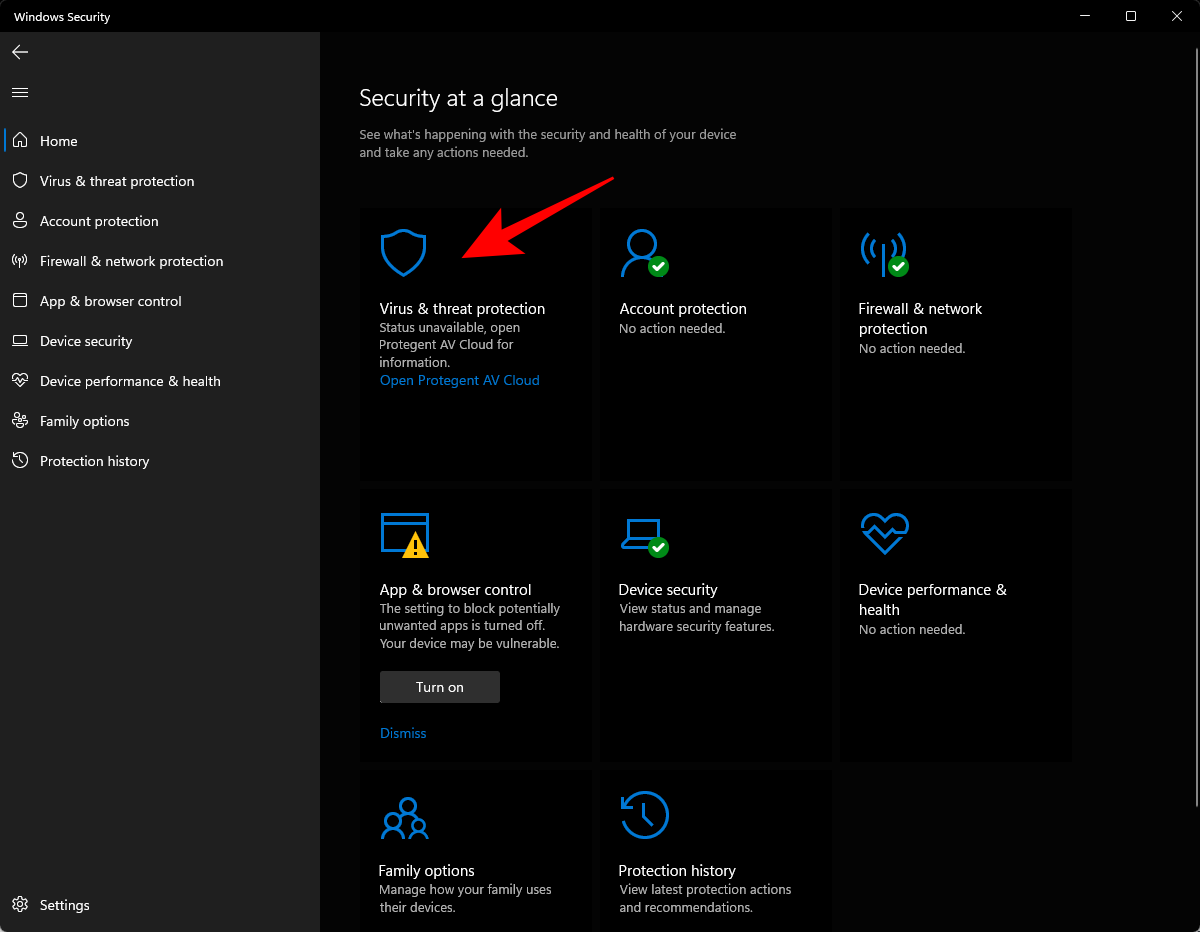
- Click on Virus & threat protection.
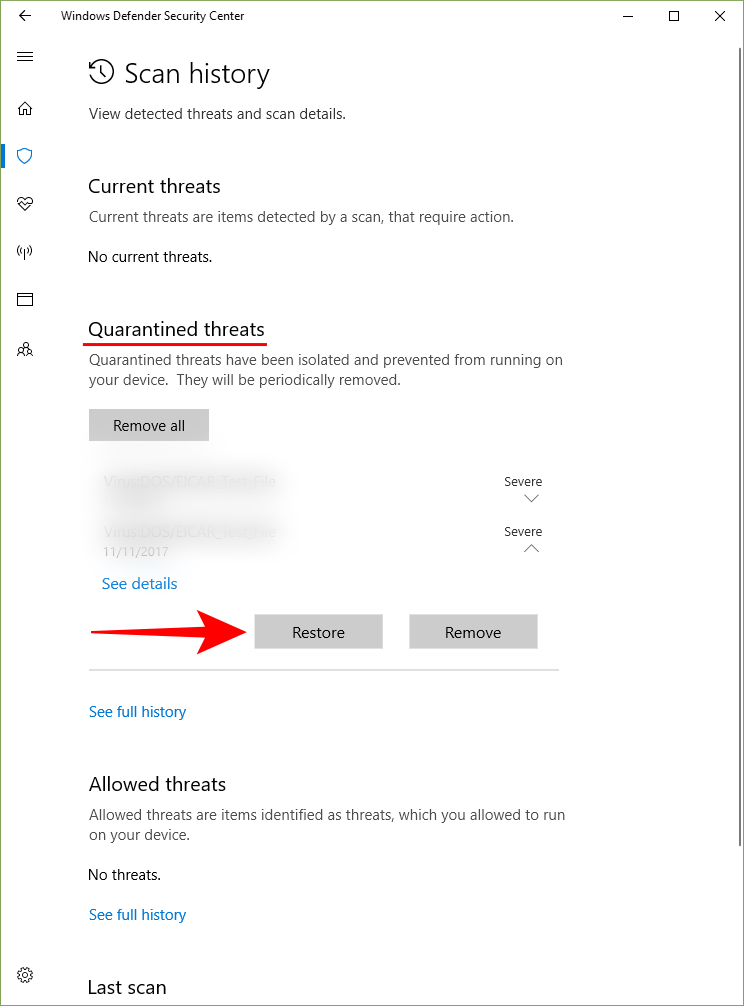
- If Windows Defender has scanned and quarantined files, you should see “Quarantined threats”. If the file is here, select it and then choose Restore.
Method 9: Update Windows
If the source of the problem was a bug, updating your Windows is a potential solution.
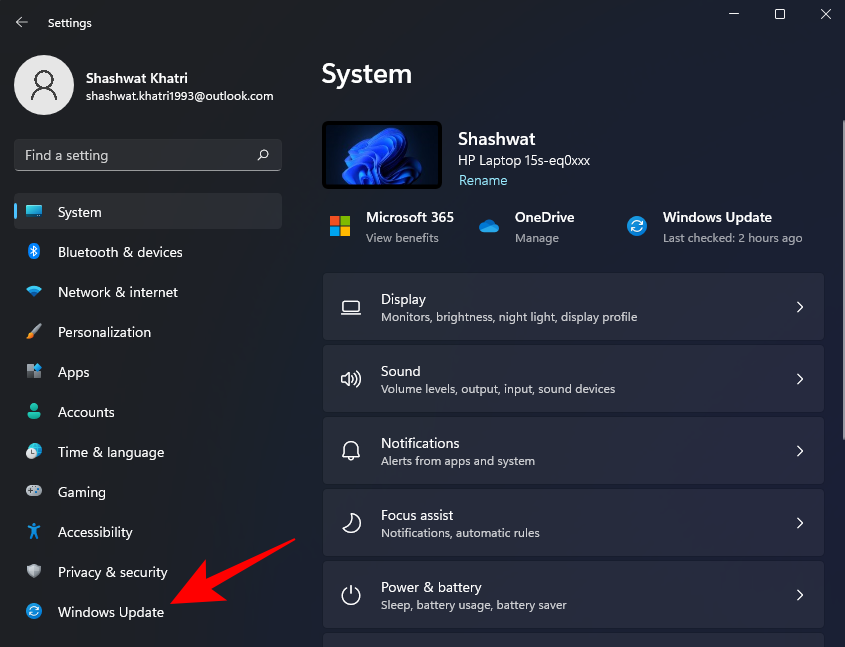
- To check for updates, press
Win + Ito open Settings and click on Windows Update in the left pane.
- Then click on Check for updates.
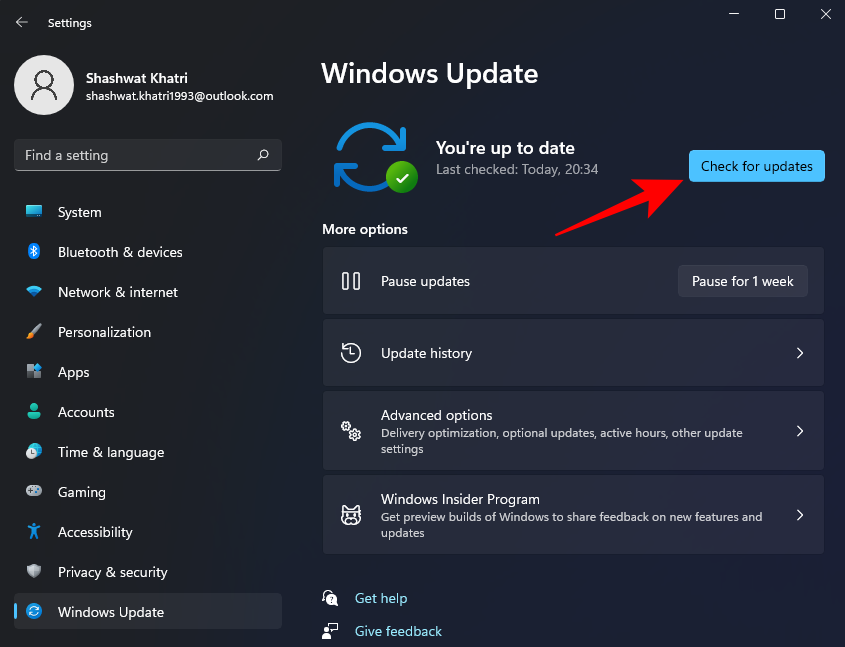
- If there are any available updates, install them and restart your PC. Then check to see if the affected program is working again.
Method 10: Perform a System Restore
A System Restore is not easy to perform, especially when time is of the essence. However, if nothing seems to be going according to plan, you should have a go at this hail mary. All you need is a Restore Point and Windows will be able to take itself back to the time before the changes were made. Restore Points can be made automatically or manually. Generally, every sizable Windows Update creates a Restore Point, which means going back to a previous build should not be that difficult.
Click on this link to learn all about System Restore and how you could take your machine to an earlier date.
In all likelihood, one of these nine methods can help you fix the “Vcruntime140.dll is missing” error message. We hope you found this guide useful and were able to run your program again.
RELATED
- Can You Disable TPM and Secure Boot After Installing Windows 11? What Happens…
- How to Install the New Microsoft Store on Windows 10
- How to Sideload Apps on Windows 11 Automatically With Double-click
- How to Get Classic Shell on Windows 11 Via Open Shell
- How to Install Aurora Store on Windows 11 in 3 Ways
- How to Use Rufus to Disable TPM and Secure Boot in Bootable Windows 11 USB Drive
- How to Download and Install Official Windows 11 ISO








Discussion