The Galaxy Nexus may be the current Nexus device but its predecessor – the Nexus S – hasn’t been forgotten by anyone and still sees active development thanks to being a pure Google device. Nexus S owners, while waiting for the official Jelly Bean update to be released by Google (should be out this month), can try out Jelly Bean Android 4.1 with an SDK port by XDA Forum Member steven676.
Despite being an SDK port – which are usually very unstable – the ROM works quite well with almost everything working properly. Since the source for Jelly Bean has been released, we should see a proper source-built ROM for the Nexus S soon, but for now, those looking to get a taste of Jelly Bean on their devices can flash the SDK port.
Here’s the list of highlights as well as the stuff that doesn’t work in the ROM:
- Based on the Jelly Bean SDK release (JRN83C), with Google apps and other components from the Nexus 7 factory image (JRN84D). Hardware-related files and kernel from the ICS IMM76D release for Nexus S.
- Wifi, Bluetooth, GPS, GSM all work. NFC should work.
- Sound and calls work as of July 9 (SP1).
- Video recording works as of July 10 (SP2).
- Tethering, including wifi tethering, works as of July 11 (SP3).
- Calls via a Bluetooth headset work as of July 11 (SP3).
- Remarkably smooth. Project Butter really lives up to its name. (I’ve made one tweak in the init.herring.rc to make the default ICS cpufreq governor more aggressive in upping the clock frequency, in order to simulate the change in governor in the Jelly Bean kernel.)
Broken/Not Working:
- Voice dialing.
- Voice search in Google Now. (The app fails to recognize when you stop speaking, so the search is never performed.)
Read on to find out how you can flash the Jelly Bean SDK port on your Nexus S.
Compatibility
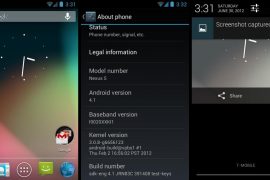
This ROM and the guide below are compatible only and only with the international GSM Nexus S. It’s not compatible with any other device. Check your device model in Settings » About phone.
Warning!
The methods and procedures discussed here are considered risky and you should not attempt anything if you don’t know completely what it is. If any damage occurs to your device, we won’t be held liable.
How to Install Android 4.1 Jelly Bean on Nexus S
- This procedure will wipe all your apps, data and settings. Backup your Apps and important data — bookmarks, contacts, SMS, APNs (internet settings), etc. This Android backup guide would help you.
Important! Don’t forget to at least make a backup of your APN settings, which you can restore later if your data connection does not work after installing the ROM. Use the backup guide to find out how. - Make sure the bootloader on your Nexus S is unlocked and you have ClockworkMod recovery installed. You can use the Nexus S toolkit here to install ClockworkMod recovery.
- Download the following files:
- Main ROM | Filename: update-crespo-JRN83C-preview-2012063001.zip
- ROM Service Pack: Go to the official development page and download the latest Service Pack file of the ROM. This file is important as it includes improvements and fixes.
- Copy the two downloaded zip files to the SD card on the phone (do not extract them).
- Boot into ClockworkMod recovery. To do so, turn off the phone. Then, press and hold the Volume Down and the Power buttons together to boot into fastboot mode. Here, highlight the RECOVERY option by navigating to it using the volume buttons, then select it using the Power button to boot into recovery.
In recovery, use the volume buttons to scroll up/down and the power button to select an option. - Select wipe data/factory reset, then select Yes on next screen to confirm. Wait a while till the data wipe is complete.
- Select install zip from sdcard, then select choose zip from sdcard. Scroll to the update-crespo-JRN83C-preview-2012063001.zip file on the SD card and select it. Confirm installation by selecting Yes – Install update-crespo-JRN83C-preview-2012063001.zip on the next screen. The ROM will start installing.
- After the ROM installation completes, select choose zip from sdcard again, but this time select the Service Pack file (downloaded in step 3.2) to install the ROM’s service pack.
- After installation of the Service Pack is complete, select go back then select reboot system now to reboot the phone and boot up into Jelly Bean.
- To update to further versions of the ROM, simply go to the development page, download the latest Service Pack file, and install it from recovery. No need to wipe data or install the main ROM again.
The SDK based Android 4.1 Jelly Bean ROM is up and running on your Nexus S. Visit the development page for updates and more info. Share your thoughts on the ROM in the comments below.


6 responses to “Get Android 4.1 Jelly Bean on Nexus S With This Mostly Working SDK Port”
Will this work for the Samsung Nexus S SHW-M200K ?
Will this work for the Samsung Nexus S SHW-M200K ?
Please help
It’s unsuccessful
It’s unsuccessful
Please help