
The average Windows user may never have to access the Windows Registry, but a variety of applications and Windows services do. If the registry items have gone bad, you will experience a variety of problems such as higher CPU utilization, random system crashes, extended startup and shutdown times, and sub-par global performance. Needless to say, it’s imperative that the registry stays in working order.
Here’s everything you need to know about fixing registry items in Windows 11, creating registry backups, and a few tips on system maintenance.
What is Windows Registry?
The Windows Registry is a system-wide repository of files and settings that stores important information about Windows, user preferences, applications, hardware, and a host of other critical constituents that make up your personal computer.
This data is stored within ‘key’ and ‘values’ – the two basic components of the registry – and is referenced by Windows whenever needed.
Registry items that go missing, are infected, altered wrongly, or are otherwise broken can impact your PC in a number of ways, and should be avoided altogether.
What can lead to broken registry items?
There are a number of factors that can lead to broken registry items. Here are a few common ones:
1. Virus and Malware: Perhaps the most common reason for broken registry items, malware infestation can corrupt multiple keys and values at once and impact the functioning of all those settings that rely on them.
2. Fragmentation: Fragmenting of the registry over time can also break certain items, especially after installing software or updating software and services.
3. Registry meddling: Improper changes to the registry done via the Registry Editor can end up breaking registry items too, especially when done without proper knowledge or information about what’s going on.
4. Build-up of items: Over time, your registry can end up with tons of items that are corrupted, unnecessary, plain empty, or misplaced. This can not only hurt other, functional registry items, but also clog your system and damage it internally.
How to fix broken registry items on Windows 11 (10 methods explained)
If your system has slowed to a crawl, is taking longer to boot up/shut down, crashing sporadically, or spewing errors at every corner, you may have broken registry items. Here are a few ways of fixing them.
Method 1: Run System File Checker (SFC) Scan
The native System File Checker is designed specially to fix broken missing system files, including those in the registry. Here’s how to make use of it:
- Press Start, type cmd, right-click on the Command Prompt, and select Run as administrator. That will open the Command Prompt tool for you.

- Here, type the following command:
sfc /scannow

- Press Enter. Wait for the scan to finish.

- You should get a message that says that Windows Resource Protection found corrupt files and successfully repaired them.
If you get a message that says otherwise, move on to the next few fixes.
Method 2: Run DISM Tool
The second route to take when fixing broken items is to use the Deployment Image & Servicing Management (DISM) tool to scan for issues. Here’s how to do so:
- Open the Command Prompt as shown before. Then type the following command:
DISM /Online /Cleanup-Image /ScanHealth

- Then press Enter. Wait for the scan to finish.

- Then enter this command:
DISM /Online /Cleanup-Image /RestoreHealth

- Press Enter.

- Once finished, restart your PC and check if the system functionality has improved.
Method 3: Run the Disk Cleanup Tool
Disk Cleanup is a native tool that can help clean up system files and unclog registry items. Here’s how to make use of it:
- Press Start, type disk cleanup, and open the application.

- Now, choose drive ‘C:’ (default selection) and click on OK.

- On the disk cleanup window, you’ll find a bunch of files that you can delete to save up space. But we want to clean system files so choose Clean up system files towards the bottom left.

- Again choose C: drive and click OK.

- Wait for the scan to finish.

- You will see ticks next to the files Disk Cleanup recommends you should clean. Click OK to confirm.

- Click Delete files again.

Restart your computer once the cleanup is finished and you should have fewer registry files clogging up the system.
Method 4: Run Startup Repair
Startup Repair is another option built into Windows Recovery environment that can help diagnose and troubleshoot problems with the system, including broken registry files. Here’s how to access it:
- Press the shortcut combination Win+I to open the Settings app. With ‘System’ selected in the left pane, scroll down and select Recovery.

- Next to Advanced startup, click on Restart now.

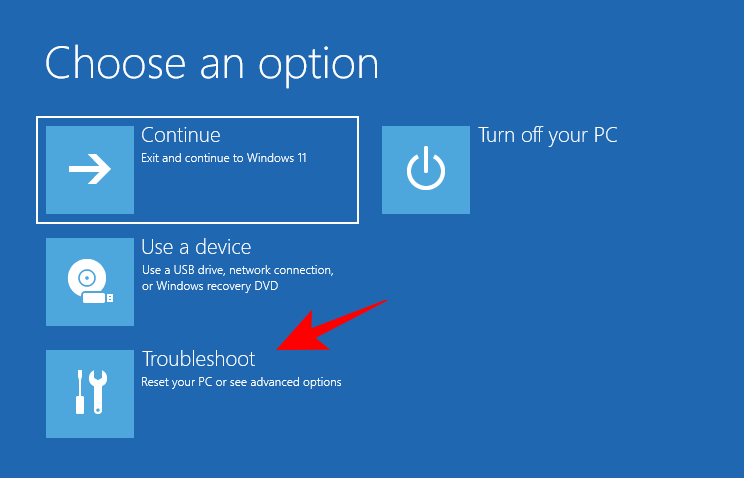
- The computer will now restart and boot into Windows Recovery Environment. Click on Troubleshoot to begin.

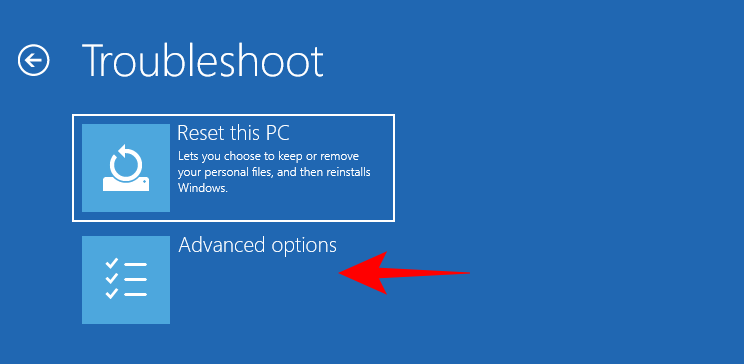
- Click on Advanced options.

- Click on Startup repair.

- Windows will now run startup repair, troubleshoot problems, and apply solutions.
If you get the Srttrail.txt error along with the message “Startup couldn’t repair your PC”, refer to our guide on how to fix the Srttrail.txt error.
Method 5: Do a System Restore
If broken registry items are impacting your ability to use Windows, you may have to resort to a system restore and roll back the settings to a point in the past when they were functional. Here’s how to do so:
- Press Start, type “create a restore point”, and click on Create a restore point.

- Click on System Restore.

- Now, with Recommended restore option selected, click on Next.

- Otherwise, if you want to choose a different restore point, select Choose a different restore point and click on Next.

- Check the box next to Show more restore points.

- Now choose the event before which you want the system to restore. Then click Next.

(Note: You can click on “Scan for affected changes” to check the software that will be removed by system restore. Once the system is restored, you will have to reinstall these.) - Finally, click on Finish to begin system restoration.

Any broken items that may have been introduced after this date or event will be removed from the registry.
Method 6: Use a Third-Party App (CCleaner)
Registry clean tools such as CCleaner, Restoro, and Wise Registry Cleaner have received a lot of flak in the past, especially from Microsoft which says that it doesn’t support the use of registry cleaning utilities. But if the native tools don’t work, these can be relied upon, for the most part, so long as you are careful.
Because the possibility of deleting or altering the registry files improperly is quite high, it is recommended that you back up the Registry manually before starting out. But since most of these third-party registry cleaners already prompt you to do the same, we can move on to the app itself. For our example, we’re using CCleaner, but the options are more or less the same for most such applications.
Download: CCleaner
- Go to the above link and click on Download.

- Install CCleaner by following the on-screen prompts.

- Then open the application and go to the Registry tab.

- Then select the items you want to scan (best to leave them all selected) and click on Scan for Issues.

- Wait for the scan complete and then click on Review selected Issues.

- Before making any changes, CCleaner will prompt you for registry backup. Clean Yes.

- Pick a location to save the registry backup and click on Save.

- For every registry issue, you will get a pop-up Window that will allow you to review it beforehand. To fix the issue, click on Fix Issue.

- To fix all issues at once, click on Fix All Selected Issues.

- Once the issues are fixed, restart your PC.
Method 7: Restore a Registry backup
If you have a registry backup, you can always restore the registry settings with it. But this method works only if you already have a registry backup in place. To learn more about creating a registry backup, check out the final few sections of the article.
Here’s how you can restore your system with a registry backup:
- Press Start, type “Registry editor” and open it.

- Click on File.

- Select Import.

- Browse for the registry backup file (one that ends with .reg), select it, and click on Open.

- Wait for the registry to be restored.
Method 8: Reset your PC
If the aforementioned solutions don’t work, it’s possible that the registry items have been bad for a long time and cannot be easily fixed. In such cases, it helps to reset your PC and restore Windows to its default settings. Here’s how to do so:
- Press Start and click on the power button.

- Then while holding down the Shift button, click on Restart.

- This will lead you to the Windows Recovery environment. From here, select Troubleshoot.

- Then click on Reset this PC.

- Choose either to keep your files or remove everything.

- Then follow the on-screen prompts to continue resetting the PC.
Method 9: Reinstall Windows
When all else fails, reinstallation can feel like a defeat. But reinstallation will provide you with a clean copy of Windows to start afresh and take better care of the registry items this time around. You will require a bootable USB for this to work.
- Plug in the USB and restart your system in the Windows Recovery Environment (as shown in the previous method). Select Troubleshoot.
- Click on Advanced options.
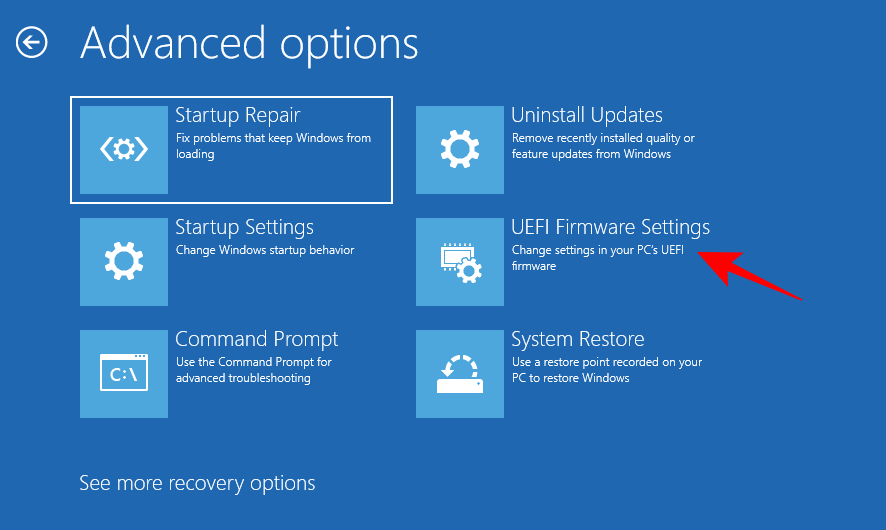
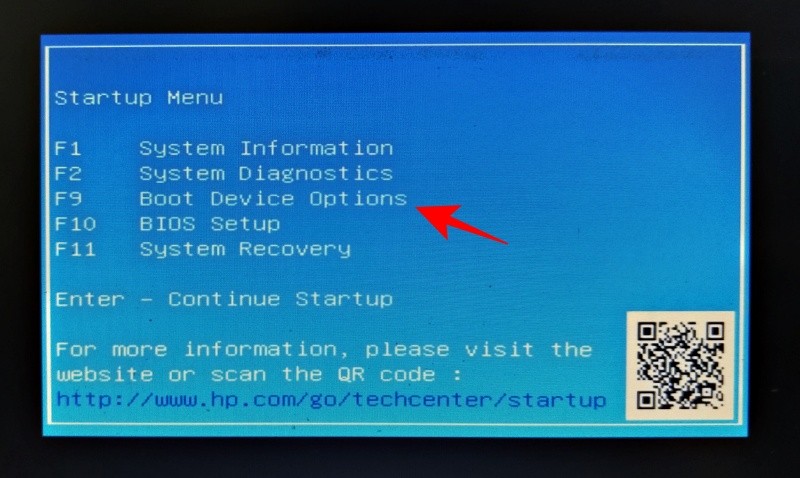
- Select UEFI Firmware Settings.
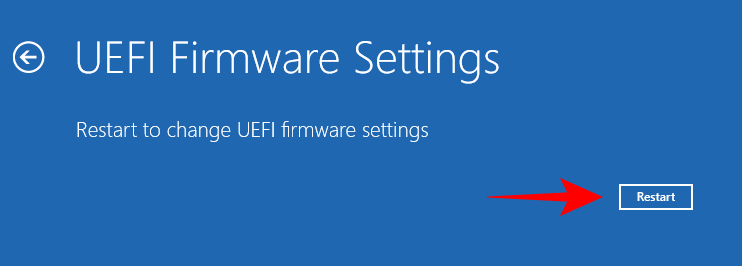
- Click on Restart.
- Select Boot Device options by pressing the corresponding key.
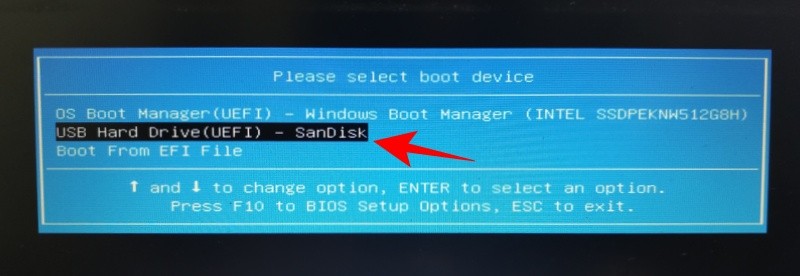
- Select your USB device with the arrow keys. Then press Enter.
- Once the Windows Setup starts, click Next.
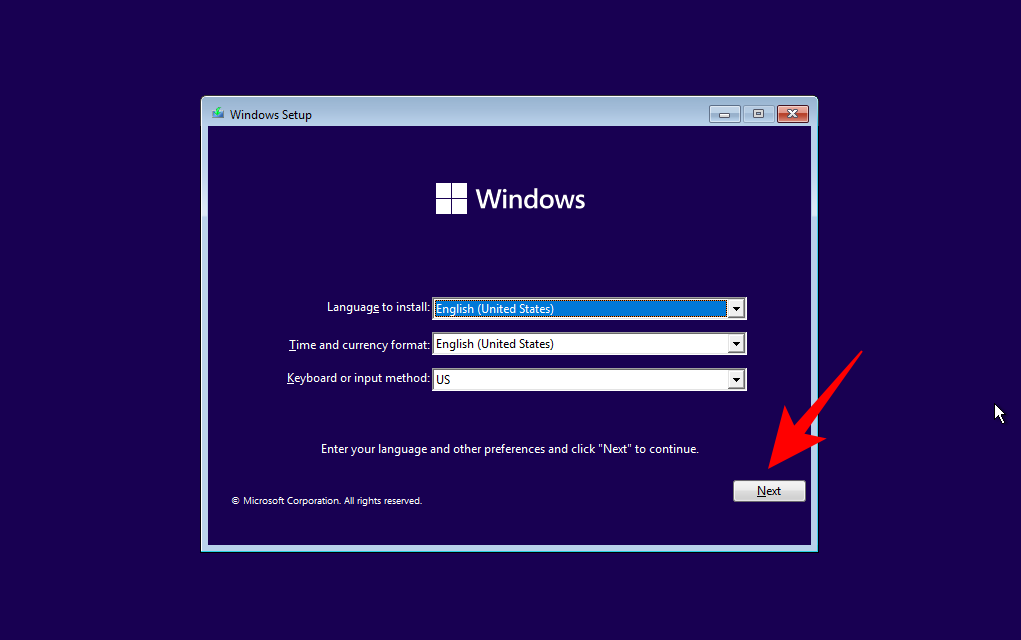
- Now follow the on-screen prompts to reinstall Windows.
Method 10: Check if Registry Editor is allowed in the Group Policy Editor
Note: This method applies only to Pro, Enterprise, and Education editions of Windows 11. To get the Group Policy Editor on Windows 11 Home, refer to our guide on How to Enable Group Policy Editor on Windows 11 Home.
If you’re not able to access Registry Editor, you will have to take the assistance of the Group Policy Editor.
Here’s how to check whether the Registry Editor is allowed via the Group Policy Editor.
- Press Start, type gpedit and open Edit Group Policy.

- In the left pane, expand User Configuration, then Administrative Templates, and then click on System.

- On the right, find Prevent access to registry editing tools and double-click on it.

- Now, make sure either the “Not configured” or “Disabled” option is selected.

- Then click OK.

- Restart your PC to take effect and your Registry Editor will be enabled.
Maintaining Registry Backups
Once your system is back to speed, it is important to ensure that your PC starts maintaining registry backups if it isn’t already the case. Creating registry backups from time to time ensures that you have a prior snapshot to revert to in case the registry and its items go bad again in the future. Here’s how to back up the registry:
1. Create a backup of the Registry
Firstly, let’s look at how you can create a backup of the registry yourself.
- Press Start, type registry editor, and open the Registry Editor.
- Click on File.
- Select Export.

- Give your backup a name and save it somewhere safe (such as a USB or an external hard drive).

- Then click Save.
2. Enabling Registry Automatic Backup (and how to restore the Registry with it)
In previous versions (version 1803 and earlier), Windows used to create a secret backup automatically that could be accessed if one were so inclined. However, that has since been discontinued. Nevertheless, with a few tweaks, you can enable it yourself and access it later in case things go south again.
Firstly, here’s how you can enable registry automatic backup of registry items:
- Open the Registry Editor (as shown earlier). Then go to the following path:
Computer\HKEY_LOCAL_MACHINE\SYSTEM\CurrentControlSet\Control\Session Manager\Configuration Manager
Alternatively, copy the above and paste it in the Registry Editor’s address bar, and hit Enter.

- Now, right-click on the Configuration Manager folder on the left, select New, and then click on DWORD (32-bit) Value.

- Name the newly created registry key EnablePeriodicBackup.

- Double-click on it and change the value to 1. Click OK.

- Restart your system for changes to take effect. Once booted up, go to the following address and check if it is populated with files:
C:\Windows\System32\config\Regback
In the beginning, you may see that the files within the folder are all ‘0 KB’ in size.

But don’t worry about it. This will be updated whenever Automatic Maintenance takes place, which is about once every 10 days.
If you want the registry to be backup up right now, you will have to take the help of ‘Task Scheduler’. Here’s how to go about it:
- Press Start, search for task scheduler, and hit Enter.

- In the left pane, expand Task Scheduler Library.

- Then Microsoft.

- Expand Windows.

- Then select Registry.

- You should see a “RegIdleBackup” file on the right.

- Right-click on it and select Run.

- Now if you return to the ‘RegBack’ folder, you should see that the size of the files has been updated.

Let us now see how this backup can be used to restore order to your broken registry items.
- Press Start and click on the power button.
- Then hold down the “Shift” key and click on Restart.
- This will open up the Windows Recovery environment. Here, click on Troubleshoot.

- Select Advanced options.

- Click on Command Prompt.

Here, we will be typing the drive letter where Windows is installed. The default drive letter for Windows is C. However, this could be different for some especially when done via the command prompt in the Windows Recovery environment. The recovery mode doesn’t always show the default drive (C:) as the one where Windows is installed.
- To check if that is the case, type
C:, press Enter, and then typedirand hit Enter to see what is within that drive. If you find that it has folders like ‘Program Files’, ‘Windows’, etc., then you are on the right path.

- If not, make sure to try out a few different letters, followed by the
dircommand. In our case, it was the default letter C: itself. - Once the right drive is selected, type the following command:
cd C:\Windows\system32

- Hit Enter. Then type the following command:
mkdir configBackup

- This command is to create a backup folder where files from the ‘config’ folder can be temporarily backed up. Hit Enter. Then type the following:
copy config configBackup

- Hit Enter. This will move the files from the temporary folder to the ‘configbackup’ folder.

- Once you see that the files are copied, type the following command:
cd config\Regback

Hit Enter. We have now moved the path to the secret Registry backup folder. - Type the following to check the contents and the size of each file:
dir

- Hit Enter. Take note of the names of the files here.

- Now type the name of the file and hit enter one by one for each file, as such:
copy /y software ..

- Hit Enter.

- Now type the following:
copy /y system ..

- Hit Enter.

- Similarly, do so for all the files highlighted earlier. Once done, close the Command Prompt and restart Windows. This should restore your registry files with the ones that are automatically backed up.
So these were a few ways to fix broken registry items. We hope you were able to find a solution that worked and now know how to clean the registry and create backups in case things go wrong in the future.


