As is the case with all operating systems, Windows 11 can get corrupted over time, slow down, crash at random, show blue screens, and start to show their age. Fortunately, there are a variety of native tools that can repair Windows with a few commands. The Command Prompt has been the go-to command terminal to fix things when anything goes wrong with the system files, the bootup procedure, or anything that causes Windows to fail in one sense or another.
If Windows is causing trouble and needs to be repaired, the Command Prompt can definitely come to the rescue at numerous junctures. This guide will show you how to repair Windows 11 using the command prompt.
8 ways to repair Windows 11 using Command Prompt (aka CMD)
There are different commands and tools that you can run on Command Prompt to repair Windows 11. Similarly, there are numerous ways to open Command Prompt on your PC as well, depending on the screen that you’re on. To make it easier, we have provided the 6 ways here on this page too, below.
Read: 14 ways to open Command Prompt in Windows 11
Note: Order of Scans: CHKDSK over DISM over SFC
There are a few native tools that scan for system files and images such as the Check Disk utility (CHKDSK), Deployment Image Servicing and Management (DISM), and System File Checker (SFC). Because these scans will diagnose and fix different elements of the system image and files, they will need to be run in a particular order so you can get the most out of them.
The CHKDSK tool is the most advanced scan-and-fix utility among the three chiefly because it scans the hard drive for system file issues and repairs the same.
After that comes the DISM utility that fixes issues with the system image, and lastly, there is the SFC scan that looks for and fixes issues related to system files.
In that order, let’s now take a look at the commands that will allow you to repair Windows 11.
Read: 14 ways to open Command Prompt in Windows 11
Method 1: Using CHKDSK in CMD
- In an elevated instance of the command prompt, type the following command and press Enter:
chkdsk C: /f /r /x
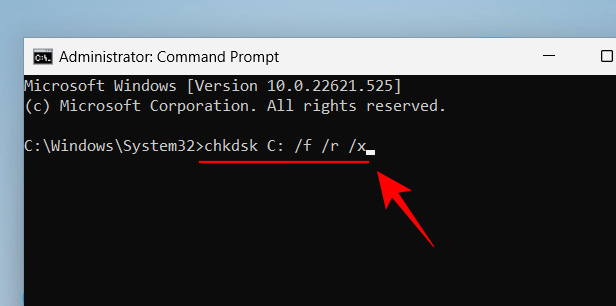
- If you want to scan any other drive, replace ‘C’ with that drive letter. But if you want to repair system files, ‘C’ is the default drive for it.
- When asked to schedule the scan upon reboot, type Y and hit Enter.

- The utility will be checked upon restart only.
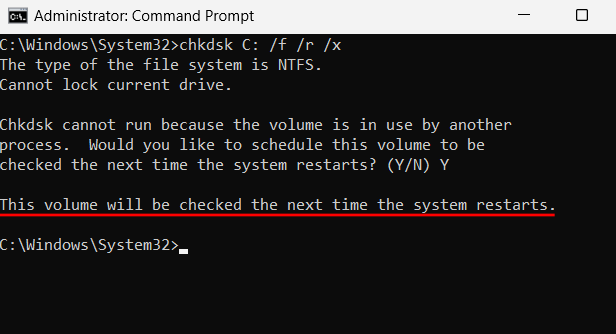
- So close the command prompt and restart the system. Wait for it to finish (this can take some time) and check if Windows is repaired and functional after the restart.
Method 2: Using DISM tool commands in CMD
Before repairing Windows using the DISM tool, we will check the health and integrity of the Windows component store.
- Type the following commands:
DISM /Online /Cleanup-image /Checkhealth

- Press Enter. Wait for the scan to finish.
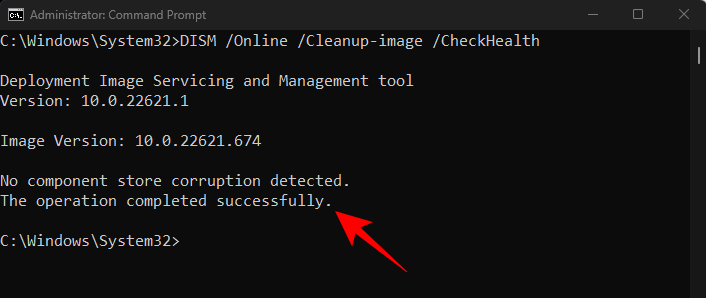
- Once done, type the following command:
DISM.exe /Online /Cleanup-image /Scanhealth
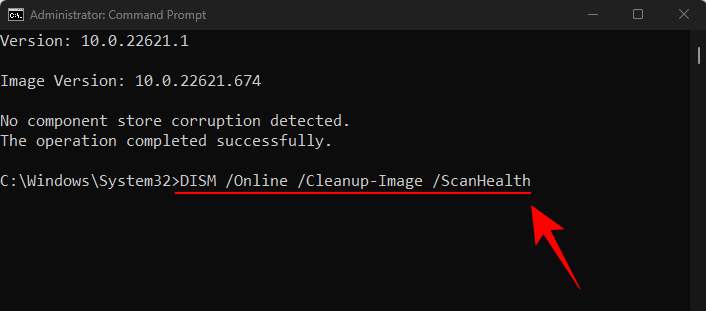
- Press Enter.
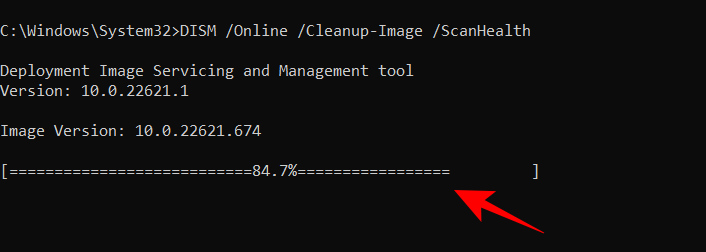
- Once the scan finishes, type the following command to repair the system image:
DISM.exe /Online /Cleanup-image /Restorehealth

- Press Enter.
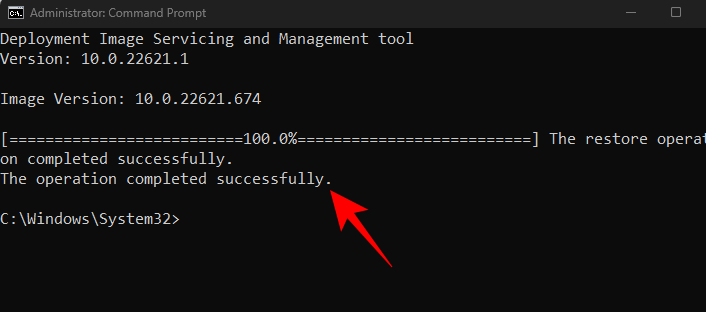
Once the restore operation is completed successfully, the Windows 11 system image file will be repaired.
Method 3: Using DISM scan with Windows Installation Media
The DISM scan can be used even if you just have the Windows installation media. This is the same DISM scan mentioned above, but it uses the ‘install.wim’ image file found within Windows Installation media. That means that the command will need to specify the source of the image file for the DISM scan to run. Here’s how to run the offline DISM scan using the install.wim image:
Firstly, download the Windows ISO file from the link given below:
Download: Windows ISO file
- On the download page, click on the drop-down menu option.

- Then select Windows 11.

- Finally, click on Download.

- Once downloaded, right-click on the file and select Mount.
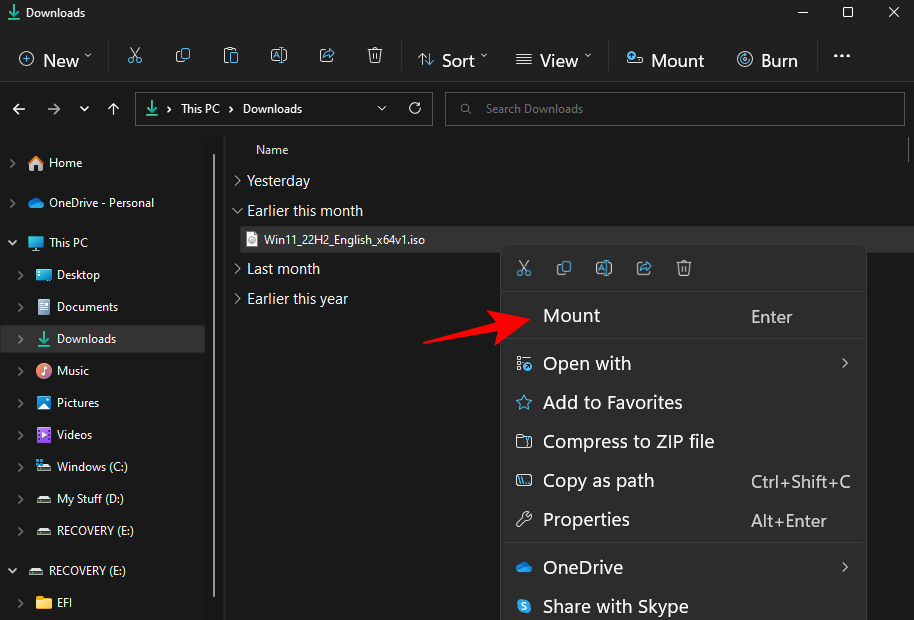
- Now open the command prompt with administrative privileges, and type the following command:
DISM /Online /Cleanup-image /RestoreHealth /Source:F:\Sources\install.wim /LimitAccess

- Make sure to replace ‘F’ letter with the letter where the installation ISO is mounted. Press Enter.

The command prompt will run the DISM scan using the install.wim image file and look to fix the system files and repair your PC.
Method 4: Using SFC tool commands in CMD
Once the system image is repaired, it’s time to use the SFC tool to fix corrupted system files. Here’s how to do so:
- Open the elevated Command Prompt, then type the following:
sfc /scannow

- Hit Enter. Wait for the scan to finish.
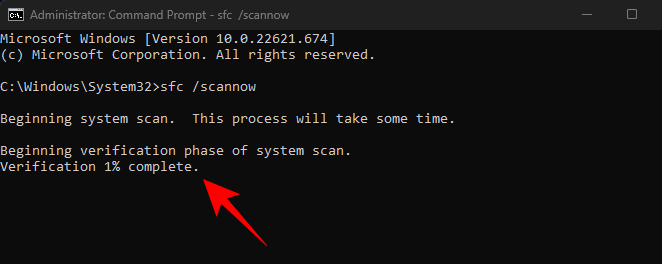
Once done, reboot your system to check if Windows is repaired.
Method 5: Running offline SFC Scan in Recovery
The SFC scan can also be run offline. To do so, you will have to open Command Prompt from the Windows Recovery Environment (WinRE) as shown before.
- Once you have opened the command prompt, type the following command:
diskpart
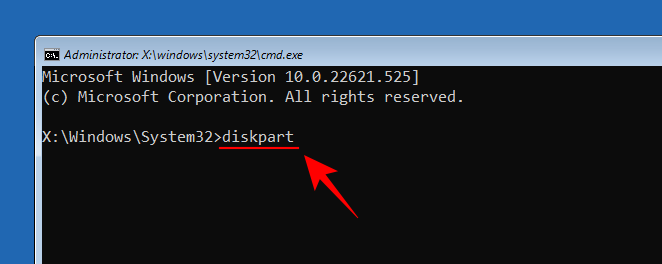
- Hit Enter. You should see ‘DISKPART>’ at the start of the command.

- Then type the following:
list volume

- Hit Enter. This will list the drives on your system.
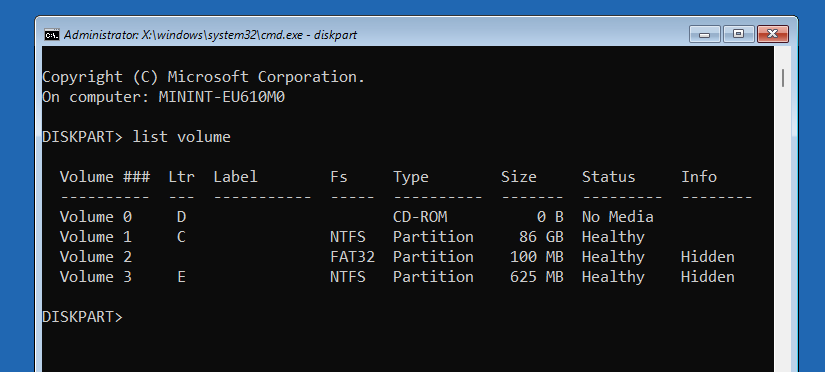
- Take note of the recovery boot partition drive (which will approximately be 600 MB) and the system drive where Windows is installed. In our example, the boot partition drive letter is ‘E’ while the system drive is ‘C’.
- To exit diskpart, type the following:
exit

- Hit Enter. Now type the following command:
sfc /scannow /offbootdir=e:\ /offwindir=c:\windows

- Make sure to replace the letters ‘e’ and ‘c’ with the ones that you noted before. Then hit Enter.

SFC will now begin scanning the recovery boot directory as well as the drive where Windows is installed and fix errors if they’re found.
Method 6: Using BootRec tool commands in CMD
If the system is facing issues, particularly while booting up, you can get assistance from the bootrec.exe tool. This native tool will help you fix your system’s Master Boot Record (MBR), the bootup process, as well as rebuild the system’s Boot Configuration Data (BCD).
- Here are the commands for using the bootrec tool for the same:
bootrec /fixmbr

- Press Enter.

- Then type the following command:
bootrec /fixboot

- Press Enter.

- If you get the ‘Access is Denied’ message, type the following command:
bootsect /nt60 sys

- Hit Enter.
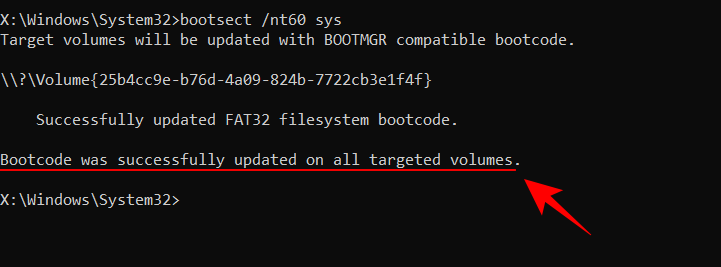
- Now enter the
bootrec /fixbootcommand again.

- And hit Enter.

- Then type the following:
bootrec /rebuildbcd
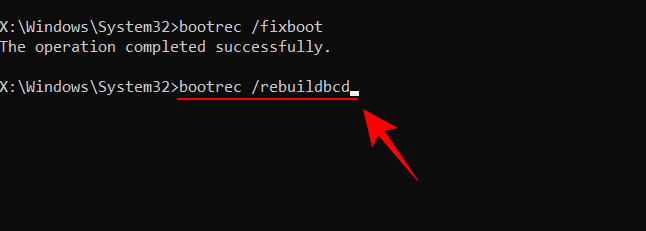
- Hit Enter. The bootrec tool will scan Windows installations and should yield the message – “Total identified Windows installations: 1”.
Method 7: Using System Restore commands in CMD
Repairing Windows can sometimes be beyond what the above tools can fix. Systems that are suffering major problems may have to have their settings reverted through a system backup. However, for this method to work, you would first need to have a system backup already in place.
Here’s how to use the command prompt for it:
- Open the command prompt. Then type the following command:
rstrui.exe
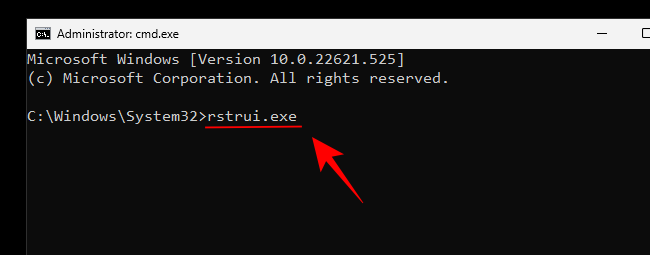
- Press Enter. This will open the System Restore window. Click Next to continue.
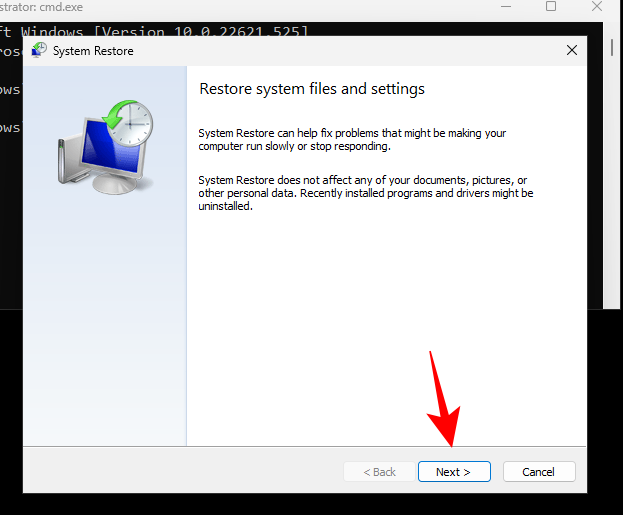
- Then select your restore point and click Next.

- Review your system restore selection and click on Finish.

- When prompted, click Yes.
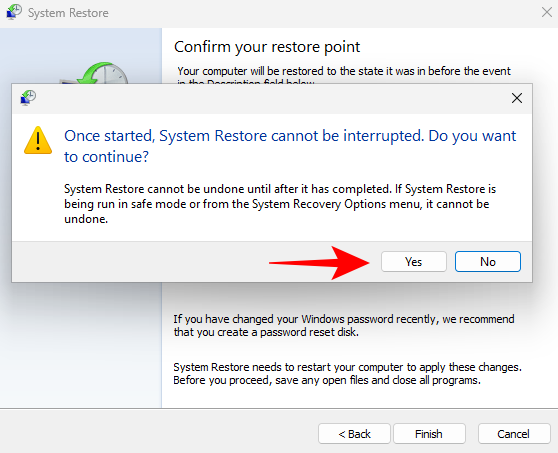
- Then wait for the system restoration to complete.

Method 8: Using System Reset commands in CMD
We hope it never comes to this, but if the above methods don’t work out, that is the only choice to repair Windows with the command prompt. Here’s how to go about it:
- Open an elevated instance of the command prompt, then type the following command:
systemreset -cleanpc
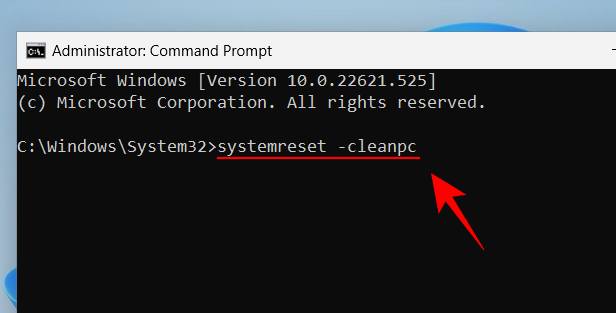
- Then hit Enter. Select Next.
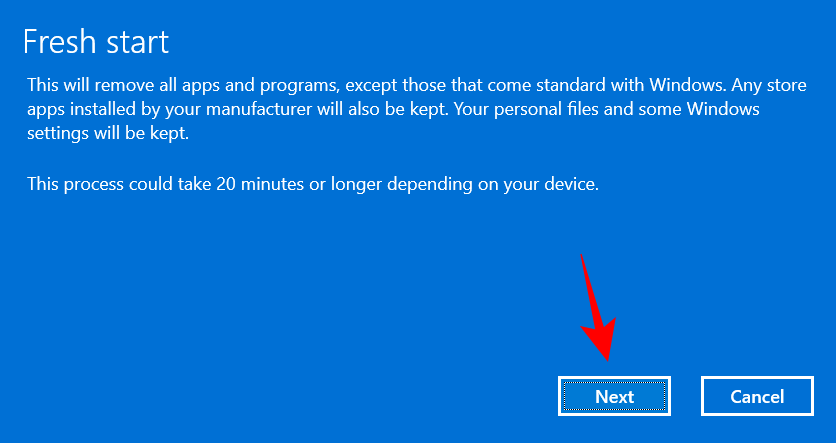
- Then wait for the PC to reset.
Though not technically repairing, resetting the system does get you back to a functioning Windows PC. You can make use of another command to factory reset your PC.
- In the command prompt, type the following:
systemreset --factoryreset

- Hit Enter. Now choose the Keep my files option.
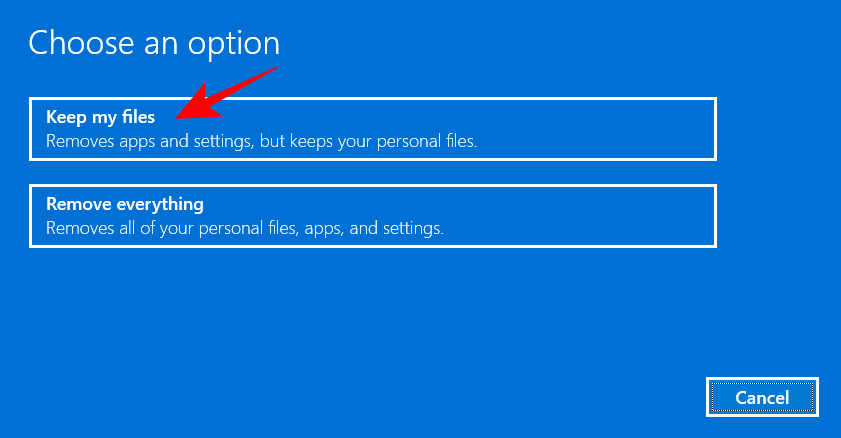
- Then continue with the on-screen prompts to reset your system.
Tip: 6 ways to open Command Prompt
Because command terminals are such important tools, they can be accessed in a few different ways. Depending on the screen that you are on, you may have to open the Command Prompt differently. Here are a few ways to open the command prompt.
Method 1: From Start
If Windows 11 is booting normally and you can access the desktop, the simplest way to open the command prompt is to search for it from the Start Menu. Here’s how:
- Press the Start menu button. Type cmd and then click on the Command Prompt to open it.

- If you want to run the command prompt with administrator privileges, right-click on the search result and select Run as administrator.

This will open an elevated instance of the command prompt. For most of our guide above, you will need to open the command prompt with administrative privileges.
Method 2: From the RUN window
The RUN command box can also be used to run the Command Prompt. To do so, firstly, press the key combination Win+R to open the RUN command box. Now type cmd and press Enter to open a regular command prompt.
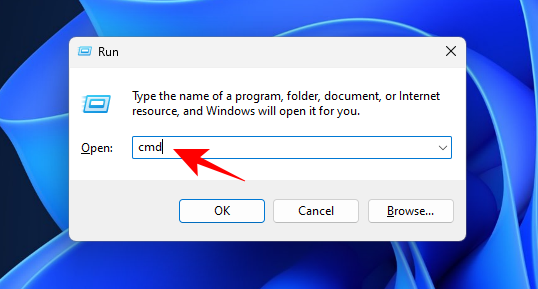
To open an elevated instance of the command prompt with administrator privileges, type cmd but press the key combination Ctrl+Shift+Enter.
Method 3: From Windows Recovery Environment (WinRE)
If Windows 11 fails to boot up properly and you find yourself in the Windows Recovery environment, here’s how to run the command prompt.
- Select Troubleshoot.
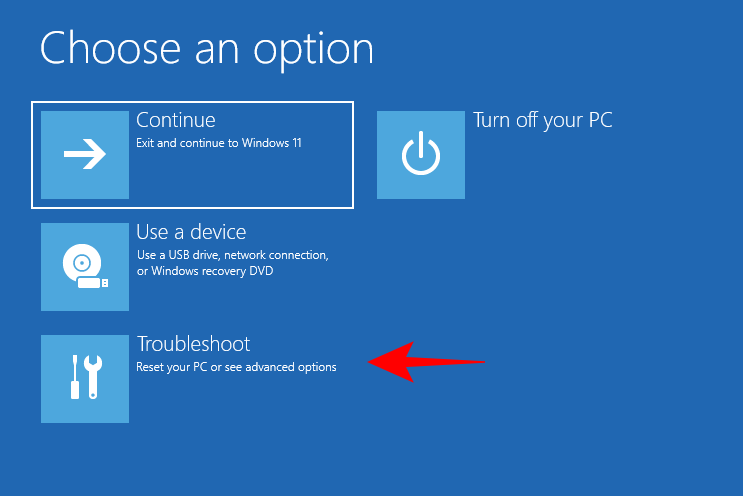
- Click on Advanced options.
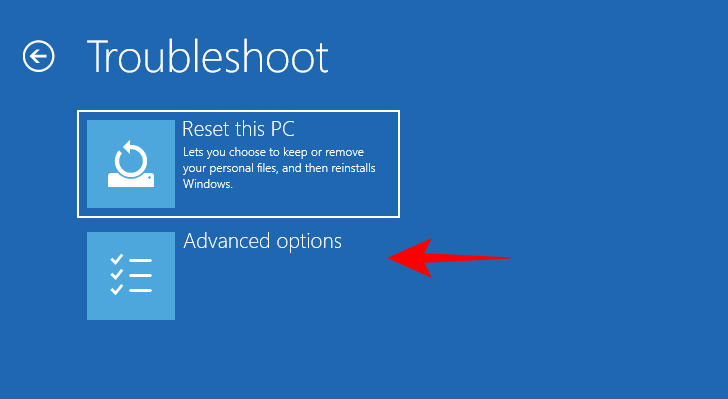
- Select Command Prompt.

This will open up the command prompt.
Method 4: In Safe Mode (from WinRE)
The stripped-down environment of Safe Mode allows for troubleshooting and diagnoses of problems, for which purpose the command prompt can be a real handy tool. The steps to access the command prompt in the safe mode will be a little different depending on how you’re accessing the Safe Mode – whether from the WinRE or normal Windows boot-up.
Here’s how to access the command prompt in Safe Mode if you’re in WinRE:
- Select Troubleshoot.

- Click on Advanced options.

- Select Startup settings.
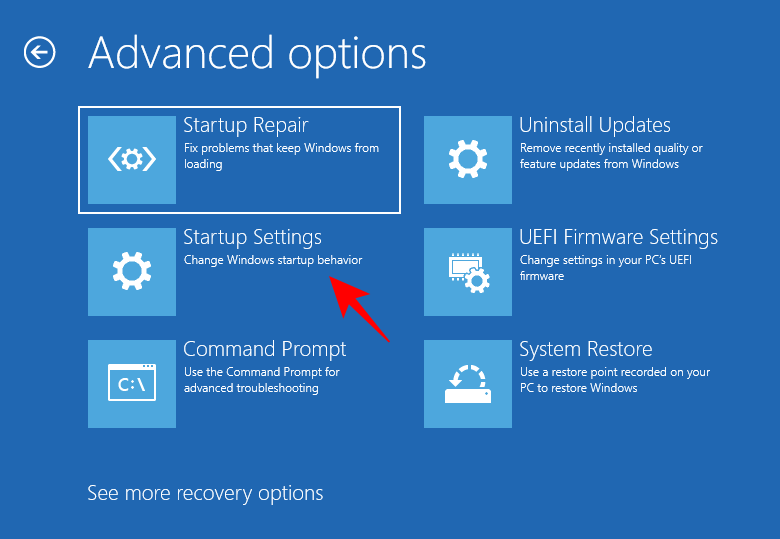
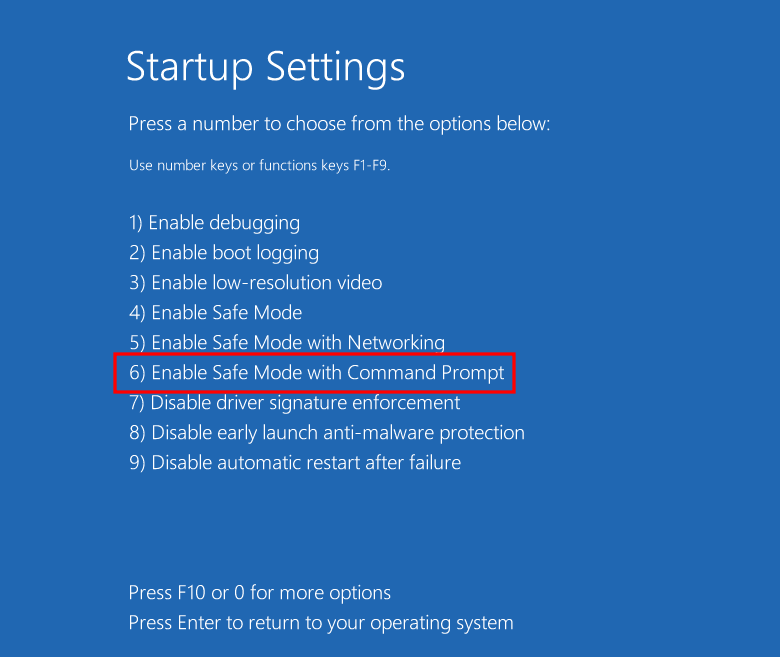
- Press Restart.

- Then select Safe mode with Command Prompt by pressing the corresponding number – 6.
Method 5: In Safe Mode (from the System Configuration app)
If Windows is loading normally, the System Configuration app allows you to set the boot option to Safe mode with ‘alternate shell’ – which is the command prompt itself. Here’s how to go about it:
- Press Start, type msconfig, and run the System configuration app.
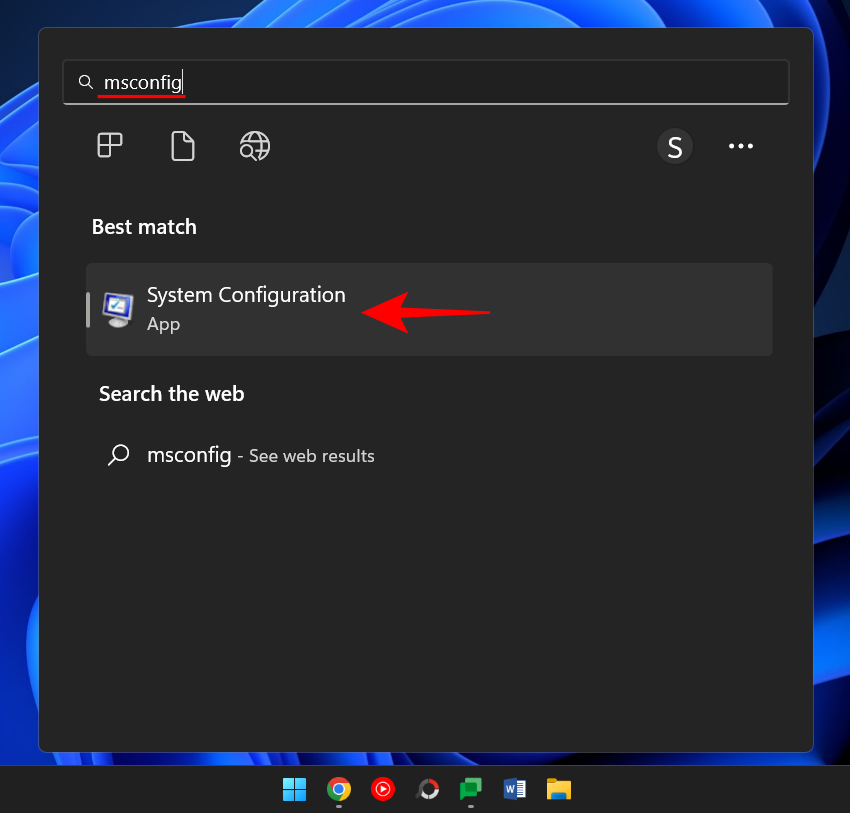
- Once it opens up, move over to the Boot tab.

- Now, under “Boot options”, click on Safe boot.
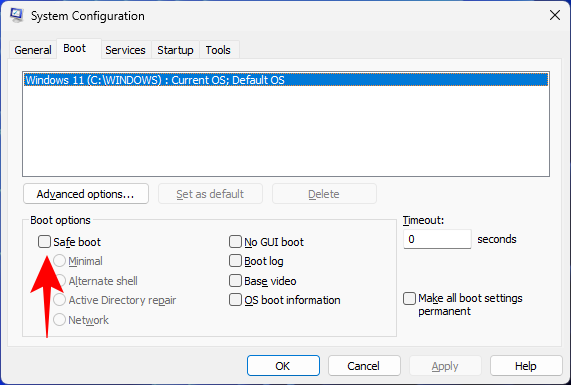
- Then select Alternate shell.

- Click OK.

- To restart immediately, click on ‘Restart’.
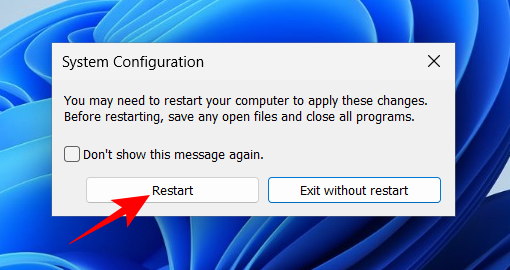
- Once it boots up, it will do so in Safe Mode with access to the Command Prompt with admin privileges.

Method 6: From Windows Setup
If you’re using a bootable USB drive and are on the Windows Setup screen, there is a quick shortcut that will let you access the command prompt there itself.

Once on the Windows Setup screen, press the key combination Shift+F10 to open the Command Prompt.
FAQs
Here, we have answered a few frequently asked questions concerning the scans and the details of the SFC scan.
Which scans can help repair Windows 11 through the Command Prompt?
The DISM and SFC scans will help check the health of the system image and system files, and fix any anomalies that are found while scanning. It is advisable to do a DISM scan before an SFC scan as the former checks and fixes issues related to the system image, while the latter does so with the system files.
The Check Disk utility scan is another major scan to run. This can be run even before the DISM scan as it is a much more advanced utility that also scans for and solves all those areas that the other two utilities do.
The Bootrec utility is meant mainly to fix the boot loader. But it is an important cog in the Windows machine that will need to be repaired if it’s facing errors.
Refer to the guide above to know how to run these scans from the command prompt.
How to see the SFC scan results?
Those who’re interested in knowing the results of the SFC scan can follow the steps below to check out the log that is created once the scan is complete.
Press Win+E to open File Explorer. Then navigate to C:\Windows\CBSand then double-click on the CBS text document.

Note that this CBS text file will include information about the SFC scan every time it was run on the computer.

To check the details of the latest scan, take a look at the date and time entries.
We hope this guide helped you to repair Windows 11 from the command prompt.



Using “Method 2: Using DISM tool commands in CMD” instructions above, I was able to correct a condition where Windows Update had stopped working with error code (0x80080005) indicated.