
What to know
- Narima’s Horn removes the 15-minute dragon summon cooldown entirely
- You must unlock its crafting recipe through mission dispatch in Timeworn Ruins
- Rare materials like Dragon Claws and Stalactite are required
- Crafting is done via the witch under Special Items
Narima’s Horn is one of the most powerful utility items in Crimson Desert, especially if you rely heavily on dragon summons during exploration or combat. Instead of waiting out the long cooldown, this item gives you immediate access, which can completely change how you approach difficult encounters or traversal.
Before you start chasing it, you should understand that this is not a simple pickup item—it requires preparation, multiple missions, and resource farming. But once obtained, it becomes a permanent advantage in your gameplay loop.
| Feature | Details |
|---|---|
| Item Type | Special Utility Item |
| Main Use | Removes dragon summon cooldown |
| Unlock Method | Recipe via Timeworn Ruins dispatch |
| Crafting Location | Witch (Special Items tab) |
| Key Materials | Dragon Claws, Stalactite, Feathers |
| Difficulty | Moderate to Time-Intensive |
Why Narima’s Horn is a game-changing item
The biggest limitation of dragon summoning is the enforced cooldown, which can feel restrictive when you’re trying to chain fights or move quickly across large areas. Narima’s Horn completely bypasses this system, allowing you to summon your dragon whenever needed.
This makes it especially valuable if you are:
- Engaging in repeated boss fights or elite enemy farming
- Traveling across dangerous terrain quickly
- Trying to optimize combat efficiency and mobility
Once you start using it, going back to cooldown-based summoning feels significantly slower and less flexible.
How to prepare before unlocking the horn
Before heading straight to the ruins, you need to set up your research progression properly. This step is often overlooked but is essential for unlocking efficient resource gathering.
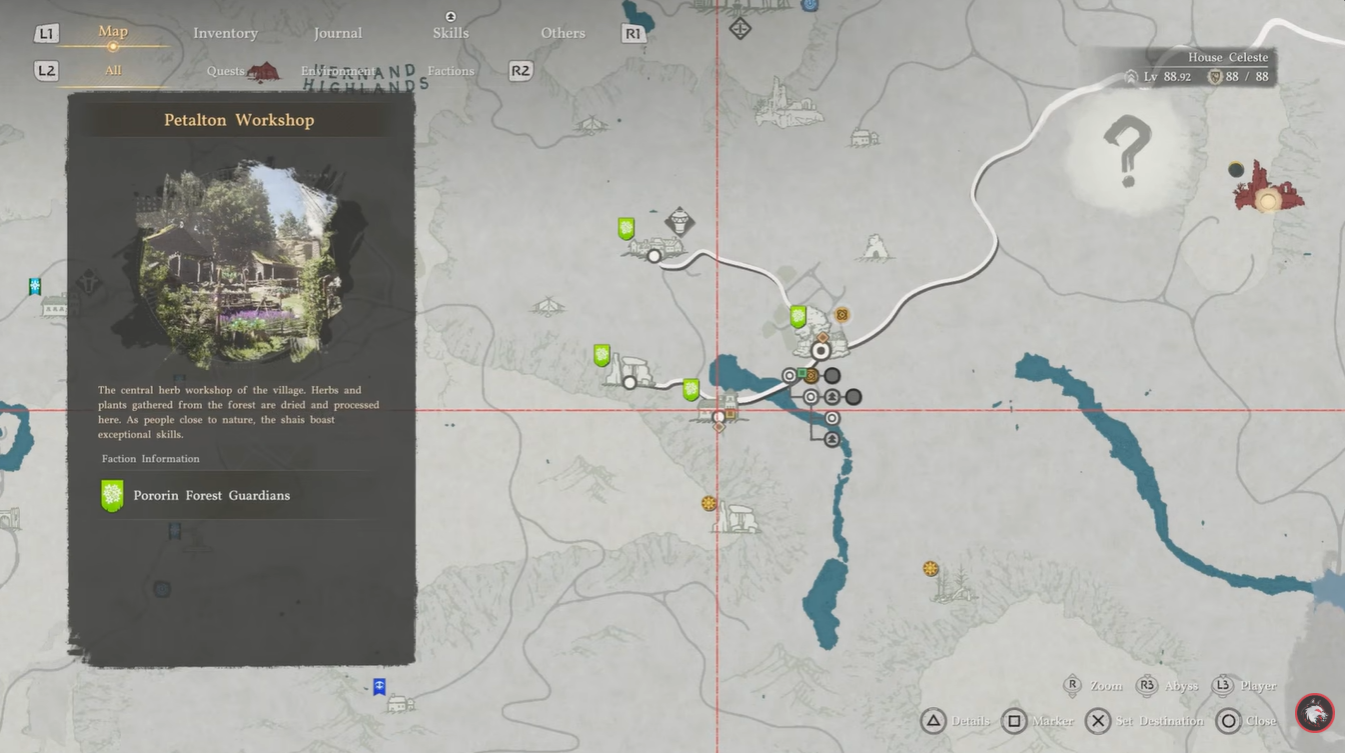
Visit the Petalton workshop and access the research station. This is where you improve your crafting efficiency and mission rewards.
Invest in Efficient Energy and Efficient Gathering upgrades. These upgrades reduce grind time and improve your resource yields. Confirm upgrades are active before proceeding, as they directly impact how quickly you can farm rare materials later.
Skipping this step will significantly slow down your progress, so it’s worth doing early.
How to get Narima’s Horn recipe from Timeworn Ruins
The recipe is not found directly—it comes through a mission system tied to exploration and dispatch.
Step 1
Travel to the Timeworn Ruins and clear all enemies in the area. Expect resistance, so prepare accordingly.
Step 2
Interact with the mission dispatch system after clearing the zone. This allows you to send out missions tied to the area.
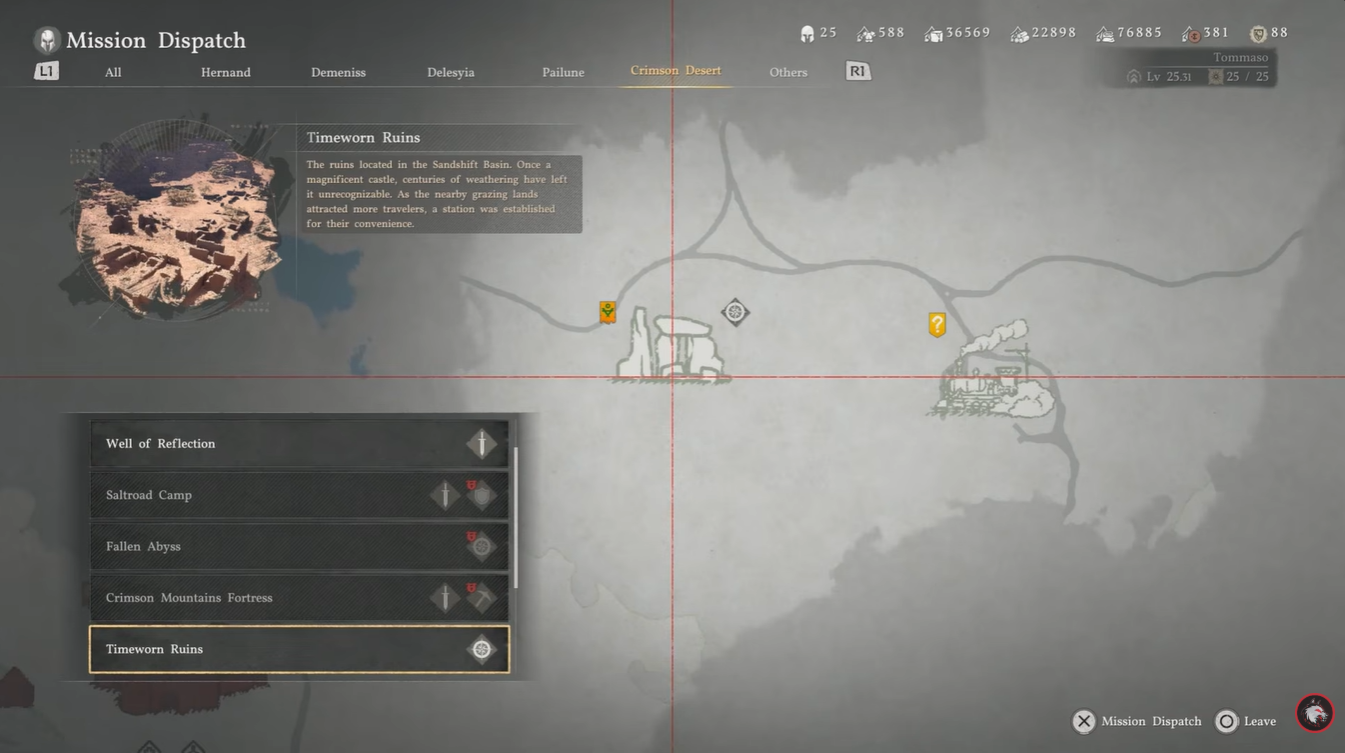
Step 3
Run dispatch missions repeatedly until the recipe drops. This can take time depending on RNG and mission cycles.
Step 4
Claim the Narima’s Horn recipe once unlocked.
This is the most time-consuming part of the entire process, so patience is key here.
How to farm materials efficiently for crafting
Once you have the recipe, the next challenge is gathering materials. Each resource comes from mission-based farming rather than simple pickups, making efficiency upgrades crucial.
Required crafting materials
| Material | Quantity | Source |
|---|---|---|
| Dragon Claw | 3 | Mission rewards / elite enemies |
| Stalactite | 1 | Rare drop from dig sites |
| Feather | 2 | Dispatch missions |
How to farm materials at Tinkerton dig site

Head to the Tinkerton dig site and scan the area for mission availability. Initiate repeated missions to gather crafting resources. Focus on missions that reward rare drops. Prioritize missions that yield Dragon Claws, as they are typically the hardest to obtain.
Repeat runs until all required materials are collected. Expect some grinding here, but upgrades from earlier will noticeably speed things up.
How to craft Narima’s Horn at the witch
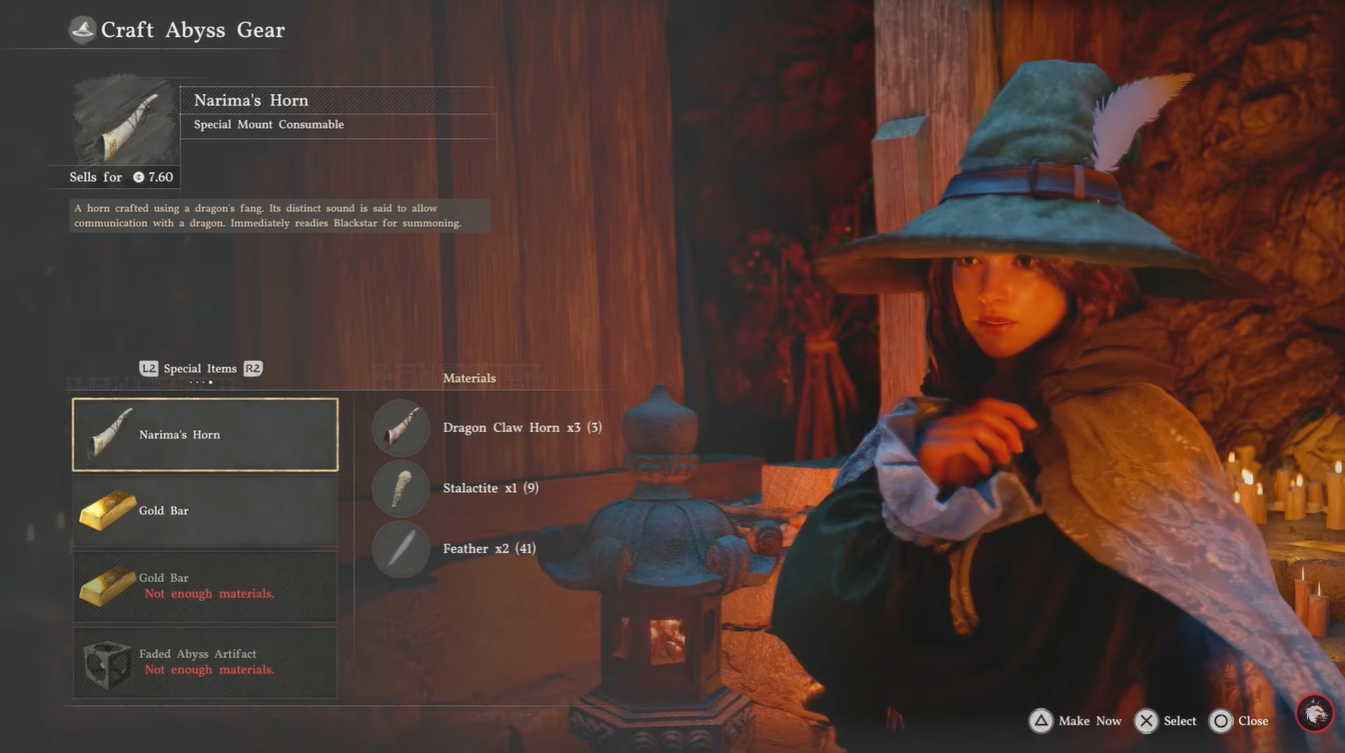
Once everything is ready, crafting is straightforward. Here is how to craft the horn-
- Visit the witch NPC and open the crafting interface.
- Navigate to the ‘Special Items’ tab.
- Select Narima’s Horn from the list (recipe must be unlocked).
- Confirm crafting using collected materials.
After crafting, the horn is permanently available in your inventory.
How to use Narima’s Horn effectively
The horn shines most when you’re in high-pressure or time-sensitive situations. For example, if you are chaining fights or escaping dangerous zones, instant dragon access can save time and resources.
Using the horn is simple, but understanding when to use it is where the real advantage lies. Here is how to use the Narima’s horn:
- Open your inventory and locate Narima’s Horn.
- Activate the item when your dragon summon is on cooldown.
- Immediately summon your dragon without waiting.
Timing matters here—using it strategically during combat or traversal can significantly improve efficiency.
It also pairs well with exploration-heavy playstyles, where mobility is just as important as combat strength. Over time, you’ll likely integrate it into your core gameplay loop rather than treating it as a situational tool.


Leave a Reply