Sharing files and folders between computers over a network has become faster and safer over the years. It is also one of the most convenient ways to allow access to shared folders and facilitate collaboration at the workplace.
Sharing the folder and accessing the folder are two halves of the process. If a folder is already shared over a network, the receiving party still needs to access it from his/her system. There are a number of ways to do so, and quite a number of pitfalls as well that are built in to maintain security.
In this article, we’ll go through a few ways of accessing a shared folder on Windows 11, and a few fixes for the problems associated with not being able to access the shared folder.
-
6 ways to access a shared folder on Windows 11
- Method 1: From File Explorer (Network side-pane)
- Method 2. From File Explorer (with IP address)
- Method 3: By mapping the network drive (with IP address)
- Method 4: Using Network Path with RUN Command
- Method 5: Computer Management
- Method 6: Access shared folders and files via Command Prompt
- Method 7: Mount shared folder as a drive via Command Prompt
- Fix: Unable to access a shared folder on a network
Here are seven ways of accessing a shared folder on Windows 11, listed in ascending order of difficulty.
Method 1: From File Explorer (Network side-pane)
Accessing a shared folder through File Explorer is the simplest method there is. Here’s all that you have to do:
Press Win+E to open File Explorer.
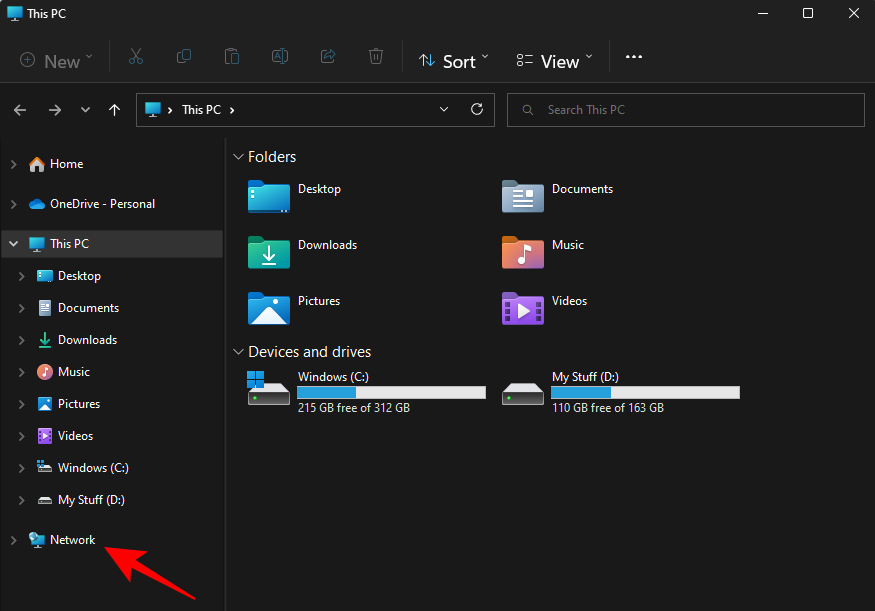
Click on Network in the side panel.
Double-click the computer name that shared the folder.
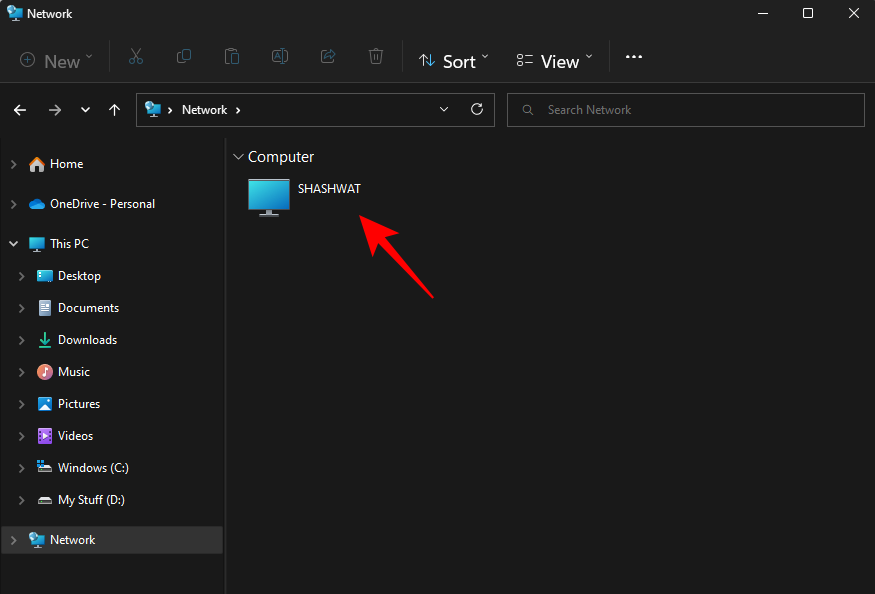
If prompted, sign in with the account that shared the folder. You will now be able to access the shared folder(s).
Method 2. From File Explorer (with IP address)
If you have the IP address of the computer that did the sharing, you can use it to search for the folder from File Explorer itself. Here’s how to do so:
Press Win+E to open File Explorer.
Then click on the address bar.
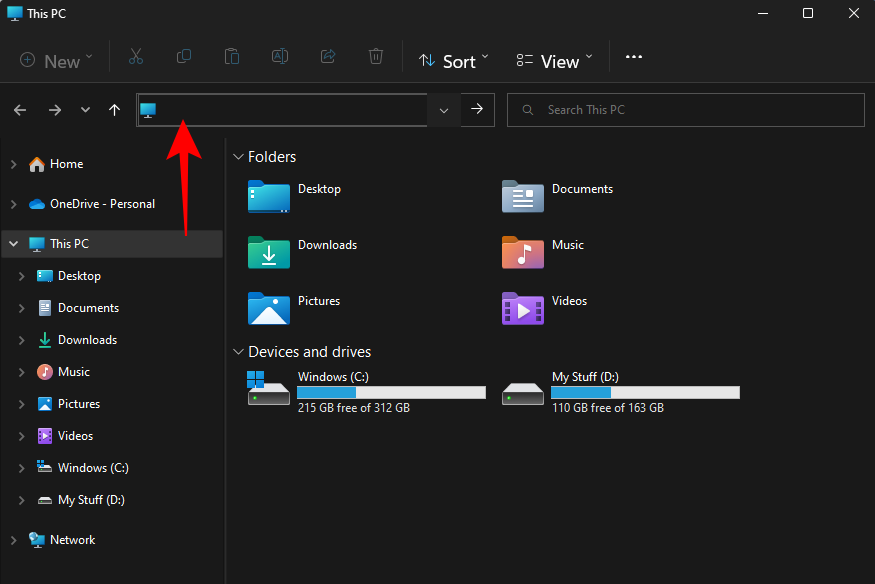
Now type two backslashes, followed by the IP address.
\\IPaddress
Here’s what it should look like:
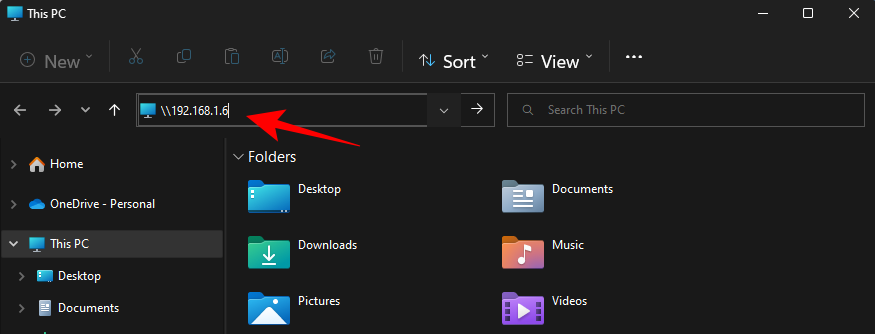
Press Enter. This will allow your PC to search for the computer with this IP address on the network.
Alternatively, you can also type the computer and folder name in the following manner:
\\ComputerName\SharedFolder
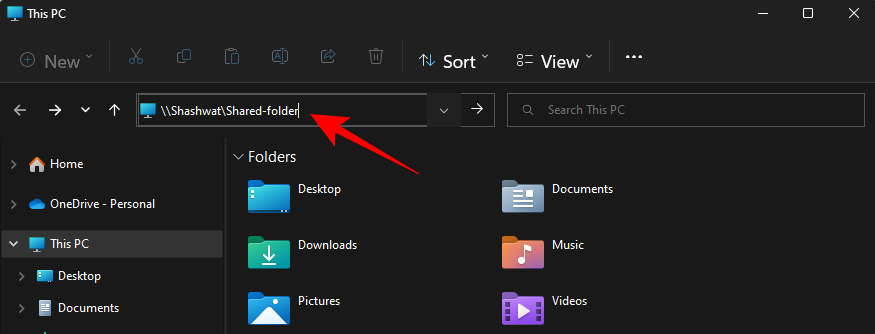
Then press Enter.
You should now be able to access the shared folder.
Method 3: By mapping the network drive (with IP address)
File Explorer also has a nifty “Map a network drive” option that allows the receiver to mount a shared folder as a separate drive. Here’s how to do so.
Press Win+E to open File Explorer. Select This PC.
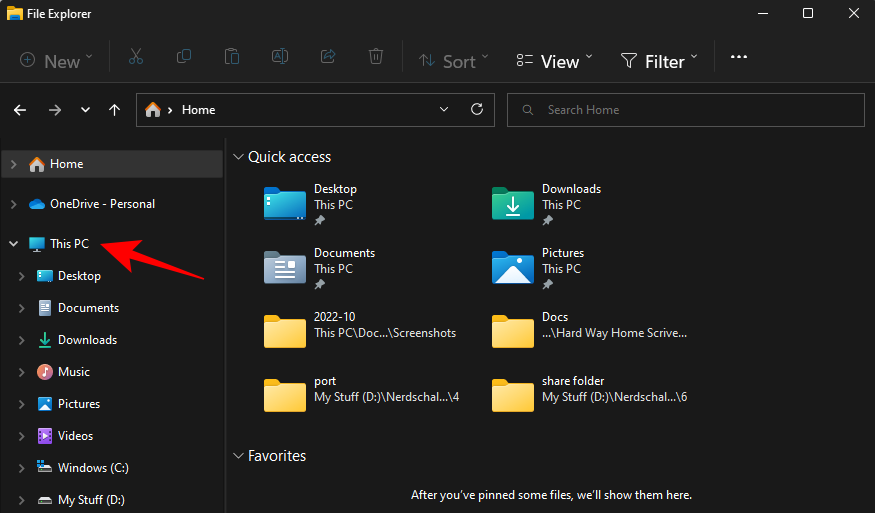
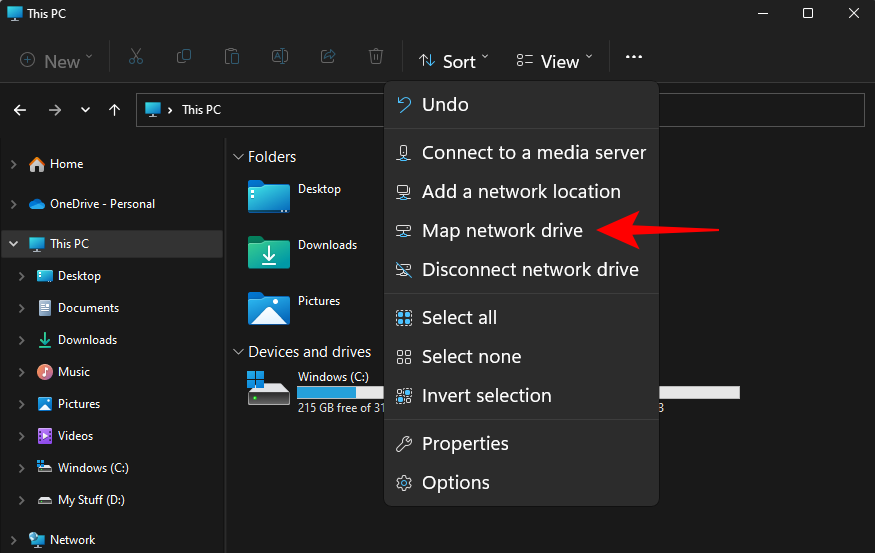
Click on the three-dot menu in the toolbar above.
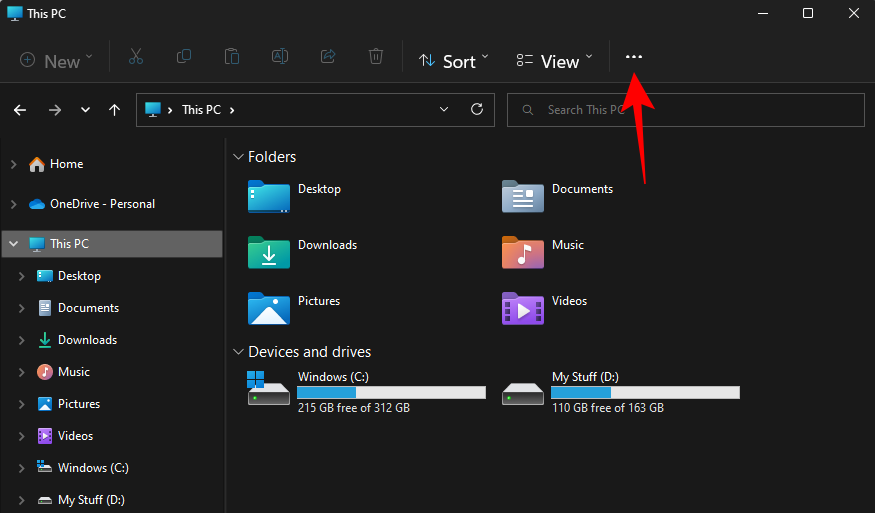
Then select Map network drive.
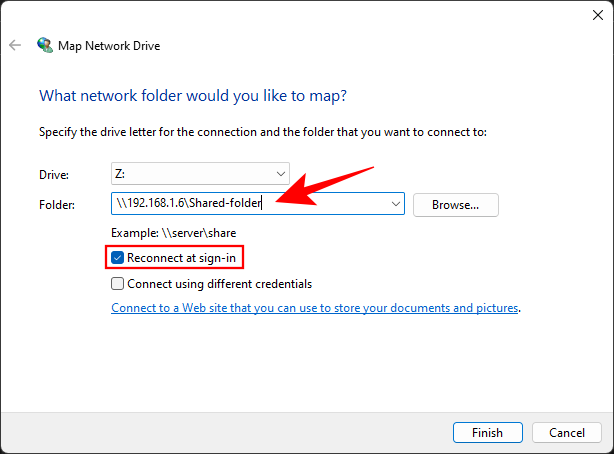
Here, enter the IP address, and the shared folder in the following format:
\\IPaddress\sharedfolder
Also make sure that the Reconnect at sign-in option is checked.
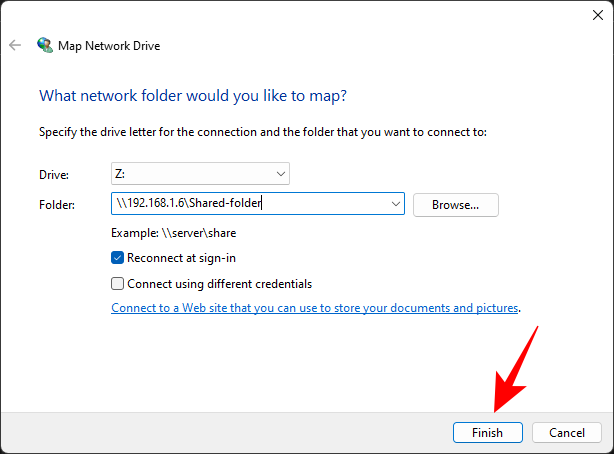
Click on Finish.
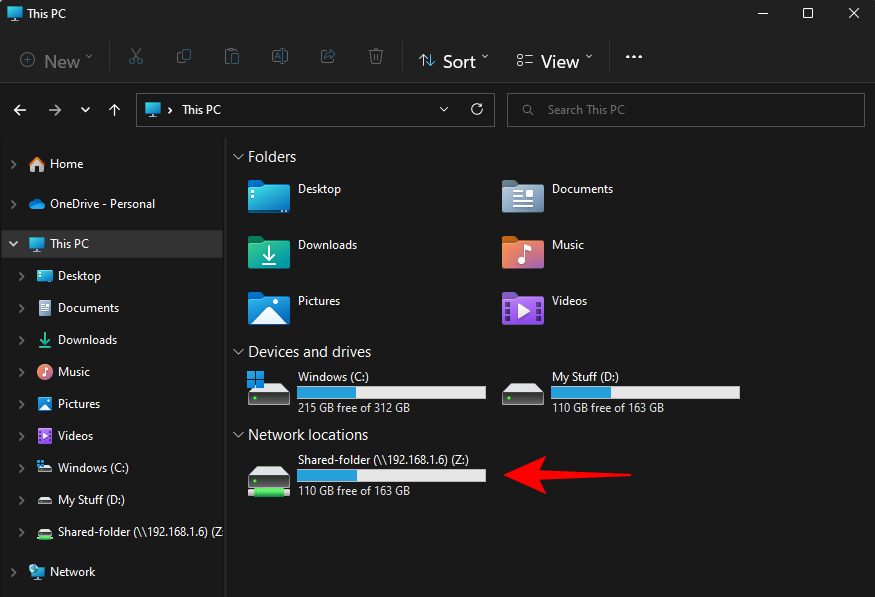
The shared folder will be mounted as a drive and can be accessed from the “This PC” page in File Explorer.
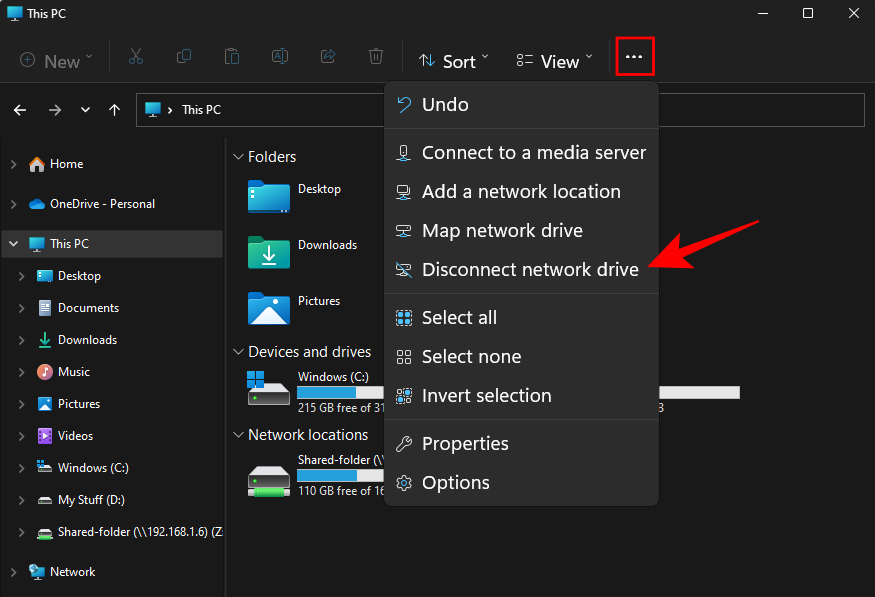
If you wish to disconnect the network drive later, go back to the same three-dot menu from ‘This PC’ and select Disconnect network drive.
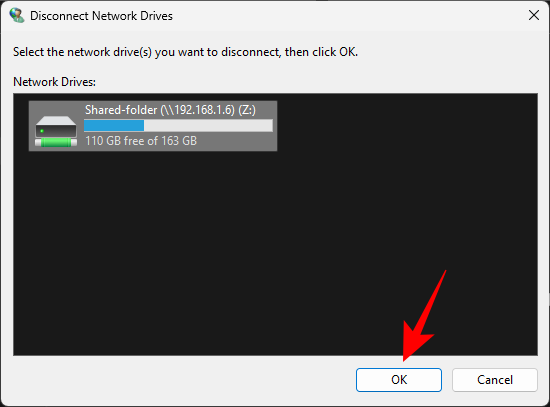
Then select your network drive and click OK.
Method 4: Using Network Path with RUN Command
You can use the RUN command if you know the IP address, or if you know the name of the computer and the shared folder. Here’s how:
Press Win+R to open the RUN box first. Now type the path to the shared folder:
\\ComputerName\SharedFolder
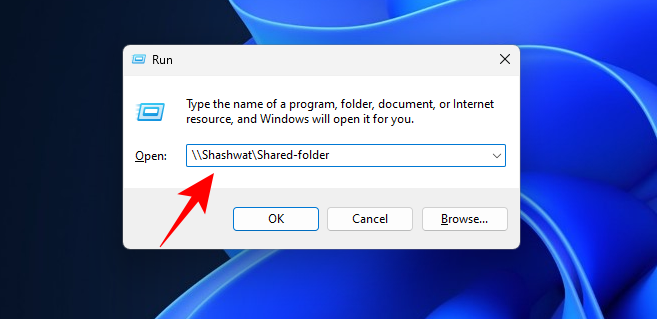
And press Enter. Alternatively, type the IP address in the following way:
\\IPaddress
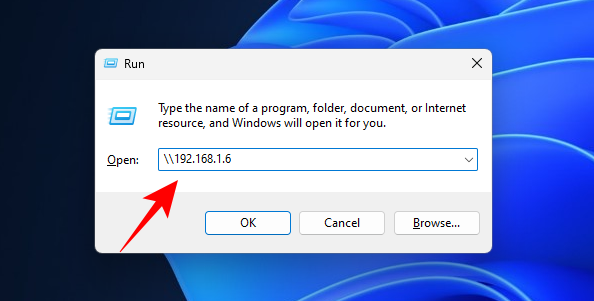
Then press Enter. You will now be able to access the shared folder(s).
Method 5: Computer Management
Computer Management not only lets you access shared folders, but also provides additional information such as the folder paths, number of client connections, and which files are being open currently.
Follow the steps below to access the shared folder(s) through the Computer Management app:
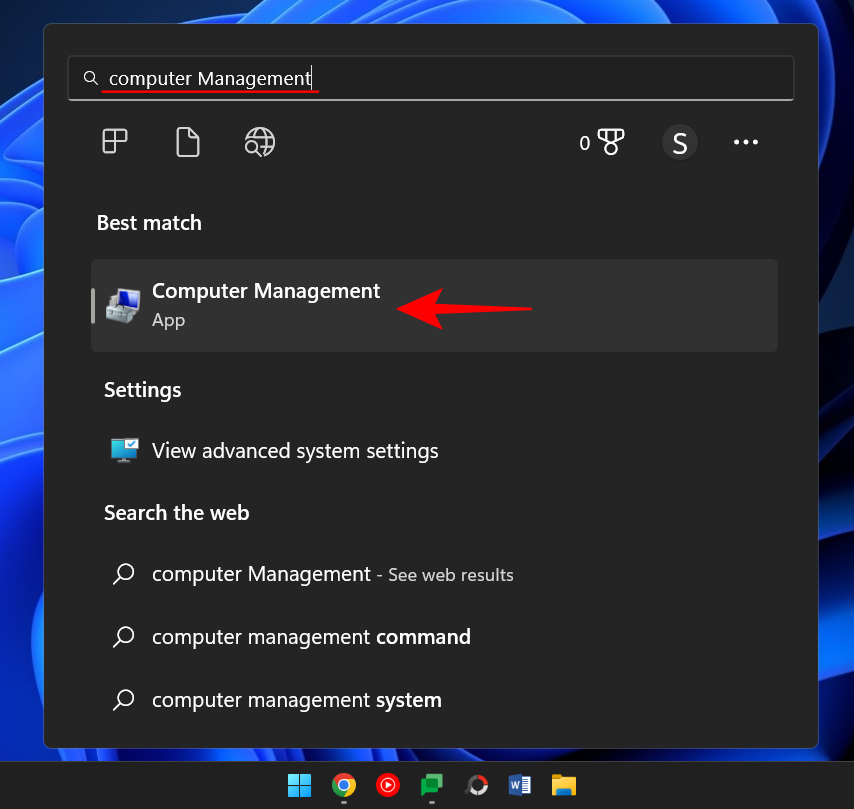
Press Start, then type and select Computer Management.
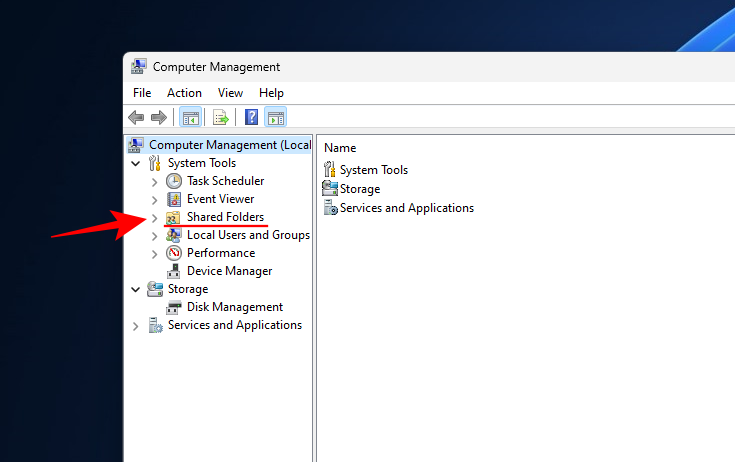
As it opens up, click on Shared Folders in the left panel.
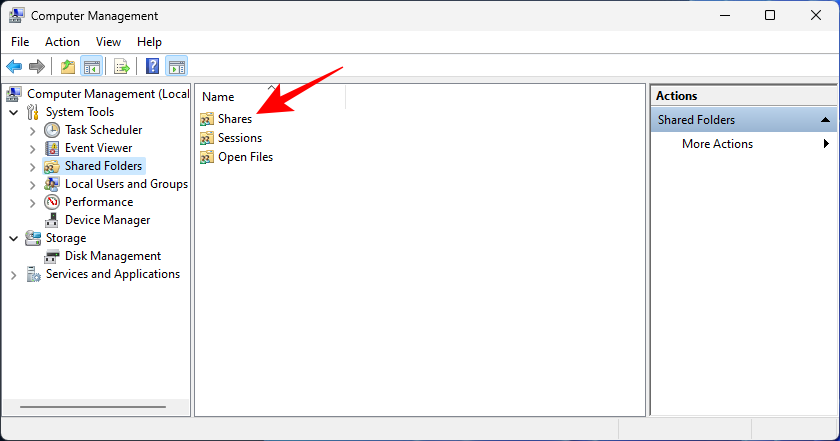
Then double-click on Shares.
Here you will see all the shared folders, their paths, and the number of client connections.
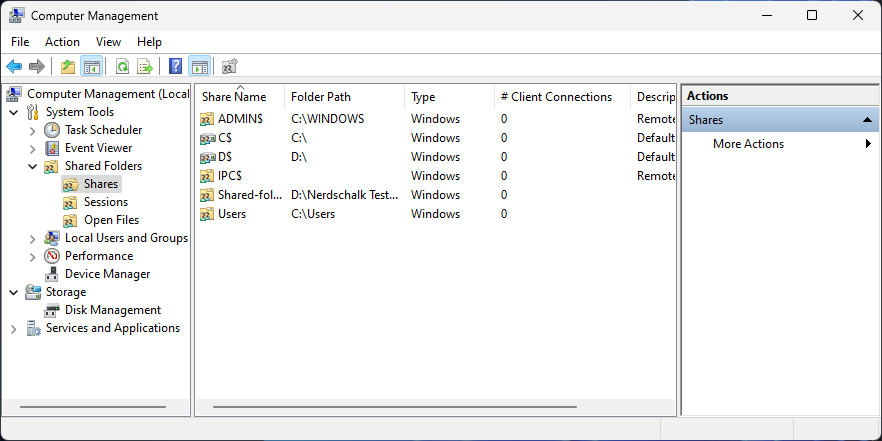
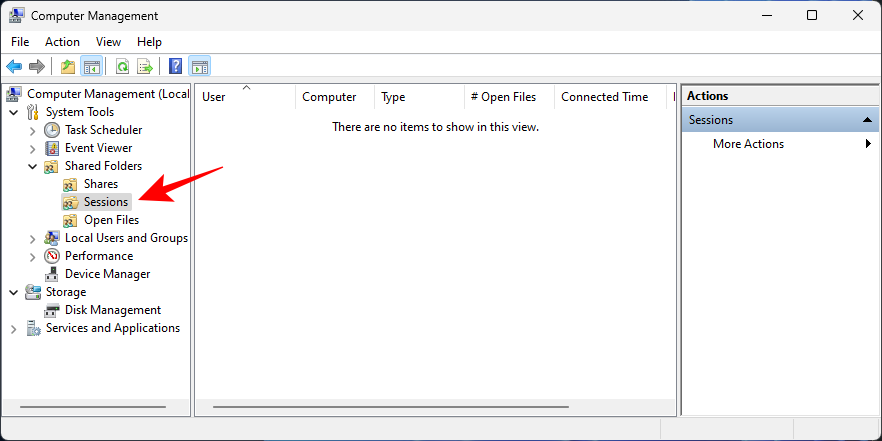
If you want to know which computers are currently connected on the network, select Sessions from the left pane.
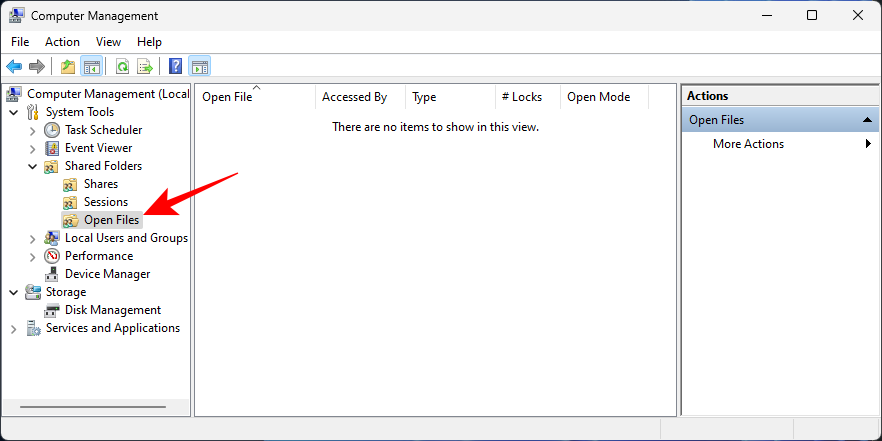
If you want to know which files within the folders are currently opened, click on Open Files in the left pane.
Command terminals like the Command Prompt can also be used to access shared files on a network. You will require the name of the computer and the folders for this.
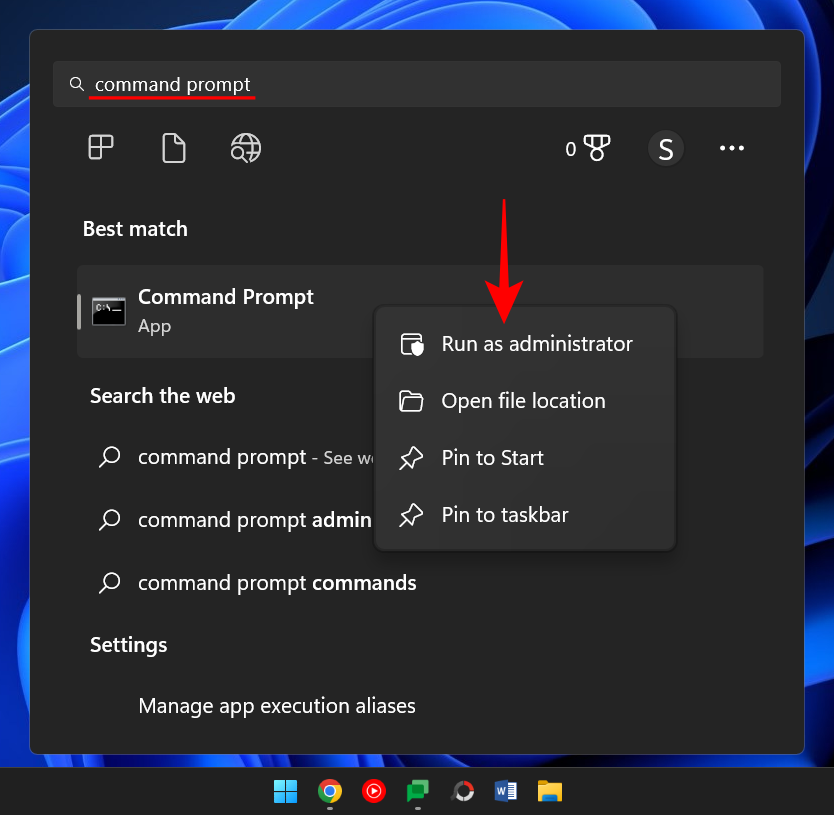
Press Start, type “Command prompt”, right-click it, and select Run as administrator.
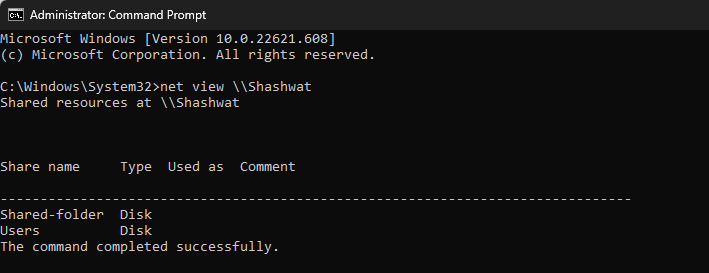
Now type the following command to list all available shared folders:
net view \\computername
Make sure to replace computername with the actual computer name.

Press Enter.
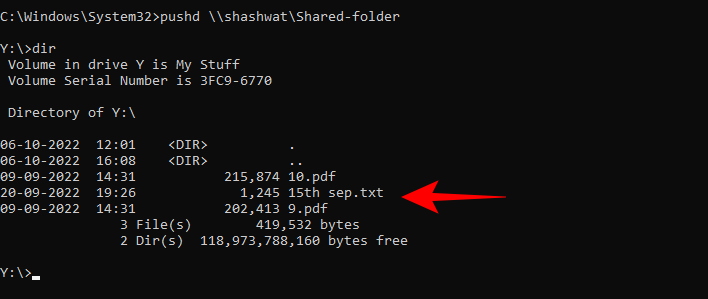
To access the shared folders, type the following command:
pushd \\computername\foldername
Then press Enter.

To view the files shared within the folder, type this command:
dir

Press Enter. You should now see the list of files within the folder, including information about when they were created and their size.
The command prompt can also be used to mount the shared folder as a drive, similar to what we saw in method 3. Here’s how to do so:
Open the command prompt (see above), then type the following command:
net use X: \\computername\foldername

Here, X is the letter for the drive that Windows will be using to mount the folder. You can have any letter as the drive, except the ones that are being used currently. Press Enter once the command is typed.

You can now access the shared folder from File Explorer as a drive.
Not being able to access a shared folder on a network is a common query. This is so mainly due to the fact that there are various processes in the background that could go wrong. However, there is a way to fix all of them. Given below are a few solutions that can help put things right. You’re advised to try accessing the folder after each fix to see if it’s worked.
Fix 1: Turn on Windows Features
This first fix will ensure that the appropriate windows features are turned on. Here’s how to do so:
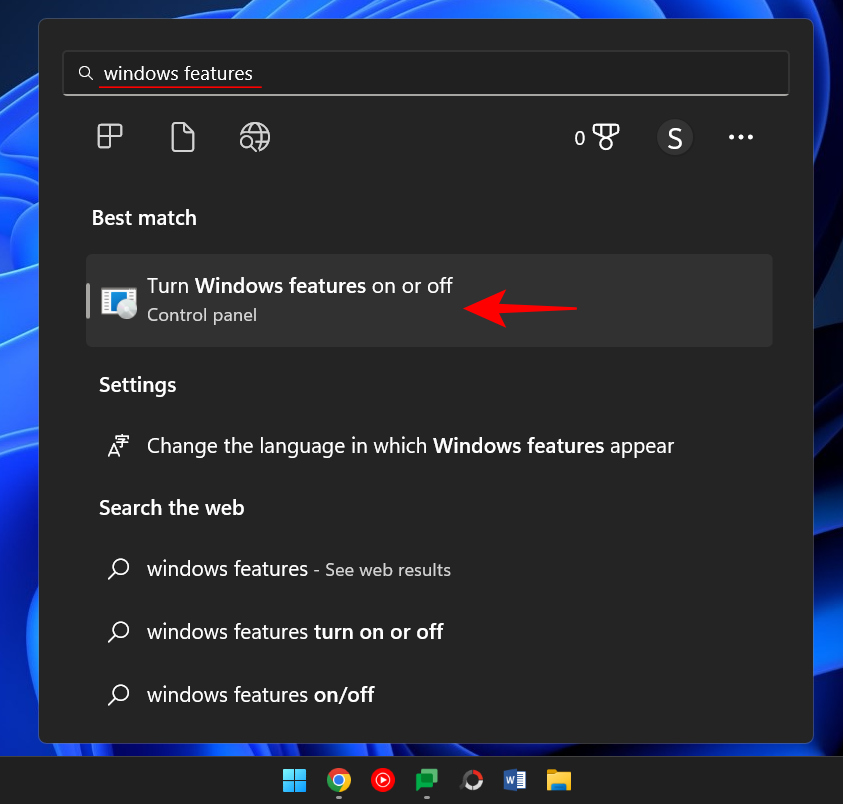
Press Start, type Windows features, and select “Turn windows features on or off”.
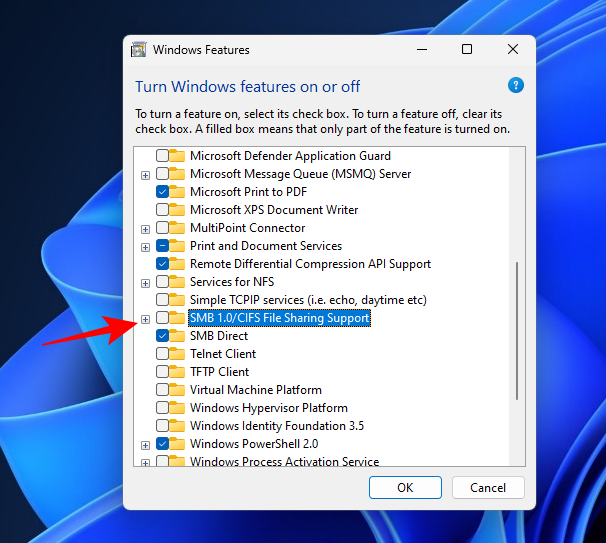
Then scroll down to SMB 1.0/CIFS File Sharing Support and click on the ‘+‘ sign to expand it.
Then check SMB 1.0/CIFS Client.
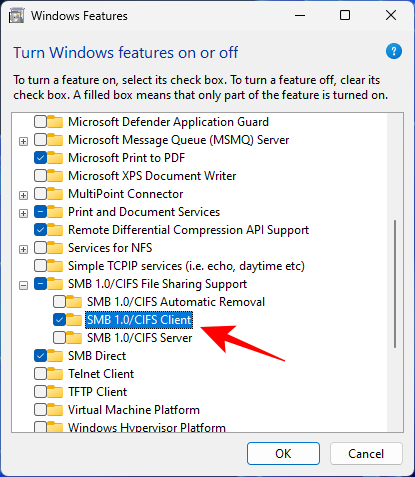
Click OK.
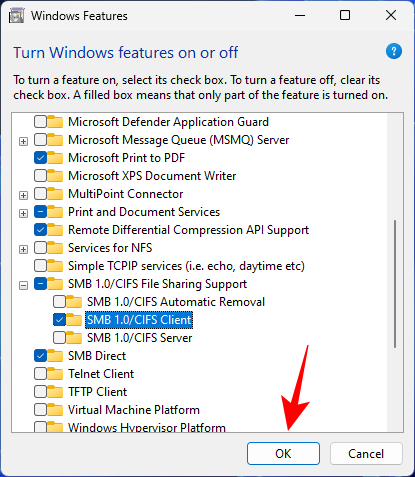
Now check if you’re able to access the folder from one of the methods listed above.
Fix 2: Change Permissions to Everyone
It’s possible that you’re not able to access the folder because you don’t have permission to do so. This could perhaps be because the sharing was set up incorrectly. To correct this, you will need to contact the person who’s in charge of sharing the folder and ask them to do the following:
Right-click on the folder to be shared and select Properties.
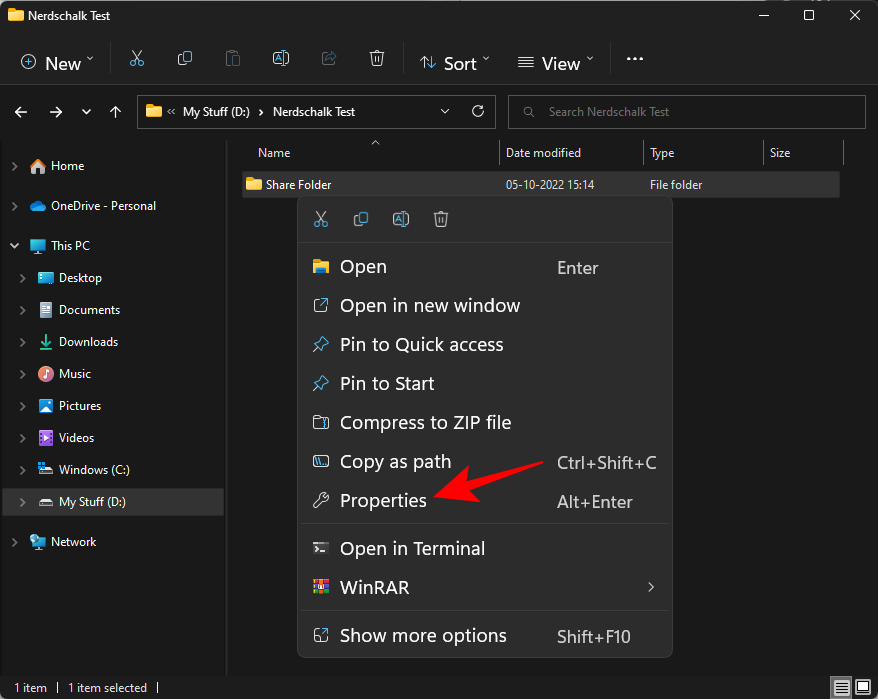
Then click on the Sharing tab.
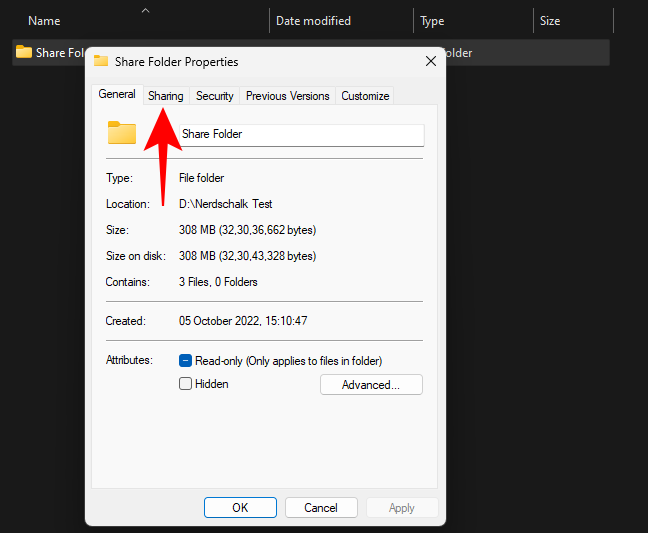
Click on Advanced sharing.
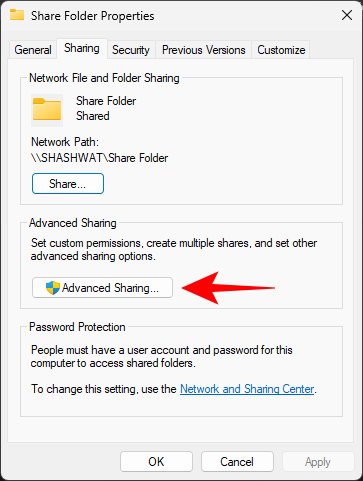
Make sure that there is a check next to Share this folder. Then click Permissions.
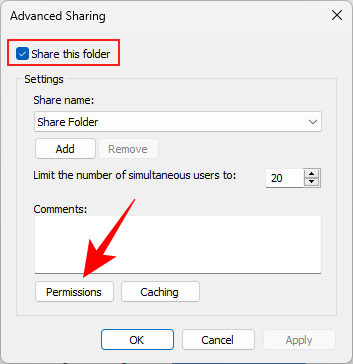
Select Everyone, modify the permissions, and then click OK.
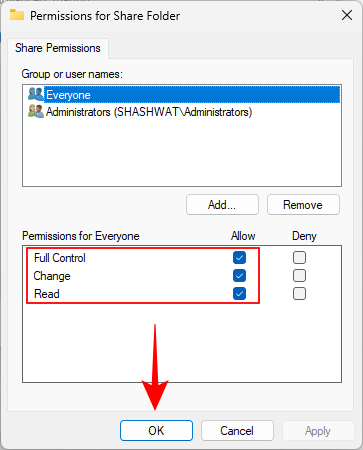
Click OK again.
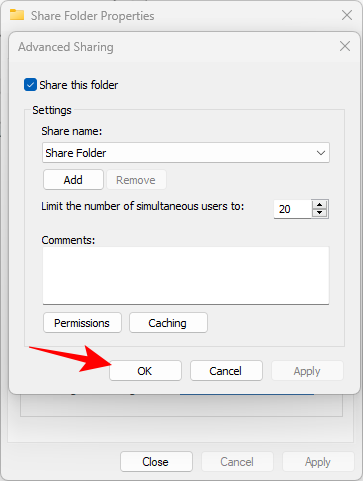
Check to see if you’re able to access the shared folder.
Fix 3: Enable Network Discovery
There’s always the possibility that network discovery is turned off. To fix this, follow the steps below:
Press Win+I to open Settings. Then click on Network and internet.
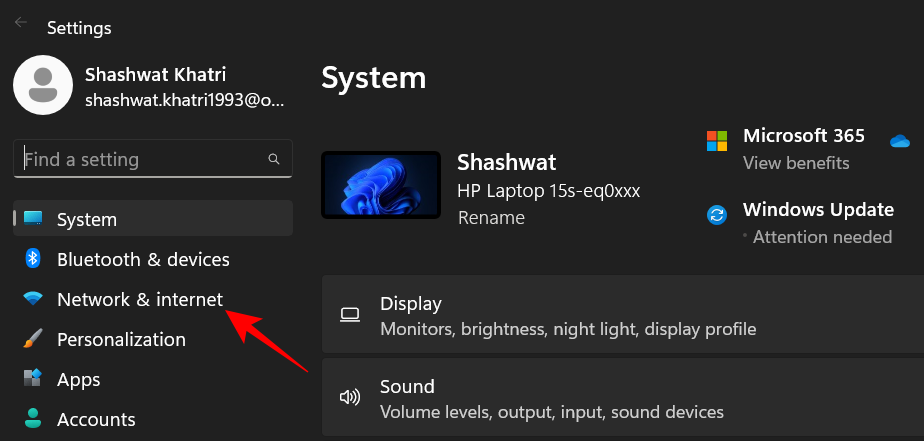
Click on Advanced network settings.
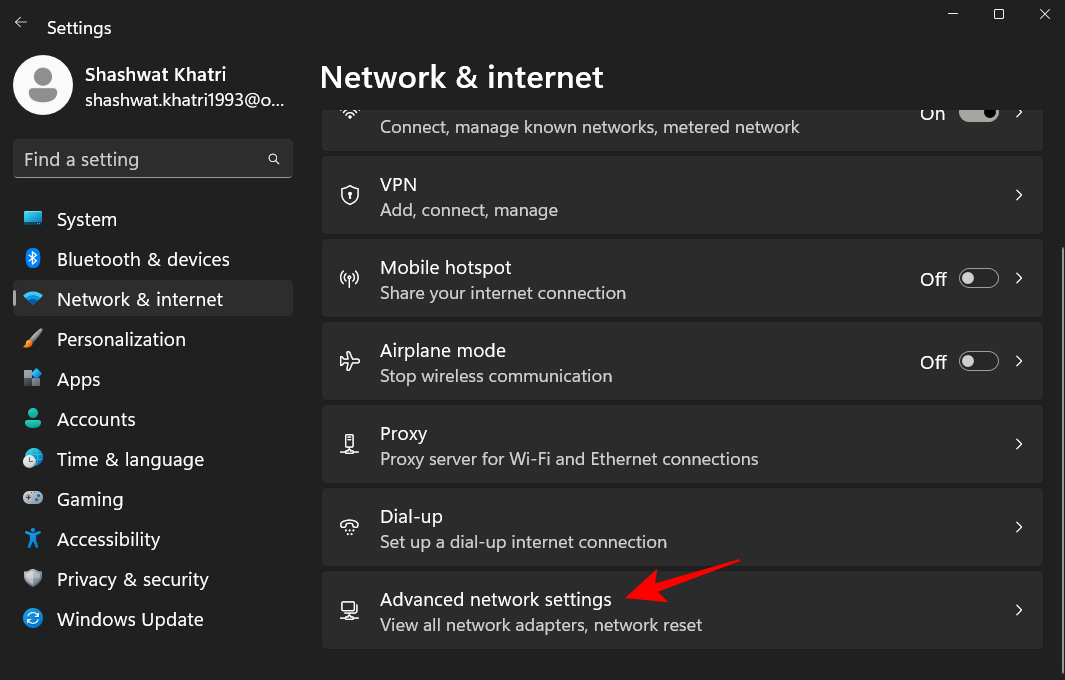
Click on Advanced sharing settings.
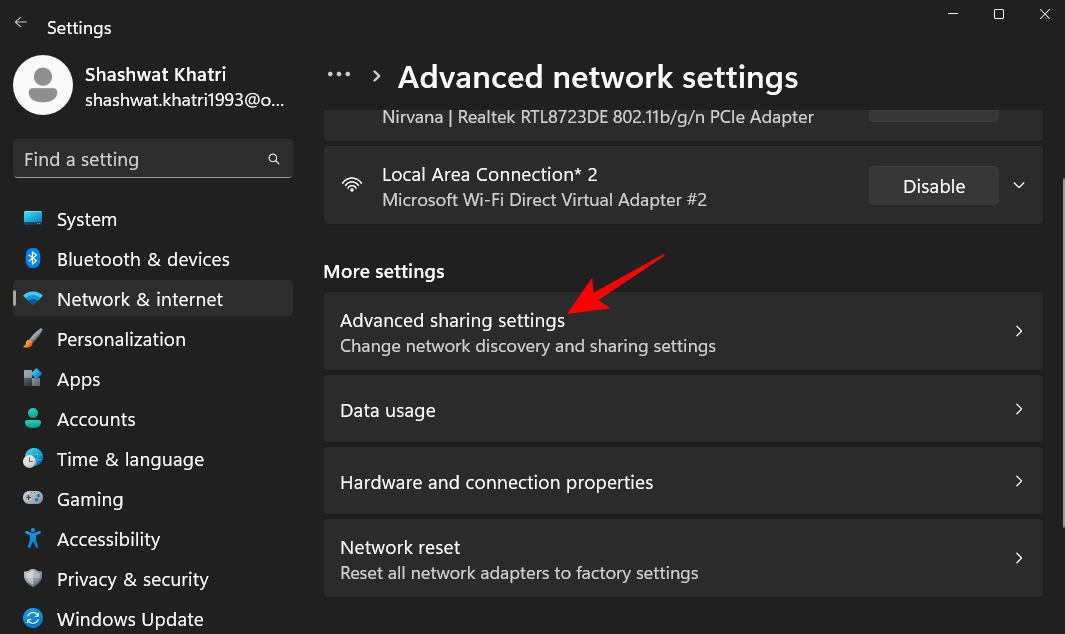
Make sure that Network discovery and File and printer sharing under “Private networks” are turned on.
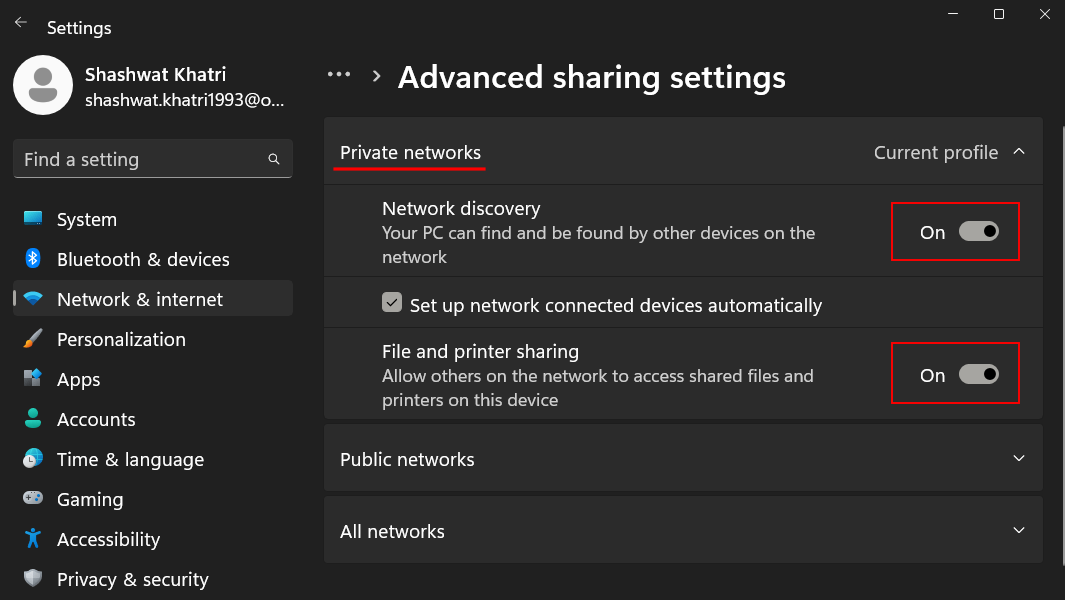
Then click on Public networks to expand it.
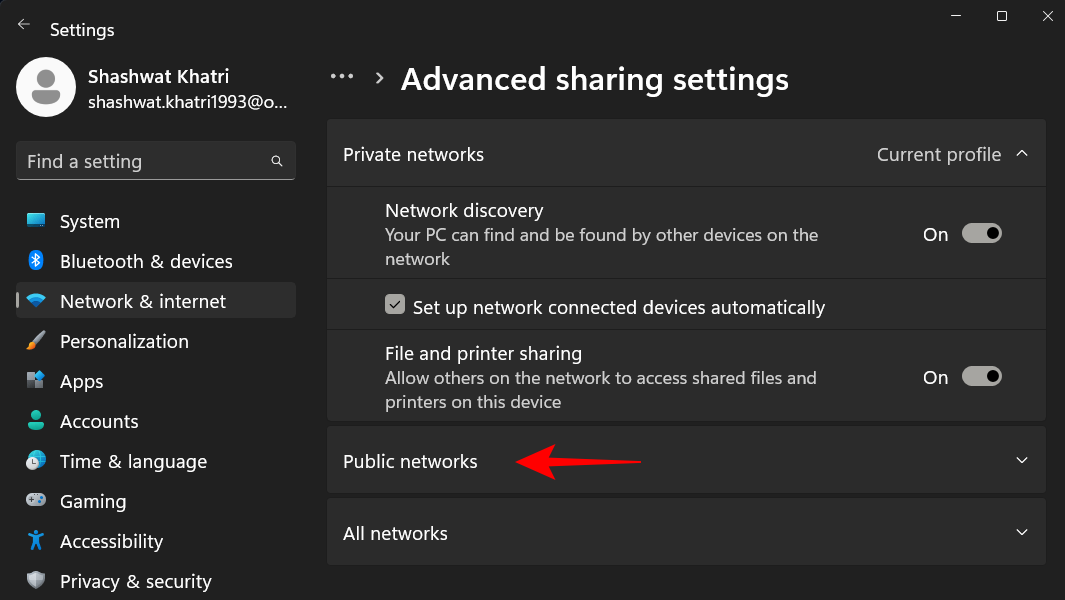
Then turn on Network discovery and File and printer sharing.
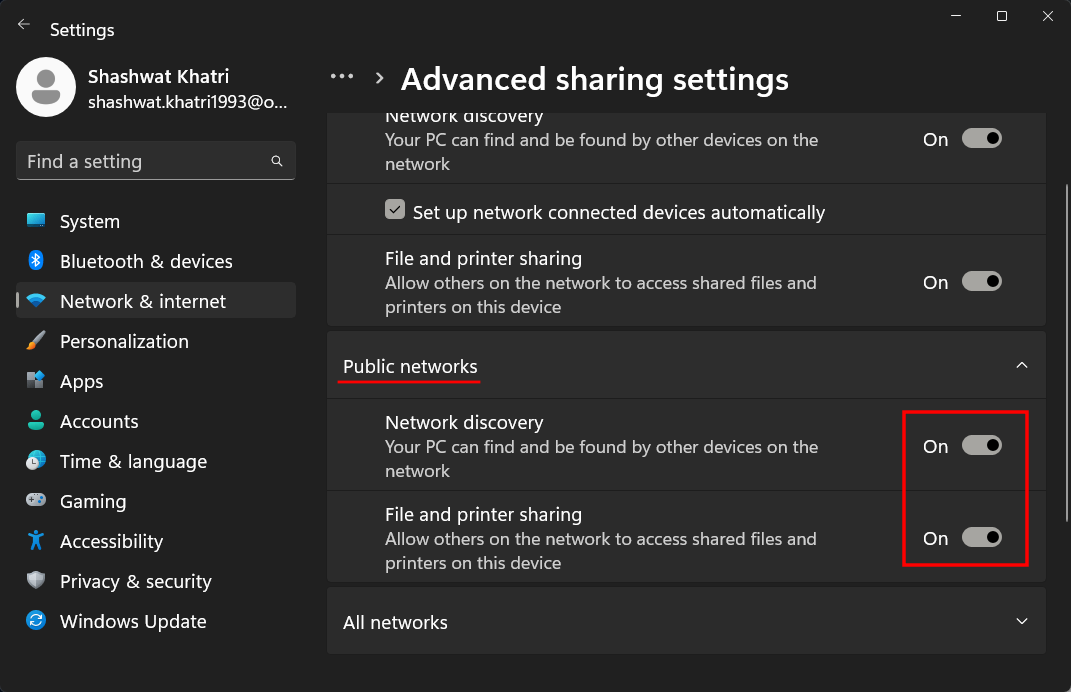
Confirm whether the issue is resolved.
Fix 4: Start services
Accessing shared folders over a network leverages a few services that need to be turned on first. Here’s how to do so:
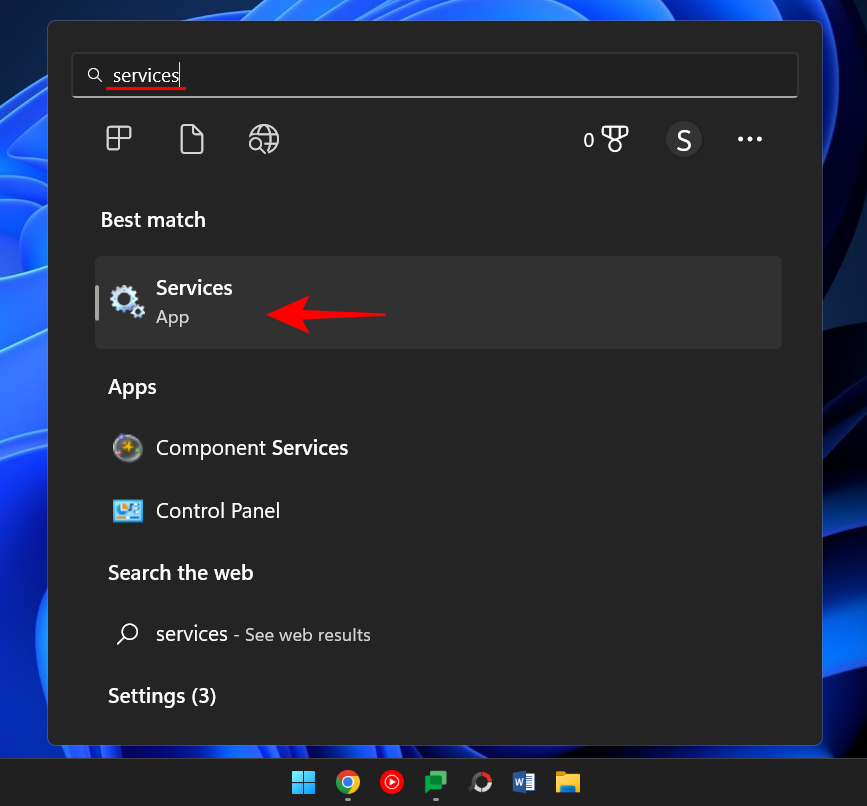
Press Start, type services, and hit Enter.
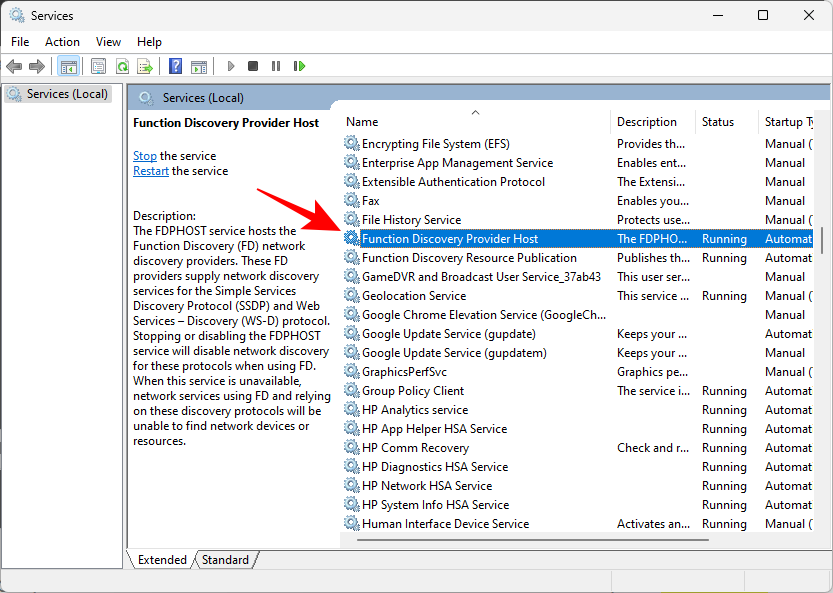
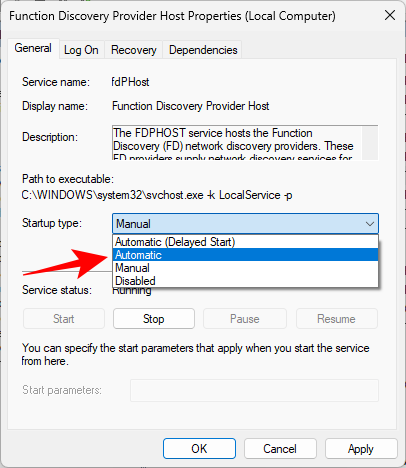
Find Function Discovery Provider Host and double-click on it.
Click on the drop-down menu next to “Startup type”.
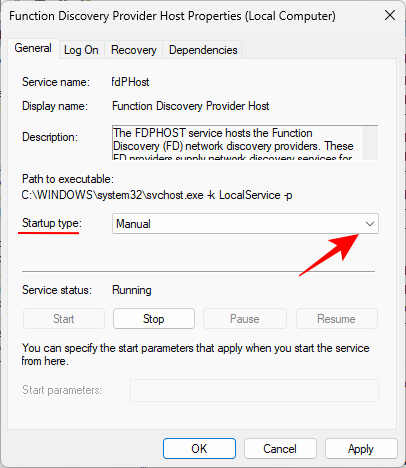
Set it to Automatic.
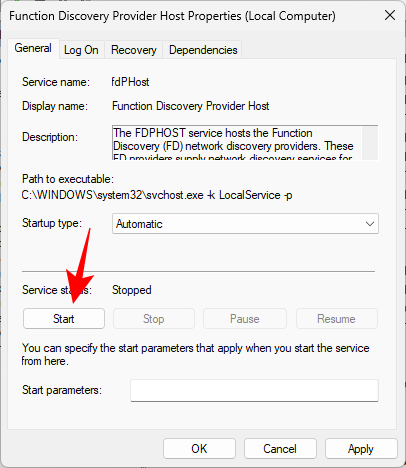
Then, under “Services status”, click Start.
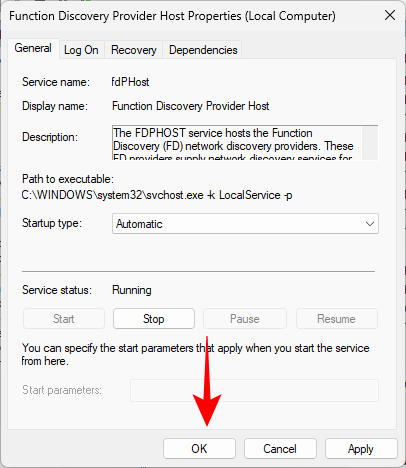
Then click OK.
Then do the same for these three services – Function Discovery Resource Publication, SSDP Discovery, UPnP Device Host.
Once done, restart your computer and check if you’re able to access the shared folder now.
Fix 5: Registry Editor
If you’re still not able to access the shared folder, you may have to change your computer’s sharing policies. This can be done via the registry editor. Here’s how to make that happen:
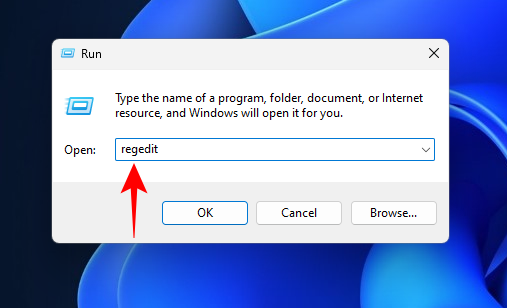
Press Win+R to open RUN box, type regedit, and hit Enter.
Click on the address bar, then navigate to the following address:
Computer\HKEY_LOCAL_MACHINE\SOFTWARE\Policies\Microsoft\Windows\LanmanWorkstation
Or, you could just copy the above address and paste it into the address bar.

Then press Enter.
If you’re unable to find the LanmanWorkstation key, go to the ‘Windows’ key in the given address, right-click on it, and select New > Key.
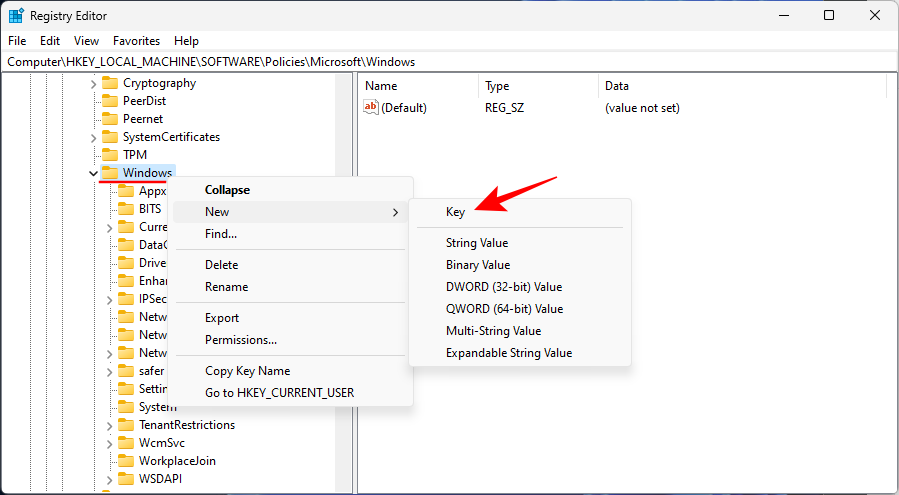
Name it LanmanWorkstation.
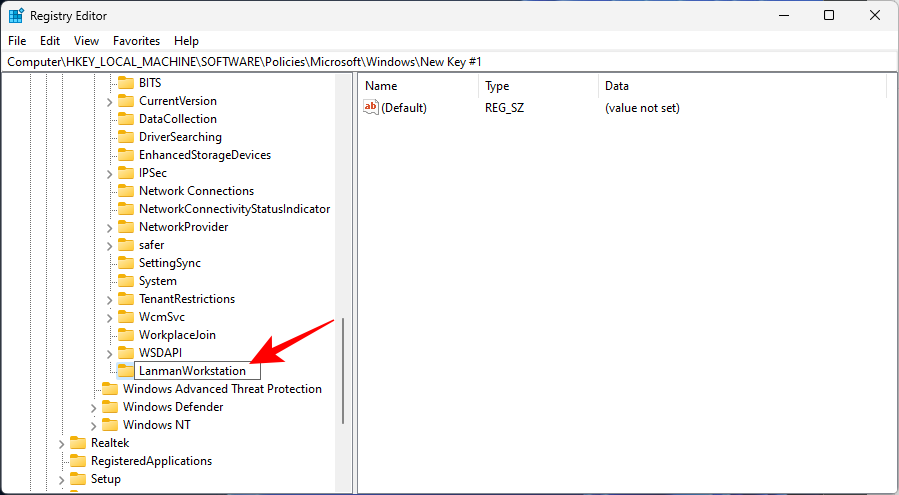
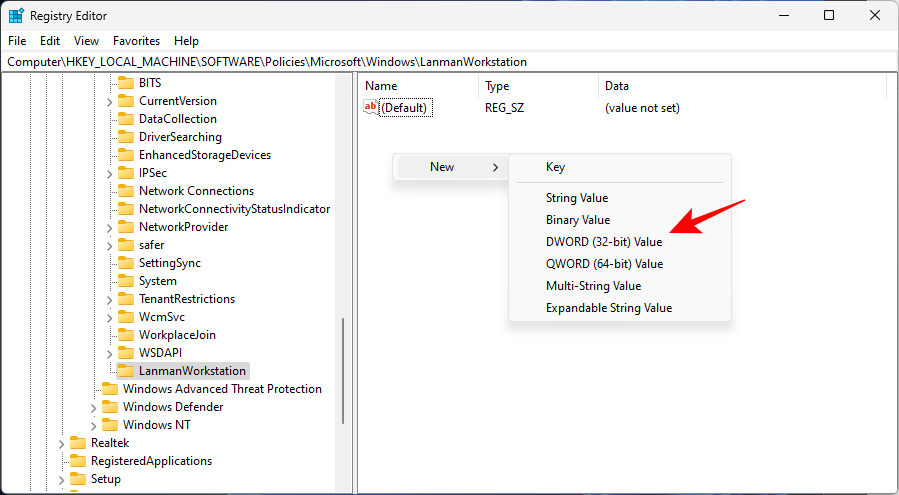
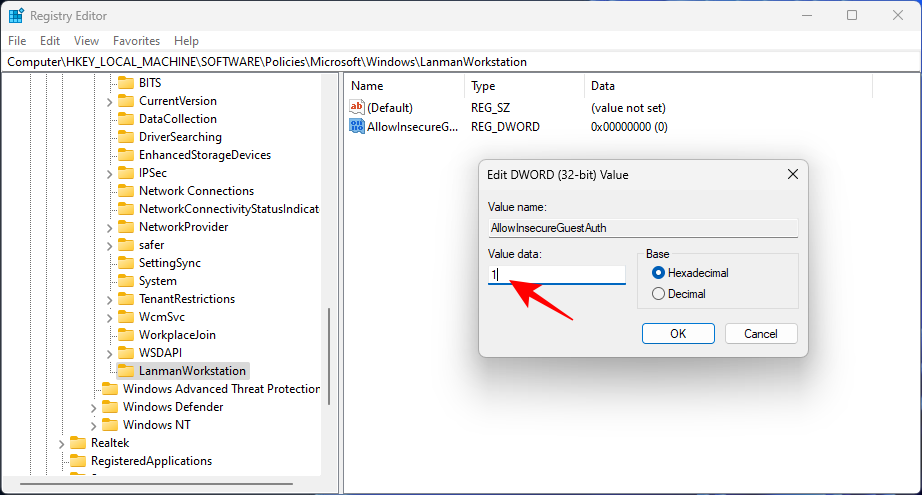
Now select this LanmanWorkstation key. Then right-click on the central pane, and select New > DWORD (32-bit) Value.
Name it AllowInsecureGuestAuth.
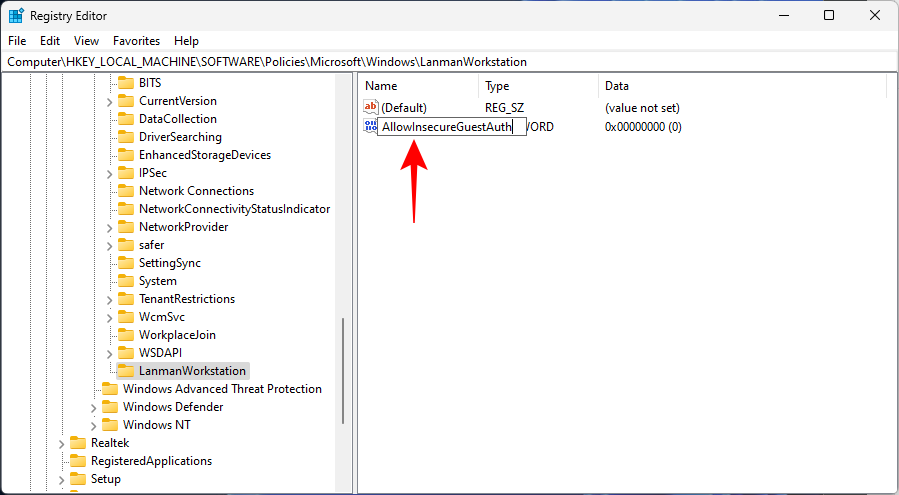
Double-click on this key. Then change the “Value data” to 1.
Click OK.
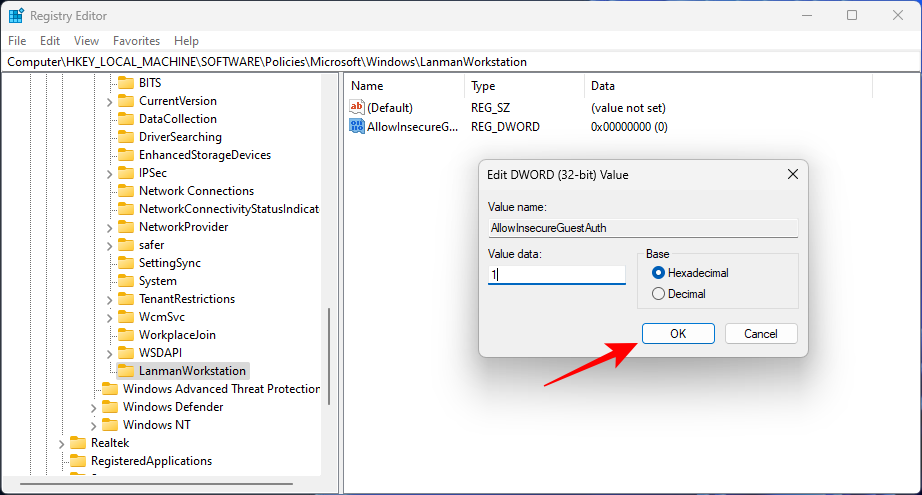
Now restart your PC and see if you can access the shared folder now.
If you’re having authentication problems on your computer, it could likely be because you’re using your Microsoft account on your system. This has been quite a frustrating problem for many, but there is a workaround for this that involves accessing the shared folder using a local account.
Create a local account or switch to it if there’s already a local account on your system. The local account can be used to authenticate and access a shared folder.
To know more about how to set up and switch to a local account, check out our post on Using Windows 11 Without Microsoft Account.
Once you’re done, you can switch back to your Microsoft account.
So these were some of the ways that you can access a shared folder on Windows 11 and fix any issues that there might come up in the process. We hope you found a method that was convenient for you to use. Until next time!


