Apple rolled out iOS 15 on September 20th, 2021 with a host of new, impressive features. More impressively, Apple did not kick the iPhone 6s out of the support cycle, even though the device is now over six years old. As always, there is a bit of a learning curve involved, and you must spare some time to get accustomed to the intricacies of the new operating system.
Today, we will take a tour of the latest version of iOS, and teach you a bunch of uncommon tricks that will help you master iOS 15. Now without further ado, let us get to it.
iOS 15 tricks you must know
Here are some of our favorite tricks that we love to use on iOS 15 to make the experience wholesome. Give them a try!
#1. Add exceptions to a Focus profile
iOS 15 has introduced a new productivity feature called Focus. When your turn on an appropriate Focus profile, unnecessary app notifications are hidden, allowing you to focus on the stuff you care about. iOS 15 comes with four pre-determined Focus profiles. Not only can you edit the profiles, but you can also create your own. To top it off, there is an option to add exceptions as well.
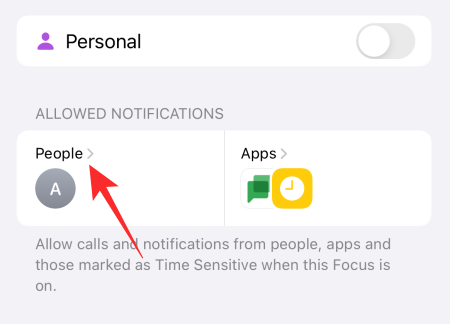
Exceptions are apps or people who do not need to oblige to Focus profile restrictions, meaning they can notify you when that specific Focus profile is engaged. To set an exception, first, go to Settings and tap on ‘Focus.’

Now, go to the profile you want to edit.

Next, tap on ‘People.’
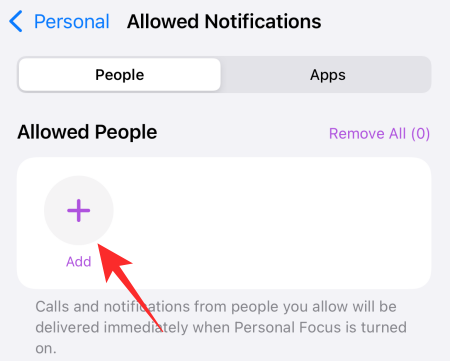
Next, under the ‘Allowed People’ banner, tap on ‘Add.’
Now, add as many people as you want and exit the area and tap on ‘Done’ when you are satisfied.
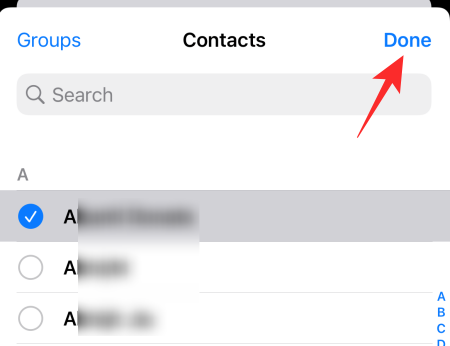
Your contacts will be added to the exception list.
Similarly, to add an app to the list of exceptions, tap on the ‘Apps’ area at the top-right.

Now, tap on ‘Add’ and select the application you want to add to the exception list.
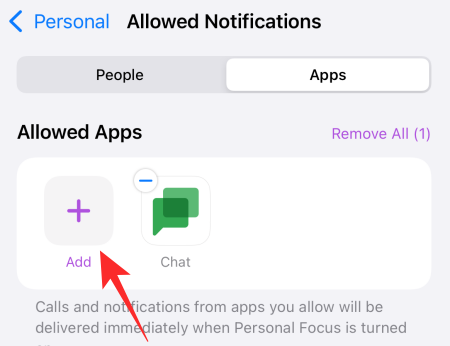
Tap on ‘Done’ to save the changes.

You will get notifications from the apps you added when that particular Focus Profile is engaged.
#2. Change the Start page image on Safari
Safari on iOS 15 has gotten some neat upgrades, but its default start page remains bland as ever. Thankfully, there is a super-easy way of changing the start page and the change would reflect immediately across all your Apple devices.
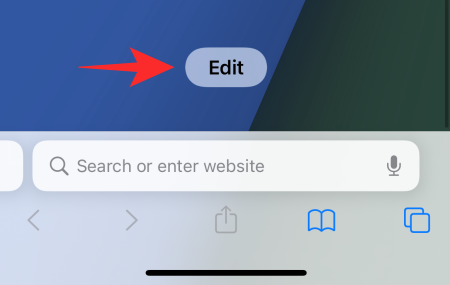
First, launch Safari on your iOS 15 device. When on the Start page, scroll down. Next, tap on ‘Edit.’
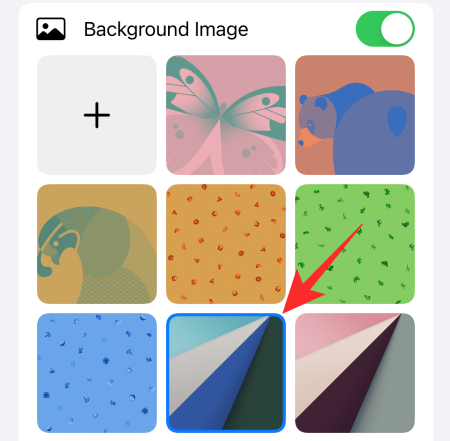
Here, you will find a ‘Background Image’ section with nine preloaded images. Tap on any to set it as you Start page image on Safari.
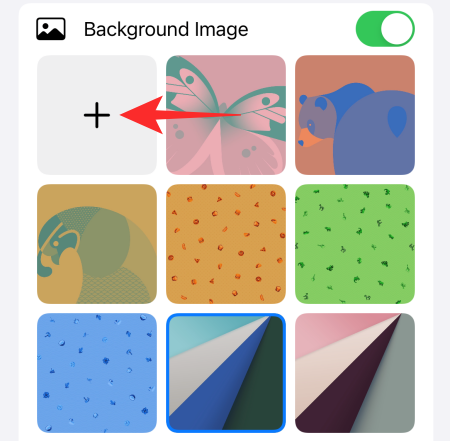
Tap on the ‘+’ button at the top-left corner of your screen to select an image from your Photos library.
#3. Save a Safari Tab Group to Notes
To make compartmentalizing easier than ever, Safari offers something called Tab Groups. You can pick a name for a tab group and keep relevant web pages under one roof. Interestingly, you can even share the links under one Tab Group with only a couple of taps. This makes sure you are not jumping back and forth from one tab to the other, copying links.
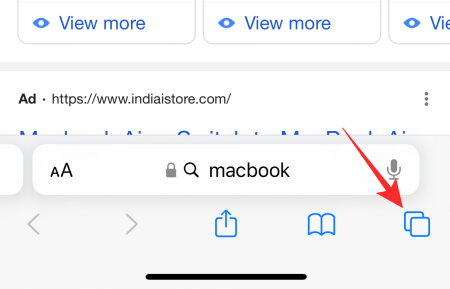
To copy the link of every web page under a Tab Group, launch Safari and tap on the Tabs button at the bottom-right corner of your screen.
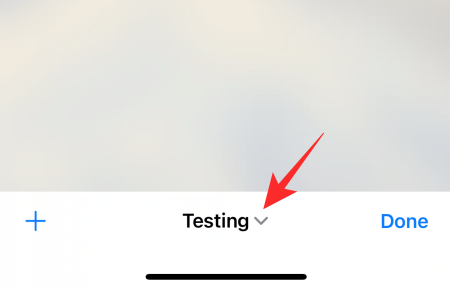
Now, tap on the name of the Tab Group down the middle.
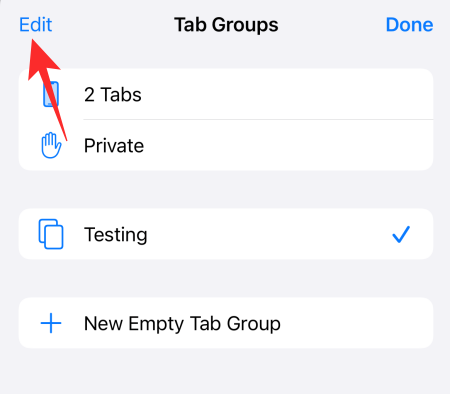
Now, at the top-left of the screen, you will find the ‘Edit’ button.
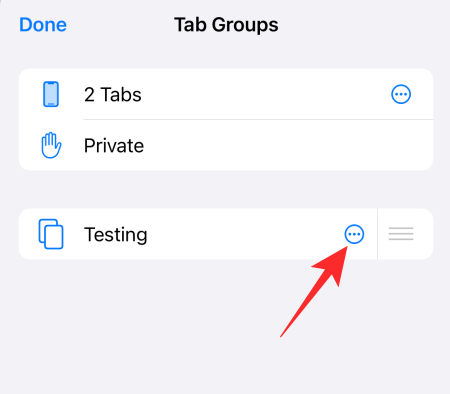
Once you tap on it, you will get a circular ellipsis button.
Next, tap on it and an options menu will pop up. Tap on ‘Copy Links’ to copy the links of all web pages under the Tab Group.
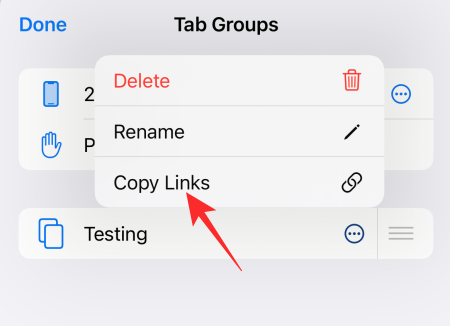
You can then go to the Notes app to paste the links you copied.
#4. Rearrange Home pages in a heartbeat
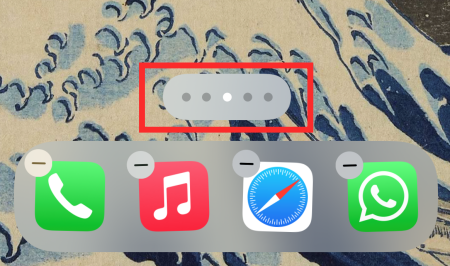
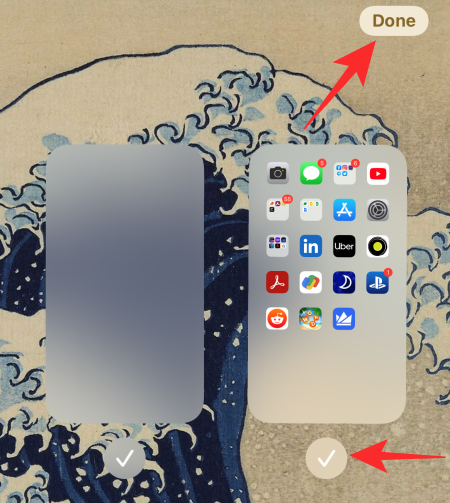
Home pages are now a real thing on iOS devices and it is important to organize them as neatly as you possibly can. Thankfully, iOS 15 makes it super easy to do so. To organize your home page, you have to enter ‘Jiggle mode’ — that is what Apple calls it when you press and hold your home screen — and the apps start shaking. Now, tap on the page selector at the bottom of your screen to move pages or delete one in an instant.
Press on ‘Done’ when you are happy with your selection.
#5. Use Magnifier
The Magnifier used to be an integral part of iOS until iOS 13. The little tool did not make an appearance in iOS 14 but is back again in a smaller avatar in iOS 15. To use the Magnifier, all you have to do is press and hold the area you want to highlight and its surroundings will be zoomed in for clearer viewing.
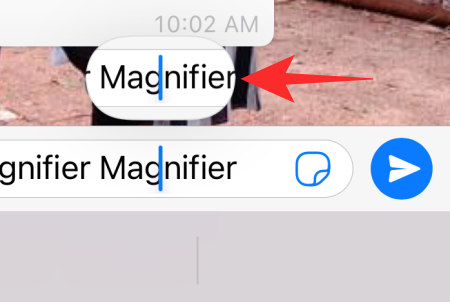
This comes in very handy when you are trying to edit a portion of the text and want to see your cursor clearly.
#6. Move Safari Address bar to top
iOS 15 has introduced a lot of new features in Safari. However, it has also taken a pretty controversial decision along the way, choosing to place Safari’s address bar at the bottom of your screen. As expected, not many have been fond of this unnecessary switch and wish for it to go back to its original position. To take Safari’s address bar back to the top, first, tap on the ‘aA’ button on the left of the address bar.
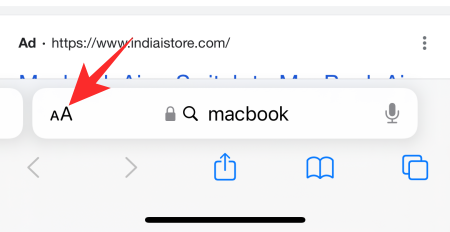
Now, to make the address bar appear at the top, tap on ‘Show Top Address Bar.’
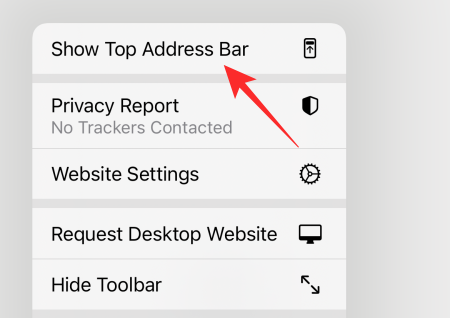
That is it!
#7. Lock a PDF document
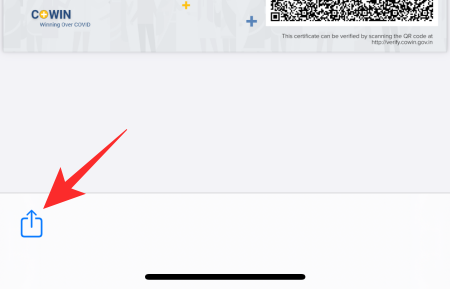
PDF documents, in general, contain important information. Whether it is your tax statement or a credit card bill, it is always a good idea to protect your precious PDFs. Fortunately, iOS 15 comes with a built-in tool that manages to do just that without having you jumping through hoops. To password protect a PDF file, first, locate the file in My Files and tap on it to open. Now, tap on the Share button at the bottom-left corner of the screen.
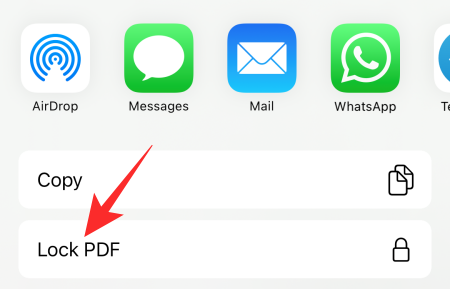
When you get the options, tap on ‘Lock PDF.’
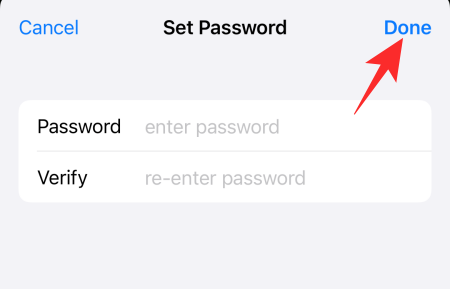
This will take you to the password screen, where you will have to enter your password and verify it. Tap on the ‘Done’ button at the top-right corner of the screen to set the password.
#8. Turn on iCloud+ Private Relay
In its WWDC 2021 Keynote, Apple talked a lot about privacy, introducing new features that make life easier, safer, and, hopefully, more private. Amid this sea of privacy-centric features, there is something called Private Relay, which is exclusive to iCloud+ users. iCloud+ is the paid subscription tier for iCloud and starts at only $0.99/month.
Once subscribed, you can turn Private Relay, which will make sure the information leaving your device is never intercepted by a malicious party. Your browsing activity and IP address remain private on Safari, which stops others from profiling you. Considering you already have iCloud+, turning it on is a breeze.
First, go to Settings and tap on the banner at the top of the screen, where your name is written.

Next, tap on ‘iCloud.’

Now, go to ‘Private Relay (Beta).’

Finally, hit the toggle to turn it on.

#9. Change location preferences for certain apps
Almost every other app out there seems interested in learning about our location and whereabouts. If you are not careful, you might end up giving the permissions to just about any app out there, which is definitely not the way to go.
To review the location permissions you have granted thus far and make necessary changes, you will have to go to ‘Settings.’ Now, tap on ‘Privacy.’

Next, go to ‘Location Services.’

The toggle has to be turned on. If it is not, tap on it to turn it on. Now, down the bottom, you will find the list of applications that are allowed to access your location. Tap on the application you want to review.

You can choose from four options: ‘Never,’ ‘Ask Next Time or When I Share,’ ‘While Using the App,’ and ‘Always.’
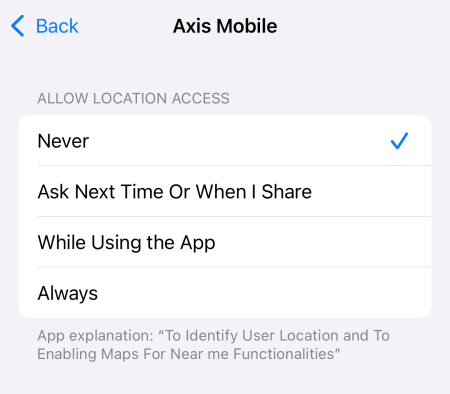
If you only want the app to use your location while you are using it, tap on ‘While Using the App.’ You can also tap on ‘Never’ to stop the app from getting your information.
#10. Turn off Website Tinting
iOS 15 has also something called Website Tinting in Safari. This tries to make your browsing experience more immersive by matching the top bar of the browser with the prevalent accent color of the webpage you are visiting. Website Tinting is turned on by default, but you can choose to carry the frosted default look if you choose. Go to Settings > ‘Safari’ > Toggle off ‘Website Tinting.’

Click on this link to learn all about Website Tinting.
#11. Use background sound effects in iOS 15
Background sound effects can go a long way in limiting distraction, helping you to focus, be calm, or simply rest. Background sound effects are easy to turn on and come in six forms: ‘Balanced Noise,’ ‘Bright Noise,’ ‘Dark Noise,’ ‘Ocean,’ ‘Rain,’ and ‘Stream.’ To turn on background sound effects, go to Settings > ‘Accessibility’ > ‘Audio/Visual’ > Background Sounds > Turn on > Pick sound affect.

Click on this link to learn all about background sound effects in iOS 15.
#12. Keep camera preferences saved
iOS 15 has not made any noticeable changes to the general camera software or interface. However, there are a couple of quality-of-life features that can make the experience a lot more impressive. The ability to preserve camera settings is one of them. That way you can make sure that the settings you choose are not reset every time you exit the Camera app.
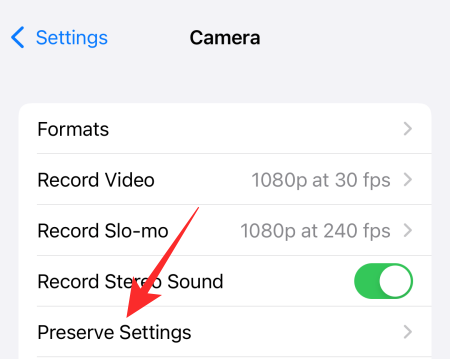
For example, if you are not too fond of the night mode feature, you can simply choose to turn it off once, after instructing iOS 15 to remember your preferences. To make sure your preferences are not forgotten, first, go to Settings, scroll down, and tap on ‘Camera.’

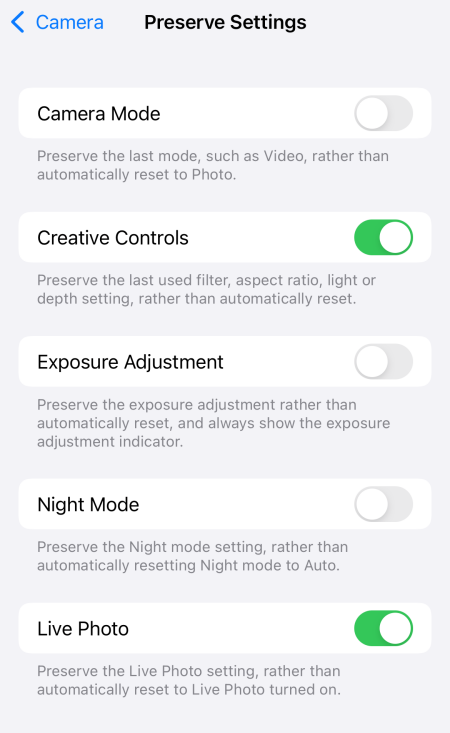
Now, tap on ‘Preserve Settings.’
Then, turn the five toggles on or off as you see fit.
#13. Scan text using Camera or Photos app
Android and Google Lens users have long had the option to scan text from images or through the camera live feed. Now, iPhone users are finally getting the same functionality with iOS 15. Yes, iPhones with iOS 15 can now extract text from the files in the Photos app as well as the live camera feed.
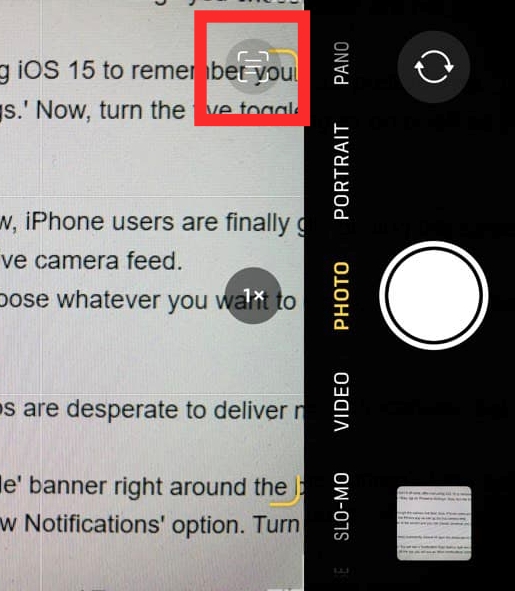
All you have to do is tap on the little scan icon when it appears on the bottom-right corner of the screen and you can choose whatever you want to do with the information.
#14. Mute individual app notifications
If you are not careful, app notifications can start piling up, making your phone buzz and beep incessantly. Almost all apps are desperate to deliver notifications, but iOS 15 allows you to review their permissions and turn them off if you feel like it.
To turn off app notifications for an app, first, go to Settings and then tap on ‘Notifications.’

You will see a ‘Notification Style’ banner right around the bottom of the screen where all the apps and their permissions are listed. Tap on the app that is bothering you.

At the top, you will see an ‘Allow Notifications’ option. Turn it off to disable all notifications from that particular app.
You can also choose the type of alerts that the application delivers. You have ‘Lock Screen,’ ‘Notification Centre,’ and ‘Banners.’ Tap whichever option seems inconvenient and it will be toggled off for good. Underneath the ‘Alerts’ section, you can also choose whether the notifications are allowed to make sounds.
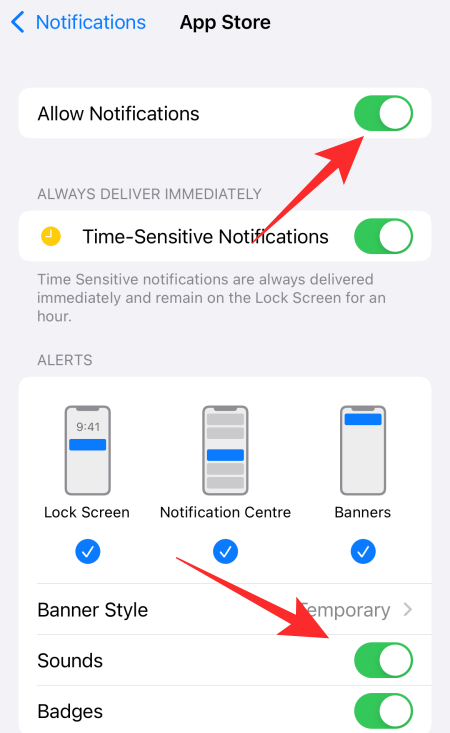
Turn off the ‘Sounds’ toggle to stop the app from bothering you in the future.
#15. Turn off Focus Mode automatically from lock screen
The lock screen on an iPhone hosts some key functions, including Focus Mode controls. When a Focus Mode is engaged, you get fewer notifications from your applications, which allows you to concentrate better on the tasks at hand. Turning Focus Mode on and off is pretty straightforward, from Settings, Control Center, and lock screen. However, if you dig a little deeper, you will find a way to turn off Focus Mode automatically after the timer runs out. straight from the lock screen itself.
When a Focus profile is engaged, tap on the Focus profile icon on your lock screen.

It will give you all the Focus profiles currently active on your system. Now, tap on the ellipsis button on the right of the Focus profile that is currently engaged.

This will give you a few automatic disable options. You can take your pick from the options and that particular Focus profile will be turned off once the timer runs out.

You can click on this link to learn all about Focus Mode and how you could manipulate it on your iOS 15 smartphone.
#16. Add songs to Photo memories
Want to make a photo or video reel worth remembering? You are ought to try iOS 15’s latest Photo memories feature. This new feature not only allows you to add cool photo effects but also lets you add the song of your choice to your memory reel.
To add a song to your reel, first, open the Photos app and go to the ‘For You’ tab.

At the top, you will see memory mixes that the application has created for you. Tap on any to open. At the bottom-left corner of your screen, you will find an add music button.

Apple will play its top suggested songs for you and apply an appropriate filter to set the mood. If that does not float your boat, you can tap on the music button around the bottom right corner to pick one of your own songs from your Apple Music library.

Press ‘Done’ and exit the area.

Your Memory Mix is now ready to be shared.
Click on this link to learn more about Memory Mixes.
#17. Identify songs on the fly
Are you one of those people who just hate it when a song plays on the radio and you just cannot place it? iOS 15 has just the tool for you. Thanks to Shazam’s super-deep integration with iOS 15, you can add a shortcut to Shazam’s music recognition and discover new songs that you like in a heartbeat.
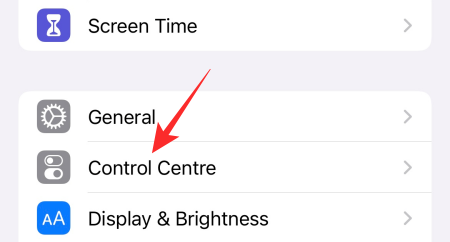
To make the Shazam toggle accessible, first, go to Settings and tap on ‘Control Center.’
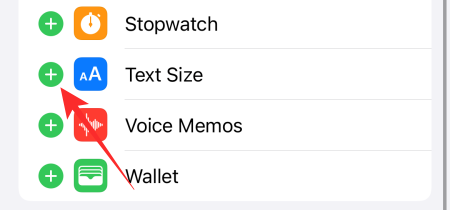
Under ‘More Controls’ you will find one called ‘Music Recognition.’ Tap on the Green plus icon on the left of the option to add it to your Control Center panel.

Now, whenever an unknown but awesome song is playing, all you have to do is swipe down from the top-right corner of the screen and tap on the Shazam logo.
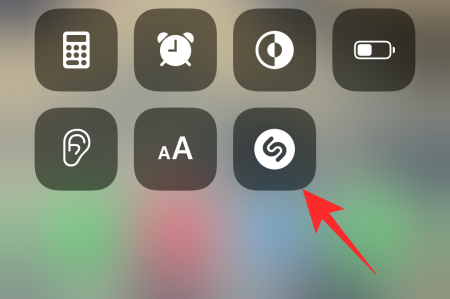
The application will listen for a bit and tell you the name of the song. You can tap on the banner at the top of the screen to learn more info about the song.
Alternatively, you could even open Apple Music from the Shazam app itself to listen to the full song.
#18. Turn Focus off for Messages
Being a first-party application, Messages on iOS 15 allows you to turn off Focus from its Settings itself. To do that, first, go to Settings and tap on ‘Messages.’

Now, at the top of the screen, you will see a banner saying ‘Allow Messages to Access.’ Turn off ‘Focus’ from that section.

This will make sure the Messages app is not able to access Focus and override the changes automatically.
#19. Add tags and mention people in Notes
iOS 15 has made the Notes app bigger and better than ever before. The Notes app now allows you to add hashtags for organizational purposes and even lets you mention people in shared notes. To mention people in a shared Note, all you have to do is use the “@” sign and write the name of the person you wish to mention.
Similarly, add “#” followed by the tag you want to use it with.

Later, simply search the tag and your saved note will pop up in an instant.
#20. Set custom text size for each app
Similar to Android, iOS also lets you pick a standard text size for all applications at once. However, on iOS 15, there is an option to set individual, custom text sizes for every application. For example, if you prefer a bigger font on one application but a smaller one on another, you can easily tweak that using the text size on iOS 15.
Before you get on your merry way, you have to add the button to the Control Center.
First, go to Settings and tap on ‘Control Center.’
Now, under ‘More Controls,’ make sure to add ‘Text Size.’
Once added, open any app, pull down the Control Center, and tap on the text resizer button.
At the bottom of the resizer, you will see two options, ‘Current app only’ and ‘All apps.’
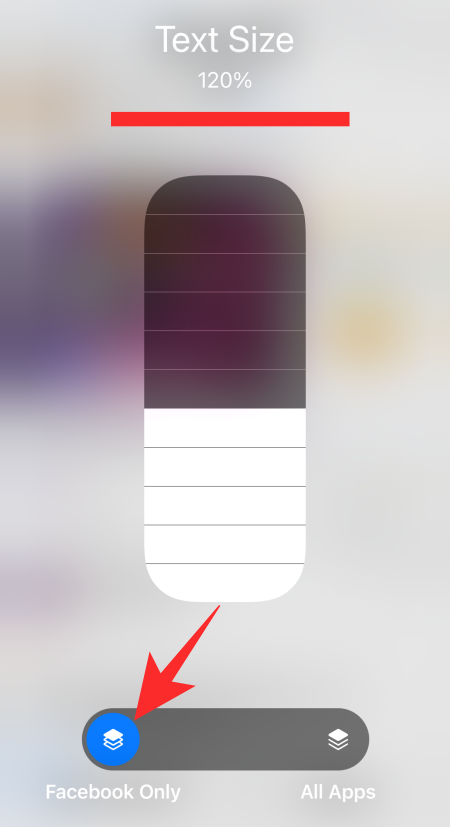
To make the app-specific changes, pick the current app-only option. You can pick any size between 85% to 310% and iOS will make sure none of your other applications are affected.
#21. Drag and drop images to other apps
Sharing photos on iOS 15 is a fairly straightforward process. It has remained unchanged for almost all third-party applications. However, if you use the Messages app to take care of your textual needs, sharing has become a lot easier for you.
To share an image from the Photos app to Messages, all you have to do is press and hold a photo — so that it turns into a mini thumbnail. While holding the image, use the app switcher with the other hand to open the Messages app and put the image down to the text field. Tap on the send button to let the message fly.
#22. Turn off detailed notifications on lock screen
If you are obsessed with privacy, you might not like the default lock screen preview, which shows notification details the moment you unlock it with Face ID. Thankfully, there is a way to turn off the notification preview disclosure even after you unlock your phone using Face ID.
To do that, first, go to Settings and tap on ‘Notifications.’
Now, go to ‘Show Previews.’
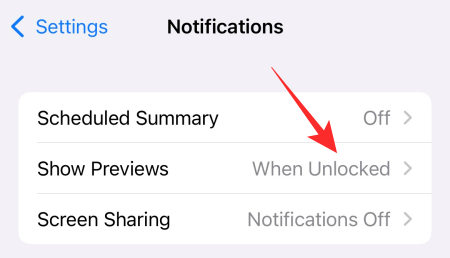
Finally, set it to ‘Never.’

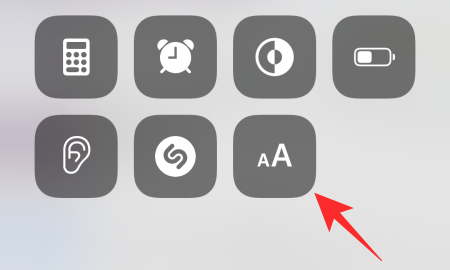
#23. Access shortcuts of an app
You do not always need to open an application to access some of its key features. You can simply press and hold an application and do it through its context menu. 3D Touch is not available on modern iPhones, of course, but iPhone’s excellent haptic engine is more than capable of matching that experience. All you have to do is press and hold an app and it will give you a generous options menu.
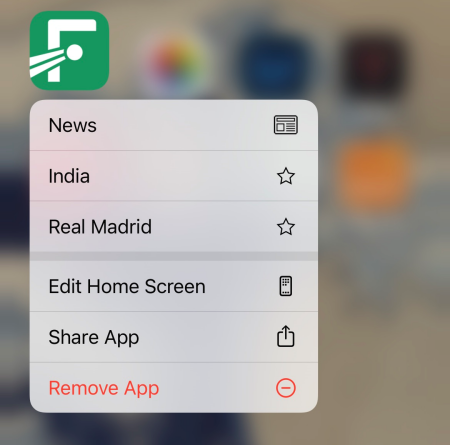
Tap on any of the shortcuts to make the app perform that task.
#24. See the Live location of your friends
If your friend has allowed you to see their location, you can go to the Find My app to know their real-time whereabouts. Unlike older iOS builds, the system is not updated periodically, but in real-time, allowing you to have a sense of their destination.

You can check out our article — How to See your Friend’s Live Location on iOS 15 — to learn all about Live Location on your iPhone.
#25. Set Tracking to always disallow
Apple calls iOS 15 the safest OS they have ever built. The developers over at Apple are determined to make iPhones as private as possible, which is why they are giving special attention to tracking prevention. When you install a new app and run it, you might get a prompt that it wants to track you to improve the overall experience or to facilitate targeted advertisement.
If you are tired of tapping on the ‘Request Not to Track’ button, there is an easy solution of making it the default option. First, you have to go to Settings and tap on ‘Privacy.’
Then go to ‘Tracking.’

Finally, disable the toggle ‘Allow apps to Request to Track.’

That is it!
#26. Temporarily silence app notifications from lock screen
iOS 15 gives users the option to silence individual app notifications right from the lock screen itself. When you get an unwanted notification, gently swipe the notification to your left. On the left of the ‘Clear’ button, you will see ‘Options.’
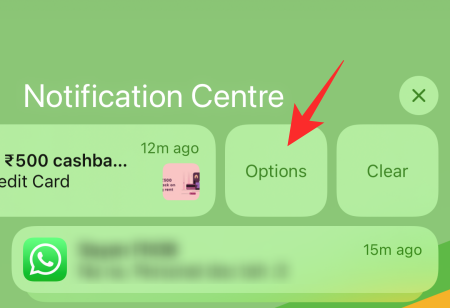
Tap on it and either choose ‘Mute for 1 Hour’ or ‘Mute for Today.’
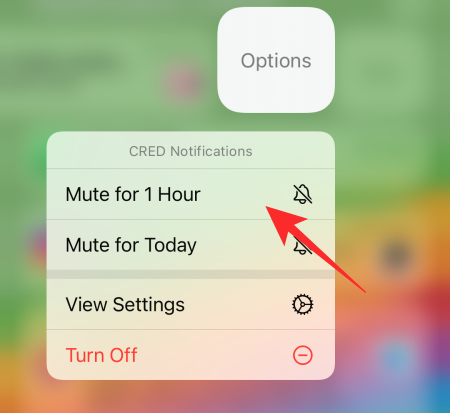
Notifications for that particular app would be turned off immediately.
#27. Locate your iPhone even when it is turned off
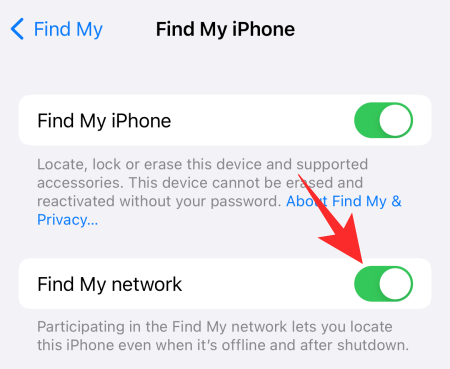
iOS 15 allows your iPhone to stay on the map even when it is switched off. So, if your phone is misplaced, you can easily get it back through the Find My network. iOS 15 comes with this new Find My feature that pretty much turns your phone into a passive AirTag when it is turned off. This means that even when it is down, it can be located through the ever-reliable Find My network.
This is achieved by sending the phone into power reserve mode, and it is turned on by default. To double-check, first, go to Settings and then tap on the banner at the top of your screen.

Now, go to ‘Find My.’
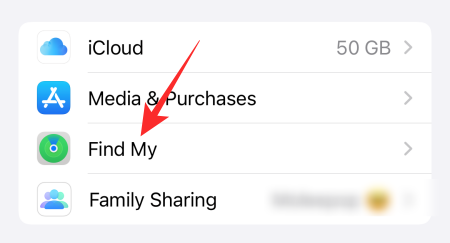
Next, tap on ‘Find my iPhone.’
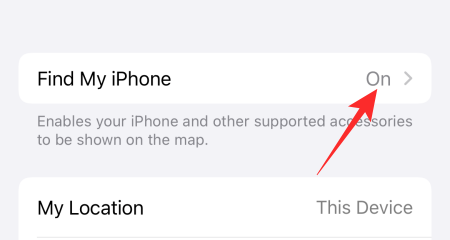
Finally, make sure the ‘Find My Network’ toggle is turned on.
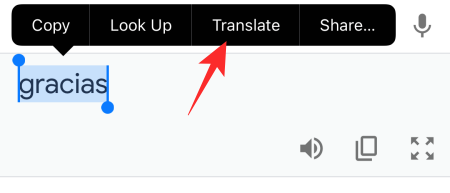
#28. Translate on the go
iOS 15 is laden with quality-of-life features and being able to translate on the go is one of the big ones. You can now translate text from any app you like and iOS will come up with a translation screen right away. All you have to do is press and hold a text you want to translate. Now, when you get the options, tap on ‘Translate.’
You can even listen to the translation if you feel like it.
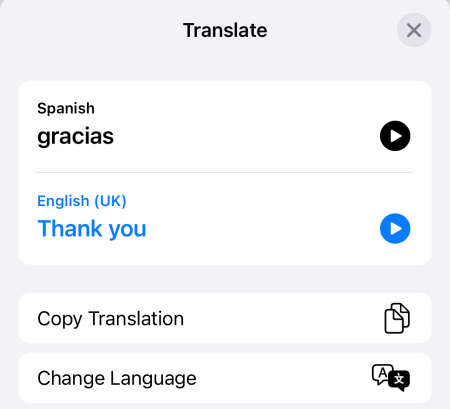
Remember that only major languages are supported at this time. So, do not be surprised if your favorite regional language is not on this list.
#29. Hide IP Addresses in Safari
Safari has gotten a bunch of privacy features in iOS 15. The ability to hide the IP addresses is definitely one of our favorites. To mask your IP address from websites as well as trackers, first, go to Settings and then tap on ‘Safari.’
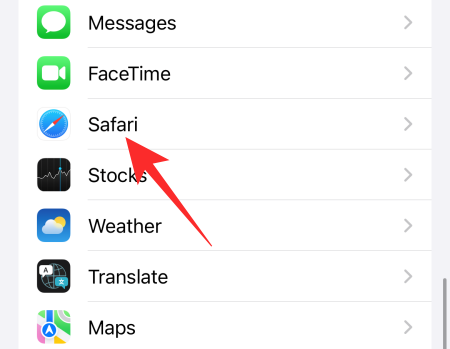
Next, go to ‘Hide IP Address.’
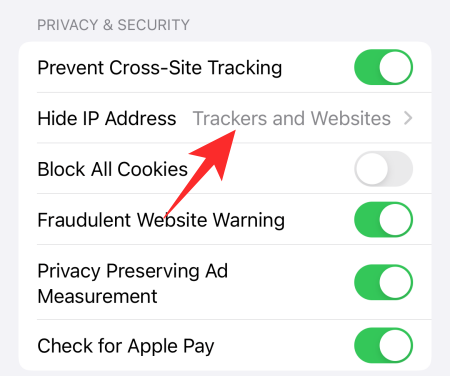
Finally, select the ‘Trackers and Websites’ option.
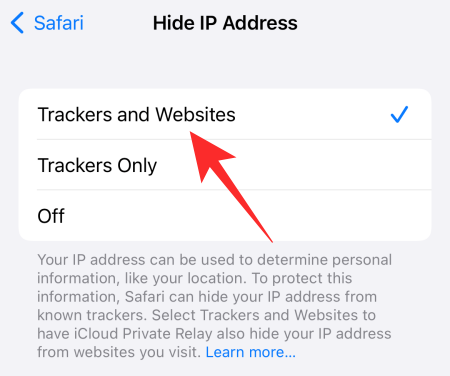
That is it!
#30. Turn off Private Relay for home network
Private Relay on iPhone is an excellent tool to minimize your exposure. However, since this is still an experimental feature, it might disrupt the flow of data, slow down your connection. To make sure your home WiFi is not suffering due to Private Relay, all you have to do is exempt it from the Private Relay protocol.
First, go to Settings and tap on ‘WiFi.’
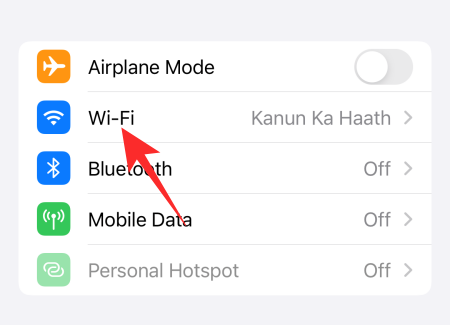
Now, tap on your home WiFi network and scroll down until you see the ‘Private Relay’ option.
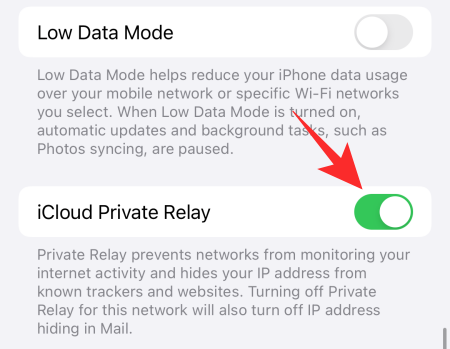
Toggle it off.
RELATED
- What Does ‘Notify Anyway’ Mean in iOS 15?
- How to Reset Network Settings on iOS 15 and What Does it Do?
- How to Turn Off Shortcut Notifications on iOS 15
- iOS 15 Battery Drain: 13 Ways to Fix and Increase Battery Life
- How to Remove “Shared With You” in Safari
- How to Turn Off Shared Photos on iPhone and Stop Sharing
- How to Change App Icons Without Shortcuts in 2 Ways


