TikTok trends are ephemeral and, partaking in harmless trends is a fun way to get in touch with your creative side. Among what are considered the safest trends out on TikTok are eye-trends, where TikTokers show off their mastery over the TikTok filters and effects to make mesmerizing shapes or colors pop from the eyes.
The latest buzz in the TikTok world are also related to “eyes”. Let’s find out what they are about!
What are the TikTok Eye Trends (February 2022)?
They say the eyes are the pathway to one’s soul! Probably why the infatuation we, humans, hold for eyes and its various colors, layers, and shapes never die. The most recent TikTok trends are both an open celebration of one’s eye colors and the majestic texture and mottled colors that conjoin in the iris to create an arresting beauty.
Yes, we are talking about the Euphoria and Hilltop road trends! Euphoria trend, like the name suggests, kindles a euphoric sense in the viewers by bringing to view the details of the iris in all its magnified and stupefying glory. The core of the trend is the naked eye with a blatant unbridling of its enthralling layers that are usually lost under normal conditions because of unflattering light or obscured vision.
The hilltop road trend on the other hand juxtaposes the beauty of the eye colors against the colors in the world. It entails short reels that zoom into any gorgeous colored iris and seemingly blend in only to emerge spontaneously in a burst of image slides of anything that resembles it in color.
@tessmaylo I thought my eyes were just blue?
One of the striking elements of both the eye trends is its hypnotic background music. A 15-second excerpt from Lake Isabel’s Hilltop Road is the perfect accompaniment to an enchanting marquee of vibrant colors, and whoever it is that started the “Hilltop road” trend, apparently astutely predicted the irresistible charm it would cast on the viewers. In Euphoria, the sound used is a hauntingly beautiful snippet from Bea Miller’s track “feel something.”
TikTokers with eye colors of all hues– black, brown, blue, green, hazel, or even mixed hues have embraced these trends as an opportunity to tear off the “undesirable” tag forced on certain colors. The end is accomplished not without effort though, for creators invest in their content the effort to truly break down their eye colors to microscopic detail and then leaf through color catalogs and image sources to curate an assortment of presentable pictures.
Such trends are in a way necessary to expose the incandescence hidden in layers deep in such eye colors that are called plain or boring. Another commendable aspect of these trends is how innocent and safe they are in a time when most popular trends are derided for being edgy or their potential to endanger creators or even uninvolved individuals. All it takes to be a part of the 2022 TikTok eye trends is an eye for beauty and simplicity.
So, let’s not dilly-dally but jump right into the fun part!
Related: How to Turn On Profile Views on TikTok
Euphoria Eye Trend: All you need to know
Euphoria eye trend, in a nutshell, is a TikTok deep zoom into your eyes using Euphoria filter under optimal lighting conditions to reveal the textures in the iris. Surprisingly, this trend doesn’t require any fancy gadgets or a degree from the university of TikTok arts and science to bring out these webs and twirls of colors lurking in our eyes.
Apart from the filter you get in the app, all you need is a source of white light, like from a selfie ring light. But, even if you do not have a ring light (I don’t, as a matter of fact), you can make do with the camera flash from another mobile or a portable lamplight, even the flashlight from a selfie stick might work…the result just wouldn’t be as dramatic as we’d hope.
Requirements:
- Selfie tripod
- Ring light
- Lamplight
How to do the Euphoria eye trend
Launch the TikTok app and tap Discover.

In the search box, enter “Euphoria eye filter” and hit Search.
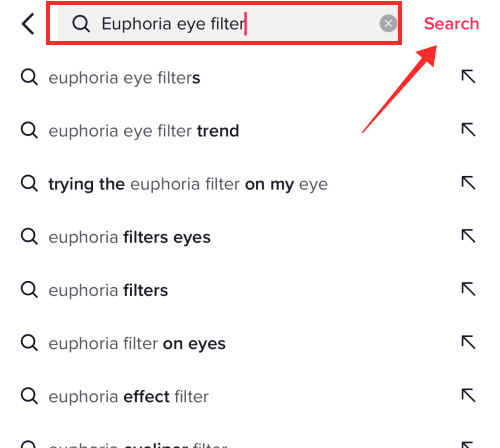
Click on one of the videos in the search result.
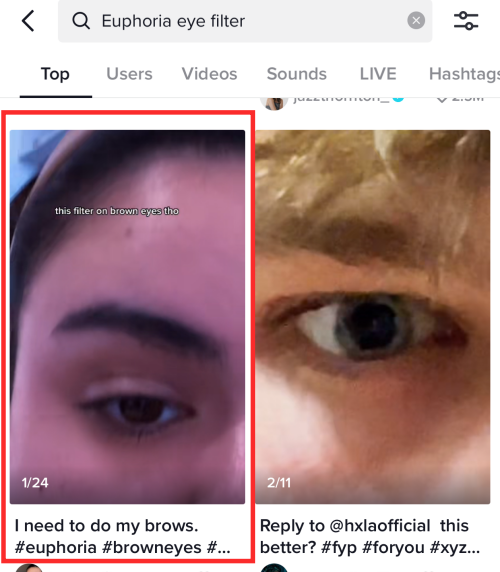
Click on Euphoria tagged as the effect used in the video.
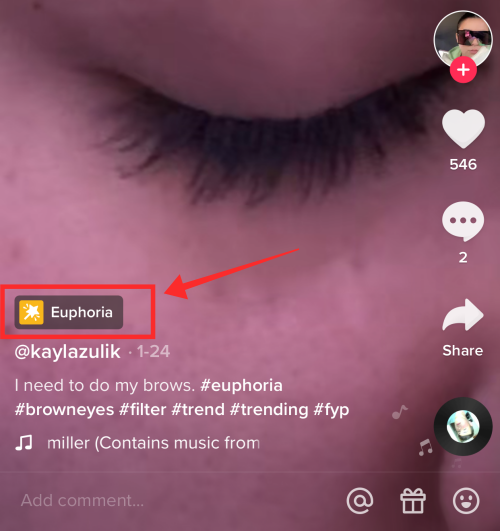
Now tap Try this effect to carry both the effect and audio over.
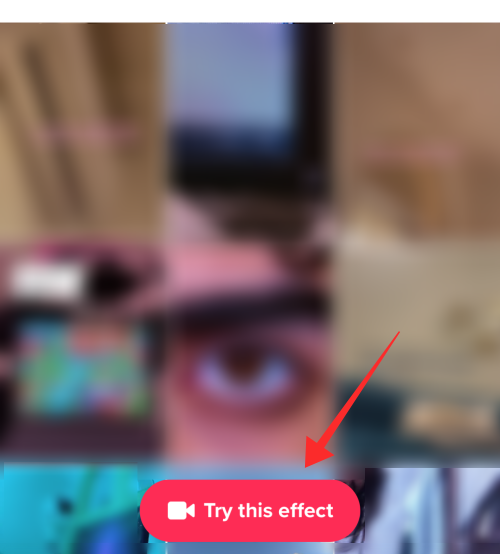
It leads you to the recording feature of the app. The duration is by default 15 seconds. If not, set the duration to 15 seconds. In this phase of recording, either the front or rear camera could work well.
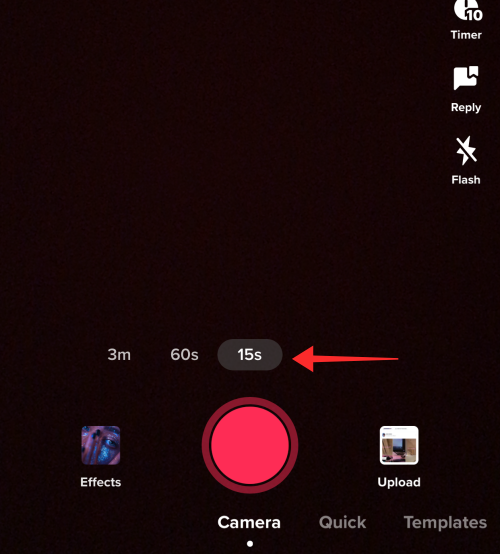
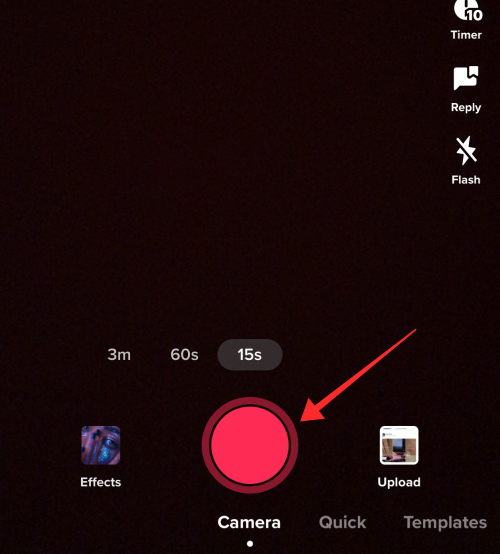
Go to an open area with abundant natural light. Alternatively, you can use the ring light to work out a good lighting setup and mount the mobile phone on the tripod where the conditions and background are optimal. Hit the red recording button to start filming your face.
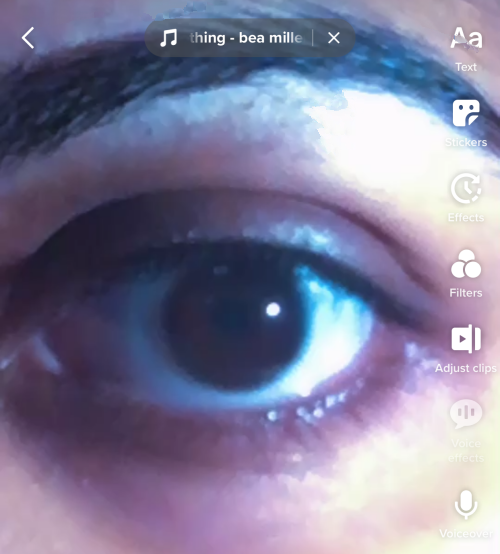
Zoom in a little on one of the eyes and move as close to the camera as is possible from an aesthetic perspective (the screenshot below is only to show you the ropes; your video will be so much better, do not worry!)
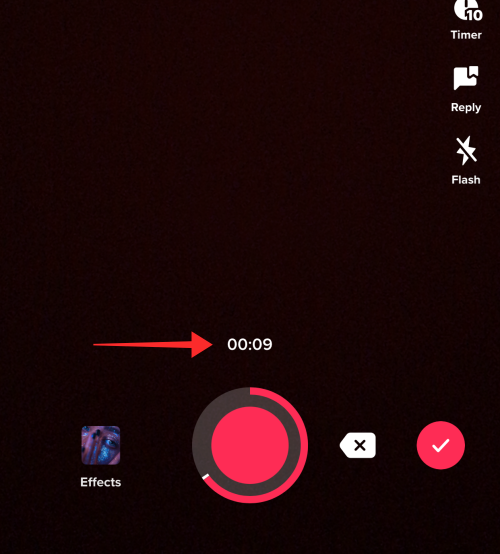
Towards the 9 seconds mark of the video slowly close your eyes and pause the video at 9 seconds.
Now turn off the ring light or move away from the brighter light conditions to a dimmer environment. Set up the tripod and mobile phone once again and flip to the rear camera for better image quality if you filmed the first clip using the front camera.
Top tip: Make sure not to switch the focus to a different eye in the second clip; if you switch cameras, make sure to switch the focus to the other eye to counteract the mirror effect caused by the front camera in the first shot. If possible, bring in a mirror as the third eye to get a peripheral view of the camera focus and the relative position of your eye.
Now set the timer to 10 seconds and hit Start Countdown. 10 seconds gives you enough time to make preparations for the final phase of recording.
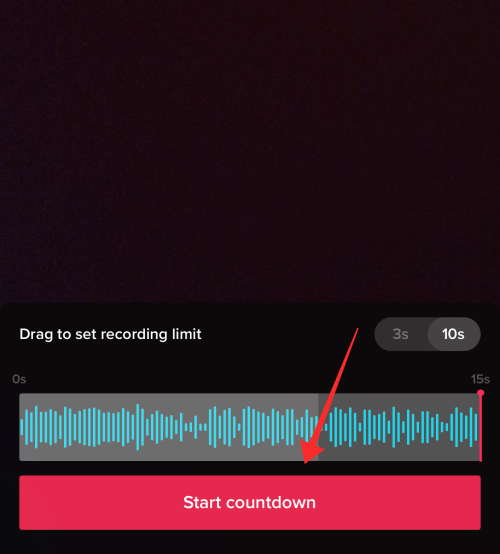
Hold the lamplight from the side of the other eye to the eye under focus — this is to avoid harsh light glare. Maintain the lighting and hold the angle until the audio cuts off indicating the completion of filming. Review the result and record the final clip again until you are satisfied with the details captured of your iris.
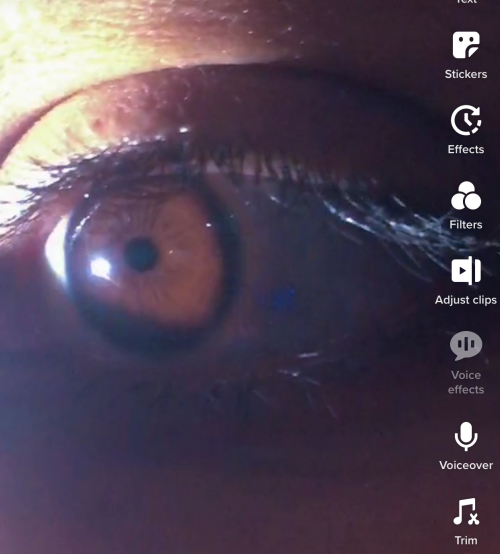
Now, tap Next.

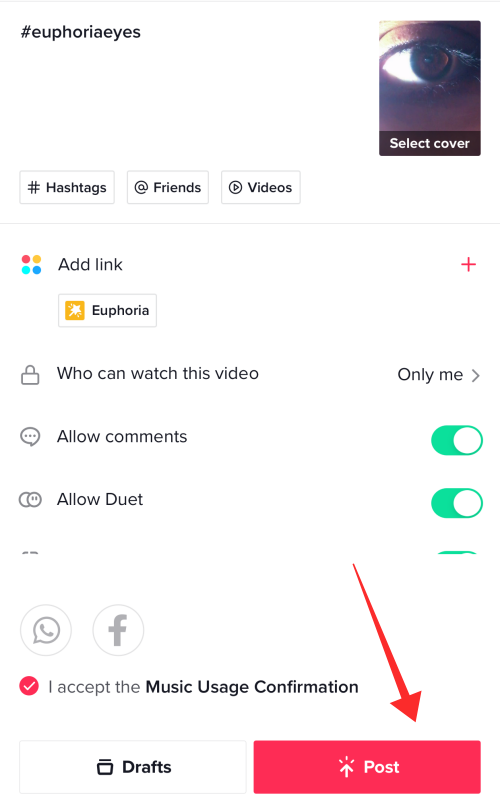
Finally, add appropriate captions and hashtags; adjust the privacy settings, and tap Post.
Hilltop Road Trend: Get ready for a tryst with colors
Indulging in the magical spell cast by variegated eye colors makes it an inexplicably exciting endeavor, not just for the participants, but even to the beholders. If you wish to join the trend, there are a few tips that might help you make headway.
For starters, study your eye color closely down to the last speck and hue. If you are unsure about the color and its shades, look up color palettes on platforms like Pinterest. Even a simple google search is enough to gain quite an insight into the various hues of any color.
Eye colors, even the ones dubbed as plain or flat have many hidden hues in them that deserve to be discovered and appreciated. To truly explore your eye color, take an HD close-up image of your eye (with maximum coverage of the details related to its color).
Now, pick out the dominant color that you recognize, say brown or green — isolate the color and lookup catalogs of the selected color to identify its shades. For instance, if your eye color is green, search “green color palette” on Pinterest or Google and sift through all its shades to lock on the precise color. Repeat the steps if your eye color entails multiple hues.
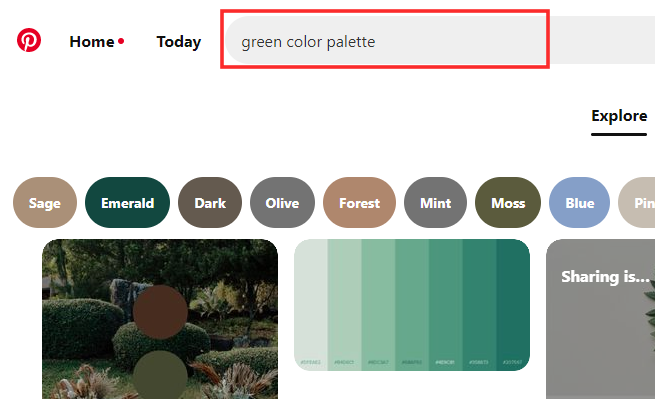
If you wish to be impeccable with your research, compare the image of your eye against the palettes to nail down the color.
Once you have cracked the mysteries of your eye color, begin your journey into the wild to hunt down images that resonate with it. You can input customized queries into Pinterest itself to get a collection of images. However, copyright-free image hubs are also a good source to dredge up hidden gems. Because they are stock images, you wouldn’t be risking copyright infringement, either!
Below are a few locations to scavenge for stunning images that could enter into a marriage with your eye color:
Stock up your library with a variety of images that you think would gel well with the theme of the video. There is no restriction in the kind of objects to be featured — it could be places, buildings, animals/pet, gemstones, colored paper… really, anything works as long as they mirror your eye color.
Related: Here’s how to remove a filter or effect from a TikTok video
How to do the TikTok Hilltop Road trend with video opening
Launch the TikTok app and tap the Discover.

In the search box, type “Hilltop Road by Lake Isabel” and hit go.
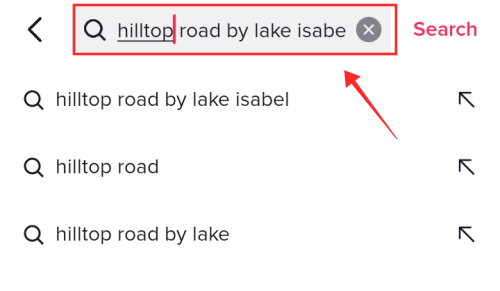
Select the Sounds tab.
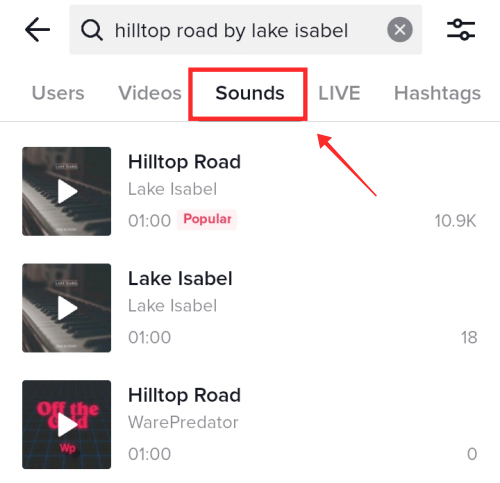
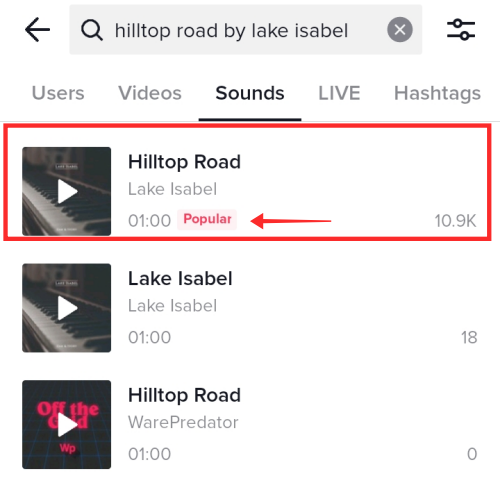
Tap the audio that reads “Hilltop Road by Lake Isabel” marked as Popular.
Tap Use this Sound.
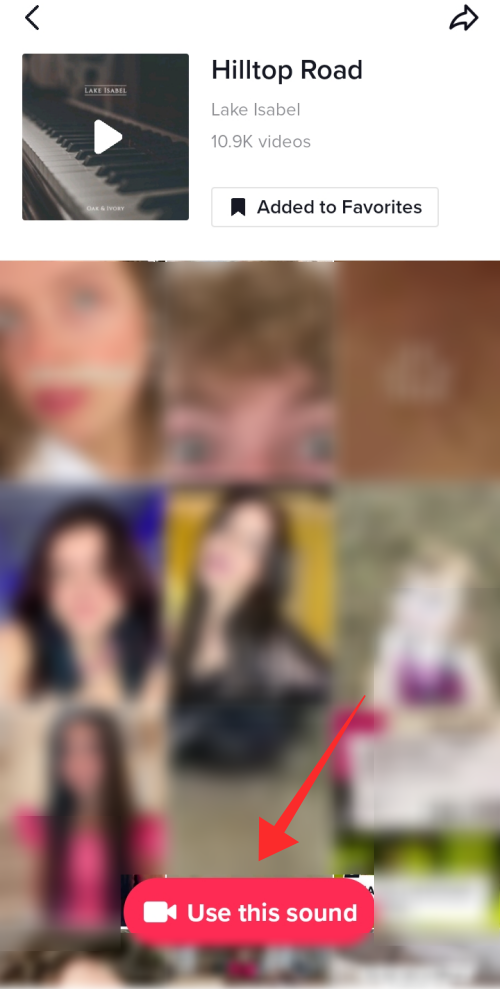
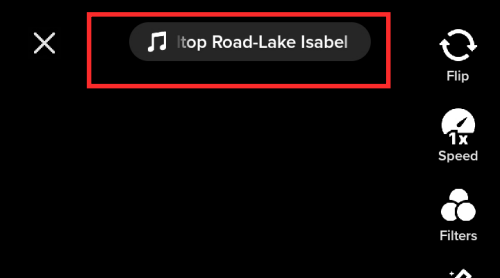
The app redirects you to the recording feature. A marquee at the top of the screen displays that the soundtrack you selected has become the backdrop for the video.
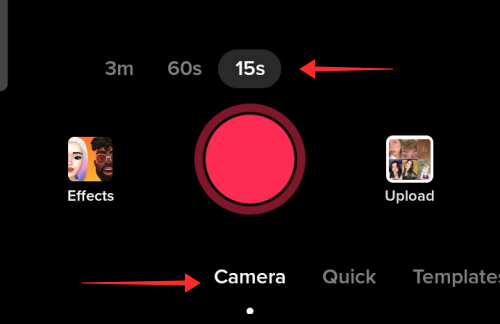
Tap Camera and select a duration for the video according. Here, we follow the short-short video length of 15 seconds.
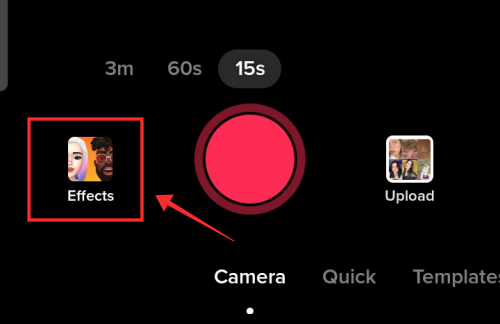
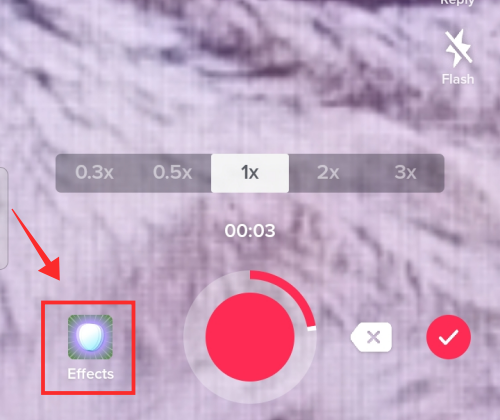
Now, tap the box that reads Effects located on the left side of the recording button.
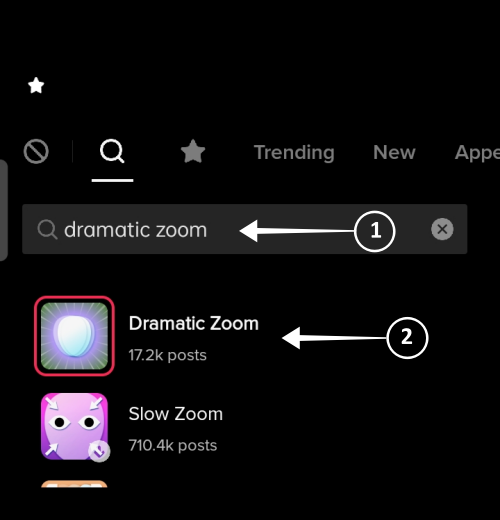
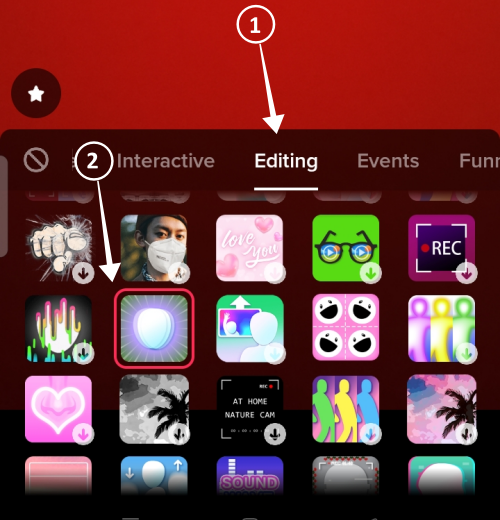
Tap the search icon and type Dramatic Zoom. Hit the effect to select it; it gets a red outline when the selection takes effect.
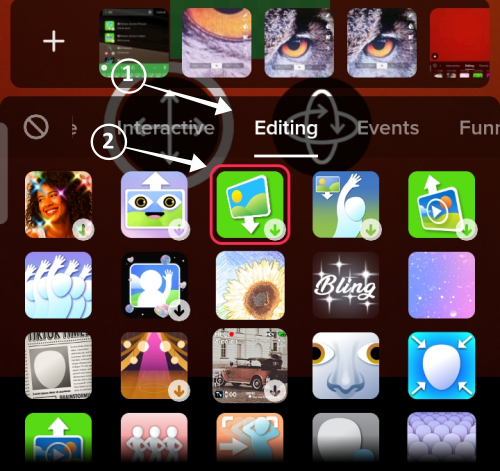
If the app doesn’t show an option to search, go to the Editing tab and select the neon silhouette with purple halo as found in the screenshot below; it gets a red outline when the selection takes effect.
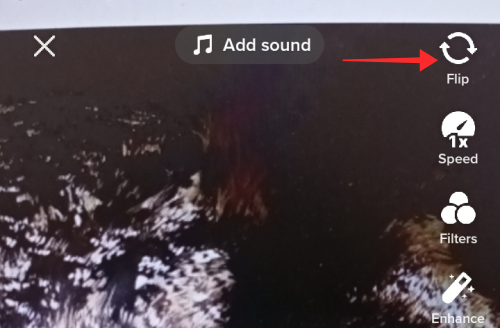
Tap an empty part of the screen to return to the main screen. Hit the Flip button to switch to the front camera or rear camera, depending on your requirement. I have chosen the rear camera to demonstrate the effect. However, if filming is undertaken individually without any help from a second person, it is recommended that you choose the front/selfie camera to optimize the result.
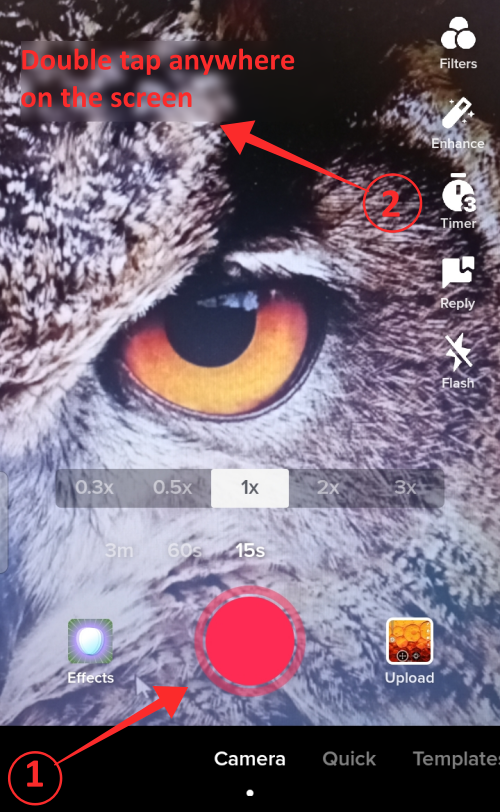
Now, tap the Red record button and double tap anywhere on the screen immediately afterwards to trigger the Dramatic Zoom effect. Take as little time as possible in between these two steps so that the zoom effect gets captured with appropriate intensity. You might have to adjust the position of the camera or your face in accordance with the shift in focal point caused by the zooming. So, be extra alert and nimble during this phase of the recording.
Hit the record button again to pause the recording when the time has hit the 3-second mark (this is in accordance to the pace I have set for the video. You may pause the recording at any point and not necessarily stick to the recommended time mark).
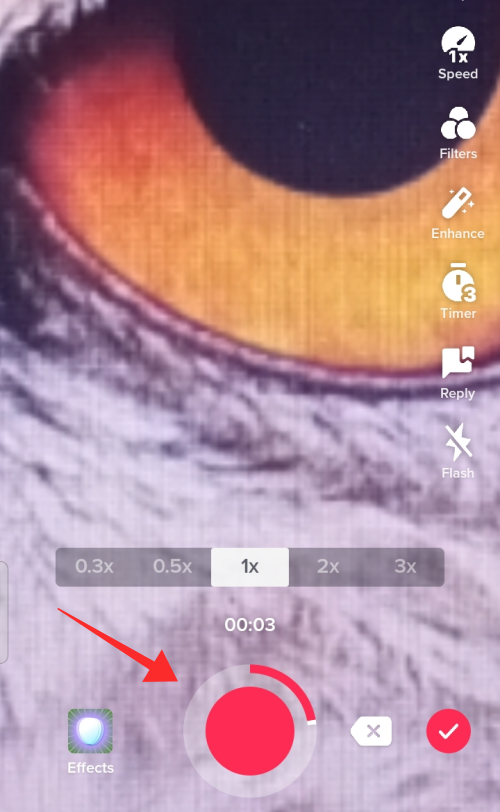
Now, tap Effects (on the left on the record button) to select a new effect.
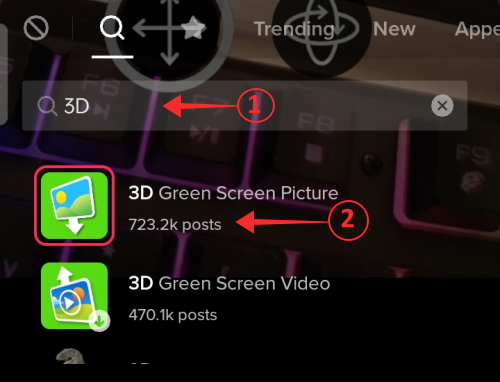
In the search box enter “3D”. Tap 3D Green Screen Picture.
If the app doesn’t offer the “search” option under Effects, you can find 3D Green Screen Picture under the Editing tab.
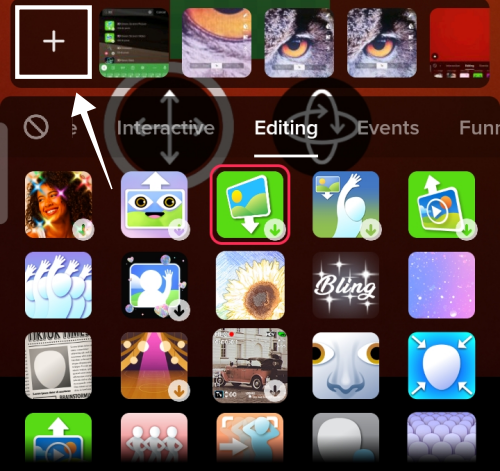
Tap the plus button to add an image from the photo library on your device.
Tap, to select any image from the gallery.
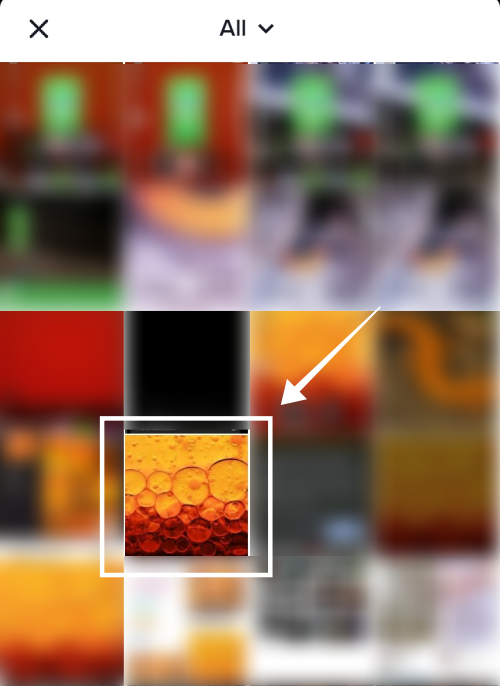
The image appears in a smaller size in the middle of the screen. Pinch zoom the image to fill the screen. You can even move the image to adjust the displayed area.
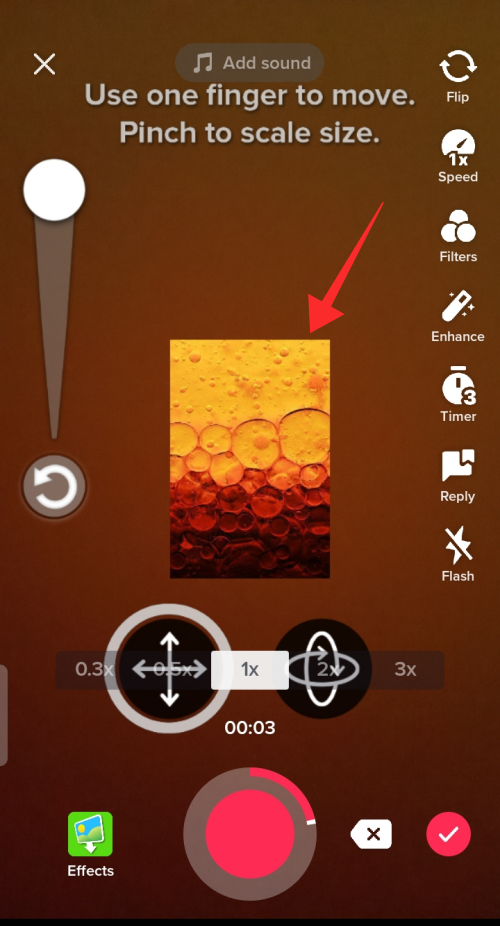
Tap the record button to resume recording and tap again to freeze the recording.
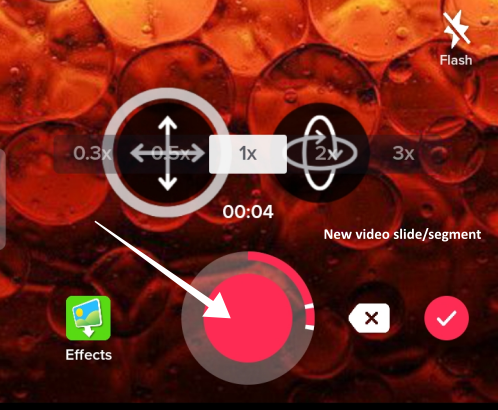
The demonstration below follows a 1-second pause for the follow-up image; you may adjust according to the rhythm of your video. Each new slide added to the video gets delineated on the video freeze frame tracker.
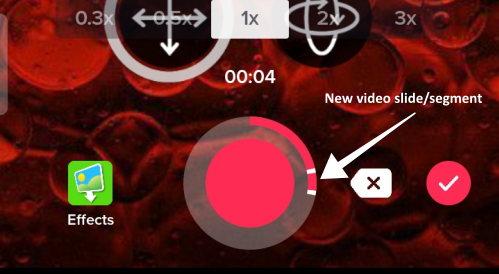
Tap the effect button again and repeat the steps above to add another image. You can add as many images as you want following these steps. Be mindful of the duration of the video; ideally, pay attention to not clutter it with too many rapid image slides if the video duration is short.
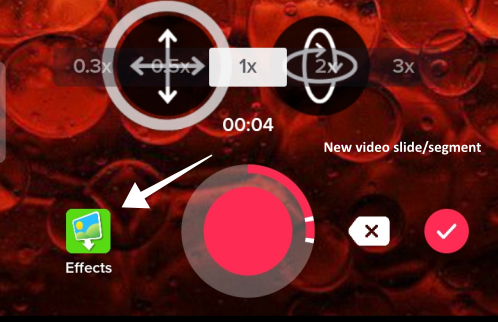
The screenshot below shows the progress made with the addition of a new image to the video. Adjust the length of the slide according to the pace set by the music.
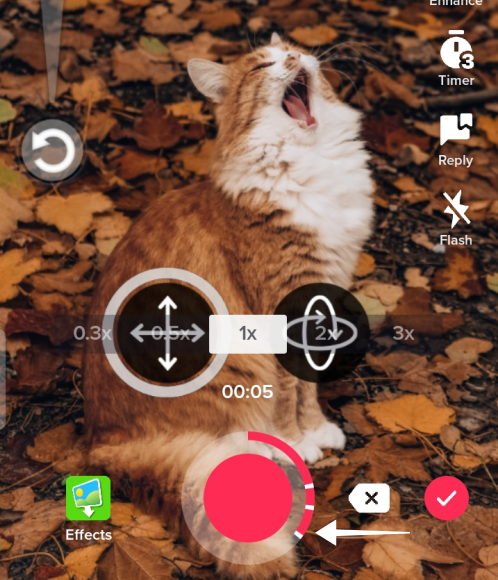
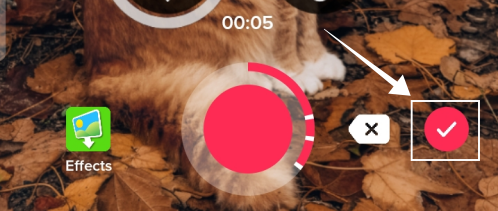
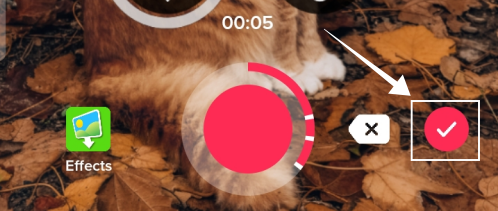
Once you are happy with the content, tap the Check button to proceed.
On the editing page, make the best use of the tools (to trim, add filter, stickers, text, volume adjustment, etc.) to furnish the video. Hit Next to enter the final phase.
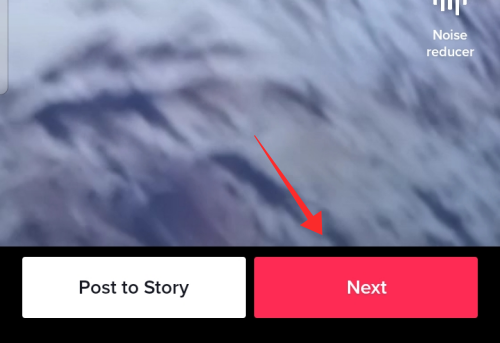
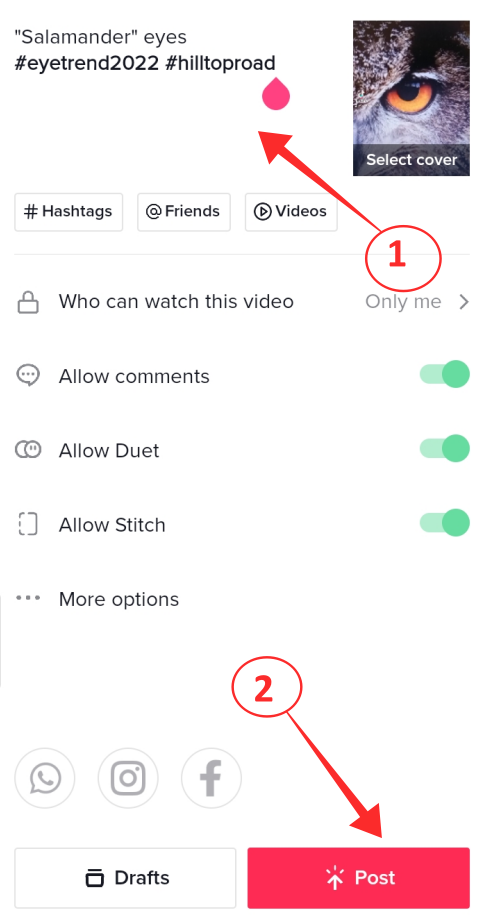
Add text and appropriate hashtags in the text box. Pay attention to the additional privacy settings below and revise the defaults as you see fit. Tap Post to upload the video.
How to do the Hilltop Road trend with an existing photo
You can do the eye color trend with a photo from the image library as the opening shot instead of using a video recorded freshly on the app. Let’s see how it is done.
Open the image library on your device.
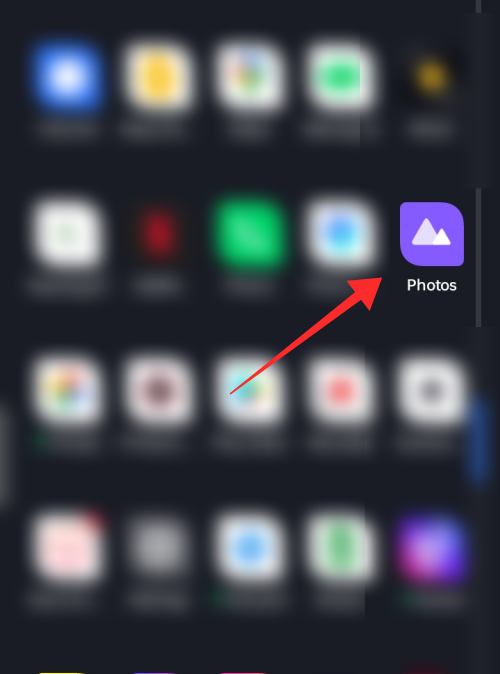
Tap the image to open it.
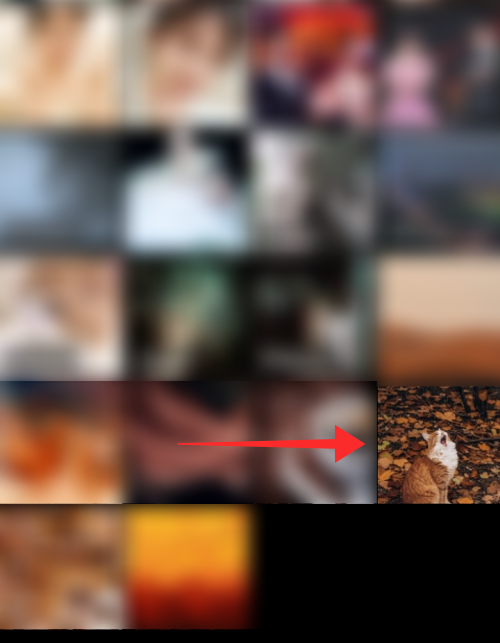
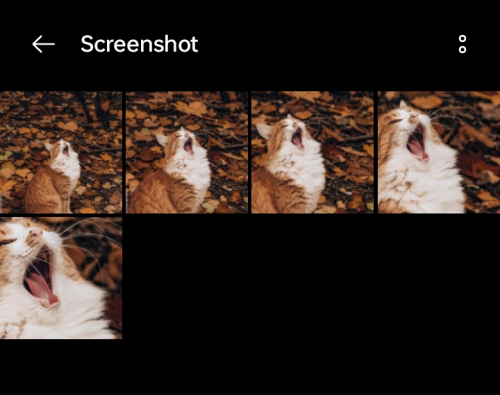
Pinch zoom the image at various phases to achieve a “gradual zooming” effect and take screenshots at each step. Repeat the process for all the images you want to apply the zoom effect to, in the video.
You can select any portrait of yours, make dramatic pinch zooms, and record each “phase” in screenshots to create an illusion of the camera penetrating deep into your eyes.
The screenshots below show how to take screenshots at varying degrees of zoom using a random image.
Now, launch TikTok app and tap the Discover.

In the search box, type “Hilltop Road by Lake Isabel” and hit go.

Go to the Sounds tab.

Tap the audio that reads “Hilltop Road by Lake Isabel” marked as Popular.

Tap Use this Sound.

The app redirects you to the recording feature. Tap Camera and select a duration for the video according to preference.

Tap the box that reads Effects located on the left side of the recording button.

In the search box enter “3D”. Tap 3D Green Screen Picture.

If the app doesn’t offer the “search” option under Effects, you can find 3D Green Screen Picture under the Editing tab.

Tap the plus button to add an image from the photo library on your device.

It is recommended to start with the zoomed-out or original image first. The image appears in a small size in the middle of the screen. Pinch zoom on the image to fill the screen. You can even move the image to adjust the displayed area.
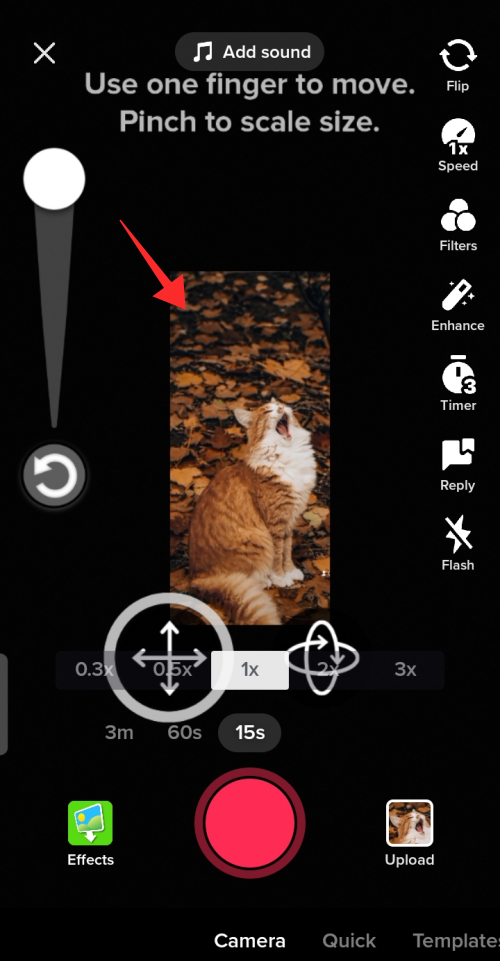
Tap the record button to resume recording, and tap again to pause the recording. Set the pace to the music and try to keep the transition smooth yet stark.
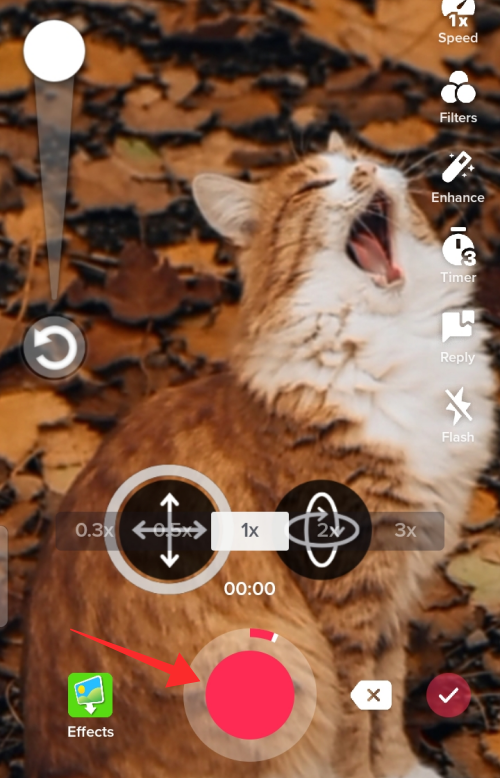
Add as many slides as you see fit by repeating the steps above. The demonstration below follows a 1 – 2 second pause for the follow-up images. You may adjust according to the rhythm of your video.
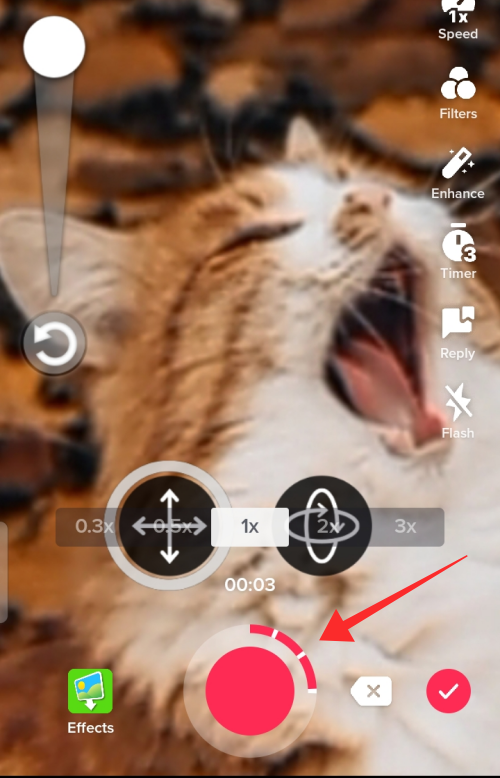
Repeat until the slides are stacked according to your vision.
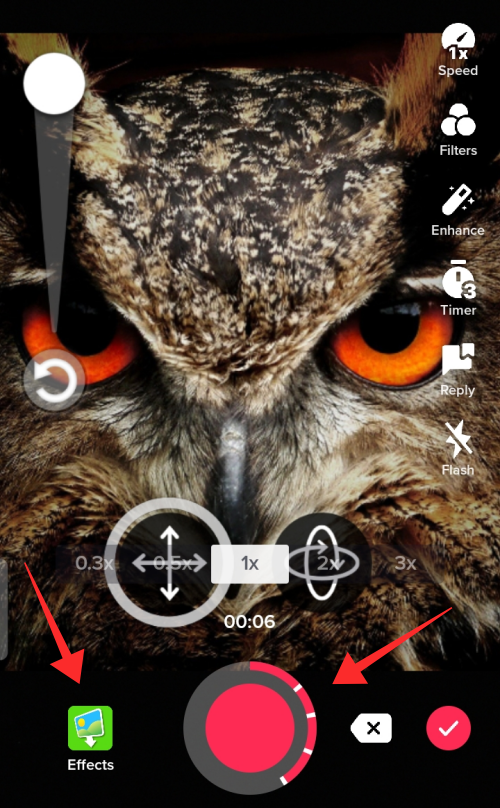
Tap the Check button when the compilation is complete.
On the editing page, use the tools (to trim, add filter, stickers, text, volume adjustment, etc) to beautify the video. Hit Next to enter the final phase.

Add texts and appropriate hashtags to your video. Pay attention to additional privacy settings below and revise the defaults as you see fit. Tap Post to upload the video.

Share the result with the world and friends to celebrate the beauty of your eyes. Hope our guide helps you create an enchanting video of your beautiful eyes.
RELATED


To anyone with marital problems, divorce issues, business problems, lost lover or any relationship related issues, you can contact PRIEST ABU the ultimate spell caster. Contact him via Email: solidspellcast @ gmail. c om
Good God… You all should help me thank a very kind and powerful Native doctor (Doctor Abu) He brought back my ex-husband who left me, he told me he wants to be alone because i couldn’t get pregnant. I was devastated everyday i keep thinking how i would live without him, I almost committed suicide. But one day a male friend of mine told me about a spell caster name Doctor Abu and how he made some predictions and cast a lottery spell for him. After so many days i went online just as my friend told me to, I found the good doctor’s website and i contacted him. He told me not to worry that my husband will be back in 24hours that was after he cast his love spell, I had some doubt though because i had to pay first but i just did all he instructed and had a little faith. To my greatest surprise the next day he was back to me, and this is the same husband that told me he was sad because i couldn’t get pregnant since we have been trying but Glory be to God Almighty I’m 3 weeks pregnant. I’m so excited i highly recommend him, he is powerful and can help you too with different problems. Contact him now. AT solidspellcast @g mail. c om
My husband changed dramatically towards me, doesn’t communicate anymore. He disrespects me and accuses me falsely of infidelity because of wicked gossip …but I’m simply AMAZED at the results of Dr. Todd who did reunion love spell for me. Everything is going so well and EXACTLY how he said it would be. Even though it took 3 days to fully progress, it was so worth it because things are just about at perfection! How he took my situation and completely turned it around to give me exactly what I wanted is beyond me, but something I will never question and just be completely grateful, God Bless Dr.Todd for turning sorrow happiness. Dr.Todd’s contact; manifestspellcast @ g mail. com