To clear the Hot Zone Surface, sweep from the broken coral outside Tailings Village through Nahheima’s lab, the central wreck, and the Tadpole Pens to collect the key blueprints, audio logs, Bio Bed upgrades, Scout Ray Chassis, decor unlocks, and optional supply caches.
The Hot Zone Surface — the shallow graveyard above the Hot Caves — is where Subnautica 2 hides two of your body upgrades, a stack of base blueprints, five audio logs, and the Scout Ray Chassis. Everything is tucked into wrecks, a secret lab, and the Tadpole Pens, so it is easy to leave half of it behind if you just skim the surface on your way to the caves. This route walks each stop in order and flags the blueprints you can safely skip if you already own them.
Access and survival prep before the route

The Hot Zone runs hot enough to cook you. Your biology caps out around 80°C by default, but the surface here pushes past 100°C, so you need the Heat Tolerance Adaptation before you commit. You earn it by building the Sonic Resonator, destroying the three Bloom Cankers, then interacting with the Angel Comb in the opened Bloom Core. Even with tolerance, swimming right into the thermal vents still chips your health, so keep a little distance.
Bring a Tadpole for oxygen — the Tadpole Pens are a long sweep with no air pocket — and pack flares for the dark caves. A patrolling Marrowbreach haunts Tailings Village; it is more nuisance than threat, but flares help you keep track of it. A Leviathan hunts the trench edge near the story building and the Easter egg, so mind how close you drift to the drop-off.
The two Bio Beds — one in Nahheima’s lab, one in the central wreck — are the real prize here; scan both to bank your body upgrades, including the extra quick slot that takes you up to seven.
Hot Zone Surface route checklist
| Route stop | Finds |
|---|---|
| Broken coral outside Tailings Village | Roof Antenna blueprint, Moonpool data box (duplicate), supply box with salt and copper wire |
| Tailings Village | Half Round Room blueprint, decor scans (jars, rug, alien hanging baskets, tailings table) |
| Northwest cave (under lava plume) | Roof Cylinder and Roof Panel blueprints |
| Nahheima’s hidden lab (south) | Nook blueprint, It’s All Go To Die audio log, power cell and power battery blueprints, Bio Bed quick-slot upgrade |
| Northeast supply cache | Crate with sulfur |
| Central wreck | Bio Bed body upgrade, blueprint, Play God audio log, Half Round Room data box (duplicate), power cell charging terminal scan |
| Nearby supply stop | Nutrient block, power storage, battery, copper wire |
| Tadpole Pens main building | Half Round Room (duplicate), Survivors Waypoint 2 audio log, Moonpool recipe (duplicate), Scout Ray Chassis, garbage can and decor scans |
| Tadpole Pens locked room | Repair tool fragment, poster, Axom wall lamp, story Bio Bed and Noah interaction |
| Southern broken base chunk | Small Crate data box (all internal wall decor), Tadpole Ops Guide audio log, spotlights, processor scan |
| Southern broken building | Moonpool recipe, hydroelectric turbine scans, We Must Voluntarily Die audio log |
| Optional: googly-eyed clam | Cosmetic Easter egg along the trench, high Leviathan risk |
KEY!Work the list top to bottom and you cover the whole biome in one loop. The Moonpool recipe and the Half Round Room blueprint both show up several times — grab the first copy you find and skip the rest once they are unlocked.
Reaching Tailings Village and the broken coral loot
From the lifepod you follow one compass line to the village, scooping up the coral-cluster blueprints and the village decor on the way.
STEP 1/6
Head toward Tailings Village
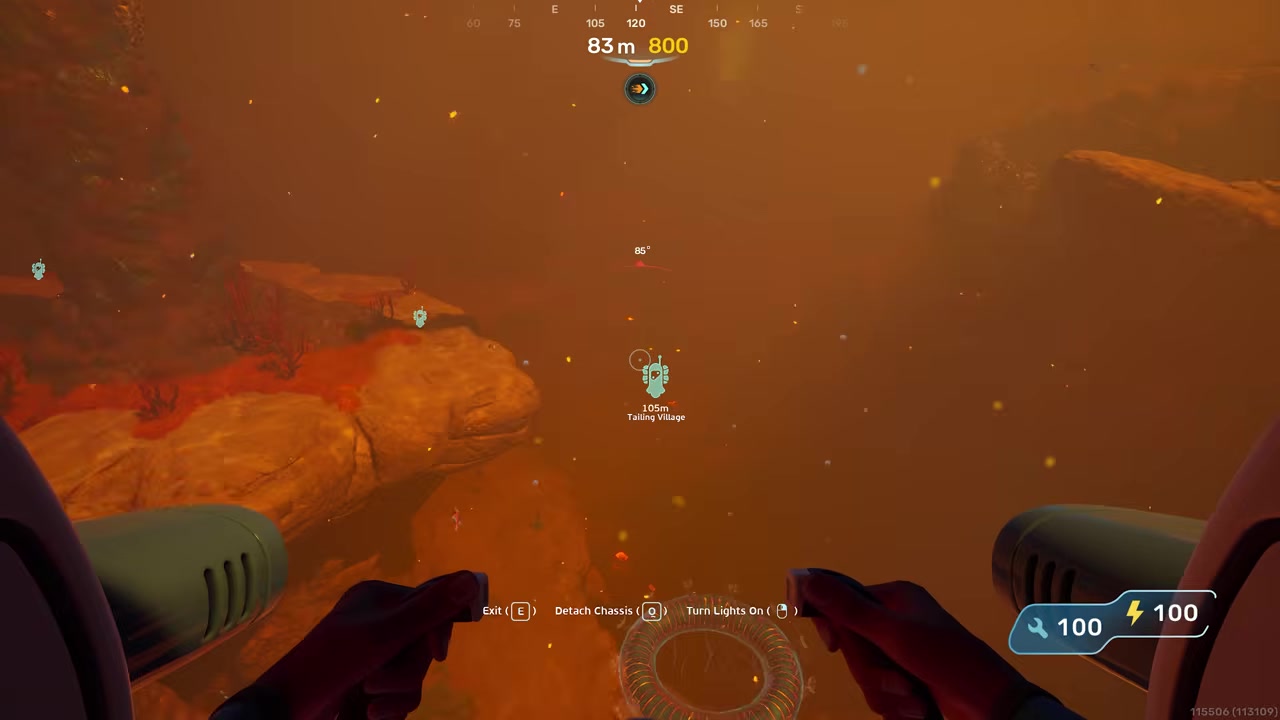
From the lifepod, cruise to a compass heading between 105 and 120.
STEP 2/6
Stop at the broken coral
Look for the coral cluster short of the village; it holds a few blueprint boxes plus a supply box with salt and copper wire.
STEP 3/6
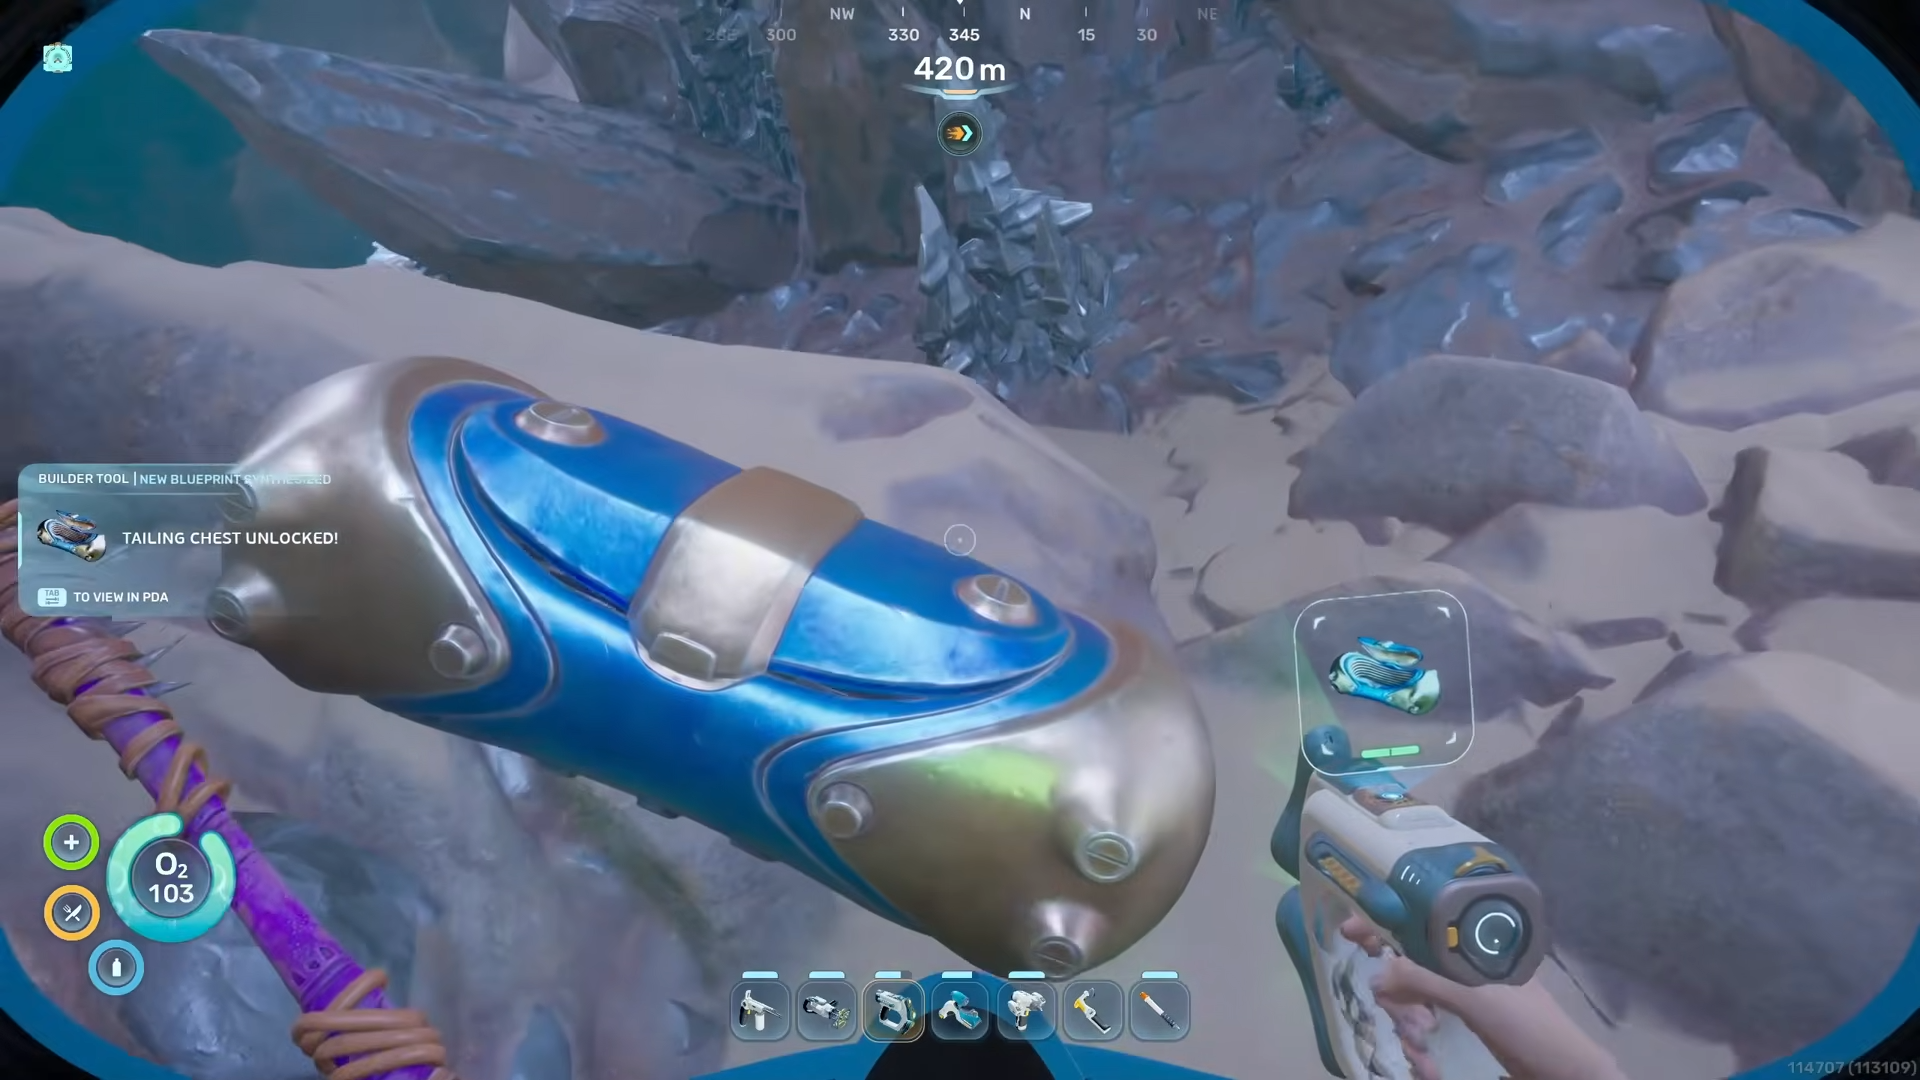
Grab the Roof Antenna box

This is external base decor — the roof antennas for the top of your base.
STEP 4/6
Take the Moonpool data card
It sits in a little building nearby; it is a duplicate, so skip it if you already own the Moonpool.
STEP 5/6
Scan the village decor
Work the buildings for the jars, rug, alien hanging baskets, and the tailings table off to the side of each room.
STEP 6/6
Pick up the Half Round Room blueprint
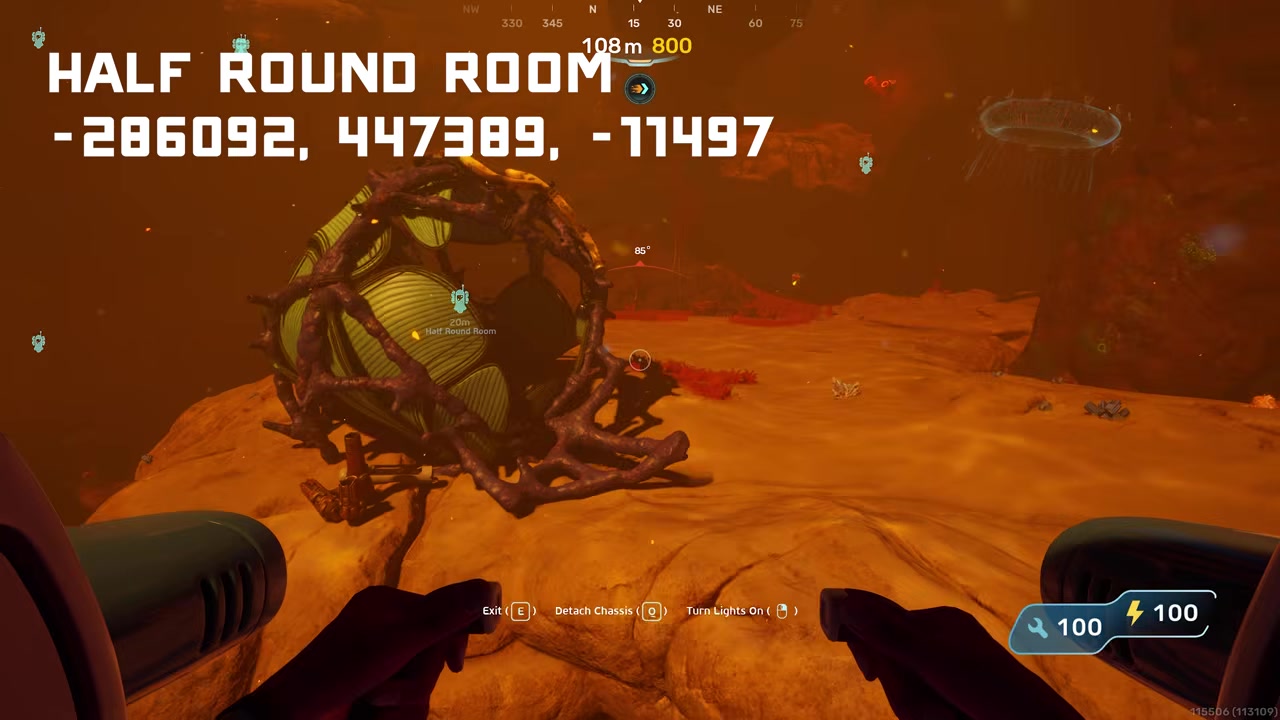
Inside the jar building; it is the big glass observatory room and the closest thing here to the old glass dome.
Finding the Roof Cylinder in the northwest cave
A short detour northwest from the village clears the rest of your roof decor set.
- Head northwest to the large cave — It sits to the north under the giant lava vent and magma plume.
- Reach the central mushroom — Drive to the large mushroom at the center of the cave.
- Grab the Roof Cylinder and Roof Panel — These finish off your roof decorations; the Roof Pump is not here — that one is down in the Hot Caves.
Getting into Nahheima’s hidden Hot Zone lab
This southern detour hides the extra quick slot, so it is worth the trip to the edge of the biome.
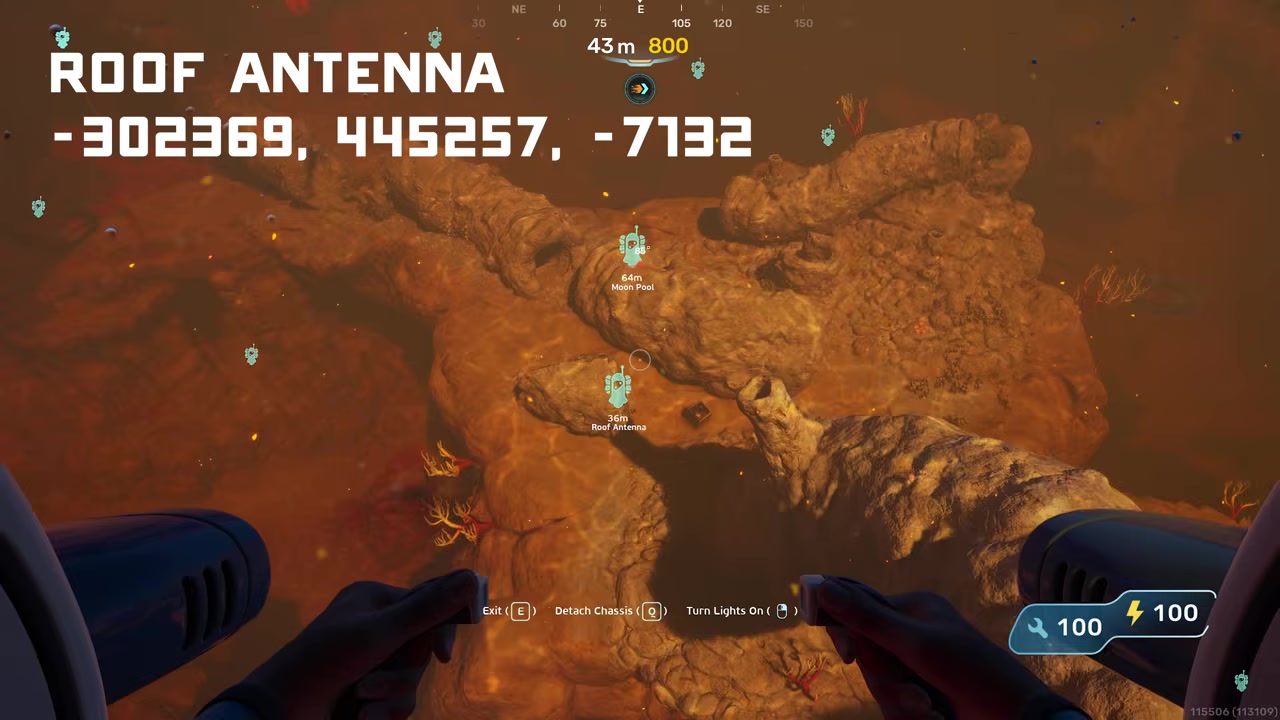
- Detour south toward bearing 255 — Head to the southern edge of the Hot Zone near the southern entrance to the Hot Caves.
- Find the holes and the dead crab — Look for the holes in the ground and the dead crab with the black box — the same landmark tied to Zip’s access ID.
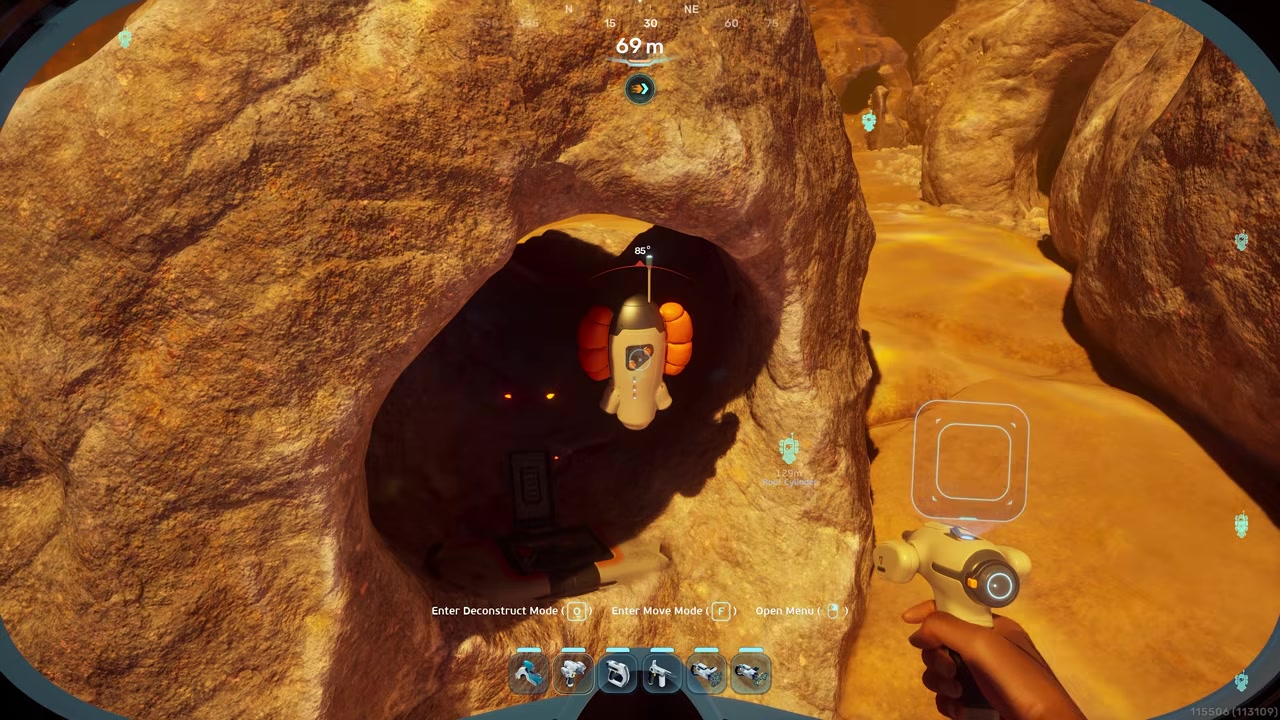
- Turn north-northeast into the cave — Face between 15 and 30 and cruise into the oddly shaped cave; this is Nahheima’s secret laboratory.
- Grab the Nook blueprint — The little reading-nook piece that pops out of the side of your base.
- Collect the It’s All Go To Die audio log — While inside, also grab the power cell and power battery base blueprints.
- Scan the Bio Bed quick-slot upgrade — This Bio Bed gives you an extra quick slot, bringing you up to seven.
Clearing the central wreck and its supply caches
The tallest lava plume in the biome marks the big wreck; the northern side hole is your way in.
- Grab the northeast supply cache — Head north-northeast to the lava plumes on the edge of the zone for a crate with a couple of sulfur.
- Enter the wreck’s northern side hole — The big wreckage sits under the tallest lava plume; the side hole is the easiest way in.
- Collect the Bio Bed body upgrade — Inside you get a second character upgrade from the Bio Bed, plus a blueprint.
- Grab the Play God audio log — Scan the wall extras too, like the power cell charging terminal.
- Take the Half Round Room data box — It sits on the floor by the half-open door to your left — a duplicate Half Round Room copy.
- Sweep the nearby supply stop — Pick up the nutrient block, power storage, battery, and copper wire from the crates just outside.
Sweeping the Tadpole Pens and the locked story room
The Pens are the densest stop, with the Scout Ray Chassis, another audio log, and the one-of-a-kind Axom wall lamp behind a locked door.
- Enter the main Tadpole Pens building — Bring your Tadpole for oxygen and take your time scanning the stools, chairs, and dining tables.
- Grab the Survivors Waypoint 2 audio log — It is off to the left as you come in.
- Take the Moonpool recipe — Another duplicate, in the main room to your right.
- Scan the Scout Ray Chassis — You only need to scan one to unlock the chassis that makes you slightly faster; grab the garbage can while you are here.
- Open the locked story room — This door needs the keycode you get from the Hot Caves where Zip is.
- Scan the Axom wall lamp — This is the only Axom wall lamp in the game and the only place to get it, so do not skip it; a repair tool fragment and a poster are in here too.
- Handle the story Bio Bed and Noah — Talk to Noah and the Bio Bed to move the story, and keep off the edge where the Leviathan lurks.
Looting the two broken Tadpole Pens structures
Two wrecked chunks finish the biome, and they hold the internal wall decor set plus the last two audio logs.
- Hit the southern broken base chunk — Scan the spotlights outside before you enter through one of its openings.
- Grab the Small Crate data box — This recipe unlocks all of the internal wall decor — wall unit, wall panel, wall unit large, wall vent, and wall vent large.
- Collect the Tadpole Ops Guide audio log — Scan the processor here if you still need it.
- Move to the southern broken building — Scan a couple of the hydroelectric turbines scattered nearby to finish that power source.
- Take the last Moonpool recipe — It sits inside alongside a few more scannables.
- Grab the We Must Voluntarily Die audio log — The final Nahheima log closes out the sweep.
Video help
Googly-eyed clam Easter egg along the trench
Once the collectibles are done, there is one optional sight for the curious. Follow the edge of the trench between the big spire and the dead crab, then drop down the rock face and dip past the barrier wall that warns you off. Somewhere along that slope is the googly-eyed clam — a tiny, cute miniature of the great jaw.
It is purely cosmetic and genuinely dangerous: the Shiver Leviathan patrols this stretch and will happily eat you. Leave your Tadpole behind so you do not lose it, and if you only want the sight, do the trip in creative mode. In survival, treat it as skippable.
Guides you’ll want next

If you are still locked out of the biome, start with the Heat Tolerance Adaptation and the Angel Comb route. The locked Tadpole Pens room ties back to the Hot Caves and finding Zip for the base access ID, so that run pairs naturally with this one. And since the two Bio Beds here are only part of the set, the full Bio Bed / inventory upgrade route across the map is the logical follow-up once you have banked these.
Frequently Asked Questions
Do you need Heat Tolerance before exploring the Hot Zone Surface?
Yes. Your default heat cap sits around 80°C and you take steady damage well before that, while the Hot Zone surface runs past 100°C. Get the Heat Tolerance Adaptation from the Angel Comb — build the Sonic Resonator, destroy the three Bloom Cankers, then interact with the core. Even then, the thermal vents themselves still hurt, so keep a small buffer around them.
Where is the quickslot upgrade in the Hot Zone Surface?
The Bio Bed in Nahheima’s hidden lab, on the southern edge of the biome near the Hot Caves entrance, gives the extra quick slot that takes you up to seven. There is a second body upgrade from the Bio Bed inside the central wreck, so scan both to complete this biome’s set.
Which items are duplicates if I already have Moonpool or Half Round Room?
Both show up multiple times. The Moonpool recipe appears at the broken coral, in the main Tadpole Pens building, and in the southern broken building. The Half Round Room blueprint appears in Tailings Village, as a data box in the central wreck, and again in the Tadpole Pens. Grab the first copy of each and skip the rest.
Where do you get the Scout Ray Chassis?
Inside the main Tadpole Pens building. Scan just one of them to unlock the chassis that makes you move slightly faster — you do not need to collect more than that.
How do you open the locked Tadpole Pens room?
That door needs the keycode from progressing the Hot Caves. Dive down to where Zip is and recover the base access ID, then return here to open it. Inside are a repair tool fragment, a poster, the one-off Axom wall lamp, and the story Bio Bed and Noah interaction.
More questions⤵
Is the googly-eyed clam Easter egg worth visiting in survival mode?
Only if you want the sight. It is cosmetic and sits past the trench warning barrier where the Shiver Leviathan hunts, so it can get you killed. If you go, leave the Tadpole behind, and consider popping into creative mode just to see it safely.


Leave a Reply