
Start farming around Bamboo Grove, follow nearby boss clusters, and choose detours for the weapons, outfits, accessories, and ultimate moves your build needs.
Bamboo Grove sits near the map’s center, so you can start there and head into several connected boss areas in Slayers 2. Your race helps determine which boss route to choose, while the ultimate move you want shapes your circuit. If you’re playing demon, prioritize the drops you need for your fighting style.
- Slayers 2 boss location index
- Map settings, travel points, and boss requirements
- Boss categories, levels, and rewards
- Zuko’s opening quest and starter drops
- Mother Bear’s quest and combat zone
- Oban’s northward approach and Serpent drops
- Hidden Mist’s Zentaro and Stone Breathing branch
- Honyozu, Yahaba, Temari, Sabito, and Giyen
- Reaper and the Dotai–Gyutai cave
- Saneri, Shinora, and the Flame Hashira approach
- Nezura’s cliff descent and Fujiko’s cavern
- Iceveil travel for Tengai and Domae
- Frozen Heart sources for the Yeti summon
- Akazo’s rock-face entrance at Windy Peak
- Enmu’s harbor approach and Dreamfall rewards
- Night-only bosses
- Iceveil Valley boss route
Slayers 2 boss location index
| Boss | Location | Known rewards |
|---|---|---|
| Obanai | Above Bamboo Grove | Serpent Haori, Serpent Katana, Serpent Mask |
| Zentaro | Below Obanai, near Hidden Mist | Thunder Haori, Thunder Katana |
| Sumari | Beyond Bamboo Grove | Outfit, Necklace, Ultimate Move |
| Yahari | Beyond Bamboo Grove | Outfit, Necklace, Ultimate Move |
| Water Trainee Sabito | Central path | Water Trainee Outfit, Ghost Warding Mask, Scarred Warding Mask |
| Giyu | Near the bridge | Boss chest |
| Reaper | Past Giyu | Outfit, Ultimate Move |
| Daki | Cave behind the red gate near the waterfall | Golden Kanzashi, Bulwark set |
| Gyutaro | Same cave as Daki | Blood Sickles, Circular Slashes |
| Sanemi | Main path | Wind-themed rewards |
| Shinobu | Further along the main path | Boss chest/rewards |
| Rengoku | Across the suspension bridge | Flame Katana |
| Nezura | Below Rengoku’s cliff | Bamboo Muzzle, Nezura’s Outfit, Missing Pyrokinesis |
| Gyomei | Near Hidden Mist Village | Boss chest/rewards |
| Fujiko | Hidden cave in Final Selection Plains | Bladed Wagasa, Fujiko’s Outfit, Ice Chest |
| Yeti | Cave near Butterfly Estate, Iceveil Valley | Frozen Heart-related encounter/rewards |
| Tengen | Snowy town near Frost Veil Shrine | Boss rewards |
| Doma | Near the Torii gate past Tengen | Black Lotus Crown, War Fans |
| Akaza | Windy Peak, behind a fake wall | Top, Bottom, Shockwave |
| Enmu | Dreamfall Hollow | Boss rewards |
Several encounters share a travel route, but reaching the marker can still leave a cave entrance, cliff descent, or concealed passage between you and the boss. Learn the local approach alongside the destination.
Map settings, travel points, and boss requirements
Open the map and enable Boss Names, Boss Icons, Area Names, Area Icons, Shrine Names, and Shrine Icons. NPC locations, region labels, and shrine destinations give you landmarks for moving between encounters.

Activate travel points before repeated farming runs. Shrine travel lets you return to destinations such as Frost Veil Shrine and Mistfall Harbor.
World bosses start at 3,000 HP and gain 1,000 HP per additional attacking player. Two attackers bring the health pool to 4,000; three bring it to 5,000. The increase follows players who hit the boss, so adding attackers also changes how much damage the group must deal. Mini-bosses such as Sabito have their own health values.
The general categories use the typical level bands below. These bands describe progression, not universal entry locks for the named encounters.
Boss categories, levels, and rewards
| Boss category | Typical level band | Spawn pattern | Reward types |
|---|---|---|---|
| Early world bosses | 25–50 | Fixed timer | Clan tokens, basic materials |
| Late world bosses | 100–150 | Fixed timer | High-tier materials, cosmetic fragments |
| Raid bosses | 150+ | Raid trigger | Raid chests, exclusive drops |
To help you get your bearings in the early area, Tier 1 spawn locations are within 200 studs of the first village. Tier 2 spawns sit along the main road that links the first two zones, frequently beside landmark structures. These descriptions help focus your search without assigning a tier to every boss.
The spawn-cycle change limits affected spawns to one encounter per cycle. Every boss category uses a fixed respawn timer.
Before you enter a boss area, pick up quests nearby so your equipment hunt can also advance quest objectives on the same trip.
If your goal is experience or upgrade materials, compare your boss clear time with nearby repeatable enemies. Regional enemies also provide upgrade materials, giving you another farming option between boss attempts.
Group nearby bosses into the same trip when farming chests, and reserve distant detours for a drop you’re actively chasing.
Zuko’s opening quest and starter drops
Zuko is the first mini-boss in the opening progression. Krue’s level 7 bandit-boss quest unlocks the encounter, making that quest your starting point for finding him.
His rewards include a Common Chest and the Cutlass, which has an approximately 20% drop chance. Zuko returns after a few minutes, so the encounter supports repeat attempts while you’re still working through the opening quests.
Mother Bear’s quest and combat zone
Tom’s level 18 quest points you toward Mother Bear through its bear-area objective. The encounter offers a chest reward, with associated quest rewards available through Tom’s task.
Oban’s northward approach and Serpent drops
From Bamboo Grove, head slightly north to reach The Serpent King Oban.
Oban’s chest reward is World Events Chest. His Serpent Mask, Serpent Katana, and Serpent Haori each have a 0.5% drop chance.
Descend from Oban’s position toward the mist edge and approach the cliffside hut for The Thunder King Zentaro. The downward branch takes you away from the central circuit before you return toward Bamboo Grove.

Zentaro offers World Events Chest, with Thunder Mask, Thunder Haori, and Thunder Katana at 0.5% each. His clothing drops also include Thunder Top and Thunder Bottom.
The same village approach leads toward Gior. Add that branch when you want the encounter, then return toward Bamboo Grove to resume the central route.
Honyozu, Yahaba, Temari, Sabito, and Giyen
Honyozu’s interior route
Look for Honyozu along the interior route close to the early demon encounters. He can drop Sickles, including a variant associated with Blood Manipulation builds; this association doesn’t establish that every build requires that equipment.
Yahaba and Temari’s bridge approach
The lower route away from Honyozu leads toward Yahaba. Continue beyond Yahaba and across the bridge for Temari.
Yahaba supplies the Arrow ultimate. Temari supplies her clothing and the Temari ultimate, so your chosen Demon Art determines which reward to pursue here.
Water Trainee Sabito’s river stop
Continue through the river stretch to reach Water Trainee Sabito. He has 600 HP and an approximately two-minute respawn, giving this mini-boss a different pace from the world-boss encounters.
Sabito’s rewards include a Common Chest, Ghost Attendant Outfit at 2%, and Scarred Warding Mask at 2%. Ghost Haori is also among his drops.
Giyen beside the forest path
From Sabito, continue toward The Water Hashira Giyen. Find him beside the bridge on the dirt path through the forest.
Giyen supplies World Events Chest and Water equipment: Water Katana, Water Haori, Water Top, and Water Bottom.
Reaper and the Dotai–Gyutai cave
Reaper beyond the cliff
Continue beyond Giyen’s bridge toward Reaper, whose position is behind Temari’s area. His rewards include his outfit and the Tornado Surge ultimate.
Dotai beside the waterfall
The cave entrance sits behind the red gate. Inside, The Obi Demon Dotai stands beside the waterfall; this is the first of the two cave encounters on the inward approach.

Dotai supplies World Events Chest, Golden Kanzashi at 0.5%, Dotai’s Outfit at 0.5%, and an Obi ultimate.
Gyutai farther inside
Continue deeper into the same cave for The Blood Sickle Demon Gyutai, also called Gyutaro. Both encounters fit into one cave visit.
Gyutai offers World Events Chest, with Blood Sickles and Gyutai’s Outfit at 0.5% each. His Circular Slashes drop is the Blood Manipulation ultimate, with an approximately 5% chance; that percentage applies to the ultimate, not the weapon.
Saneri, Shinora, and the Flame Hashira approach
Saneri beyond the cave gates
Leave the cave and head north. The Wind Hashira Saneri is near Windy Peak.
Saneri’s rewards include World Events Chest, Wind Mask, Wind Slayer Haori, and Wind Katana. Each of those three equipment drops has a 0.5% chance.
Shinora down the descending path
The path down from Saneri leads to Mistfall Harbor, where The Insect Hashira Shinora is located. This continues the connected stretch toward the suspension bridge.
Shinora offers World Events Chest, plus Butterfly Haori, Shinora Mask, and Shinora Katana at 0.5% each. Shinora Katana is the corresponding insect weapon.
Flame Hashira across the suspension bridge
Cross the long suspension bridge from Shinora’s side to reach the Flame Hashira.
Farm this encounter for the Flame Katana. Its dungeon-related progression leads to the Volcanic Katana V2, making the Flame Katana the starting weapon for that upgrade path.
Nezura’s cliff descent and Fujiko’s cavern
Nezura beside the torches
From Flame Hashira’s position, drop down the cliff to reach The Pyrokinesis Demon Nezura. A separate approach starts east of Bamboo Grove Sanctuary toward Butterfly Estate and uses the left bridge.

Nezura supplies World Events Chest, with Bamboo Muzzle and Nezura’s Outfit at 0.5% each. She also drops the Pyrokinesis ultimate.
Fujiko beneath the weeping trees
Continue from Nezura through the dense trees and into the hidden cavern. Inside is Fujiko, the secret umbrella boss, an endpoint for the central run when you’re pursuing the umbrella weapon.

Fujiko’s chest reward is an Ice Chest. Her other drops include Bladed Wagasa at 0.5%, Fujiko’s Outfit at 0.5%, and Shade Breaker.
Iceveil travel for Tengai and Domae
Prepare for the snowy branch before using Frost Veil Shrine as your arrival point.
The Emberheart Lantern has Legendary rarity. Its separate tooltip bonuses are +0.35 Illumination, +25 Max Health, and +20 Max Stamina.
Tengai beyond the village gates
From the shrine, head into Iceveil Valley to reach The Sound Hashira Tengai. A nearby option lets you set your spawn for return visits.

Tengai supplies World Events Chest, Sound Slayer Uniform at 0.5%, and Sound Katana x2 at 0.5%. His rewards also include String Performance.
Domae along the snowy path
Continue from Tengai along the snowy route to The Cryokinesis Demon Domae. Doma and Douma are alternate names for this encounter.
The snowy village’s red bridge and Iceveil’s tank NPC are additional approach landmarks: Domae lies beyond the bridge, and an approach also runs past the tank NPC.
Domae offers World Events Chest, with Black Lotus Crown, War Fans, Domae’s Bottom, and Domae’s Outfit at 0.5% each. The Ice/Cryokinesis ultimate is another reward to pursue here.
Frozen Heart sources for the Yeti summon
Frozen Heart awakens the Yeti boss, so prepare the summon item before committing to the encounter.
You can obtain Frozen Hearts from roaming chests, including the bandit chests scattered around the map. The black market is an additional source.
Akazo’s rock-face entrance at Windy Peak
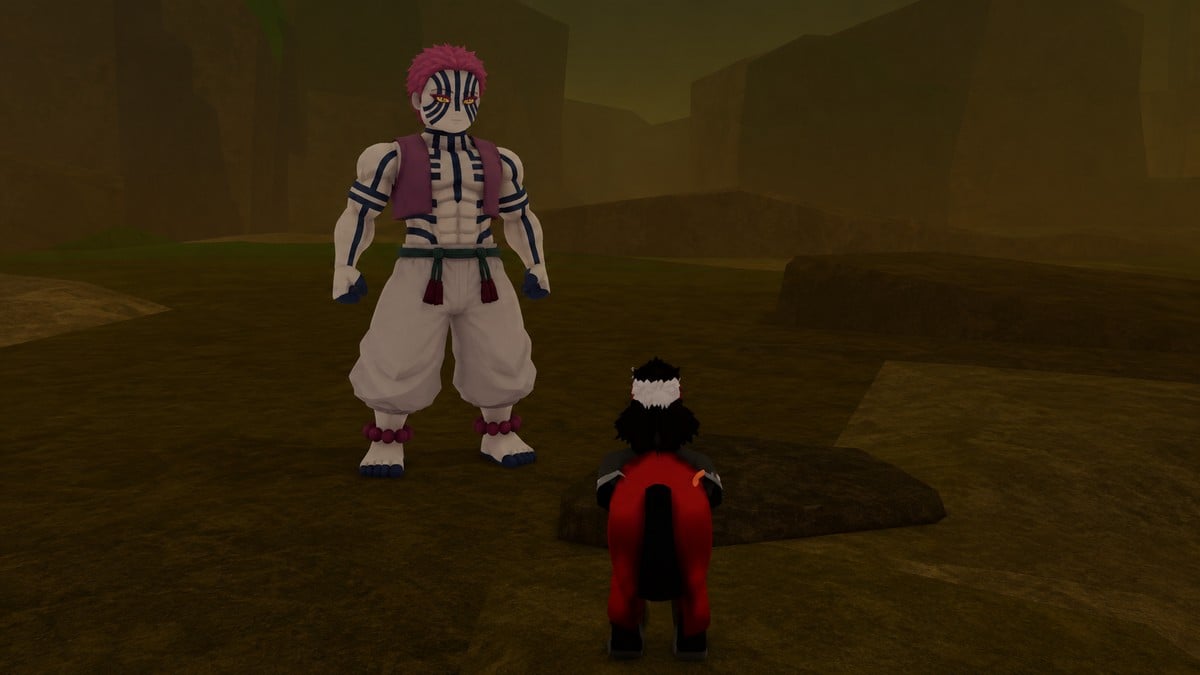
Go to Windy Peak. The rock face on that approach leads to The Shockwave Demon Akazo, also called Akaza.

Akazo supplies World Events Chest, Akazo’s Bottom at 0.5%, and Akazo’s Top at 0.5%. His move reward is the Shockwave ultimate.
Enmu’s harbor approach and Dreamfall rewards
Enmu is the encounter reached from the harbor side of Dreamfall Hollow.
The level 75 quest along the approach serves as a navigation landmark. Its level marker identifies the route.
Night-only bosses
Sumari and Yahari require the correct time of day.
Both are located beyond Bamboo Grove and appear at night. Their reported rewards include an Outfit, Necklace and Ultimate Move. If either boss is missing during daytime, the location itself is not necessarily wrong—the encounter has a timing requirement.
Iceveil Valley boss route
The Iceveil Valley encounters are better handled as a separate farming trip.
Travel to the Frost Veil Shrine and clear the snowy-area bosses, including Tengen and Doma. Doma is located near the Torii gate beyond Tengen and is associated with the Black Lotus Crown and War Fans.
The Yeti requires additional preparation because Iceveil Valley applies cold damage. Current guides report that the Emberheart Lantern is needed to safely operate in the area, while the Frozen Heart is used to initiate the Yeti encounter.
Related Slayers 2 guides






Leave a Reply