- What to know
- Replaced boss overview
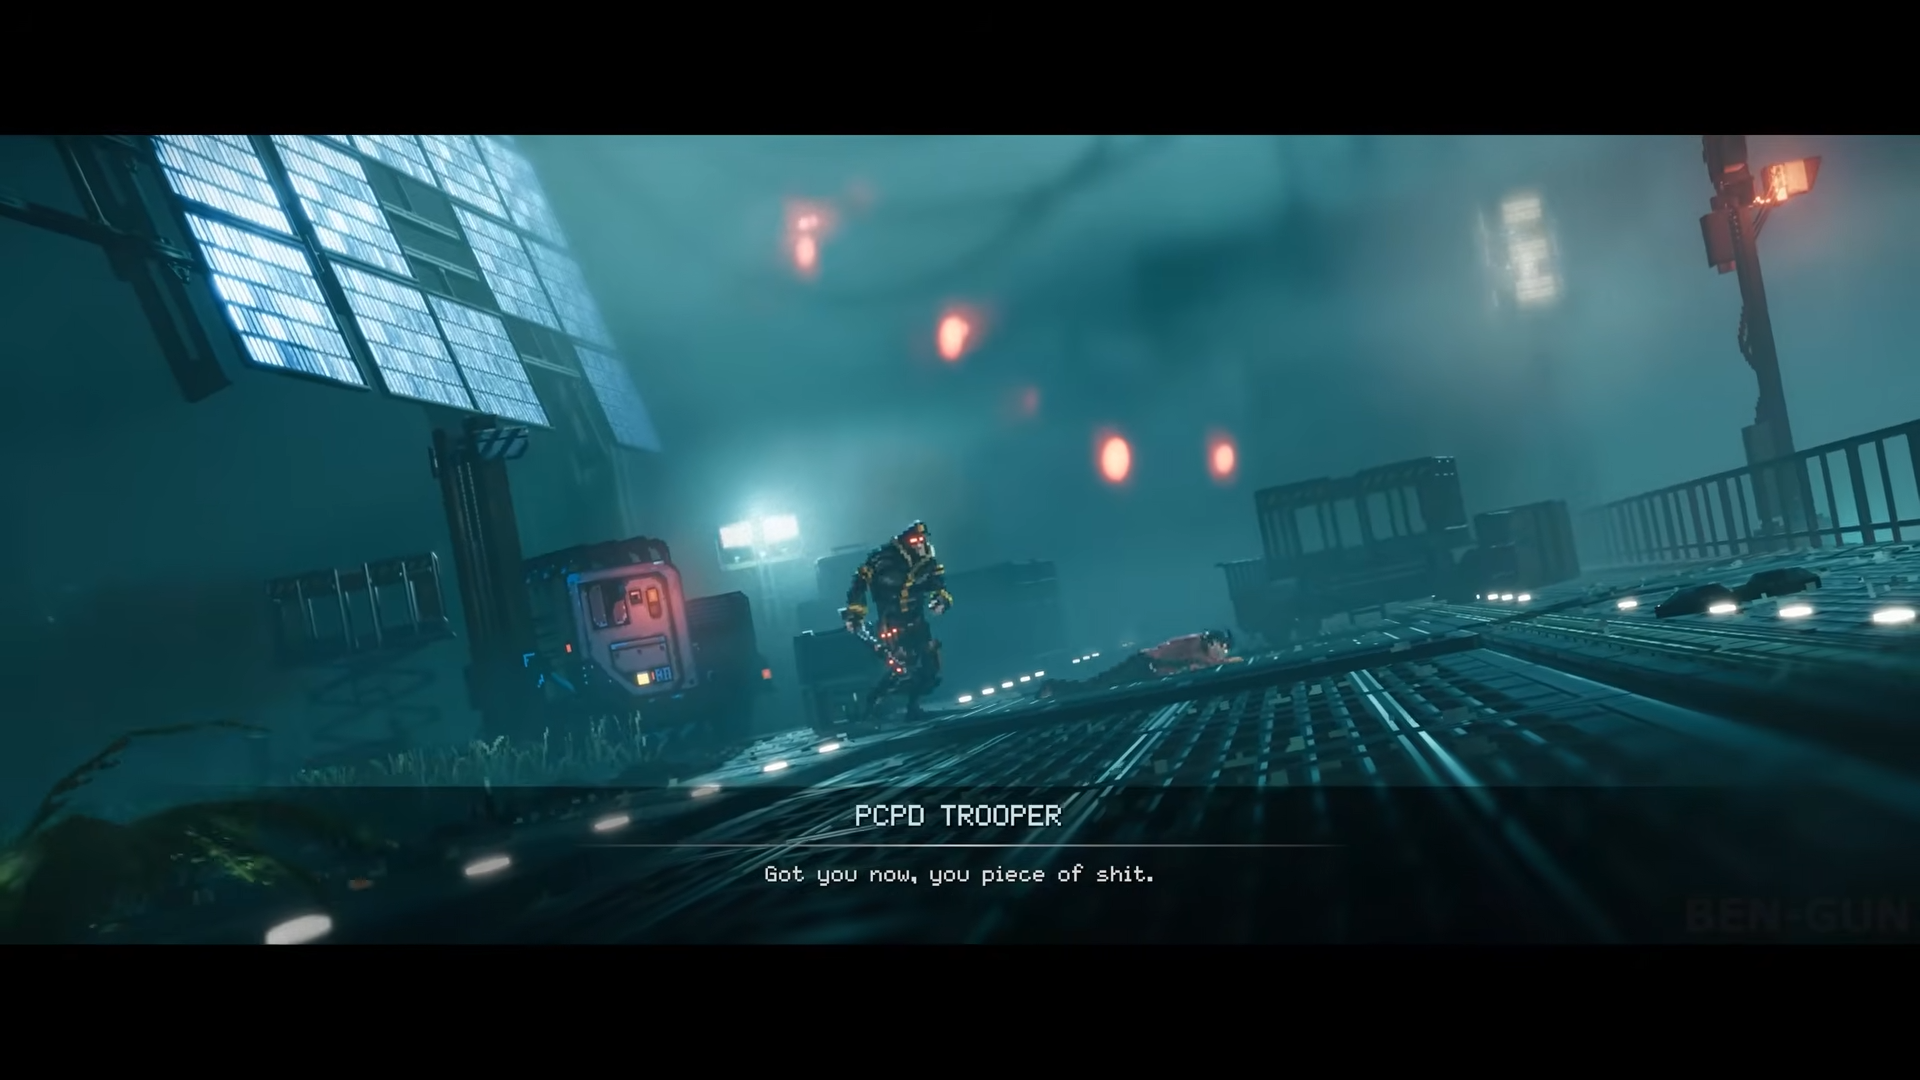
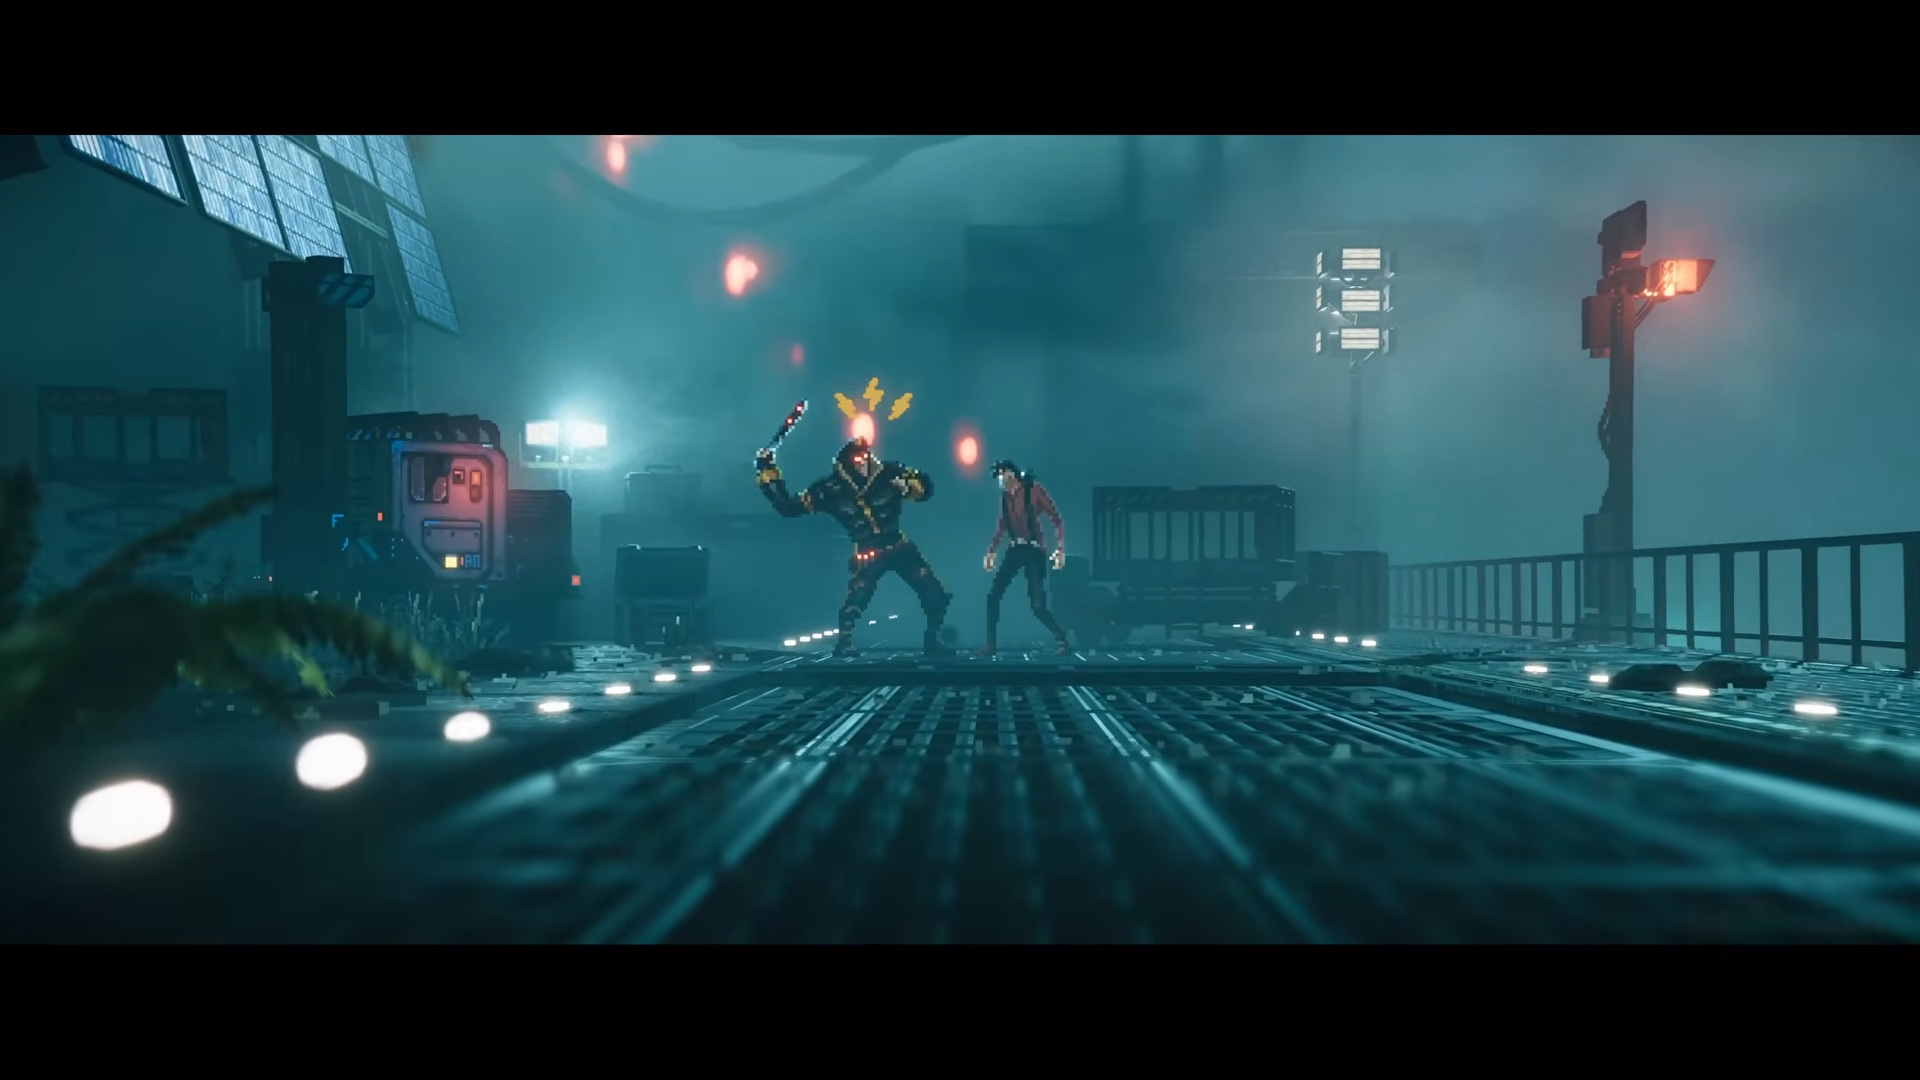
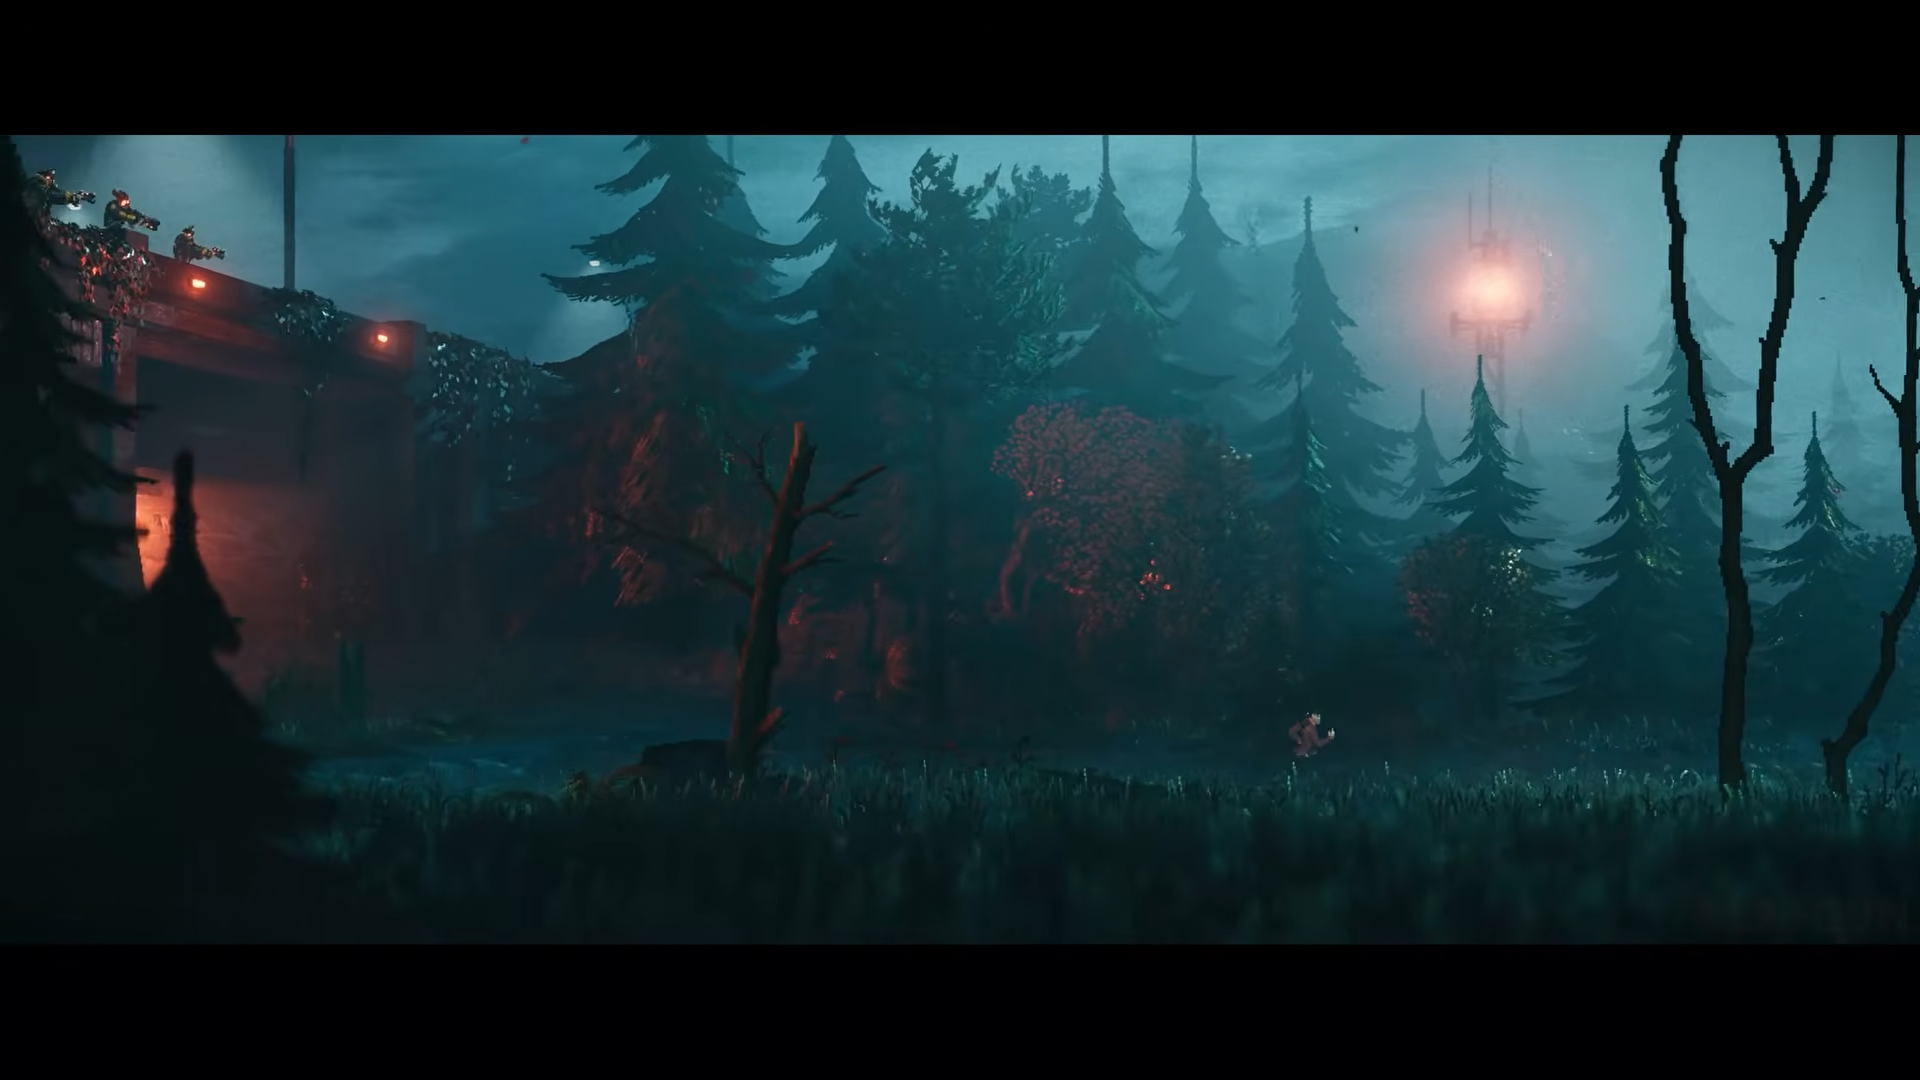
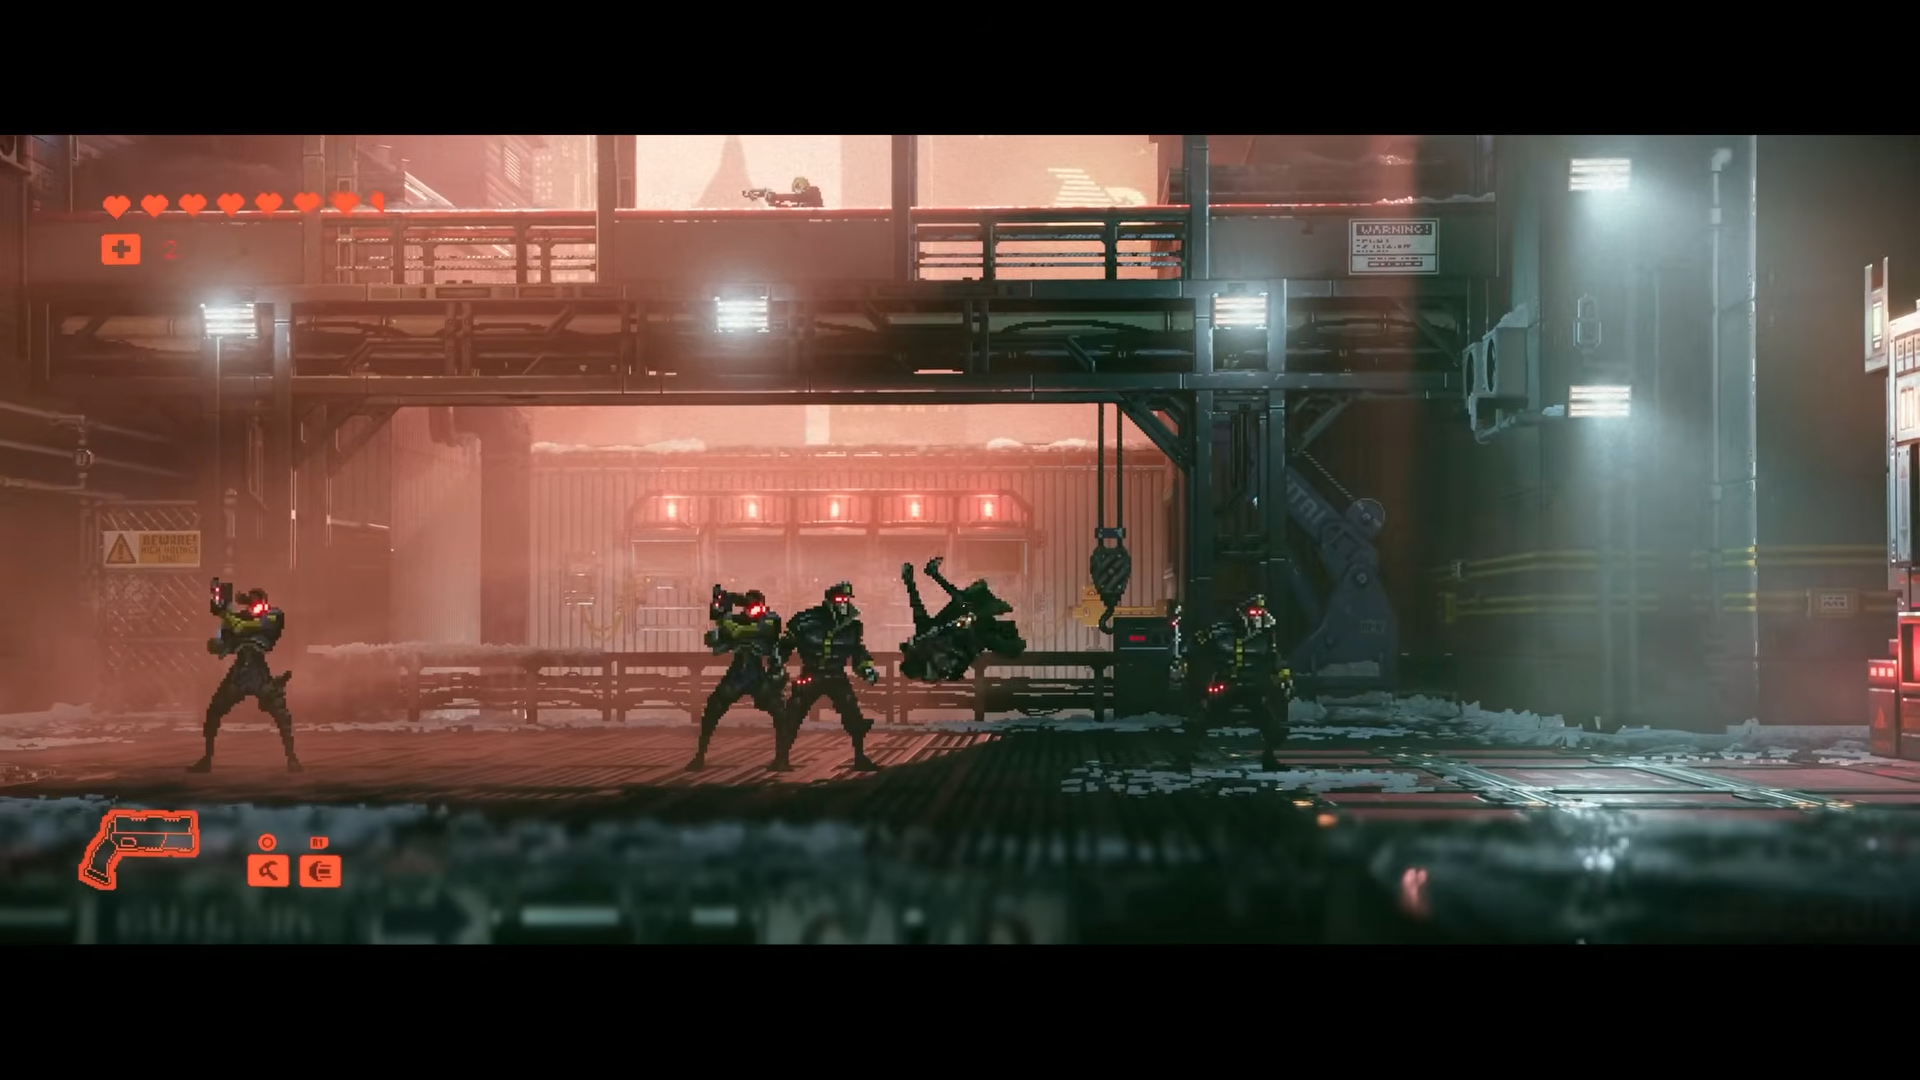
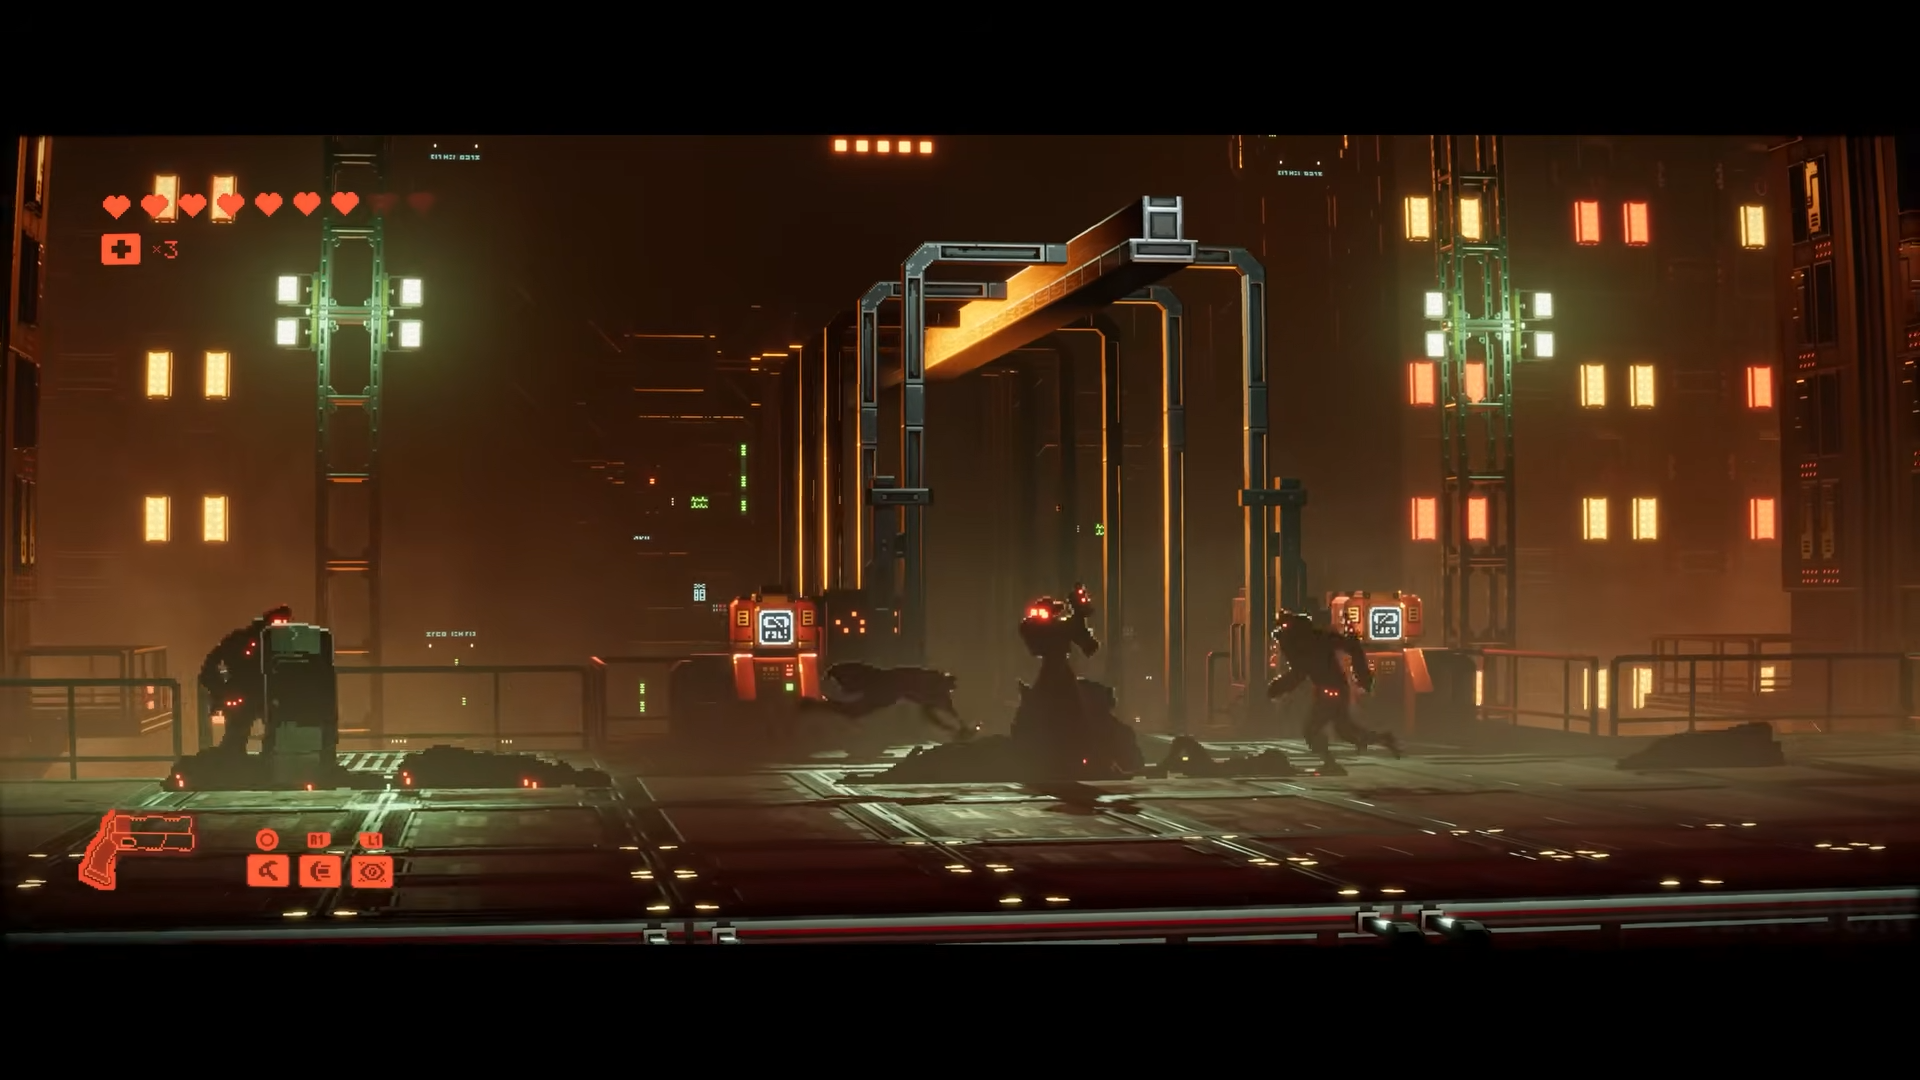
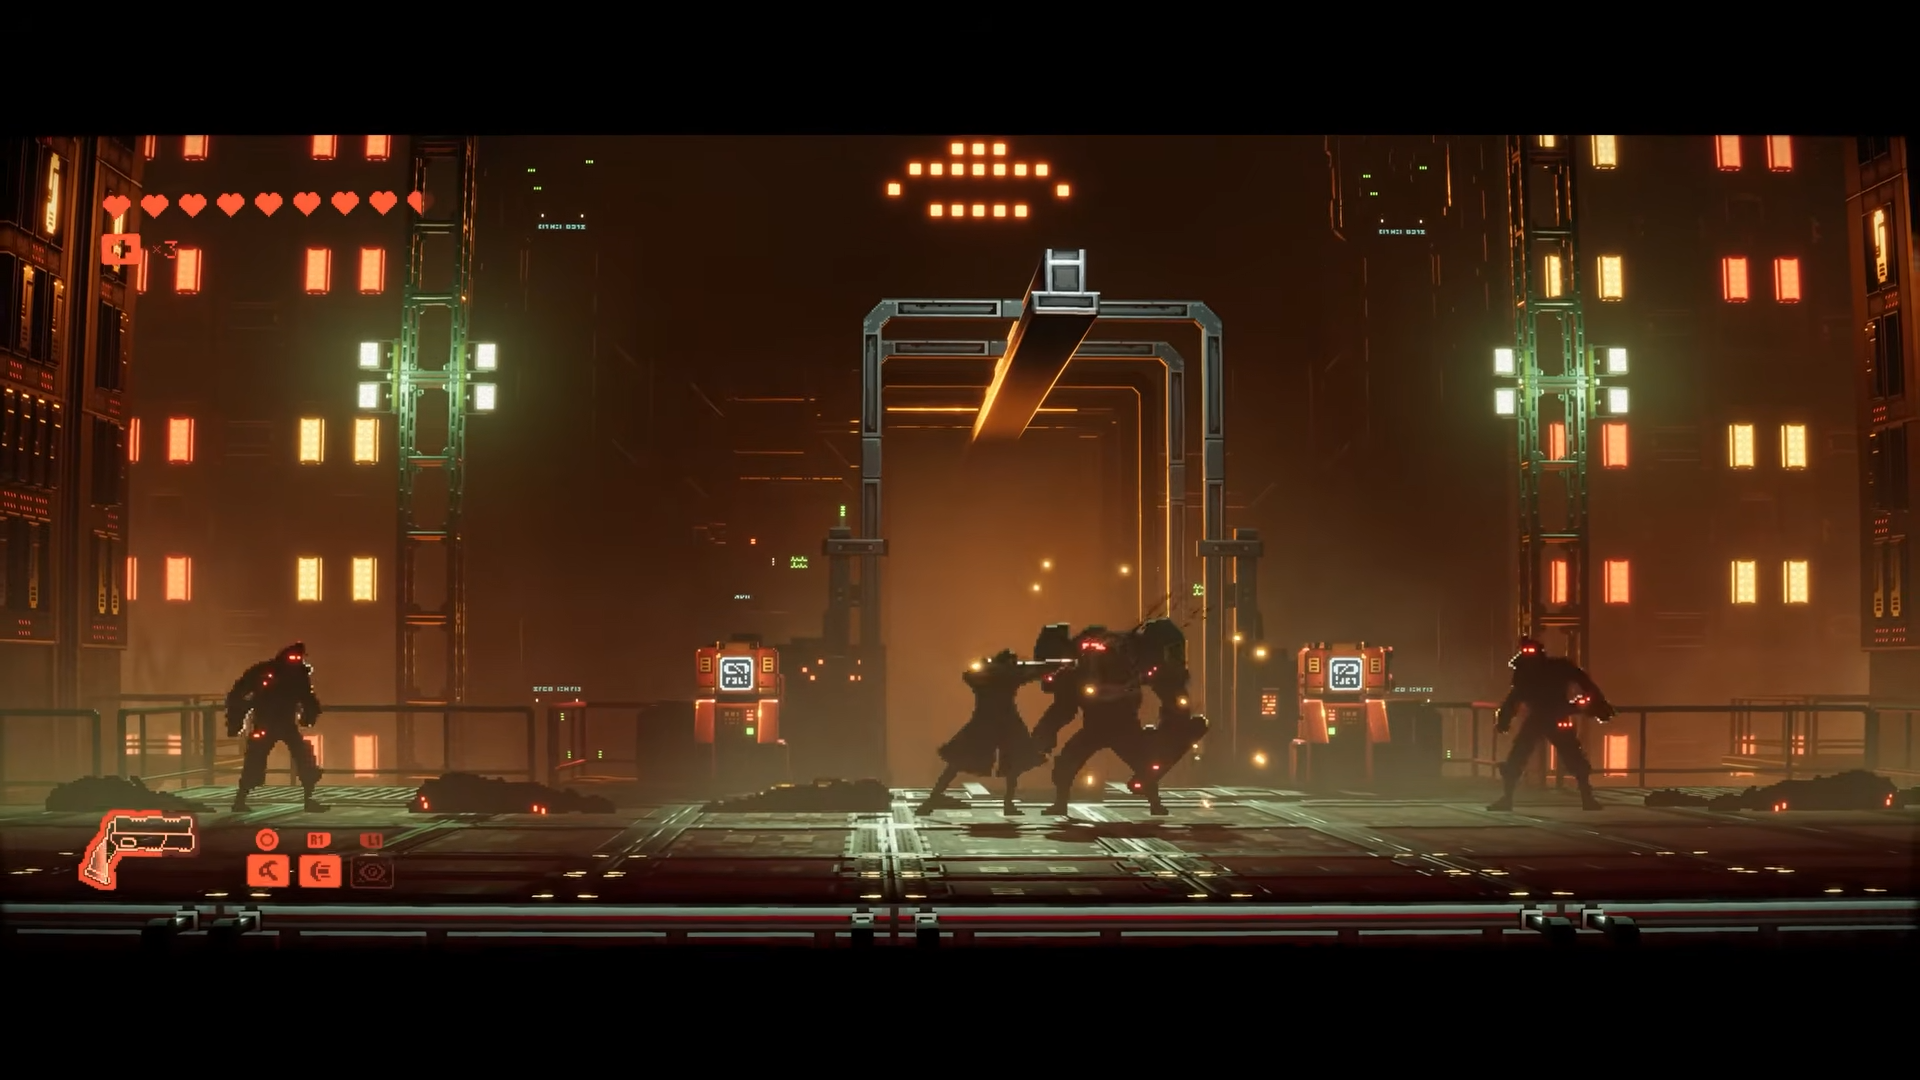
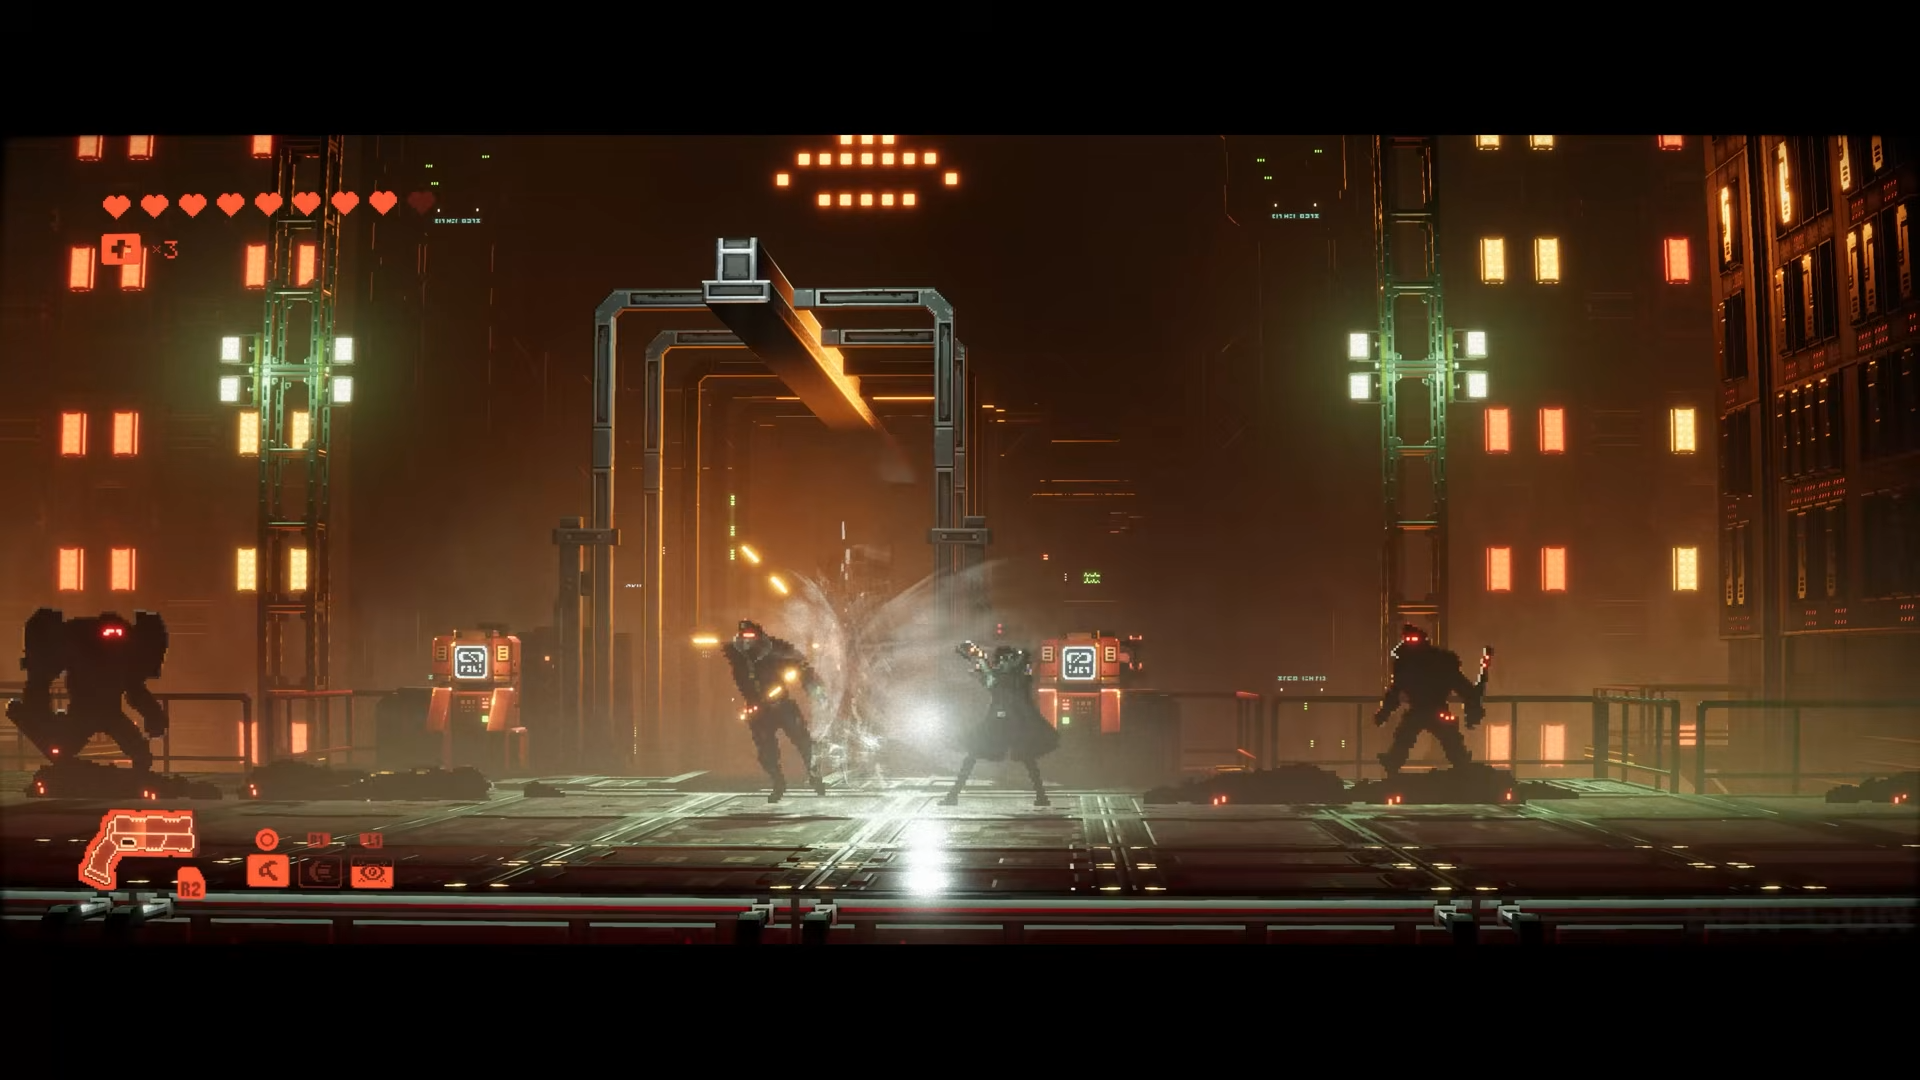
- 1. PCPD Squad
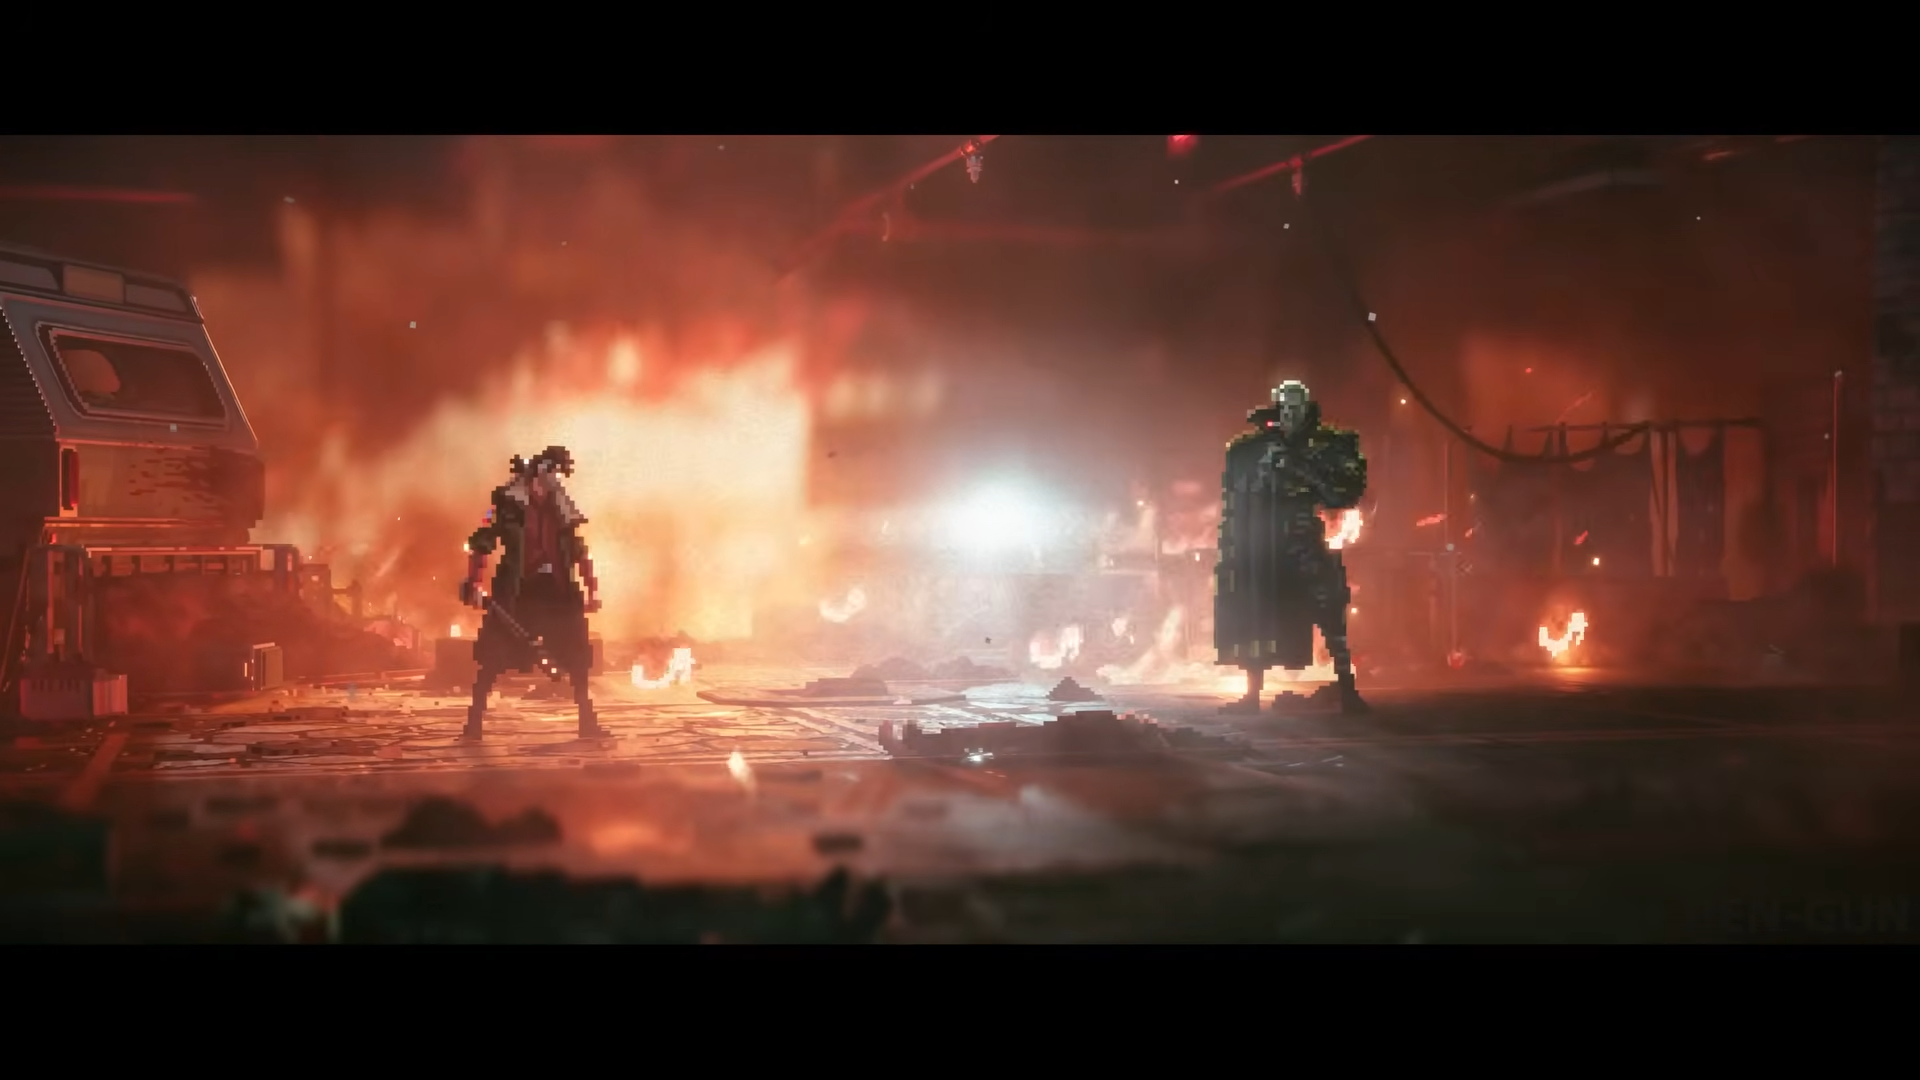
- 2. Uncle Ben (Termite Lair boss)
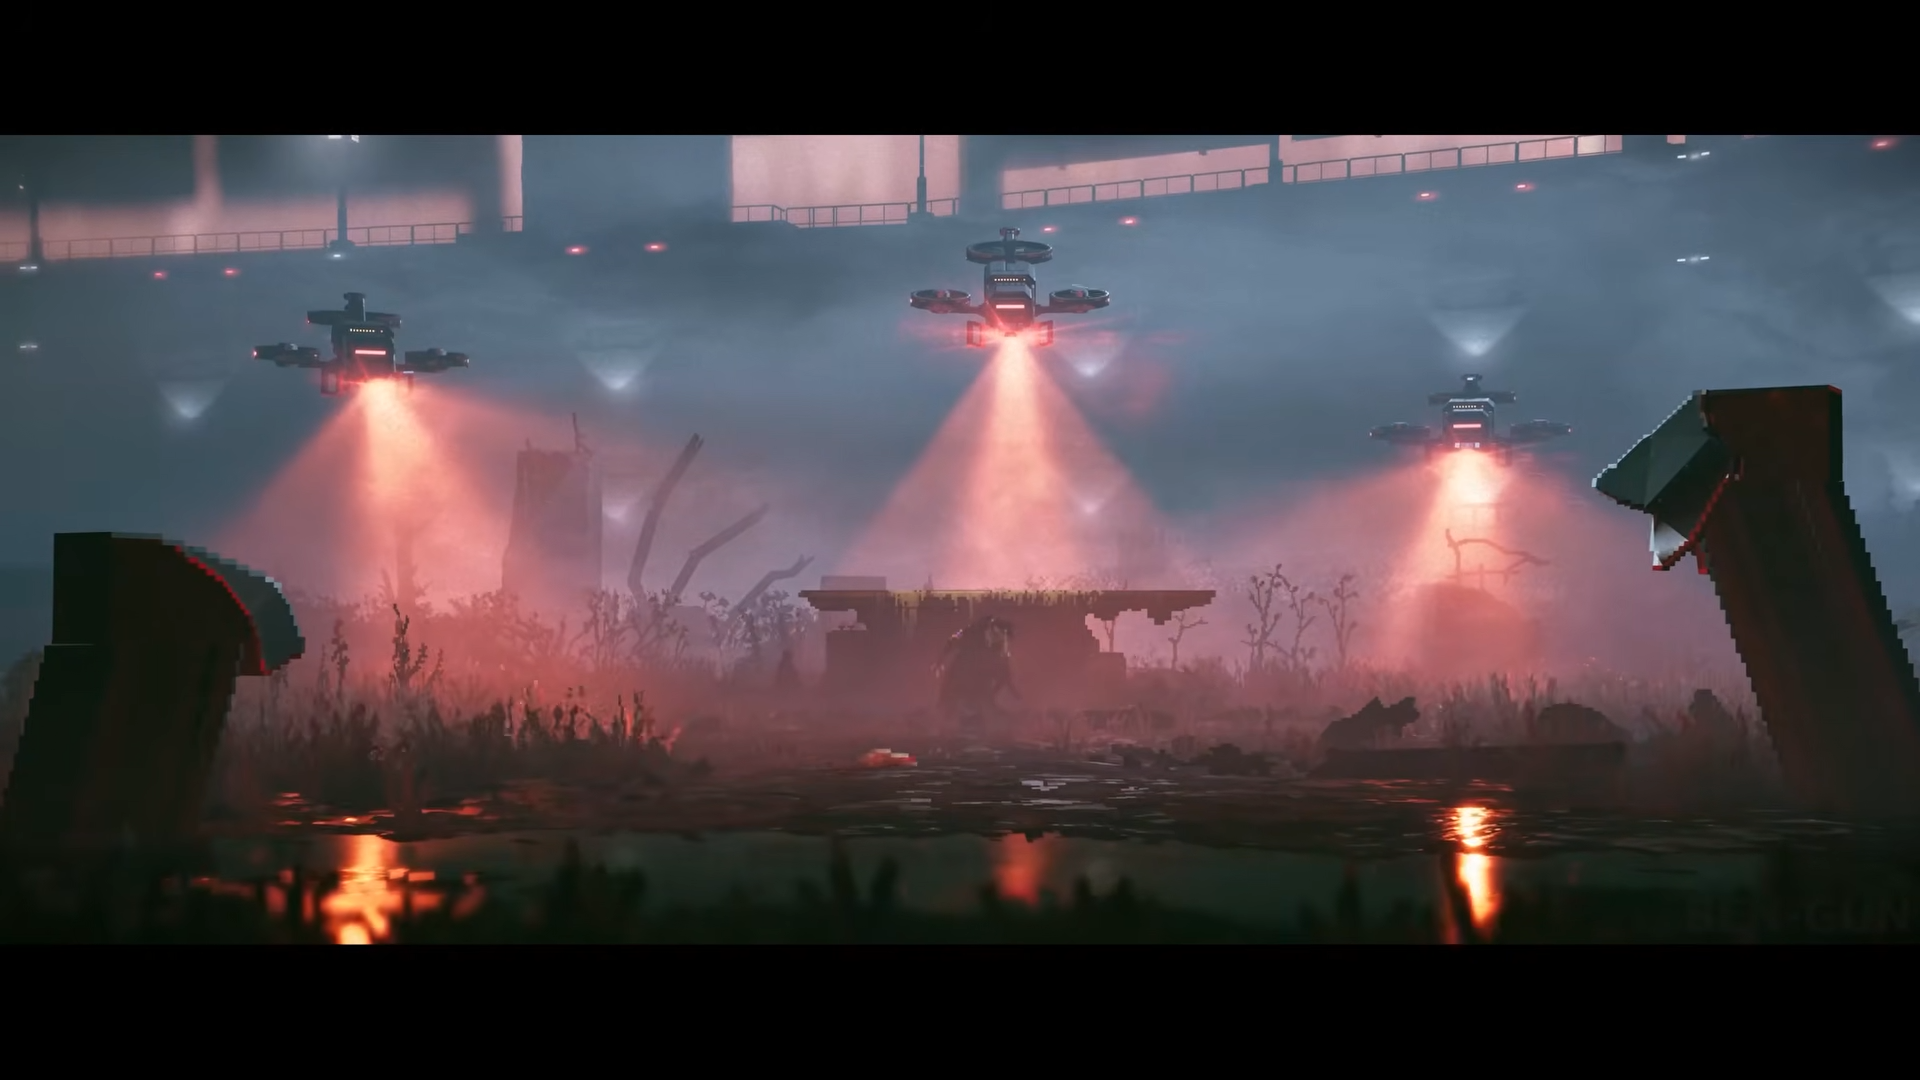
- 3. Police Drones
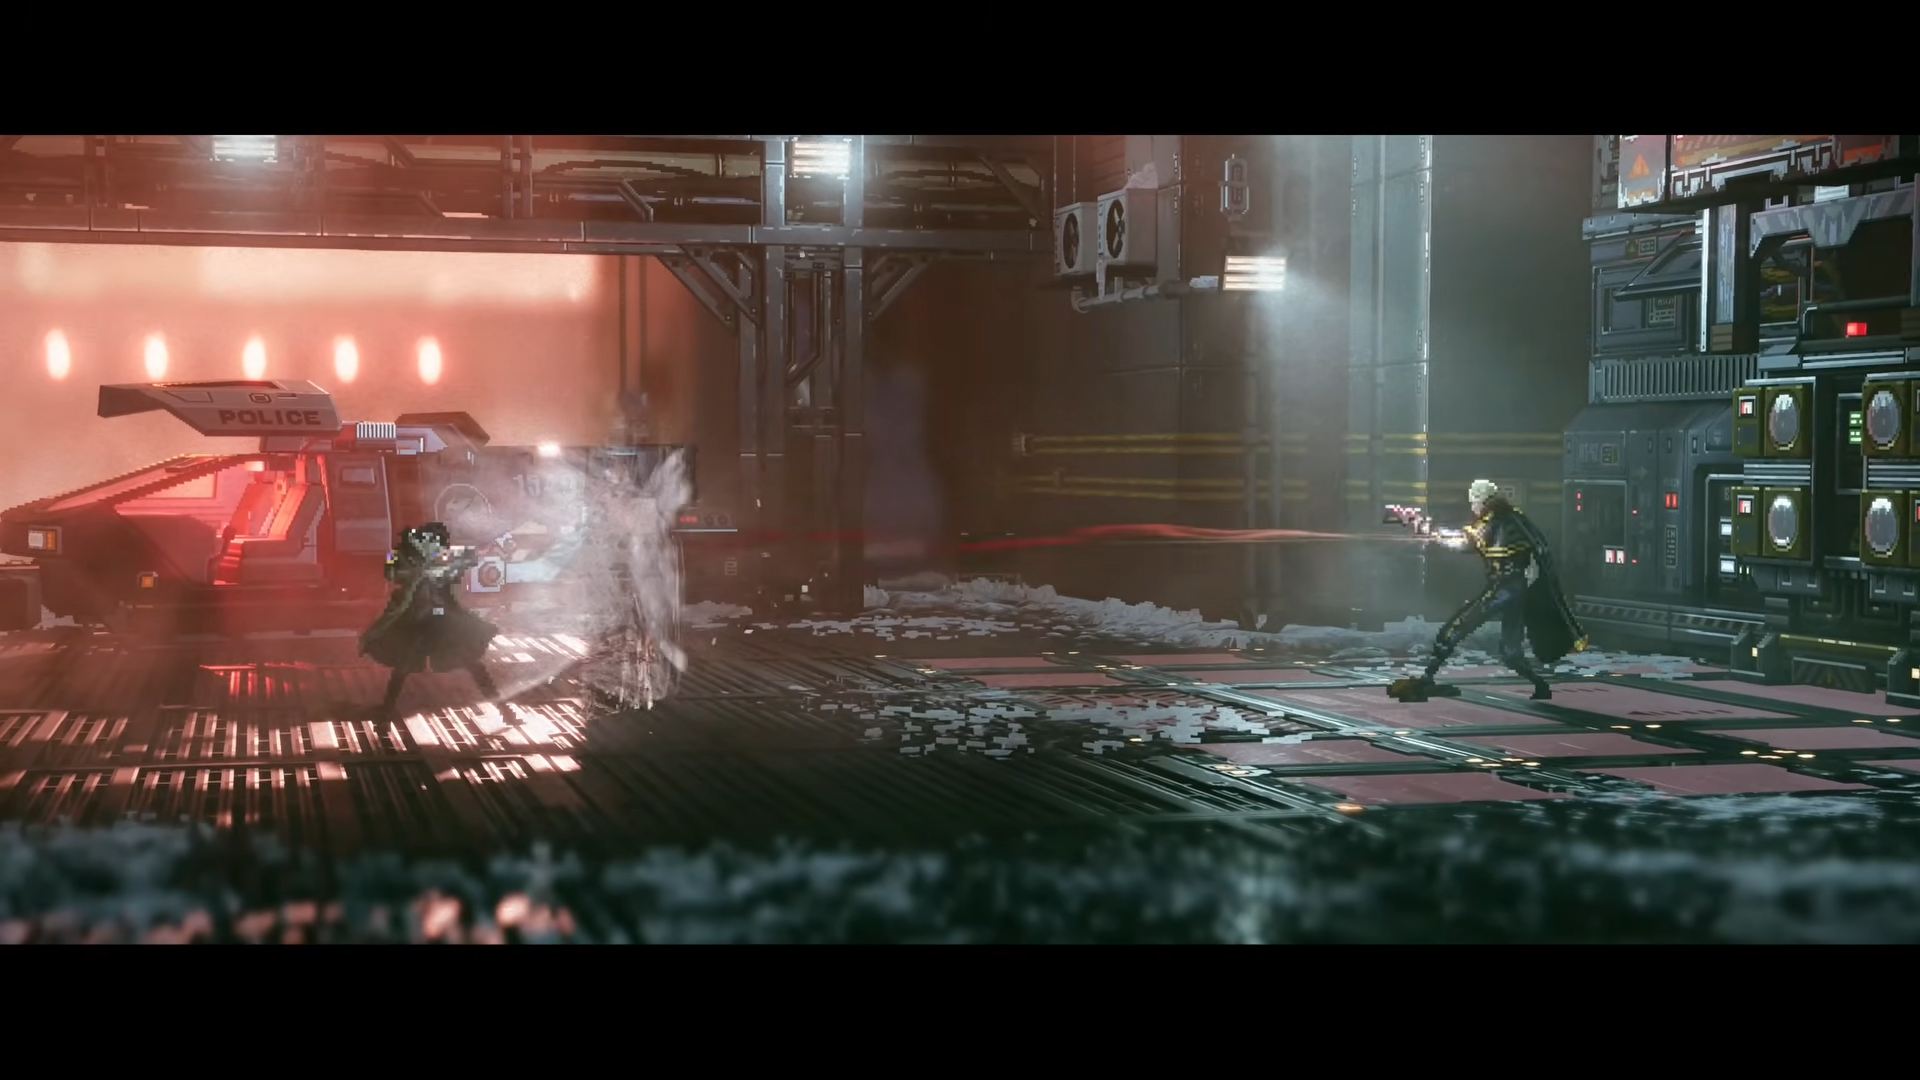
- 4. The Commissioner (Generator fight)
- 5. The Commissioner – final fight
- 6. The Matriarch
- 7. The final boss
- Boss fight locations across Phoenix‑City
- Boss fight rewards and progression
- Keeping your edge in every Replaced boss fight
What to know
- Replaced currently features seven major boss encounters: PCPD Squad, Uncle Ben, Police Drones, The Commissioner (two separate fights), the Matriarch, and a climactic final boss.
- Combat revolves around rhythmic dodges, parries, and counters, with on‑screen indicators showing when to evade or retaliate rather than long combo strings.
- Upgrades to health, Huxley gun abilities, and crowd‑control tools dramatically change how forgiving boss fights feel, so story and side‑quest progress before big encounters matters.
- Most bosses test specific skills (crowd control, ranged pressure, armor breaking, or multi‑phase endurance), so adapting your approach for each encounter is more important than raw damage.
Replaced is a cinematic 2.5D action‑platformer set in a retro‑futuristic, post‑nuclear America, where you play as R.E.A.C.H., an AI trapped in a human body fighting through Phoenix‑City and the wastelands around it. This guide walks through every major boss in order, focusing on what each fight is testing, how to prepare, and precise steps you can follow to survive.
Replaced boss overview
| Boss fight | point in story | Core challenge tested |
|---|---|---|
| PCPD Squad | Early game, shortly after the prologue action | Handling multiple armed enemies under pressure |
| Uncle Ben | Chapter 3 climax in the Termite Lair | Reading heavy melee pressure and tight windows |
| Police Drones | Mid‑game in an industrial/combat zone | Surviving layered ranged attacks and movement tax |
| The Commissioner (Generator) | Later chapter at the checkpoint/wall facility | Splitting focus between boss and arena hazards |
| The Commissioner – final fight | Follow‑up confrontation inside Phoenix power hub | Long multi‑phase duel with reinforcements |
| The Matriarch | Late‑game, chapter segment 3‑1 | Pattern recognition |
| Final boss | Final chapter in the Phoenix‑City endgame | Endurance, tight counters, and overall mastery |
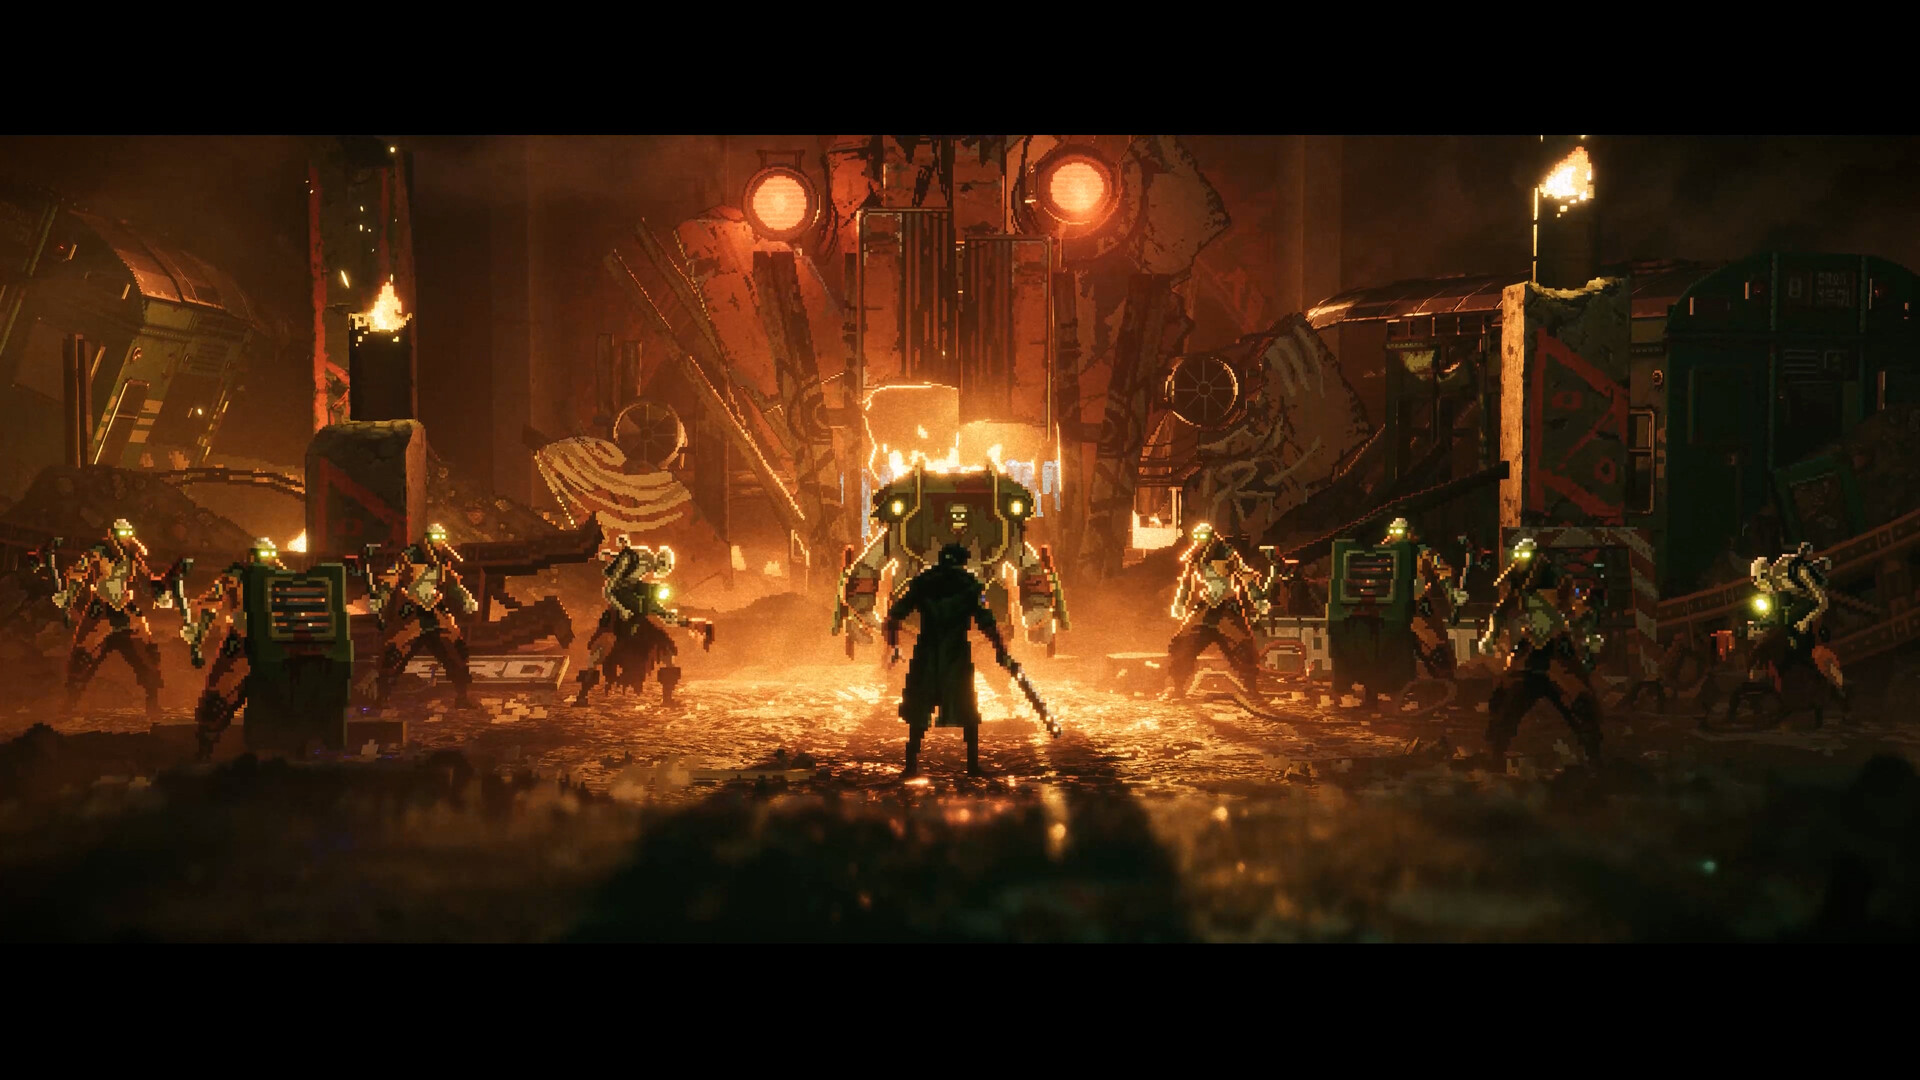
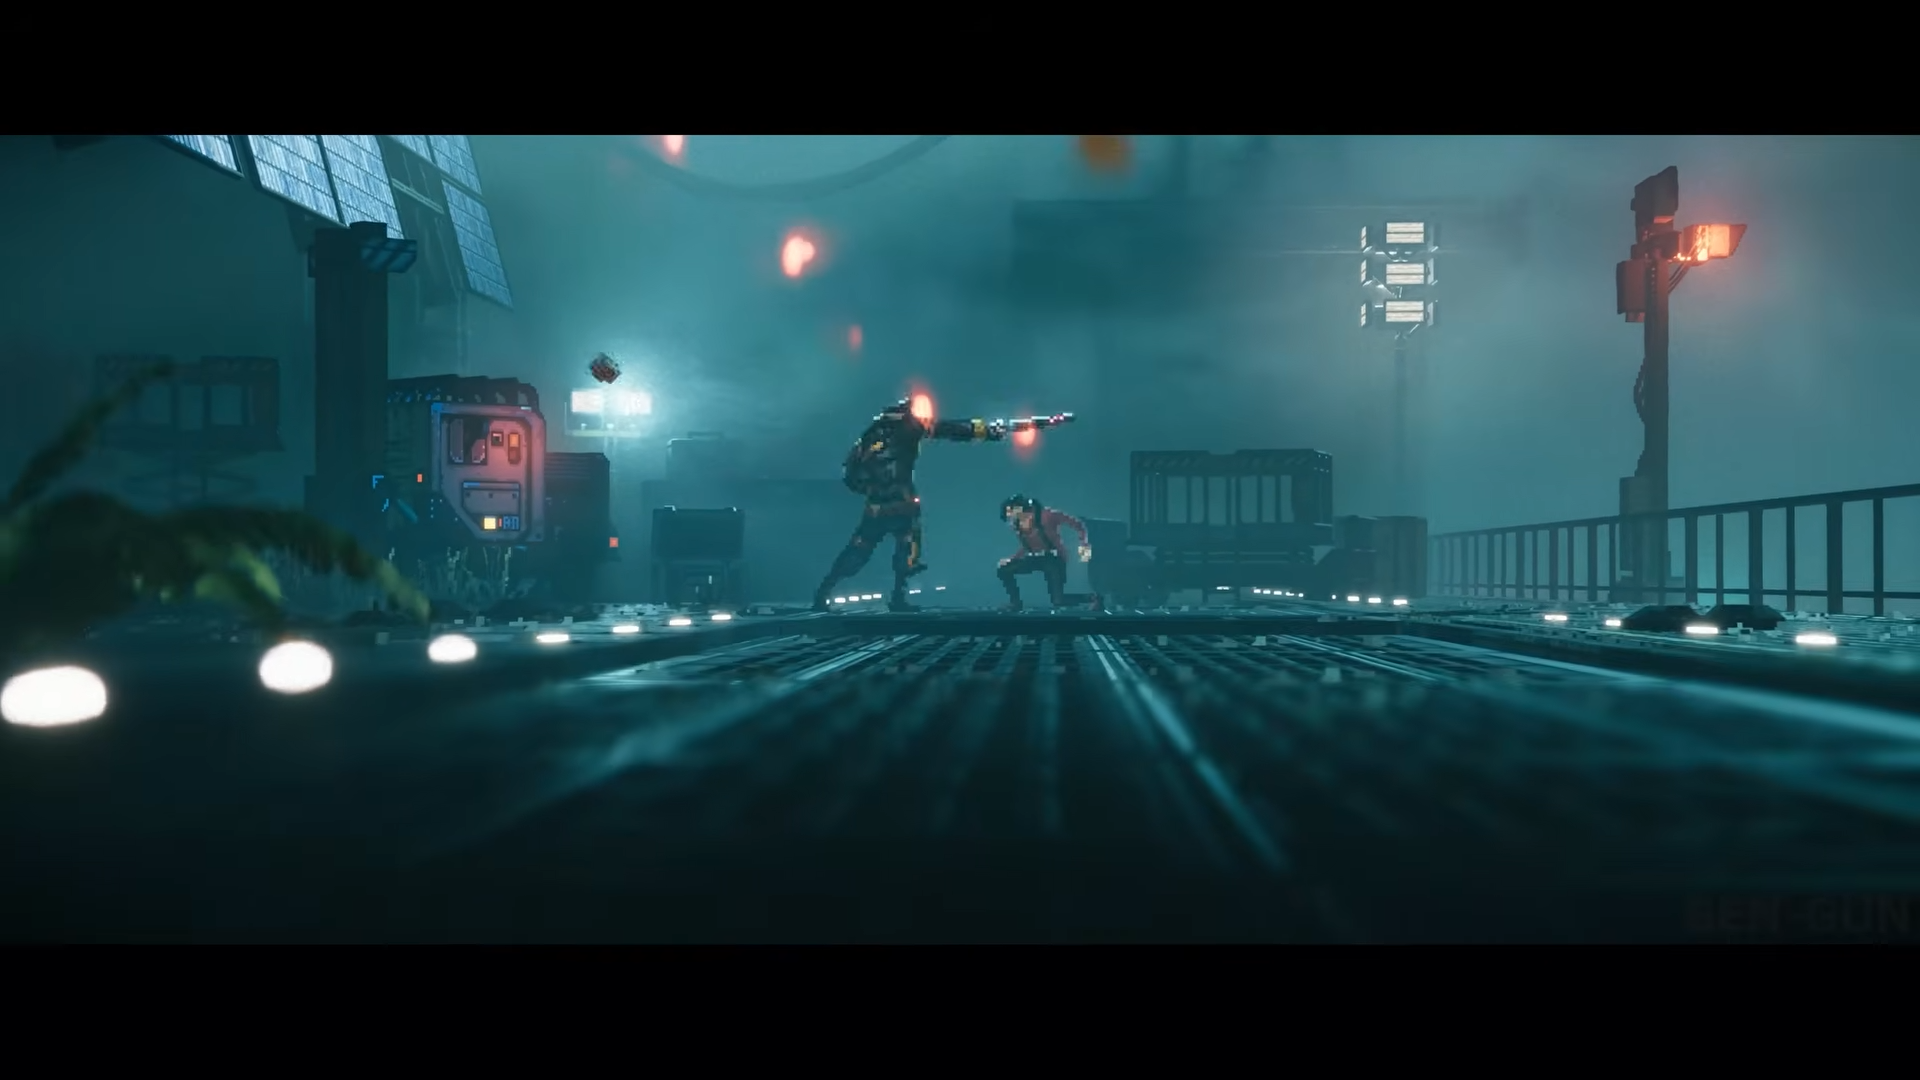
1. PCPD Squad
This opening boss encounter pits you against a concentrated squad of PCPD officers, turning what was previously a chase sequence into your first real test of crowd management under fire.
You’re still early in the game here, so your toolkit is limited and your dodging discipline matters more than damage output.
Step 1: Learn the indicator rhythm
Focus the first few attempts on reading the attack cues above enemies’ heads, not on killing them quickly.
Let a few swings play out so you get a feel for how long after an icon appears the hit actually connects, then practice dodging at the last safe moment to earn longer openings.
Step 2: Prioritize ranged officers
Any PCPD enemies firing from the backline should be your first targets, because their shots will interrupt your combos on closer foes and push you into panic dodges.
Use movement‑based attacks—running into a stop then striking—to close distance quickly on a gunner, hit them, and immediately roll through them to exit the firing line.
Step 3: Use basic counters instead of greedy combos
Whenever an indicator suggests an incoming attack that can be countered, prioritize that timed block/counter over pushing your combo further.
A successful counter not only prevents damage but often staggers the attacker, letting you knock them down or even finish them with a stylish execution that removes pressure from the fight.
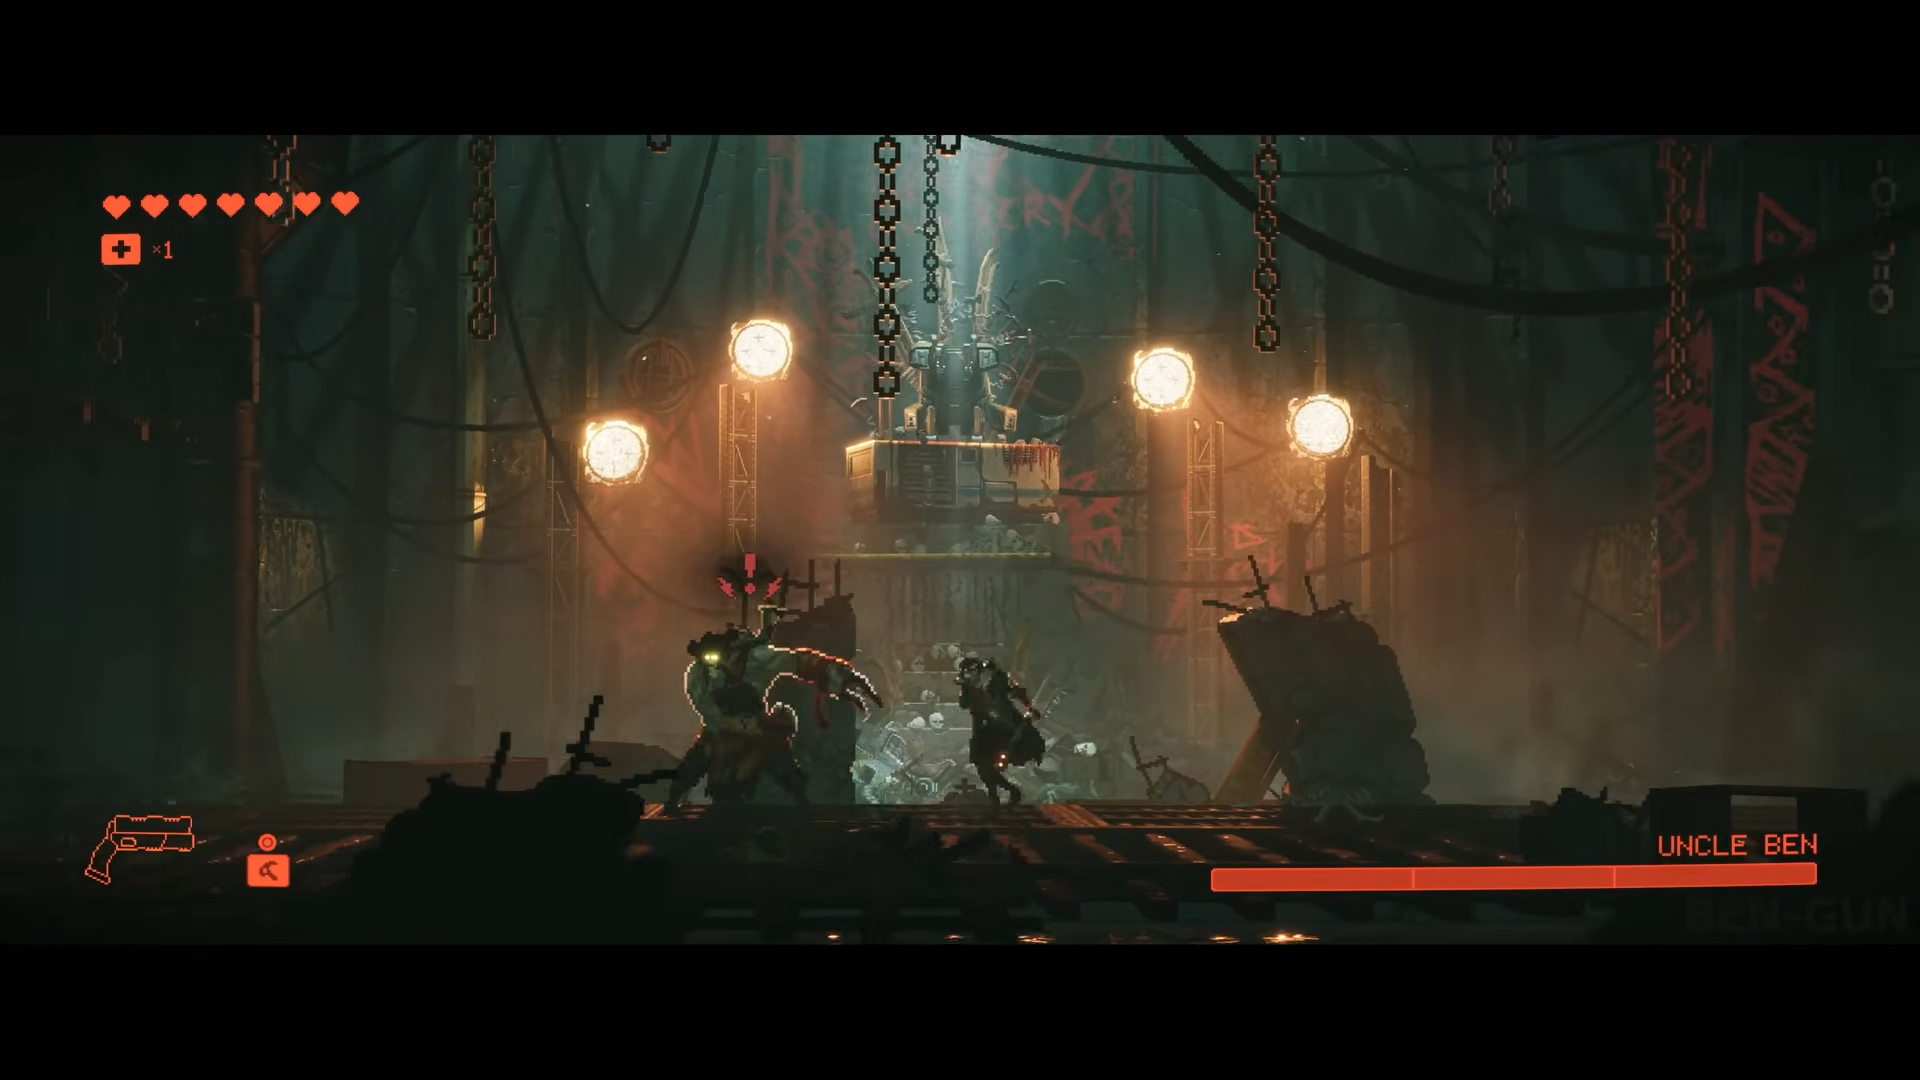
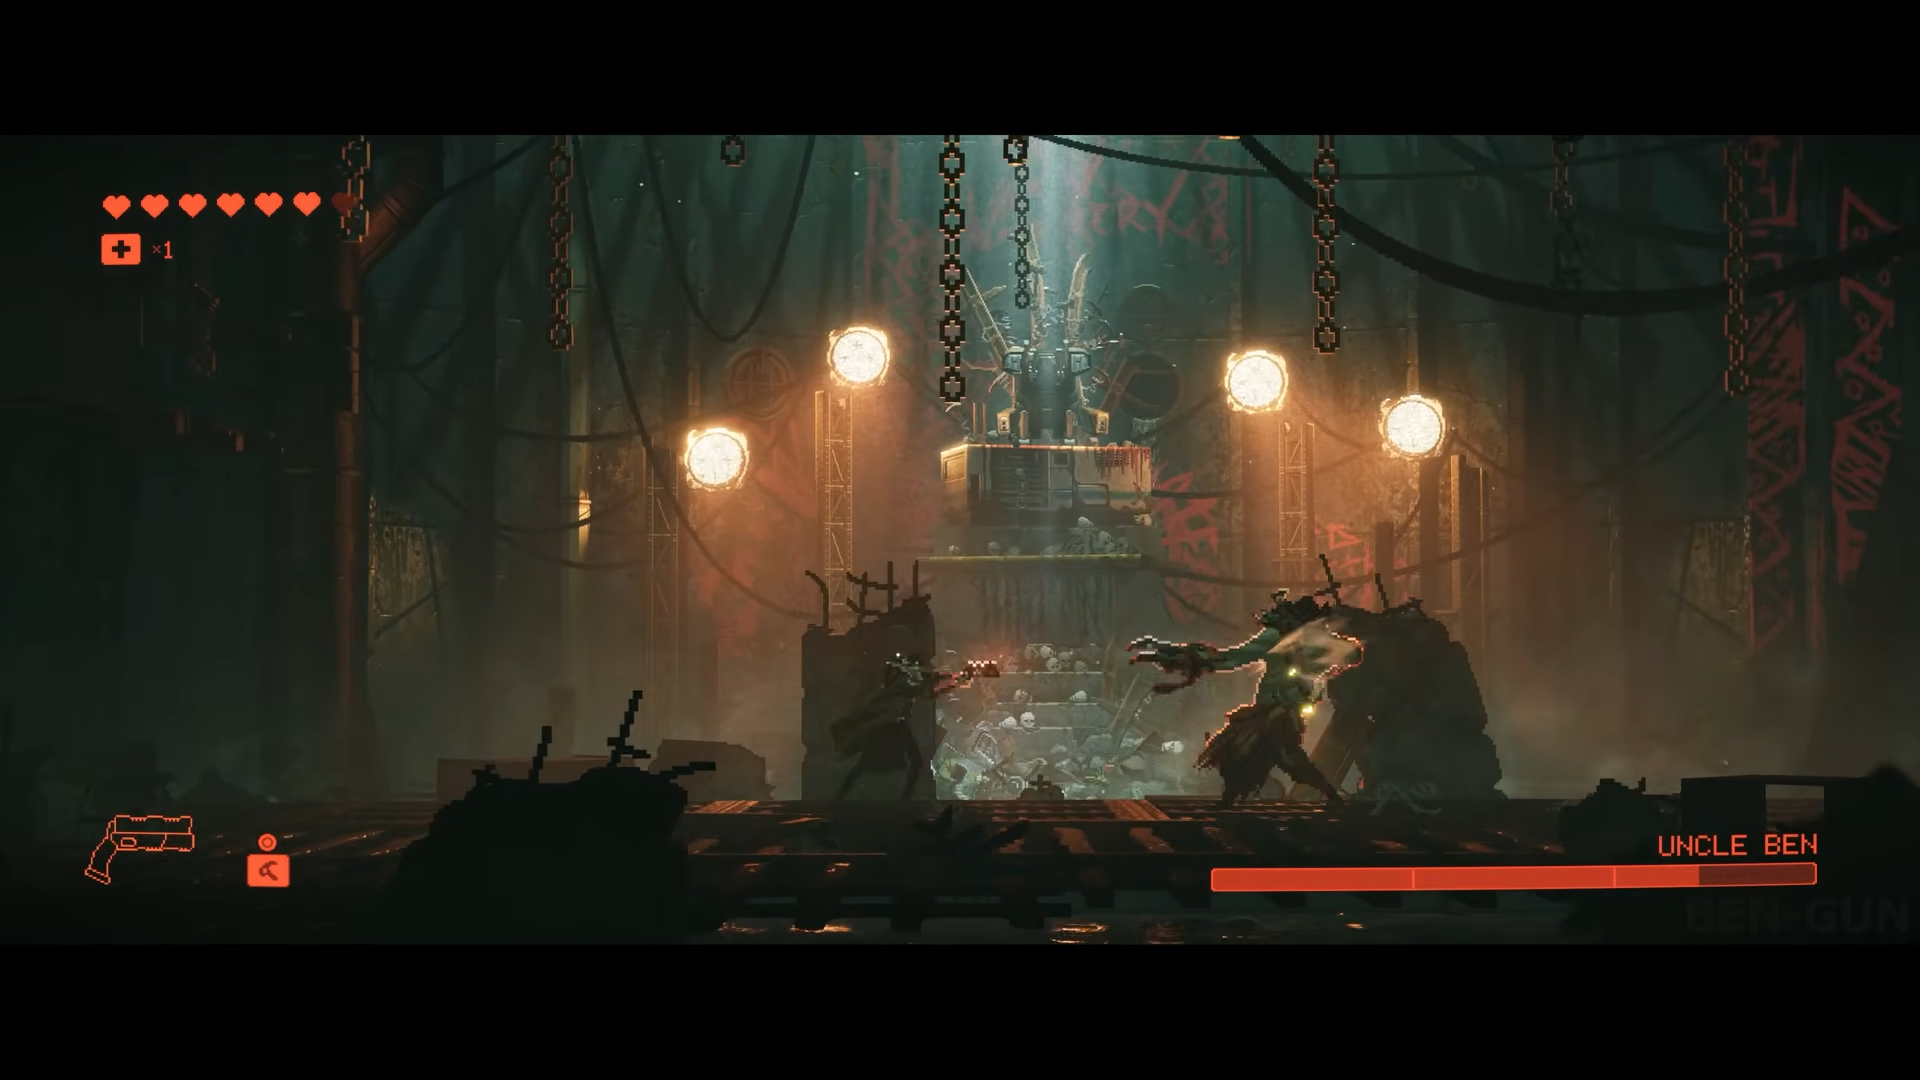
2. Uncle Ben (Termite Lair boss)
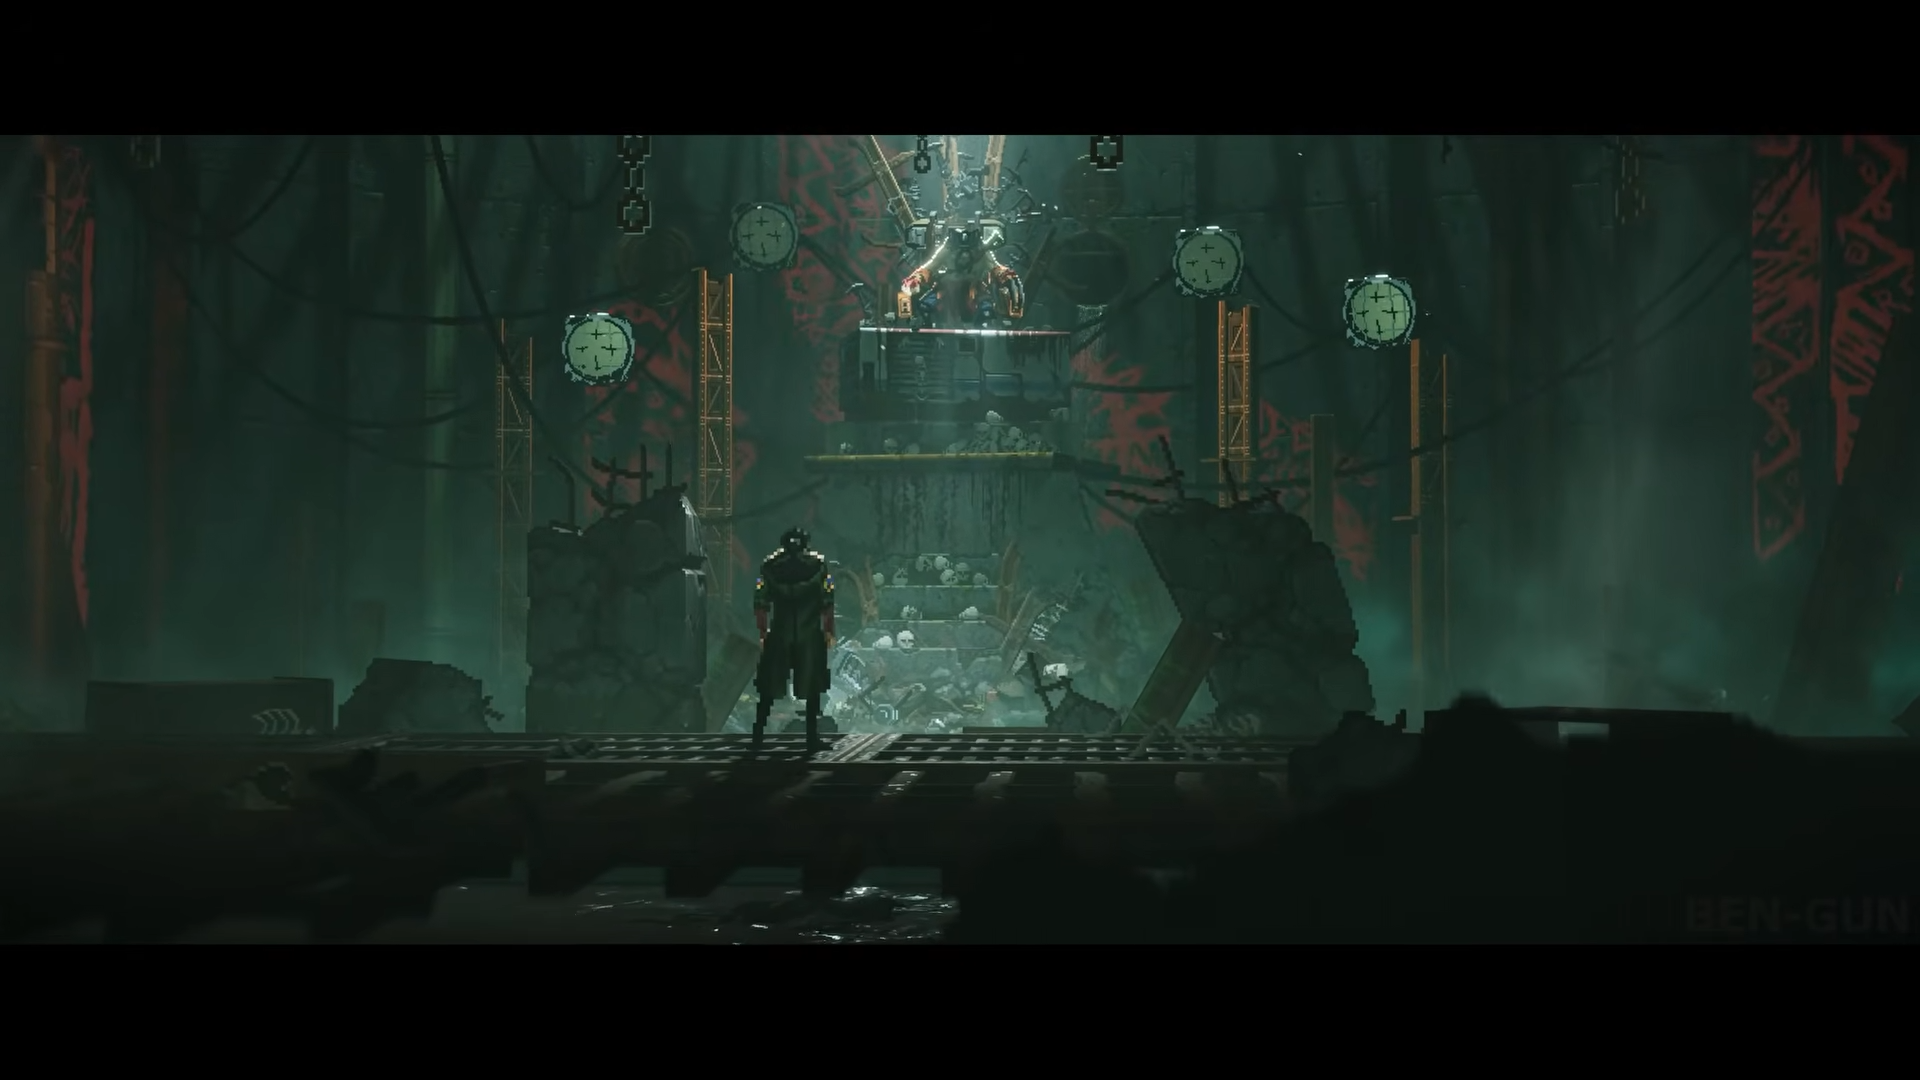
Uncle Ben is the brutal leader of the Termites, encountered at the climax of the Termite Lair sequence in Chapter 3, after failed attempts at negotiation force R.E.A.C.H. into a direct confrontation. This is your first real duel boss, a single powerful enemy with relatively tight punish windows and heavy hits.
Step 1: Go in with survivability upgrades
By the time you reach the Termite Lair one of the most impactful prep steps is to grab at least one health upgrade and any accessible weapon improvements from earlier exploration and side content. Because Uncle Ben can end runs quickly with a handful of clean hits, an extra chunk of health often buys you an entire extra pattern cycle to learn his timing.
Step 2: Stay at mid‑range to bait committal attacks
Instead of sticking to Ben’s face, hover just outside his immediate melee range so he has to commit to lunges, heavy swings, or charging attacks to reach you.
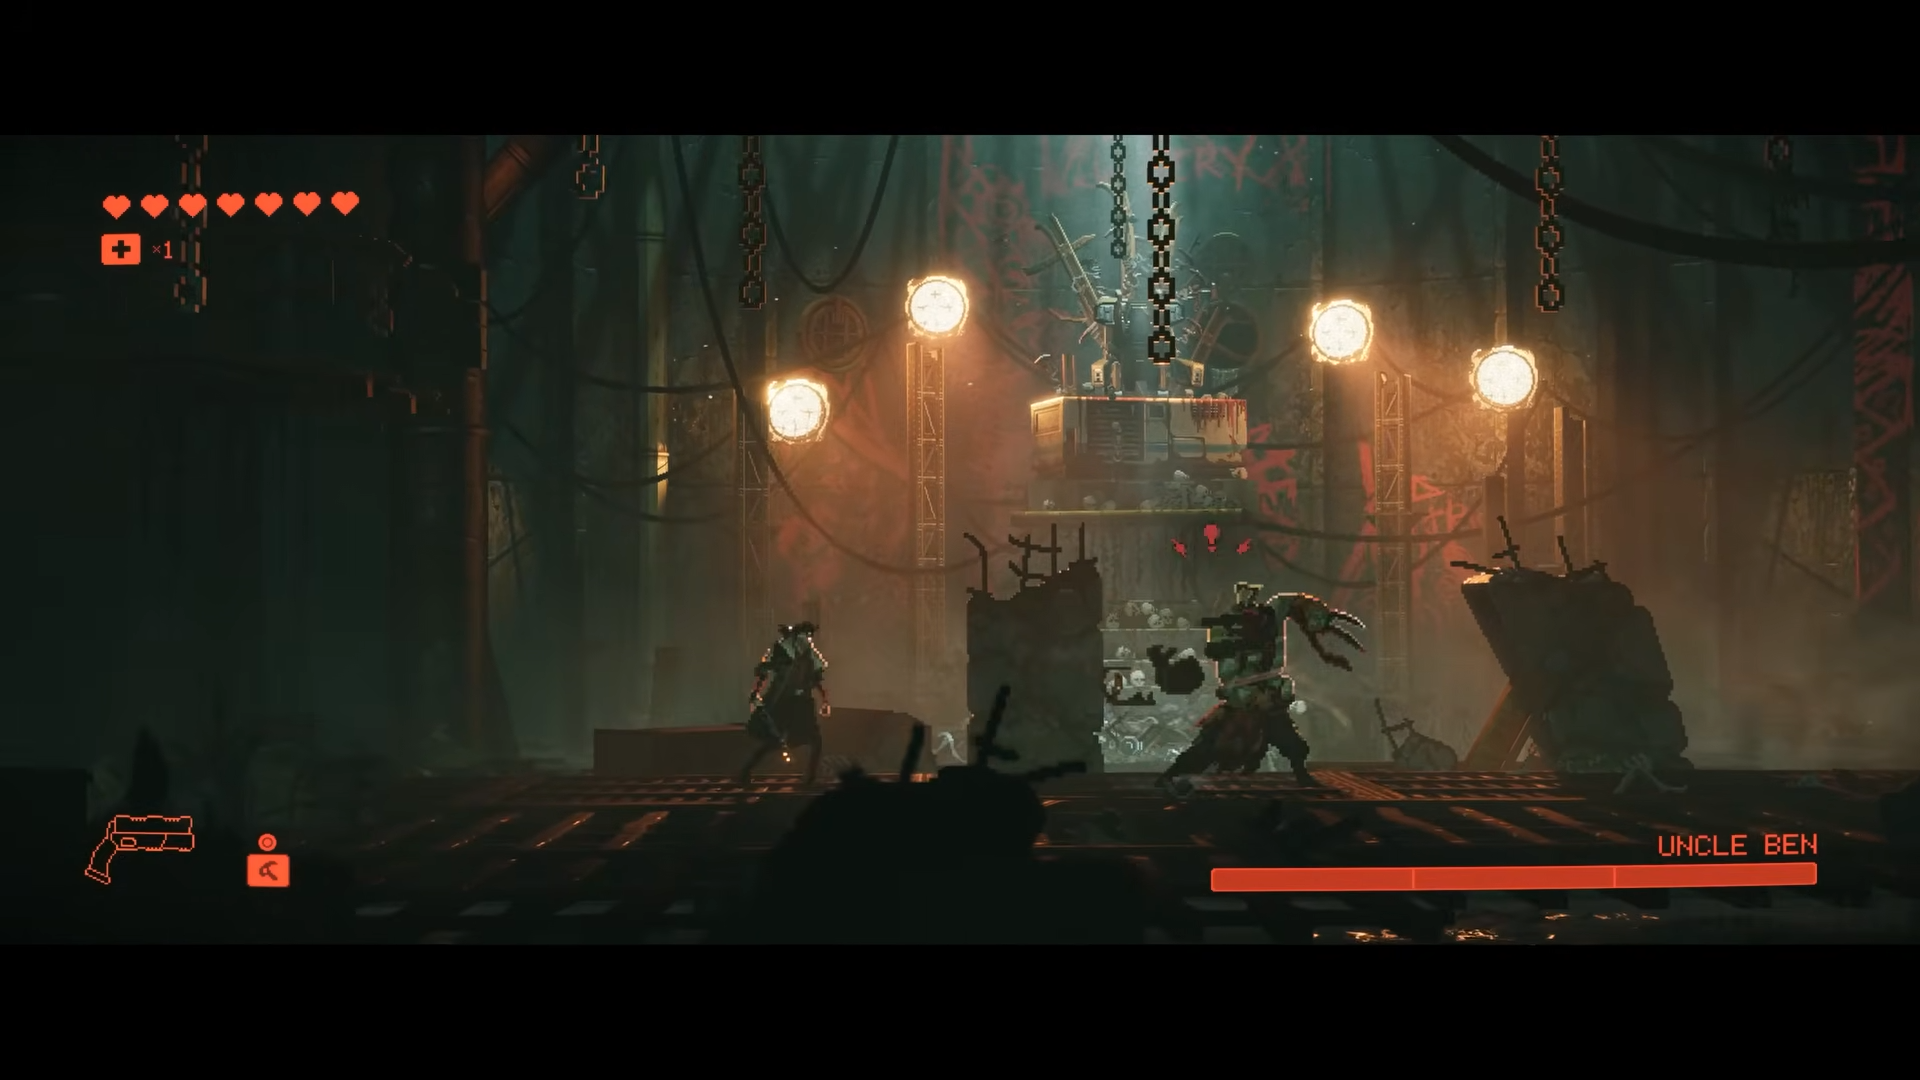
As soon as you see the indicator appear, dodge forward or to the far side of the swing, ending up behind him where you can land a short, safe combo.
Step 3: Use short strings and reset
Two or three hits into a dodge is usually safer here than trying to exhaust your full combo string. Over‑committing risks running into Ben’s next attack start‑up, and because boss health is tuned for multiple pattern cycles, consistency beats greed.
Step 4: Spend kinetic charges at key openings
As you build kinetic energy from melee hits, watch for moments when Uncle Ben is recovering from a big, easily dodged attack; using a charged Huxley shot or special at those moments is far less likely to be interrupted. This is especially valuable if he’s wearing visible armor or exoskeleton pieces tied to the Termites’ mining gear, as higher‑impact hits are better at cracking defenses.
3. Police Drones
The Police Drones encounter is built around sustained ranged pressure. Multiple airborne units force you to move constantly while you look for safe windows to return fire or close the distance.

It’s as much about controlling your movement path as about damage output.
Step 1: Keep moving horizontally and diagonally
Standing still here is almost always a mistake; treat this fight as a side‑scrolling bullet pattern test where you are constantly sliding, dodging, and changing vertical level when possible. Get used to reading projectile spacing and dodge through gaps rather than retreating straight backwards into a corner.
Step 2: Prioritize a single drone at a time
Lock your focus on one drone, ideally the one whose shots are hardest to avoid from your current position, and burn it down before spreading damage across the group. Reducing the number of overlapping firing lines is the fastest way to make the fight feel fair.
Step 3: Use deflects and counters on predictable volleys
Once you recognize a drone’s standard attack pattern, experiment with timing your defensive tool (such as the Huxley deflect shield) to bounce shots back or create a brief safe zone. Even if you’re not consistently reflecting projectiles, the attempt naturally improves your sense of rhythm and keeps you from panic‑rolling.
Step 4: Weave in kinetic shots
Because it’s risky to stand still and aim, think of charged Huxley blasts as opportunistic finishers, not your primary DPS. When a drone dips low or pauses between volleys, fire a charged shot, then immediately roll back into motion to avoid retaliation.
Step 5: Treat the arena edges as danger zones
Drones often punish you when you get pinned at the extreme left or right ends of the arena, where you have fewer escape routes. If you find yourself drifting to a wall, deliberately dodge through incoming fire towards the center again to re‑open your movement options.
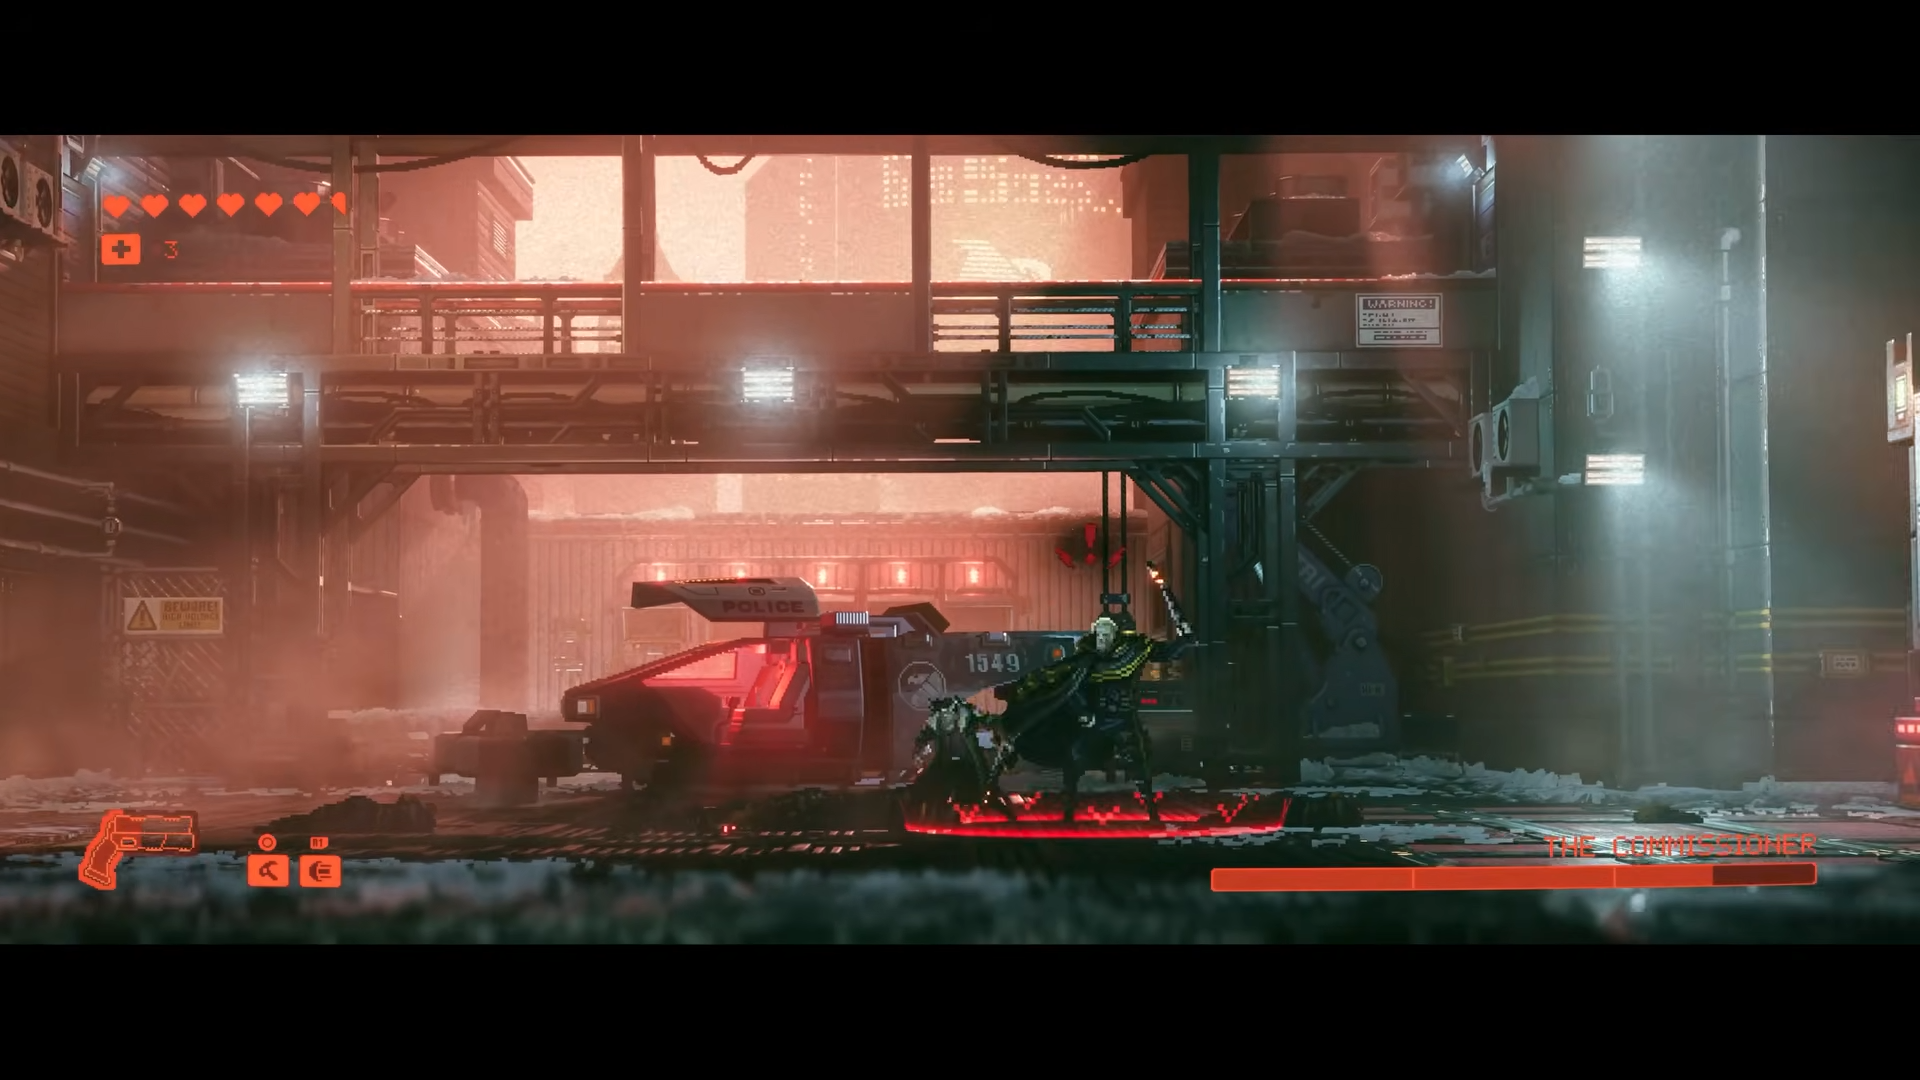
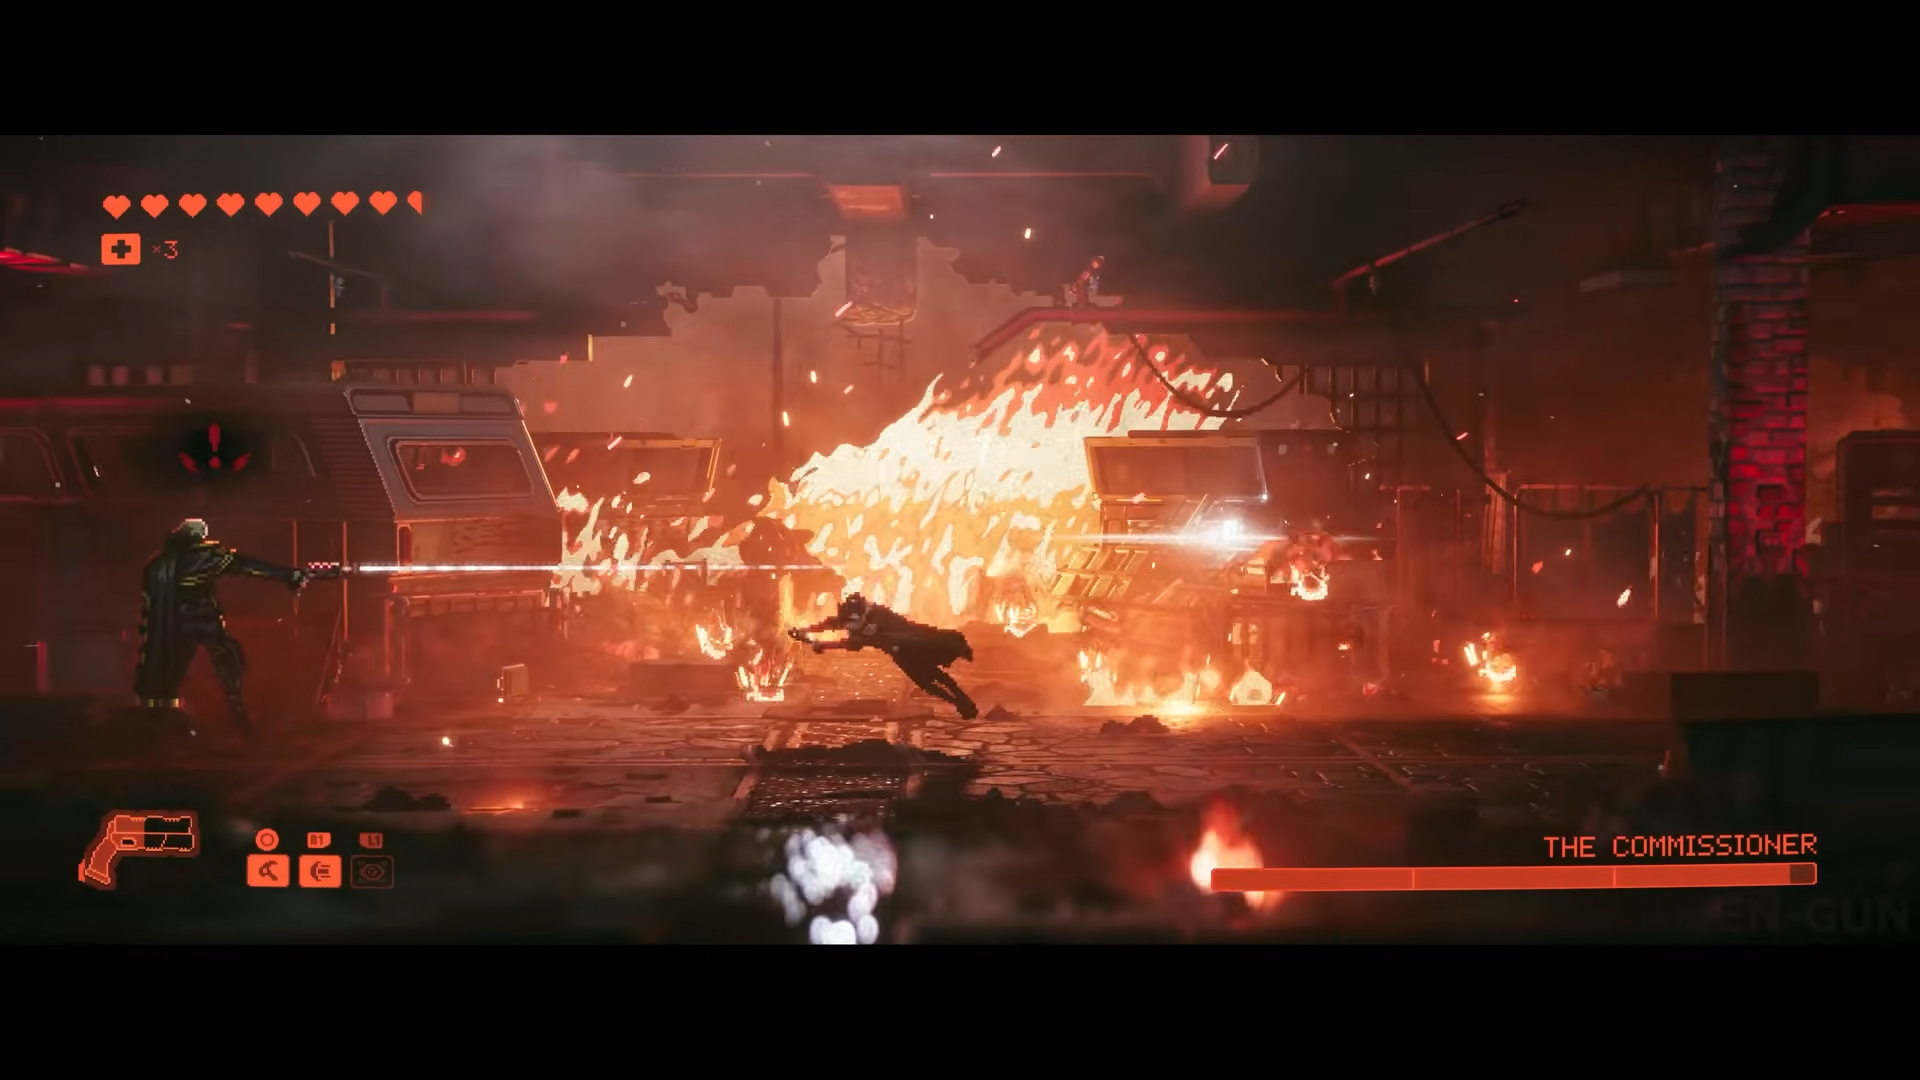
4. The Commissioner (Generator fight)
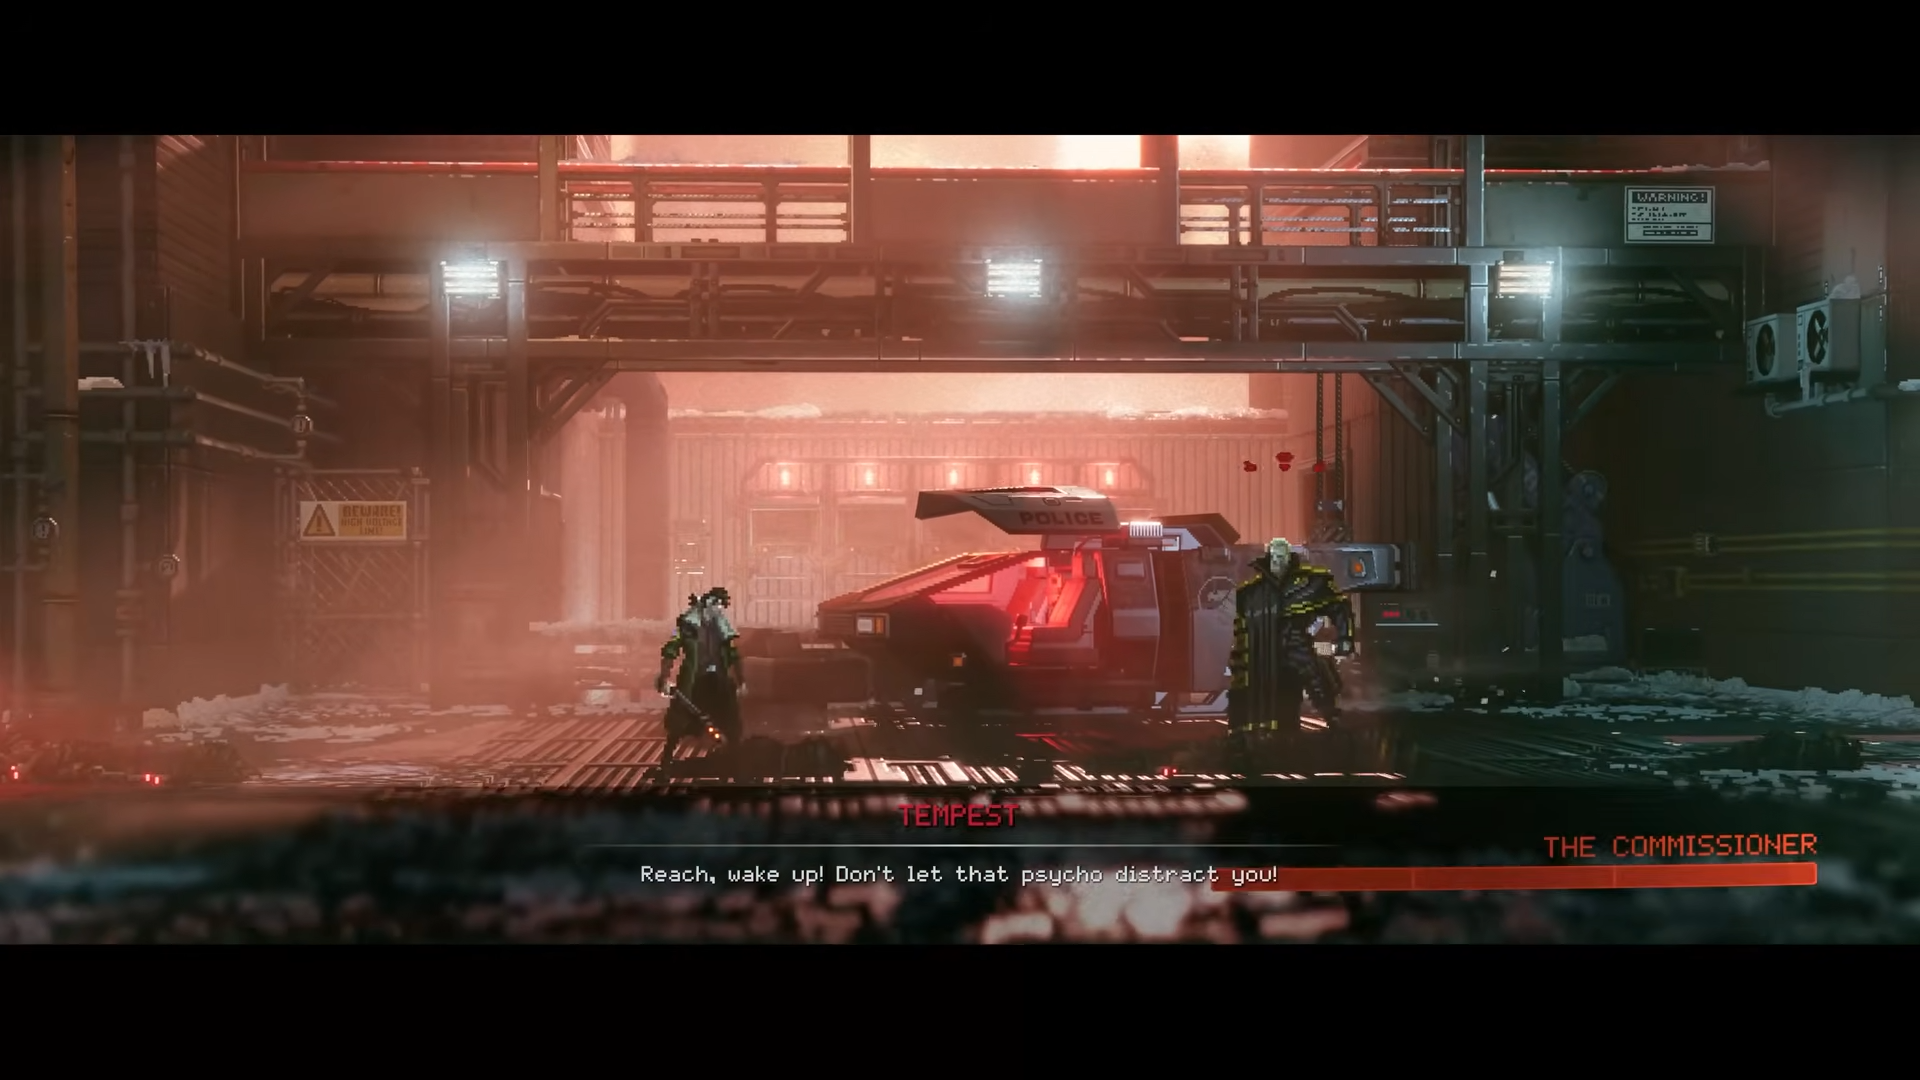
The Commissioner is one of Phoenix‑City’s central villains, and your first confrontation with him ties his presence to environmental hazards like a generator or power system integrated into the arena. This fight tests whether you can divide your attention between a dangerous boss and a lethal stage gimmick.
Step 1: Understand the arena hazard
Before worrying about perfect combos, take a minute to identify what in the arena is connected to the generator: electrified zones, timed pulses, or objects that become dangerous when power flows. Watch a full hazard cycle while playing defensively so you know when and where it’s safe to stand.
Step 2: Fight in safe slices of the arena
Mentally divide the arena into zones that are safe between pulses and those you should only cross briefly. Lure the Commissioner into safe slices before committing to attacks so you don’t have to abandon a combo early to dodge a generator event.
Step 3: Punish recovery after big telegraphed moves
Like Uncle Ben, the Commissioner uses heavy, theatrical attacks meant to feel intimidating, but they leave him open if you dodge correctly.
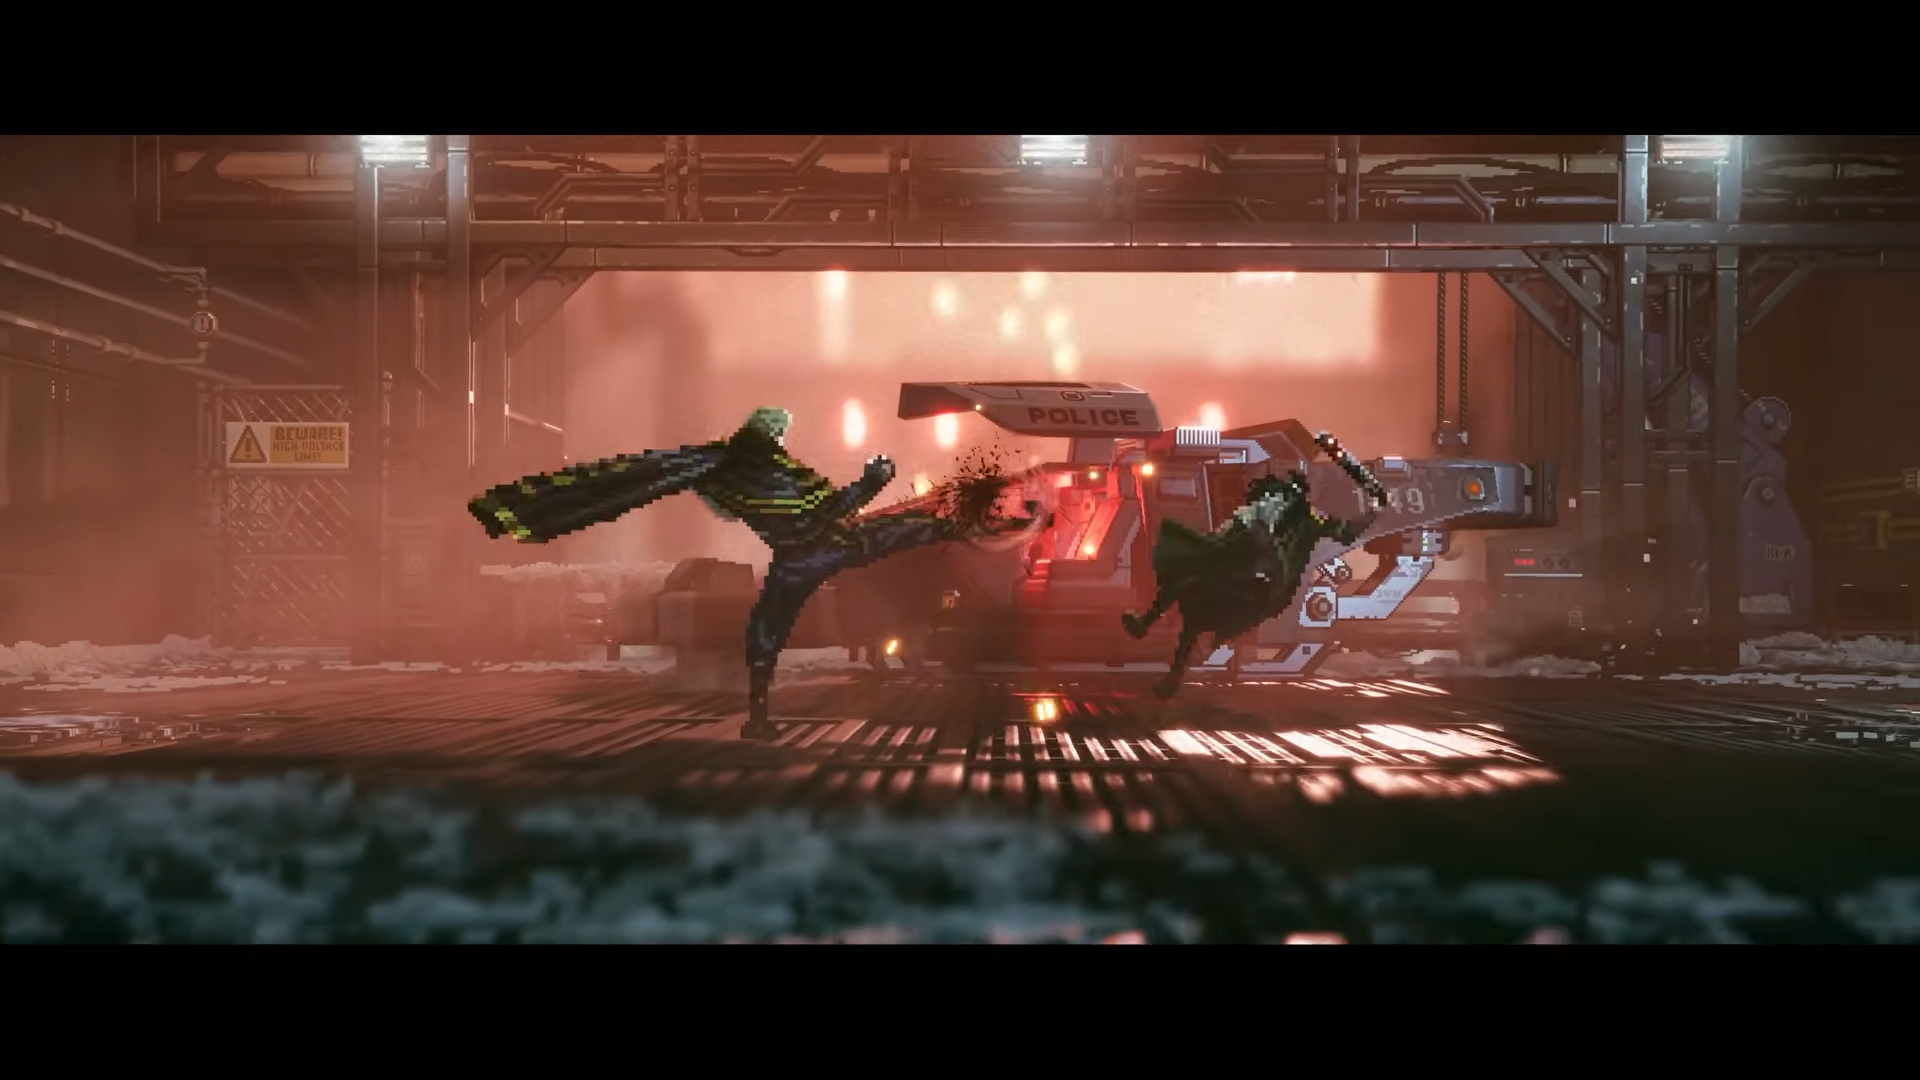
Focus on dodging toward his back or flanks during those moves, then land short strings before backing out as the next hazard cue approaches.
Step 4: Use crowd‑control tools when backup arrives
The fight includes reinforcements – troopers that come before and during the fight with the Commissioner.
So time your shockwave‑style or area‑of‑effect tools to hit them and the Commissioner together instead of burning them on single targets. This keeps you from being slowly chipped down while focusing on the main threat.
Step 5: Treat this fight as reconnaissance for the rematch
The Generator version of the Commissioner is mechanically simpler than his final confrontation, so use this opportunity to learn his baseline patterns, wind‑ups, and how he behaves near arena hazards.
That knowledge will pay off when the rematch removes some of the training wheels later.
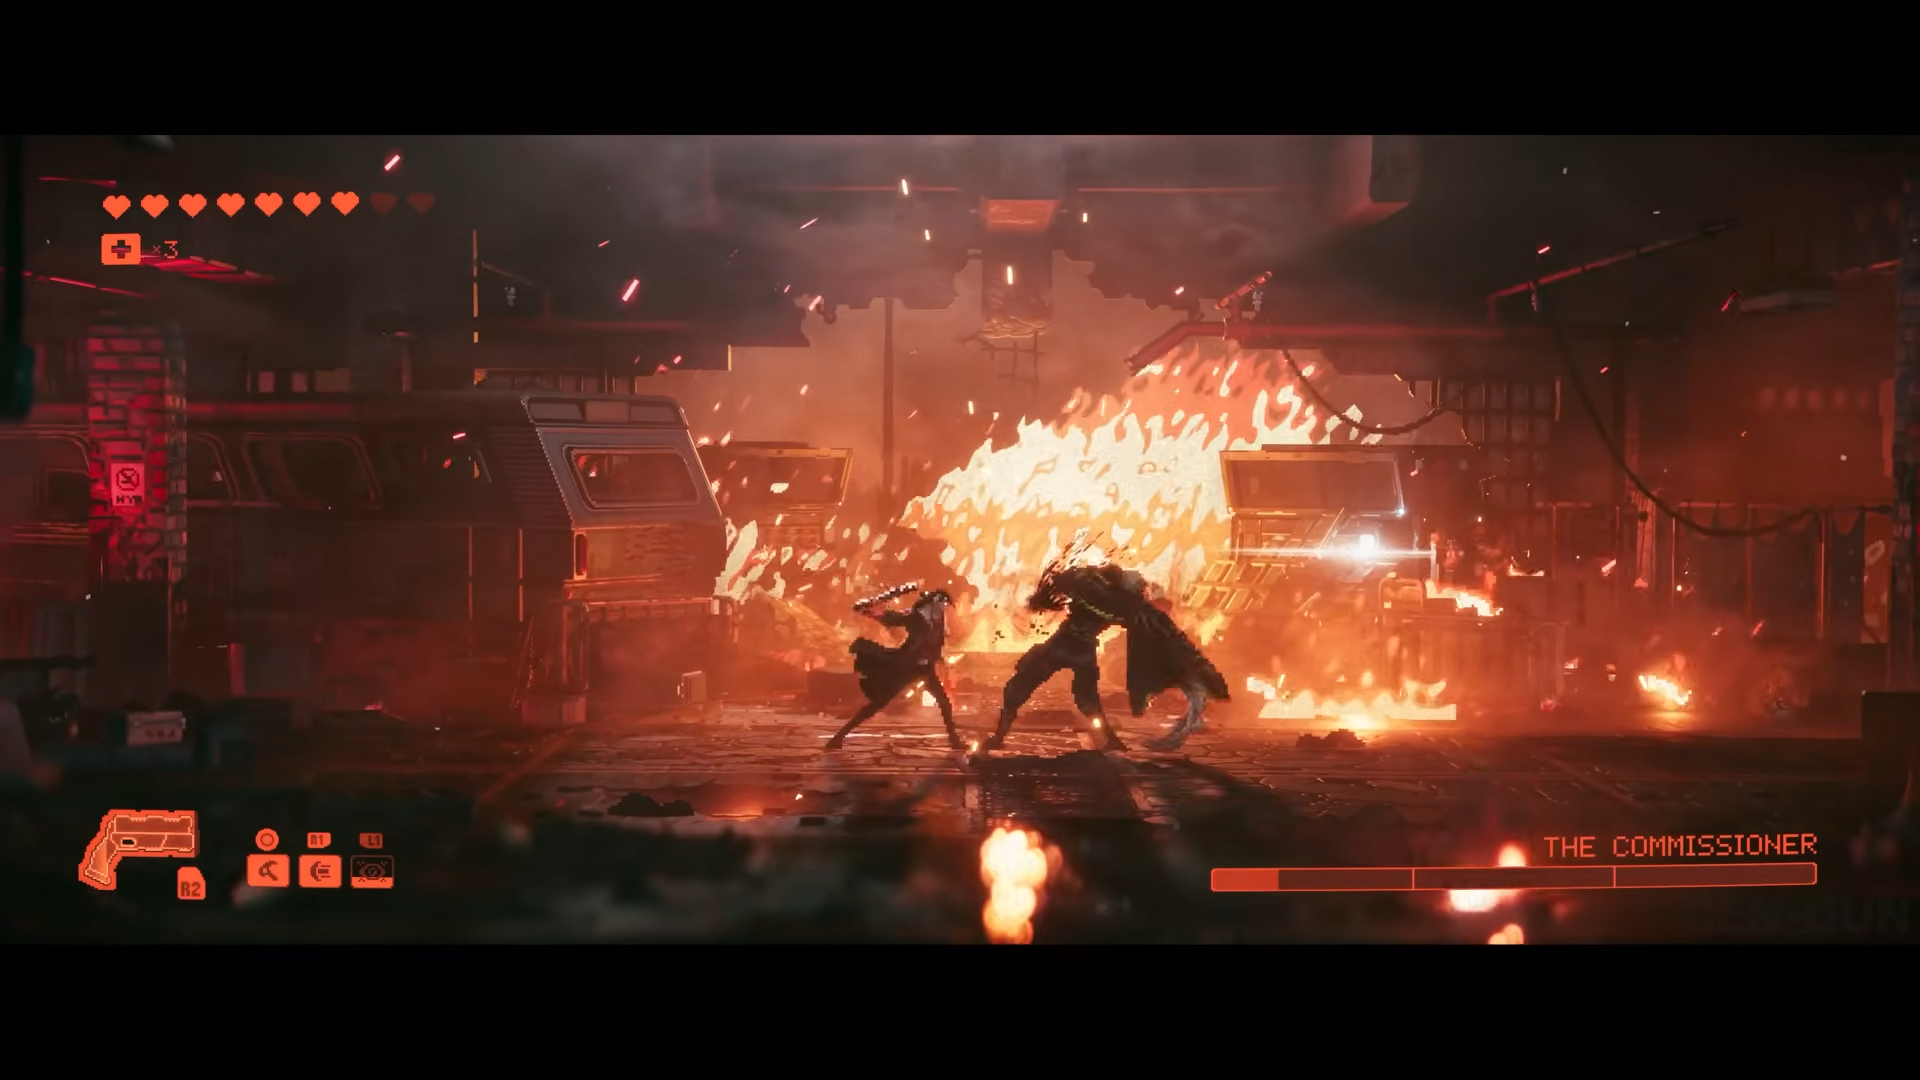
5. The Commissioner – final fight
The second Commissioner fight is where the game expects you to fully understand its combat language: multi‑phase, harder‑hitting attacks, and a mix of personal aggression plus occasional reinforcements. By this point you should have more upgrades and a deeper toolkit, and this encounter demands that you use all of it.
Step 1: Learn where phases change
Watch for clear visual or behavioral shifts: increased aggression, new moves, or the Commissioner calling in more troops usually mark phase transitions.
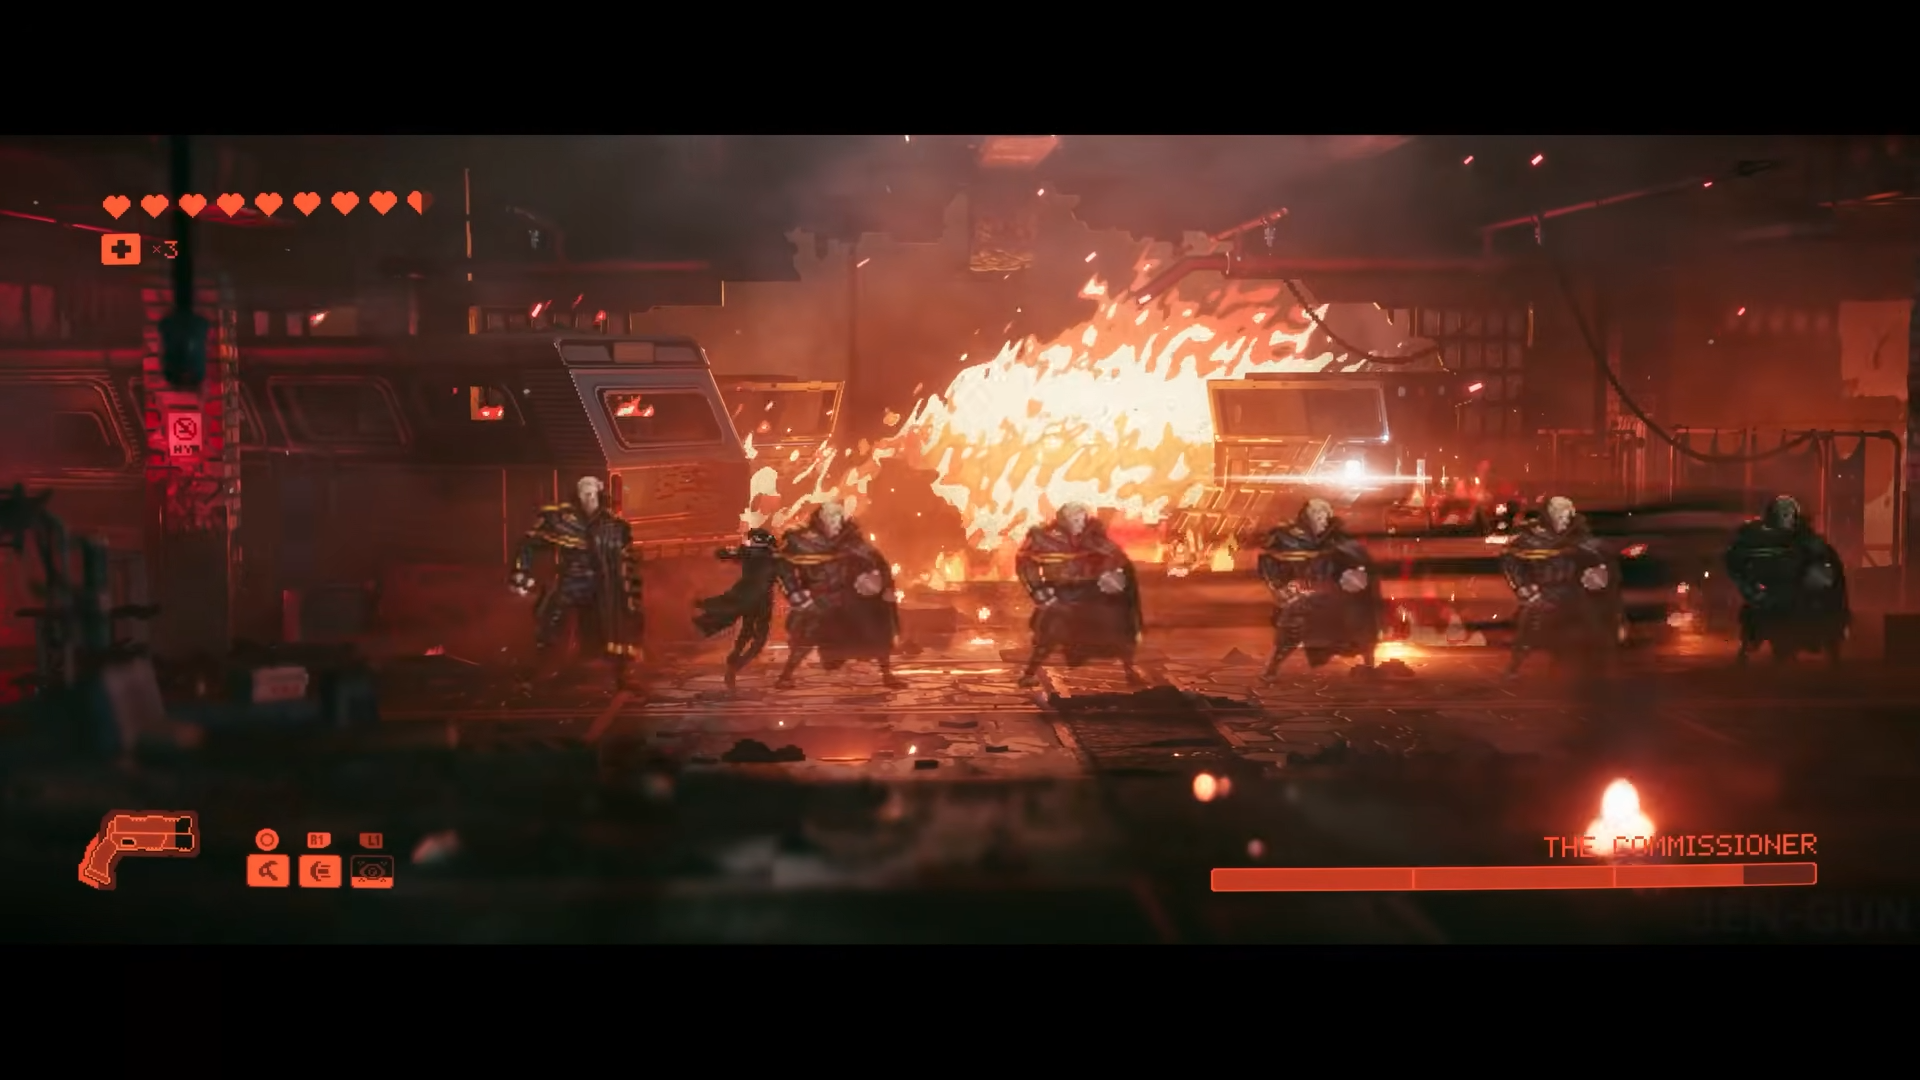
Expect a brief “free damage” window right after he recovers from a phase‑change animation; exploit it, but then assume his pattern has changed and go back on defense to scout.
Step 2: Use perfect‑timed dodges and counters to regain momentum
Simply rolling away from everything will eventually get you trapped or chipped to death; practice timing dodges at the last safe moment to trigger slow‑motion or extended counter windows when the system allows.
Then convert those windows into high‑impact strings or executions instead of just one hit.
Step 3: Save overdrive‑style abilities for clutch moments
If you unlock any temporary overdrive or heightened‑damage modes, save them for the most dangerous parts of the fight. Triggering these tools when the Commissioner is already nearly staggered or cornered helps you close out the battle before a mistake costs you the run.
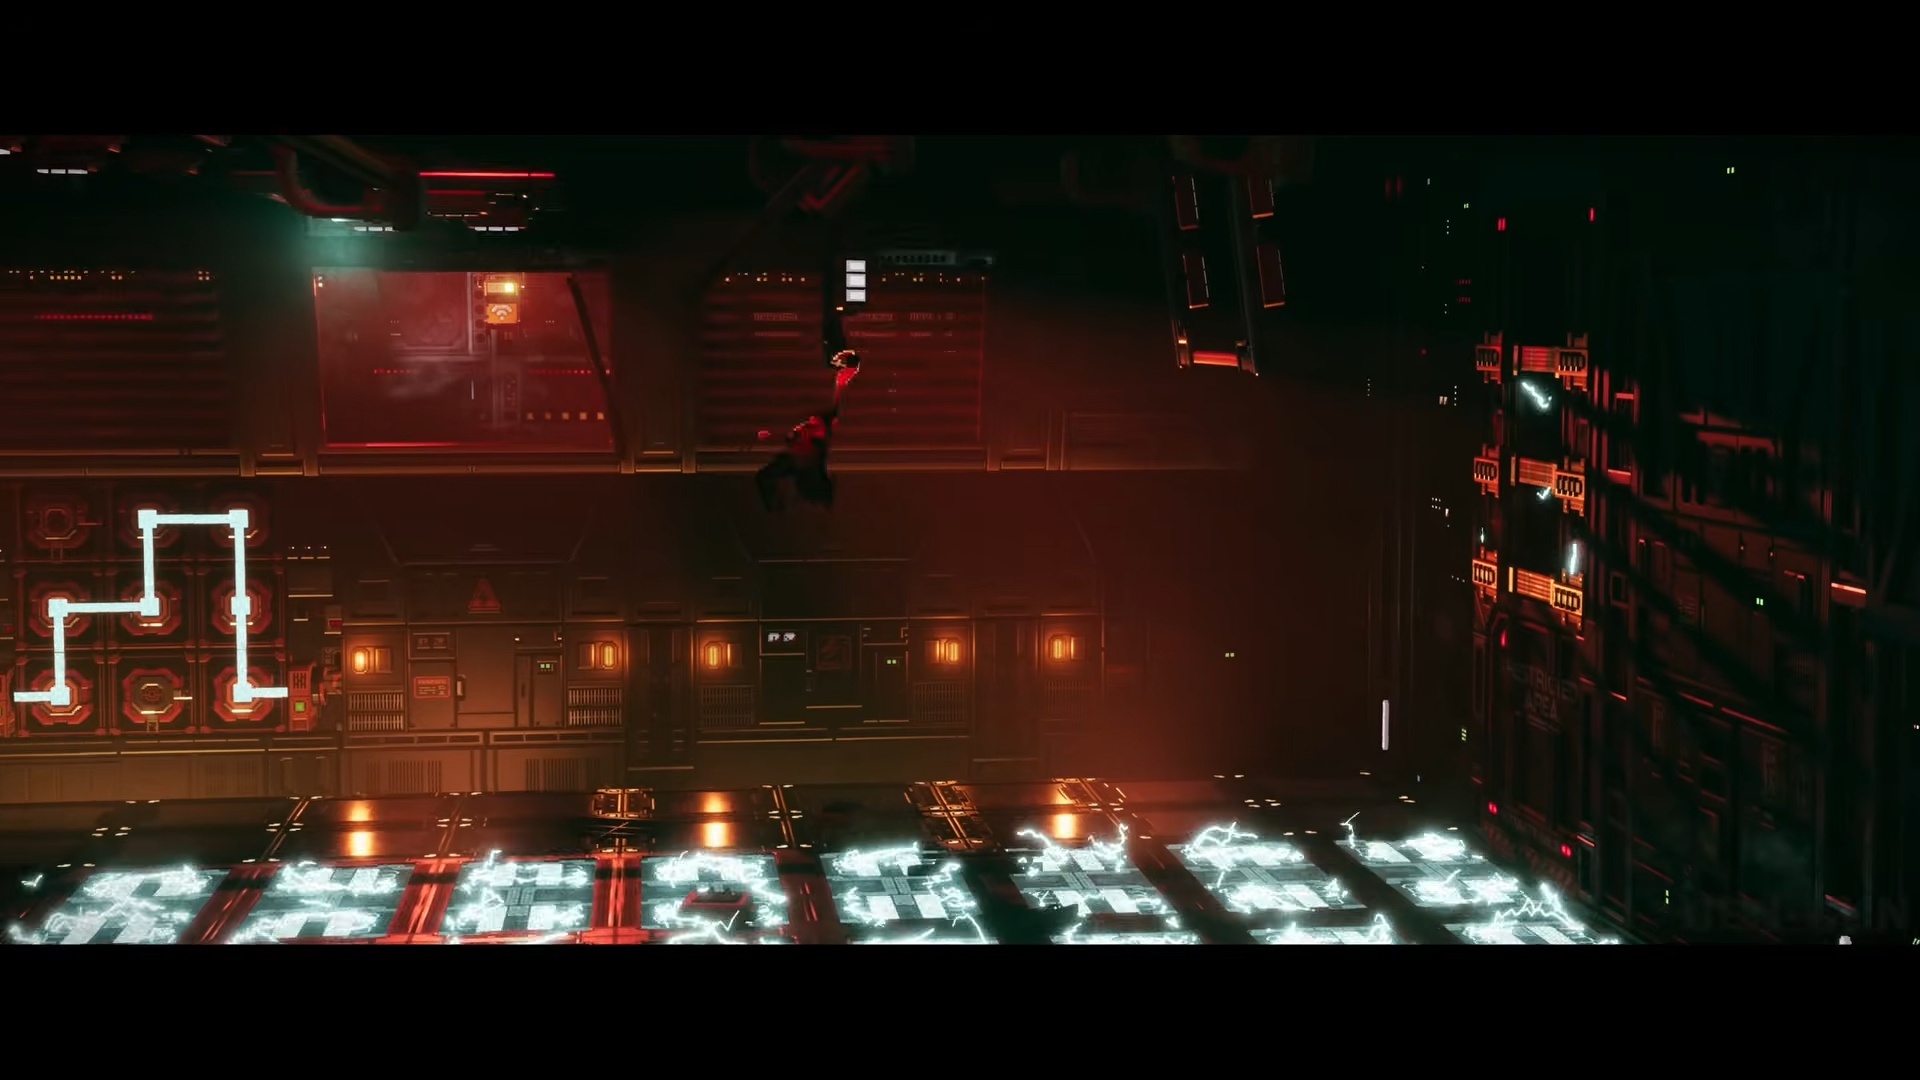
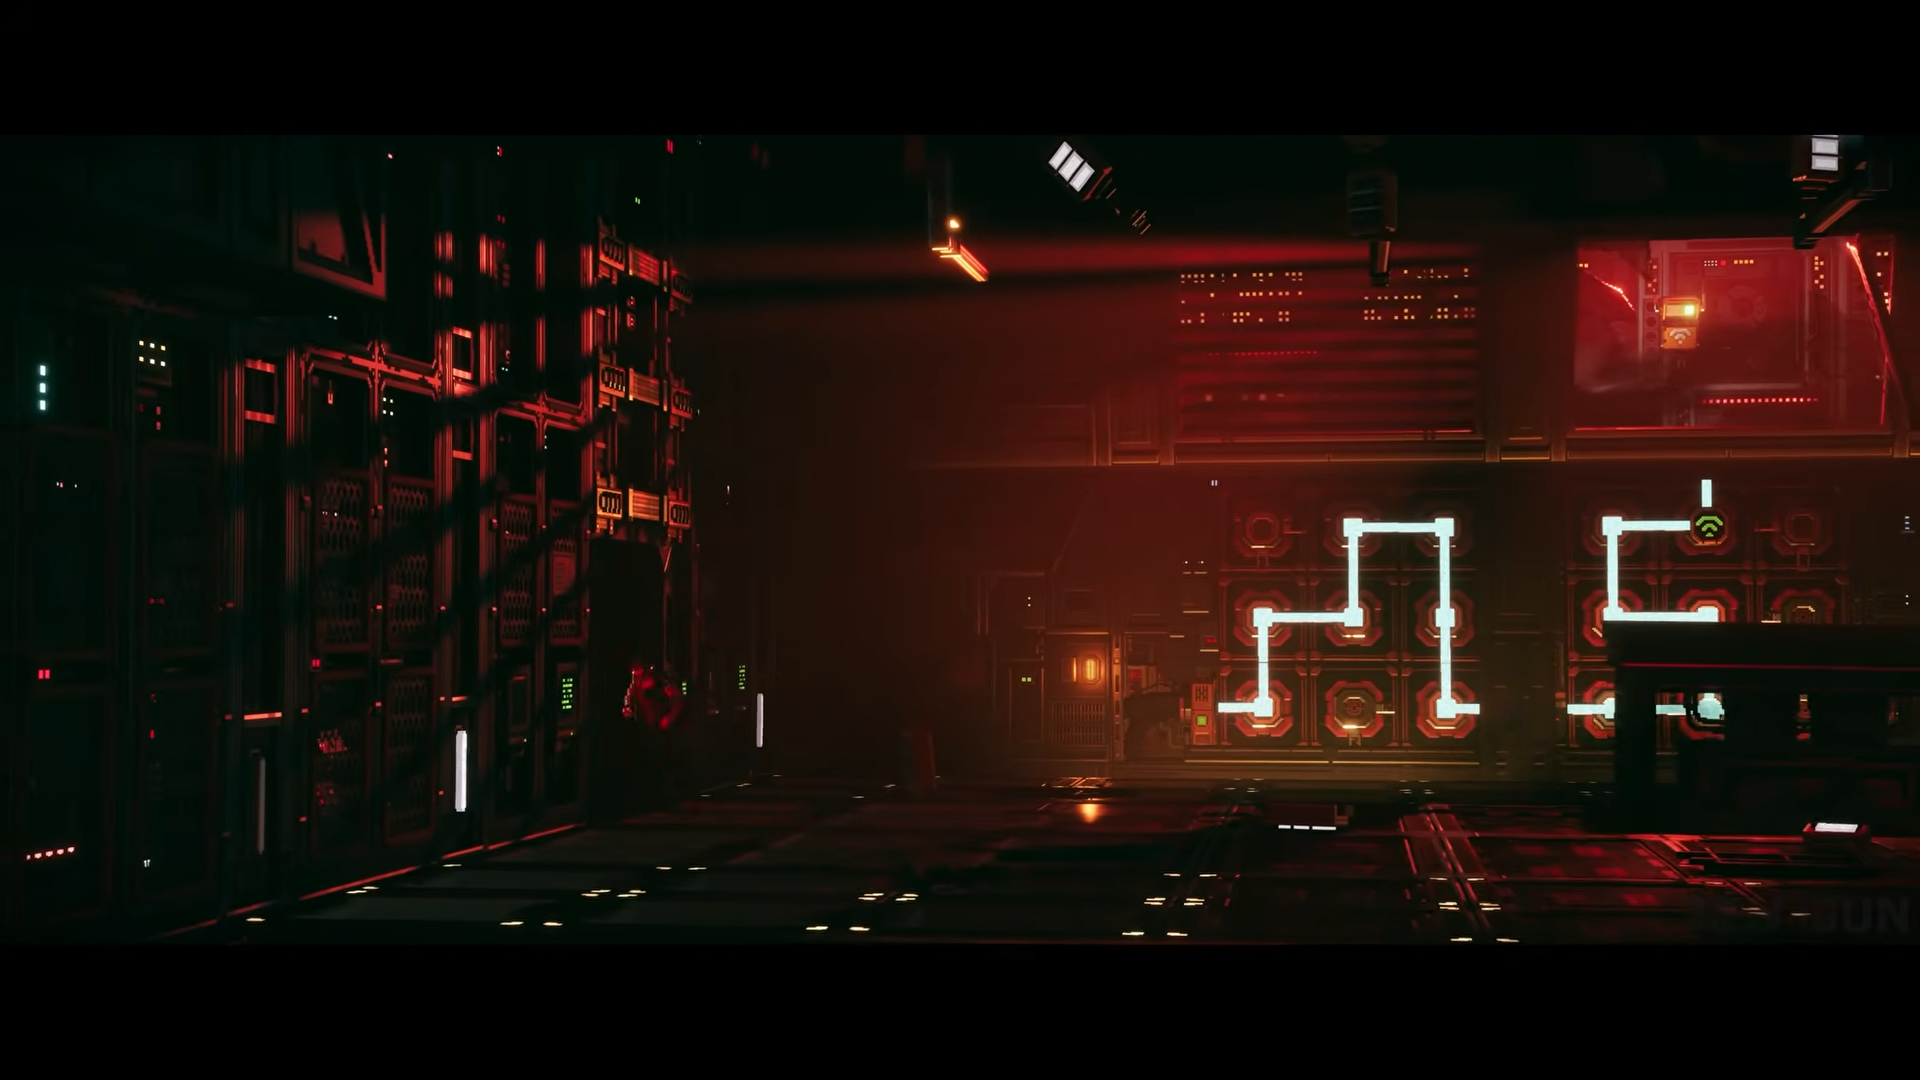
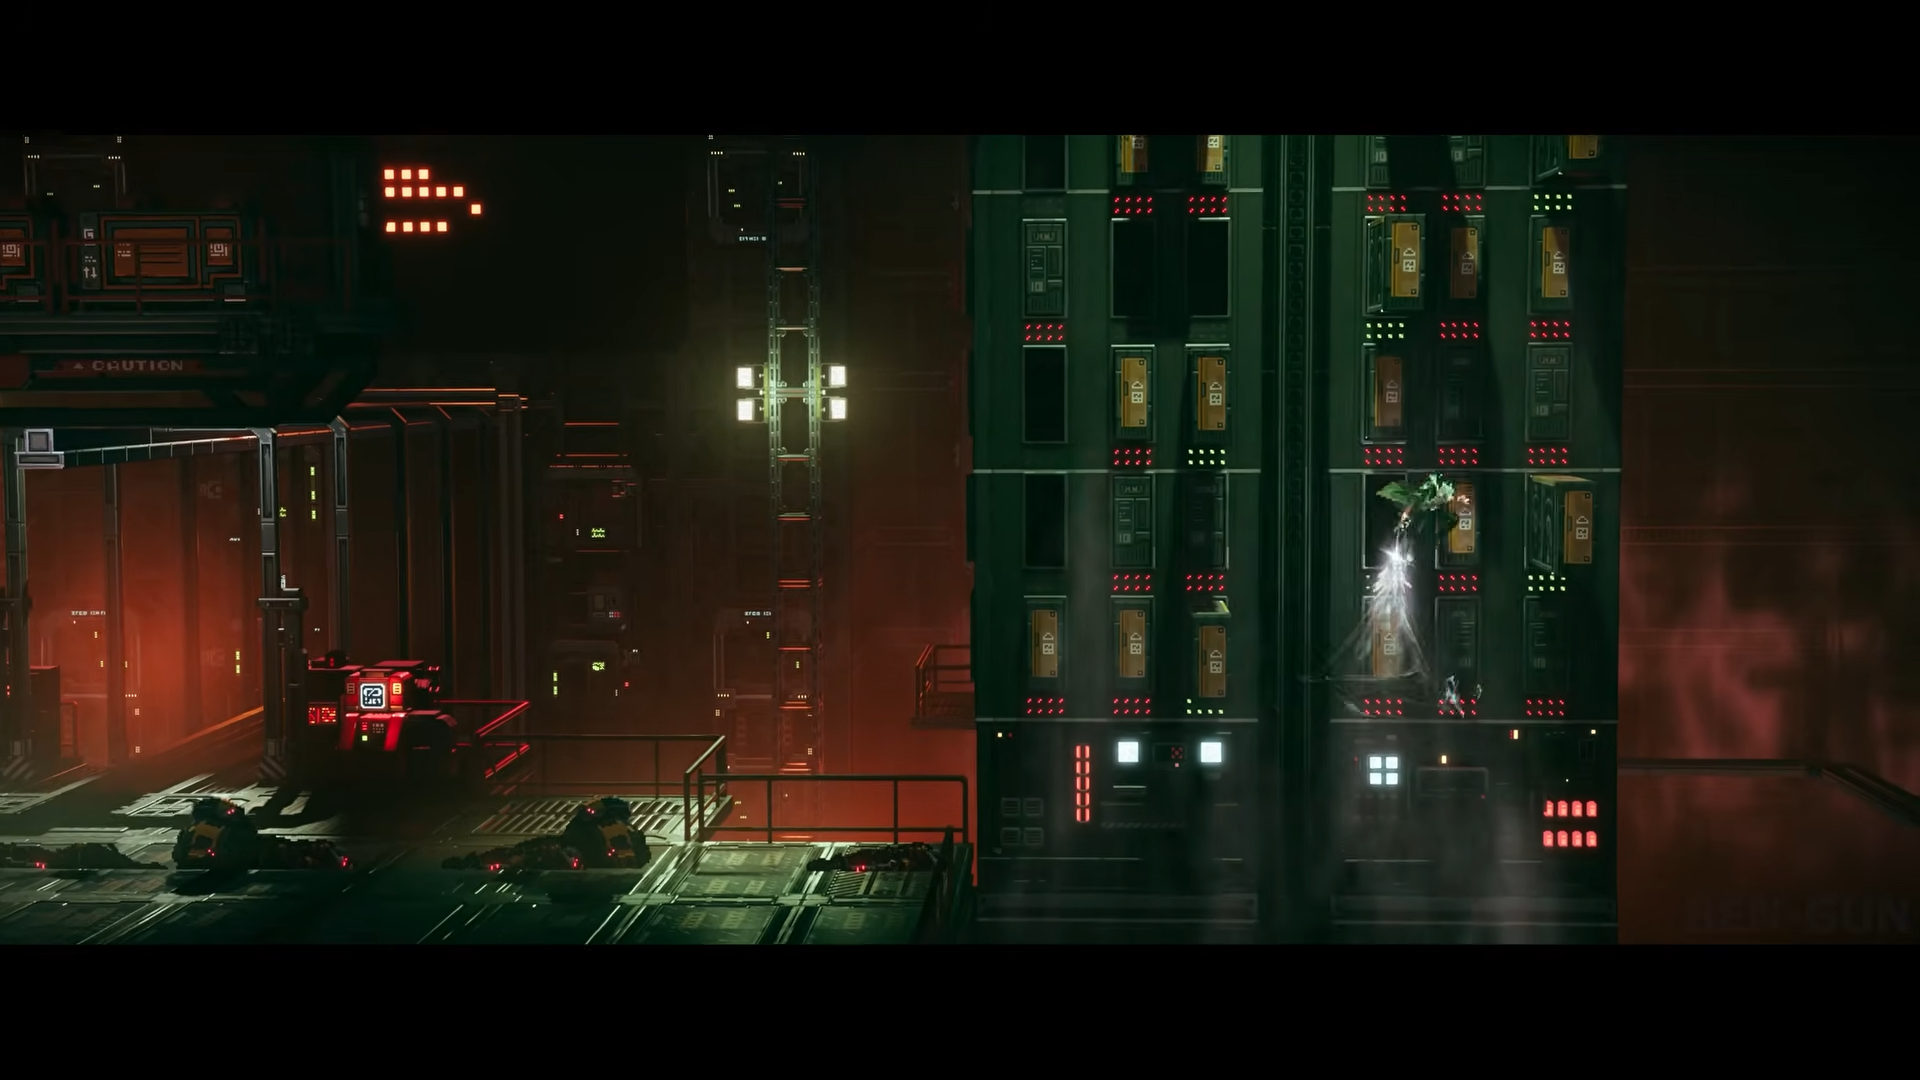
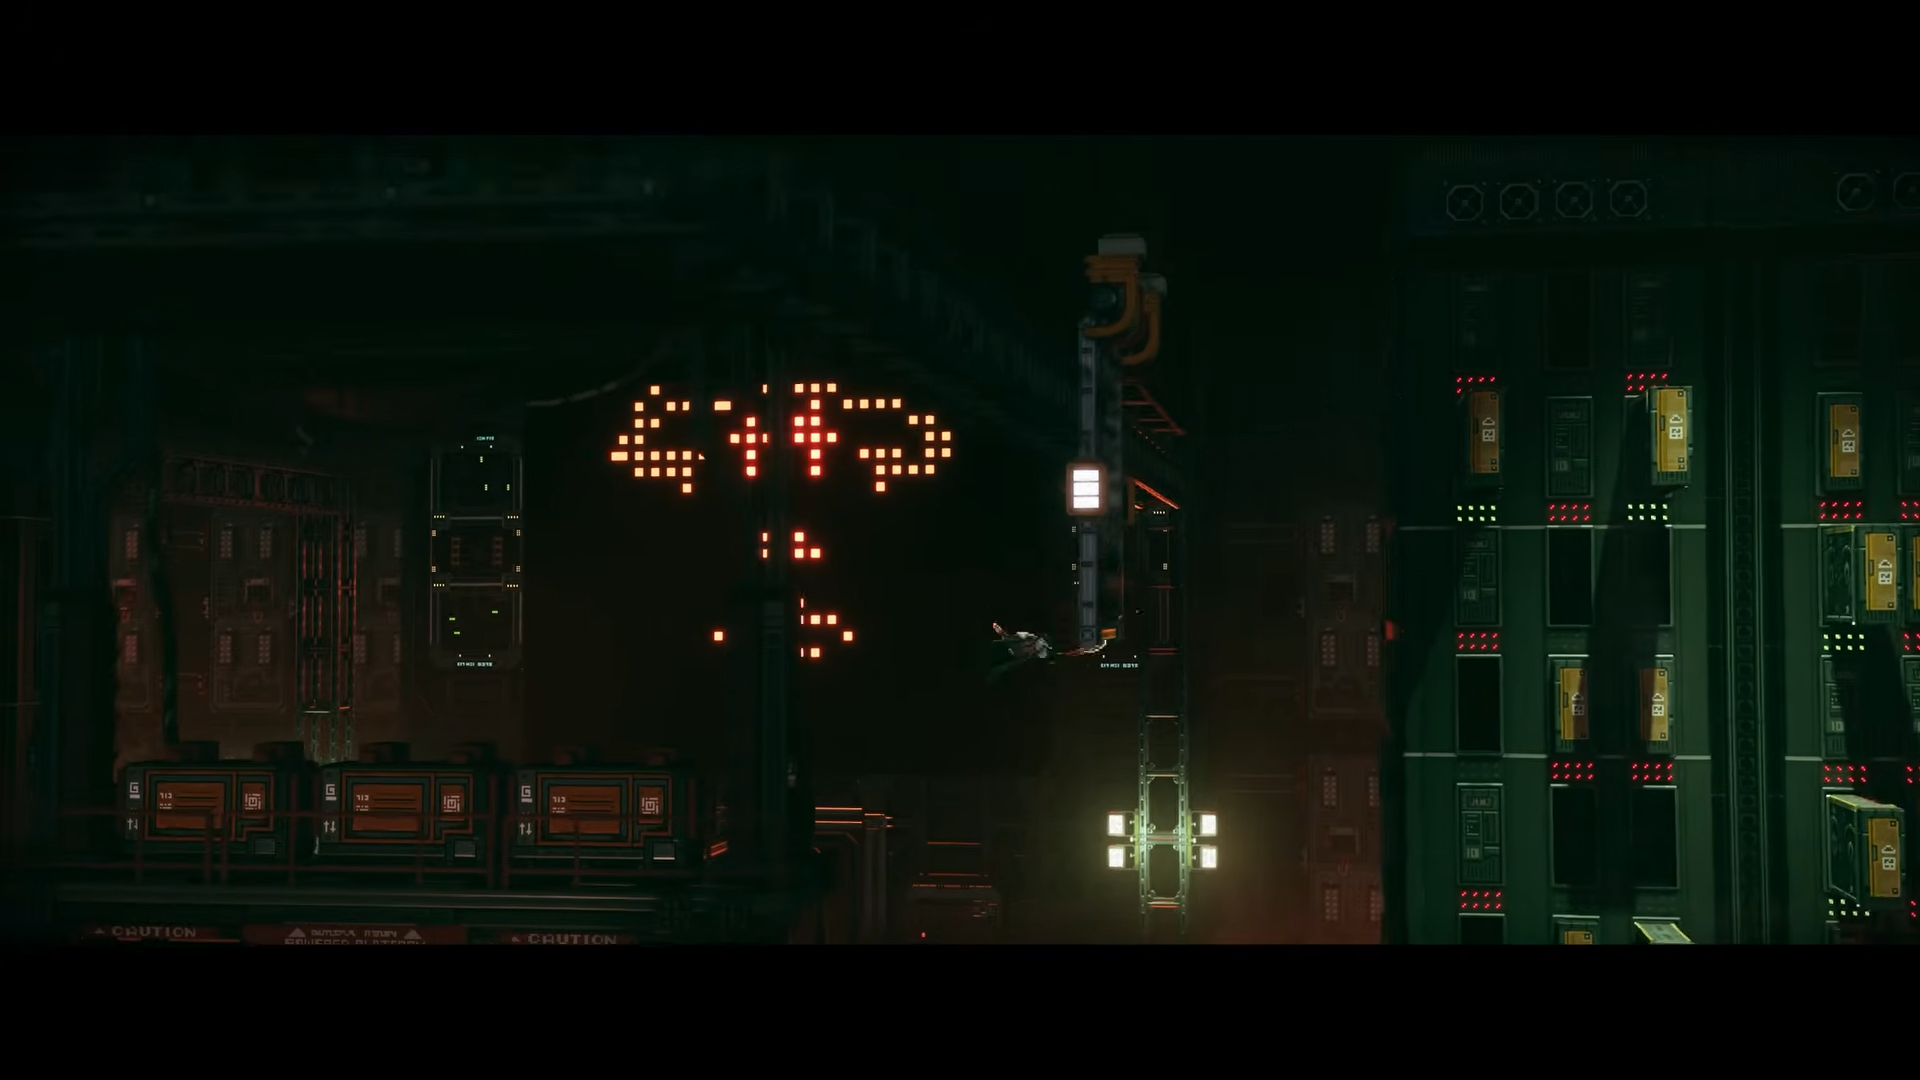
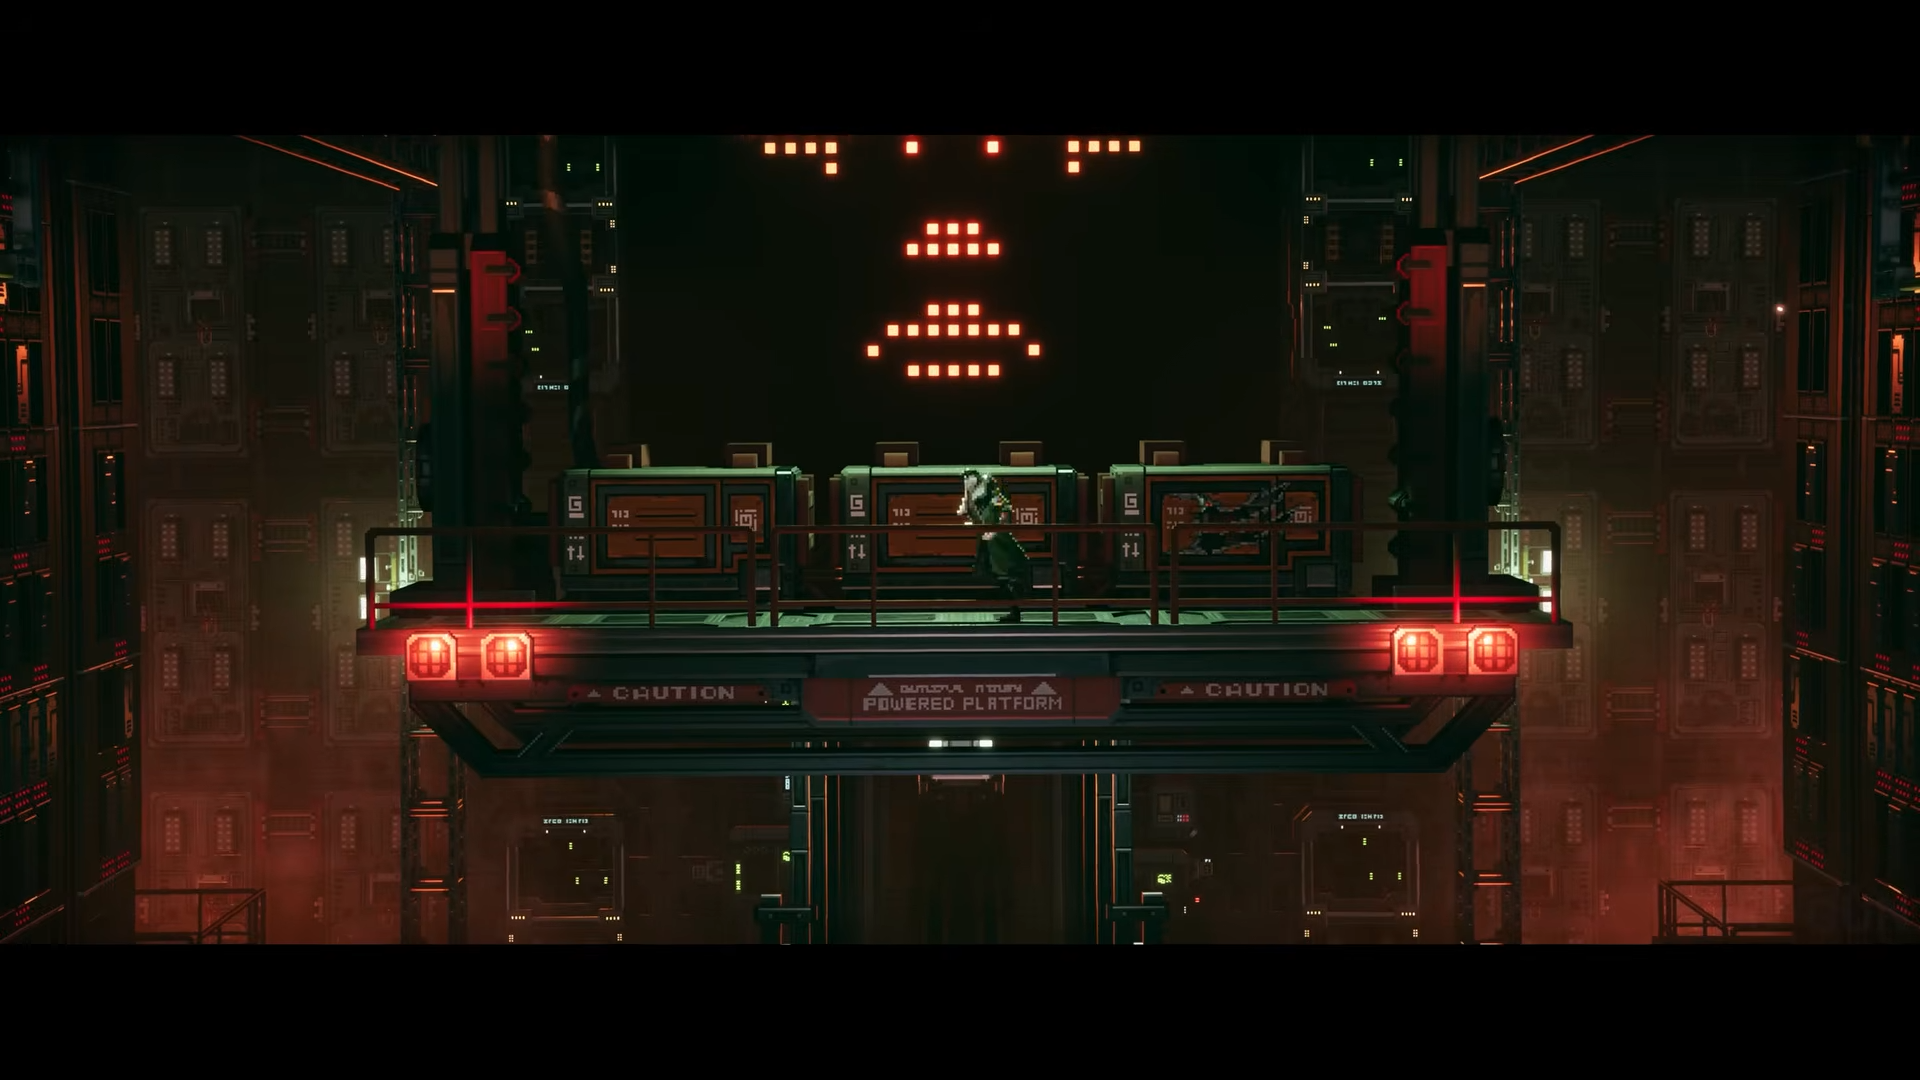
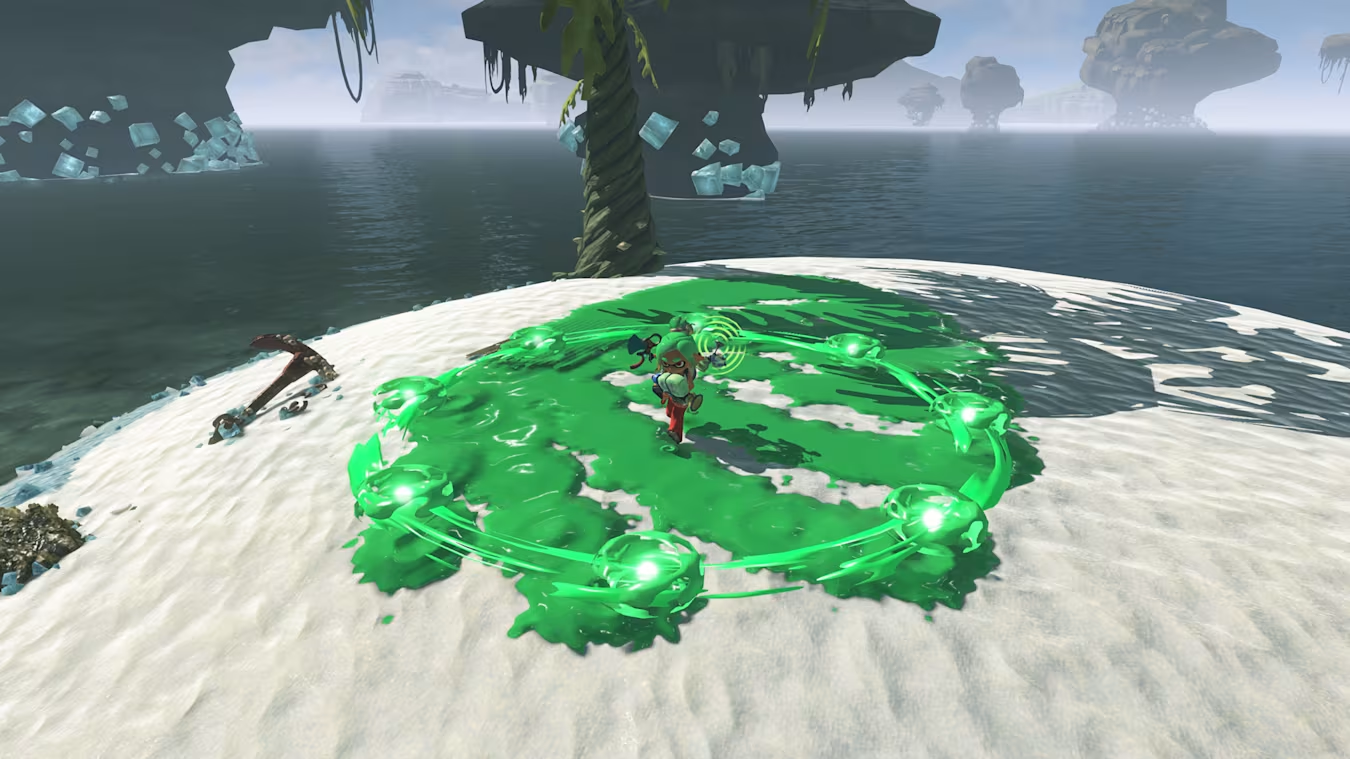
6. The Matriarch
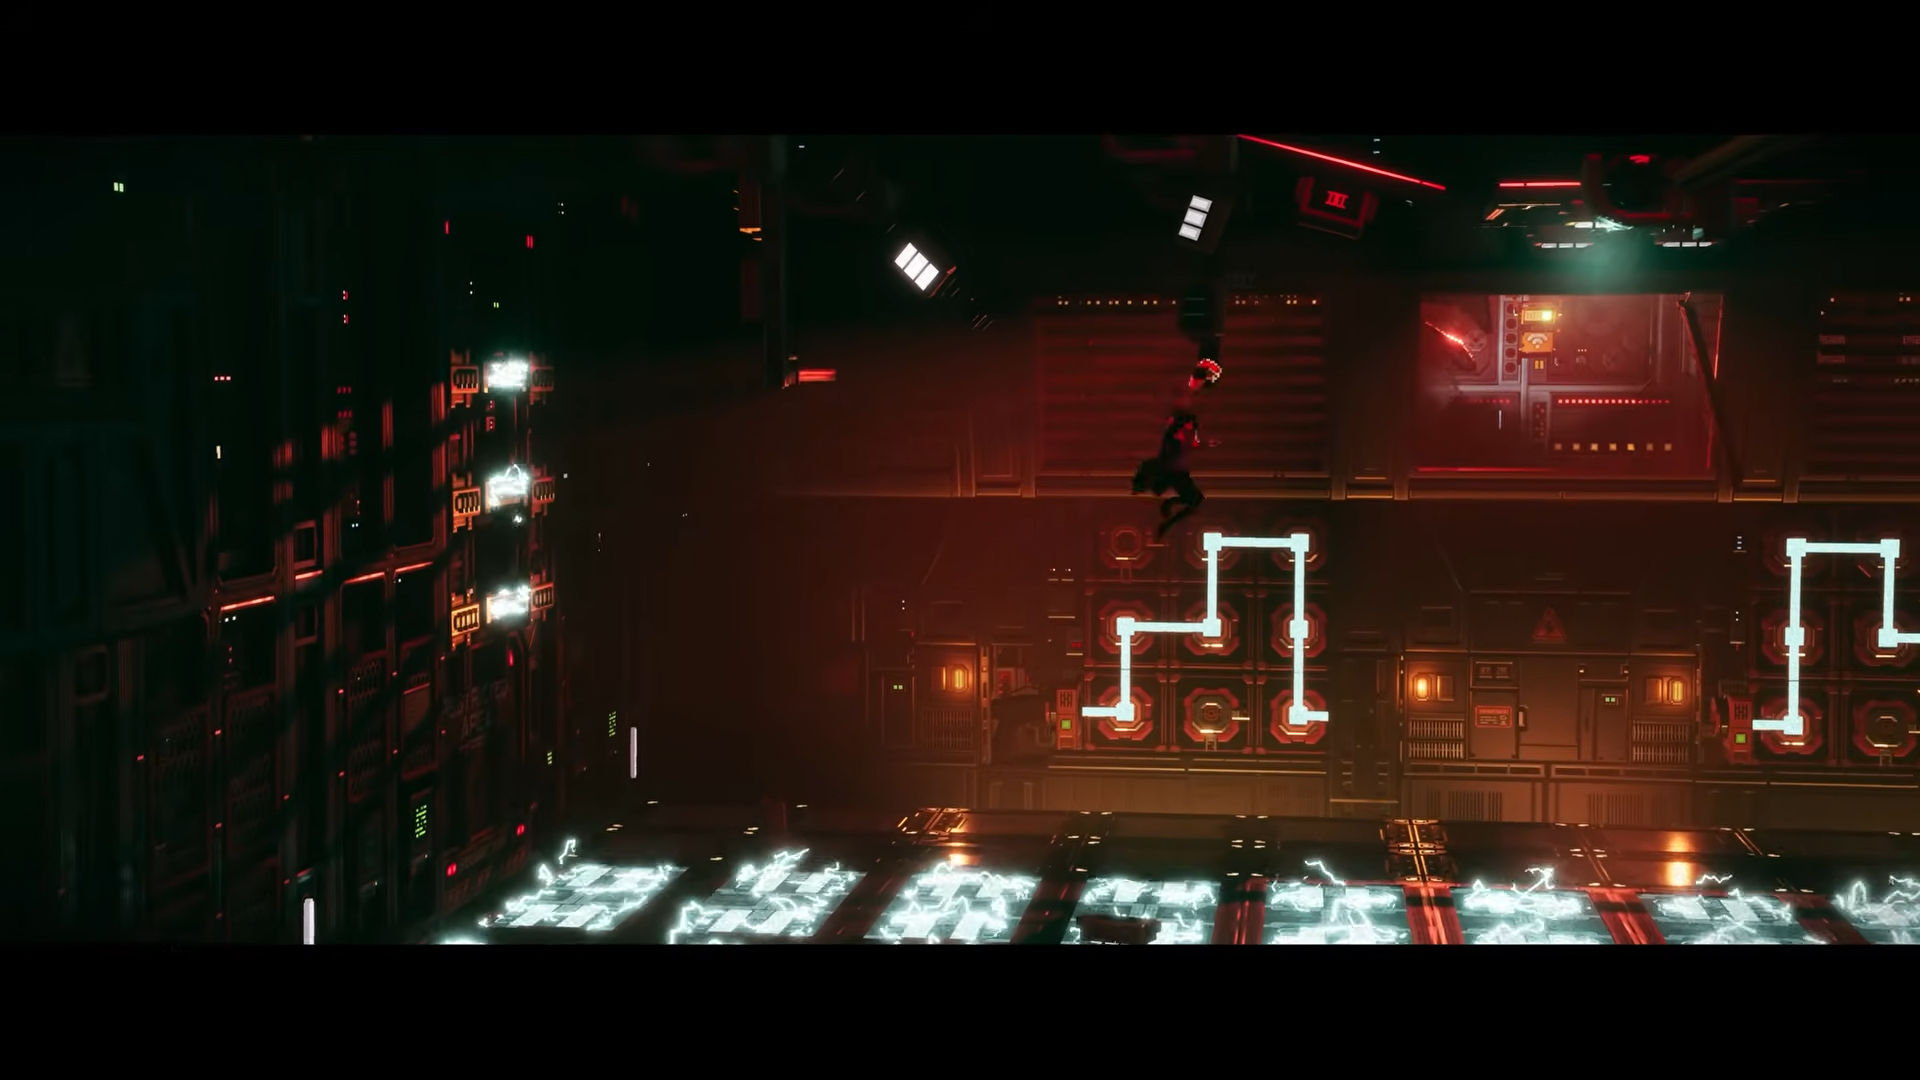
The Matriarch fight is unlike any other fight. Here, you don’t have to exactly engage in a brawl but figure out how to get out of the electrified environment.
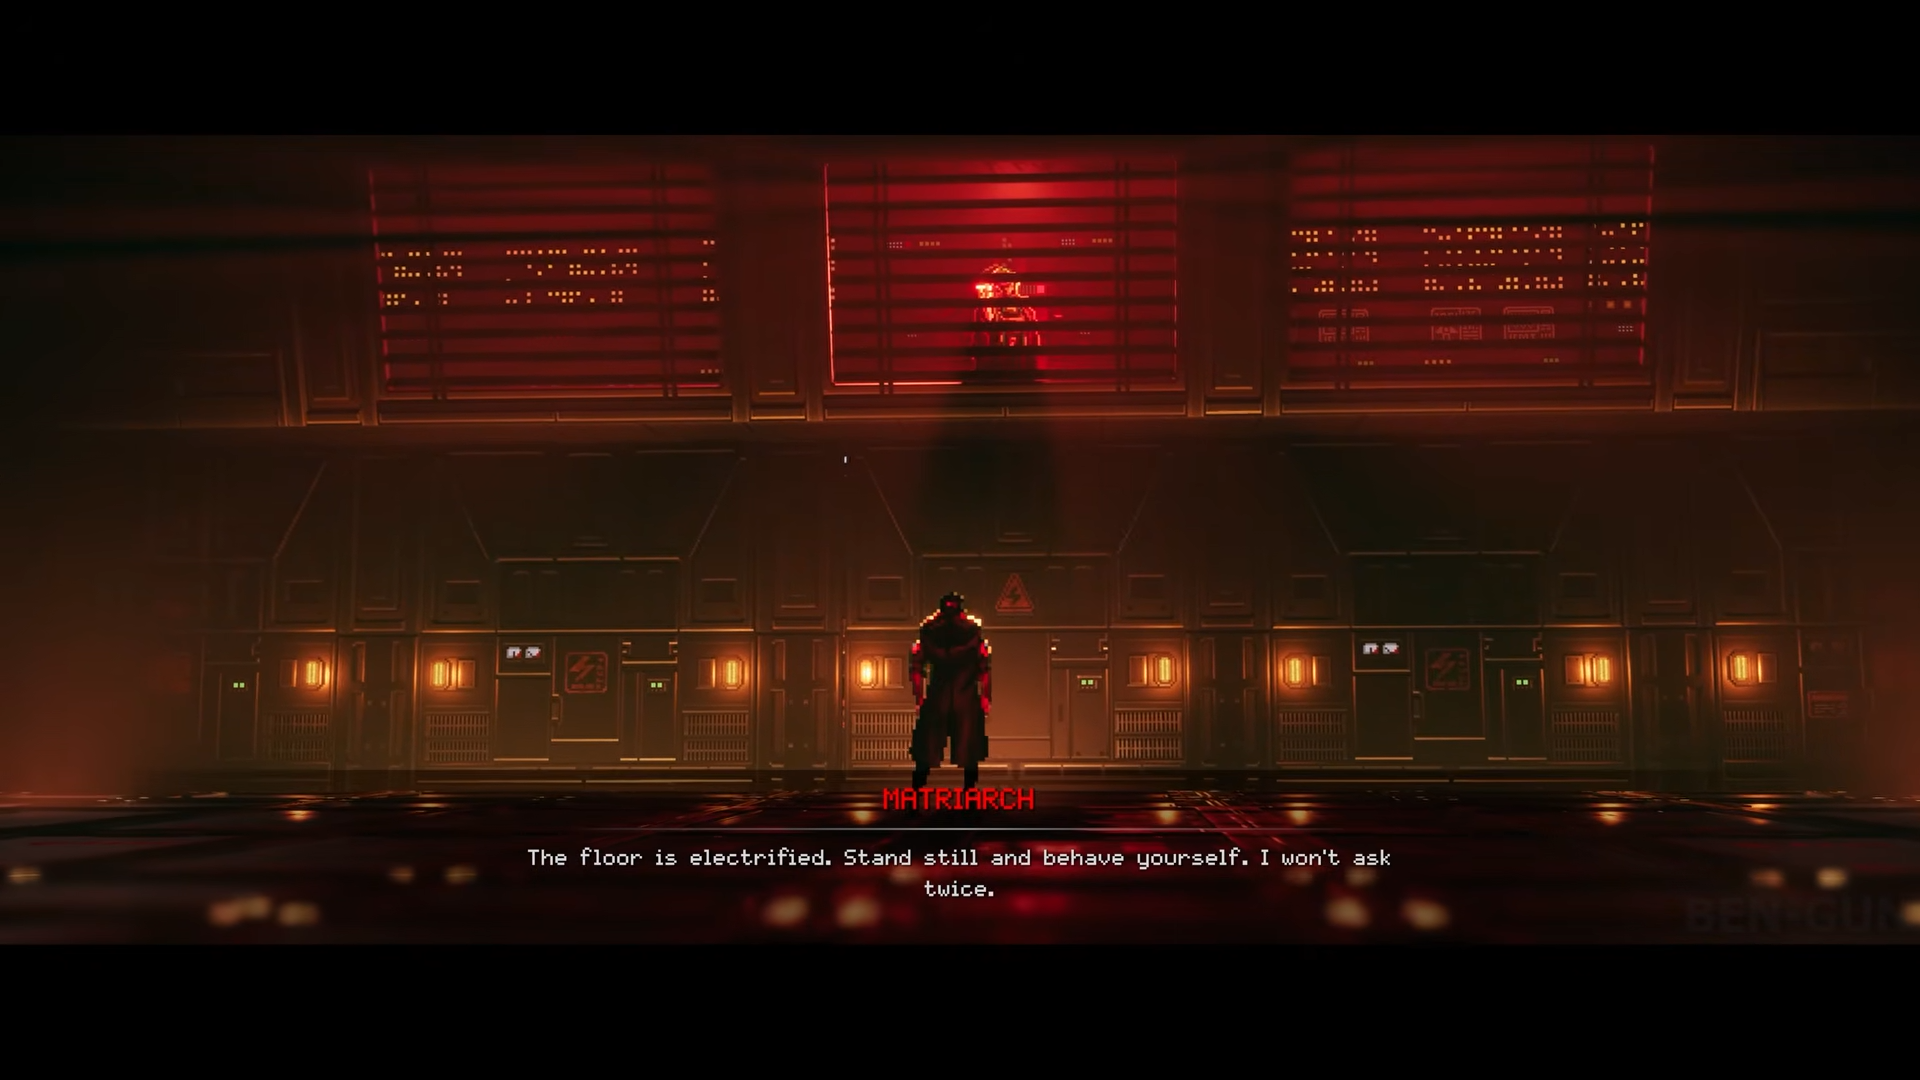
Here’s how to go about the hack:
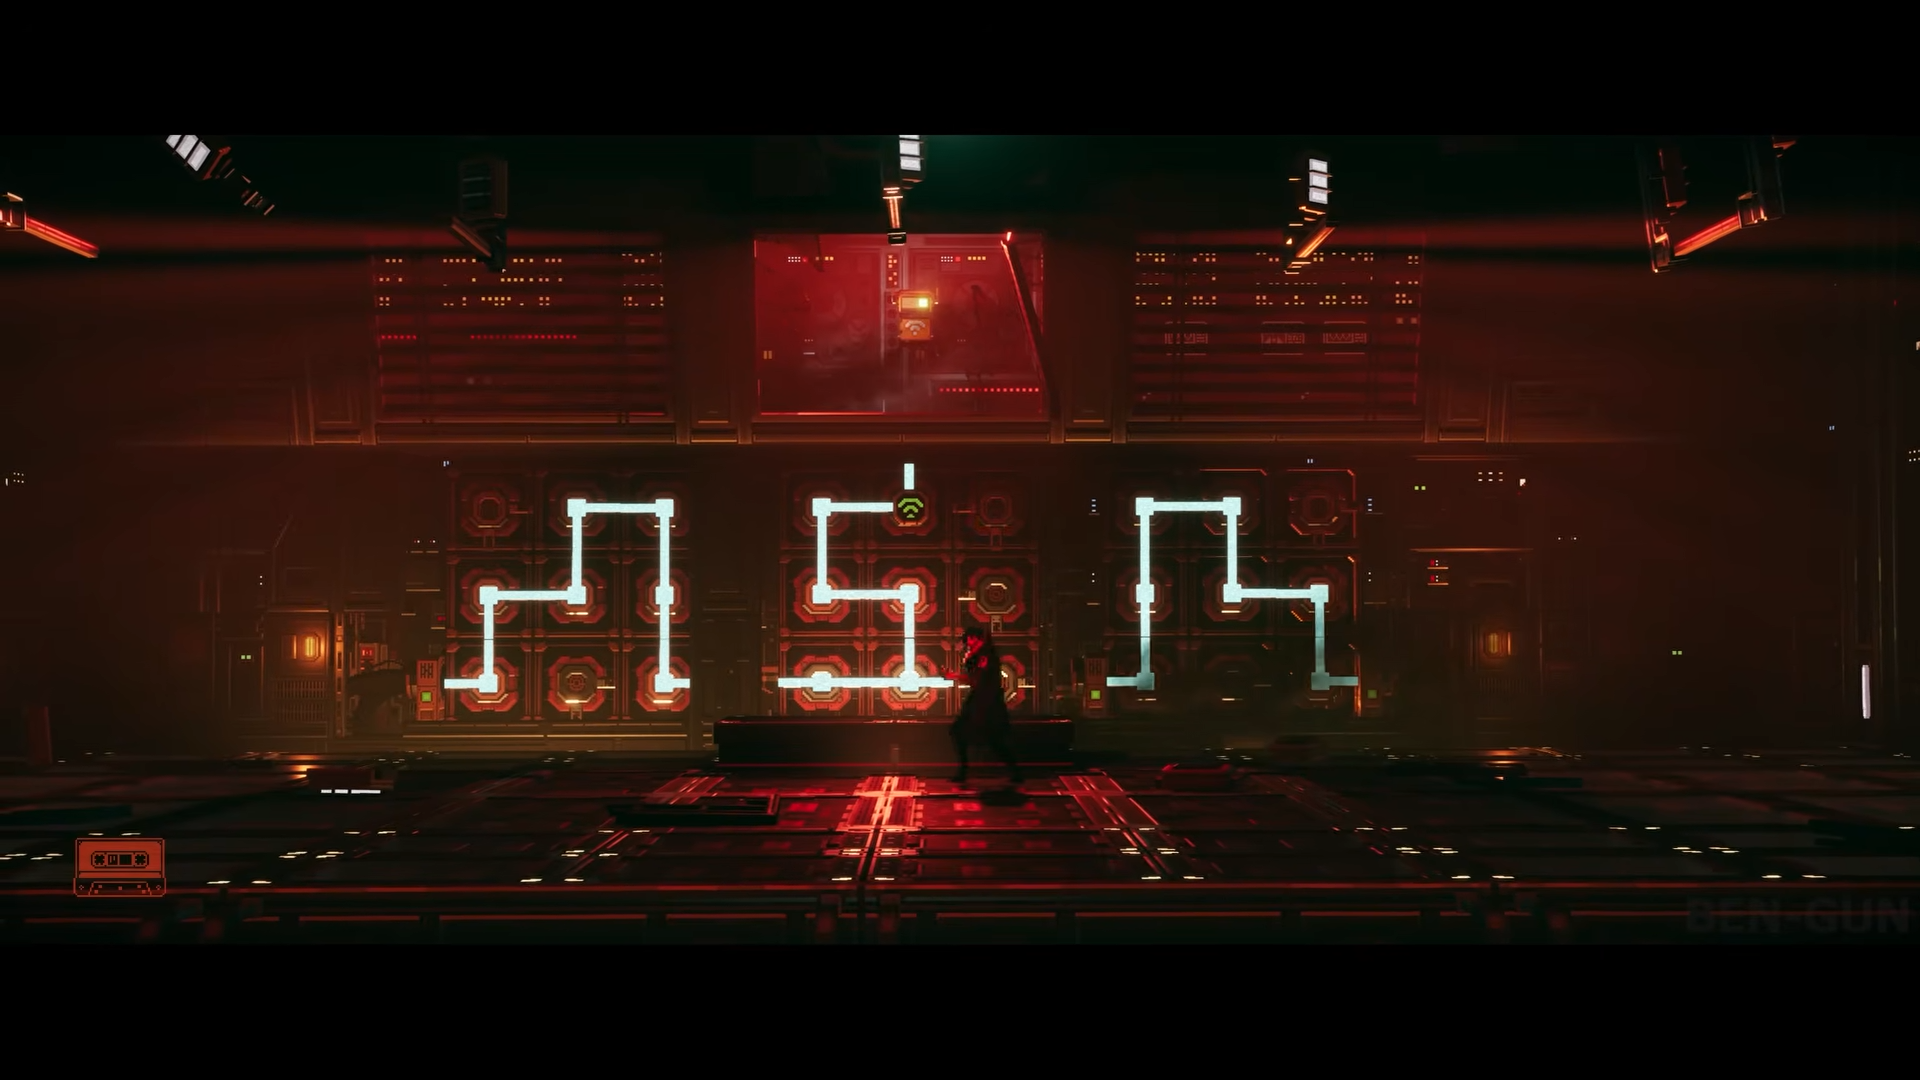
Step 1: Find 3 puzzle solutions before time runs out
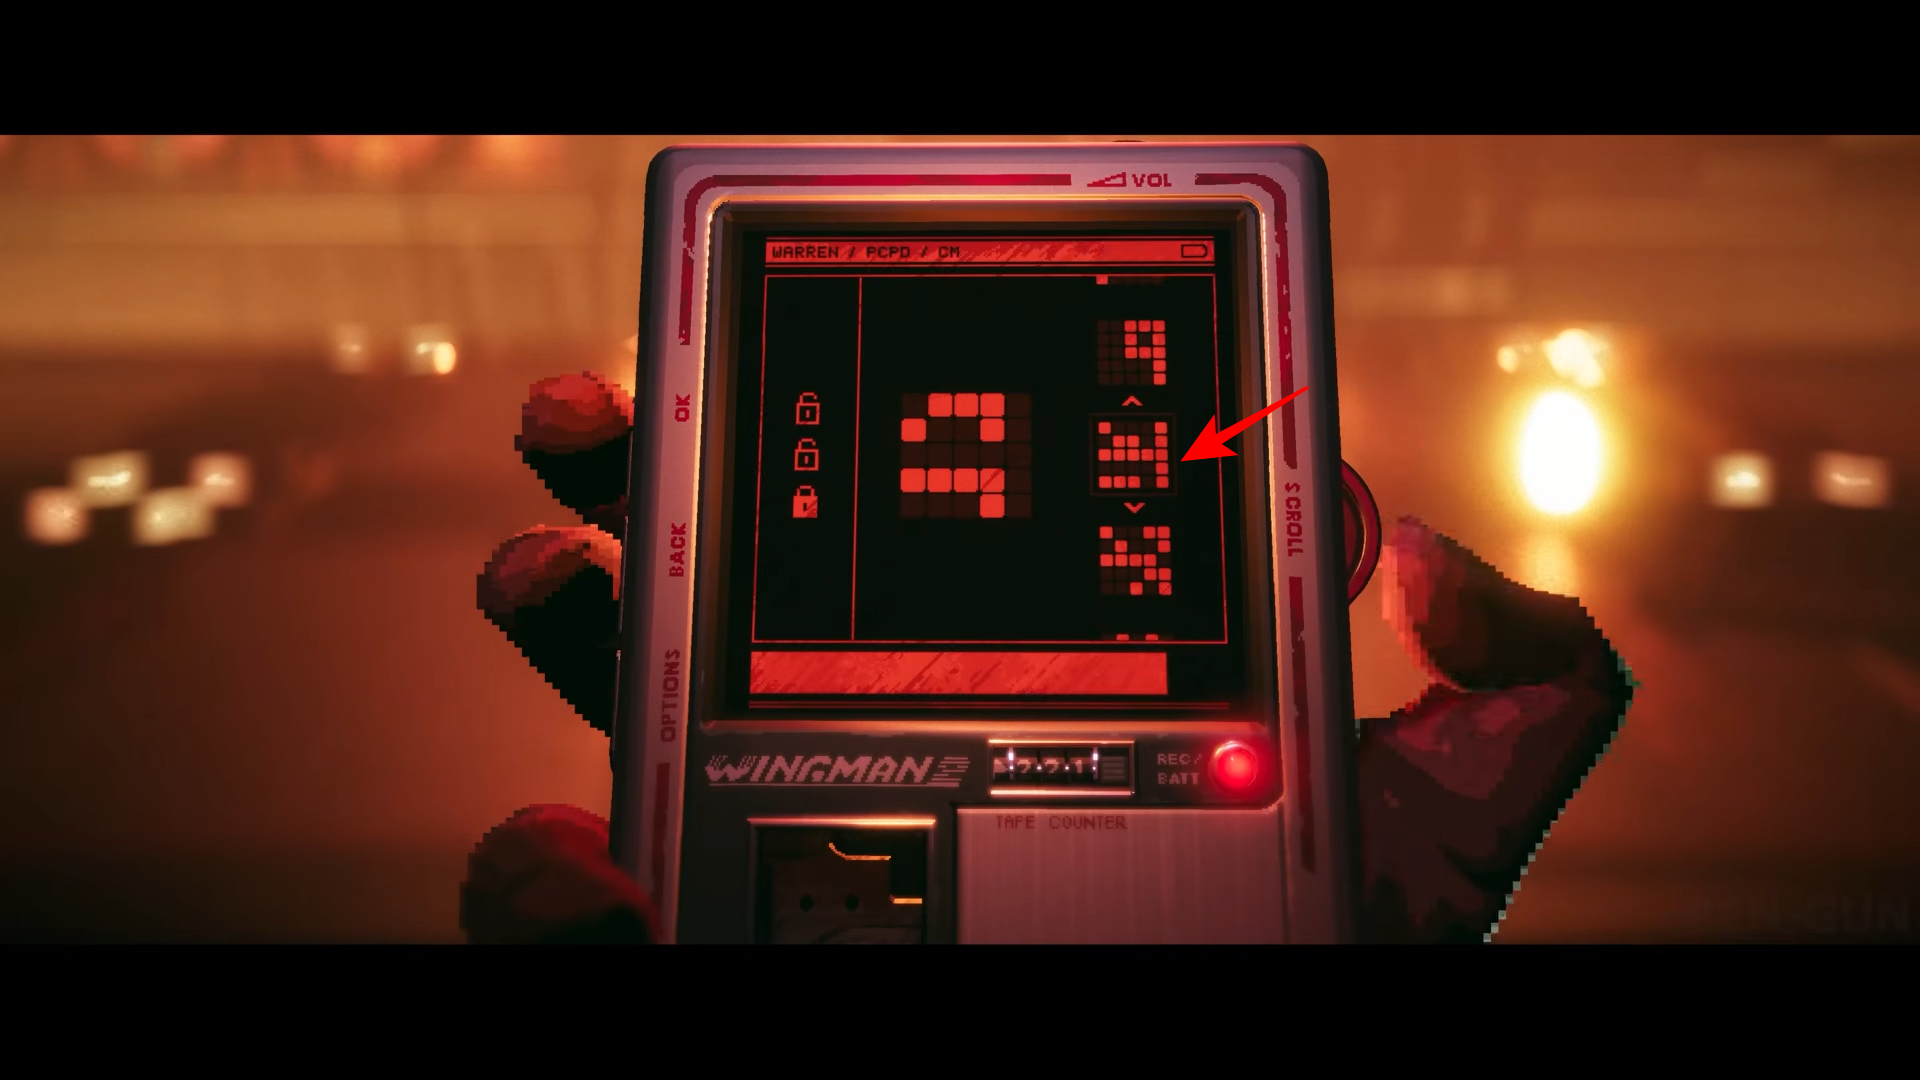
Once you take out the Wingman, you need to solve three puzzles before the time runs out. It’s a simple enough pattern recognition game that requires you to find the piece that fits the remaining boxes. For the first one, you’re looking for this piece.
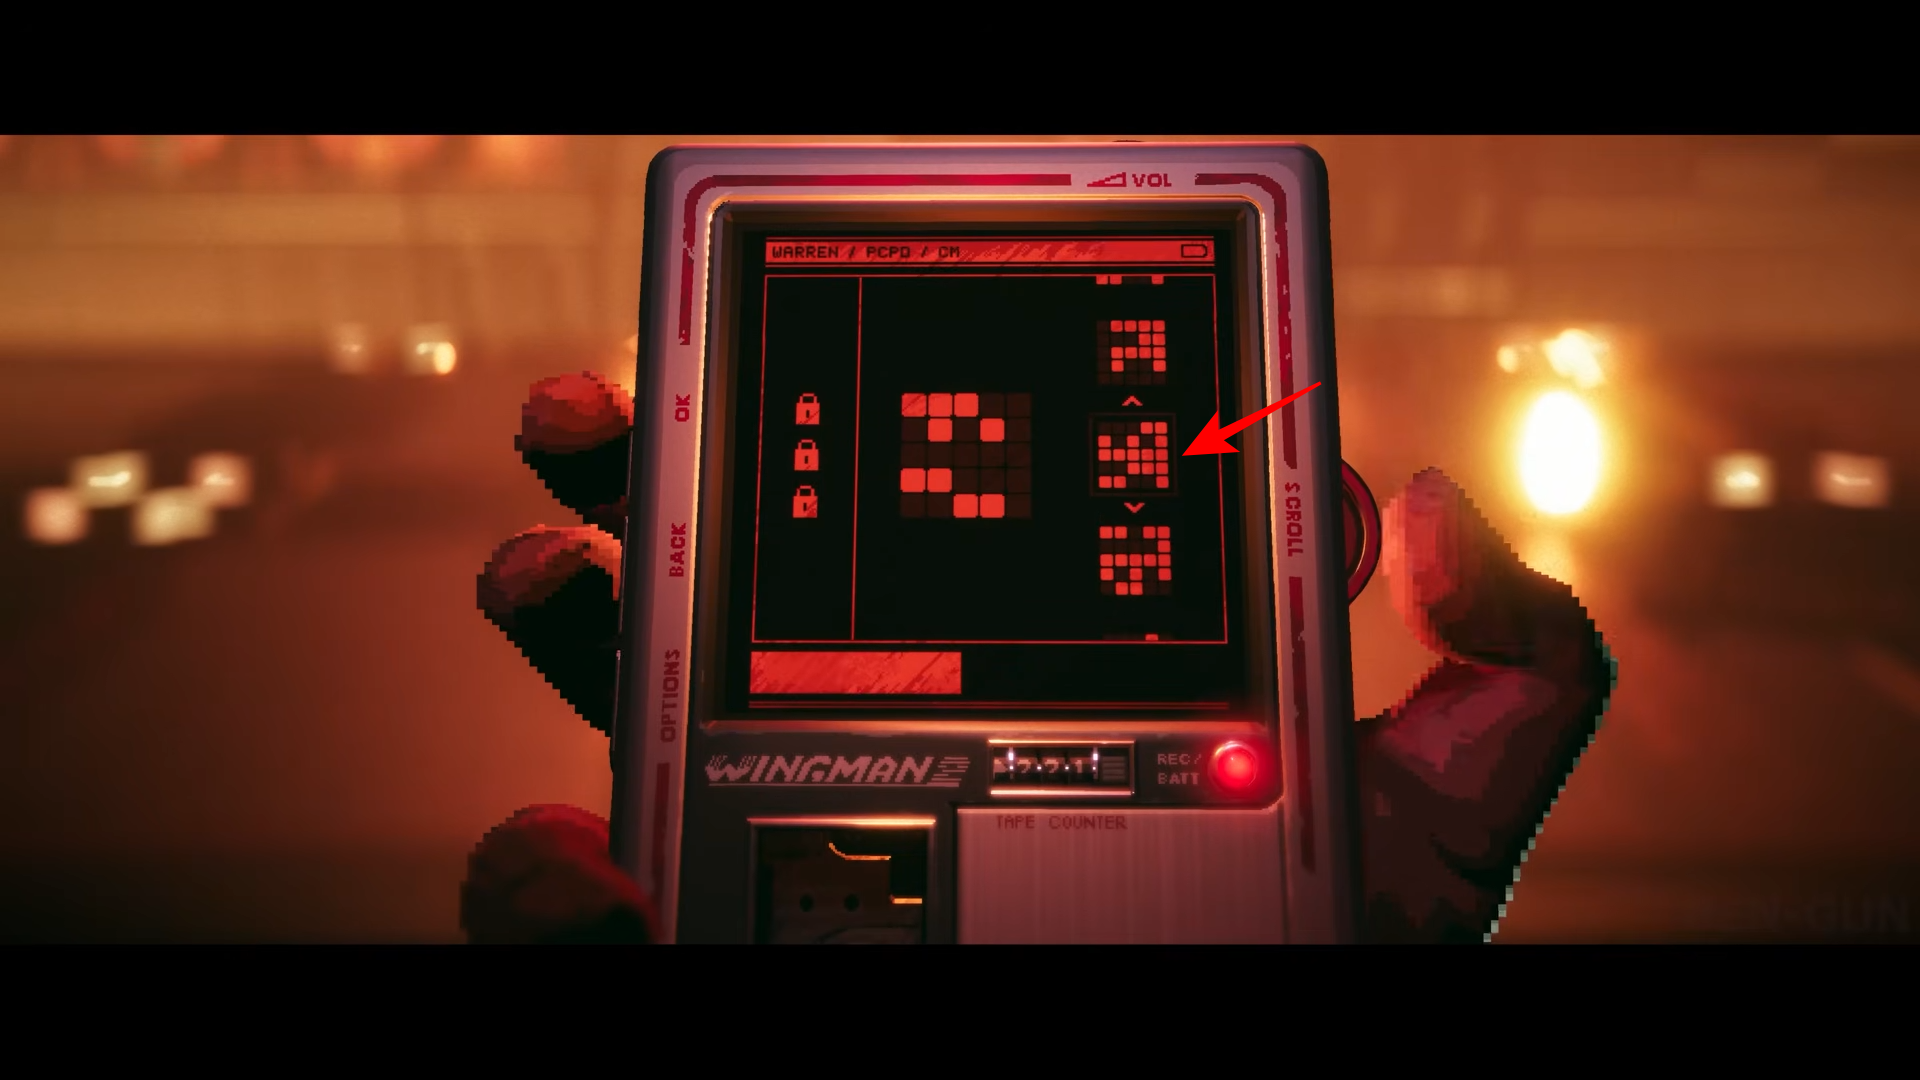
For the second one, it’s this…
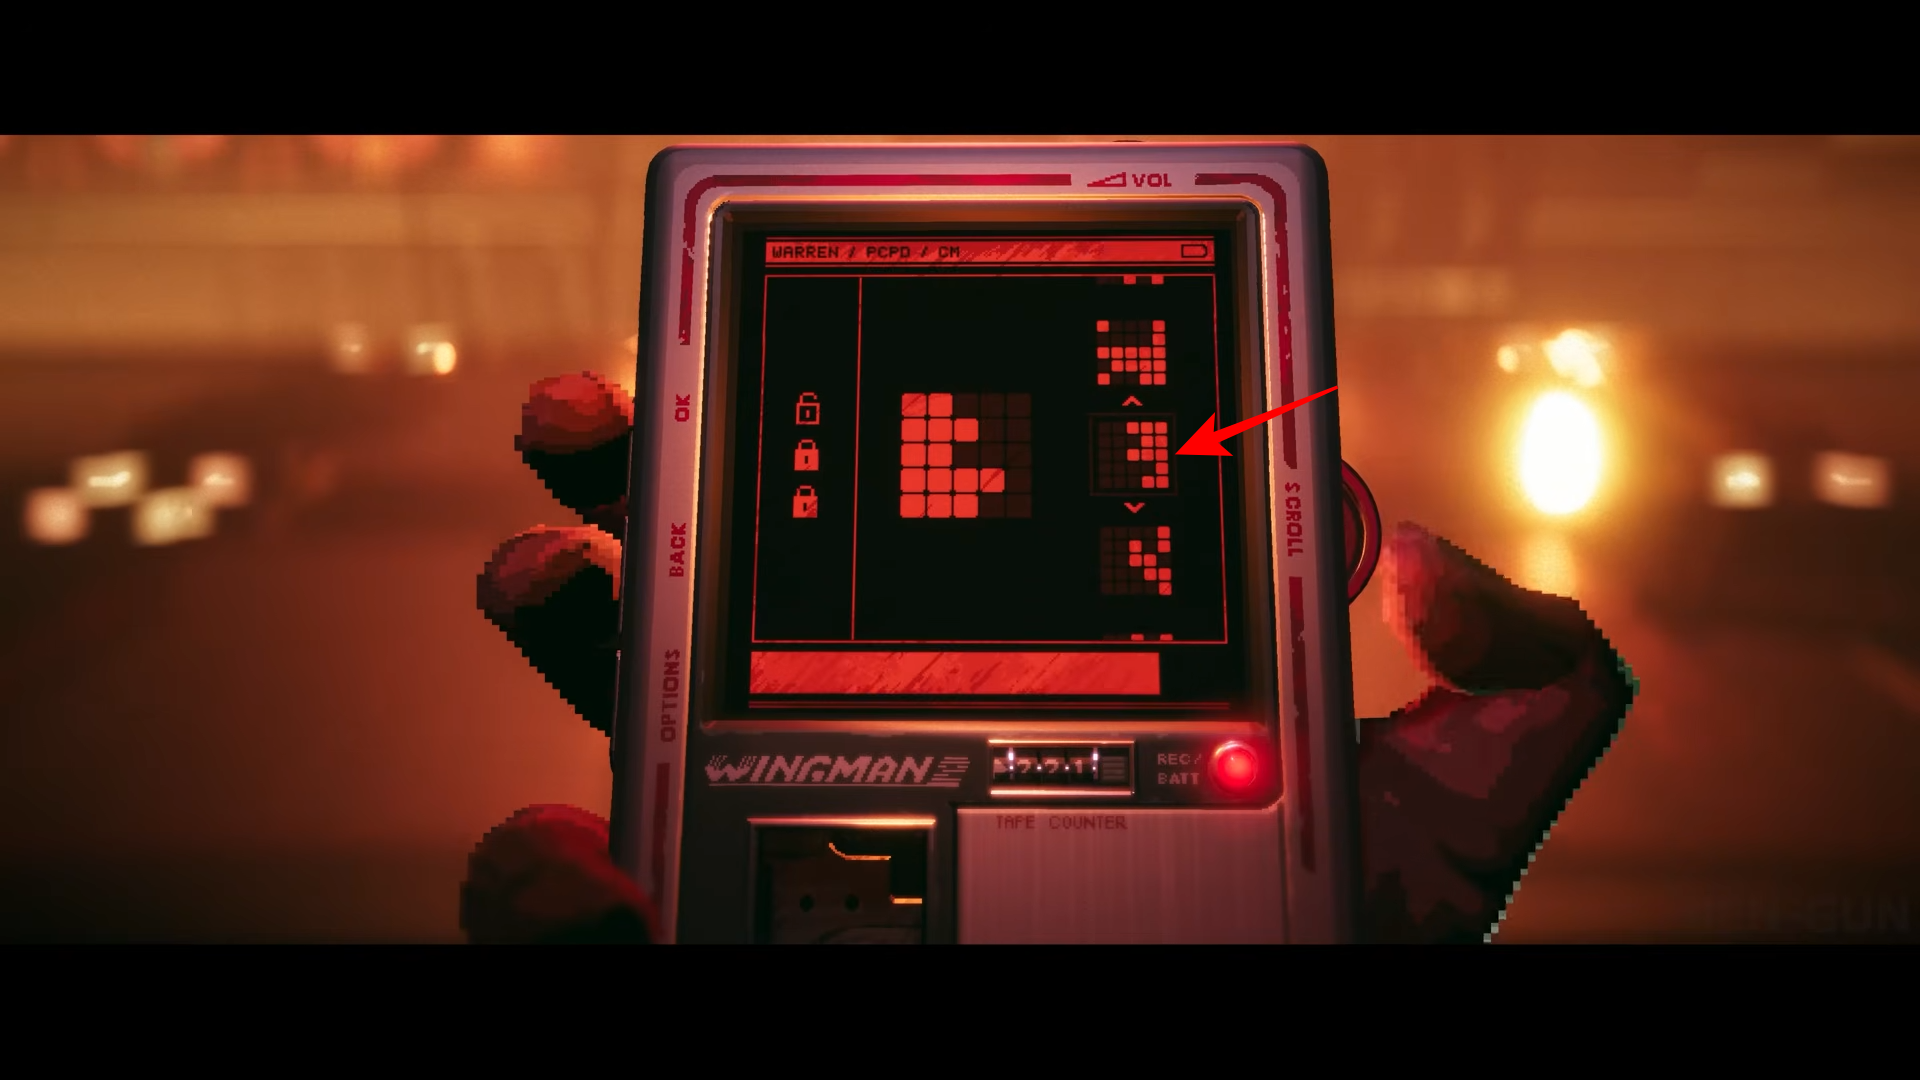
And the third…
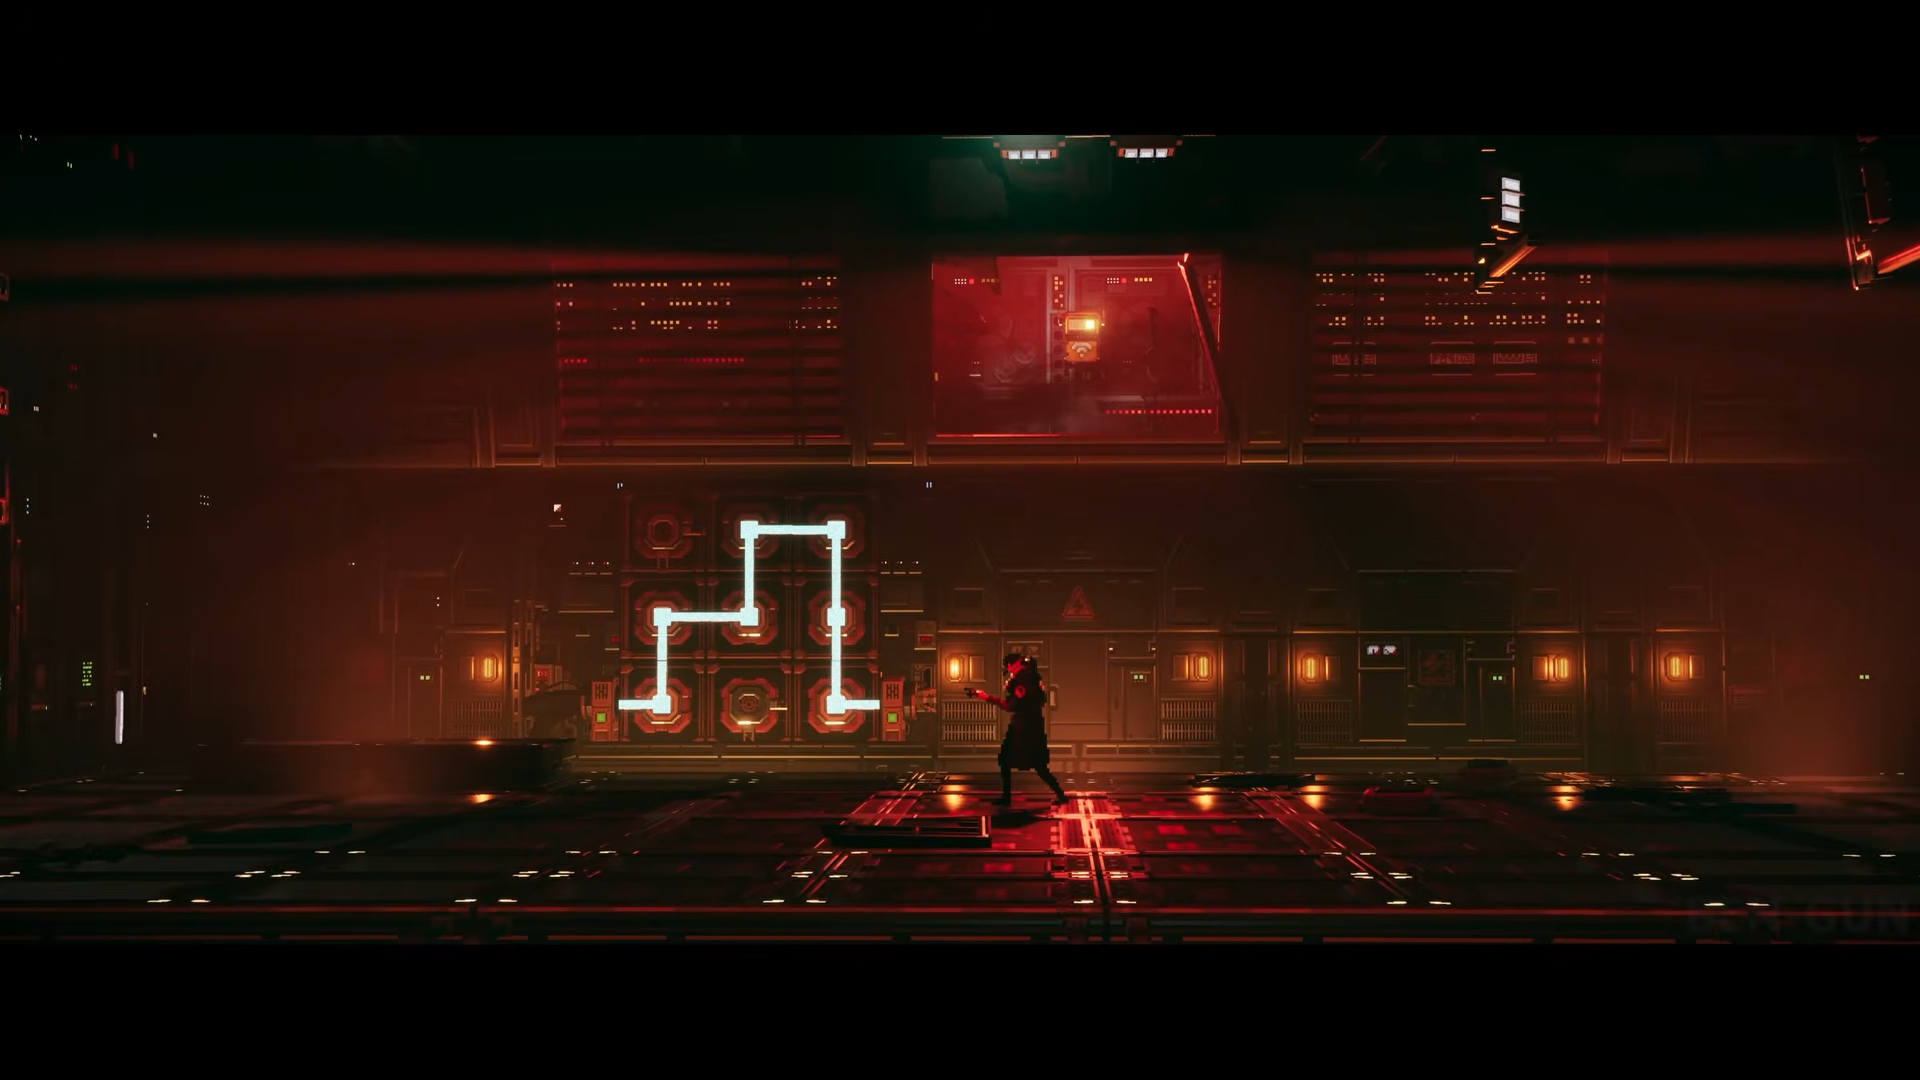
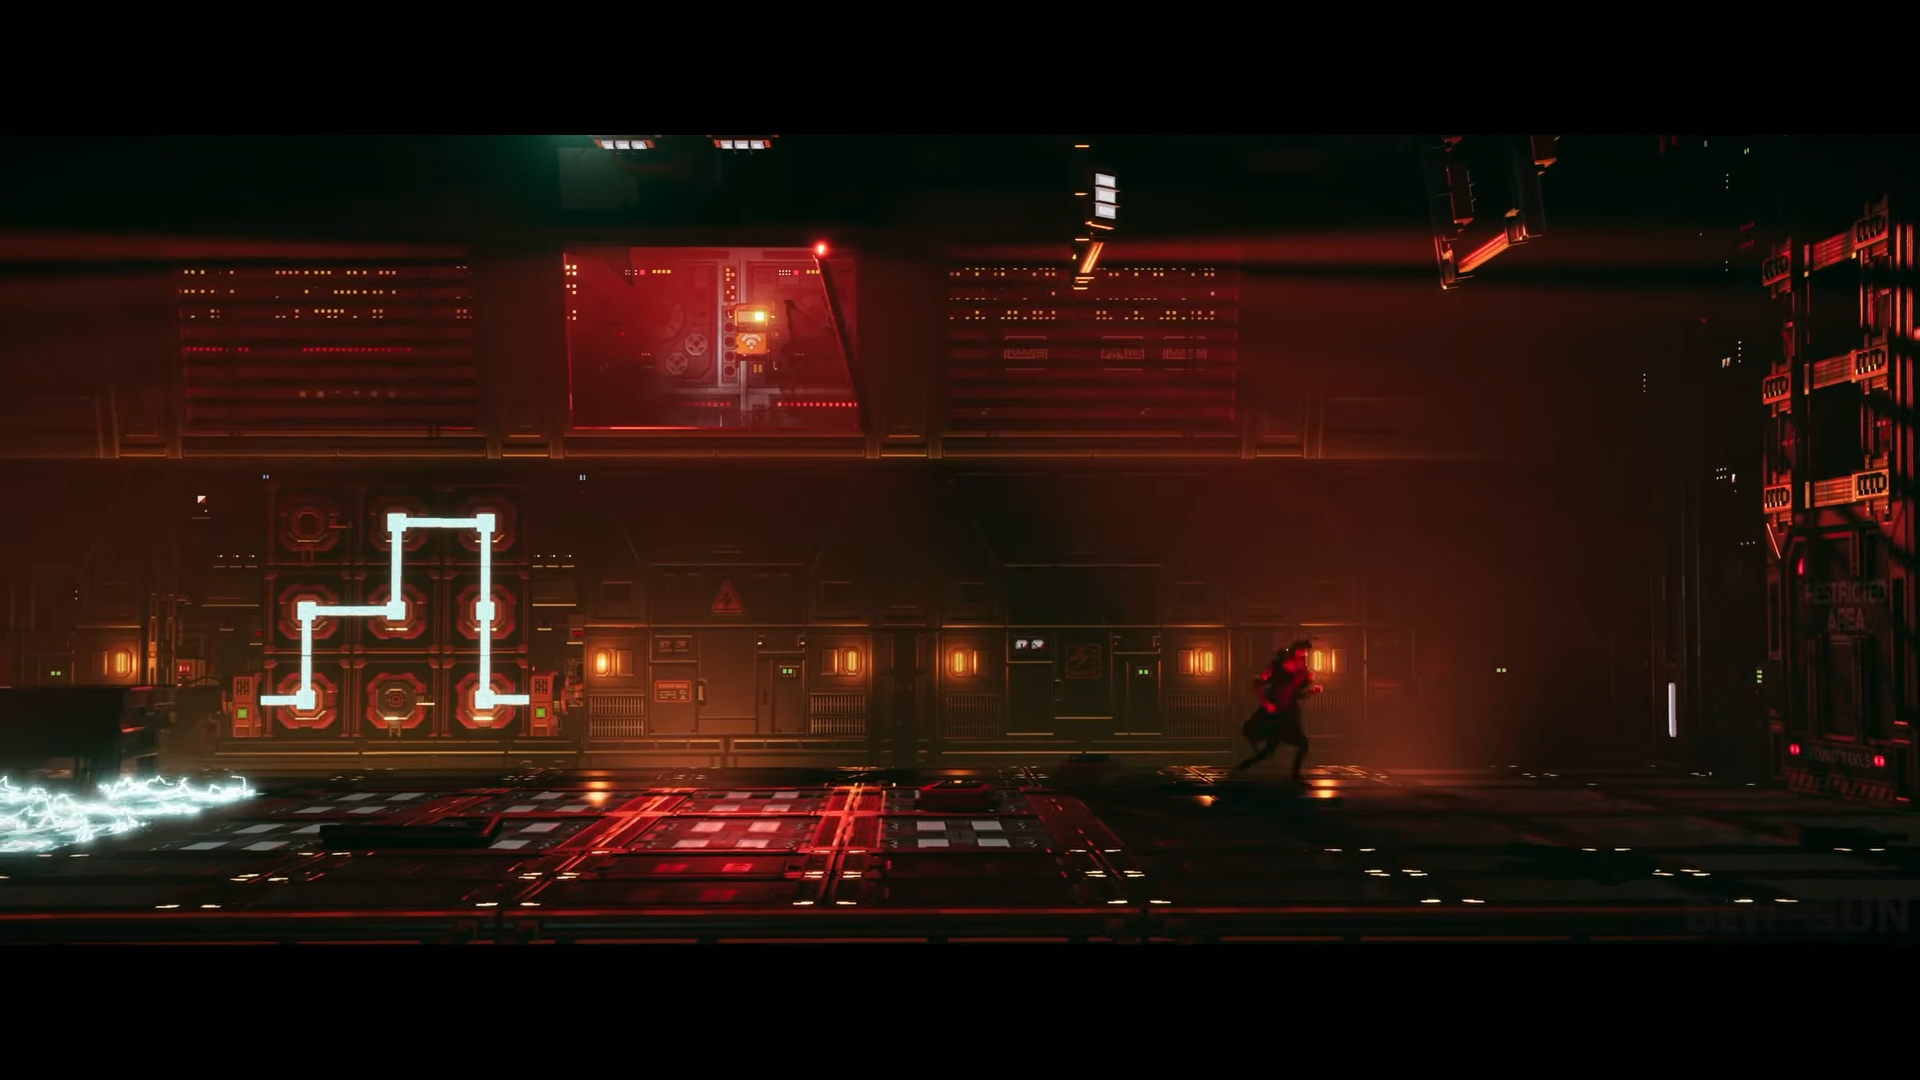
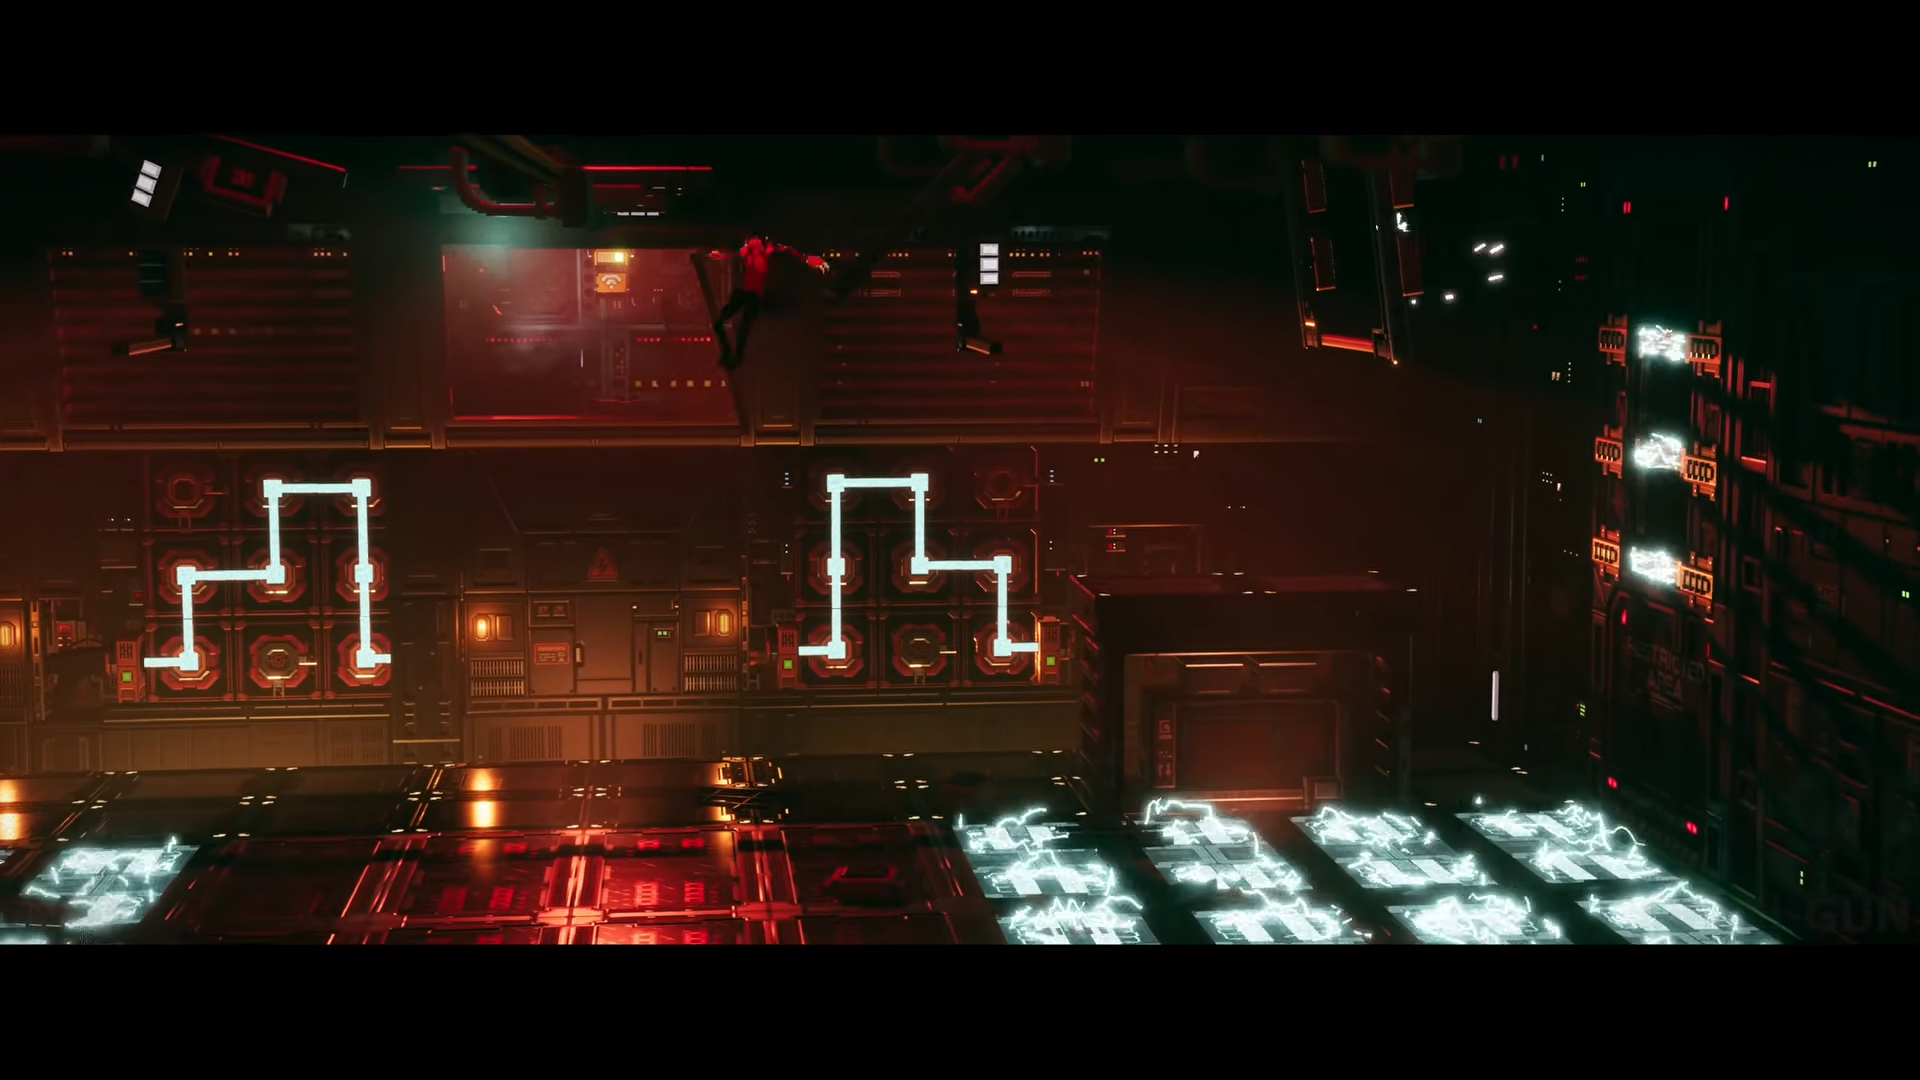
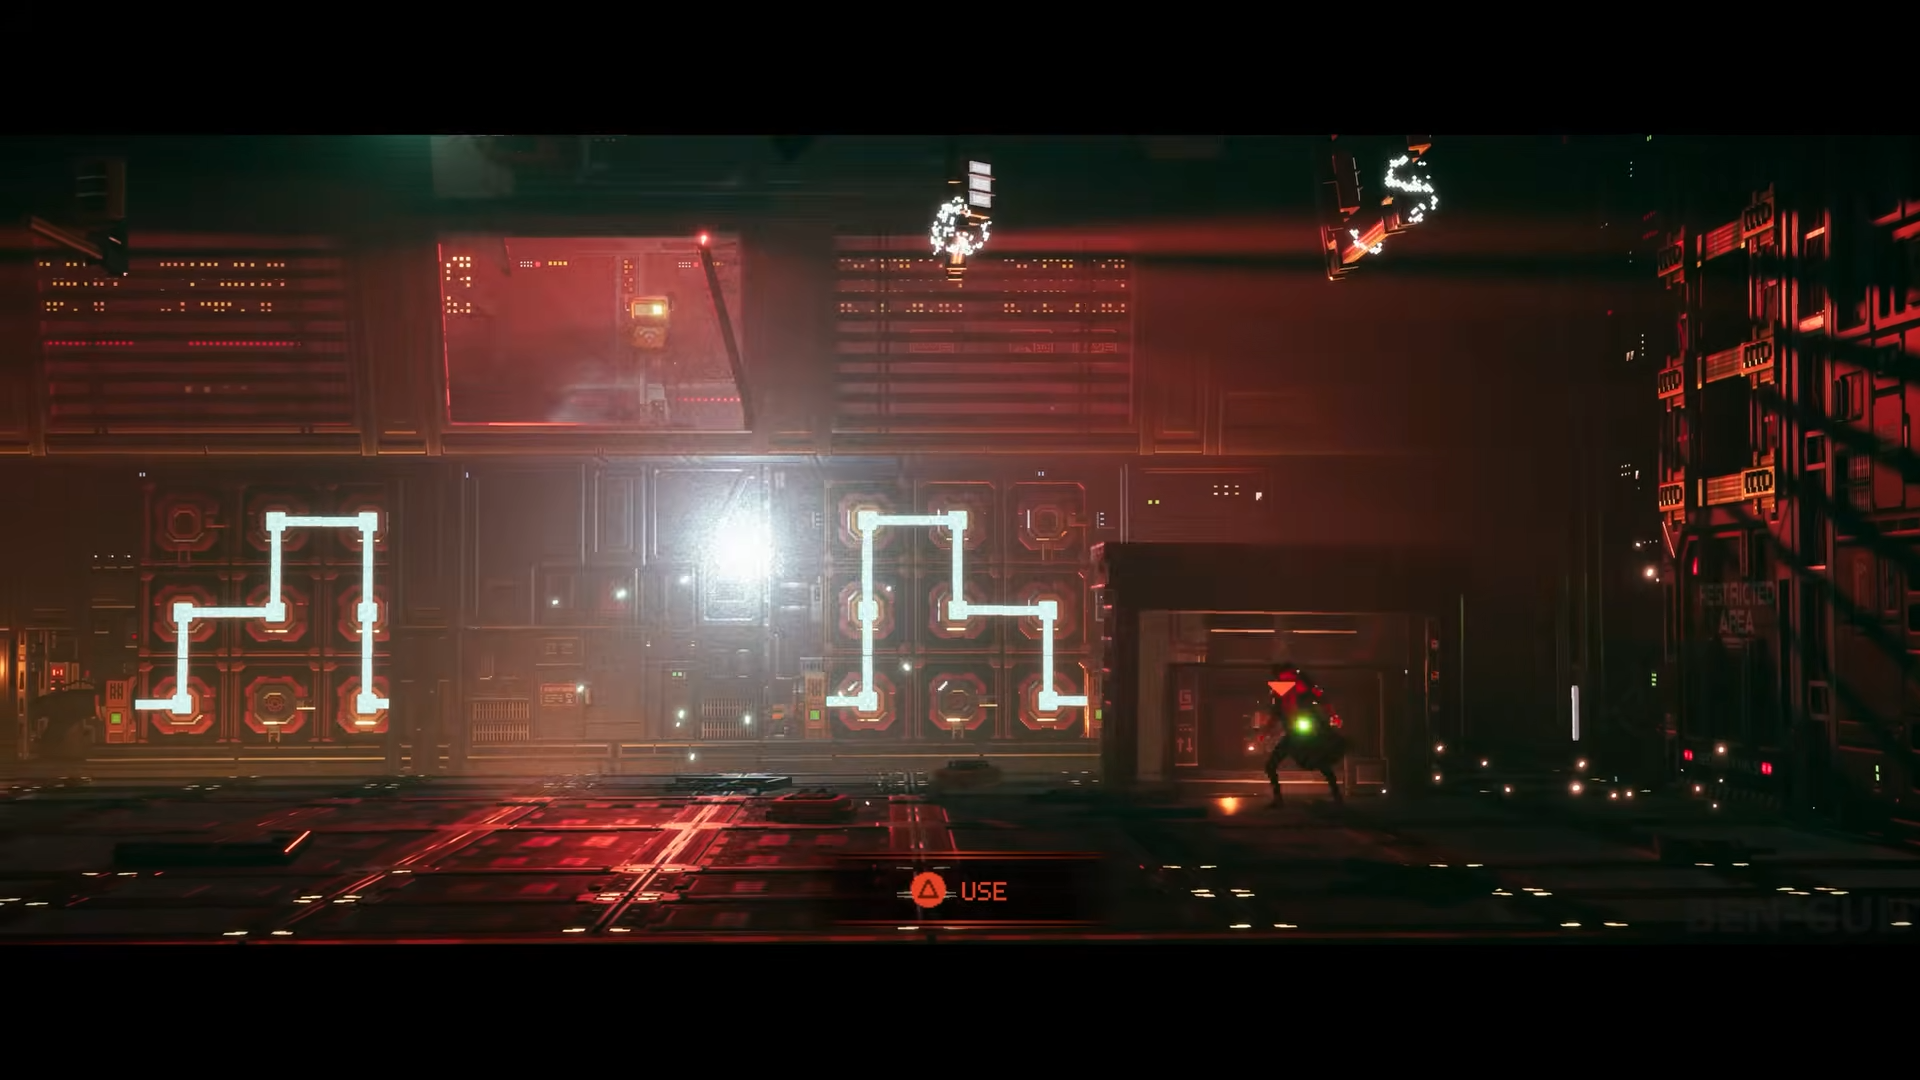
Step 2: Interact with wall puzzle
Fairly simple, simply interact with the puzzle on the wall until the connecting lines move from left to right to the bottom of the gate. Like so…
Step 3: Avoid electrified floor and interact with gate on the left
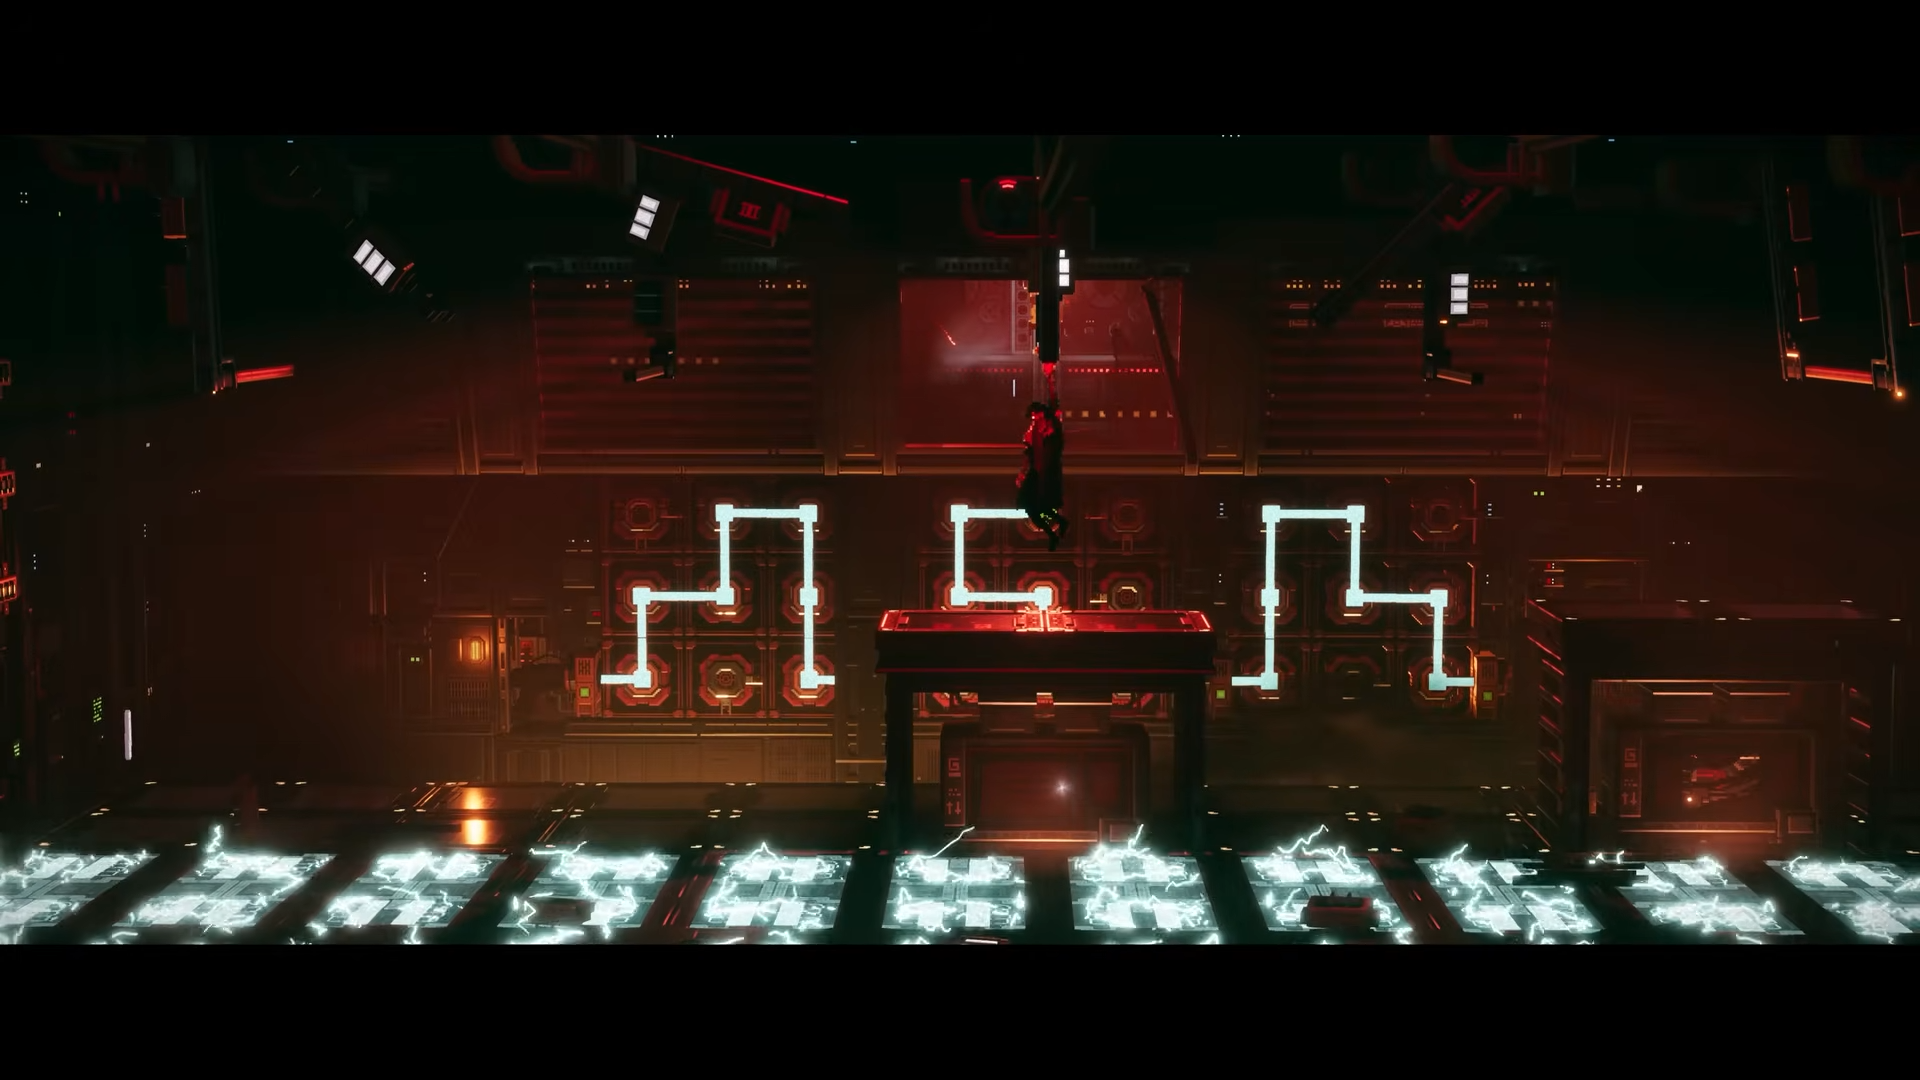
Avoid the electrified floor by climbing the wall on the right.
Then hang from the ceiling and come back in the middle.
Once that is done, strike the gate on the left by selecting ‘Use’.
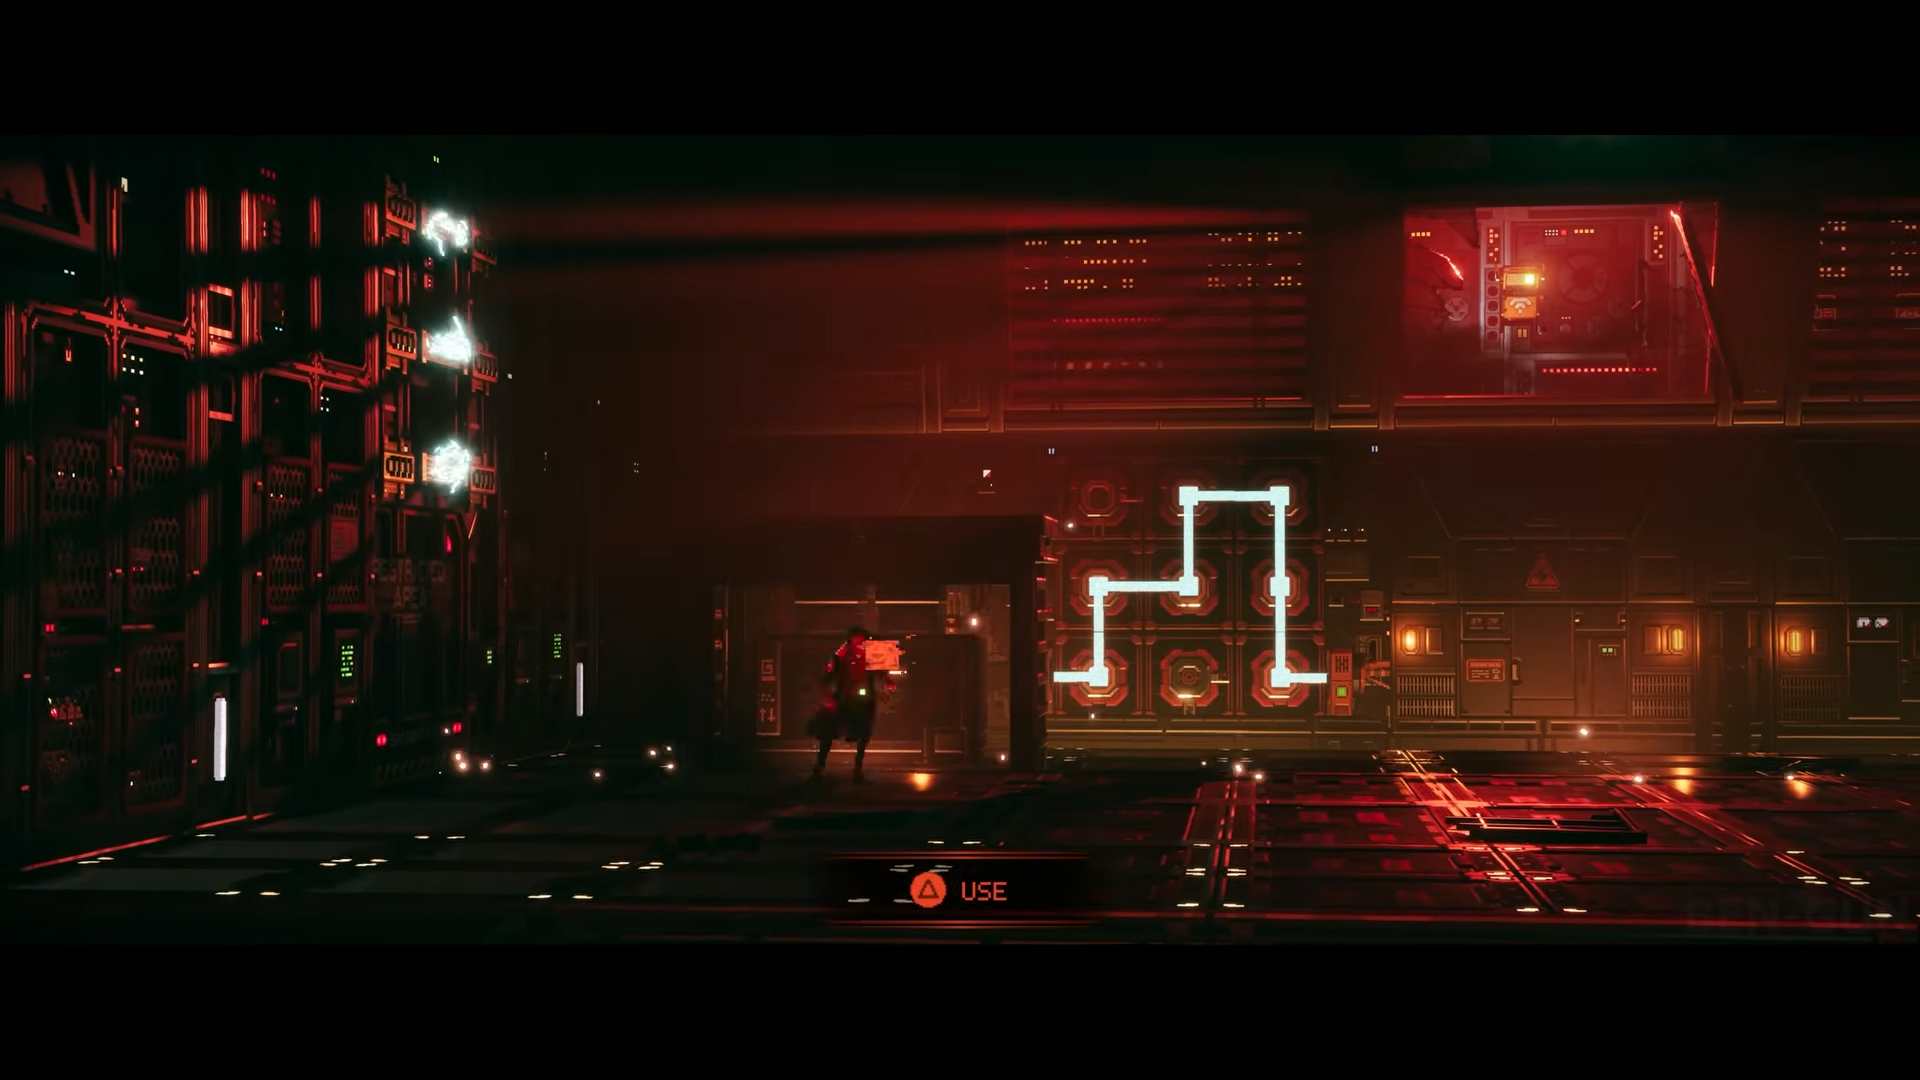
If you fail once, try again. Once that is done, the right side of the wall will be revealed.
Interact with it until it mirrors the solution on the left.

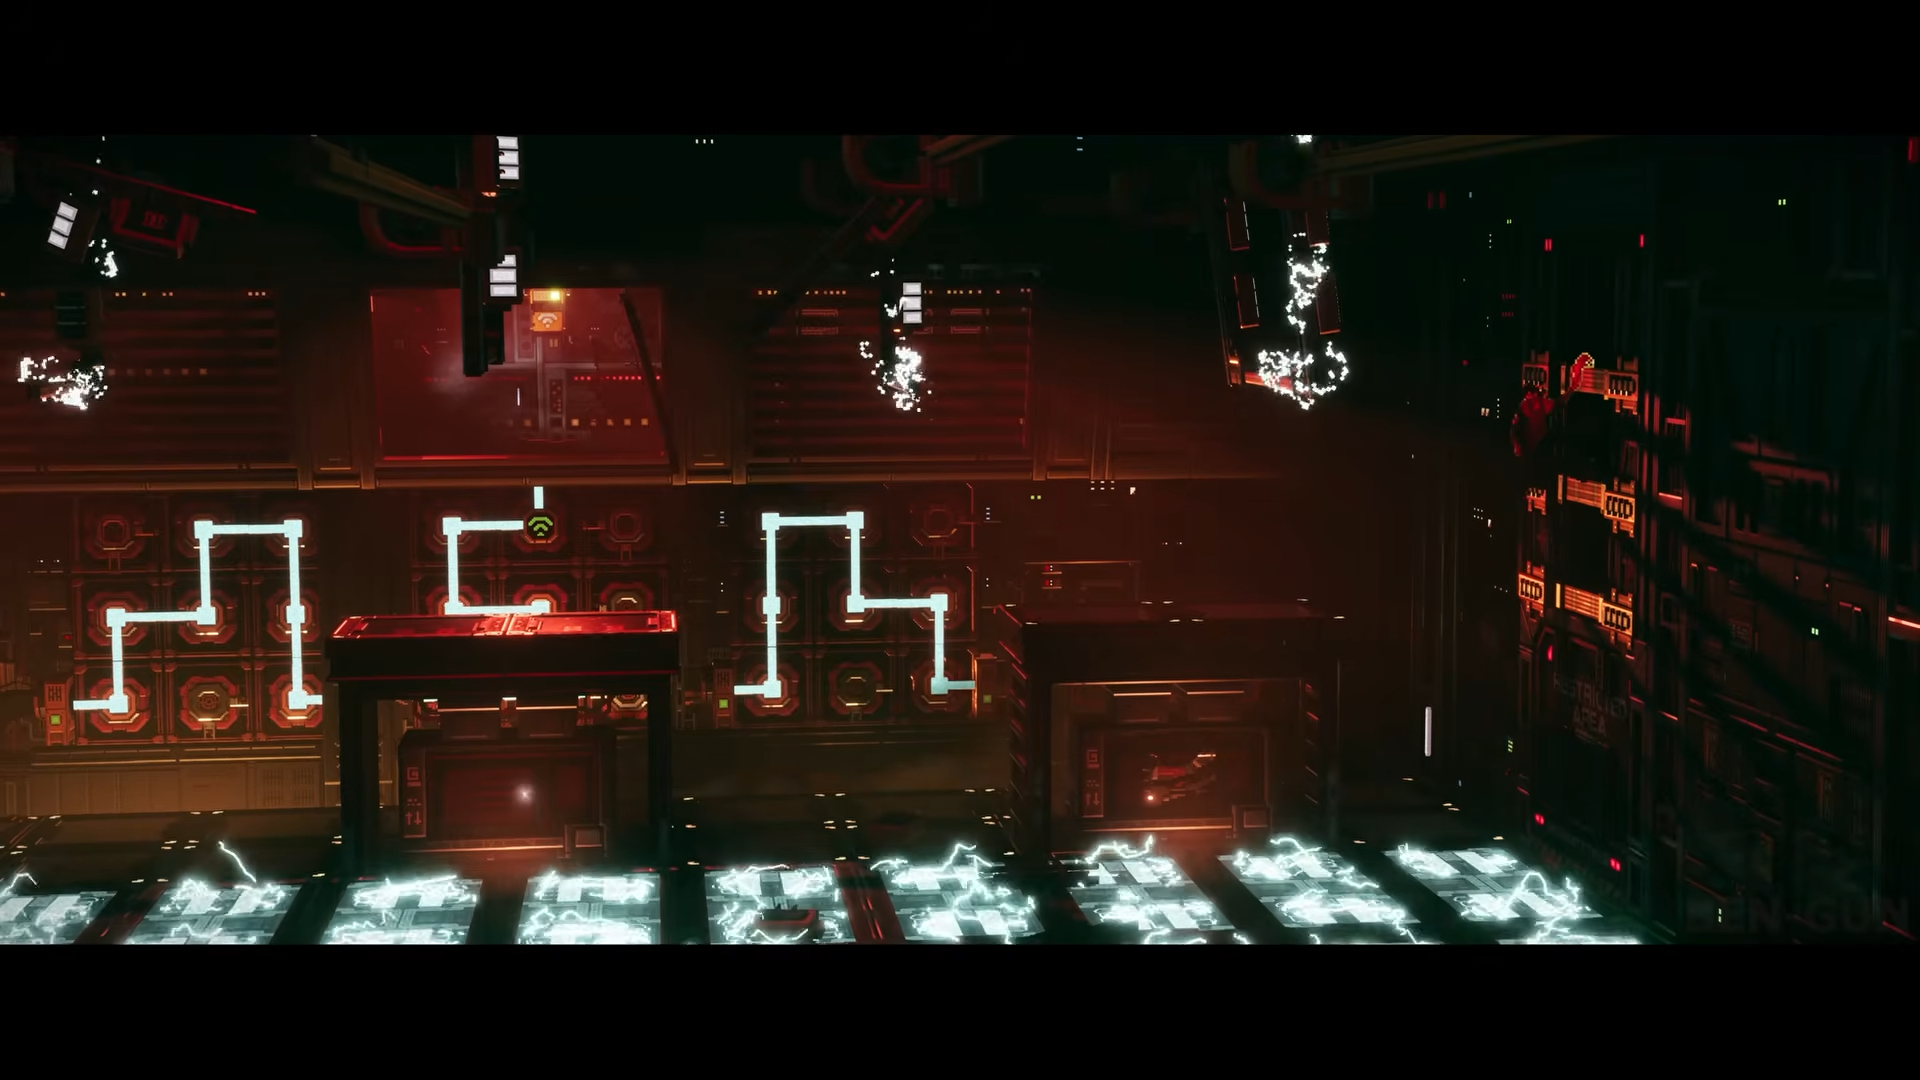
Step 4: Avoid electrified floor and interact with gate on the right
Next, you’ll have to avoid the electrified floor again. But this time, move to the wall on the left.
Then, as before, climb on to the ceiling and return to the middle.
You’ll have to do wait until the second gate is revealed. So make sure to get away from the floor.
Interact with the gate on the right.
Step 5: Solve middle puzzle and avoid electrified floor and ceiling
Once the middle wall puzzle is revealed, interact with it.
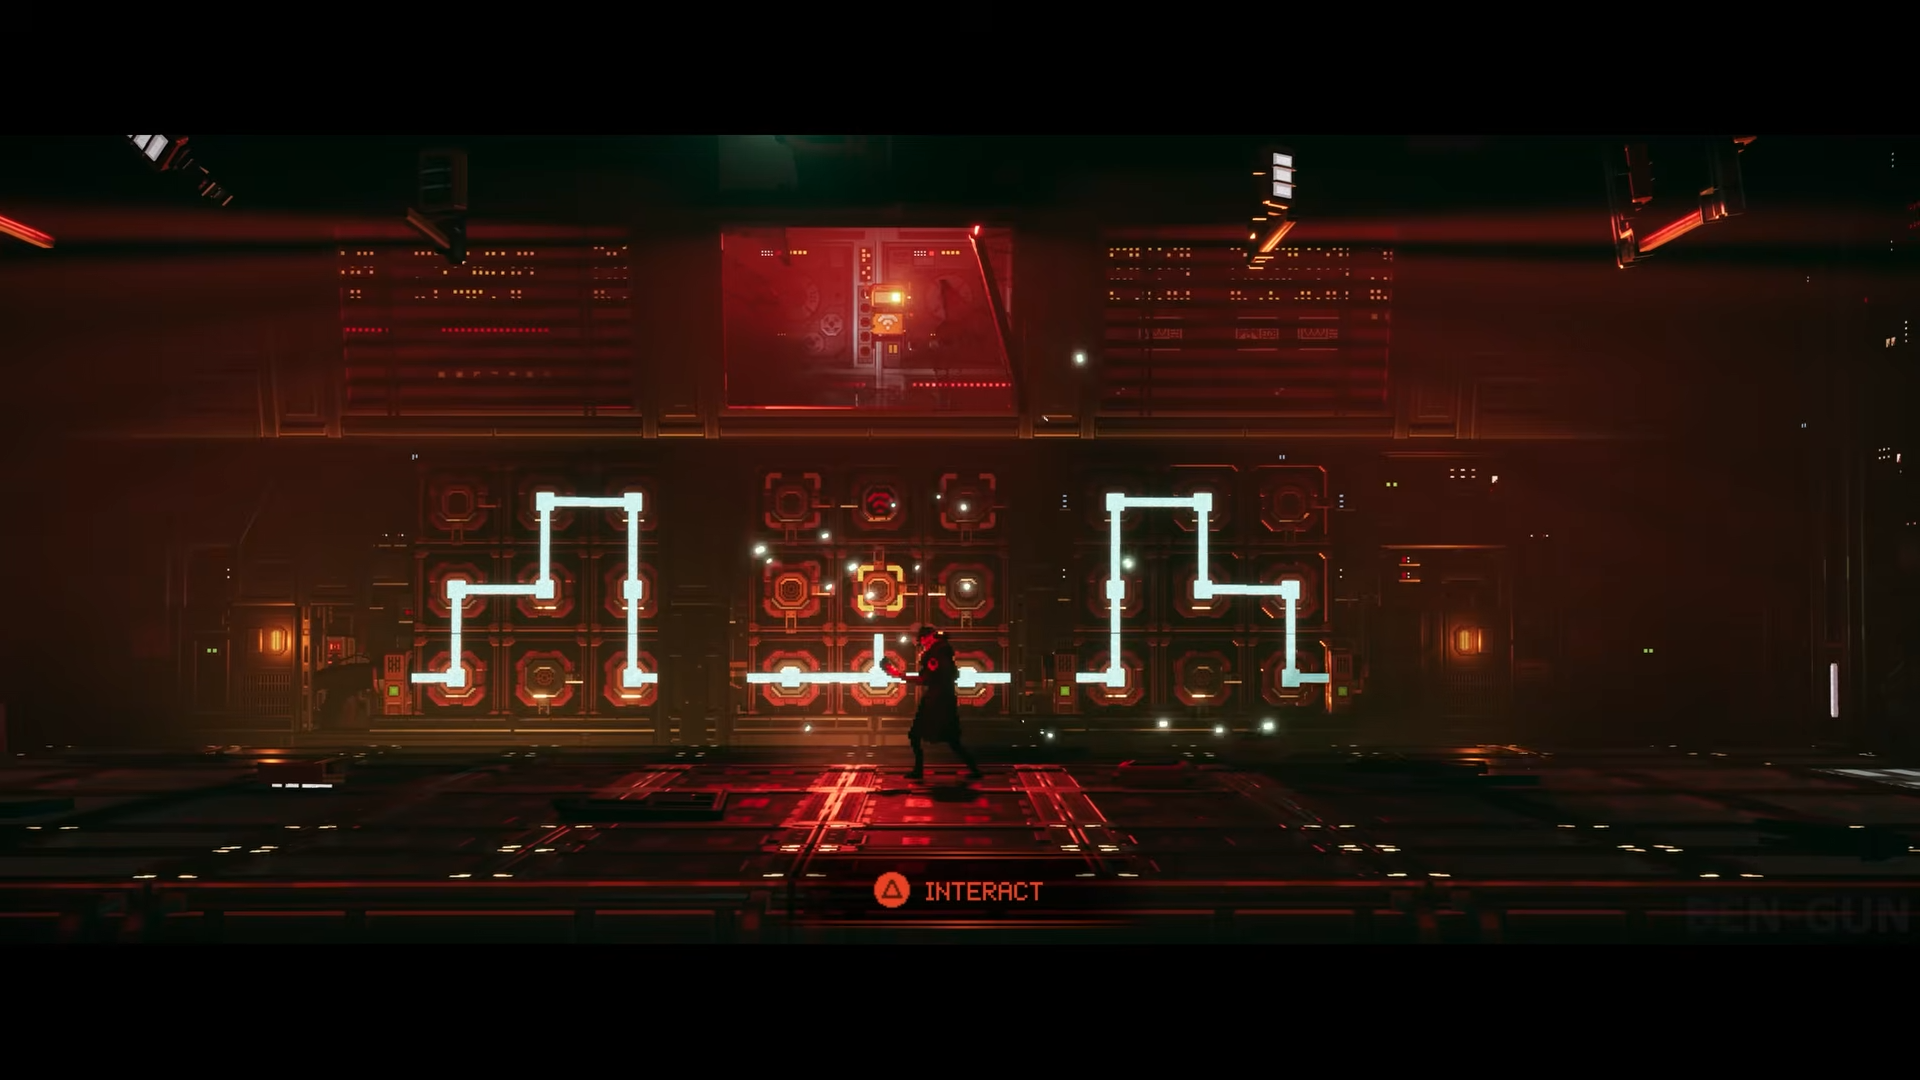
The solution looks like this…
Climb the wall and the ceiling, and hang while the middle gate comes up.
You’ll have to keep moving and avoid the electrified ceiling as well.
Step 6: Interact with middle gate and get out
Finally, interact with the middle gate.
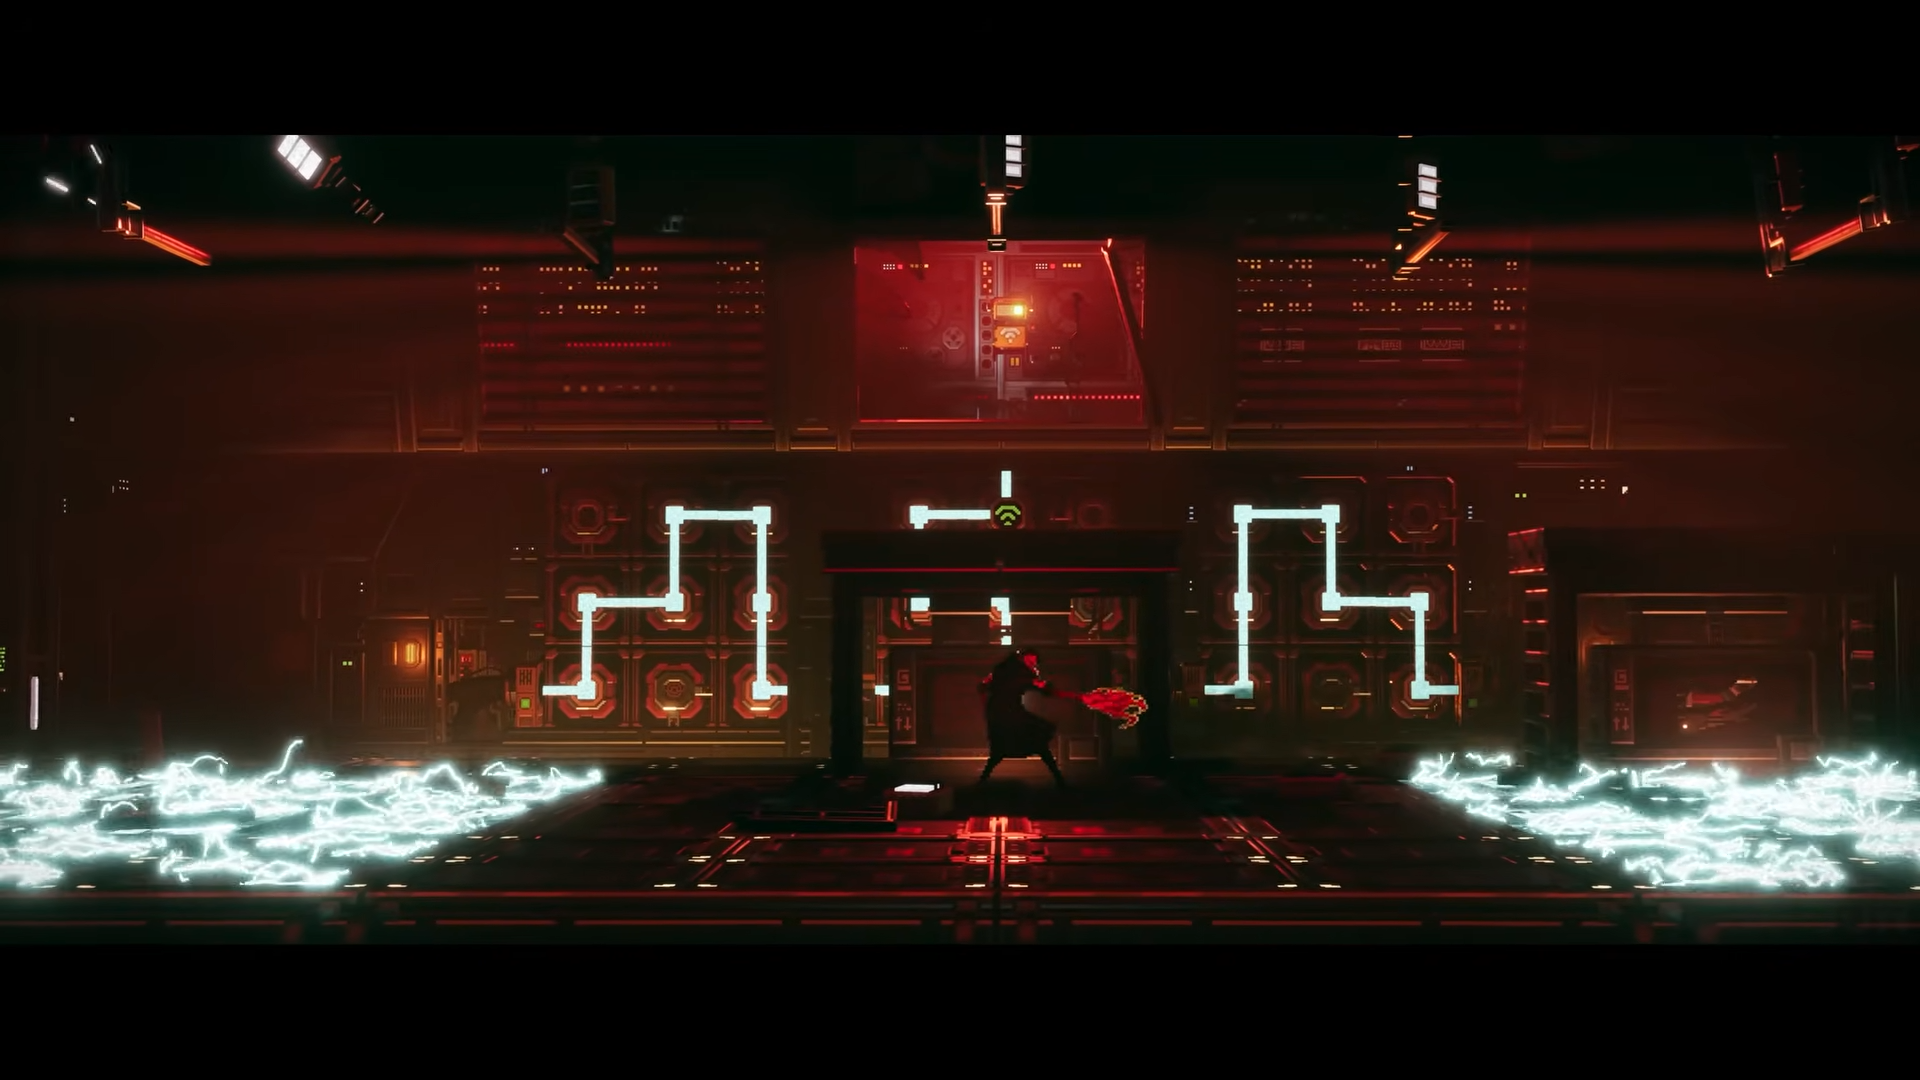
Once done, get out from the left side.
7. The final boss
The final boss caps the story in the heart of Phoenix‑City, tying together the themes of R.E.A.C.H.’s identity and Phoenix Corporation’s control, and mechanically it expects you to have internalized everything about the combat system—dodges, counters, ranged pressure, and multi‑phase endurance.
Step 1: Take care of the minions first
The fight has multiple distinct phases, each introducing at least one new attack or arena twist. But for the first phase, you’ll have to take out the party. Beware the tips of some of their knives, they carry a charge.

Step 2: Platform your way
Once you’ve taken out the minions, go right, climb the building.
Then come left and land on the upper area.
Strike the boxes there and then drop down.
After a brief cutscene, you’ll fight a few more of the minions.
Then climb the building on the left and land on the upper area and do as before.
Step 3: Practice crowd control while taking on the final boss
Take out the minions as before. You’ll also see a bigger enemy stalking you.
Identify early patterns and last‑phase chaos. Then skew your playstyle toward surviving that specific segment
Step 4: Carry forward lessons from every previous boss
Each phase tends to echo earlier checks: crowd control like PCPD Squad and drones, heavy dueling like Uncle Ben, hazard awareness like the Generator fight, and multi‑phase pattern changes like the Commissioner rematch.
Recognize these echoes and respond with the same tactics you already practiced, instead of trying to invent a brand‑new approach.
Step 5: Use all of your tools, not just your favourite combo
By this point you likely have access to multiple Huxley modes, kinetic bursts, defensive tools, and upgraded movement options. Avoid tunnel vision on a single comfortable combo; weave in deflects, shockwaves, and special shots whenever the boss’s pattern presents a safe opening.
Boss fight locations across Phoenix‑City
Boss fights are spread between the ruined outskirts and the corporate heart of Phoenix‑City: early fights happen as R.E.A.C.H. is escaping PCPD forces and dealing with gangs like the Termites outside the city walls, while later encounters unfold at fortified checkpoints, generators, and corporate interiors controlled by Phoenix Corporation leadership.
Boss fight rewards and progression
While Replaced doesn’t turn every boss into a loot piñata, each major encounter does unlock significant story and progression milestones, and often indirectly leads to new upgrades or areas.
| Boss fight | Main progression reward | Secondary benefits |
|---|---|---|
| PCPD Squad | Completes early escape arc and pushes you beyond the initial crackdown, opening up more of the world. | Unlocks full access to early hub interactions and sets up later upgrades. |
| Uncle Ben | Resolves the Termite Lair storyline and advances Chapter 3’s climax. | Often followed by new side‑quest availability and character development in town areas. |
| Police Drones | Clears a major mid‑game roadblock, opening the path deeper into Phoenix‑controlled infrastructure. | Serves as a soft gate ensuring players have mastered ranged pressure before late‑game fights. |
| The Commissioner (Generator) | Advances the checkpoint/wall storyline and leads toward the city‑interior arcs. | Teaches arena hazard management, preparing you for more complex later arenas. |
| The Commissioner – final fight | Removes a central antagonist and unlocks subsequent late‑game chapters and story revelations. | Often associated with new narrative payoffs and access to higher‑tier content. |
| The Matriarch | Clears a late‑game chapter segment and fixes certain progression‑critical checkpoints (as indicated by patches). | Solidifies your mastery of large‑body patterns before the finale. |
| Final boss | Completes the main story, triggers the ending, and rolls credits. | May unlock post‑game content, replays, or additional difficulty runs depending on your platform and settings. |
Keeping your edge in every Replaced boss fight
Mastering Replaced’s bosses is less about memorizing one perfect route and more about treating every fight as a chance to refine your timing, movement, and awareness within its rhythmic 2.5D combat system. If you consistently prioritize dodging cleanly, neutralize ranged threats, leverage your upgrades intelligently, and treat each defeat as information rather than failure, every boss from the PCPD Squad opener to the final showdown becomes a tough but fair exam you’re fully equipped to pass.


Leave a Reply