Outlook is a well-known email client that has served businesses and users alike since the early days of Microsoft Office. It allows you to manage all your email addresses and emails in a single place while adding the ability to integrate with other services, apps, and more.
Outlook even has support for Calendar invites as well as a Teams meeting add-on that can help you achieve a lot more during work hours. Sadly, like any other email client, Outlook will sometimes encounter an issue where an email will get stuck in the outbox and refuse to send. Here’s all you need to know about this issue and how you can fix it on your device.
Why are my emails stuck in the outbox?
Your emails could be stuck in the outbox due to a various number of factors. It could be network issues, incorrect internet setup on your device, proxies, VPNs, and a lot more. Here are a few common reasons why users end up facing this issue in Outlook.
- Large Attachments: Email attachments have been a thing for a long time and the ability to send files has been a much welcome addition. But some email providers limit the size of attachments in an email. This means that if you are trying to send a file larger than its permitted size then unfortunately Outlook won’t be able to handle this issue and your email will be stuck in the outbox.
- Network Issues: Issues related to your ISP, router, firewall, DNS settings, Proxy settings, VPNs and more could cause issues with your network. High ping or data loss can also interfere with the functionality of Outlook. Network Issues could also be the reason why your emails are stuck in the Outbox.
- Incorrect system date and time: Your system’s date and time are used to sync with your email servers which in turn helps you access and manage your account as well as get push notifications. Sadly if your date and time are incorrect when compared to today then you can end up facing issues with your emails, especially if your email provider has a provision for scheduling emails.
- If you opened the email: If you decided to open the email while it was stuck in the inbox then Outlook will have stopped the sending process. This is the default behavior for the service and in this case, you will simply need to re-send the email.
Related: How to Stop Apps From Opening on Startup on Windows 11
10 ways to check for issues with Outlook app
There are tons of ways to fix issues with emails stuck in the outbox in Outlook. These fixes can vary depending on your device, setup, and network connectivity. Hence we highly recommend you go through the list of checks below first. This will help you narrow down the cause of your issue and use an appropriate fix from the list below accordingly. Let’s get started.
Here are 11 checks you need to perform to find an appropriate fix. We recommend you start with the first one and make your way through the list to make sure everything is working as intended.
1. Check your network connection
We first recommend that you verify connectivity on your device. Ensure that you can receive emails by sending a dummy email to yourself which should be received by Outlook. If your network is working as intended but you fail to receive this email then Outlook is likely unable to connect to its servers.
We recommend you ensure that Outlook is not blocked in your firewall or your ISP hasn’t blocked the service respectively. It could also be that Outlook is unable to establish a secure connection which would indicate a breach in your network connection or worse. You can get in touch with your ISP to get this issue resolved for your network.
2. Check for issues with Outlook servers
We also recommend you check the service status of Outlook using the links below. It could be that the service has been temporarily suspended due to server issues. In such cases, Outlook should be back up and running within a few hours at maximum.
- Official Microsoft Service Status
- Official Microsoft 365 Service Status Twitter
- Official Microsoft Service Admin Status
- Downdetector Office 365
- Downdetector Outlook
3. Check if your ISP is blocking your outgoing mail server port number
If you are using a custom mail server port number then it could likely be that your ISP is blocking your connection. This could be for several reasons and your ISP might refuse to help you in such scenarios. In this case, we recommend switching to a different port if possible or getting in touch with your email provider instead.
4. Ensure that you are within your sending limits if using Outlook for web
If you are using Outlook for the web then there are certain limits on the number of recipients, allowed per email. This is to prevent spam and other users from misusing the free service and hence the default limits are enforced by Microsoft.
These limits vary on your usage but the default ones for subscribers of Microsoft 365 have been mentioned below. If you are a non-subscriber then you can view the estimated default limits below to get an idea of how many recipients you can have in an email.
Limits for Microsoft 365 subscribers
- Daily recipient limit: 5,000
- Maximum recipients per email: 500
- Maximum daily non-relationship recipients: 1,000
Estimated default limits for non-subscribers
- For non-subscribers with a new account
- Maximum recipients per email: 10 to 50
- Maximum emails in a day: 10 to 50
- For non-subscribers with an existing (old) account
- Maximum recipients per email: 100
- Maximum emails in a day: 300
If you have exceeded these limits then unfortunately it is the reason why your emails are stuck in the outbox. In such cases, you can wait for the next day to send the concerned email or use another email client to help you achieve the same.
5. Check your system time
We now recommend you check your system time and the status of NTP on your system. If you recently edited your system time then we recommend you check and sync the same to the current time and date in your region. Additionally, if you are using a custom NTP server then we recommend reverting to the default one using the guide below. Follow the steps below to get you started.
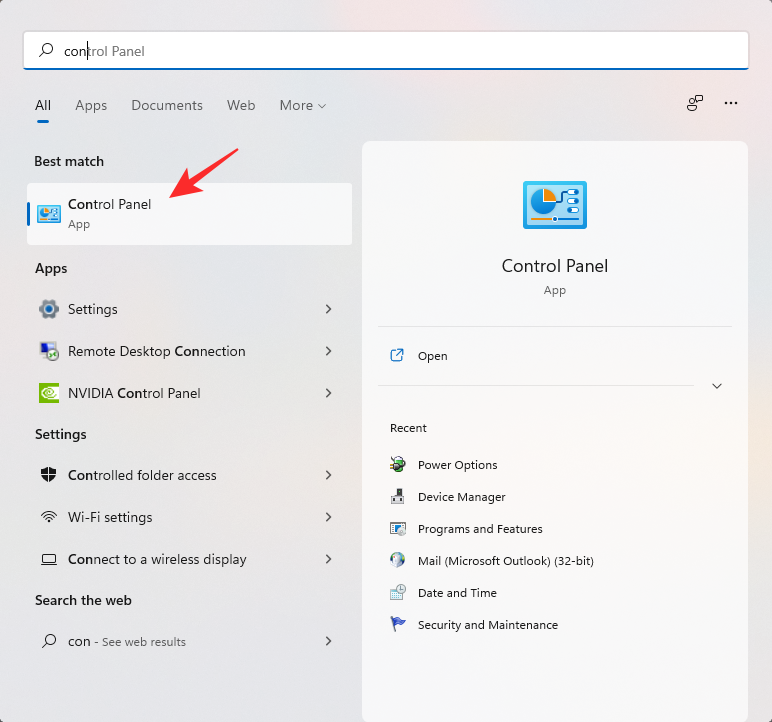
Open the Start menu, search for Control Panel and launch the same on your PC.
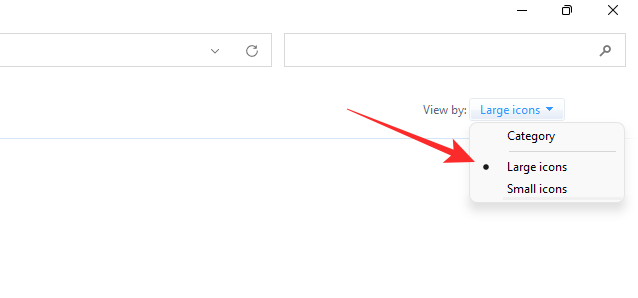
Click on the drop-down menu in the top right corner of your screen and select ‘Large icons’.
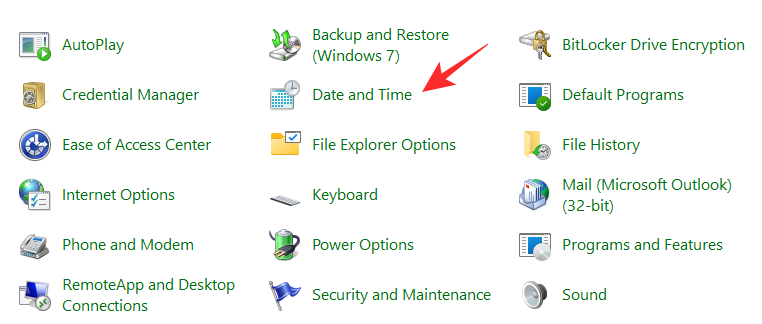
Click on ‘Date and Time’ on your screen.
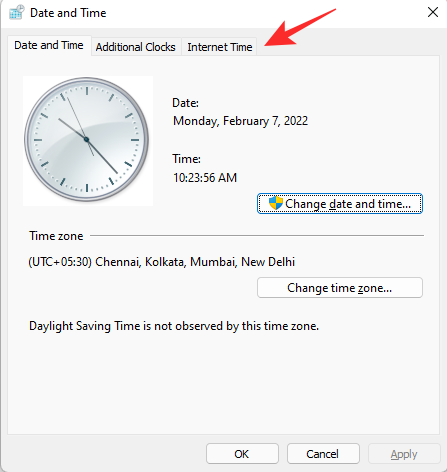
Switch to the ‘Internet Time’ tab by clicking on the same at the top of the window.
Click on ‘Change Settings…’.

Check the box for ‘Synchronize with an Internet time server’ if not already checked on your system.
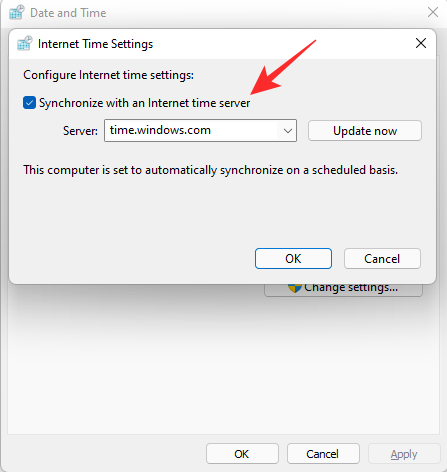
Enter the following as your preferred NTP server. This is the default windows server for NTP.
time.windows.com
Click on ‘OK’ once you are done.
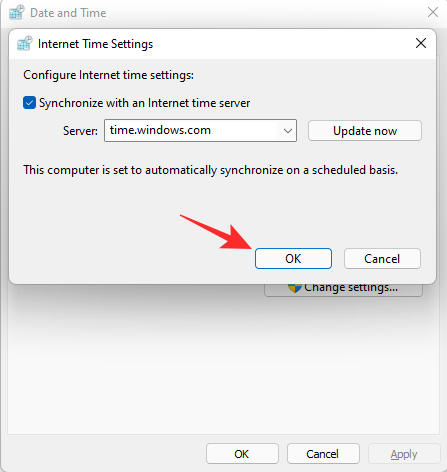
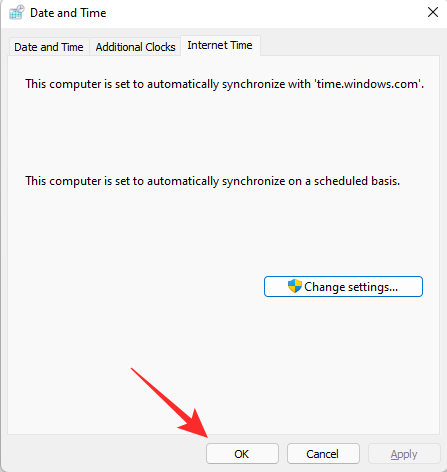
Click on ‘OK’ again to close the ‘Date and Time’ window.
Right-click on the ‘Date and Time’ in your taskbar and select ‘Adjust date and time’.
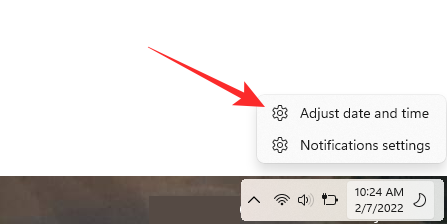
Click on ‘Sync now’ under ‘Addiional settings’.
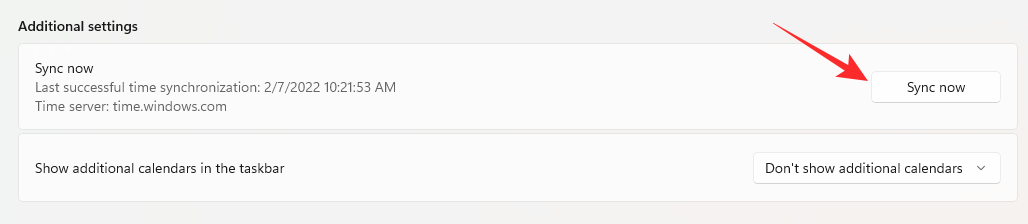
Windows will now sync your time to the recently changed NTP server and set it accordingly.
We now recommend you restart Outlook on your system and try sending the concerned email again. If NTP server or incorrect date and time was your issue, then the same should now be fixed for your system.
6. Check your provider for email/attachment sending limits
Many email providers have attachment size limits on emails. The same could be the case for you and you could be trying to send an attachment larger than the permitted size by your provider.
We recommend you check attachment limits set by your email provider and try sending an attachment that complies with these limits. This will ensure that your email attachment does not get stuck in the outbox in Outlook. Here are some common email providers and their respective limits to help you along with the process.
- Gmail: 25MB
- HubSpot: no limit, recommended size <1GB
- ProtonMail: 25MB
- Outlook Mail: 20MB
- Yandex Mail: 30MB
- iCloud mail: 20MB
7. Check if your Outlook is set up to delay each sent email
Outlook allows you to create rules that delay the sending of emails on your system. These rules can help you retract incorrect emails or edit information in outgoing emails before they are delivered to the recipient’s inbox.
Sadly, during this delay, the email is kept in your outbox which could be the cause of your email being stuck in the outbox as well. We recommend you use the guide below to check for any Outlook rules that could be delaying your emails which in turn makes them appear stuck in your outbox.
Open Outlook and click on ‘File’.

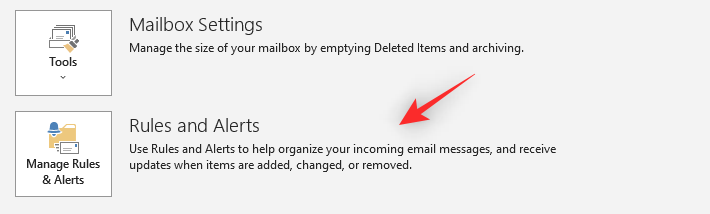
Select ‘Manage Rules & Alerts’.
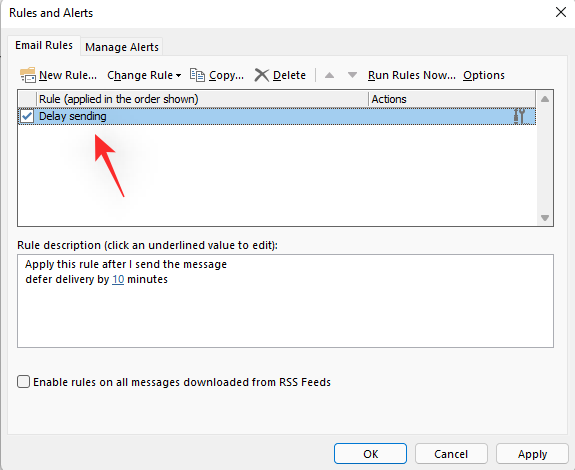
Now check the rules and alerts set up on your system. You can take a look at their respective actions and check for ‘defer delivery by several minutes’. If found, click and select the rule from the list on your screen.
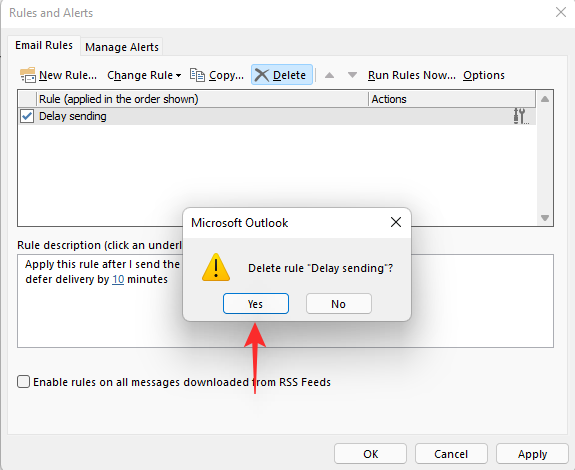
Click on ‘Delete’ at the top to delete the delay rule.

Confirm your choice by clicking on ‘Yes’.
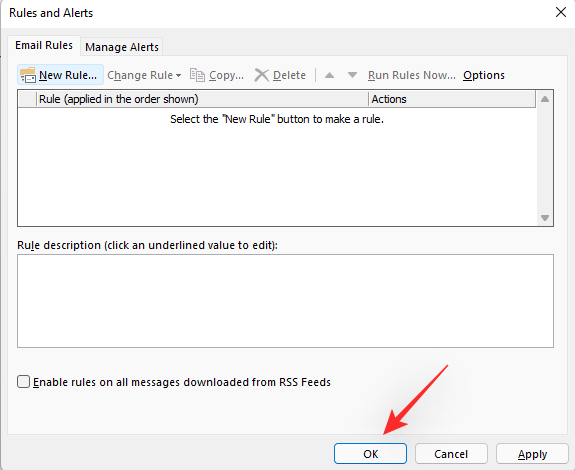
Click on ‘OK’ to apply and save the changes you made.
We now recommend you restart Outlook on your device from the Task Manager. This will help the app register the recent changes and send the emails delayed in your outbox immediately.
8. Check if Outlook is online
Outlook by default does not use your internet connection in case you are on a metered network. Additionally, some programs and firewall rules can cause issues with Outlook’s connectivity as well. We recommend you open Outlook on your device and check if it can connect to its servers. If Outlook can establish a secure connection to its servers, you should see a ‘Connected’ message in the bottom right corner of your screen.
However, if Outlook is unable to connect to the desired servers then it will read ‘Working offline’ in the same area. In such cases, we recommend you connection status first via Outlook and then troubleshoot your network connection if the problem persists. Follow the steps below to get you started.
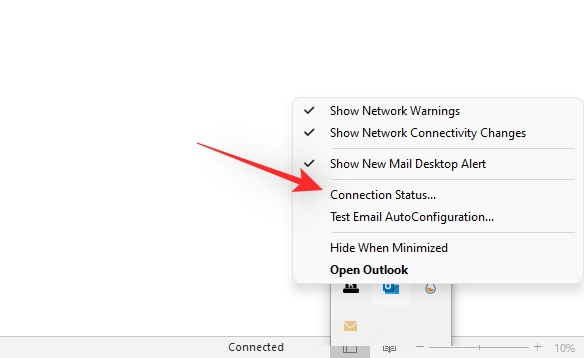
Hold down Ctrl on your keyboard and right-click on the Outlook icon in your taskbar overflow area. Select ‘Connection status’.
You should now get a window with the list of your added email accounts as well as their statuses. Check the ‘Status’ column.
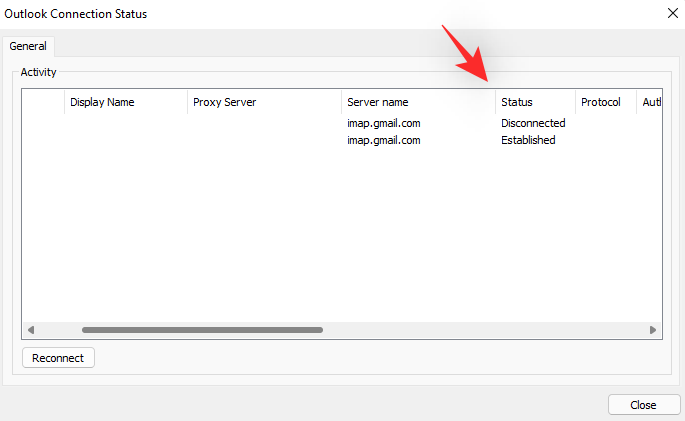
If an email account reads ‘Established’ then it is working as intended. However, if no email accounts show up in the list then Outlook is unable to connect to the internet.
At this point, if all your email accounts are unable to connect to the internet then it is likely an issue with your network connection. However, if some email accounts show ‘Established’ then it is likely that the other affected accounts are facing issues connecting to the desired servers. Click on ‘Reconnect’ to try and manually establish a connection with the dedicated servers. This should help fix the issue for most users.

If you still aren’t unable to connect to the servers then we recommend you check your password and try to re-add the email account again. You can use the guide below to help you along with the process. We also recommend that you first check the server and service status of your email provider and Outlook using the links in the next section.
9. Check server status of Outlook and your email provider
At this point, you should check the service status of Outlook and your email provider. It could be that either of the two has been facing downtime and it could be the reason why your email is stuck in the Outbox. Use the links below to help you get started. We recommend you visit your email provider’s website to check the respective service status.
- Outlook service status | Microsoft Link
- Outlook service status | Downdetector Link
If either of the services is facing an issue, then you have no choice but to wait until the issue is resolved. You can also use a different email client or a different email provider in case it is an urgent email that you need to send.
10. Check if you recently migrated to Office 365
If you have recently migrated to Office 365 then this is a known bug that many users have faced in the past. In such cases, you will have to delete your mail, re-compose a new one, and send it from Outlook 365 on your PC. This should help fix the issue and get everything up and running again as intended.
If however, this does not work for you and the email is still stuck in the outbox then sadly you will need to recreate and re-add your profiles to Outlook to fix this issue. We recommend you refer to the same in the fixes section to fix this issue. You can use this link to jump straight ahead to the discussed section.
11. Check if a recent Microsoft Office update happened
If a recent Microsoft Update happened on your PC then it is likely the reason why your email is stuck in the Outbox. Check if you have a pending restart in the Windows update section on your device. Either way, a restart is the recommended solution to fix this issue in either case and we recommend you do the same at the earliest.
Once you restart your PC the update will be applied and configured which should help get Outlook working as intended. Your mail should be sent from the Outbox once you get past the lock screen.
15 ways to fix the emails stuck issue in Outlook
At this point, if your setup checks out and passes all the checks then we recommend you start with the fixes below. You can start with the first one and make your way through the list until you fix your issue. Let’s get started.
1. Fix emails stuck due to larger attachments
If you were able to identify your issue above as a large attachment than permitted by your email provider, then we recommend you follow the guide below to delete the attachment from the email. You can then use a cloud sharing service like Google Drive to share this attachment via your email. Let’s get started.
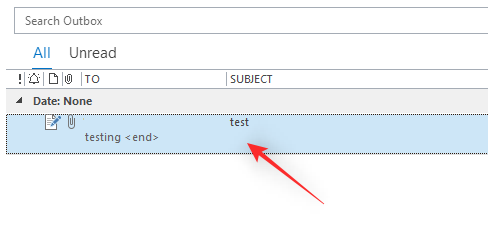
Open Outlook and click on ‘Outbox’ on your left. Ensure that the email is still in the outbox.

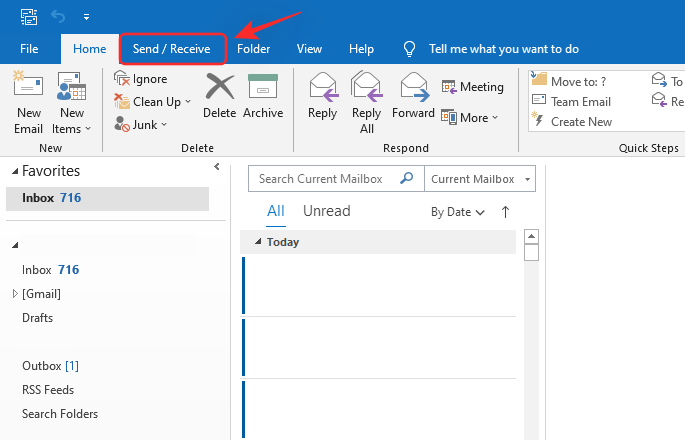
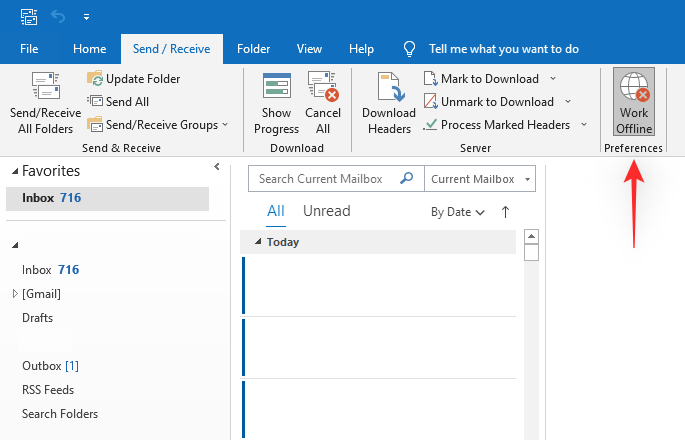
Now click on ‘Send/Receive’ at the top.
Click on ‘Work Offline’.
Close Outlook and sign out of Windows at this point.
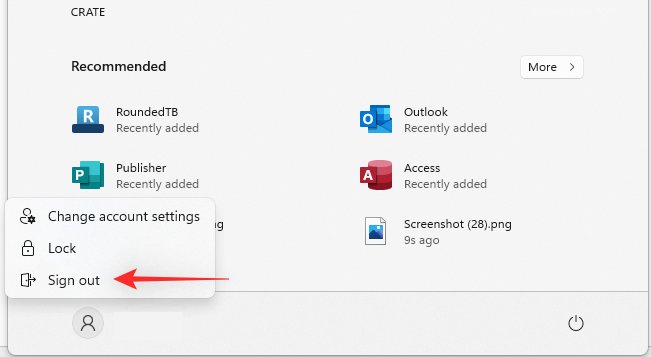
Once signed out, sign back in and restart Outlook. Click on ‘Outbox’ on your left again. Now drag the concerned email to ‘Drafts’ on your left.

Once the email has been moved to Drafts, click on ‘Work Offline’ at the top to disable the same.
Once disabled, click and open your Drafts folder.

Open the concerned email and right-click on the large attachment at the top. Select ‘Save as’.

Now choose a convenient location for the attachment on your PC. Click on ‘Save’ once done.

You can now upload it to a convenient cloud storage service and generate a sharable link for the same which can be attached to the same email and sent again. The email should this time not get stuck in your outbox.
2. Enable ‘Send immediately when connected’
Outlook has a toggle for ‘Send immediately when connected’ that does exactly what it says. However, if this option is disabled, then your emails will remain in the outbox until you manually click Send or hit F9 on your keyboard to do the same.
You can change this behavior using the guide below to ensure that future emails do not get stuck in the outbox. Let’s get started.
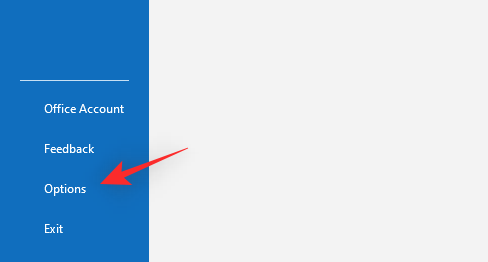
Open Outlook and click on ‘File’ in the top left corner. Click on ‘Options’ on your left.
Click and select ‘Advanced’ from the left sidebar.
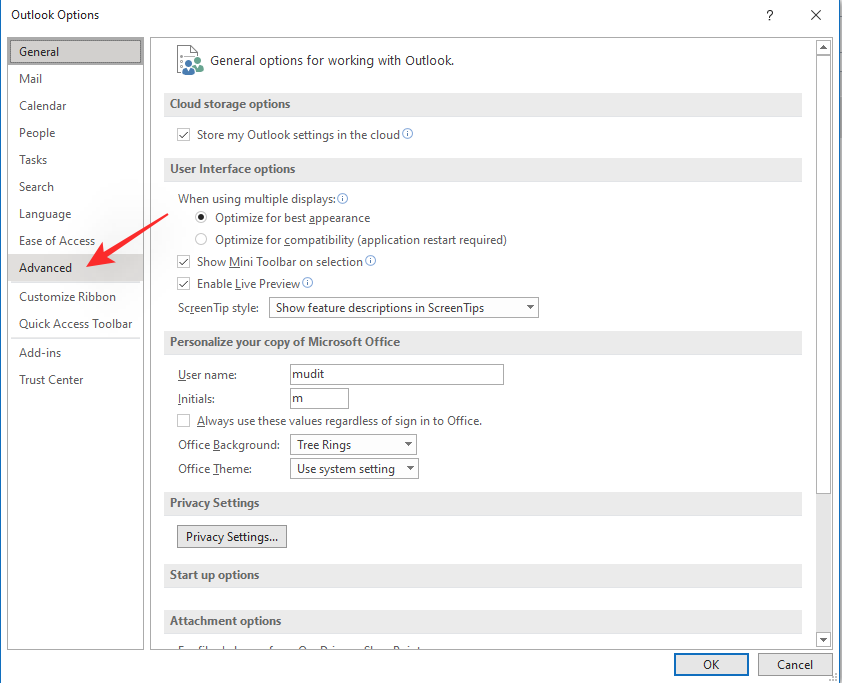
Scroll to find the ‘Send and receive’ section and check the box for ‘Send immediately when connected’.
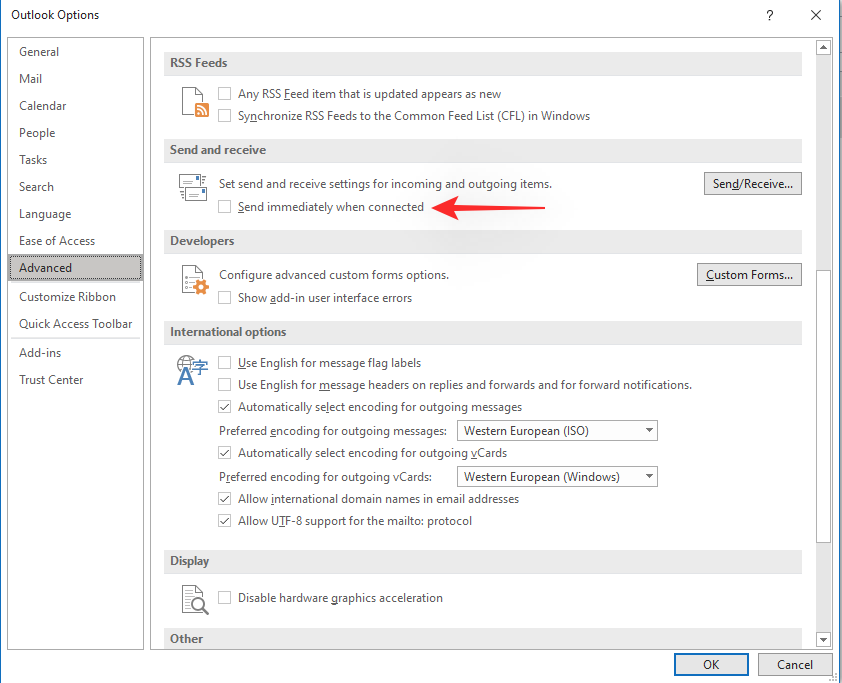
Click on ‘OK’ at the bottom to save the changes made.

And that’s it! Once enabled, close Outlook, restart your PC, and try sending the mail in your Outbox again. The stuck email should now be sent and so should any future emails affected by this issue.
3. Repair the Outlook app
We now recommend you Repair the Outlook app using the in-built repair tool. This should help fix any app-specific issues and bugs that might be preventing Outlook from sending the concerned email.
You can repair the Outlook app online or offline depending on your choice. We recommend you try online repair as the tool will be able to use your network connection to deliver more comprehensive solutions and use repair scripts hosted online. Follow the guide below to help you along with the process.
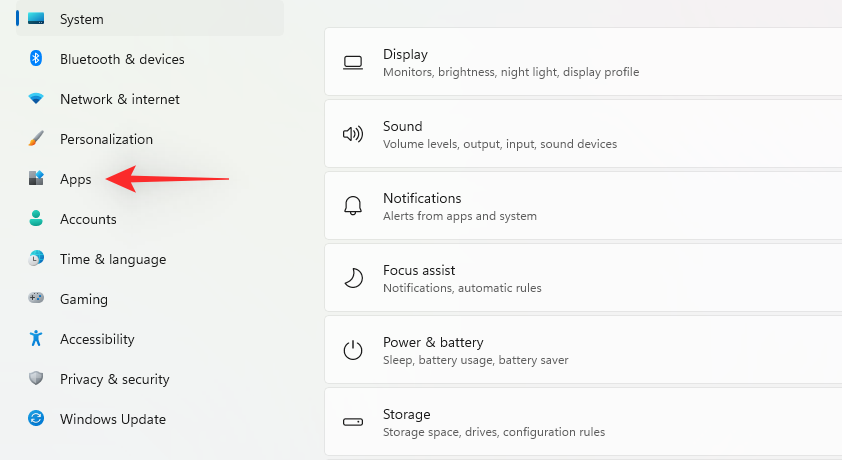
Press Windows + i on your keyboard to open the Settings app. Click and select ‘Apps’ on the left.
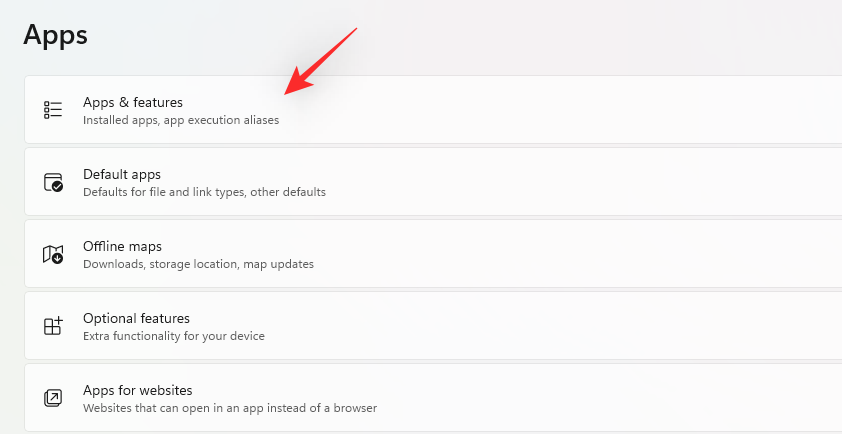
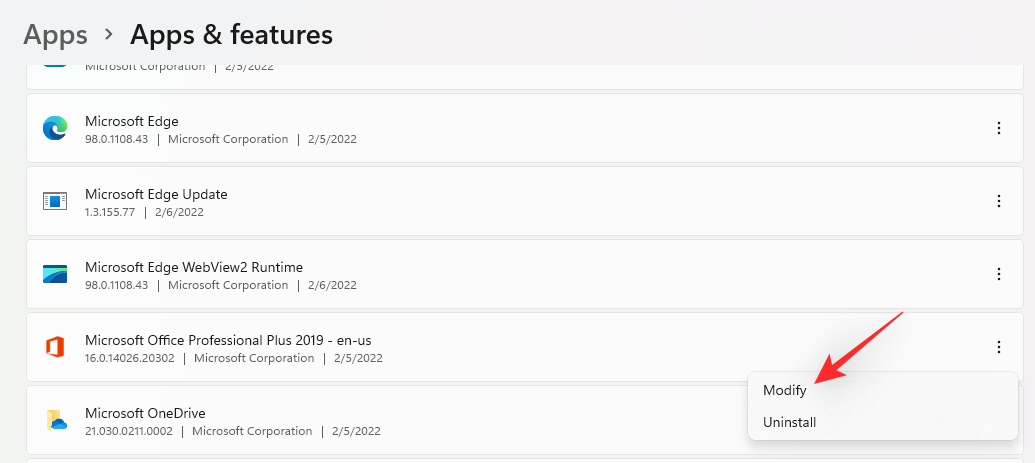
Click on ‘Apps & features’.
Now scroll the list to find Microsoft Office. Once found, click on the ‘3-dot’ menu icon for the same.
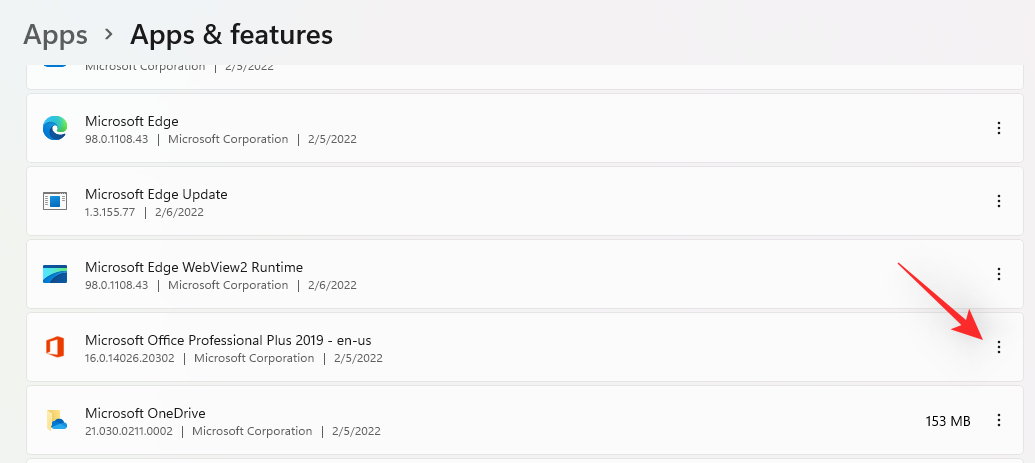
Select ‘Modify’.
You will now be greeted by the Microsoft Office repair tool. Select one of the options depending on your preferences.
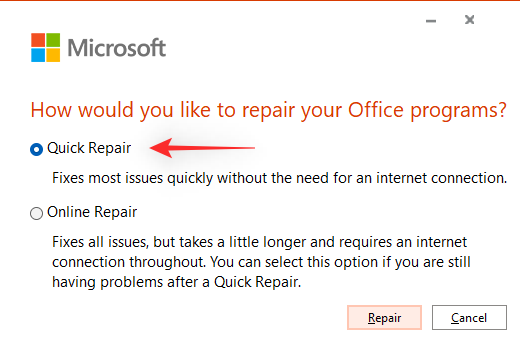
- Quick Repair: Quicker troubleshooting process that is carried out offline.
- Online Repair: Comprehensive troubleshooting process that requires an internet connection. This process takes a bit longer than the ‘Quick Repair’ option.
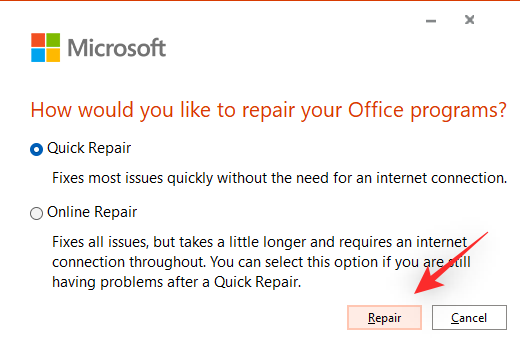
Once selected, click on ‘Repair’.
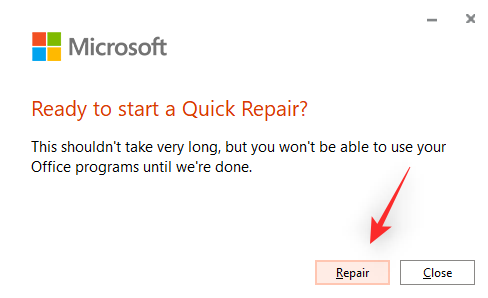
Click on ‘Repair’ again to confirm your choice and the process should now begin on your PC.
Wait for the repair tool to finish the process. Once done, click on ‘Close’. We now recommend you restart your PC before launching Outlook. Once restarted, launch Outlook and click on ‘Outbox’ on your left.
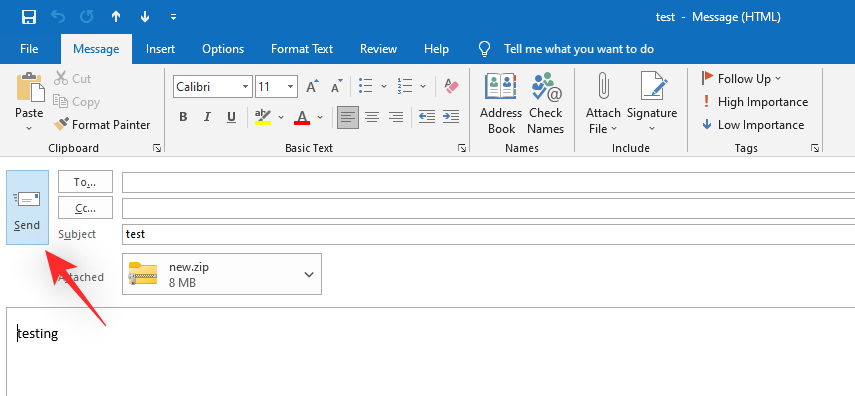
Double click and open the stuck email.
Click on ‘Send’ now.
And that’s it! The email should now be sent from the outbox as intended and no future emails should get stuck in the outbox again.
4. Update your password in Outlook if it was changed
If you recently updated your email password with your email provider then you will need to update the same within Outlook. If you haven’t updated your password then Outlook will be unable to connect to your email account which in turn is the reason why your email is stuck in the outbox. Ideally, Outlook should automatically request you for the updated password
Use the steps below to help update your password within Outlook,
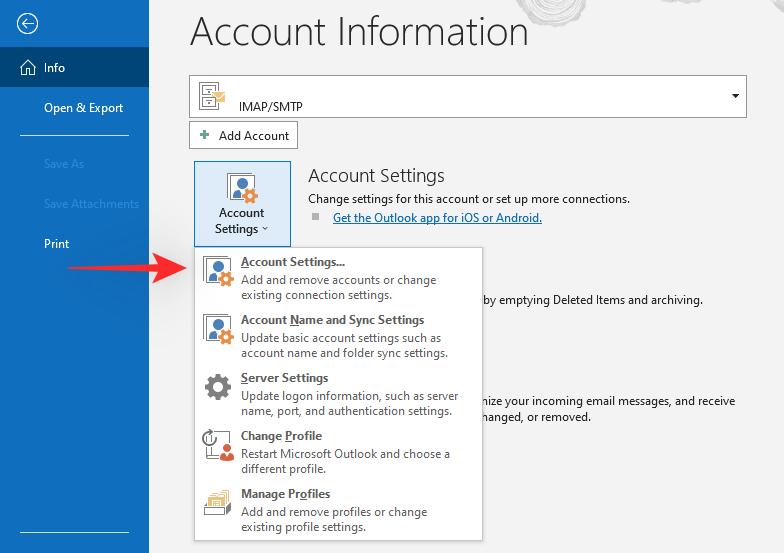
Open Outlook and click on ‘File’ in the top left corner.
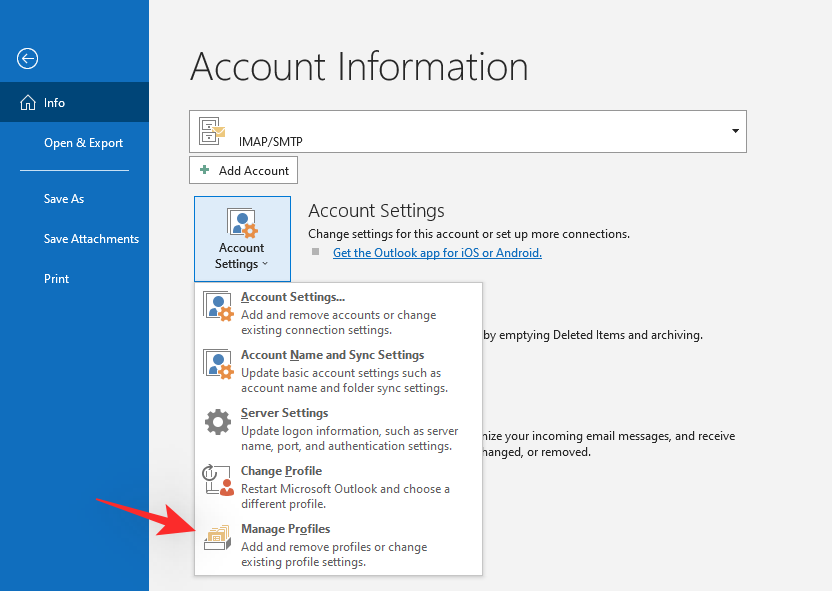
Now click on ‘Account Settings’.

Click and select ‘Manage profiles’.
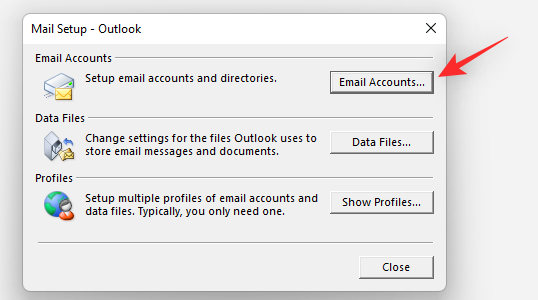
Click on ‘Email Accounts…’.
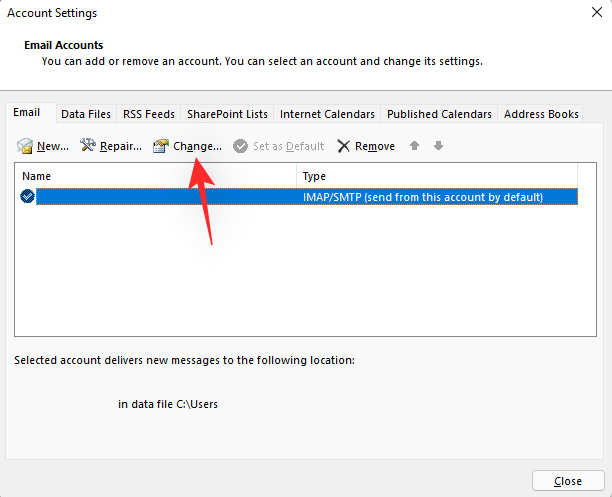
Click and select the account for which you wish to update your password.
Now click on ‘Change…’ at the top.
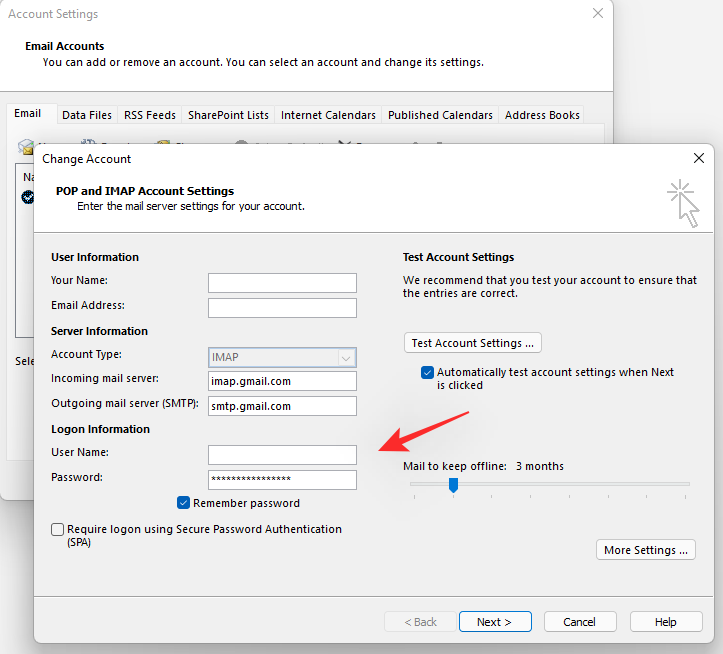
Enter your updated password at the bottom, on your left.
Once entered, click on ‘Next’.
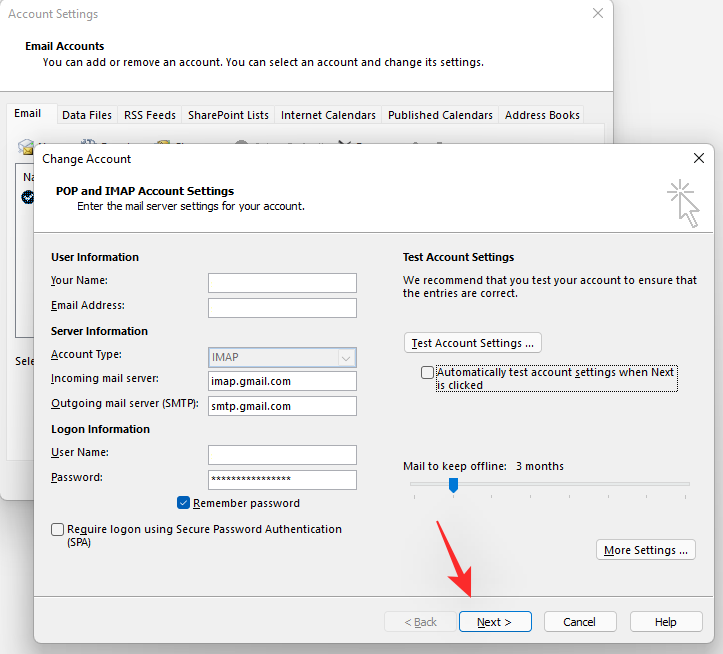
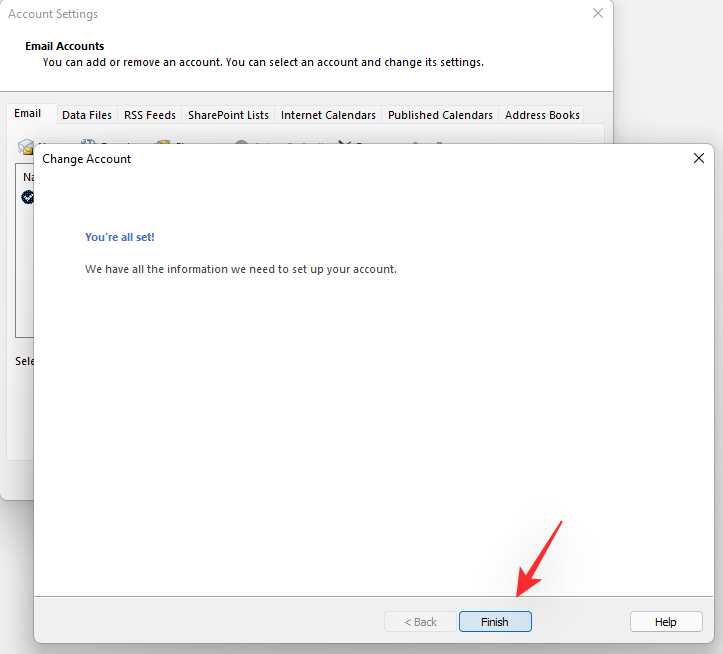
Outlook will now test your new password by connecting to the desired server and then sending a test email. If all goes correctly then Outlook will now use your updated password and show a successful message. Click on ‘Finish’.
We now recommend you restart your PC and launch Outlook again. Manually send the message in your outbox now and it should have no problem going through this time. Future emails too should no longer be stuck in the outbox as you will have now updated your password.
5. Delete your Outlook OST file
The Outlook OST file is the place where all your offline data for Outlook is stored. This contains all your offline emails and attachments and allows you to make changes to them while working offline. This offline database, however, can sometimes face bugs that can not only cause your emails to be stuck in the outbox but also prevent you from receiving incoming emails. Use the guide below to delete this file and restart Outlook. The app will then automatically populate a new file which should help fix your emails that are stuck in the outbox.
Open Outlook and click on ‘Outbox’ on your left.
Now click and drag the stuck email to your ‘Drafts’ folder on the left.
The email will now be moved to your drafts. If the email has an attachment then double click on it to open the email.
Now right-click the attachment and click on ‘Save as’.
Choose a convenient location to save the attachment and click on ‘Save’ once done.
The email will now be stored in your drafts and the attachment in your local storage. We recommend you back up the body to a text file just to be safe.
Repeat the steps above for any stuck emails to back them up in case they are not restored when rebuilding your OST file.
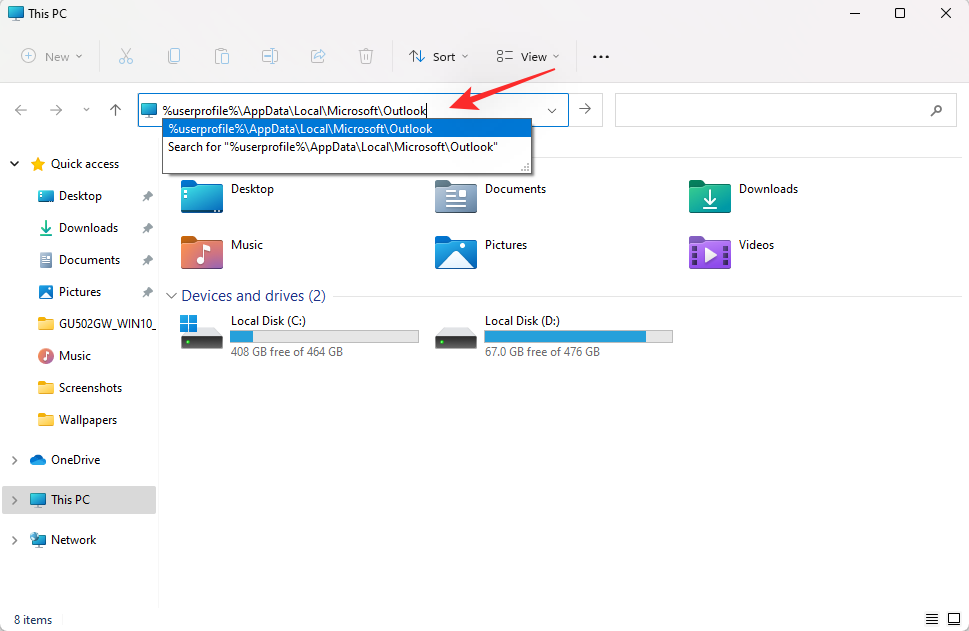
We can now delete the OST file on your PC. Press Windows + E on your keyboard to open the file explorer and paste the address below in your address bar at the top.
%userprofile%\AppData\Local\Microsoft\Outlook
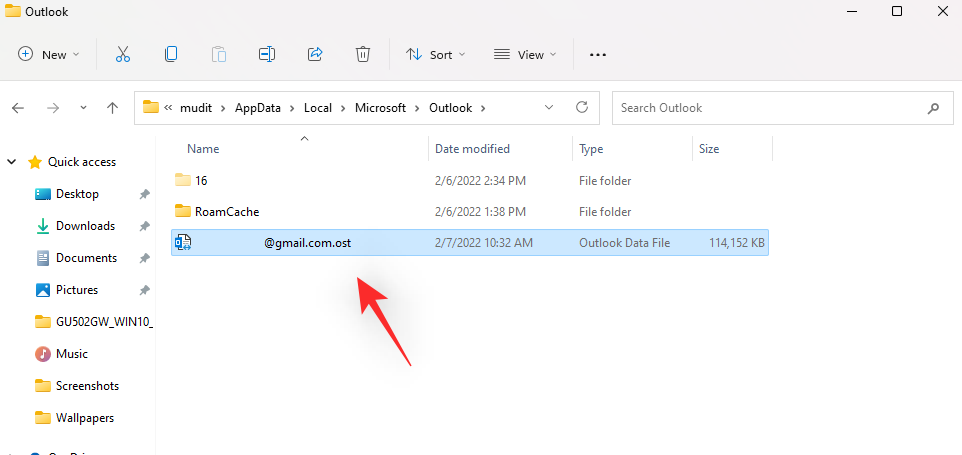
Click and select the concerned .ost file for the corrupt email ID in Outlook where the email is stuck in your outbox. Hit Del on your keyboard and click on ‘Yes’ to confirm your choice.
Once the file has been deleted, restart your PC and re-launch Outlook. And that’s it! The app will now automatically create a new .ost file. If your outbox emails were synced to the cloud then they should automatically show up in your Outbox. Once the connection has been re-established, these emails should be automatically sent to their respective recipients. In case they do not, you can manually click on ‘Send’ to send them again.

The emails won’t get stuck in your outbox this time. If however, the emails were not synced then you can use the backups we made earlier in drafts and text files to restore them and send them again.
6. Remove and re-add the email account
At this point, it’s time for some drastic measures. We will now remove and re-add your email account in Outlook. This should help get everything set up again and fix any bugs related to your email account in the background. Use the guide below to help you along with the process.
Open the Start menu, search for Control Panel and click and launch the same from your search results.
Click on the drop-down menu in the top right corner and select ‘Large icons’.
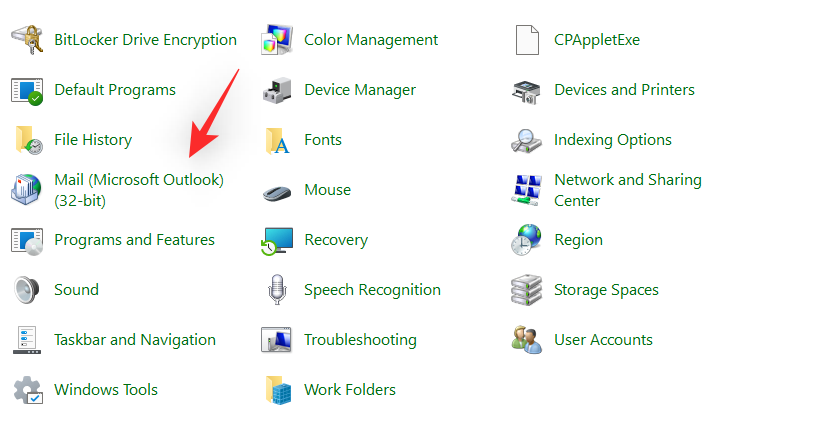
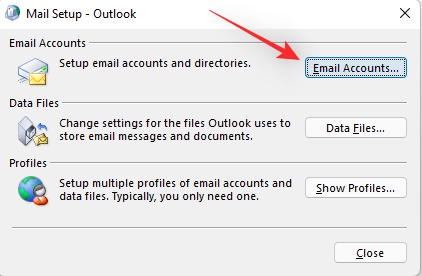
Click on ‘Mail (Microsoft Outlook) 32-bit’.
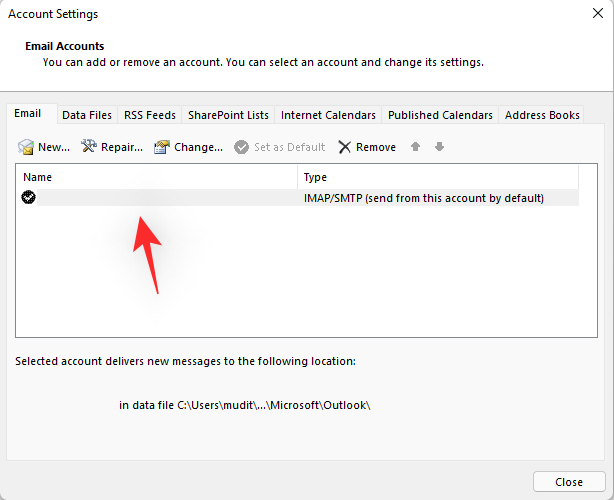
Now click on ‘Email Accounts…’.
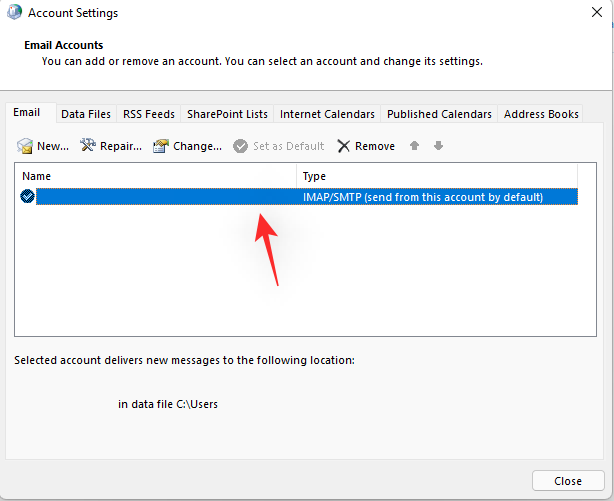
Click and select the email account where your emails are stuck in the outbox.
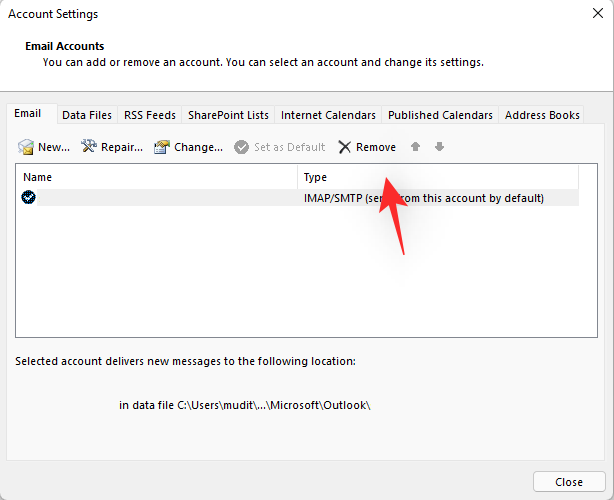
Now click on ‘Remove’ at the top.
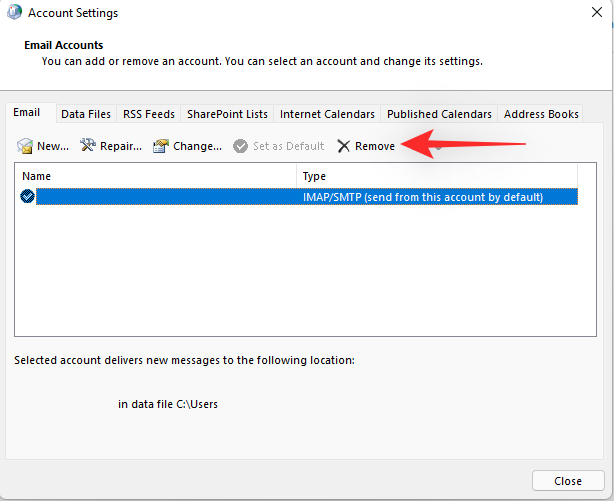
Confirm your choice by clicking on ‘Yes’. The concerned email account should now be removed from your Outlook app. Close the app and sign out of Windows. Once signed out, sign back in and re-launch Outlook on your PC. Click on ‘File’.
Now click on ‘+ Add Account’.
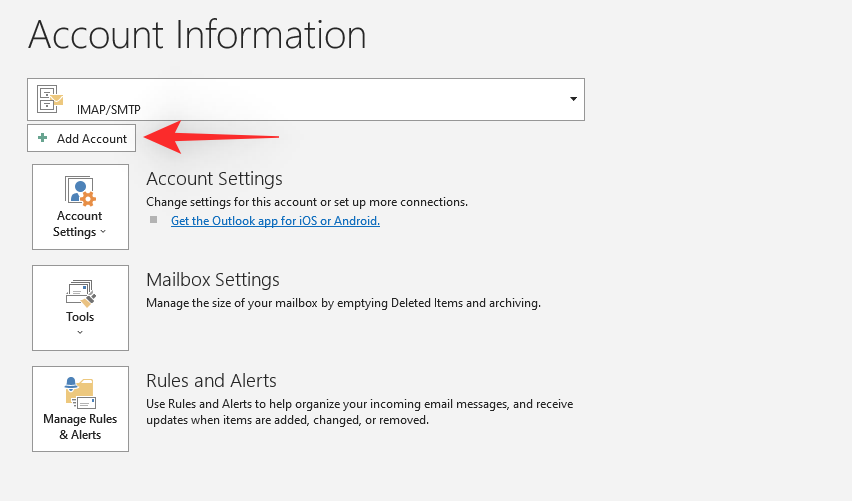
Add your email address and click on ‘Connect’.
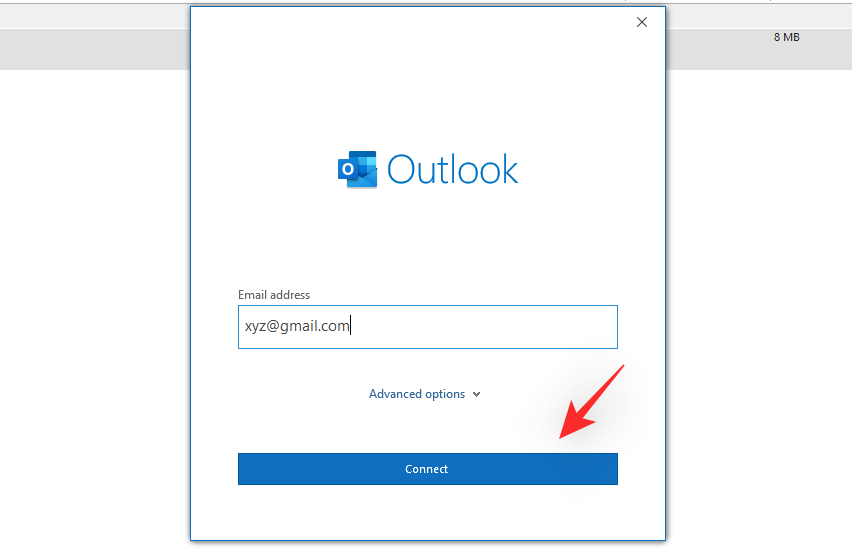
Now follow the on-screen instructions depending on your email provider to add your email account.
Once your email has been added, try sending the concerned email again. It should no longer be stuck in the outbox and should be sent to the concerned recipient’s inbox as intended.
7. Use the offline mode trick
The offline mode trick is a long-standing way to get stuck emails in the outbox working again. Follow the steps below to help you along with this process.
Open Outlook and switch to ‘Send/Receive’ by clicking on the same at the top.
Now click on ‘Work Offline’.
Once Outlook enters offline mode, click on ‘Outbox’ on your left.
Right-click on the stuck email and select ‘Delete’.
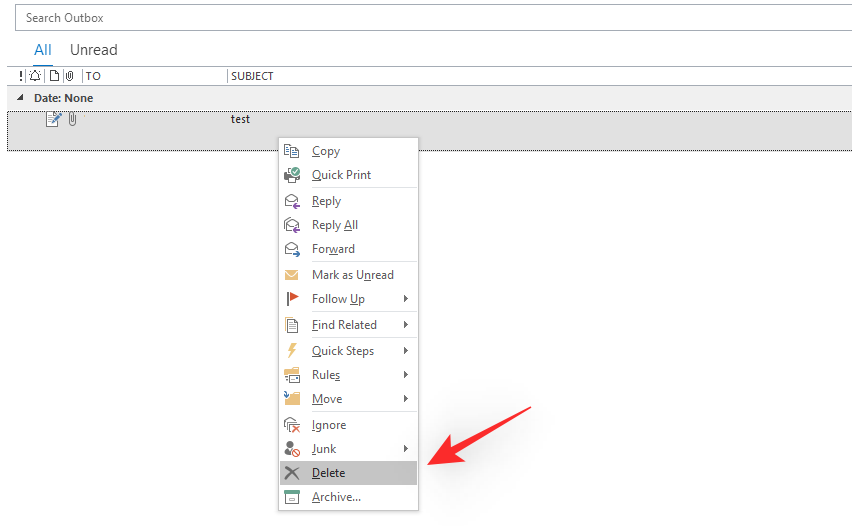
At this point, Outlook will stop trying to send the mail but the email won’t be deleted. Wait for 10 minutes and then click on ‘Work Offline’ at the top to go online.

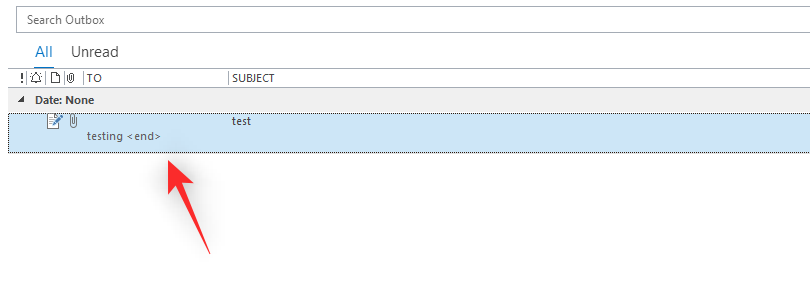
Close Outlook and log out of your PC. Once logged out, sign back in and launch Outlook. Click on ‘Outbox’ on your left.
Open the stuck email by double-clicking on the same.
Click on ‘Send’.
The email should now be sent as intended. If not, you can use the desktop trick below to try and see if that fixes the issue for you.
8. Use the desktop trick
If the offline mode trick did not do the job for you then this desktop trick might just do the trick for you. We will create a local file for your stuck email. Follow the steps below to help you along with the process.
Open Outlook and click on ‘Outbox’ on your left.
Click and drag the stuck email to your desktop.
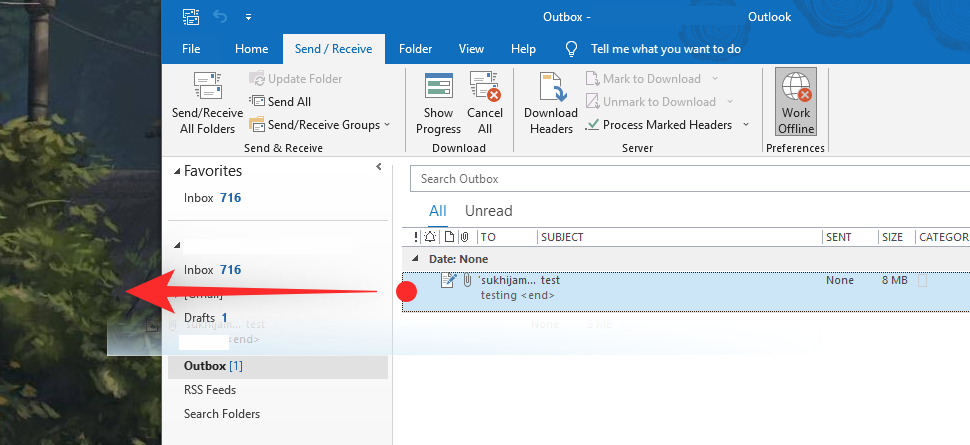
A local file for the concerned email will now be created on your desktop.
Switch to Outlook and delete the stuck email.

Close Outlook and restart your PC. You can also re-login to achieve the same effect after closing Outlook. Once done, double click on the local email stored on your desktop.
Click on ‘Send’.
If you were facing a temporary bug then this should help fix your issue and the email should no longer get stuck in your ‘Outbox’.
9. If using an a version than Outlook 2016
If you are using older Outlook email clients an SFC scan will help you fix Outlook and get most of your emails unstuck. Ensure that Outlook has been terminated on your PC and then follow the guide below to help you get started.
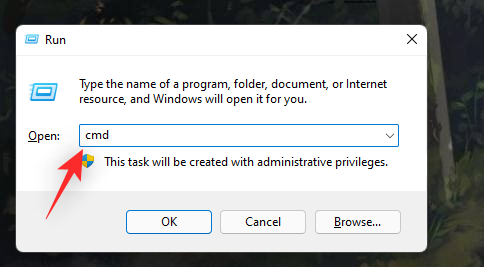
Hit Windows + R on your keyboard and type in the following, press Enter once you are done.
cmd
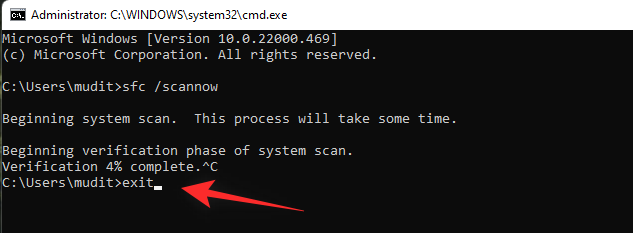
Type in the following and press Enter on your keyboard. This will run the SFC or System File Checker on your system and fix any corrupt system files that could be causing issues with Outlook.
sfc /scannow

Once the scan completes, type in the following and hit Enter to close the command prompt window.
exit
Launch Outlook and click on ‘Outbox’ on your left.
Now open the stuck email and click on ‘Send’.
The email should now go through as intended.
10. Turn off Cached Exchange Mode
Cached Exchange Mode is a feature where a copy of your exchange account’s inbox is stored locally on your device. Hence this fix only applies to users using an Exchange account within Outlook.
The local database created by this feature can sometimes be corrupted which can cause your emails to be stuck in the Outbox. This issue can be fixed by disabling Cached Exchange Mode and you can use the steps below to help you along with this process.
Open Outlook and click on ‘File’ in the top left corner.
Now click on ‘Account Settings…’ and select the same from the drop-down menu.
Click and select the concerned exchange account from the list on your screen.
Click on ‘Change’ at the top.
Now uncheck the box for ‘Use Cached Exchange Mode’ under Offline Settings. Click on ‘Next’ once you are done. You will now be informed that changes made will not be applied until Outlook has been restarted on your device. Click on ‘OK’ to dismiss the message. Now click on ‘Finish’.
Close and re-open Outlook on your PC. Once re-opened, wait for the email client to update itself. Once updated, click on ‘Outbox’ on your left and double click on the stuck email.
Click on ‘Send’.
The email should no longer be stuck in your ‘Outbox’ and should be sent directly to the recipient.
11. Check your add-ins
If by this point your email is still stuck in your outbox then you need to check add-ins currently added to Outlook. Add-ins can sometimes introduce bugs and break Outlook with feature updates or add-in updates.
You can identify misbehaving Outlook add-ins by restarting Outlook in safe mode and then checking if your emails get stuck in the outbox or not. Follow the steps below to get you started.
11.1 – Identify misbehaving add-ins
Press Windows + R on your keyboard to launch the Run dialog box.
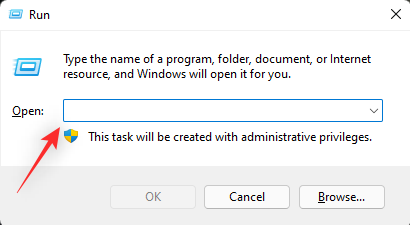
Now type in the following and hit Enter on your keyboard.
Outlook.exe /safe
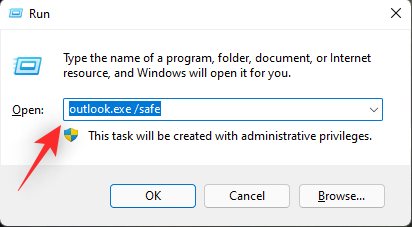
Note: If the above command does not launch Outlook in safe mode, then use this command instead – C:\Program Files\Microsoft Office\OfficeNN. Replace NN with the current version of Outlook installed on your PC.
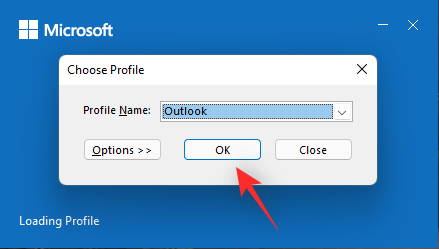
Click on the drop-down menu and select the Outlook profile where you are facing this issue.
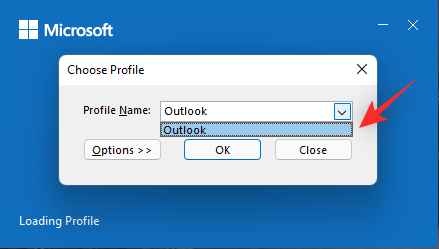
Click on ‘Ok’ once you are done.
Outlook will now launch in Safe mode. Click on ‘Outbox’ on your left.
Double click on the stuck email and click on ‘Send’ to try and manually send it again.

If the mail can go through then you are facing an issue with a misbehaving add-in that causes your mails to get stuck in the inbox. In such cases, you can try removing them one by one and check Outlook normally until the issue is fixed for you.
However, if your mail is still stuck in the outbox in safe mode, then you can check out the last resorts mentioned below.
11.2 – Remove misbehaving add-ins
Here’s how you can remove misbehaving add-ins once you have identified them using the guide above.
Open Outlook and click on ‘File’ in the top left corner.
Now click on ‘Options’.
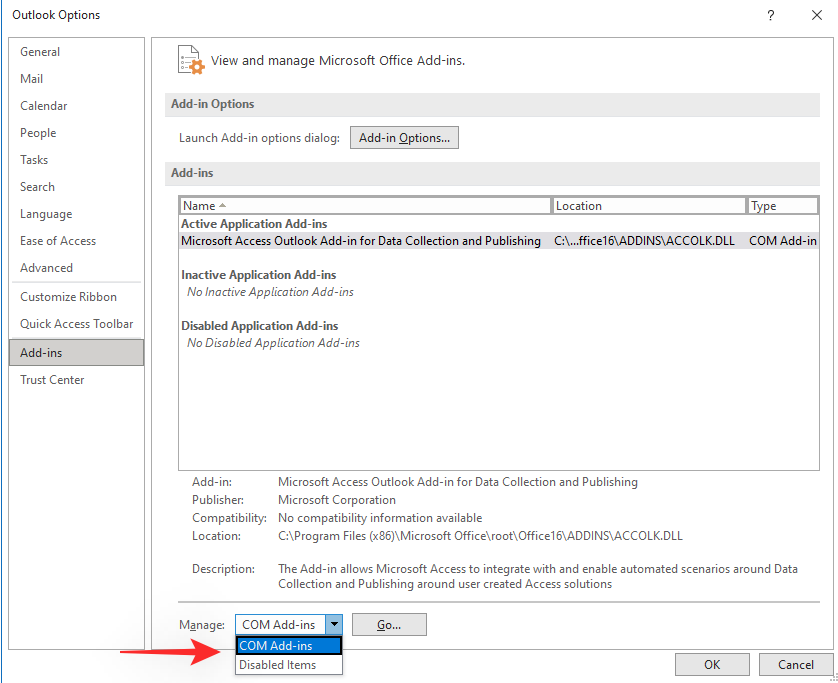
Click and select ‘Add-ins’ from the left sidebar.

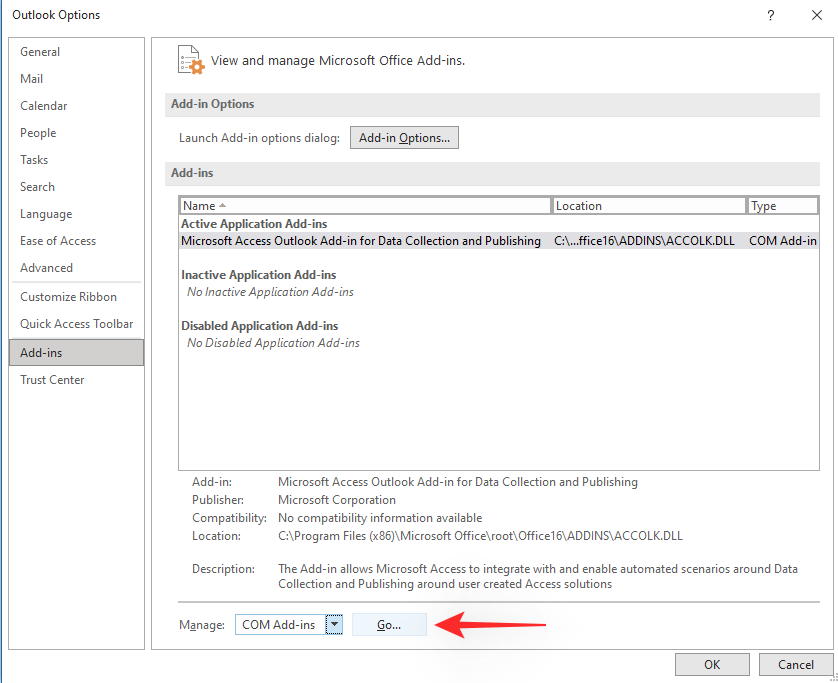
Now if the add-in you wish to remove is enabled, click on the drop-down arrow at the bottom beside ‘Manage:’ and select COM Add-ins. However, if a disabled add-in is misbehaving in the background, then select ‘Disabled items’.
Click on ‘Go’ once you are done.
You will now be shown a list of active or inactive add-ins depending on your choice above. Click and select the add-in you wish to remove.
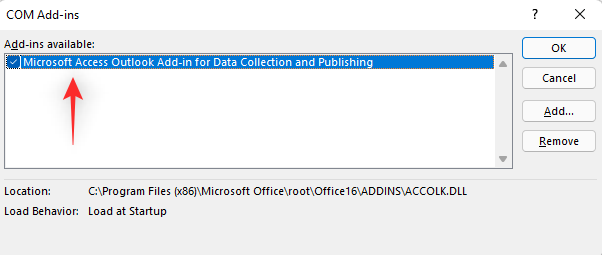
Click on ‘Remove’.
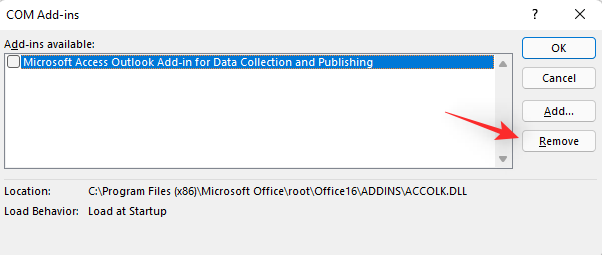
The add-in will now be removed. Click on ‘Ok’ to close the window. We now recommend you log out of Windows and log back in after closing Outlook.
This will restart Outlook and re-establish connections with your email provider which should help get everything back up and running again. You can now manually send the stuck email in your outbox and it should go through this time.
If by this point you haven’t been able to get your emails unstuck then here are a few last resorts that should help you get your mails unstuck. However, these methods are not ideal and might need you to set up various things again. Hence we recommend you backup your data and account credentials before proceeding with the fixes below.
12. Set up a new profile in Outlook
We now recommend you set up a new profile in Outlook and add your email address there again. This should help fix sync issues and a new profile will ensure that you don’t encounter similar bugs when trying to re-send your stuck mails. You can use the guide below to add a new profile to Outlook.
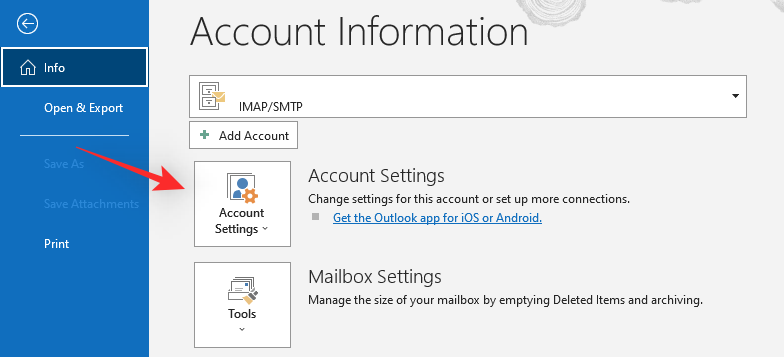
Open Outlook and click on ‘File’.
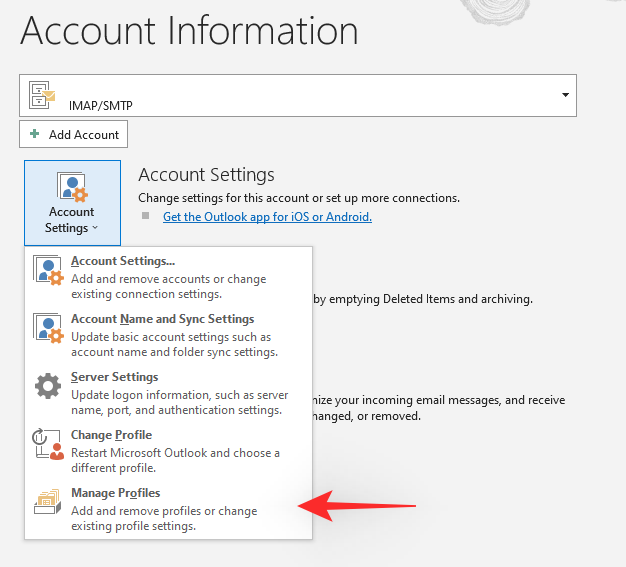
Click on ‘Account Settings’.
Select ‘Manage Profiles’.
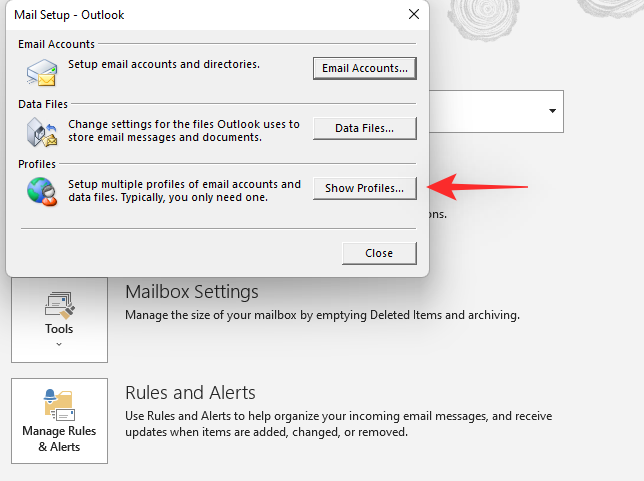
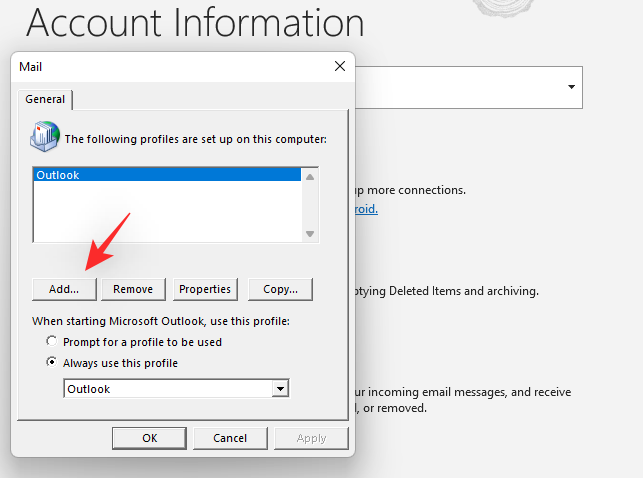
Now click on ‘Show Profiles…’ to view all your currently added profiles in Outlook.
Click on ‘Add’.
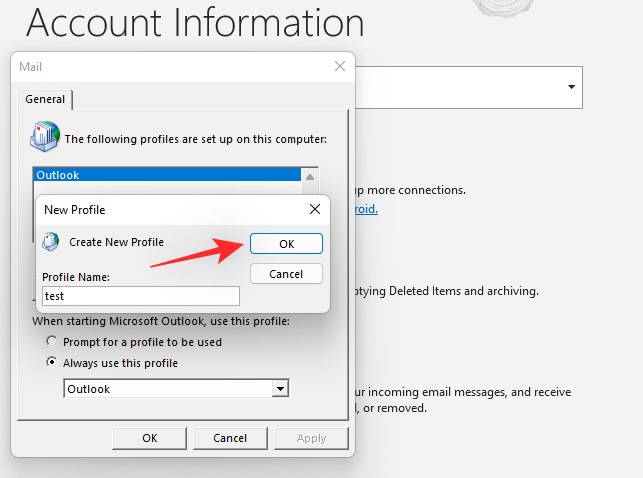
Enter a name for your new profile. Click on ‘Ok’ once you are done.
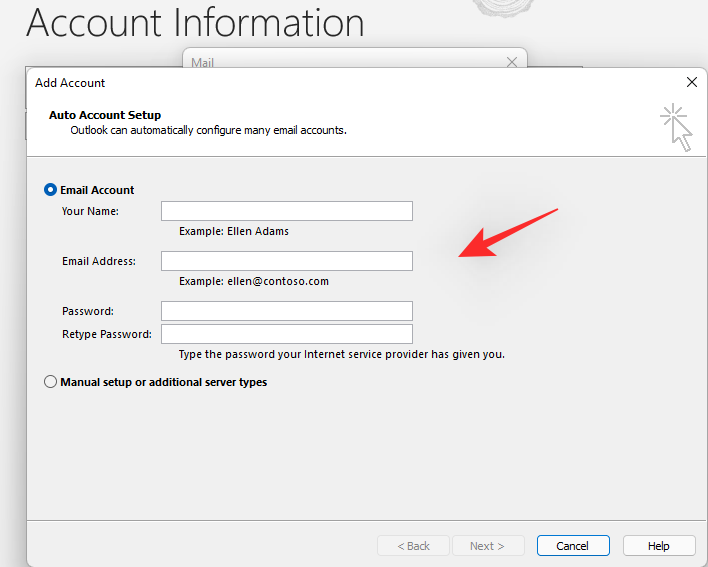
You can now set up your email address by entering the credentials in the respective fields.
Click on ‘Next’ once you are done.
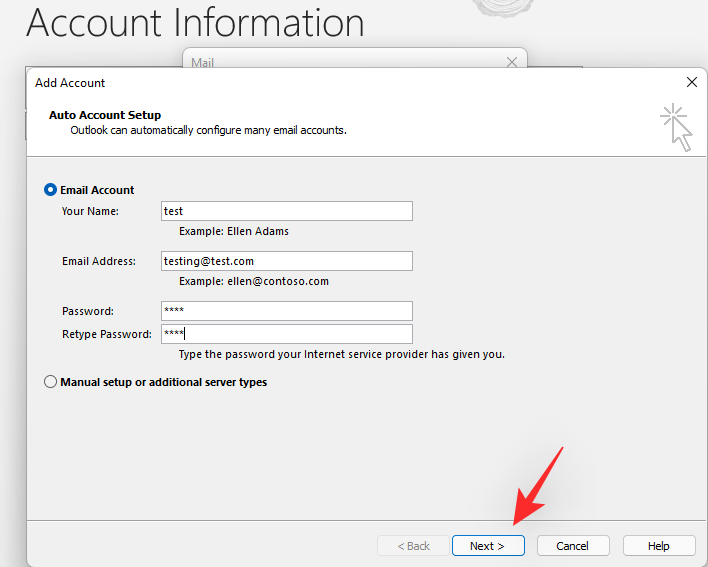
Outlook will now do the needful and set up your account within Outlook. If you face an issue like me then you can click on ‘Next’ and set up your account manually. Follow the on-screen instructions to help you along with the process.
And that’s it! Once your email is set up in a new profile, emails should no longer get stuck in your Outbox. You can now manually send all stuck emails once your Outbox has been synced to your email account.
13. Run SFC and DISM commands to fix missing components and check file system
You could be facing an issue with corrupted system files or a corrupted windows image. In such cases, we recommend you run SFC and DISM on your PC to check and fix any such issues. Follow the guide below to get you started.
Press Windows + R on your keyboard and type in the following. Press Ctrl + Shift + Enter on your keyboard once you are done.
cmd
Now enter the following command to run SFC.
sfc /scannow
Wait for the process to finish. Once finished, enter the following command and hit Enter again.
DISM /Online /Cleanup-Image /RestoreHealth
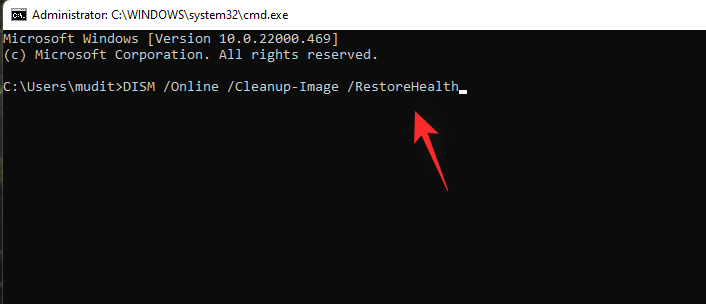
This will launch DISM to check your Windows image. Once the process completes, type in the following to close the command prompt. Hit enter once you are done.
exit
Restart your PC and try using Outlook again. We recommend you manually send stuck emails and see if they go through. If the emails manage to reach their destination then you likely had a few corrupt system files causing issues with Outlook.
14. Reinstall Outlook
Microsoft Outlook is now a part of Microsoft Office and you will need to re-install the same to get your emails unstuck in Outlook. A fresh install will ensure that all your emails go through no matter what the cause of your issue. Go to Settings > Apps > Apps and features to uninstall Microsoft Office from your system.
Once uninstalled, use one of the links below to get the respective version of Microsoft Office depending on your license key.
We now recommend you restart your PC before re-installing Office. This will help ensure that any cache files that could be causing this issue are also removed from your system. Once restarted, re-install Office and set up Outlook again as intended. Once done, all your pending emails in the Outbox should automatically send themselves on the first sync. If they do not, you can manually send them and they should no longer get stuck in your outbox.
15. Reset your PC
If nothing else works, but you desperately need to fix the issue, then you can consider resetting your PC and install everything again (do not restore a backup), including Outlook, to give your system a fresh start. This solved most of the problems and that should be the case with issues you are facing with Outlook too.
Check our guide on how to reset a PC at the link below.
Read: How to Reset Windows 11
FAQs
With so many fixes to get Outlook emails stuck from the outbox, you are bound to have a few questions. Thus here are a few commonly asked ones to help you get up to speed with the latest information.
Are Outlook emails stuck in outbox sent automatically when the issue is fixed?
This depends on your connection and current Outlook setup as well as your current email provider. With so many variables at play, it is always a good idea to send your emails manually once you have applied a fix.
What can I do if my ISP is blocking Outlook?
You will need to get in touch with your ISP to get Outlook unblocked or use a different port that isn’t being blocked by your ISP. You can also try using a VPN which should help Outlook access its servers for most ISP providers.
Will switching Outlook versions fix emails stuck in Outlook?
If you have a valid subscription then upgrading Outlook can help solve deprecated bugs and issues. However, in case you are downgrading your version of Microsoft Outlook, then you will likely keep facing this issue as it was caused by a future version of the app.
Is it safe to delete the OST file?
Yes, it is completely safe to delete your .ost file. This data will be automatically rebuilt by Outlook once you launch it on your PC again after deleting the .ost file.
Will a Reset fix Outlook?
A Windows Reset can help fix Outlook but it is not recommended as you will end up losing your data and could end up encountering more issues than you might have bargained for. We recommend you get in touch with Microsoft Support using the link below as a final resort before you decide to reset your PC.
We hope this post helped you fix emails stuck in the Outlook outbox. If you have any more questions, feel free to drop them in the comments section below.
RELATED: