
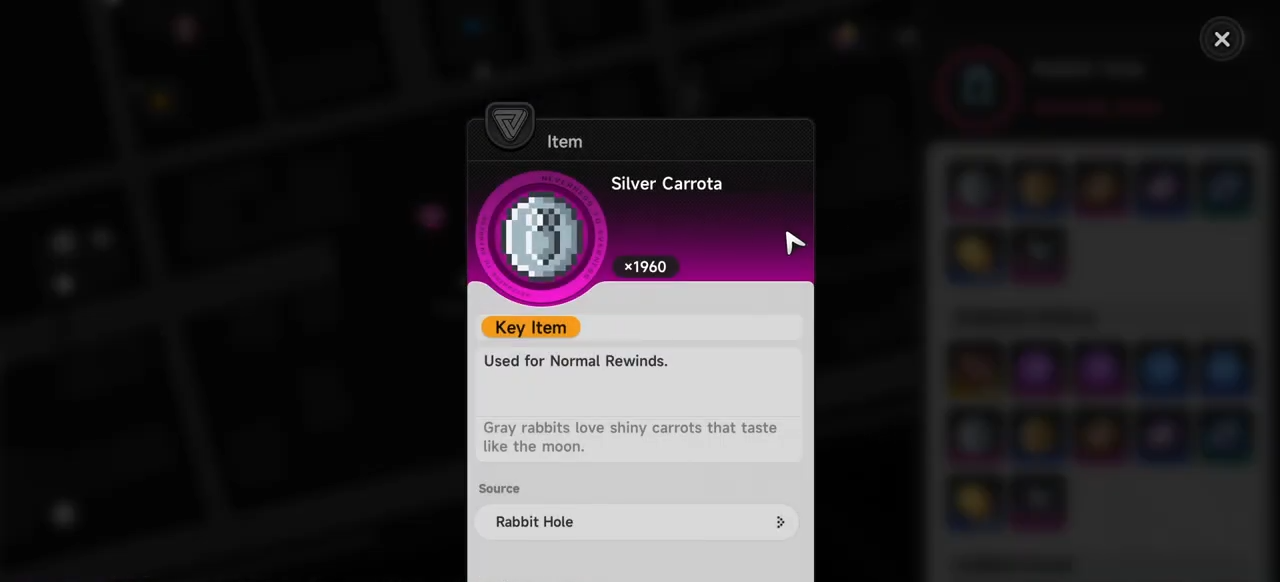
- Carrota Coins in bronze, silver, and gold tiers serve as currency for the Rewind gacha system to obtain modules.
- Farm them primarily in Rabbit Hole dungeons within New Herland District by clearing stages and talking to NPCs.
- Use coins in Rewind pulls at varying difficulties: Easy for bronze/common modules, Normal for silver/rare, Hard for gold/legendary.
- Modules fit into Tetris-style Console grids alongside cartridges for stat boosts and set effects.
Neverness to Everness features a deep gear system where Gold, Silver, and Bronze Carrota Coins play a central role in acquiring modules, essential puzzle-like pieces that enhance your characters’ stats and abilities.
| Aspect | Bronze Carrota | Silver Carrota | Gold Carrota |
|---|---|---|---|
| Rarity | Common | Rare | Legendary (S-Rank) |
| Rewind Mode | Easy | Normal | Hard |
| Pull Cost (Single) | 80 coins | 80 coins | 80 coins |
| Pull Cost (10x) | 800 coins | 800 coins | 800 coins |
| Module Quality | Blue/Common | Purple/Rare | Orange/Legendary |
| Hunter Level Req. | None (base) | Lv. 20 | Lv. 30 |
| Drop Zones | All Rabbit Holes | Higher stage clears | Elite/Hard clears |
Rabbit Hole locations in New Herland District
Head to the New Herland District on your world map, specifically around Cape Square in the south for the main Rabbit Hole entry via the Rabbit Hole teleport point.
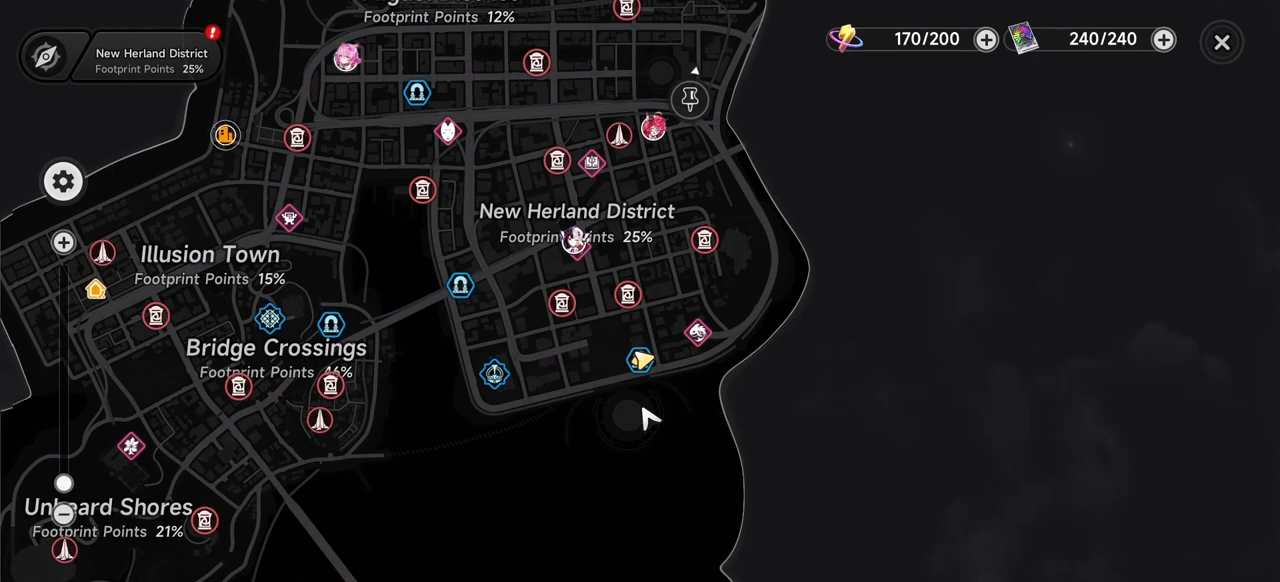
This anomaly zone hosts multiple stages like Sculpture Gallery, Latitude Loom, Defend the Radish, Mental Map, Night of the Rails, and Clock Tricks, each costing 40-80 Character Pixels per run. Clear enemies (often 6 per stage), defend objectives, or collect items while watching for clock mechanics or pigeon hazards in specific areas.

Talk to the NPC after each clear to claim your Carrota Coins, Hunter EXP, Beetle Coins, and other rewards like Manhole materials.
How to farm Carrota Coins efficiently
Farming relies on repeated Rabbit Hole runs, as these yield the only reliable source of all three Carrota types.
Step 1: Access the zone
Teleport to Rabbit Hole in New Herland District and enter a forward instance.

Step 2: Select and clear a dungeon
Pick any available stage based on your level—start with easier ones like Sculpture Gallery for consistent bronze drops, progress to Defend the Radish or Clock Tricks for mixed silver/gold chances.
Step 3: Interact post-clear
Defeat all enemies or objectives, then speak to the NPC to collect coins (bronze most common, gold rarer in hard stages).
Step 4: Repeat and optimize
Use double-reward events when active; spend stamina daily (240 pool regenerates over 24 hours). Aim for 20-30 runs per session for a healthy coin stockpile. Higher Hunter levels unlock better drops.
How to access and use Rewind for pulls
Open your character menu, switch to the Console tab, and click Rewind in the bottom-left corner—this controlled gacha lets you target modules by shape and type.
Step 1: Choose difficulty
Select Easy (bronze for commons), Normal (silver for rares, Lv. 20+), or Hard (gold for legendaries, Lv. 30+).

Step 2: Select pull type
Opt for random single (80 coins), 10-pull (800 coins), or Module Selection (10-pull only, guarantees one specific shape like Type II/III/IV).

Step 3: Confirm and pull
Spend coins; pity system builds toward better rates on repeats.
Step 4: Inventory and equip
Modules drop into inventory—check substats (unlock every 5 levels up to +20) and main stats.
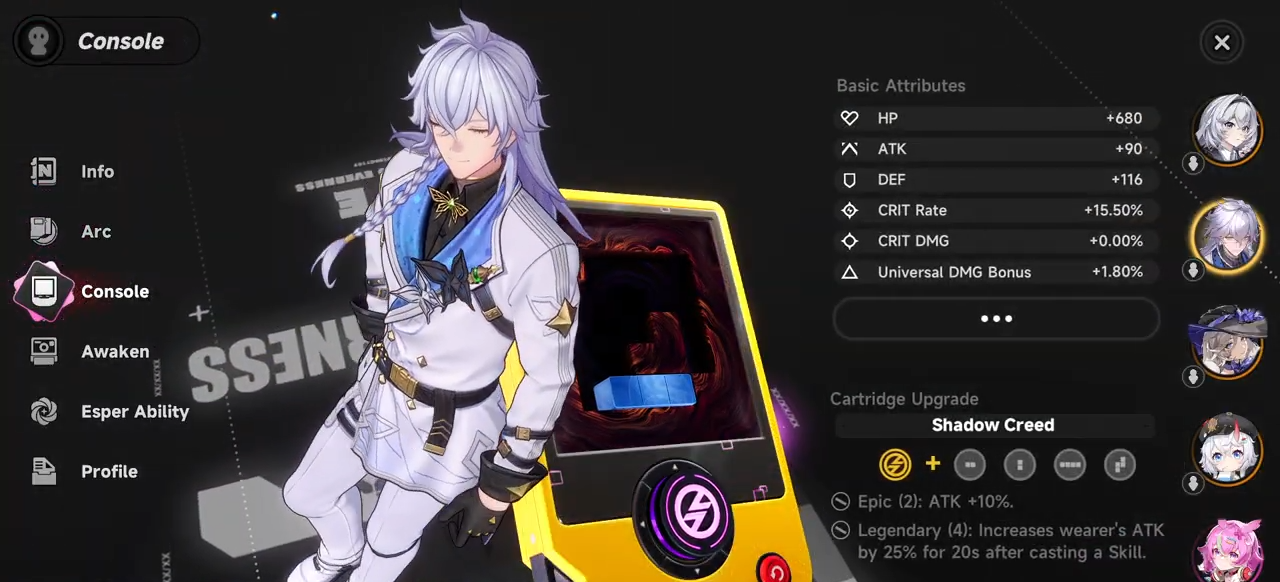
Modules and Cartridge integration basics
Modules are Tetris-shaped (Type II: 2-block, Type III: 3-block, Type IV: complex) that slot into your character’s Console grid.

Equip a Cartridge first for base stats and set bonuses (e.g., 2-piece for +10% DMG, 4-piece for advanced effects like Incantation boosts). Match Module shapes to the Cartridge’s required pattern to activate sets—fill preferences (character-specific 2- or 3-block) for extra bonuses. Upgrade both with Manhole tokens from Rabbit Holes.
| Cartridge Example | 2-Piece Effect | 4-Piece Effect | Module Shapes Needed |
|---|---|---|---|
| Lost Radiance | +15% Crit Rate | +20% Elemental DMG | 2x Type III, 2x Type II |
| Crimson: Twin Butterflies | Incantation DMG +10% | Burst DMG +25% | 4x Type IV |
| Street Boxer | ATK +12% | Skill Haste +15% | 1x Type II, 3x Type III |
Rewards from Carrota farming and Rewind
Beyond modules, Rabbit Hole clears provide:
| Reward Type | Common Sources | Usage |
|---|---|---|
| Bronze/Silver/Gold Carrota | All stages/NPC | Rewind pulls |
| Manhole Crook/Boss/Thug | Mental Map, Night of the Rails | Upgrade Modules/Cartridges |
| Beetle Coins | Every clear | Shops, ascensions |
| Hunter EXP | Base reward | Level unlocks |
| Cartridges (e.g., Devil’s Blood, Fireflies) | Latitude Loom, Sculpture Gallery | Set anchors |
| Arcana Threads/Diablos | Clock Tricks | Crafting/materials |
Optimize your builds with Carrota gear
Prioritize gold Carrota for legendary modules in Hard mode once at Lv. 30—target sets like Lost Radiant for endgame DPS.

Use Module Selection to farm specific shapes matching your team’s Cartridges. Daily stamina on Rabbit Holes nets 500-1000 coins weekly; double events boost to 2000+. Track substats: focus Crit Rate/DMG, ATK%, Elemental bonuses. Test grid layouts for full coverage without gaps.
Mastering Gold, Silver, and Bronze Carrota turns average builds into powerhouses, enabling harder content clears and faster Hunter ascensions.


Leave a Reply