Apple makes it easy for you to share pictures and videos from a recent trip or a gathering with your friends and family members using iCloud Shared Photo Library. With this feature, you can move certain pictures from your personal collection to the Shared Library so everyone can view or edit them or add content of their own in a single shared space.
In case you didn’t share certain pictures while setting up iCloud Shared Photo Library or from the Camera app, you can still transfer anything you want to the Shared Library manually using the Photos app on your iPhone. This is what we’ll help you with in this post.
Related: How to Fix Weather App Battery Drain on iPhone
- How to manually transfer photos to Shared Library on iPhone
- What happens when you transfer photos to Shared Library?
- Can you transfer your photos automatically?
- How to check what’s in your Shared Library
- What happens when you duplicate pictures from Shared Library?
- How to transfer content from Shared to Personal Library
When you create or join a Shared Library, the Photos app will automatically categorize your pictures and videos into Personal Library and Shared Library. Unless configured otherwise, not all of the content from your iPhone is transferred to the Shared Library, so you may need to move some of your pictures and videos manually after the initial setup.
To move existing pictures from your iPhone to the Shared Library, you’ll have to transfer them manually from the Photos app to the Shared Library. You can either transfer your content individually or in bulk and we’ll explain both of these ways below.
Method 1: Transfer one photo/video at a time
- To transfer photos to Shared Library manually, open the Photos app.

- To move a single picture or video to the Shared Library, tap on it inside the Photos app.

- This will open the content in fullscreen view. To share this picture/video, tap on the 3-dots icon at the top right corner.

- In the overflow menu that appears, select Move to Shared Library.

The picture will now be moved out of your Personal Library and sent to the Shared Library.
Related: 5 Ways to Copy Subject on iPhone
Method 2: Transfer multiple items at once
- To transfer photos to Shared Library manually, open the Photos app.

- Inside the Photos app, tap on Select at the top right corner.

- You can now select all the pictures you want to move to the Shared Library by tapping on them. When a picture is selected, you’ll see a tick mark with a blue background on it.

- After you’ve selected the content you’d like to move, tap on the 3-dots icon at the bottom right corner.

- In the overflow menu that appears, select Move to Shared Library.

The selected content will now be moved to the Shared Library.
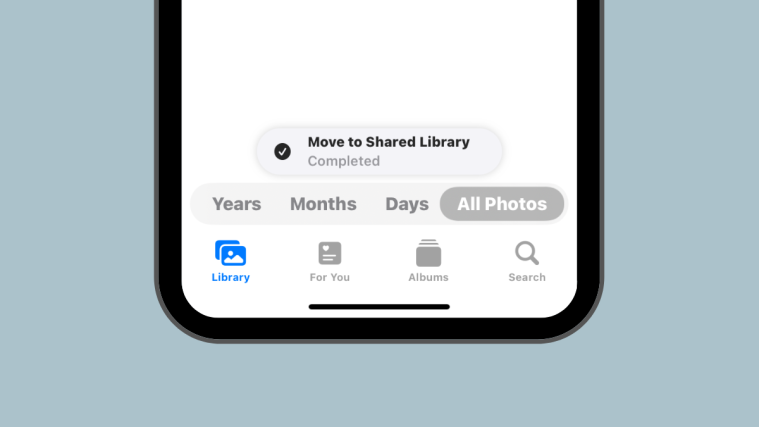
When you transfer any content on the Photos app to the Shared Library, the selected content is taken out of your Personal Library and moved to the Shared Library. To notify you about the content you just moved, iOS will show a “Move to Shared Library Completed” banner at the bottom of the screen.

Since the Photos app is, by default, set to show you Both Libraries (Personal and Shared), you’ll see photos and videos that are available in both the Personal Library and Shared Library at all times, unless you change your Library View. None of the pictures and videos will, however, stay in both the libraries inside the Photos app. This means that when you switch to the Personal Library, you won’t see the content you moved to the Shared Library and vice versa.
Can you transfer your photos automatically?
Yes, depending on how you set up the Shared Library at the very start. Existing content in the Photos app will ONLY move to the Shared Library automatically if you select either of these options when setting up Shared Library on your iPhone – All My Photos and Videos or Choose by Date. We’ll explain which of your content gets transferred automatically below.
If you select All My Photos and Videos during setup, the Photos app will move all pictures from your existing library to the Shared Library as well as any new content you capture or save on your iPhone.
If you selected Choose by Date during setup, the Photos app will move everything you capture since the starting date that you specified at the time of setting up the Shared Library. With this option, only photos you’ve taken or saved since the specified date will be moved from your Personal Library to the Shared Library. Any content older than the set date will be kept within your Personal Library.
Your photos and videos WON’T be transferred automatically to the Shared Library if you opted to manually share them during the initial setup. In such cases, the only way to move the existing content to the Shared Library is by transferring them using the Photos app as explained in the guide above.
Regardless of how you set up Shared Library on your iPhone, you can still move new content to the Shared Library automatically from the Camera app by following the guide in the link below.
➤ How to Share Photos and Videos From Camera to Shared Library on iPhone
The Photos app can show you pictures and videos from your Personal Library, Shared Library, or both at once.
- When the Library View inside the app is set to Both Libraries, you can take a quick glance at the content that’s present inside the Shared Library by tapping on Select at the top right corner.

- The Photos app will now reveal all the pictures and videos in the Shared Library by marking them with multi-user icons.

- This way, you can differentiate this content from pictures outside the Shared Library, which won’t be marked with any icons as such.
- Another way to check what’s inside your Shared Library is by changing the Library View inside the Photos app. To change the Library View, open the Photos app and tap on the 3-dots icon at the top right corner.

- In the overflow menu that appears, select Shared Library.

- You’ll now see all the content that’s visible in the Shared Library you’re a part of.

When the Library View switches to Shared Library, the 3-dots icon will also be replaced with the multi-user icon to indicate that you’re now viewing contents from Shared Library only.
Like any content inside the Photos app, photos and videos from the Shared Library can also be duplicated on your iPhone. When you duplicate a file from the Shared Library, the Photos app will save the copied version inside your Personal Library.
In the screenshot below, you can see the Shared Library pictures marked with multi-user icons, and the duplicates we created are left unmarked. These unmarked ones are saved in your Personal Library inside the Photos app.

Similar to transferring your photos to the Shared Library, you can also move content back from the Shared Library to your Personal Library.
- To move items back to your Personal Library, open the Photos app and tap on Select at the top right corner.

- When the Photos app is in Both Libraries view, you’ll see a multi-user icon on pictures and videos that are available inside the Shared Library.

- To start moving them back to your Personal Library, tap on the content to select which ones you’d like to transfer.

- Once you’ve selected the photos and videos you want to transfer, tap on the 3-dots icon at the bottom right corner.

- In the overflow menu that appears, select Move to Personal Library.

- The selected content will now be transferred to your Personal Library. The Photos app will also show a “Move to Personal Library Completed” banner at the bottom when the transfer is completed.

That’s all you need to know about transferring pictures to Shared Library with the Photos app on an iPhone.
RELATED


