If your work is confined to being at home and the only way you’re able to interact with your colleagues and superiors is through video conferencing software, then your webcam is your best buddy during these tough times. However, unlike other tools of technology, webcams haven’t really made huge strides in quality.
But what if you already have a GoPro camera? Can you use it as a webcam for your meetings? The answer is yes, thanks to GoPro’s recent attempt to make its cameras work as your default webcam.
What do you need
In order to set up your GoPro Camera as a webcam for video conferencing, you will need to have the following items in check:
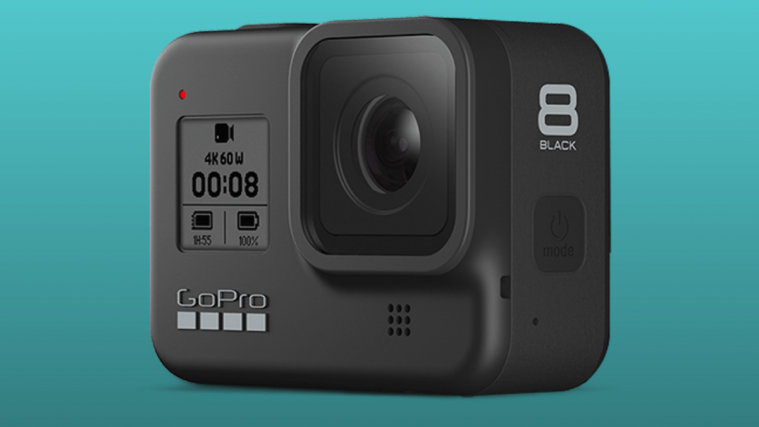
- GoPro HERO8 Black camera
- USB-C cable that came with your GoPro
- A macOS machine (MacBook, Mac, or Mac mini)
- A USB adapter/dongle if your Mac system doesn’t have a USB-C port
- Your camera’s microSD card, adapter and card reader
How to enable a GoPro camera as your virtual camera on a Mac
Once you have made sure that you have all the items listed above, you can proceed to enable the GoPro Camera as your default webcam on a Mac.
Update your camera firmware
Since the ability to use the GoPro as a webcam arrives through the latest beta firmware, you first need to update your camera software to get the functionality. To update to the latest beta build, download the GoPro Webcam Beta Firmware on your Mac and unzip the file which will create a folder in the name of the .zip file.
Now, insert your camera’s SD card to your Mac by placing it inside its SD card adapter and then inserting it into the native SD card reader. If your Mac doesn’t have an inbuilt SD card reader, you will need an external SD card reader to plug into the USB port. Once your micro SD is detected on the Mac, copy the extracted folder (extracted from the .ZIP file) onto the SD card using Finder.
To install the GoPro beta firmware, power OFF your camera, insert the micro SD card into the camera and then power it back ON. The camera will be able to update its software automatically and will beep during the installation process. Once the software is installed, you will be able to see a checkmark on the GoPro screen.
Note: In case the update failed, remove and re-insert the battery and then power ON the camera for allowing it to install the firmware again. Follow this support page for more details on the installation.
Download and install GoPro Webcam Desktop Utility on your Mac
After the beta firmware on your Go Pro is installed, you can now install the GoPro Webcam Desktop Utility on your Mac. You first need to download the GoPro Webcam Desktop Utility, open the “.PKG” file and follow the on-screen instructions to install the GoPro tool for your Mac.
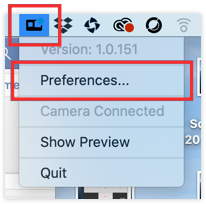
Once the installation is complete, a new GoPro icon will appear in the Menu bar.
Setting up your GoPro webcam
Before you connect your GoPro Camera to the Mac, it’s important that you set it up right, so that it’s perfect for being used as your default webcam. Since a GoPro is known to have a wider field of view than most cameras, you can set it up nearer to you than your regular webcam. You can position it in front of Mac’s screen like on a desk or mount it on top of Mac’s screen using your existing GoPro mounts.
Additionally, you can purchase and use GoPro’s own accessories like the Jaws Flex Clamp, Magnetic Swivel Clip, Suction Cup, and Gooseneck to mount your GoPro in different angles and creative point-of-views.
Connecting your GoPro to the Mac
Now that you have set up your GoPro in position to be used as a webcam, you can connect it to your Mac using the USB-C cable that came with your Go Pro. After connecting the two devices, power ON your GoPro.
The GoPro icon in your Mac’s Menu bar will now display a blue dot to indicate that it has successfully established a connection with the GoPro.
At the same time, the display on your GoPro will also show the USB icon, indicating that it is currently in USB Mode.
You can preview your webcam view by clicking on the GoPro icon in the Menu bar and selecting the ‘Show Preview’ option. Inside the Preview, you will have the ability to switch between ‘Mirror’ and ‘Flip’; you can decide which one you want depending on the view you like.
Enable GoPro camera inside your video conference app
Now that you have enabled the GoPro as your webcam, it’s time to set it as your default video source inside the video conference app you use.
Here are steps to enable the GoPro camera as your default webcam in some of the popular video calling apps:
Zoom: Go to Your profile picture > Settings > Video > Camera and select GoPro Camera.
Google Meet: Head over to Settings > Video > Camera and click on GoPro Camera.
Skype: Go to your profile picture > Settings > Audio & Video > Camera and select GoPro Camera from the list.
Teams: Click on your profile picture, go to Settings > Devices > Camera and select GoPro Camera from the list.
Webex: Go to Video Icon > Video Connection and select GoPro Camera.
On Chrome: When using video calling services on the web, you will have to enable Chrome to have access to the GoPro and use it for webcam purposes. To do that, click on the 3-dots menu and go to Settings > Advanced > Privacy and security > Site settings. From here, click on Camera and select GoPro Camera from the list.
Additional tips
The above guide was for those of you who wanted an easy and simple setup solution of the GoPro Webcam on a Mac. You can also follow the tips mentioned below to make the most of your GoPro inside meetings and video conferences.
Change video resolution
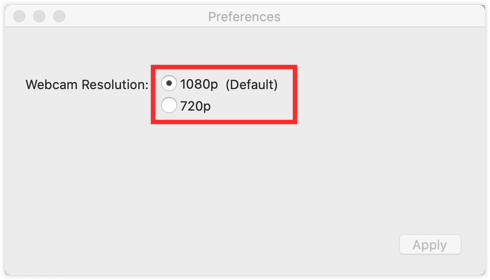
By default, GoPro offers 1080p videos for video calls but if you find that too hard on your data consumption or if your internet isn’t that fast to upload a continuous 1080p feed, you can change the video resolution of your GoPro Webcam. You can do so by clicking on the GoPro icon in the Menu bar, then ‘Preferences’, and then selecting 720p in the next window.
Adjusting the Field of View using Digital Lens
The GoPro Webcam Desktop Utility comes with a Digital Lens feature which lets you change the Field of View of your webcam. The Digital Lens option will only be visible when your GoPro is being actively used as a webcam.
You can change the Field of View by clicking on the GoPro icon in the Menu bar, then Digital Lens, and selecting one of the three options – Wide lens, Narrow lens, and Linear lens.
GoPro camera as webcam a Windows PC
Well, GoPro’s software supports only macOS right now. Hence, if you got a Windows PC, or any other OS, you can use your GoPro camera as a virtual camera on that.
Was this guide helpful to teach you to use the GoPro HERO8 Black as a webcam on your Mac?
Related:
- Snap Camera filters for Zoom, Microsoft Teams, WebEx, Skype, Google Hangouts and more
- How to exit Snap Camera filter immediately (even when in a call or meeting)
- How to Uninstall Snap Camera on your PC
- A definitive guide to buying a security camera solution for your home or office
- How to receive alerts on your phone when someone trespasses on your premises
- Best Camera Apps to Silently Record Videos and Photos


