
Snap Camera is an easy to use fun software from the house of Snapchat that allows you to use Snapchat filters on your desktop webcam. The app works by capturing your webcam output virtually and overlaying it with filters. This means that these filters can work within various apps that are popularly used for video calls and video conferencing like Skype, Zoom, Microsoft Teams, Twitch, and more.
These filters are a great way of enhancing your live streams and increasing the appeal of your video chats. But these filters are very resource-intensive and depending on your output resolution could end up taking a toll on your RAM and GPU.
RELATED: Download Cool and Free Zoom Backgrounds for Video Calls and Meetings
The app is also known to bug out on some operating systems and create glitches with some streaming and video calling services as well. If you’re encountering any of these issues and wish to remove Snap Camera from your system, then you have landed on the perfect webpage. We have compiled a simple step by step guide that will help you uninstall Snap Camera from your system. Let’s get started.
RELATED: How to turn off Snap filters super quickly
On Windows
Snap Camera installs its uninstaller application in Windows. Follow these simple steps to run it and remove Snap Camera from your PC.


Note: Open task manager by pressing ‘Ctrl + Shift + Esc‘ on your keyboard and find Snap Camera in your processes. Now right-click on it and select ‘End Task‘ to kill the application. You can alternatively select the application and click on ‘End Task‘ in the bottom right corner of your window as well.

On Mac
Note: By default, the apps are sorted in alphabetical order.
Note: You might be prompted to enter your password depending on your security settings.
Snap Camera should now be completely removed from your Mac upon booting again.
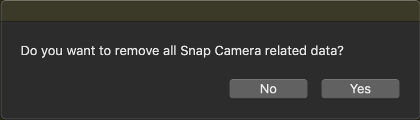
Remove leftover files from Snap Camera on Mac
In case there are any leftover files, especially the virtual camera app in other applications, then follow this guide to remove these files. This is a known issue on Snap Camera which is expected to be fixed soon in the coming updates.
launchctl remove com.snap.AssistantService

rm ~/Library/LaunchAgents/com.snap.AssistantService.plist

rm -r ~/Library/Caches/Snap/Snap\ Camera

rm -r ~/Library/Preferences/Snap/Snap\ Camera

osascript -e 'do shell script "launchctl remove com.snap.SnapCameraRemover; rm /Library/LaunchDaemons/com.snap.SnapCameraRemover.plist; rm -r /Library/CoreMediaIO/Plug-Ins/DAL/SnapCamera.plugin; exit 0" with administrator privileges'
Note: You might be asked to enter your password after hitting enter.
Snap Camera and the virtual camera app should now be completely removed from your macOS system.
Feel free to share your views and queries with us in the comments section below.


6 responses to “How to Uninstall Snap Camera on your PC”
The steps given to uninstall snap camera on a PC do not work UNLESS you start your computer in SAFE mode. THEN follow the uninstall procedure above.
I have encountered the problem with snap camera but u have to end task for snap camera on background then uninstall it
Thank you so much team, kudos. I was having so much trouble installing this shit. Now its fine. Thank you.
When i go to task manager it doesent show me snap camera…
Go to Task Manager – Details- Scroll down to Snap Camera- Right Click- “End Task”
Go to Start Menu – Scroll to Snap Camera – Right Click “Uninstall”
(it’ll redirect you to Uninstall and Changes, just scroll to the app and right click “Uninstall” again)
None of this works for PC Windows 10. I’ve uninstalled the Snap Camera from my PC using all the uninstall processes plus Revo Uninstaller Pro. No Snap Camera files appear anymore. But the camera still shows up as an option in Zoom and Meet, sometimes preventing a functioning camera from being selected or used. Really a problem. Help!!!