Microsoft’s Office 365 is cutting edge when it comes to new features. The latest web app from Microsoft is packed with stuff you never even knew you needed. Recently, Microsoft has added a new function that lets you transcribe your audio recordings. In the age of virtual meetings and video conferences, this is a welcome update to the app.
What is the new Transcribe function on Microsoft 365?
With most of our interactions now being online, organizations have a ton of recordings just sitting there. It can be hard work, not to mention time-consuming to transcribe each recording to a written format. That is why Microsoft has introduced a new ‘Transcribe’ function in Word that basically takes care of your audio recordings for you.
The Transcribe function gives you the option to upload your own audio file or to record audio right from the Word web app itself. All you need to do is give the website permission to use your microphone, and the app will do the rest. The transcribe function is incredible in that it can identify the voices of different people. The transcription is generated and separated by different voices that are recorded. You do not even need to mention how many speakers are present; the app can identify that for itself!
Related: How to translate speech using Google Translate, and other best apps for transcribing
What formats can be transcribed on Microsoft 365 Word
Currently, the Transcribe function is only available on a desktop browser on Microsoft 365 Word. Transcription is also only available in English (us-EN). We should see other languages added quickly, but for now, the engine can only identify the English language. Additionally, the function only works on Microsoft Edge and Google Chrome browsers.
Transcribe supports most of the common audio formats; .wav, .mp4, .m4a, and .mp3 formats. You can upload an audio file in any of these formats and the engine will be able to identify the speech.
Related: How to enable Live Captions on Chrome
How to use the Transcribe function on Microsoft 365 Word
As mentioned above, you can use the Transcribe function only on Microsoft 365 Word. There are two options available; you can either record a meeting directly from the Microsoft 365 Word web app or upload an audio file in the formats mentioned above.
Recording a live meeting
You can record a live meeting on your web browser using Microsoft 365. To do so visit the Microsoft 365 Word website and log in with your Microsoft account.
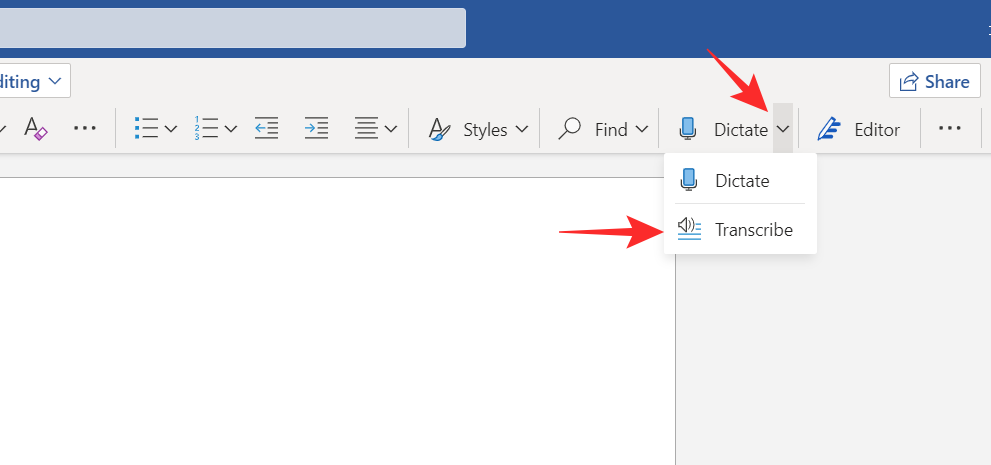
Click the drop-down arrow beside ‘Dictate’ and select ‘Transcribe’.

Now click ‘Start Recording’ to record a live meeting. If this is the first time you are using the Transcribe function, you will need to grant the website access to your microphone. Simply click ‘Allow’ on the pop-up.

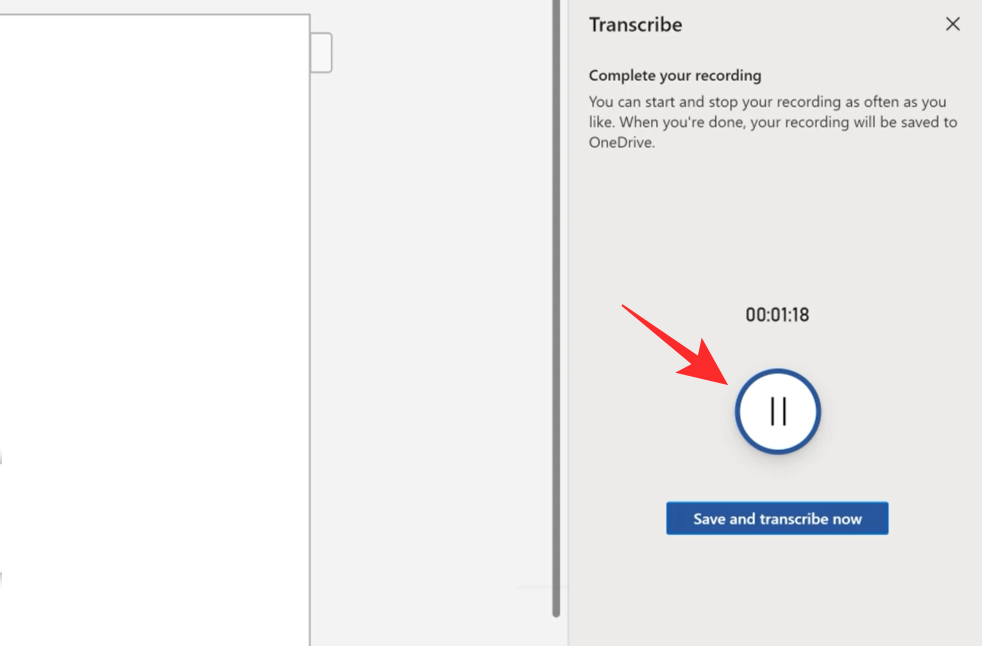
You should see the timer begin counting. This means the recording has started. You can pause and resume the recording at any point clicking the ‘Pause’ button

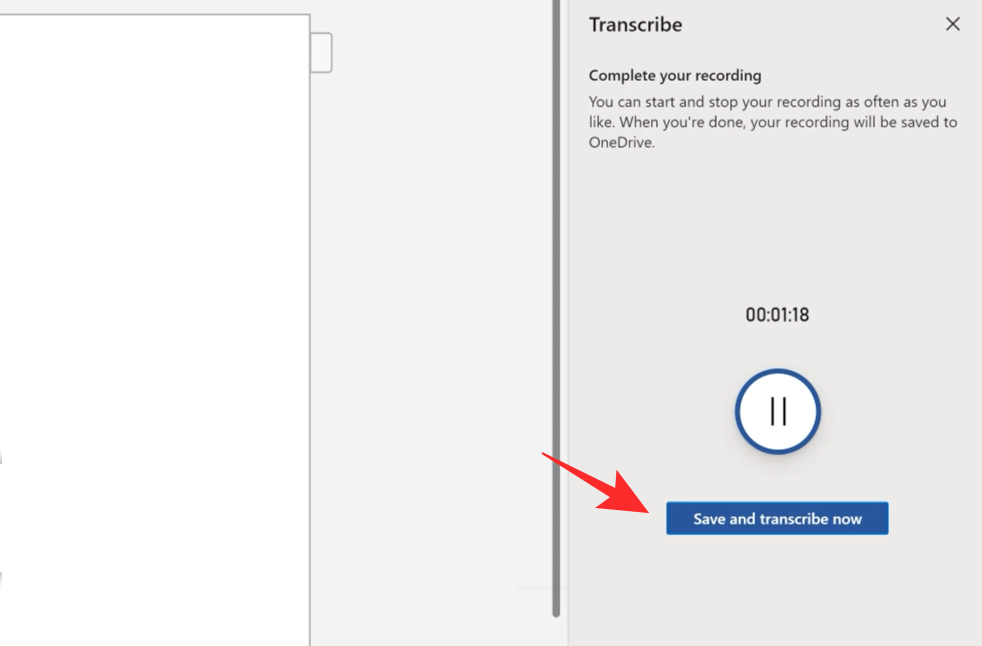
Once you are done, click ‘ Save and transcribe now’. Your recording will be saved to OneDrive.

Depending on how long the recording was, transcription can take a while. Do not close the Transcribe panel while the app is still transcribing. Once the process is complete you will see the transcription with different speakers automatically separated.

Uploading an audio file
If you have an old audio recording of a meeting, you can use Microsoft 365 Word to transcribe it. To do so visit the Microsoft 365 Word website and log in with your Microsoft account.
Click the drop-down arrow beside ‘Dictate’ and select ‘Transcribe’.

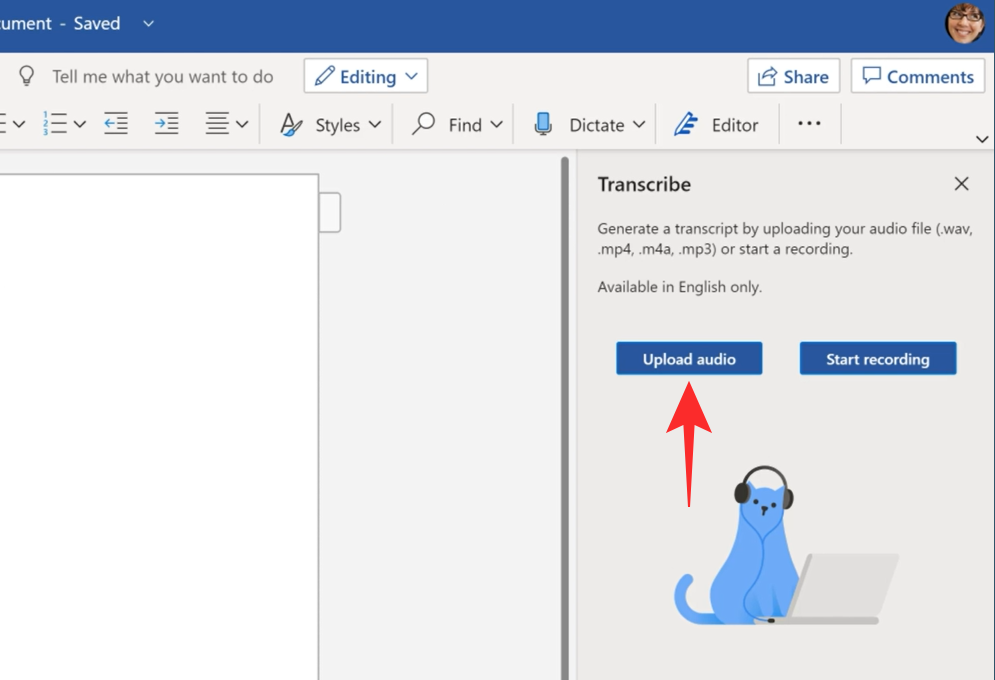
Now click ‘Upload audio’. This will open a File Explorer window. Locate the audio file and upload it.

Depending on how long the recording was, transcription can take a while. Do not close the Transcribe panel while the app is still transcribing. Once the process is complete you will see the transcription with different speakers automatically separated.
Where to find your saved transcripts
All your transcripts as well as uploaded audio files and recording as saved on the OneDrive. Use the same Microsoft account to access your OneDrive cloud storage. All your transcription data can be found in the ‘Transcribed Files’ folder in OneDrive.
Can you transcribe virtual meetings with Microsoft 365?
Yes, you can! Follow the same process outlined above to record a live virtual meeting. For the best results, do not plug in a headset to your computer. Let the audio play through your PC’s speakers so that Word can pick it up easily. Also, Microsoft advises that you use your PC’s built-in microphone while live transcribing.
We hope this article helped. If you have any queries, feel free to reach out to us in the comments below.
Related:
- What is a channel in Microsoft Teams?
- 3 Ways to Force Remove or Disable Microsoft Edge on Windows 10 [It works!]
- How to set Gmail out of office message on your iPhone, Android and PC in 2020


