With the inception of smartphones and mobile applications, a lot of the tools that gave professional cameras a superior edge over its mobile counterparts have shifted to the other side of the camp. You can now professionally perform almost any kind of editing to your photos and videos from your mobile device and one of them involves being able to create slow-motion videos.
Not only can you shoot slow-motion videos from your device but you can also edit your videos to have a slowed-down effect after you’ve shot them. If you’re someone who uses Snapchat, then it’ll be easier for you to slow down videos to post them to your stories as the app features Speed Modifiers for the videos that are available in your gallery.
The following guide will help you slow down a video on Snapchat so that you can create fun slow-motion videos and share it to your friends and family on Snapchat.
Method 1: Using Snapchat
The following method can be used to slow down an already captured video from directly within Snapchat.
Step 1: Open Snapchat and tap on the gallery button below the Shutter icon. 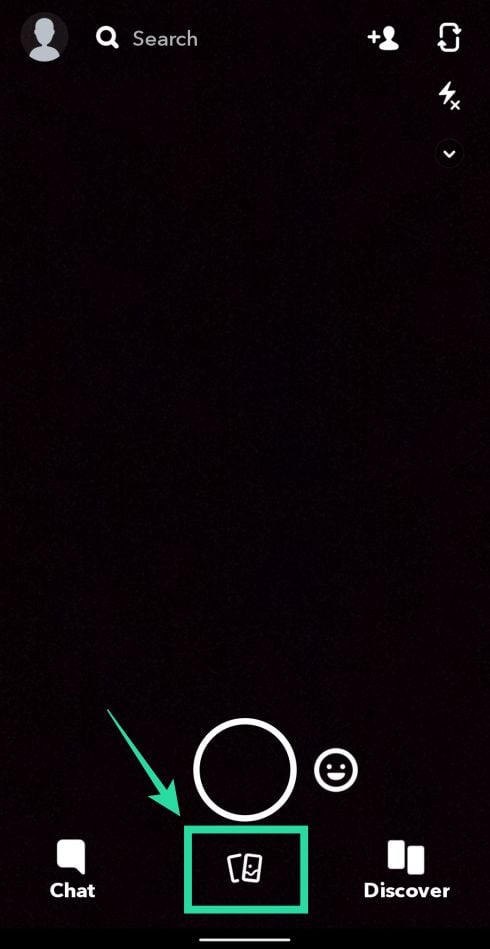
Step 2: If the video was captured using Snapchat, select the Snaps tab at the top. Otherwise, tap on the Camera Roll tab.
Step 3: Select the video you want to create the slowed-down effect on.
Step 4: Once the video open in full screen, tap on the 3-dot icon at the top right, and select the ‘Edit Snap’ option from the popup menu.
This will open the video editing screen with options to add stickers and filters to the selected video.
Step 5: In this screen, swipe from left to right to change filters, one of which will feature a ‘Snail’ icon. Select this filter to apply the slow-motion effect on the video. 
Step 6 (Optional): You can perform other editions to the video by using any of the tools on the right side of the screen like crop, cut, stickers, text, and sketch. 
Step 7: Tap on the ‘Send to’ button on the bottom right to share the slowed-down video to your friends on Snapchat. 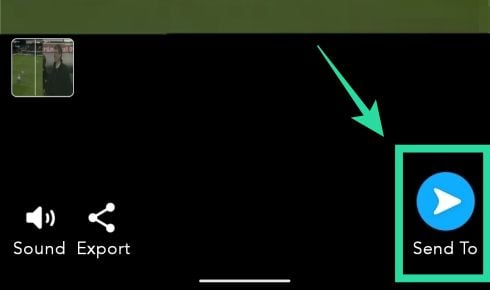
Method 2: Using Slow Motion Video FX
Since Snapchat allows only one setting for its slow-motion videos, you might want to use another app for slowing down videos and sharing them on Snapchat. In this guide, we’re using the Slow Motion Video FX app which is pretty straightforward in the way it works. We selected the app for one neat reason and it is that you can select how slow you want the video to be.
Step 1: Download and install the Slow Motion Video FX app from Google Play. Once the app is installed, open it.
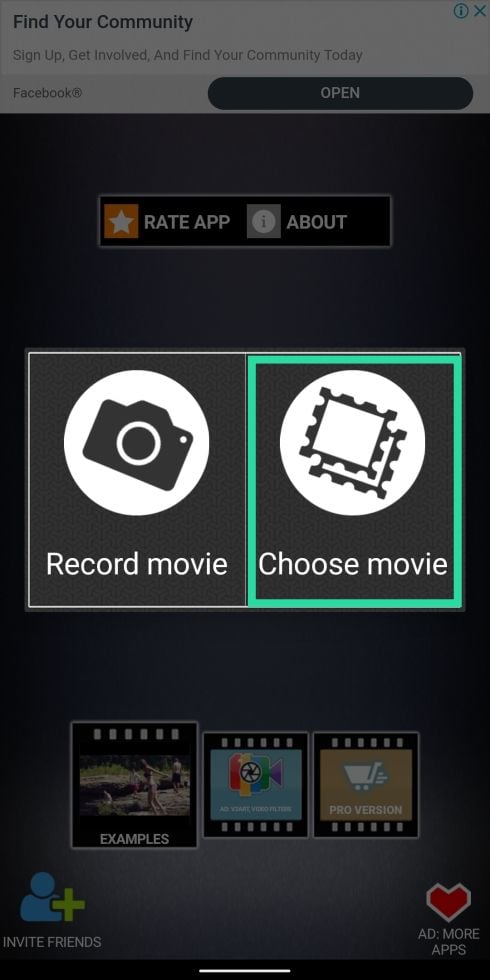
Step 2: Tap on the ‘Start Slow motion’ option on the home screen and select ‘Choose movie’.
Option A: Slow down the entire video
Step 3A: When the gallery opens, select the video that you want to slow down and tap on Simple.
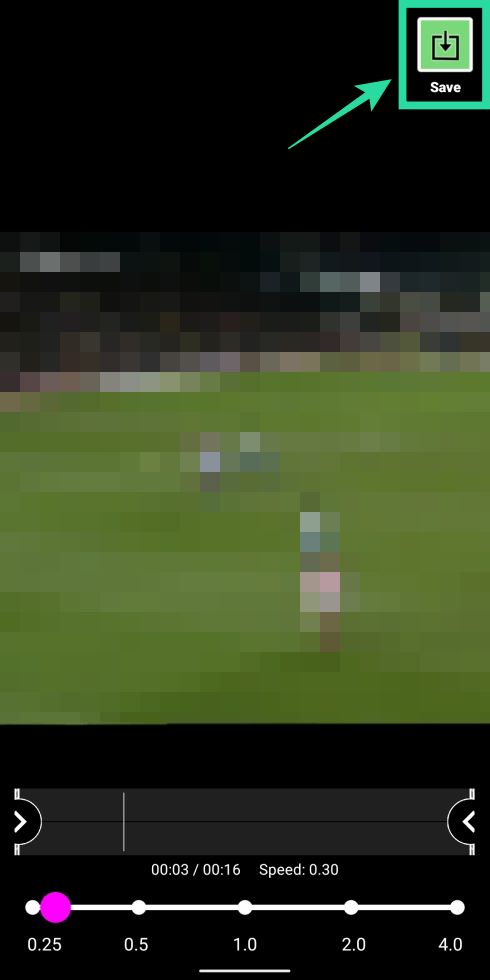
Step 4A: Here, you can select the speed you want the video to switch to by sliding through the speed adjustment slider. You can manually choose any speed between 0.25 and 1.00 to make a slow-motion effect on the video. Selecting a value above 1 will fasten the video.
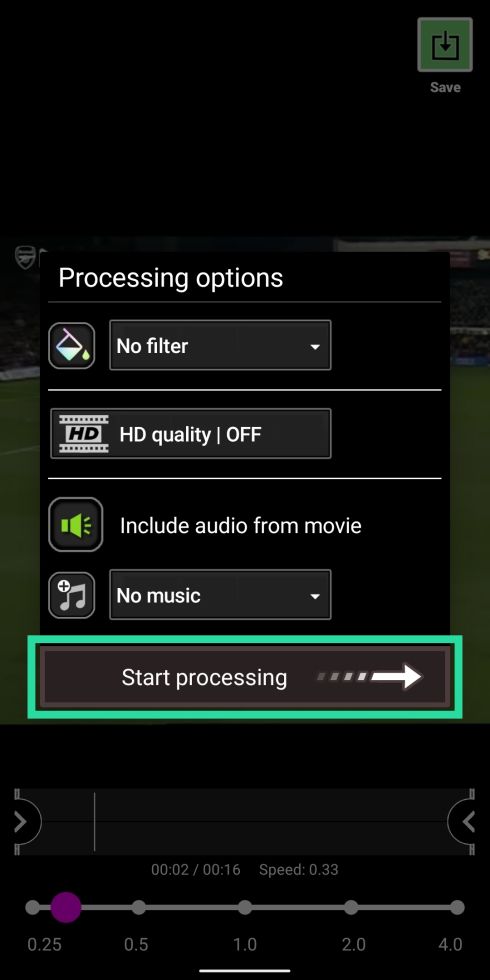
Step 5A: Once the slowed-down video is ready, tap on the Save button at the top right and then select Start Processing.
Step 6A: Once the slow-motion video is fully rendered, you can share the video on Snapchat by tapping on the hamburger icon, then tapping the Share icon, and selecting Snapchat from the Share menu.
Option B: Slow down sections of the video
Step 3B: After Step 2, select the video that you want to slow down and tap on Advanced.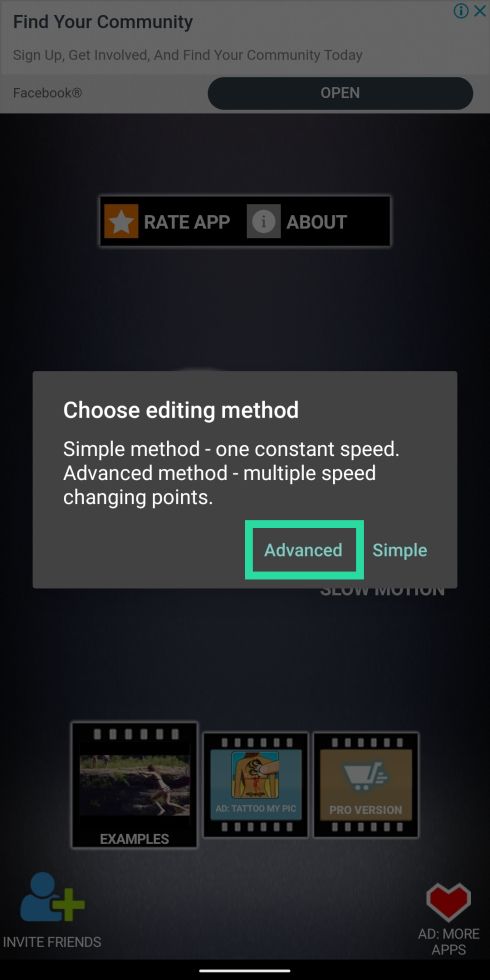
Step 4B: To change speeds of certain parts in the video, select the points according to the speed you want them to run on. Customize the slow-motion effect by considering the following options:
- Slide all four points on the graph below the half-way line to slow down the entire video.

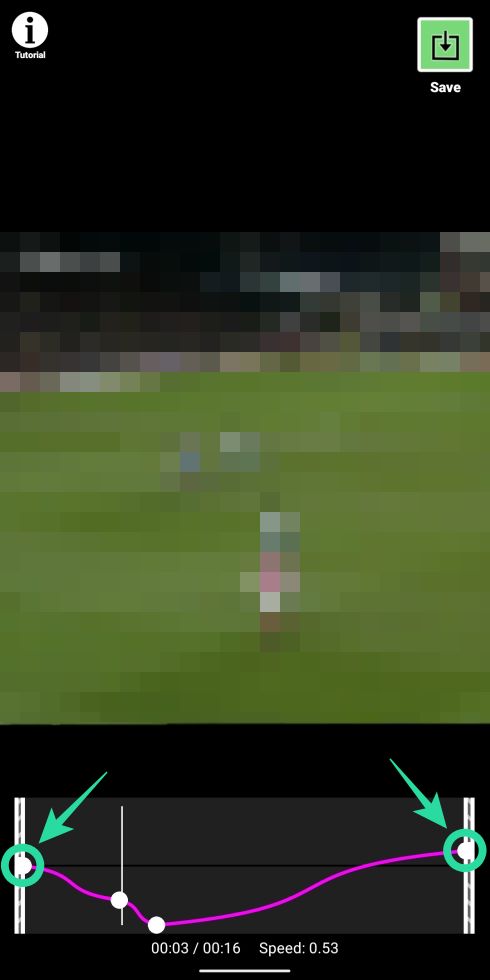
- Select the start and end points that are positioned on the extreme left and extreme right. In addition to selecting the speed for the start and end points, you can use them to cut out unwanted sections of the video at the start or at the end.
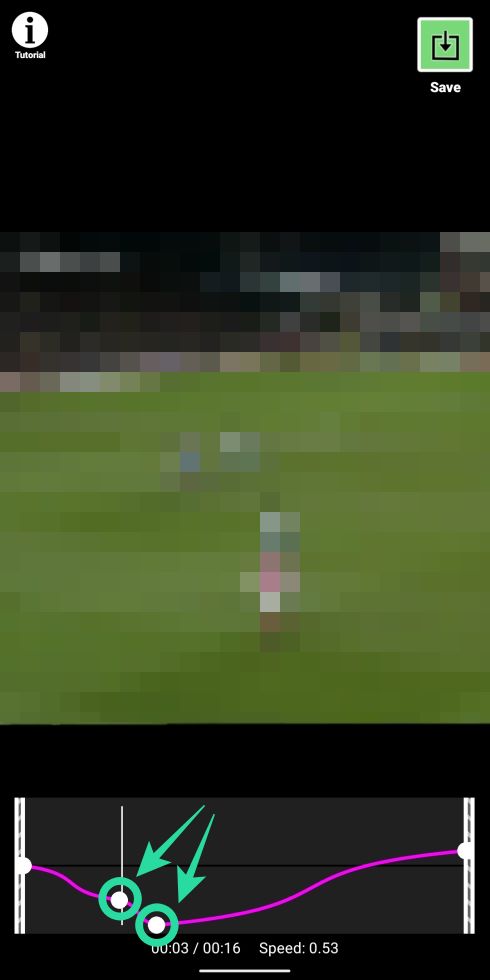
- Slide the two points in the middle below the half-way line and keep them at different speeds (anywhere between 0.25 and 1) to give different sections of the video different slow-motion effects.
Step 5B: Once the slowed-down video is ready, tap on the Save button at the top right, and then select Start Processing.
Step 6B: Once the slow-motion video is fully rendered, you can share the video on Snapchat by tapping on the hamburger icon, then tapping the Share icon, and selecting Snapchat from the Share menu.
Did the above guide help you slow down videos on Snapchat? Let us know what you often do to create slow-motion videos when sharing on Snapchat.


