What to know
- You can easily customize or personalize your device using Microsoft Launcher.
- With Microsoft Launcher, you can view your day at a glance, and add tasks, sticky notes, widgets, and more.
- To download and use Microsoft Launcher, your device should support Android version 7.0 or higher.
Do you find your Android device’s home screen boring and outdated? No worries! We have a solution for you. Microsoft Launcher is a customizable home screen replacement app developed by Microsoft Corporation that allows you to transform your device with exciting features and options.
With Microsoft Launcher, you can personalize and make your home screen on your Android device more enjoyable to use. In this article, you will learn how to set up and use Microsoft Launcher on your Android devices.
What is Microsoft Launcher and how does it work?
Launchers play an essential role in providing the background interface on your phone and organizing everything so that you can have quick and easy access. Although every Android device has a pre-installed default launcher, you can also install third-party launchers such as Microsoft Launcher.
Microsoft Launcher offers you a new home screen experience that helps you become more efficient across all your devices. Microsoft Launcher is easy to customize. With Microsoft launcher, you can easily organize everything on your phone. You can personalize your feed and access your to-do lists, calendar, and sticky notes from anywhere and at any time.
Once you install Microsoft Launcher as your new home screen, you have the option to begin anew with your preferred apps or import your existing home screen layout.
Related: How to Set Up and Use Agent GPT (ChatGPT)
Download and install the app from Play Store
To download and install the app from Play Store, follow these steps:
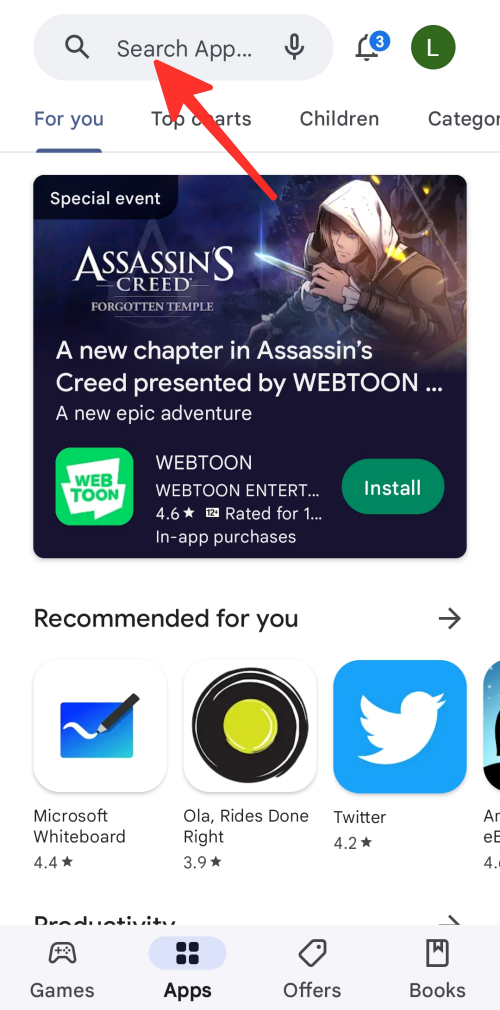
1Open Play Store on your phone.

2Tap on the search bar located at the top of the screen.
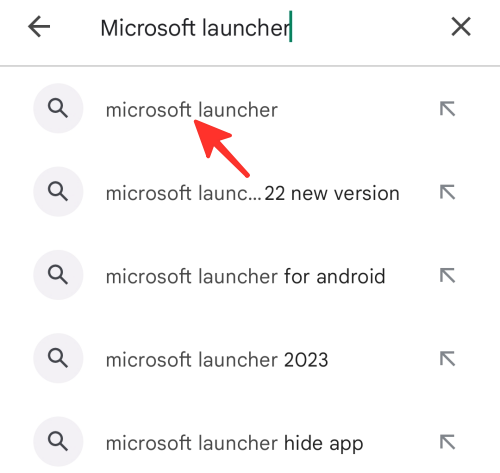
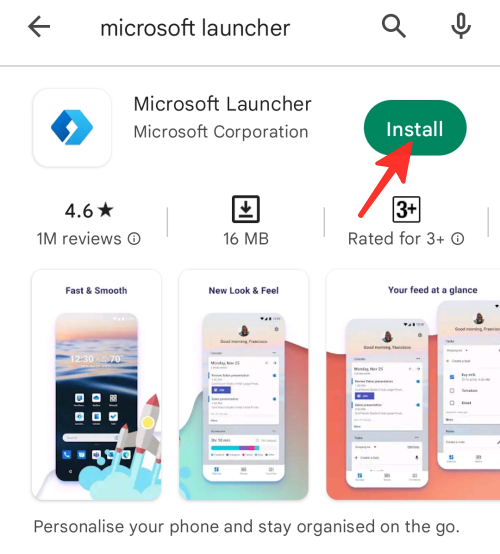
3Type “Microsoft launcher” in the search bar and tap on Microsoft Launcher from the results.
5After your app is installed, tap on Open.
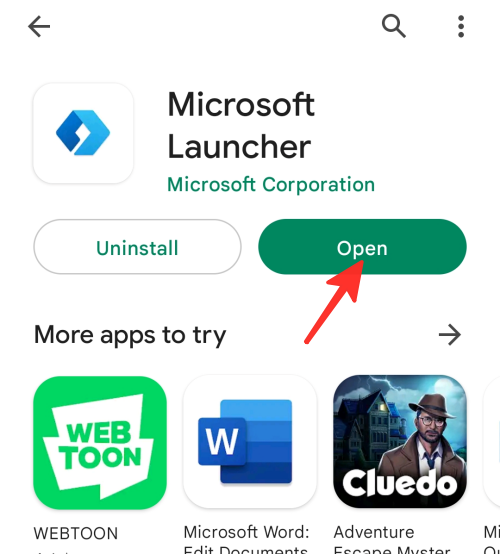
That’s it! You have successfully downloaded and installed Microsoft Launcher on your Android phone.
How to set up Microsoft Launcher on Android
To set up and use Microsoft Launcher on your Android phone, follow the steps below:
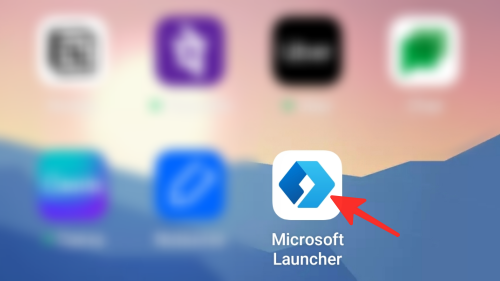
1Open Microsoft Launcher on your phone.
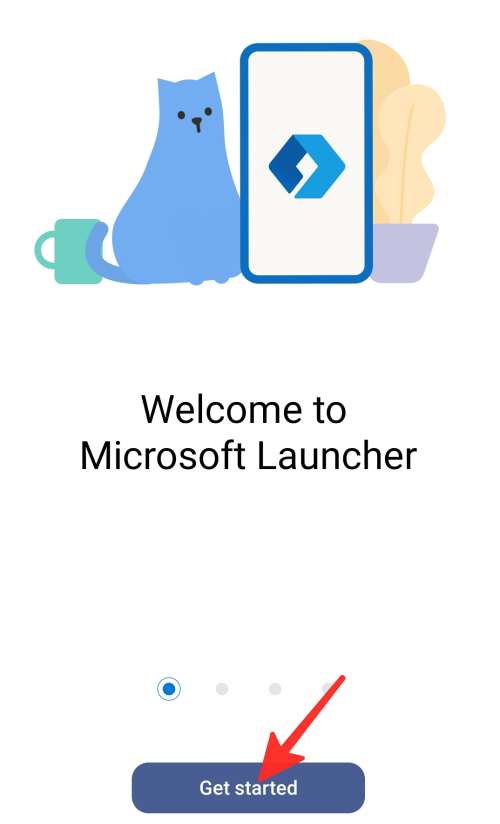
2To set up Microsoft Launcher, tap on Get started.
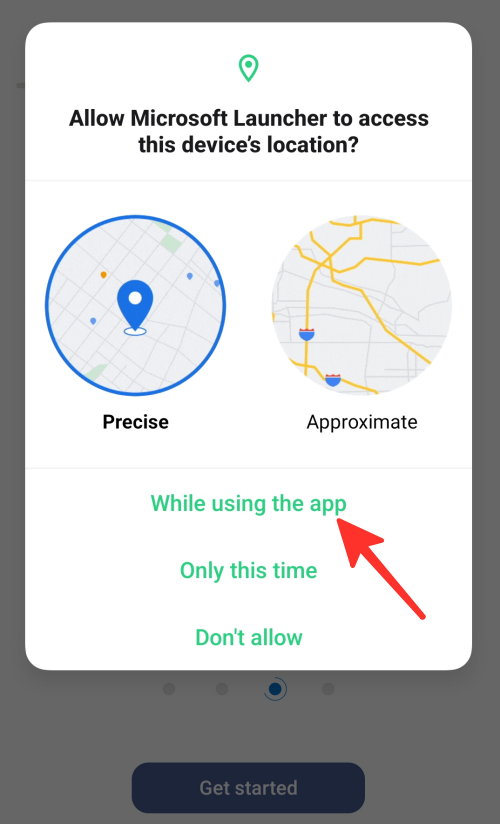
3Microsoft Launcher will ask you permission to access the device’s location. Select “Precise” or “Approximate” and then select “While using the app” or “Only this time.” You can also select “Don’t allow.” We have selected “Precise” and “While using the app” in the image given below.
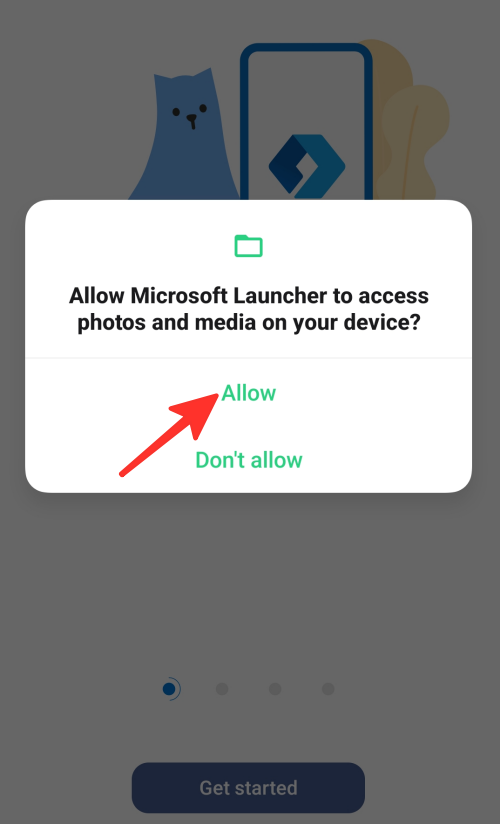
4Next, the Microsoft Launcher app will ask permission to access your device’s photos and media. Here, you can select “Allow” or “Don’t allow.” We have chosen “Allow” in the image given below.
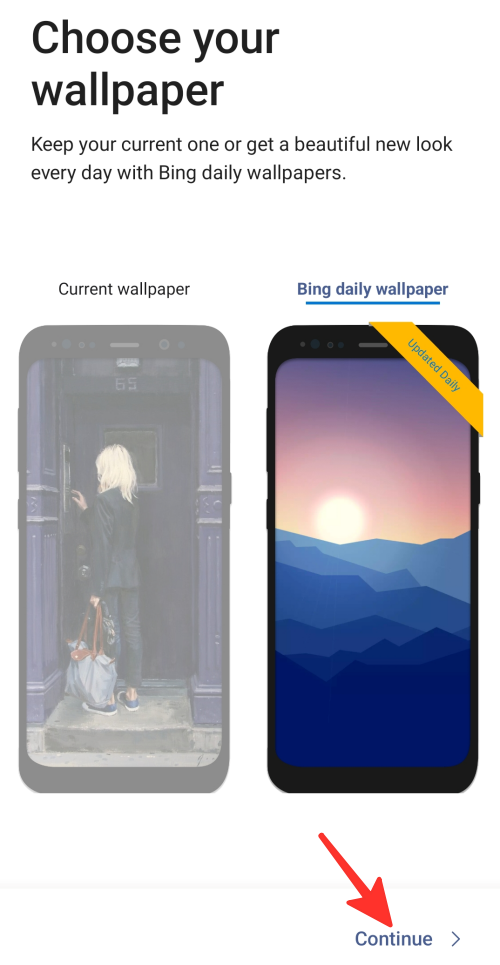
5Next, you can choose your “Current wallpaper” or “Bing daily wallpaper” which will change daily for your device. We chose “Bing daily wallpaper.” Tap on Continue.
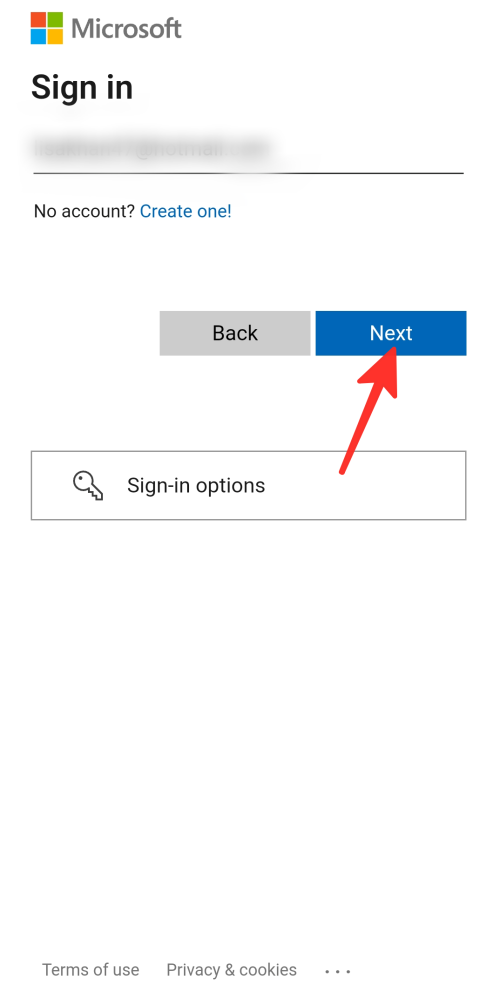
6Next, the app will ask you to sign in with your Microsoft or business accounts. Enter your account details and tap on Next to continue.
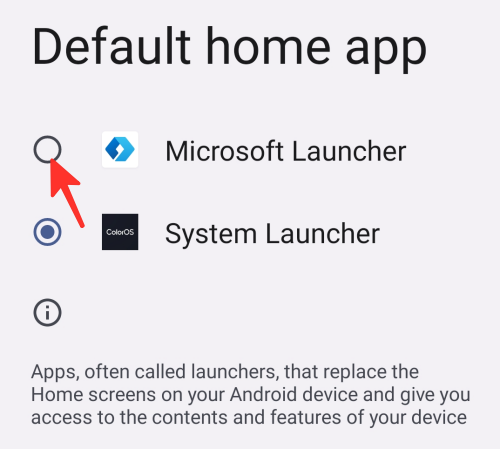
7For a better experience, set Microsoft Launcher as your default look.
Done. You have successfully set up Microsoft Launcher on your Android phone.
Related: How to set up and use TreeSize
How to use Microsoft Launcher on Android
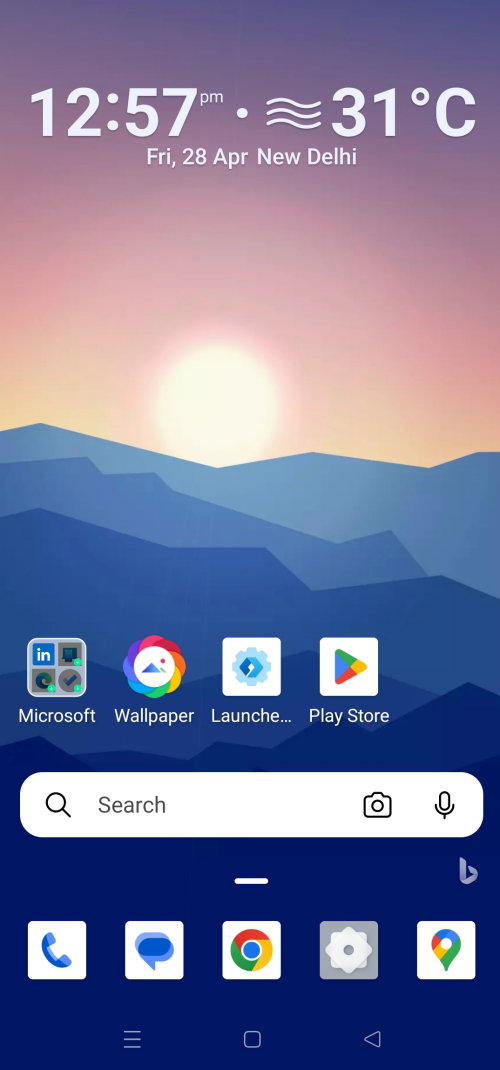
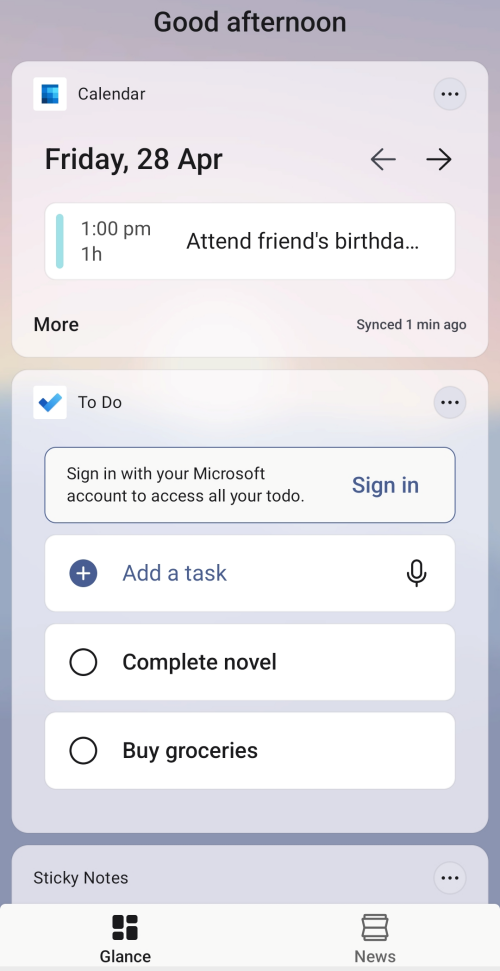
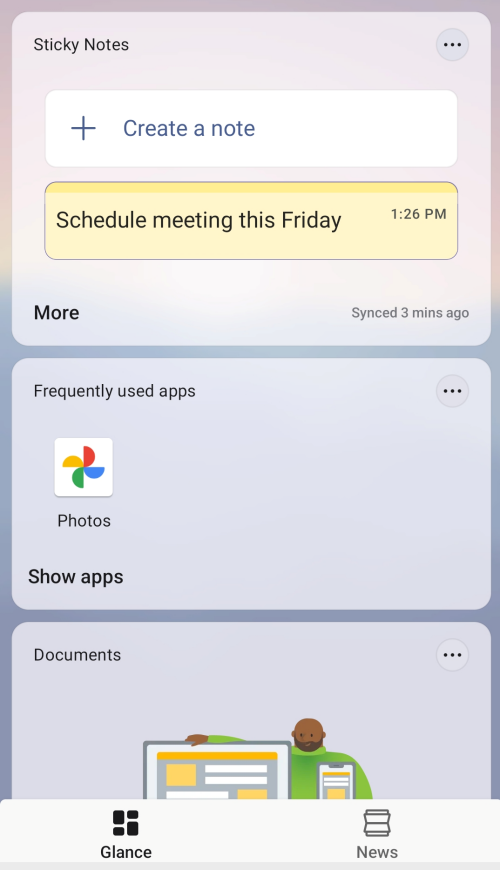
If you swipe left, you’ll see your upcoming events, to-do tasks, sticky notes, documents you are working on, and more. Your account is frequently synced by Microsoft Launcher to ensure that you are always up to date.
1. Add your favorite apps on home screen
To add your favorite app to your home screen, simply touch and hold the app, then move it around the screen with your finger until you find the desired location.

2. Download Microsoft apps directly
To download Microsoft applications straight from your home screen, follow these steps:
1Tap on the Microsoft folder on your home screen.
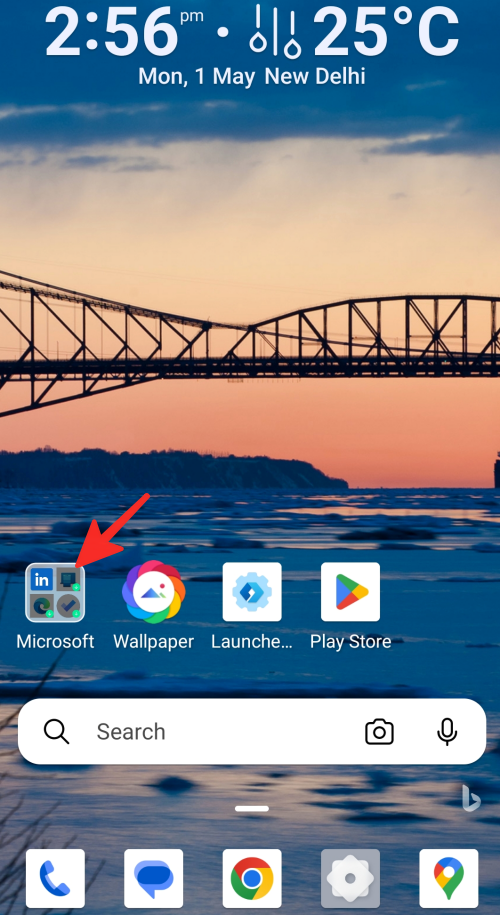
2Next, simply tap on the app you want to install.
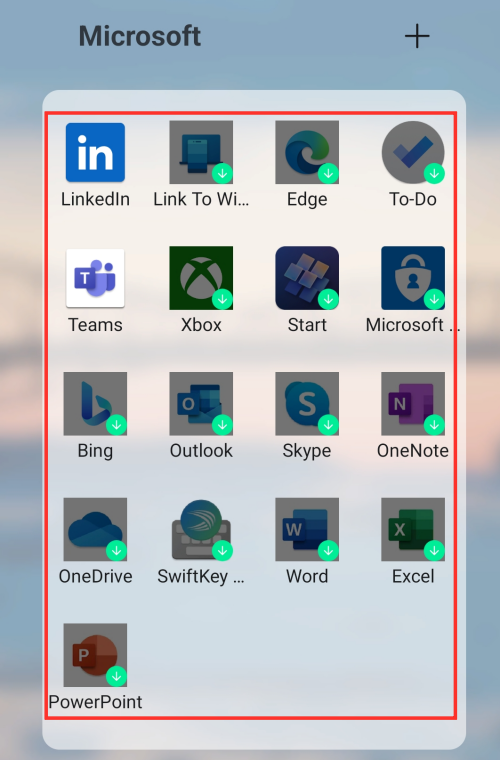
That’s it! You have successfully downloaded Microsoft apps.
3. Add tasks
To add tasks using Microsoft Launcher, follow the steps below:
1Swipe left on your home screen.

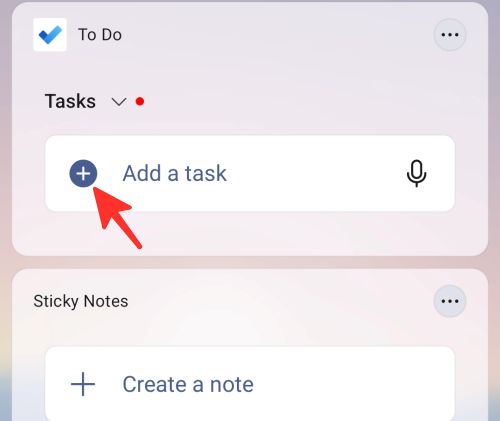
2Tap on + Add a task under the “To Do” section.
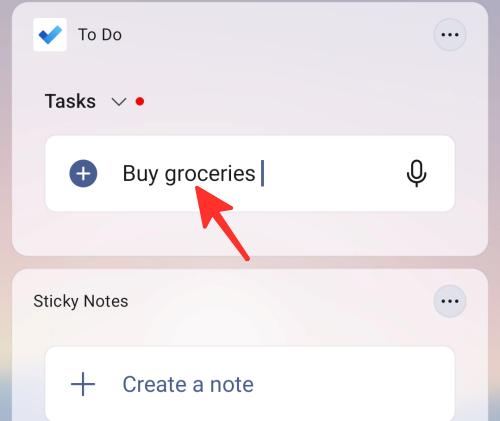
3Type in or use your voice to add the task and hit enter.
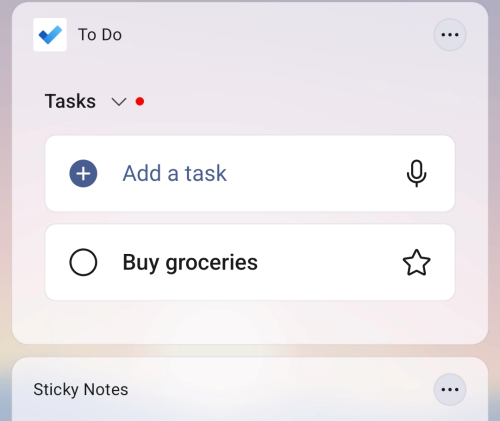
Done. You have successfully added a task using Microsoft Launcher.
4. Add sticky notes
To add sticky notes using Microsoft Launcher, follow these steps:
1Swipe left on your home screen.
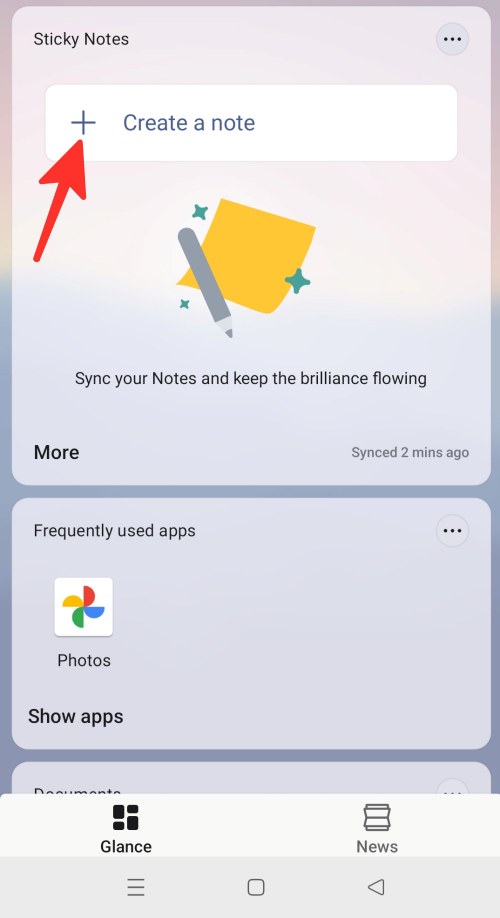
2Tap on + Create a note under the “Sticky Notes” section.
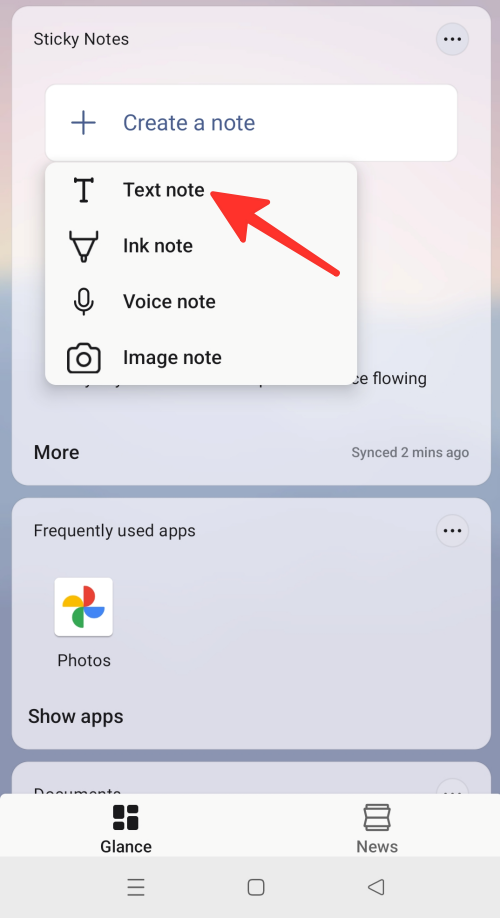
3Select the type of note you want to create. You can add a text, ink, voice, or image note. We have selected “Text note” in the image given below.
4Type in your note and tap on the back arrow to save it.
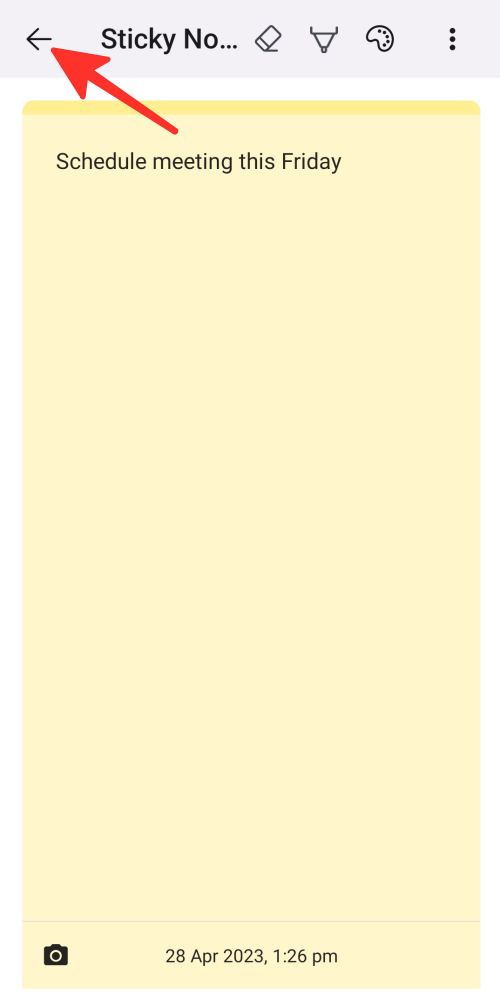
That’s it! Your note will be displayed under Sticky Notes.
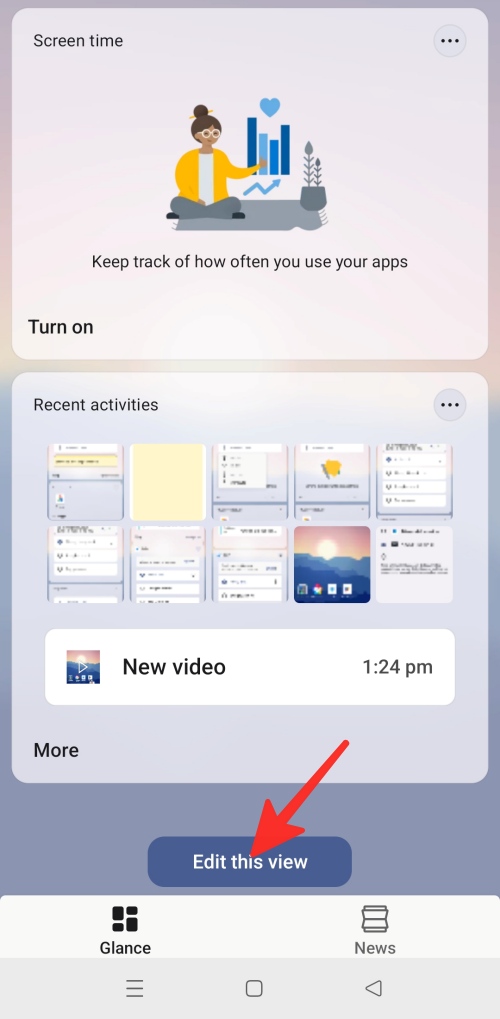
To add widgets using Microsoft Launcher, follow the steps below:
1Swipe left on your home screen.
2Scroll down at the bottom of the screen and tap on Edit this view.
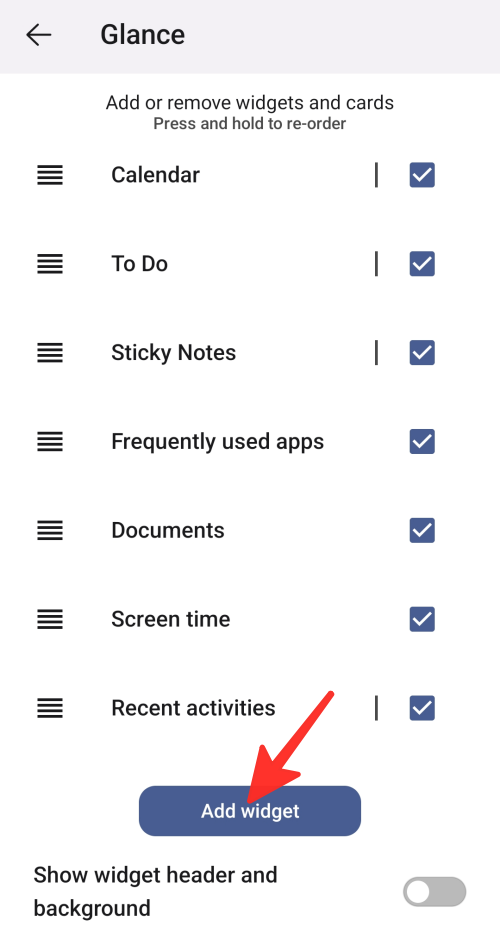
3From here, you can add or remove widgets and cards. You can also enable “Show widget header and background” if you want. To add widgets, tap on add widget.
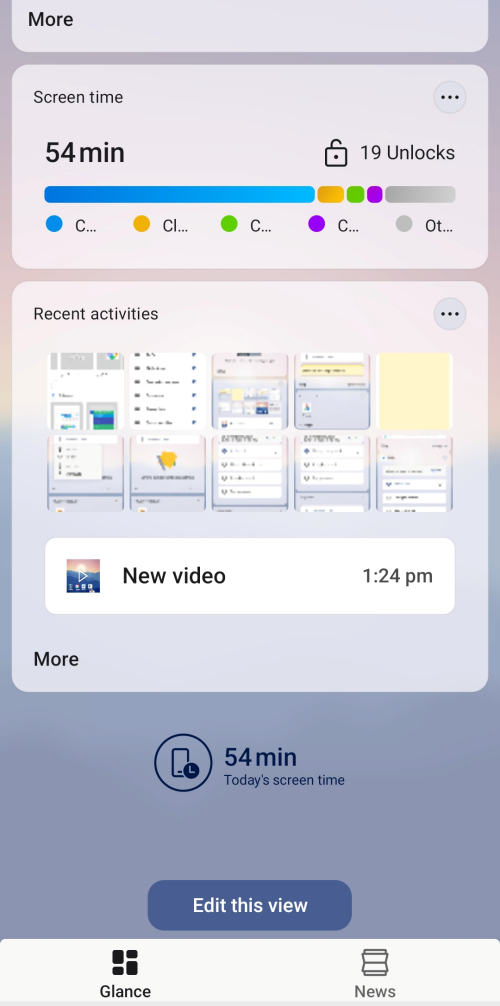
4Tap on the widget you want to add to your screen to select it. We have selected “Today’s screen time” in the image given below.
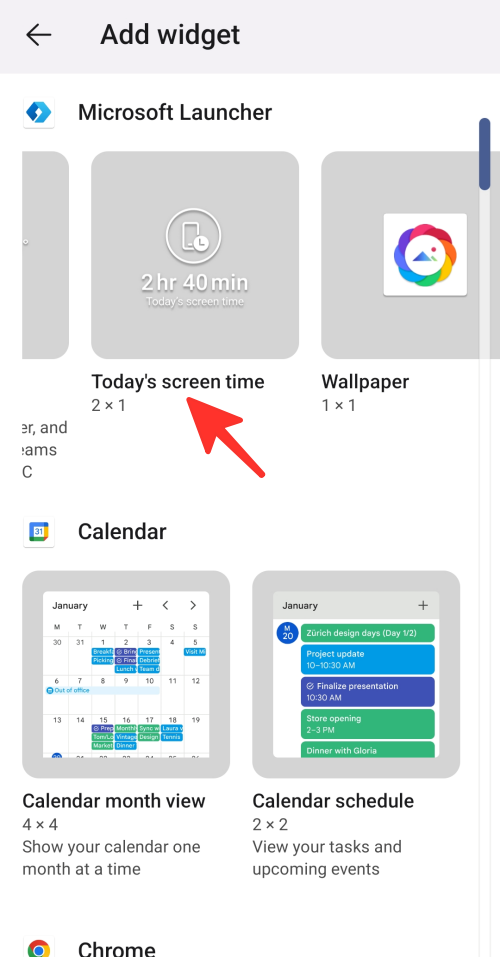
Done. Your widget will be displayed in your feed.
Tip: You can also add widgets to your home screen. To do so, long press on your home screen, then choose “Add widgets.” Then, select the widget you want to include and position it in the desired location by dragging and dropping it.
That’s it! You have successfully added a widget in your feed and home screen.
How to change settings on Microsoft Launcher on Android
The following is a step-by-step guide to changing Microsoft Launcher’s settings. To achieve your desired result, follow the steps below.
Wallpaper
To change your wallpaper, follow these steps:
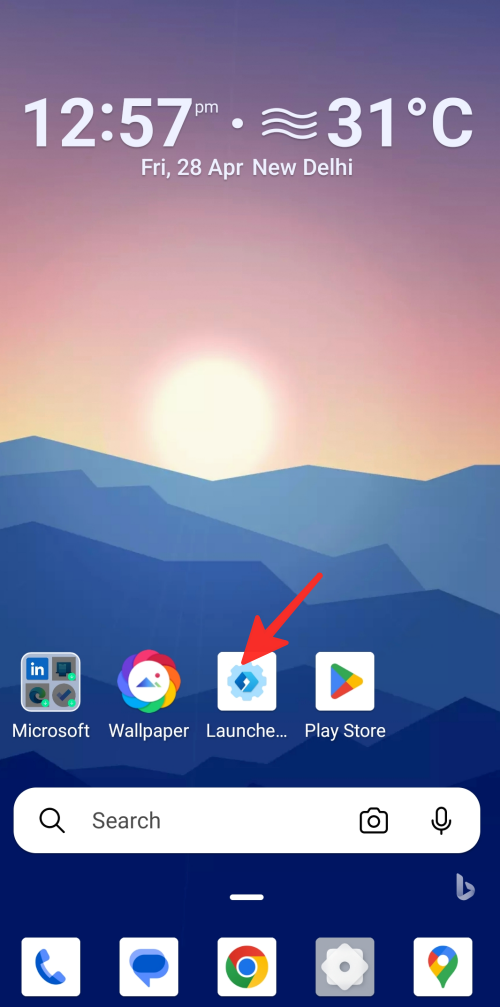
1Tap on Microsoft Launcher’s settings icon on your home screen.

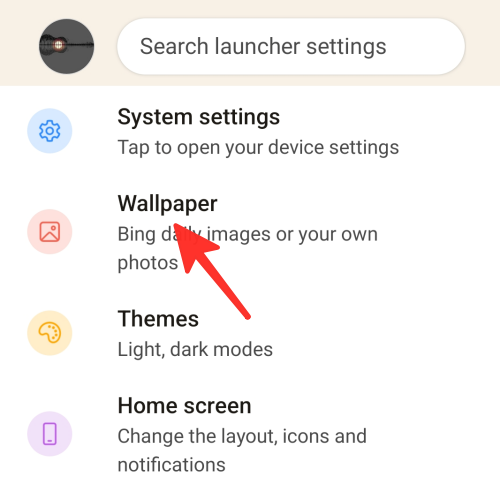
2Next, tap on Wallpaper from the list of options.
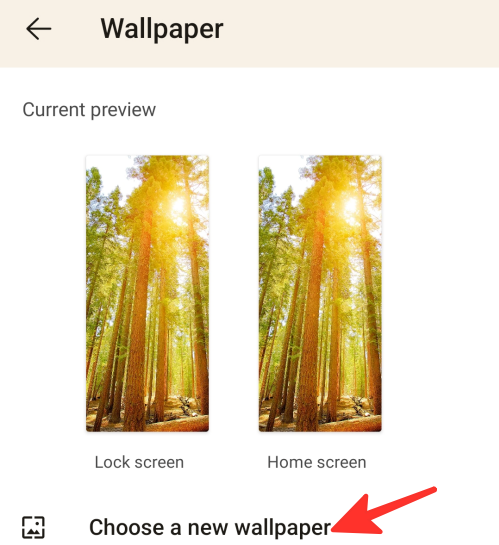
3To change your wallpaper, tap on Choose a new wallpaper.
4From here, you have the option to choose wallpaper from your photos, Bing, Microsoft Launcher, or live wallpaper. We have selected “Bing” in the image given below.

Tip: You can change your wallpaper directly by tapping on the Wallpaper icon on your home screen.
Tip 2: You can also change the wallpaper by long pressing your home screen and selecting the change wallpaper option. From here, you can select wallpaper for your home screen, lock screen, or both from the available options.

That’s it! You have successfully changed your phone’s wallpaper.
Theme
To change the theme of your device, follow these steps:
1Tap on the Microsoft Launcher’s settings icon on your home screen.
2Tap on Themes from the list of options.
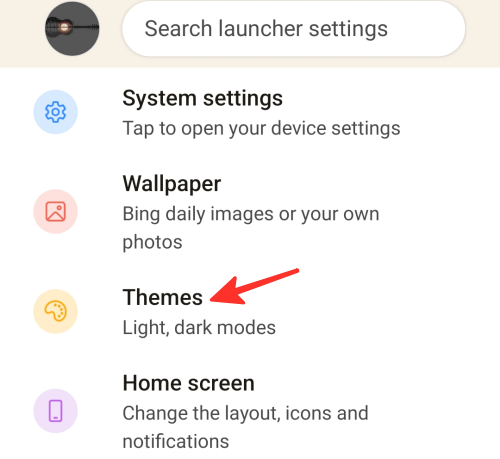
3From here, you can adjust the opacity, and blurriness of the interface. Additionally, you can enable or disable features such as “Apply blur effect to all screens,” “Enable blur effect,” and “Accent color.”
Done. You have successfully changed the theme of your phone.
Home screen
To change home screen settings, follow these steps:
1Go to Microsoft Launcher’s settings and tap on Home screen from the list of options.
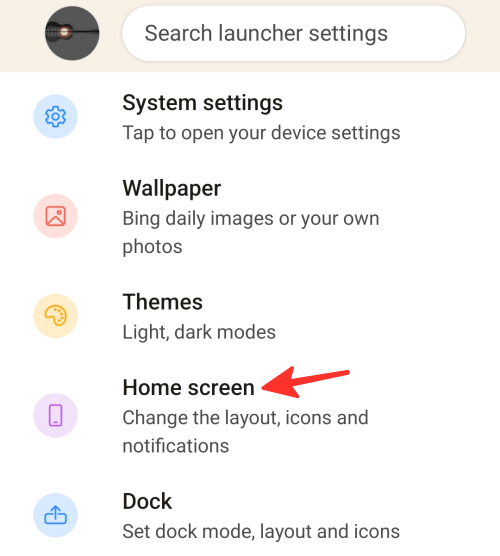
2 Next, tap on Icon layout and size to modify your icons’ size and layout.
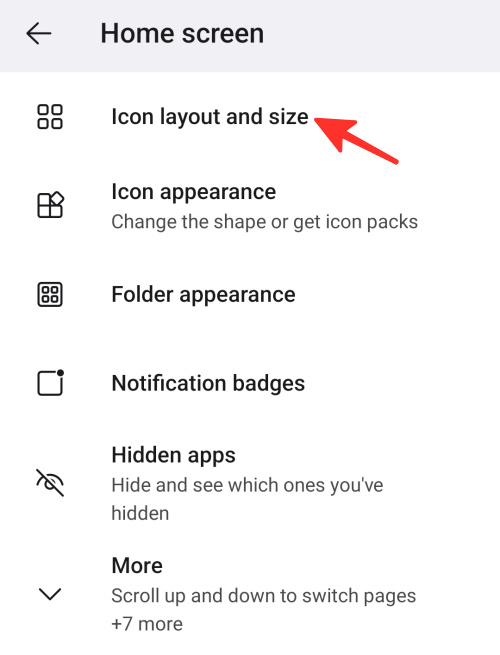
3From here, you can change the size and layout of the icon. You can select the number of columns and rows on your home screen. In addition, you can also enable “show single label,” “show home screen padding,” “show app and folder names,” “match home screen and dock icons,” and “match home screen and app drawer icons.”
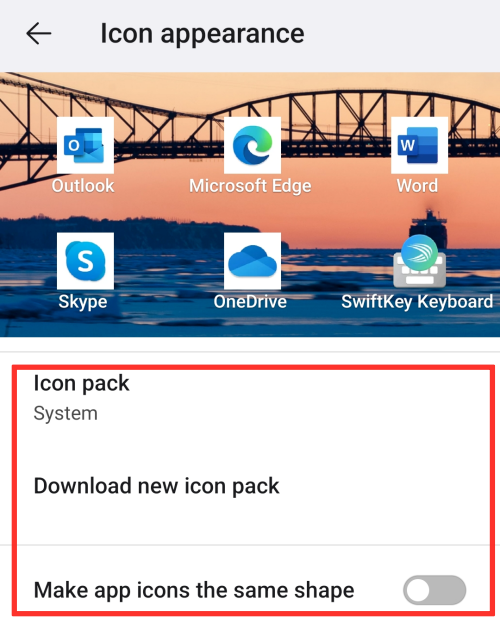
4To change your icons’ appearance, tap on Icon appearance.
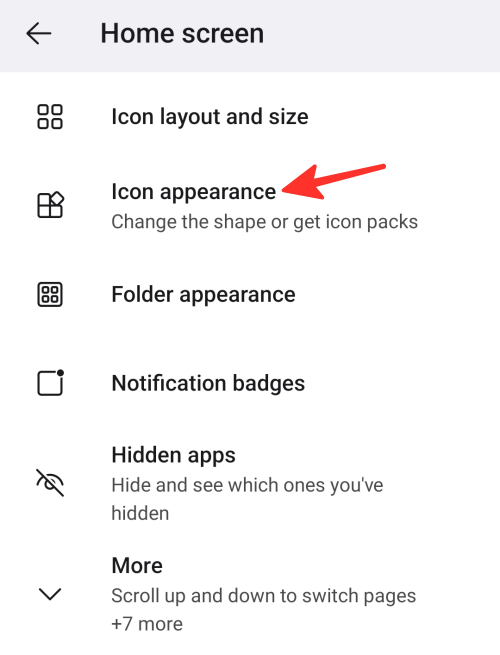
5 From here, you can choose between “system” or “Microsoft Launcher’s” icon pack, download a new icon pack or make app icons the same shape.
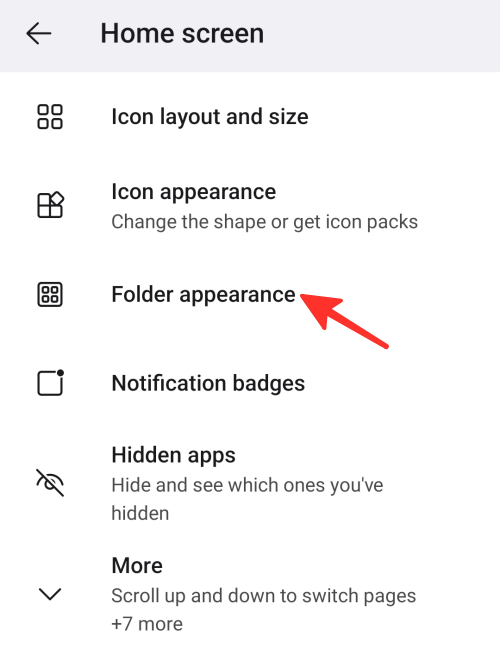
6To change folder appearance, tap on Folder appearance.
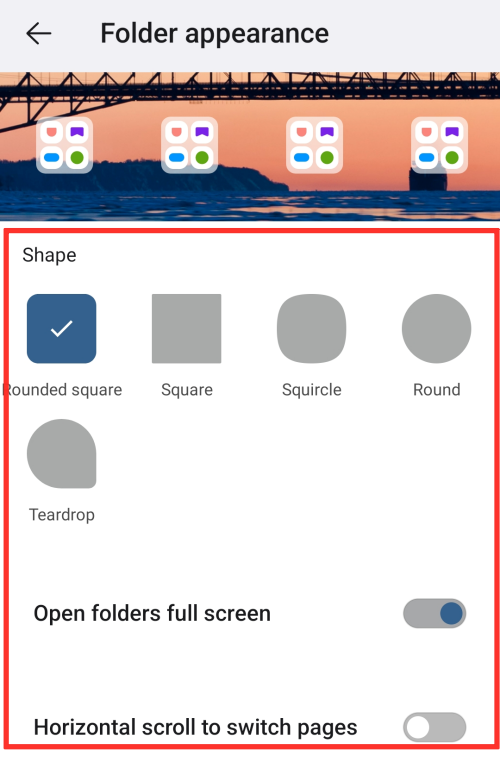
7From here, you can choose the shape of the folders. You can also enable “Open folders full screen” or “Horizontal scroll to switch pages.”
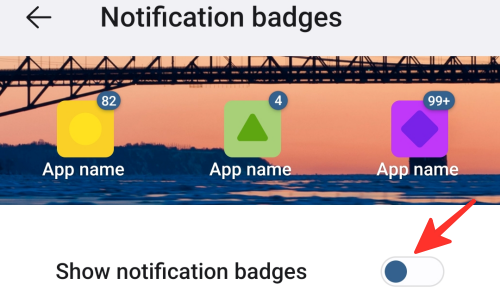
8 To change notification badges settings, tap on Notification badges.
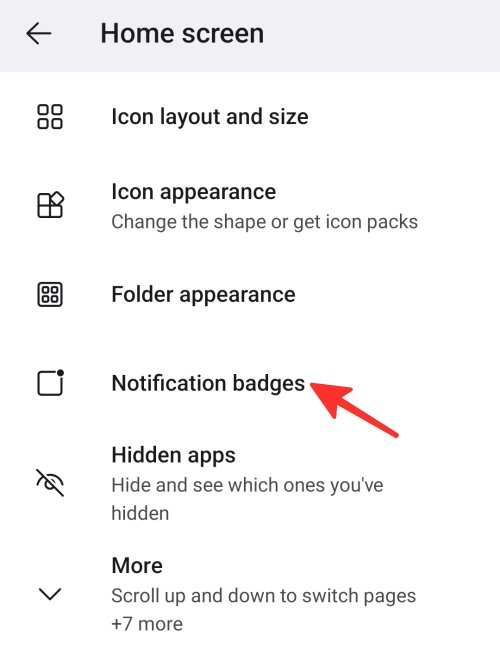
9From here, you can enable or disable “Show notification badges” which will show the number of unread notifications you have in your apps.
10Additionally, you can see or hide hidden apps. You can also enable or disable “scroll up and down to switch pages,” “keep page header,” “lock home screen,” “show page indicators,” “show status bar,” “add new apps to home screen,” “allow home screen rotation,” and “allow sub-grid.”

That’s it! You have successfully changed your home screen settings.
Dock
To change the settings of dock, follow the steps below:
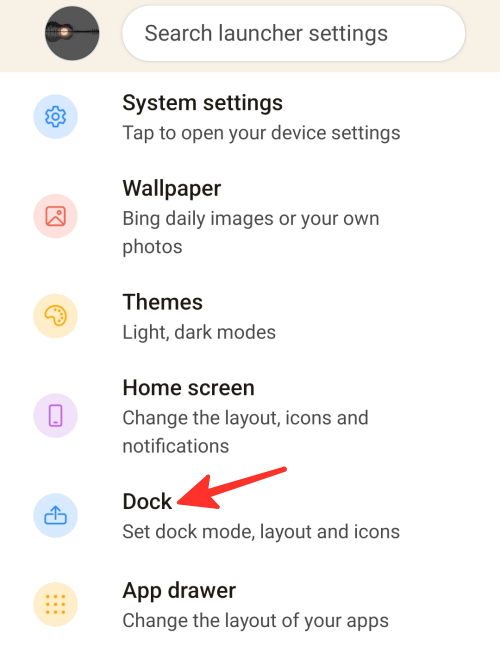
1Go to Microsoft Launcher’s settings and tap on Dock from the list of options.
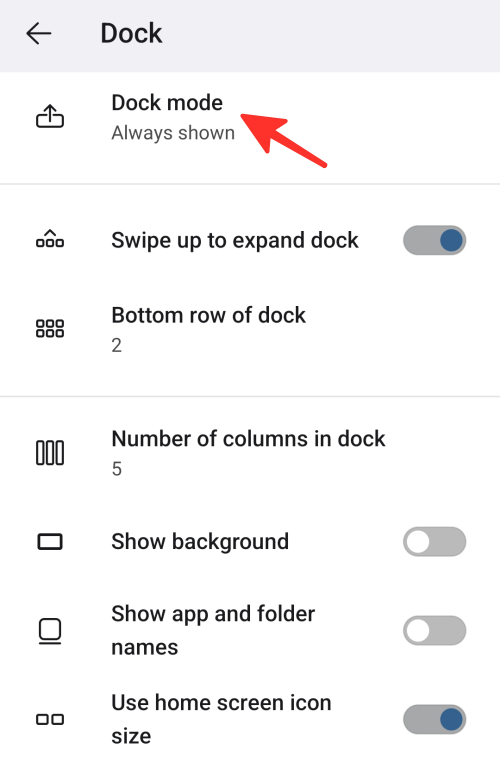
2Next, tap on Dock mode to change its settings.
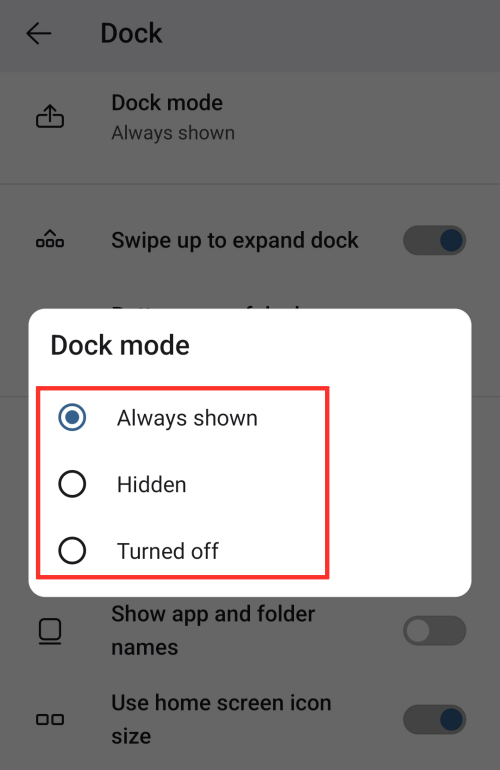
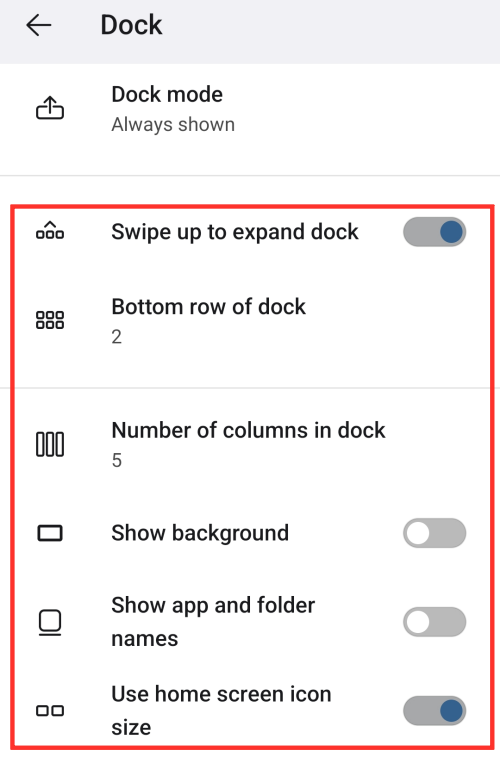
3From here, you can always show, hide or turn off dock mode. We have selected “Always show” in the image given below.
4 In addition, you may specify the number of columns in the dock as well as the number of bottom rows. You can also enable or disable “swipe up to expand dock,” “show background,” “show app and folder names,” and “use home screen icon size.”
That’s it! You have successfully changed the dock settings.
App drawer
To change app drawer settings, follow the steps below:
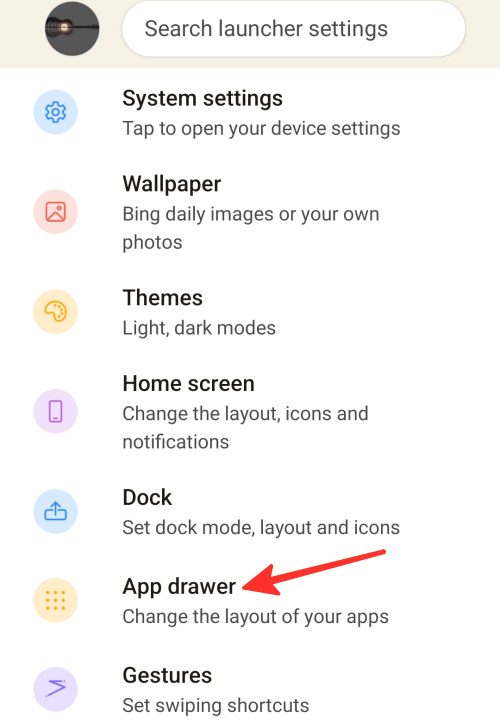
1 Go to Microsoft Launcher’s settings and tap on App drawer from the list of options.
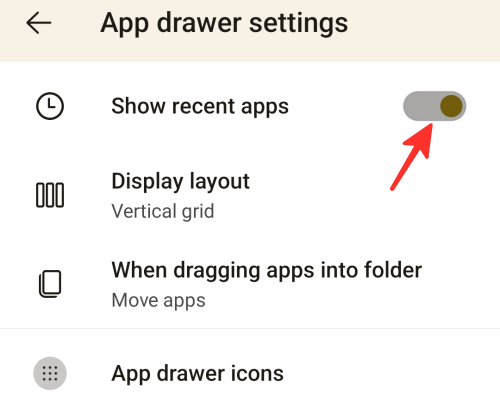
2From here, you can enable or disable “Show recent apps option” in the App drawer settings.
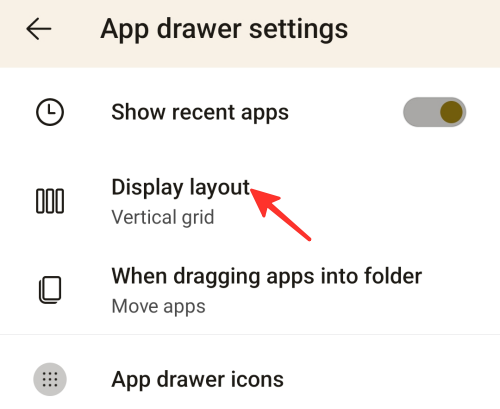
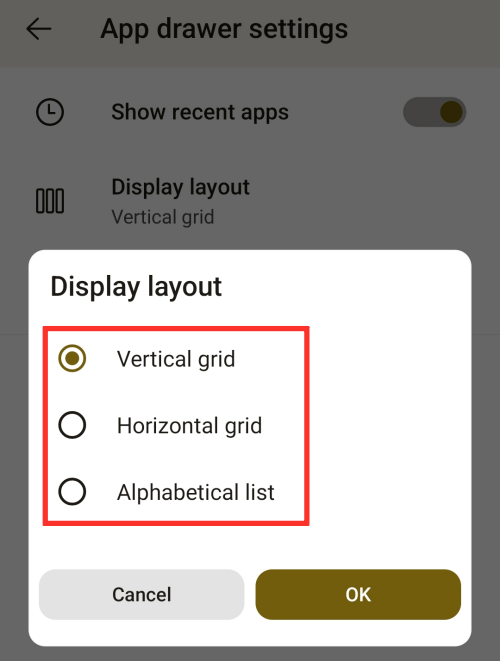
3You can also change the layout of your apps. Tap on Display layout to modify it.
4You have the option to select “Vertical grid,” “Horizontal grid,” or “Alphabetical list.” We have selected the “Verticle grid” in the image given below.
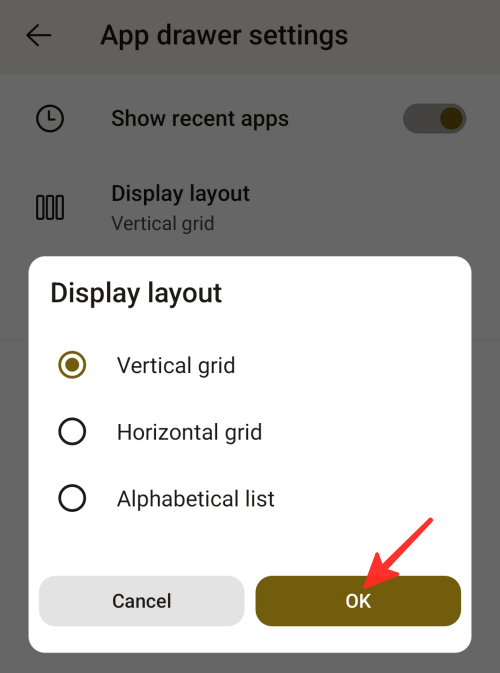
5After selecting your display layout, tap on Ok to save it.
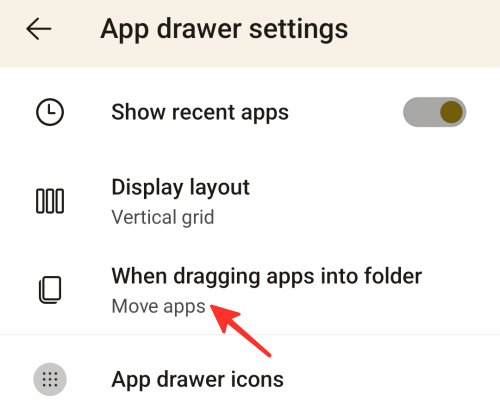
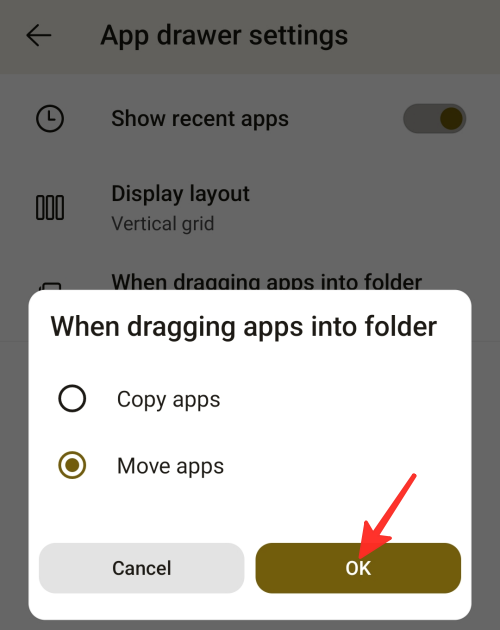
6Next, tap on When dragging apps into folder to change its setting.
7You have the option to select between “Copy apps” or “Move apps.” We have selected “Move apps” in the image given below.
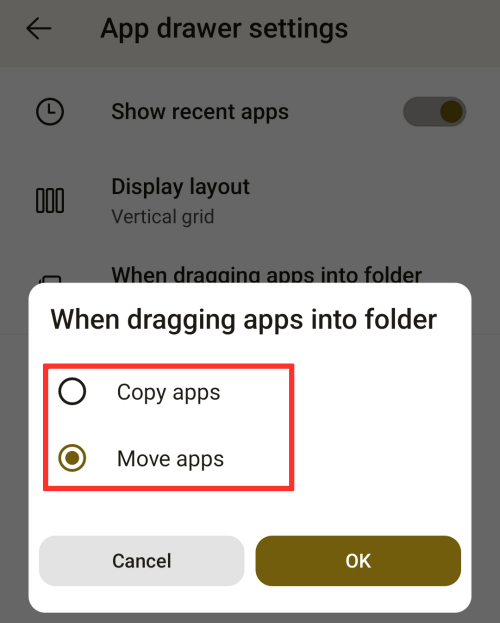
8After you have selected your option, tap on Ok to save it.
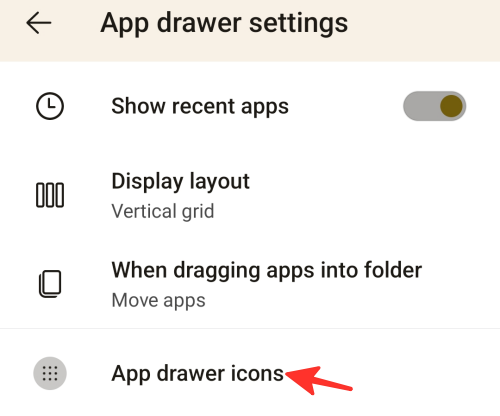
9To modify the size of your app icons, tap on App drawer icons.
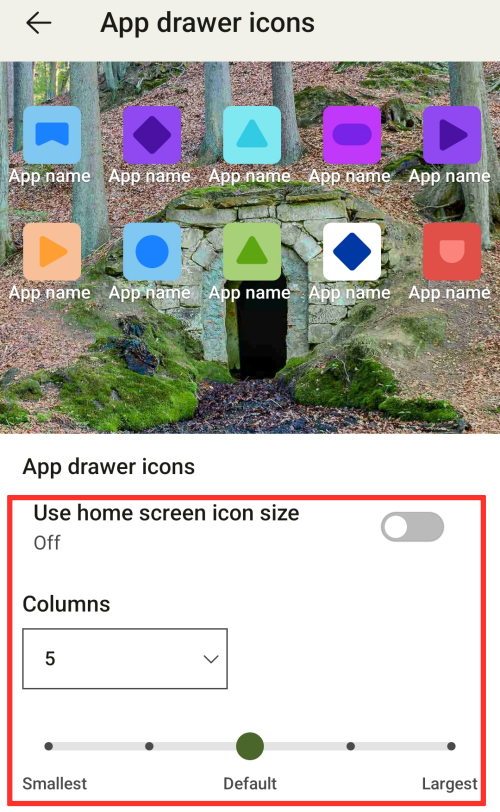
10From here, you can either enable “Use home screen icon size” or customize the size of icons and the number of columns to your preference.
That’s it! You have successfully changed your App drawer settings.
Gestures
To modify the setting of gestures, follow these steps:
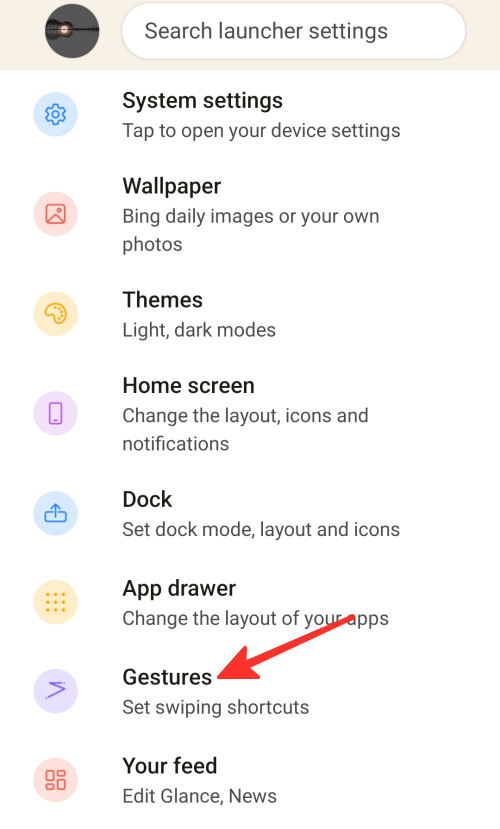
1Go to Microsoft Launcher’s settings and tap on Gestures from the list of options.
2You’ll find a comprehensive list of gestures that you can customize to your liking. Tap on the gesture setting you want to change. We have selected “Swipe up” in the image given below.
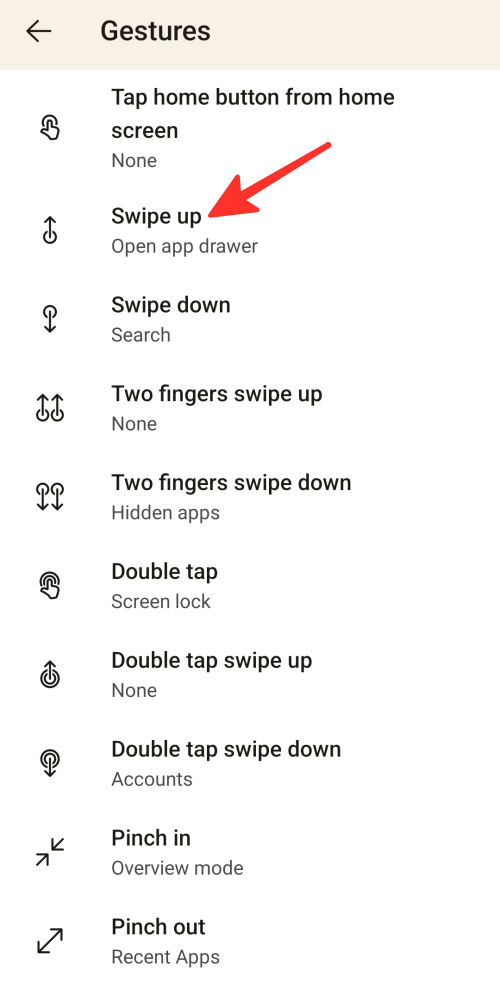
3From here, you can change the default settings of the gesture to perform any action in the launcher. You can also use the gesture to open an already installed app or execute shortcuts and perform advanced actions. We have selected “Open app drawer” as the action.

Done. You have successfully changed gestures settings.
Your feed
To modify your feed’s settings, follow the steps below:
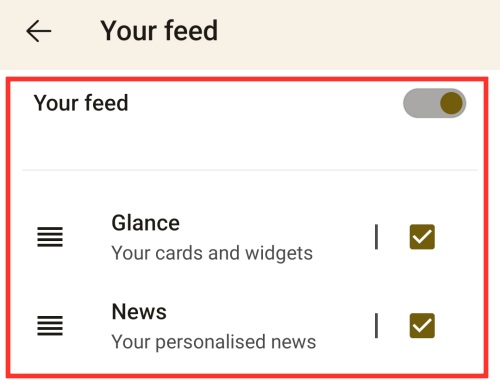
1Go to Microsoft Launcher’s settings and tap on Your feed from the list of options.
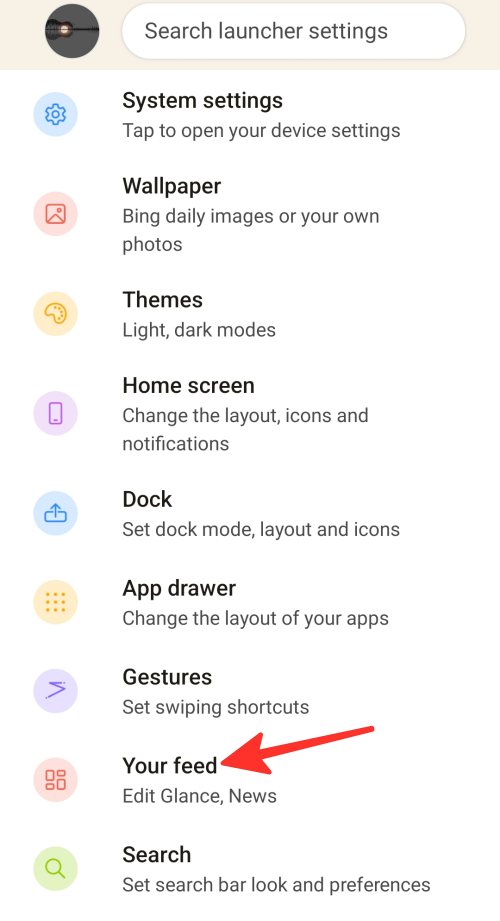
2The “Your feed” option allows you to specify which items will be displayed on your feed such as Glance or News. Additionally, you can disable the “Your feed” feature entirely if you prefer not to use it.
That’s it! You have successfully modified your feed settings.
Search
To change search settings, follow the steps below:
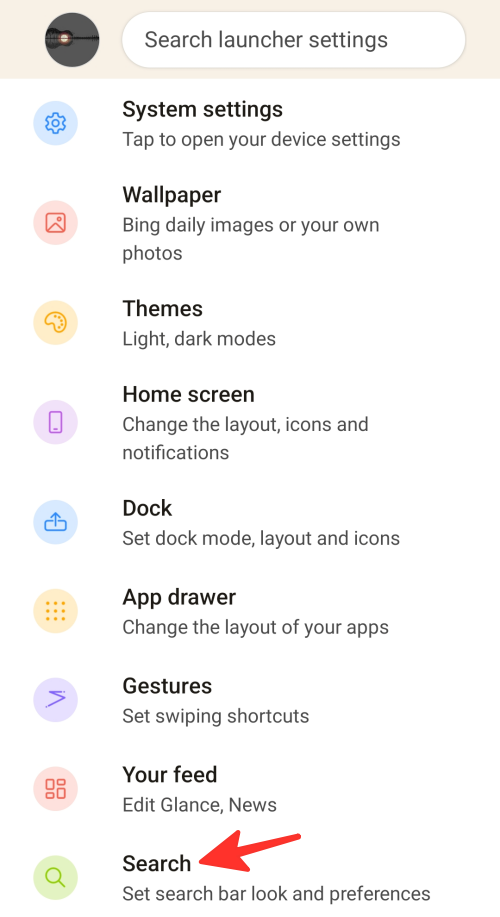
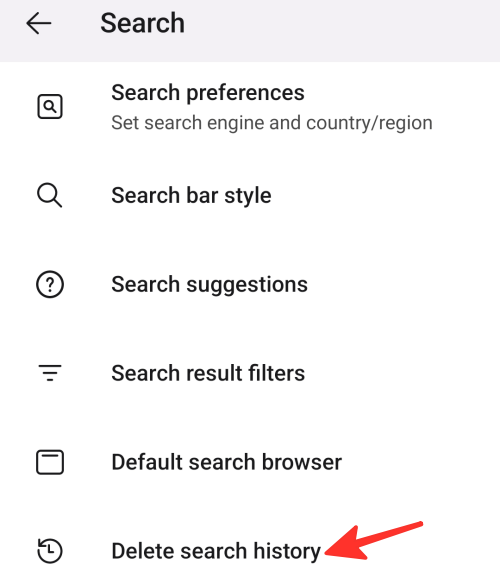
1Go to Microsoft Launcher’s settings and tap on Search from the list of options.
2 Next, to change search preferences settings, tap on Search preferences.
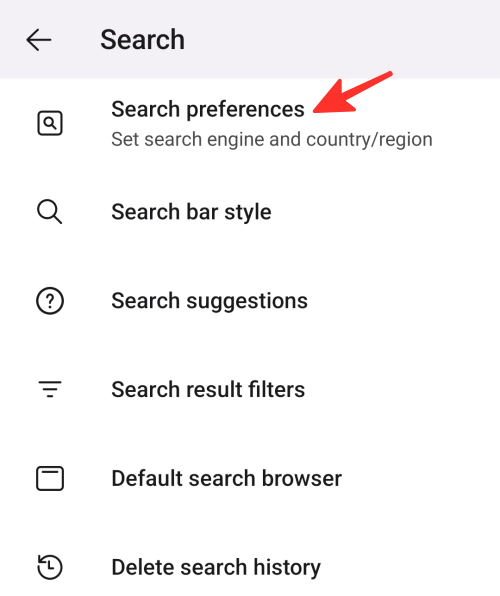
3From here, you can choose the search engine, country/region, and voice search language. You can also enable the “Copy QR code result to clipboard” option.

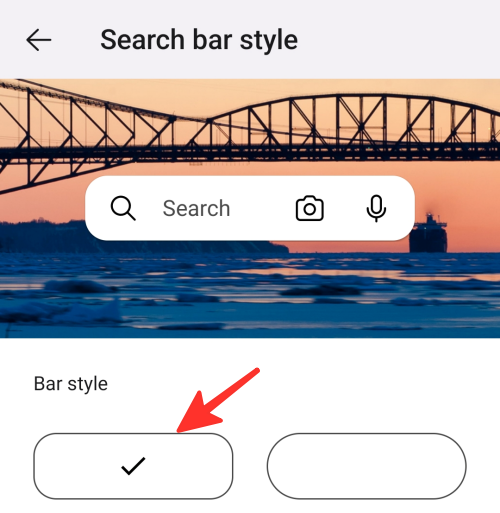
4To change the search bar style, tap on Search bar style.
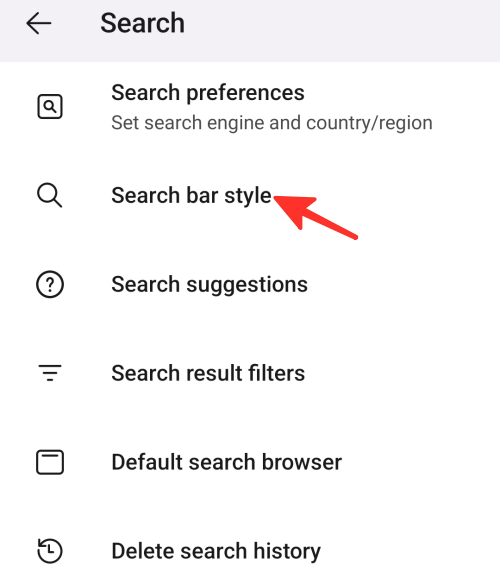
5 Here, you can select any search bar style according to your preference.
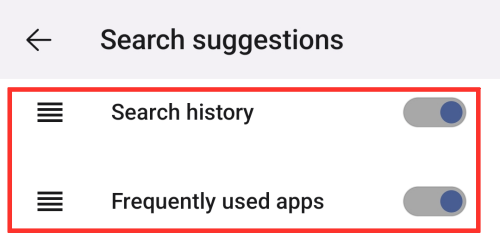
6To change the settings of your search suggestions, tap on Search suggestions.
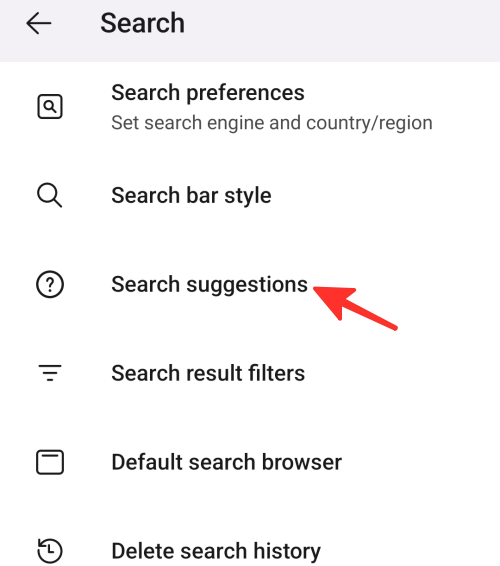
7 Here, you can enable or disable “search history” and “frequently used apps.”
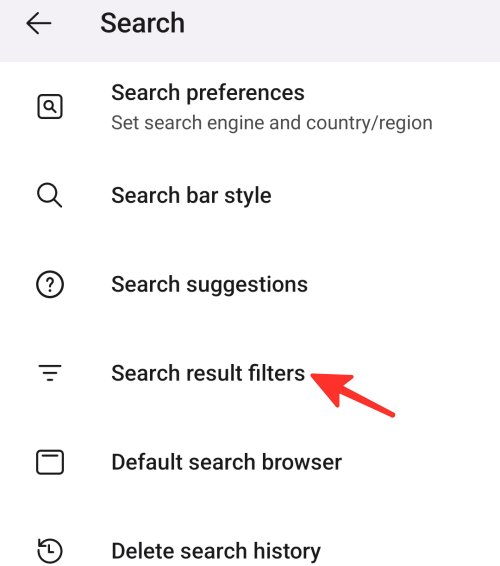
8To change the settings of your search result filters, tap on Search result filters.
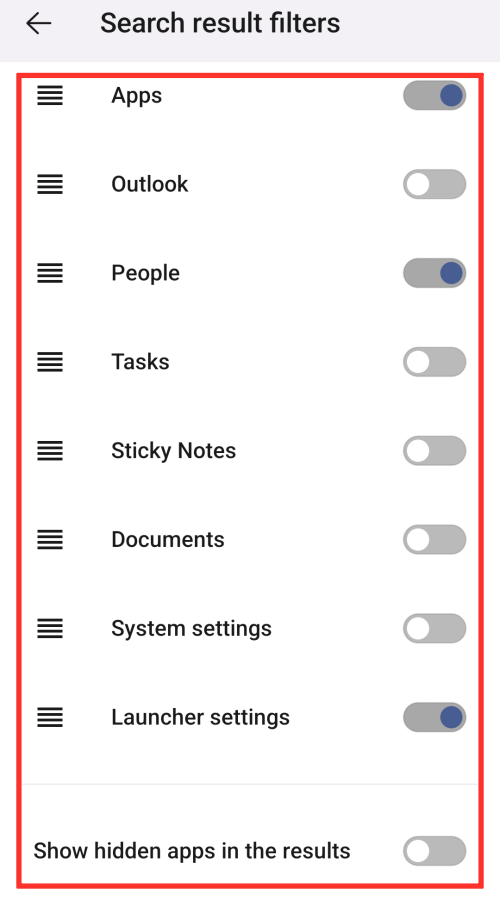
9Here, you can enable or disable “Apps,” “Outlook,” “People,” “Tasks,” “Sticky Notes,” “Documents,” “System settings,” and “Launcher settings.” You can also enable “Show hidden apps in the results” option.
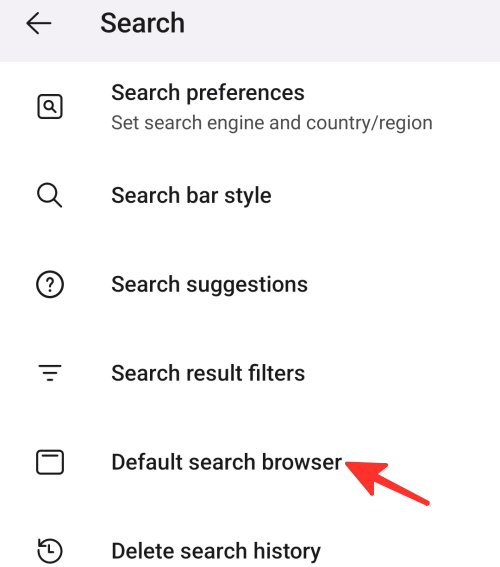
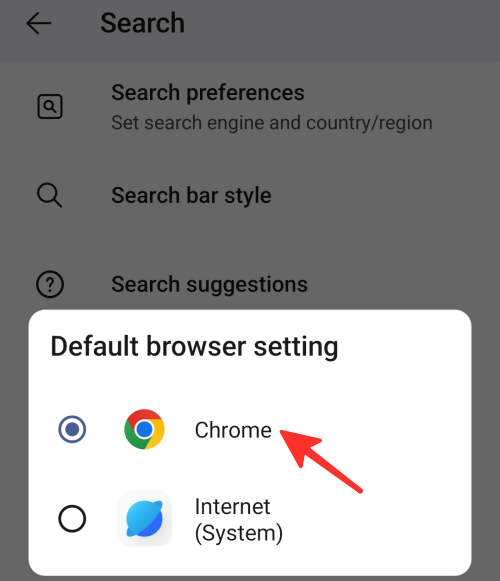
10 To choose your default search browser, tap on Default search browser.
11Now, you have the option to select Chrome or your system browser as your default browser. We have selected “Chrome” in the image given below.
12To delete your search history, tap on Delete search history.
Done. You have successfully changed your search settings.
Back up and restore
To back up or restore your Microsoft Launcher, follow these steps:
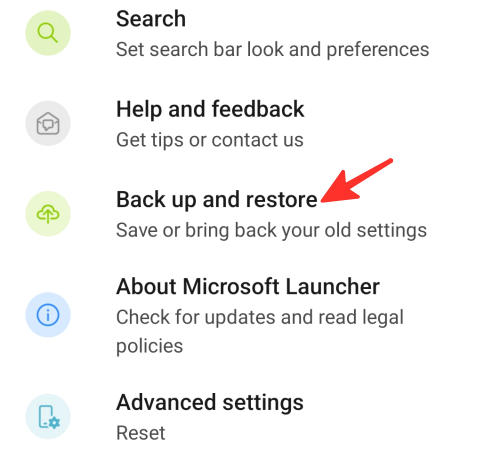
1Go to Microsoft Launcher’s settings and tap on Back up and restore from the list of options.
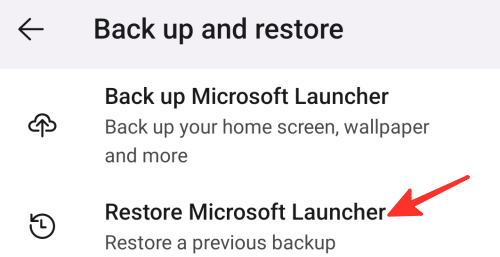
2If you want to back up your Microsoft Launcher, tap on Back up Microsoft Launcher.
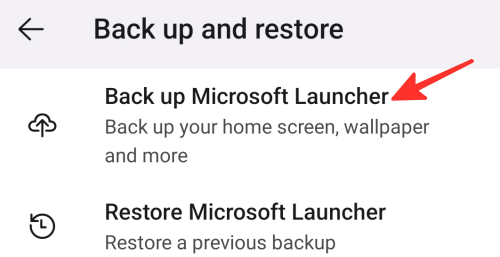
3If you already have a backup and want to restore your Microsoft Launcher to the previous backup, tap on Restore Microsoft Launcher.
Done. You have successfully backed up or restored your Microsoft Launcher.
Reset or switch launcher
To reset or switch launcher, follow the steps below:
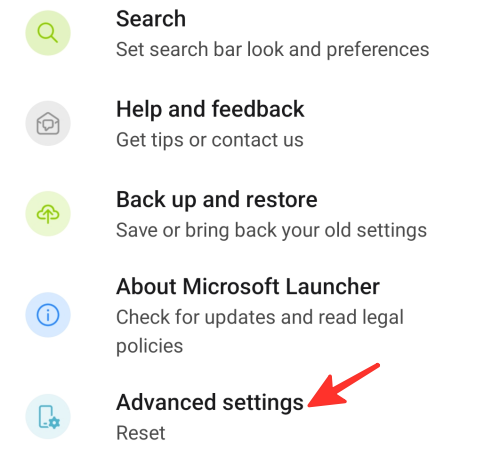
1Go to Microsoft Launcher’s settings and tap on Advanced settings from the list of options.
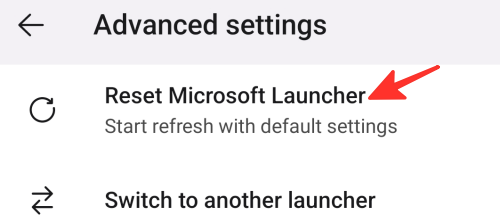
2If you want to reset your Microsoft Launcher, tap on Reset Microsoft Launcher.
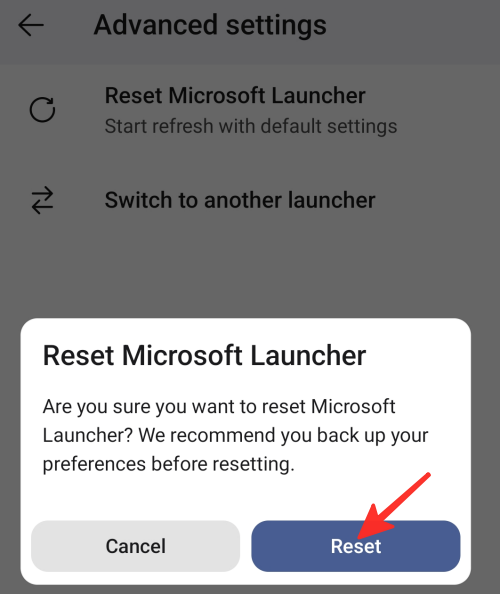
3To confirm, tap on Reset.
4If you want to switch your launcher, tap on Switch to another launcher.

That’s it! You have successfully reset or switched to another launcher.
FAQ
Is Microsoft Launcher free to download and use?
Yes, you can download and use Microsoft Launcher for free.
Do I need a Microsoft account to use Microsoft Launcher?
You can use some of the Microsoft Launcher’s features without a Microsoft account. However, if you want to use more advanced features, such as syncing your settings across devices, you’ll need to sign in with your Microsoft account.
Can I uninstall Microsoft Launcher if I no longer want to use it?
Yes, you can uninstall Microsoft Launcher from your Android device just like any other app. To do so, go to your device’s “Settings” menu, select “Apps,” then “App management,” find Microsoft Launcher in the list of installed apps, and then tap on “Uninstall.”
Check out the detailed guide above on how to set up and use Microsoft Launcher on Android. Simply follow the steps outlined in the guide above to achieve the desired result with ease.
RELATED