

The world of AI technology has seen a huge rise in the past couple of months, with tons of companies jumping on the bandwagon, hoping to capitalize on this latest trend. We have tons of AI assistants that range from full-fledged language models to contextual assistants that can help you with your workflow. Thus it was only a matter of time before an AI emerged that did it all in one simple click, and Auto GPT is exactly that.
Based on the popular GPT LLM, Auto GPT is a GPT 4-based AI that chains together different LLM thoughts to achieve whatever goal you set for it. So if you’re looking for an AI that can do it all in one swoop, then you might want to give Auto GPT a try. Here’s how you can set up and use it on your Windows PC.
How to set up and use Auto GPT
Auto GPT can be set up on your PC by cloning its GitHub repository. You will need to download and install Python and Git on your PC in order to do so. Follow the steps below to help you set up and use Auto GPT on your PC.
Step 1: Download and install Python
Start by downloading the latest version of Python from https://www.python.org/downloads/. Click Download Python (version number) once you visit the link.

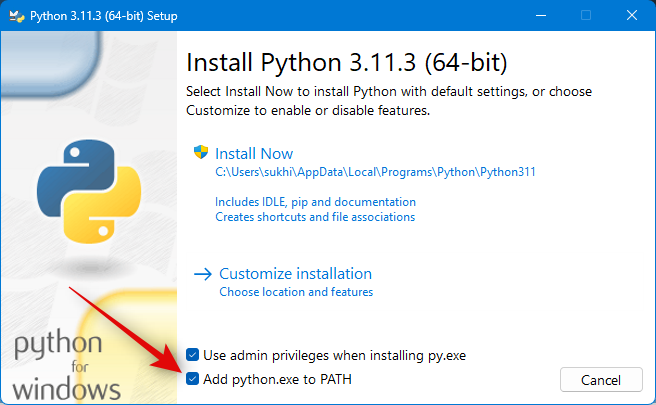
Once the setup has been downloaded, double-click and launch it on your PC. Click and check the box for Add python.exe to PATH at the bottom.
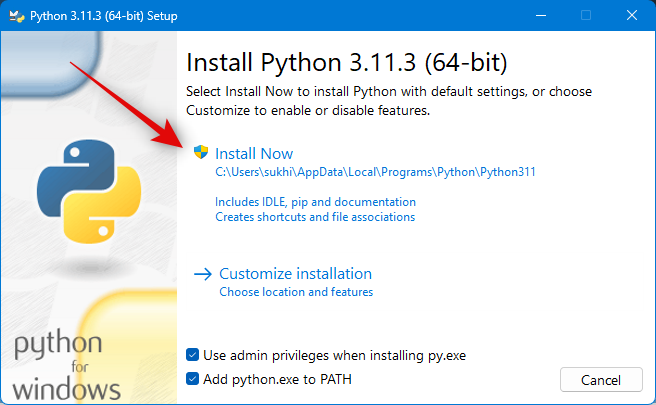
Click Install Now once you’re done.
Note: If you have an older version of Python already installed on your PC, we recommend you remove it before installing the latest version using this guide.
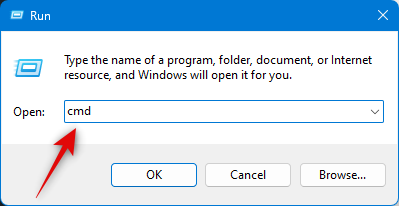
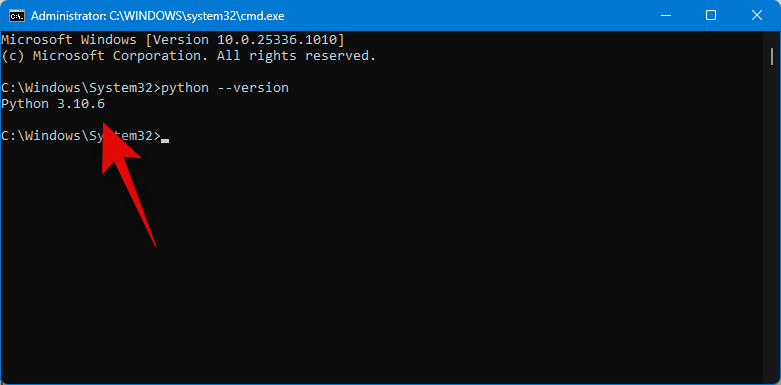
Python will now be installed on your PC. Let’s test if it has been installed correctly. Open Run by pressing Windows + R on your keyboard.

Now type in the following and press Ctrl + Shift + Enter.
cmd
Type the following and press Enter once the Command Prompt opens on your PC.
python --version
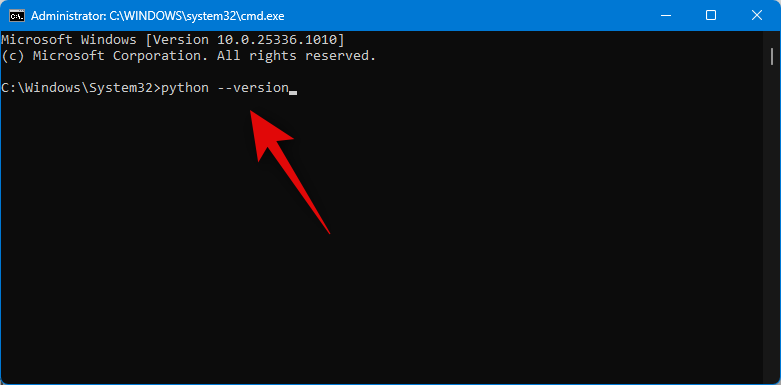
The currently installed version of Python should now be visible on your screen.
This means the installation went as intended, and we can now download and install Git on your PC.
Step 2: Download and install Git
Here’s how you can download and install Git on your Windows PC.
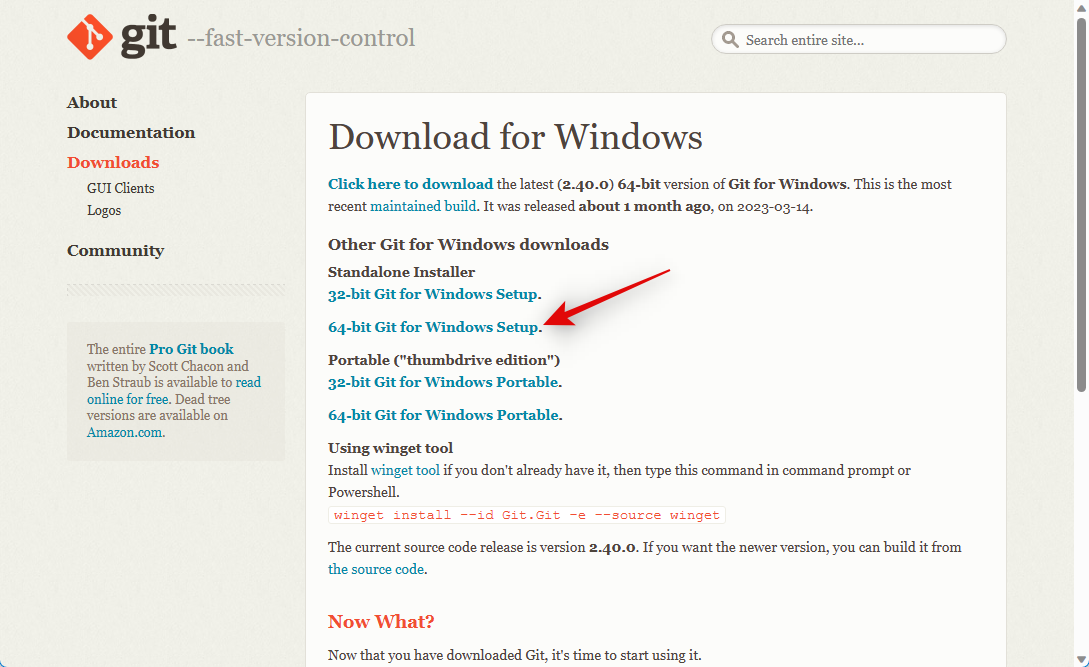
Visit https://git-scm.com/download/win in your browser and click 64-bit Git for Windows Setup.
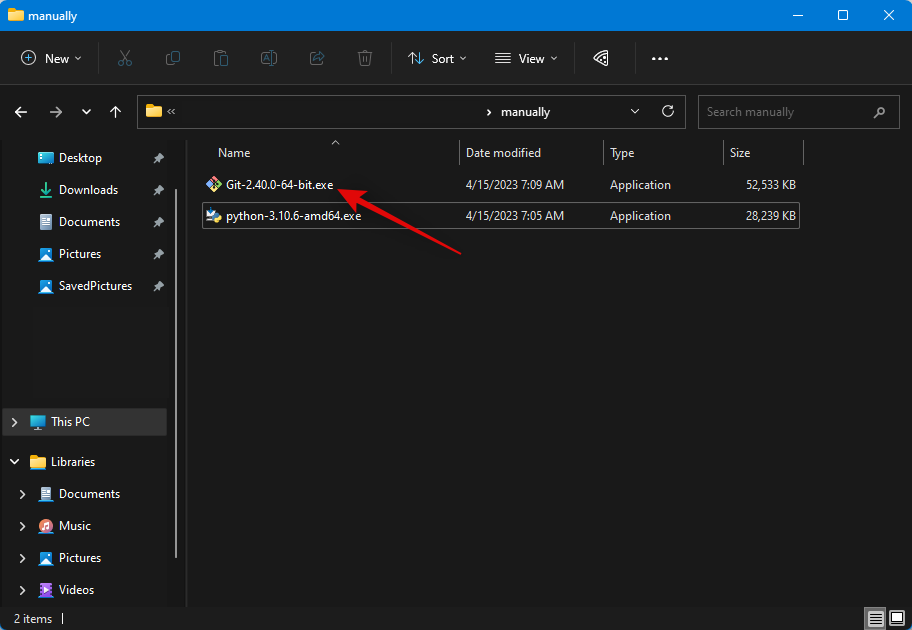
A download will now be initiated for the setup file. Save the file to a convenient location on your PC. Double-click and launch the file once it has been downloaded.
Review the license agreement and click Next.

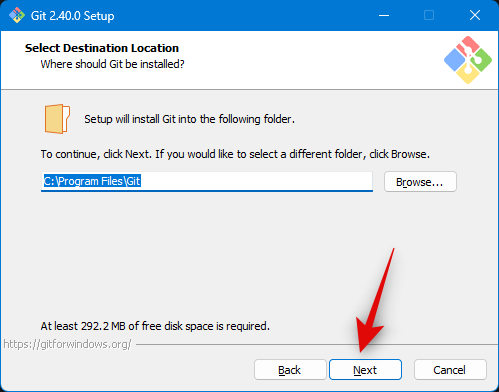
Click Browse… and choose where you wish to install Git.
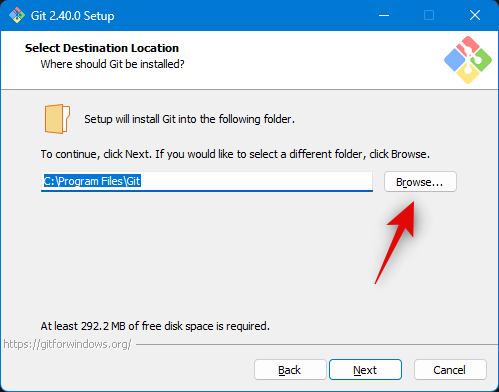
Once done, click Next again.
Leave the components selection at the default values, and click Next.
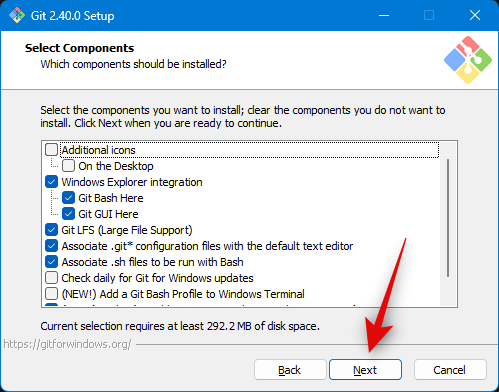
Click Next again.
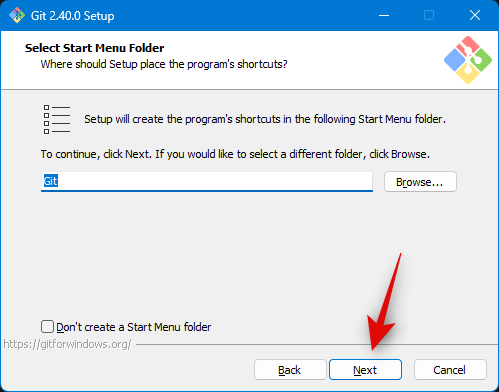
Click Next on the next step.
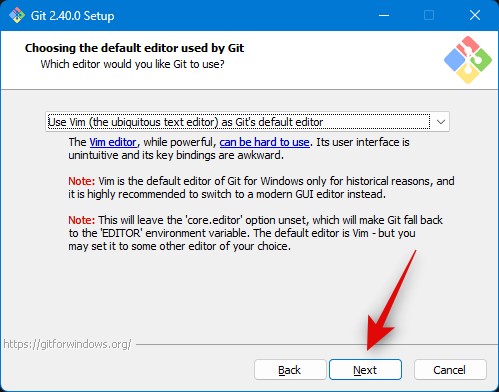
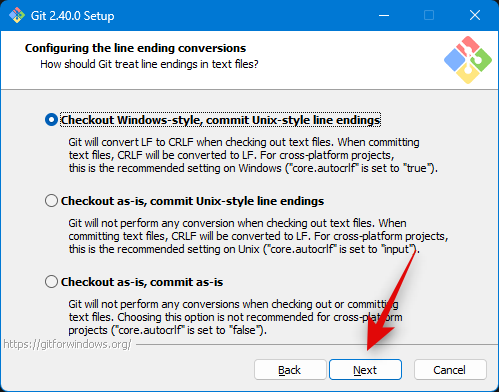
Ensure Let Git decide is selected at the next step and click Next again.

Select Git from the command line and also from 3rd-party software.
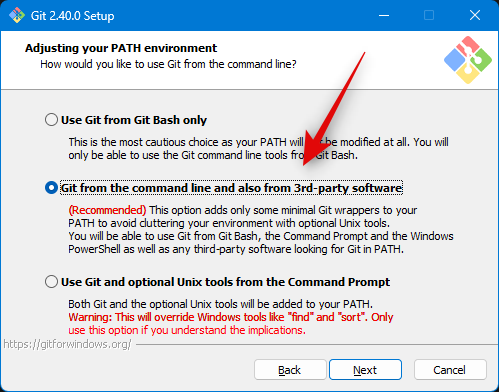
Click Next.
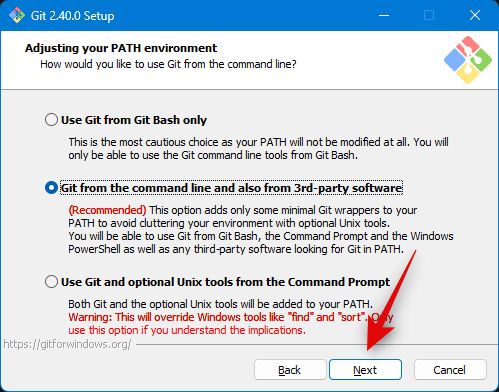
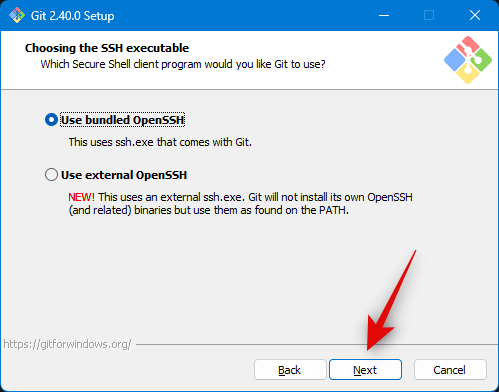
Click Next again.
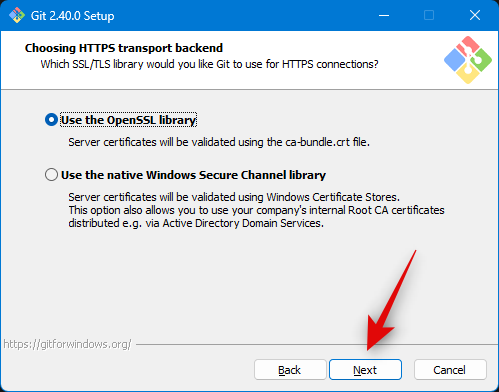
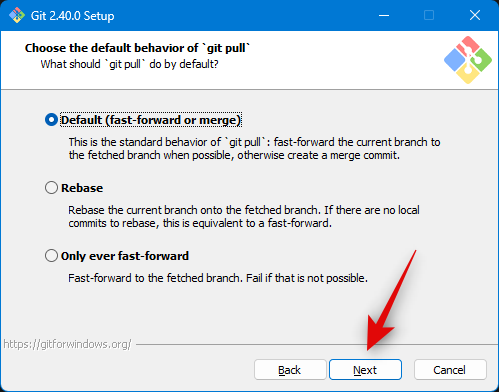
Leave the HTTPS transport backend selection at its default value, and click Next.
Click Next again.
Leave the terminal emulator selection at the default value and click Next.
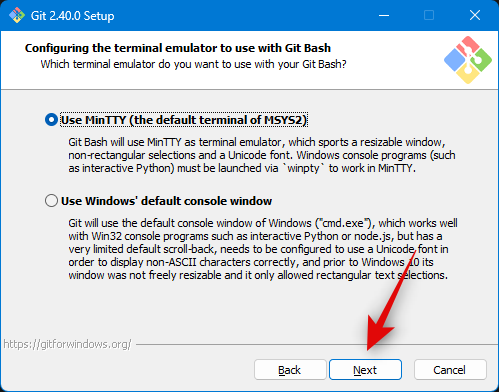
Click Next again.
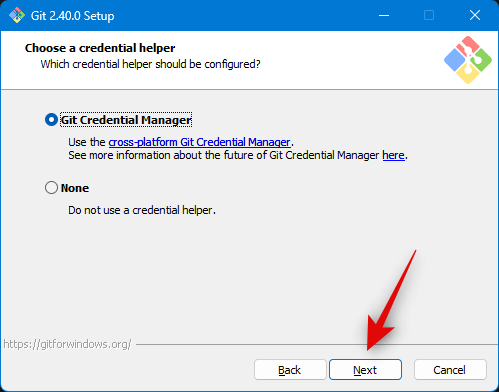
Click and choose Git Credential Manager and then click Next.
Ensure the box for Enable file system caching is checked and click Next.

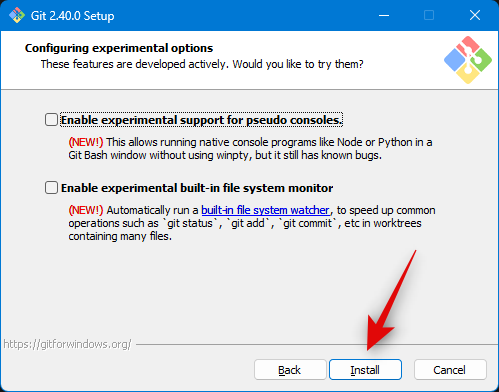
Do not select any experimental features and click Install.
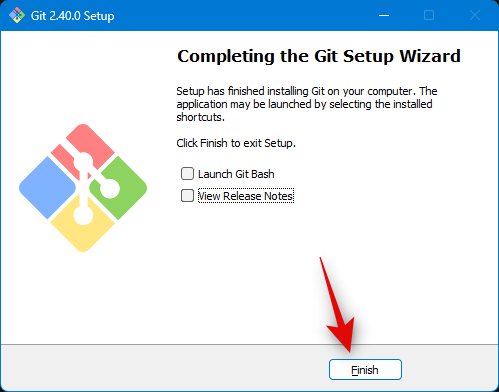
Git will now be installed on your PC. Once installed, click Finish.
Git should now be installed on your PC. We can now use it to clone the Auto-GPT repository.
Step 3: Clone the Auto-GPT repository
Here’s how you can clone the Auto-GPT repository once it has been installed on your PC.
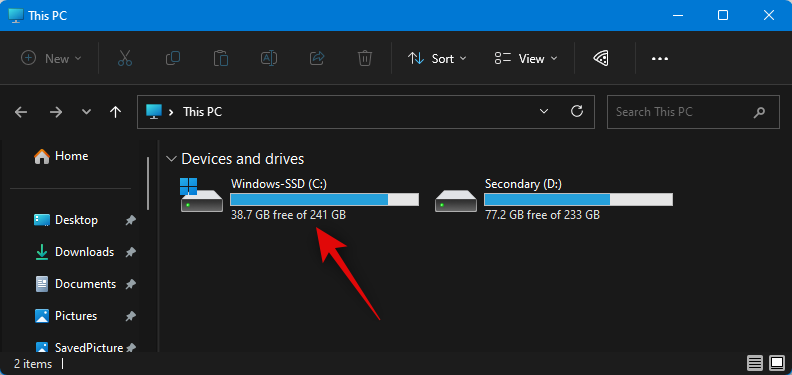
Open File Explorer by pressing Windows + E and open your boot drive.
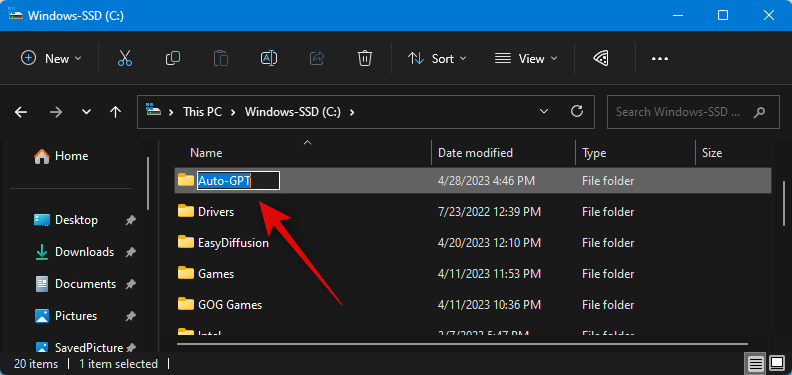
Now press Ctrl + Shift + N on your keyboard to create a new folder. Name the new folder Auto-GPT and press Enter.
Press Windows + R to open Run once you’re done.
Type in the following and press Ctrl + Shift + Enter.
cmd
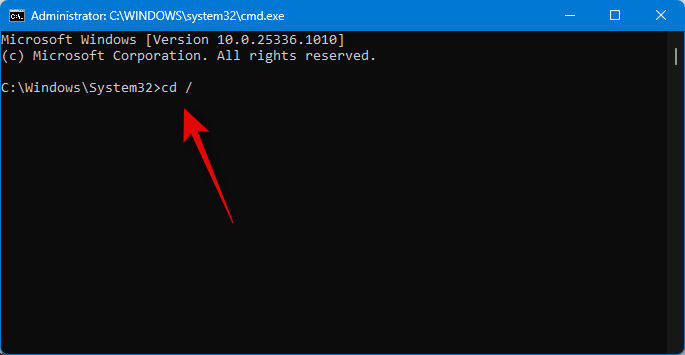
Now use the following command to go to the root of your boot drive.
cd /
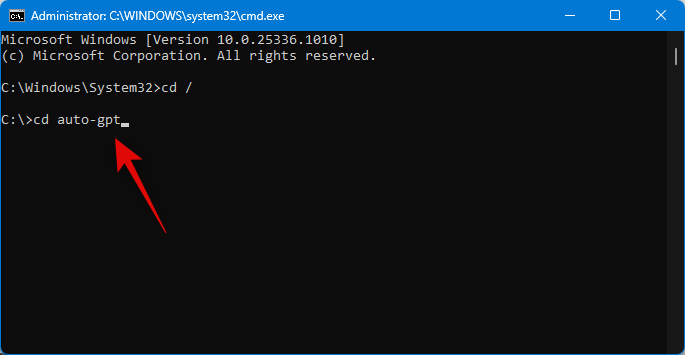
Next, use this command to navigate to the newly created Auto-GPT folder.
cd Auto-GPT
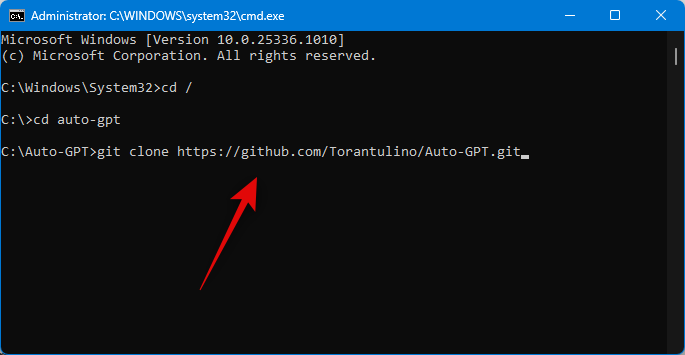
Now use the following command to clone the repository.
git clone https://github.com/Torantulino/Auto-GPT.git
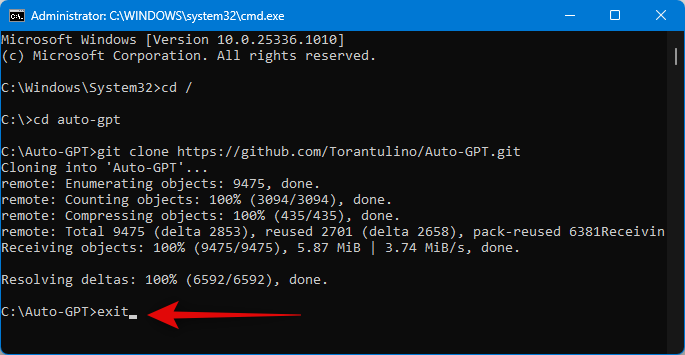
Once cloned, use the following command to close the Command Prompt.
exit
Now navigate to the following path on your boot drive.
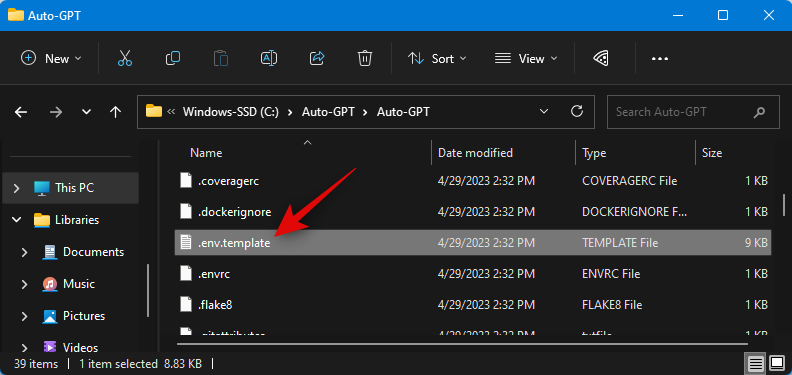
C:\Auto-GPT\Auto-GPT

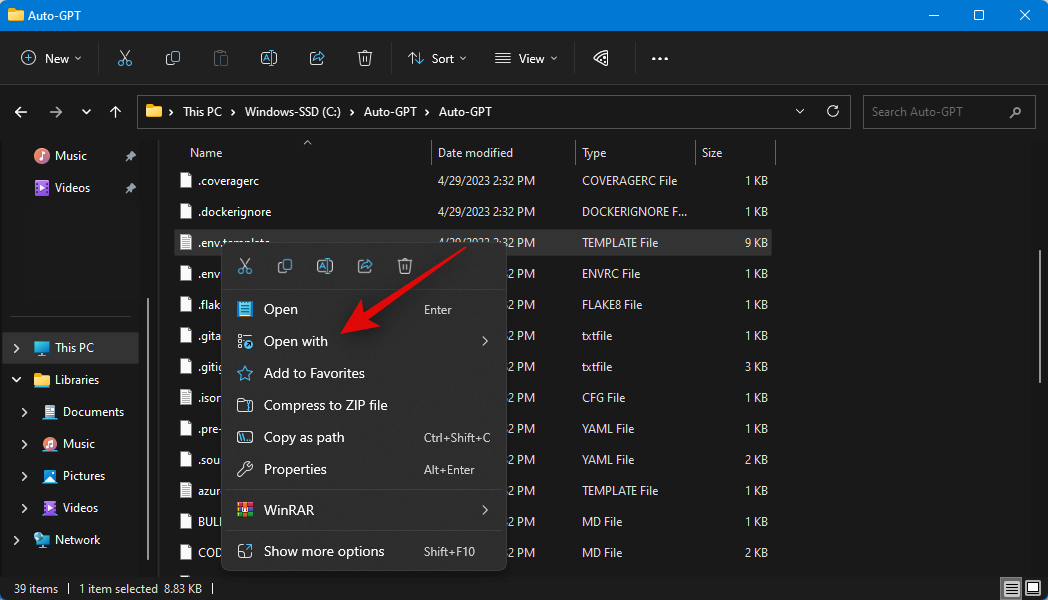
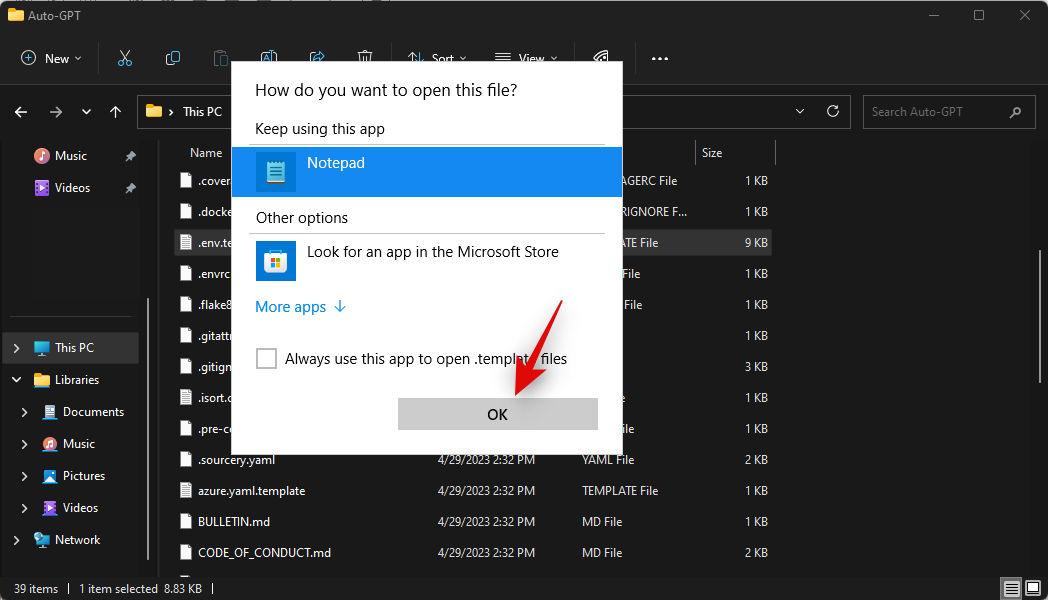
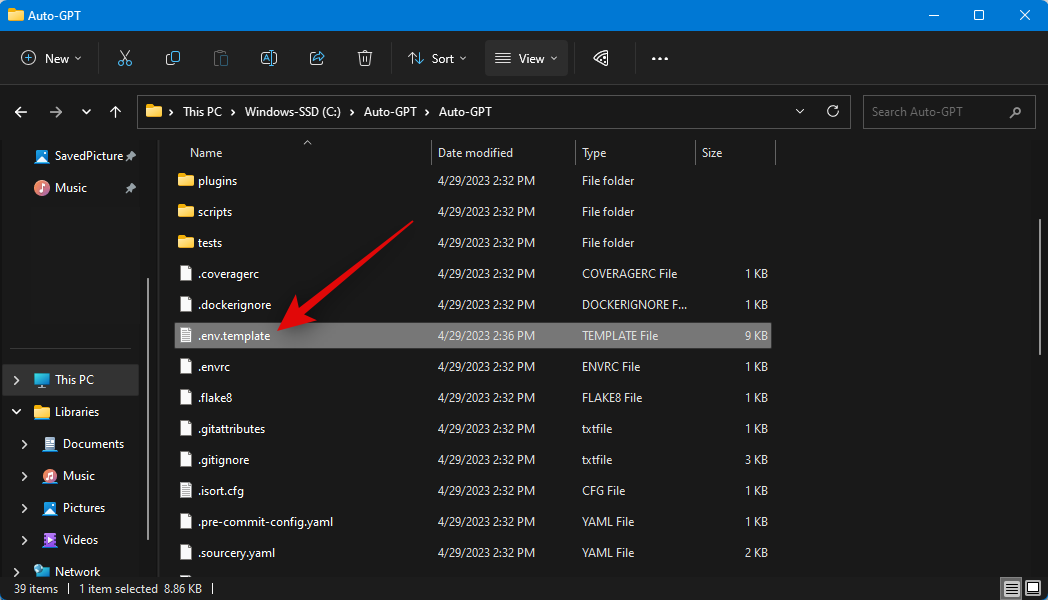
Right-click on the file named .env.template.
Select Open with.
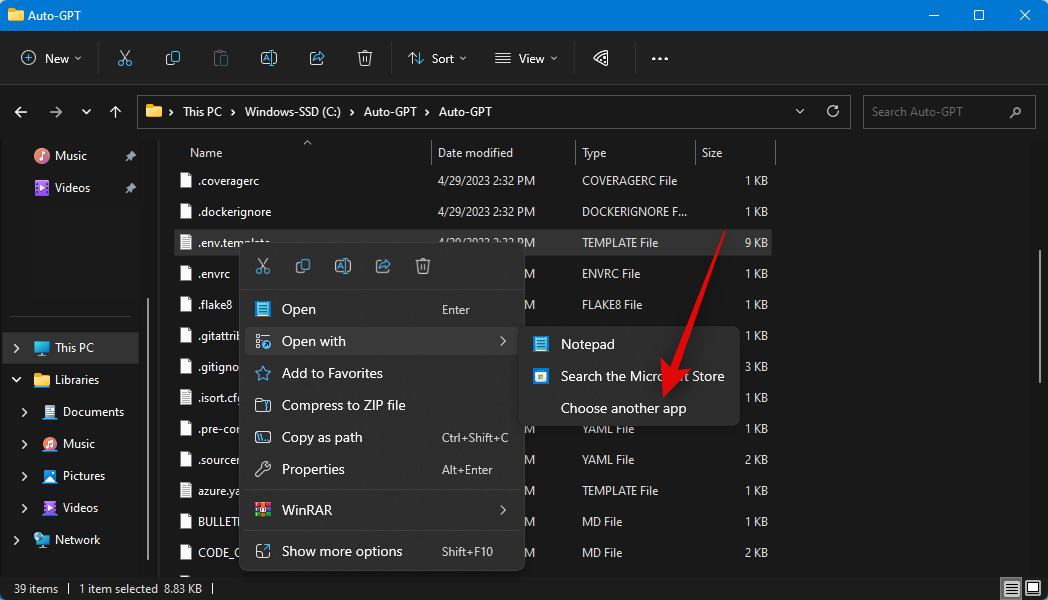
Click on More apps or Choose another app.
Click and select Notepad.
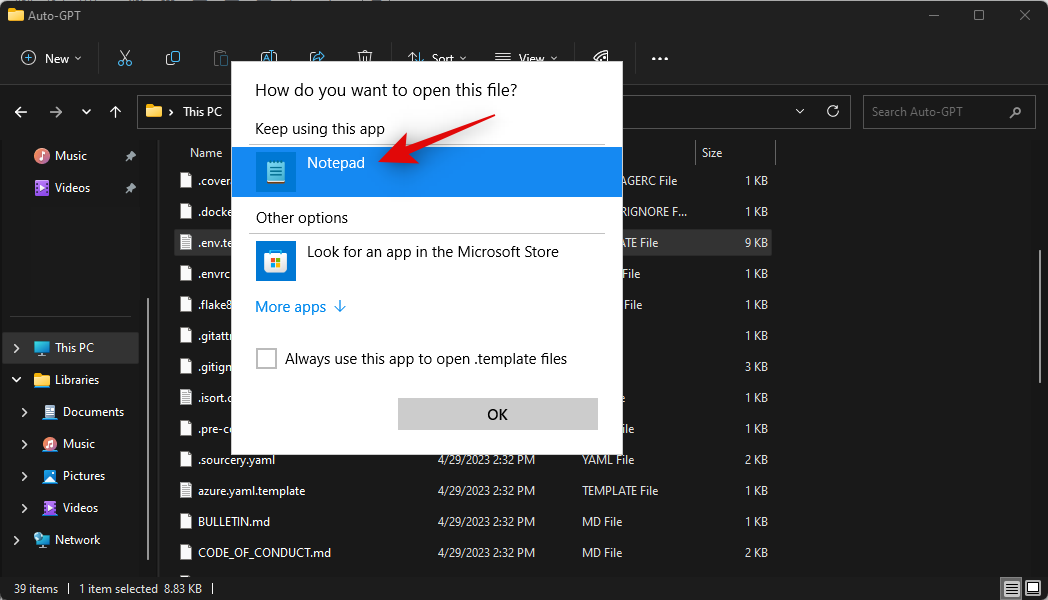
Now click OK.
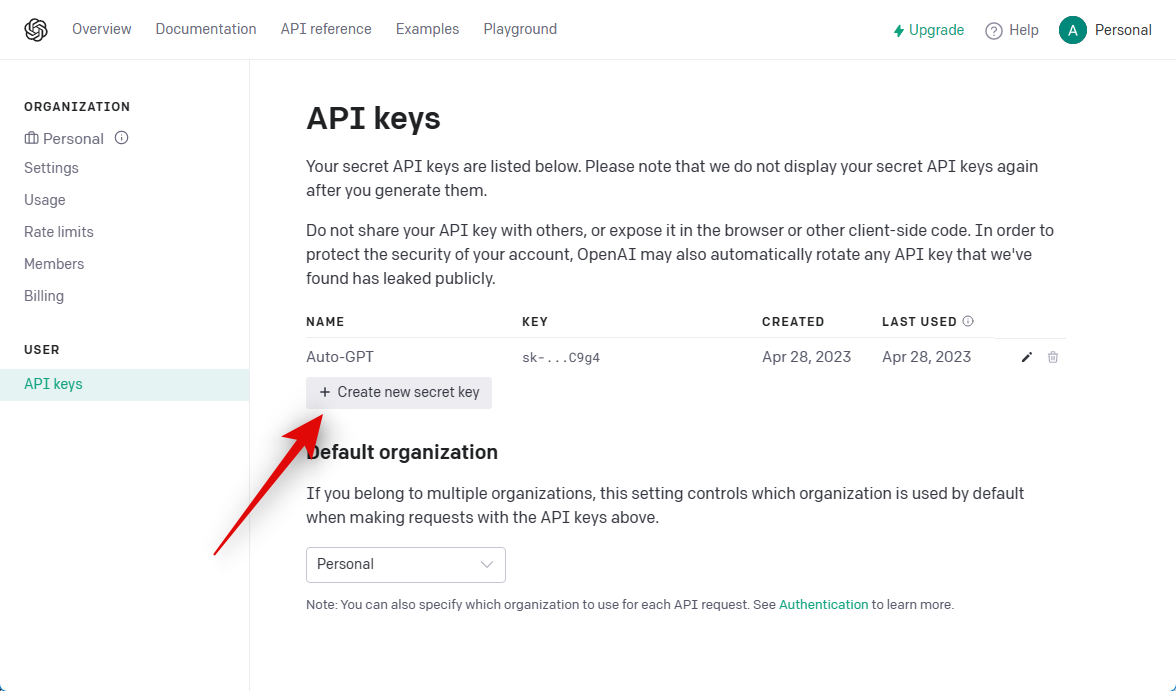
Switch to your default browser and visit https://platform.openai.com/account/api-keys. Log into your OpenAI account if needed and click + Create new secret key.
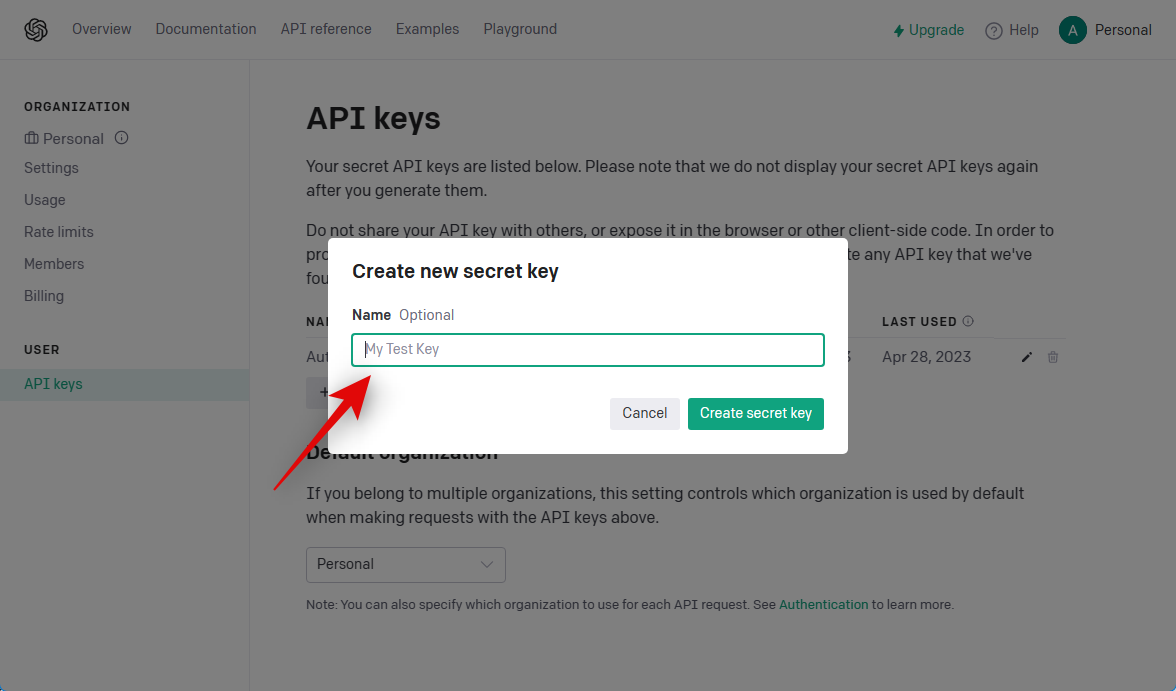
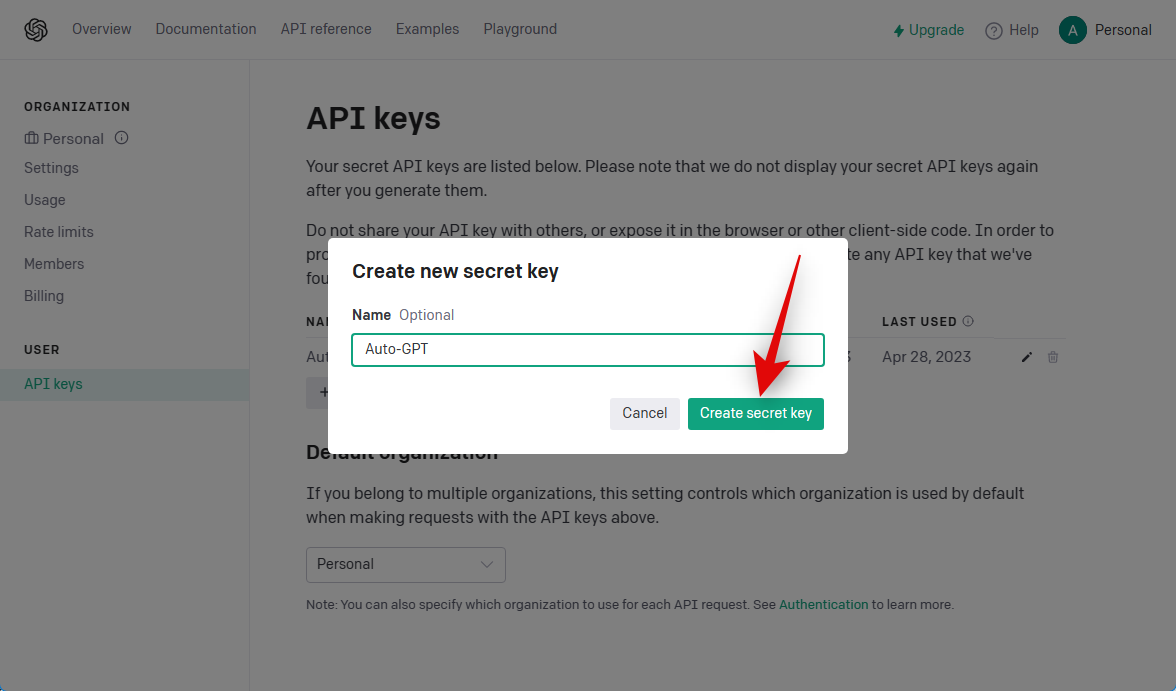
Name your API key so you can easily identify it later on. Let’s name it Auto-GPT for this guide.
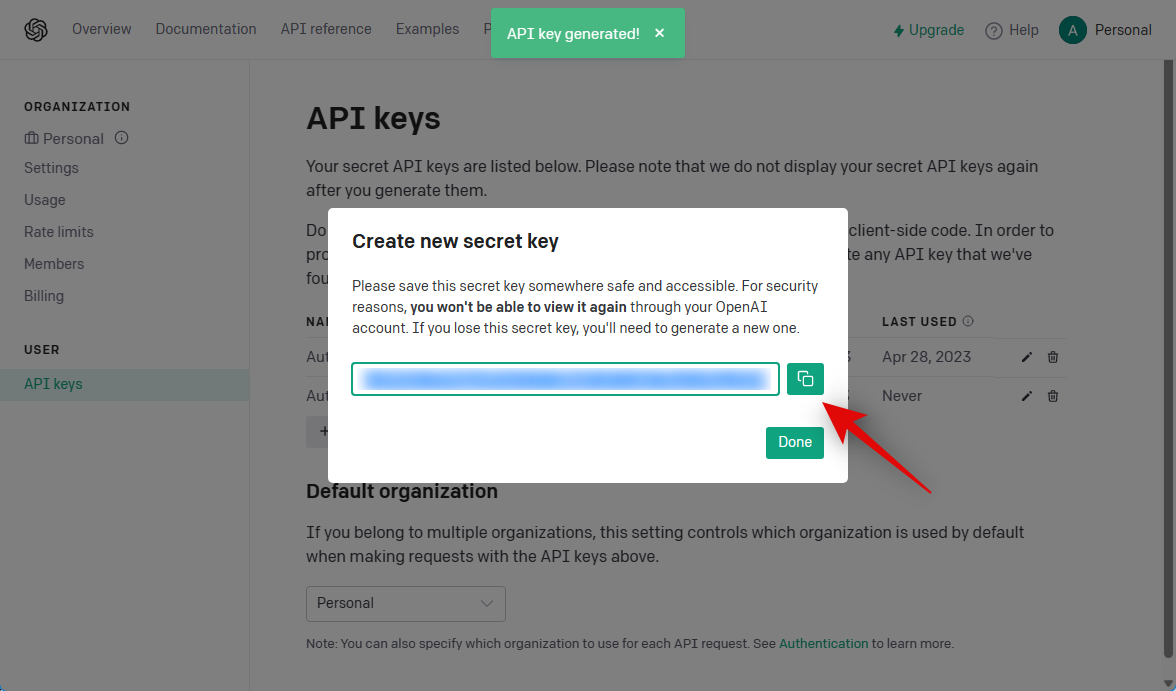
Click Create secret key.
Now click the Copy icon to copy the key to your clipboard. This key won’t be visible or available to you again, and you will have to generate a new one in case you wish to use it again in the future. Thus we recommend you keep it in a safe space temporarily so you can easily source it later when needed in this guide.
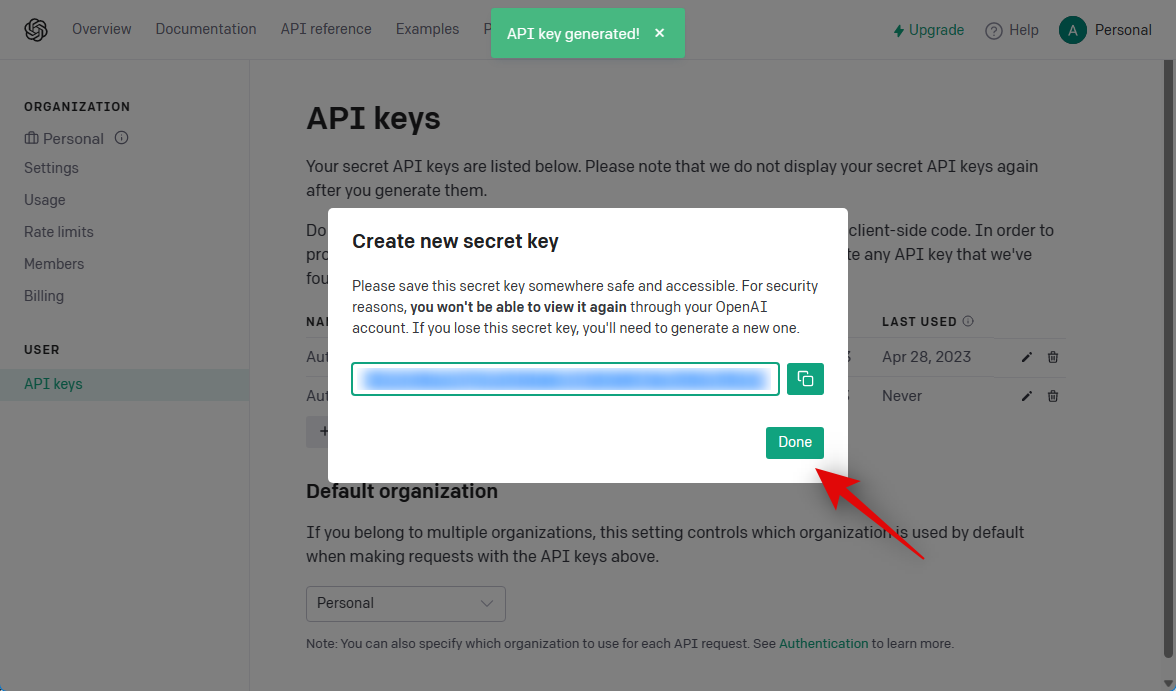
Click Done.
Now switch back to the Notepad file, and paste your copied API key beside OPENAI_API_KEY.

Note: Paste the key beside the value without the # by replacing your-openai-api-key.
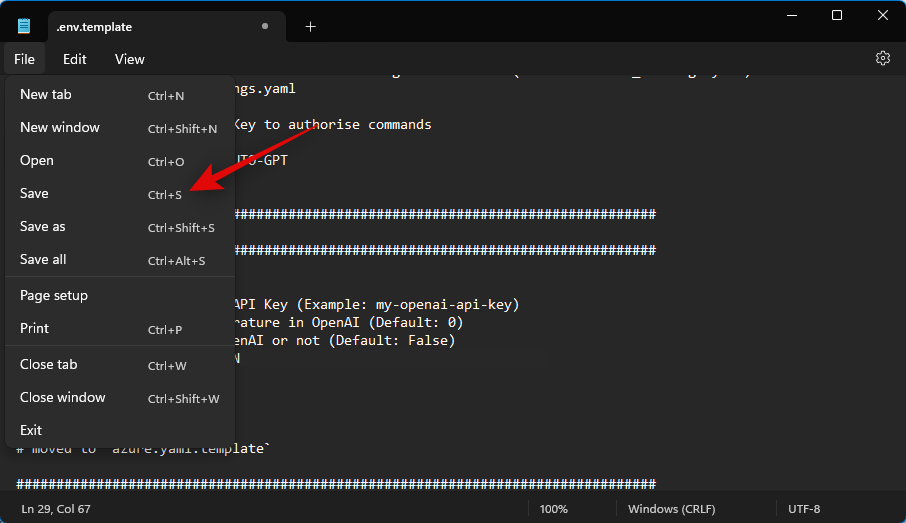
Press Ctrl + S on your keyboard to save the file.
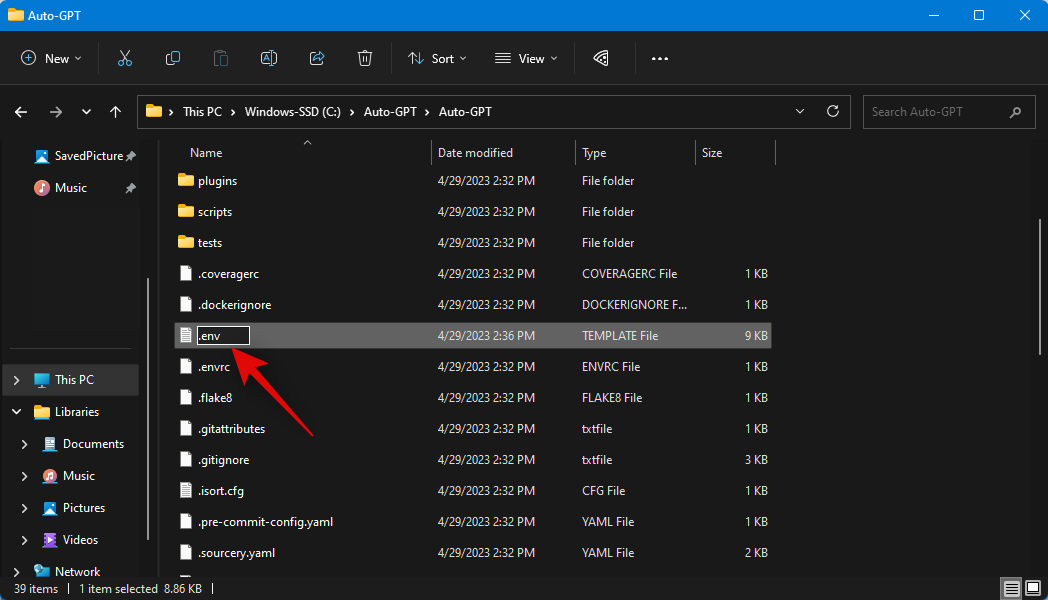
Close the Notepad and click and select the .env.template file. Press F2 on your keyboard once selected.
Now rename the file to .env and press Enter to save the changes.
You can now use the next step to install the necessary requirements for running Auto-GPT on your PC.
Step 4: Install the requirements
Here’s how you can install the required components for Auto-GPT on your PC.
Open Run on your PC using the Windows + R keyboard shortcut.
Now type the following and press Ctrl + Shift + Enter.
cmd
Type the following command and press enter.
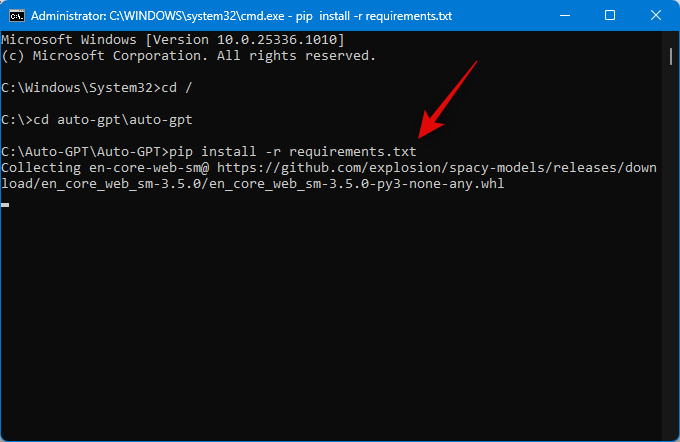
cd /
Now execute the following command.
cd auto-gpt\auto-gpt

Use the following command to install the required components on your PC.
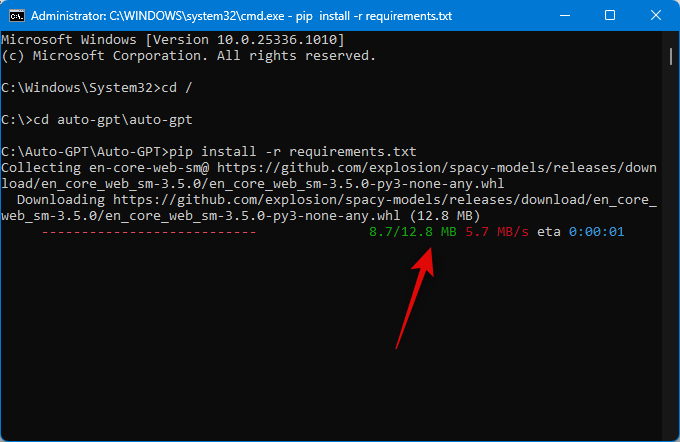
pip install -r requirements.txt
The necessary components will now be downloaded and installed on your PC.
Do not close the command prompt; we will use the same window to run Auto-GPT on your PC in the next step.
Step 5: Run Auto-GPT
Now that everything has been set up, here’s how you can run and use Auto-GPT. If you kept the command prompt window open in the previous step, then you can skip the first few steps in the guide below. Follow the steps below to help you along with the process.
Open Run using the Windows + R keyboard shortcut. Then type the command below and press Ctrl + Shift + Enter on your keyboard.
cmd
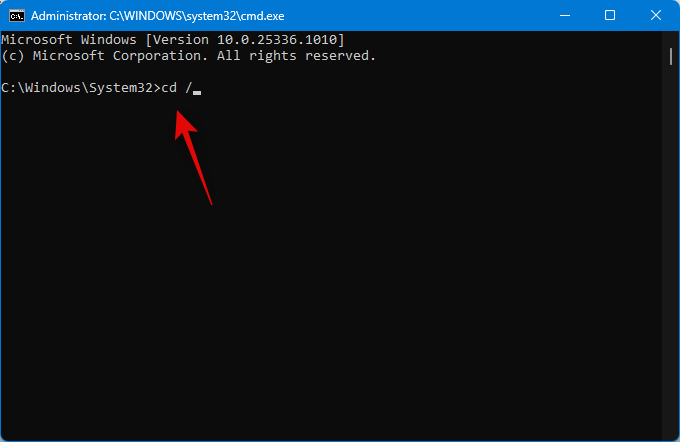
Now use the following command to go to the root of your boot drive.
cd /
Next, use this command to navigate to the Auto-GPT installation directory on your PC.
cd auto-gpt\auto-gpt
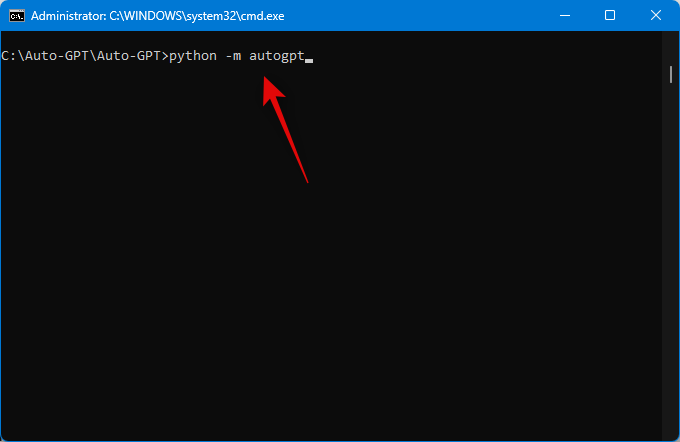
Now use this command to run Auto-GPT.
python -m autogpt
You will now be asked what you wish your AI to do. Type the goal you have in mind. Press Enter once you have typed in your goal.
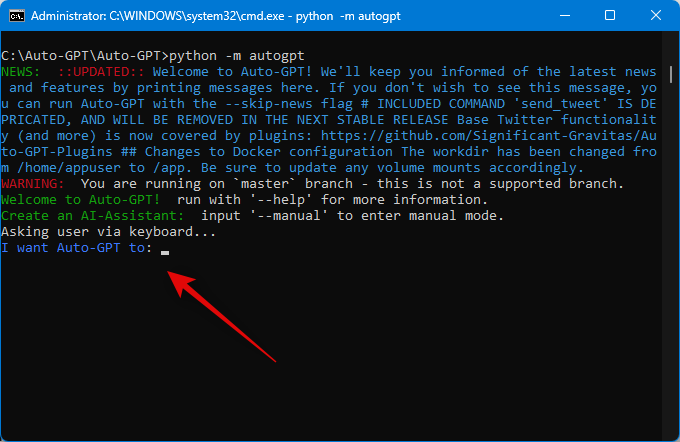
And that’s it! Auto GPT will now perform the task assigned to it, and you should be able to track its progress in real-time.
How to enter Auto-GPT manual mode?
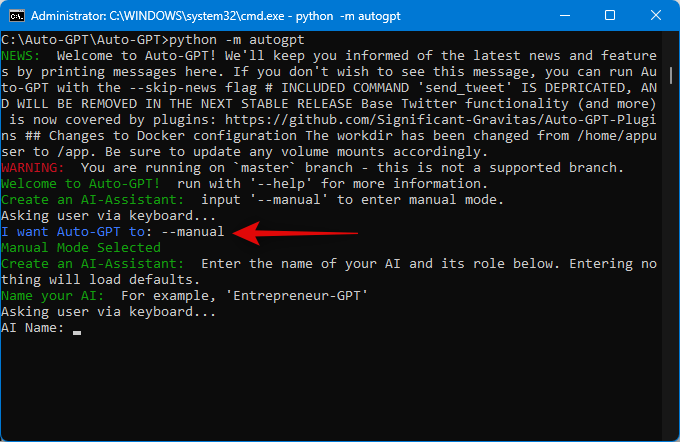
To enter manual mode, where you can name your AI as well as set unique goals on your own, type in –manual when you’re prompted to set a goal for your AI. This will enter the Manual mode, where you will be allowed to set a name for your AI as well as set goals according to your needs and requirements.
We hope this post helped you easily set up and use Auto GPT on your PC. If you have any more questions, or face any issues, feel free to reach out to us using the comments below.


Discussion