Discord is one of the most prominent gaming social media platforms in today’s age. It allows you to create your own communities, live stream content and even voice and video chat with each other. With so many features in the bag, Discord is one of the most favored services by gamers around the world.
If you are new to Discord looking to grow your community then screen sharing is a great way to share gameplay with your friends and family. Additionally, you can even use it to remotely catch up with your friends. Let’s take a look at how you can share your screen in Discord.
Related: How to reduce background noise on Discord calls
Required
- The Discord Desktop App | Download Link (Windows, macOS, Linux, Android and iOS)
Guide
Start by launching the Discord app on your desktop. Now you will need a custom server to share your screen. If you already have one, you can skip the next few steps. If you do not have a server for your community, click on the ‘+’ icon in your left sidebar.
Now click on ‘Create my own’.
Add a name and photo for your Discord server now.
Click on ‘Create’ once you are done.
You will now have one text and one voice channel by default. You will need a voice channel to share your screen with all the participants. If you wish to create a new custom voice channel, then click on the ‘+’ icon beside the ‘Voice Channels’ subsection.
Now check the box for ‘Voice Channel’.
Add a custom name for your new channel. Additionally, if you wish to keep the channel private, turn on the toggle for ‘Private Channel’.
Once you are done, click on ‘Create Channel’.
Now click on the new channel you just created in the left sidebar. Discord will automatically call into this channel and you will be connected through voice using your system’s default microphone. If you wish to turn off voice inputs from your default microphone, then click on the ‘microphone’ icon at the bottom.
Now click on ‘Screen’ to share your screen.
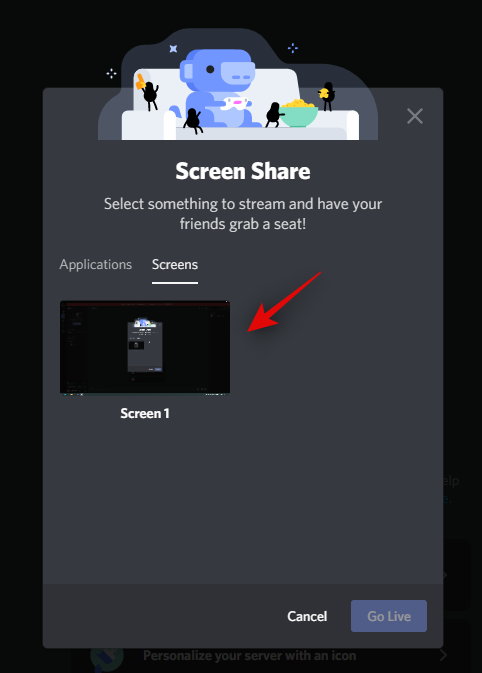
You will now see two tabs named ‘Applications’ and ‘Screen’. If you wish to share a particular application that will be shared with the channel, then you can select it under the Applications section.
In this case, no other window from your system will be visible to other users, even if the selected window is minimized or closed. Screens will allow you to select which monitor you wish to share with the channel in case you have a multi-monitor setup.
If you have a single monitor setup, then your entire screen will be shared by default if you select this option. Select the choice that best fits your streaming requirements.
Note: If you are sharing your screen then everything on your screen will be visible in the channel. This can put your private data and sensitive information at risk in certain cases. Ensure that you practice proper safety before sharing your entire screen.
Once you have made your choice, you will be asked to select the resolution and bitrate of your stream. Higher values result in better quality but use significant network bandwidth. Select the best settings for your stream based on your network capabilities.
Click on ‘Go Live’.
And that’s it! Your screen will now be shared on the Discord server selected by you and anyone who is a member of the server will be able to view it. You will also be able to see a PIP preview of your screen in the bottom right corner of your window.
Related: How to unban on Discord in 2020
How to stop the sharing
Hover over the preview of your stream in the bottom right corner of your screen and click on the ‘Gear’ icon.
Now click on ‘Stop Streaming’.
Screen sharing will now be stopped for the current server, although you will still be connected through voice/video depending on the server. If you wish to completely disconnect from the server, then click on the ‘End Call’ icon in the bottom left corner of your screen.
We hope this guide helped you easily share your screen on Discord. If you face any issues or have any more questions for us, feel free to reach out to us using the comments section below.