macOS defines all file types that are stored on the system quite efficiently. When you dig deep into Mac’s storage view, you will see an undefined “Other” category among Documents, Apps, and System. This “Other” storage might sometimes occupy a significant chunk of your memory.
If you’re wondering what’s present in the “Other” storage, we’ll explain what it’s all about, how to find the files in the Other storage, and how you can delete them from your Mac.
Related: Best Zip Program for Mac: 4 Options to Know
What is “Other” storage on your Mac?
When viewing your storage space, your Mac shows the memory consumed by different files that fall into the following categories – Apps, Books, Documents, Photos, Music Creation, Mail, iCloud Drive, System, and Other. This “Other” category could be one of the biggest culprits that might take up a significant size of your hard drive.

Apple puts files into ‘Others’ when it isn’t able to add them to the other storage categories mentioned above. The Other category is Apple’s way of simplifying the storage report to make your hard disk space look neat but in the face of it, this category comprises files with different file formats that are relatively used less frequently.
While these files may be used rarely, it doesn’t mean that they’re wasteful to keep on your Mac or are harmful. Files in the “Other” storage of your Mac help your system run efficiently but more often than not, can also fill up your hard disk. In short, files in the “Other” storage are those that cannot be added to any other storage category on your Mac.
Following are some of the files that you may find inside the “Other” storage on your Mac:
- App or System Cache: No matter how you use your Mac or how many apps have installed, there will be cache files that let you use your system efficiently and help speed up your experience. However, these cache files tend to take up more and more space over time and all those files will most probably be saved in the “Other” storage on your Mac.
- Documents: While macOS accepts documents created from its suite of productivity apps, it fails to recognize Adobe Acrobat files, documents from other proprietary apps, and other file formats like .psd. All these files are also present in the Other storage.
- System files: Apart from the cache generated by macOS, the system also creates and stores temporary files that could be beneficial for a short time. These could be anything from temporary files created by macOS or files downloaded on your computer during a system update.
- Compressed and disk image files: Files with .zip and .dmg file formats will also fall under the Other section on your Mac storage.
- Extensions and app plug-ins: While app memory of those installed on your system are shown separately under “Applications” if you have a plugin or an extension that you added to an app, its space will count inside the Other category on your Mac.
How to check your Mac’s “Other” storage
If you’re wondering how much of your storage is consumed by the “Other” category, you can view your Mac’s disk space at any time from the Menu bar.
- To check your Mac’s Other storage, click on the Apple icon from the Menu bar at the top of your Mac and select About This Mac from the overflow menu.

- When the macOS overview box appears on your screen, click on the Storage tab at the top.

- When you do that, your Mac will first show you the space currently occupied on the hard drive, available free space, and the total storage capacity. You will have to wait for a few seconds for the Mac to calculate the space that files across different categories are taking on the drive.
- Each of the storage categories will be marked with separate colors so that you may easily distinguish them. Among the ones listed on your screen, you will see a section marked in grey. When you hover over this section, you will be able to see the “Other” label appear above it along with the space it consumes on your Mac.

How to clear “Other” storage on Mac automatically
Apple offers a nifty storage management utility it calls “Optimize Storage” which scans your Mac for unwanted content and then deletes them from your local memory. Some of the items that can be removed using this utility come under the ‘Other’ category and these files can be easily removed from your Mac.
When you use the Optimize Storage option on your system, macOS will select the files that were created or downloaded when you stream content like music, TV shows, or movies and remove them automatically the moment you’re done watching them.
This way, your hard drive stays clutter-free and you don’t need to manually search for files to remove. This is one way you can clear the “Other” storage on your Mac and the only way you can do it automatically without deleting unwanted files yourself.
- To use Optimize Storage on macOS, click on the Apple icon from the Menu Bar.
- From the overflow menu that shows up, select About This Mac.
- When your Mac’s overview window pops up, select the Storage tab at the top.
- Inside the Storage tab, click on Manage.

- In the window that appears next, click on Optimize under “Optimize Storage”.

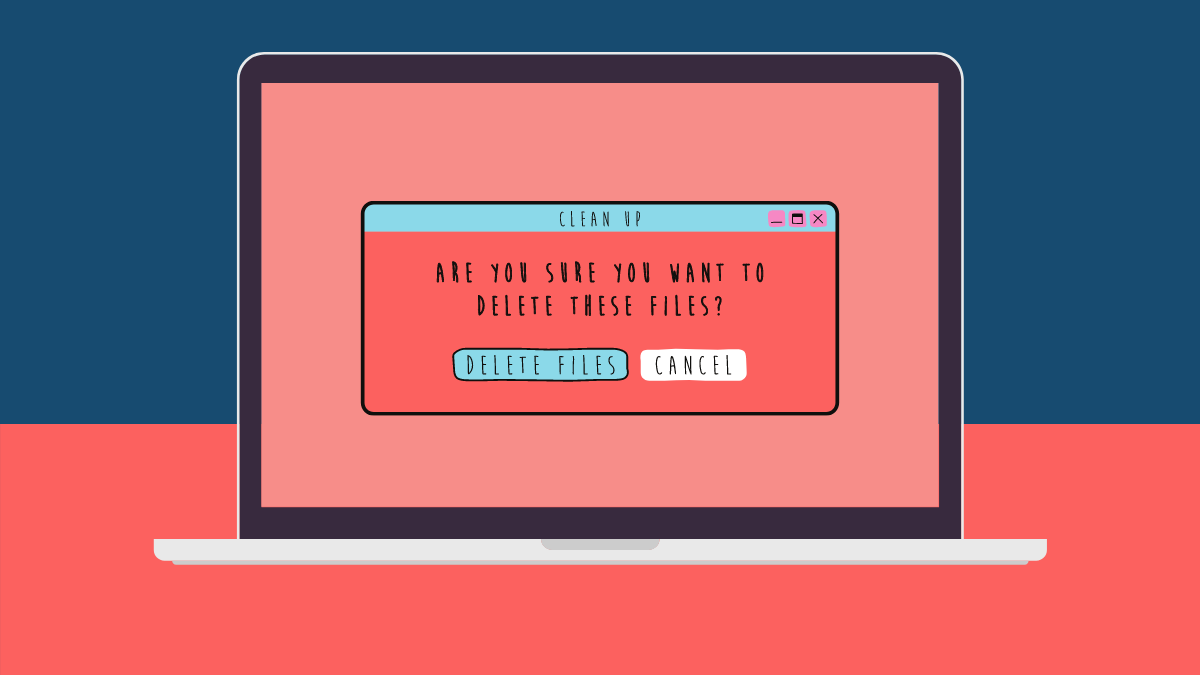
- You will now have to confirm the process by clicking on Optimize in the dialog that pops up.

- macOS will now clear up a part of the Other storage on your Mac and when the process is successful, you should be able to see the “Completed” message appear under the “Optimize Storage” section.

How to clear “Other” storage on Mac manually [5 methods]
If the ‘Other’ category is still occupying a significant amount of space on your Mac, then you will have to look for unwanted files and remove them from your system yourself. Following are the different methods you can explore when clearing the “Other” storage on your Mac.
Method 1: Clear your Mac’s cache
Not all temporary files can be removed using Mac’s Optimize Storage tool. To remove more cached files from your system, you can use the Finder app on your Mac.
You can remove the app and system cache you don’t need by searching for the cache folder on your Mac.
- To get started, open the Finder app from the macOS Dock and click on the Go tab from the Menu bar at the top. Now, select Go to Folder from the overflow menu.

- In the text box that appears, type “~/Library/caches” and then click on OK.

- You will now see a list of app folders whose cache files have been created on your Mac. You can empty the cache of apps you no longer use or those that might not have been cleared in a long time.

- If you see apps you no longer use, then select their app folders, Control-click or right-click on the selection, and select Move to Trash.

- All the folders will now be moved to the trash and you can clear them permanently by Control-clicking or right-clicking on the Trash icon from the dock and selecting Empty Trash.

You can do this every few weeks to reduce the ‘Other’ storage on your Mac.
Method 2: Find and delete individual files
You can search and remove the files present in the Other storage on your Mac by individually analyzing different file formats and deleting unwanted files from your system.
- Open the Finder app from the macOS Dock and click on the File tab from the Menu bar at the top. Here, select Find from the overflow menu.

Alternatively, you can use this keyboard shortcut – Command + F on your Mac to get the same result. - This should open the Finder app with the search tool on the screen.
- Now, click on the This Mac tab at the top.

- After this, click on the Kind dropdown menu.

- From the menu that appears, select Other.

- A new Search Attributes window will now appear on top of the Finder window. In this window, check the File Size and File Extension boxes under “In Menu” and then click on OK.

- You can now enter file formats that you want to search files with like .dmg (installer files), .zip (compressed files), .pdf, .csv, .pages (document formats), etc. For best results, we suggest you search for individual file formats so that you know what you’re deleting and which file types you might already have sorted through.

- Inspect the items you find in the search results. Select the files you may not need anymore by Control-clicking or right-clicking on the selection and selecting Move to Trash.

- Additionally, you can find files by adding other attributes using the + icon at the top right corner.

- Once all the files you want to delete have been moved to the trash, you can empty your trash by Control-clicking or right-clicking on the Trash icon from the dock and selecting Empty Trash.
Method 3: Delete older iPhone backups
If you’re someone who regularly backs up your iPhone onto your Mac, then you must note that all your backups that aren’t synced to the iCloud are stored on your system’s local storage under the “Other” category. Unless you haven’t backed up your device in a long time, there’s no need for you to keep older backups of an iPhone or iPad on your Mac. The same applies if your Mac has kept a backup of an older iPhone or iPad that you no longer own.
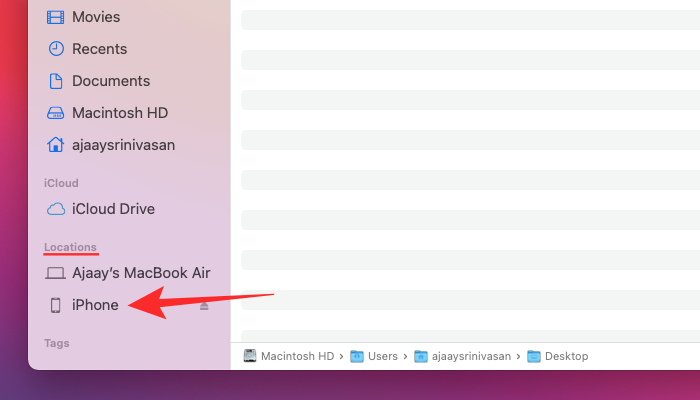
- To delete unwanted iOS backups stored on your Mac, turn ON both the iPhone and Mac and connect them using the USB-to-Lightning cable that came with your iPhone.
- When your iPhone is connected to the Mac, open the Finder app on the Mac and select your iPhone from the left sidebar under “Locations”.
- When the iPhone device management screen appears, select the General tab, and click on Manage Backups under “Backups”.

- You will now see a list of all backups you have stored for your iPhone on the Mac. Select the backup(s) you want to delete and click on Delete Backup.

- Click on Delete to confirm the process.
The selected iOS backups will now be deleted from your Mac, thus restoring some space on your storage.
Related: How To Clear Cache On iPhone, Android, Windows And Mac in 2020
Method 4: Remove extensions and plug-ins
While files and folders created by an application will occupy space in the Applications category on your Mac storage, if you have installed add-ons to a program like an extension or a plugin, then the space occupied by these add-ons will fall under the ‘Other’ category. You can clean up further space in the “Other” storage on your Mac by deleting those application extensions that you no longer need or use.
- You can delete the add-ons installed inside Safari, by opening the Safari app on your Mac.
- Inside Safari, click on the Safari tab from the Menu bar, and then select Preferences from the overflow menu.

- Inside the Preferences window, select the Extensions tab from the top.

- Select the extension you want to remove from the left sidebar and click on Uninstall on the right-hand panel.

You can repeat the steps for other extensions on your Safari browser. - To remove plug-ins or extensions of other apps, you need to find the Preferences/Settings screen of that particular app, locate the extension you want to delete, and then remove them. This will vary between different apps, so it’s best left if you take a look at the service’s FAQ page for a more detailed guide.
Related: How To Snapchat On Mac? Step-by-step Guide With Screenshots.
Method 5: Using third-party apps

In most cases, you can clean up the storage of your Mac on your own without the help of third-party services, but the following apps can make the job simpler. These apps offer handy tools that you can utilize to remove unwanted files from the ‘Other’ storage on your Mac as well as from other categories.
Not only do you get to delete unwanted files from your storage, but these utilities may also help scan your space, optimize, reduce clutter, delete caches, logs, temporary files, manage hidden settings, and more.
Can you delete files in “Other” storage?
Yes. You can delete most files on your Mac including caches but you should know what you’re about to delete and whether deleting the file would hamper your Mac’s performance negatively. So, while you can certainly remove files from the “Other” storage, you will have to be very careful what you’re about to delete.
For instance, if you find the cache data of an app that you no longer use, you can delete those files without thinking about it twice. However, if the files you’re about to delete are from apps that you use regularly, then you must note that deleting these files might hinder the apps’ preferences, library, or settings.
So, if you don’t have any idea what you’re about to delete, then you should stay away from it. But just so your system runs without a hiccup, we suggest you back up every inch of data that is stored on the Mac.
RELATED