
If you’re only getting started on video editing on a Mac, then chances are that you’re looking at a bunch of video clips to add, combine, and re-arrange into a single video. With so many files to be put into the mix, you will require a video editor that stitches together a bunch of clips into a single video file.
In this post, we will help you learn how you can combine videos into a single file on a Mac.
How to combine videos on a Mac [2 methods]
Here are two easy ways to combine two or more video clips on your Mac.
Method 1: Using the QuickTime Player app
The QuickTime Player app that comes preloaded on your Mac has all the features you may require for basic and lightweight editing. While it doesn’t promise a ton of features like iMovie, it does the basic things right and you can easily combine and merge two or more videos into one using this app on your Mac.
- To get started with this, open any one of the videos you want to combine, preferably, the video you want to be played at the start. By default, QuickTime will be the video player that the file may open up with, so you can open it up by double-clicking on it.
- In case it’s not, you need to right-click on the video file and select Open With > QuickTime Player.

- Now, head over to the folder from where you want to add another video to the current project.
- You can add the second video to the first one by simply dragging and dropping it into the QuickTime Player where the first video is open. You can add multiple videos to the project by dragging and dropping more clips in the same manner.
- Alternate method of adding clips: Another way of adding a clip to a video is using the Edit option with the QuickTime Player open in the foreground. After the first video is open, click on the Edit tab in the Menu bar, and select Add Clip to End….

- You can now browse to the folder where the other video(s) is located, select the video, and click on Choose Media under the video preview at the bottom right corner.

- To change the order of video playback, you can drag the clips left or right across the seek bar below.
- You can trim or cut each of the individual clips by double-clicking on one clip, and then adjust the size of the clip by moving the left and right margins according to your preference. To confirm the video trimming, click on Trim after making the necessary changes.
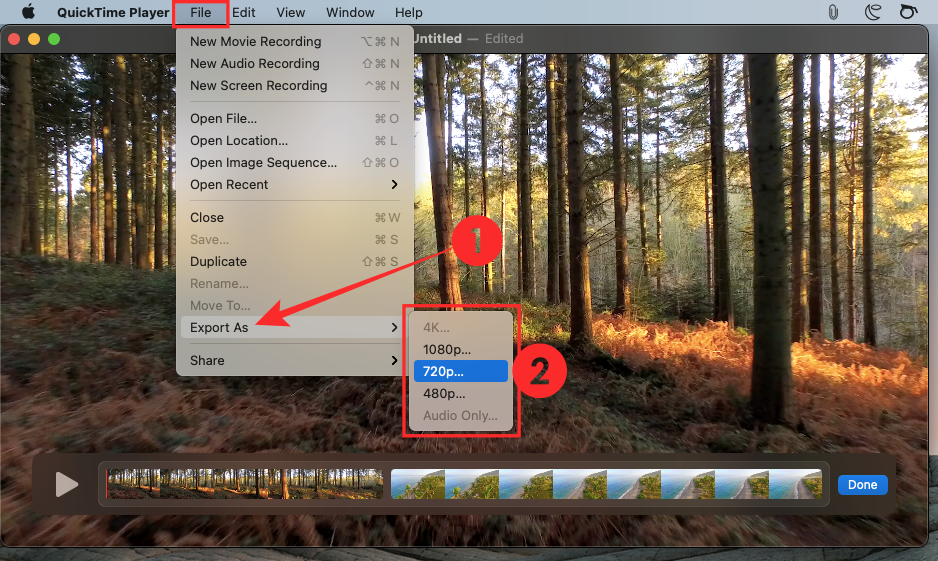
- After you have added all the clips to the same video and re-ordered them, you can proceed to save the new video. To save the video file, make sure the QuickTime Player is the active window on your Mac, then go to the File tab on the Menu bar, click on Export as, and then select the video resolution you want it to be saved as.
- In the next screen, create a name for your video file, select where you want it to be saved, and then click on Save.

That’s it. You have successfully created a video by merging two or more videos using QuickTime Player on your Mac.
Method 2: Using the Shotcut app
Although Apple’s QuickTime Player is the best option out there if you’re looking to merge two or more videos, there are other alternatives if you want to do more to the video that you’re about to create. Your next best option is Shotcut, an open-source, cross-platform video editor that you can use on your Mac without paying a dime.
- To use Shotcut, you need to go to Shotcut.org and download the latest “.DMG” installer available for macOS. You have to manually download and install the app this way because Shotcut isn’t available on the Mac App Store. But you need not worry, as Shotcut is a verified app and a widely used one at that.
- To install the app, you need to first download the “.DMG” file from the aforementioned source, open the file by double-clicking it, and this will load up the main Shotcut installer volume.
- You can now install the app by dragging the Shotcut app icon to the Applications folder that’s available inside this window. After the app is installed, it should appear inside the Launchpad on your Mac.
- You can now start editing your video. For that, open the Shotcut app on your Mac and then click on Open File at the top left corner of the Shotcut window.

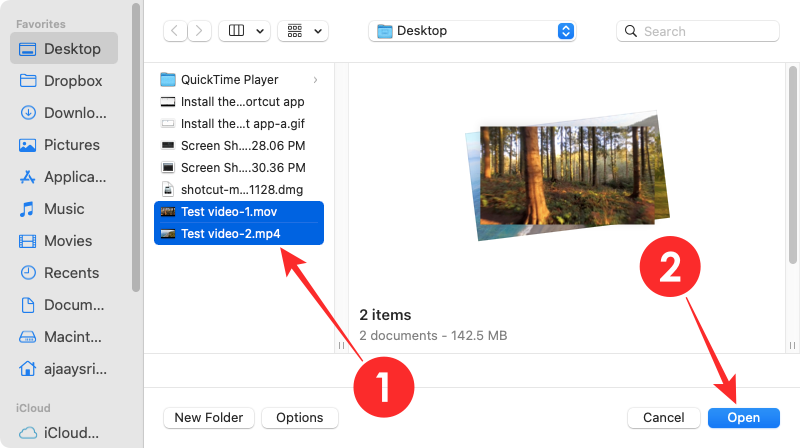
- A new screen will appear prompting you to go to the location of the video files you want to edit. Browse to the folder/location from where you want to add the clips onto a single file. Instead of adding video clips one by one, you can select multiple ones that you wish to add.
- Once you have selected all the clips to add to the video, click on Open at the bottom right corner of this window.
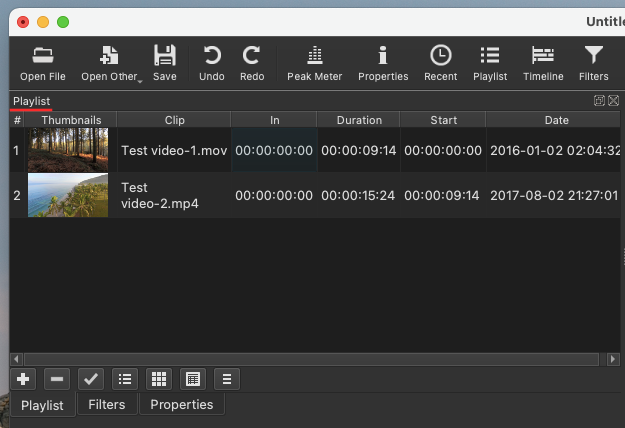
- The newly added clips will appear inside the “Playlist” section of the Shotcut app.
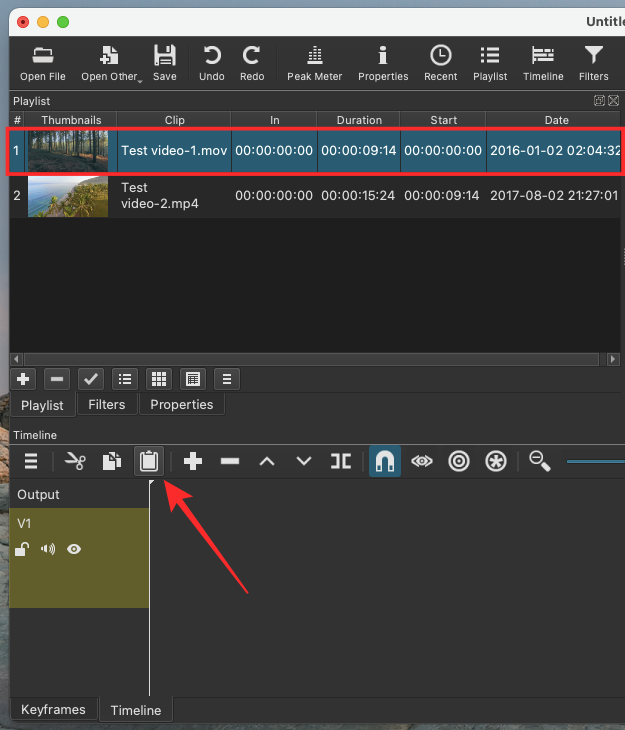
- To start adding the videos to a project, you will need to add them to the Timeline. You can do that by selecting the video you want to add first, and then clicking on the Paste icon inside the Timeline section. You can also drag and drop the video to the box inside the “Timeline” section as well.
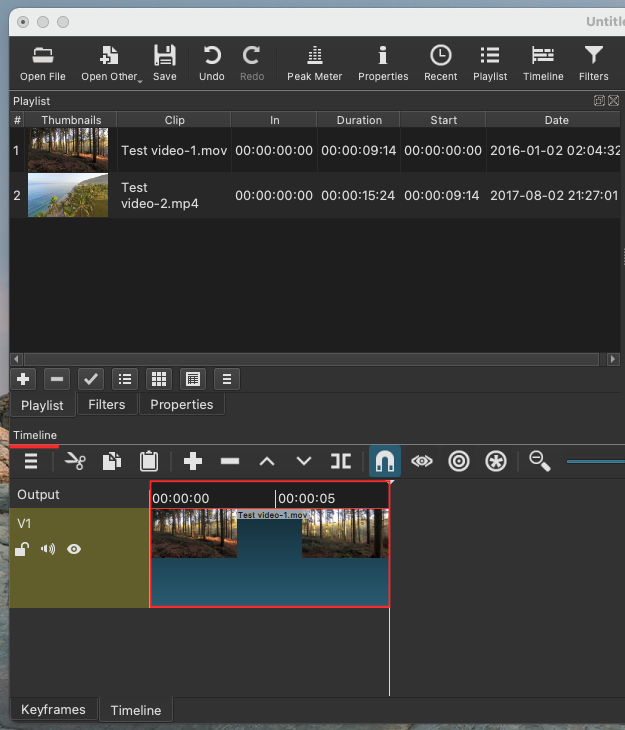
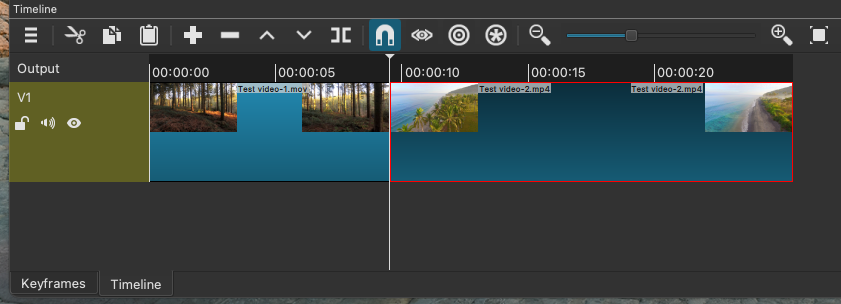
- Your first video will now appear inside the “Timeline” section.
- You can now add the next video by selecting the clip, then dragging and dropping the clip onto the Timeline.

- While adding this next clip, you need to make sure that the clip sticks to the end of the previous video so that there’s no gap when the video is played. Repeat the process to add more clips to the same video.
- Shotcut lets you modify other aspects of the video like color, audio, FX, and more to make the video look more presentable.
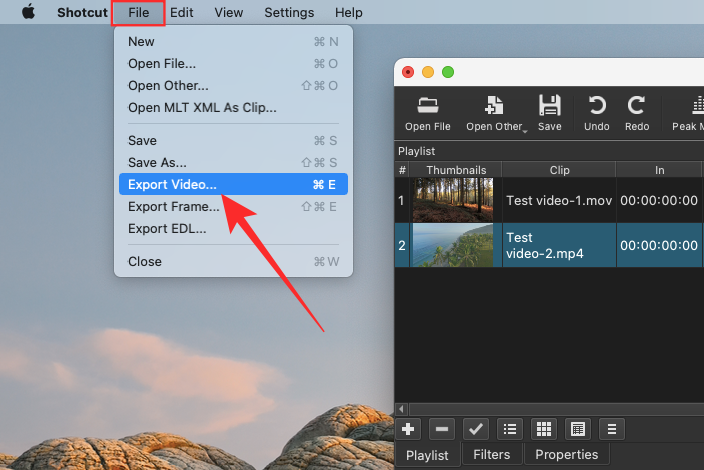
- After making all the necessary changes, and keeping the Shotcut window active, click on the File tab in the Menu bar, and select Export Video.
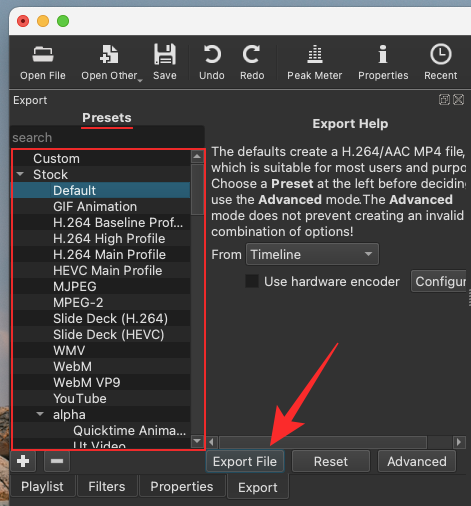
- The “Export” section will now appear inside the Shotcut app. In this section, select the presets (format) you want to save the video as from the list on the left, and then click on Export File.
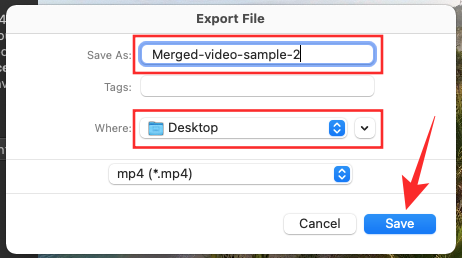
- The next step is to name the newly created video and choose a location where you want to save it. After that, click on Save. The video should appear at the chosen location when ready.
That’s it! You can easily combine two or more videos on a Mac.
RELATED


2 responses to “2 Ways to Combine Videos on a Mac”
You can also try TunesKit AceMovi to combine videos on a Mac.
None of this works anymore, since Catalina came out, QuickTime doesn’t have this functionality to drag and drop – it just gets rejected