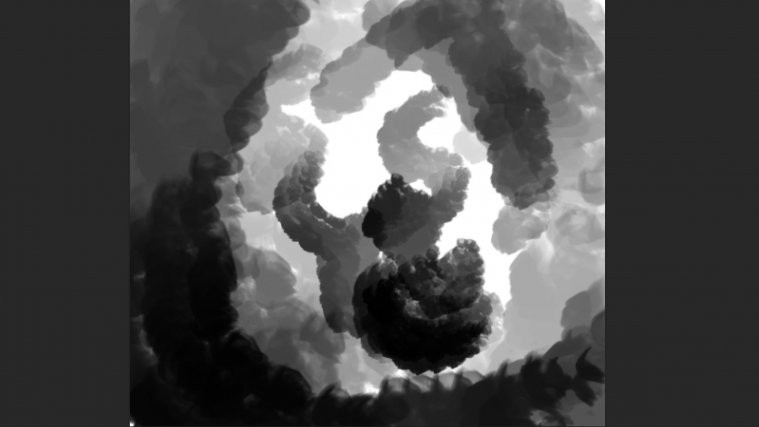
One question that will never come to an end within the online art and design community is “What brushes do you use?”
They seem like the holy grail — the answer to why that speedpaint comes out so amazing or why that environment concept has such a gritty, raw feel to it. In reality, learning how to make Photoshop brushes is more novelty than it is necessity; the fundamentals are what will make your art great, not your brush. There is no brush to rule them all; every brush is just a tool. That said, you don’t want to be limited by your tools, and knowing how to customize your brushes to resonate with your style or help meet important deadlines is a valuable skill to have.
Why Custom Photoshop Brushes Are Useful
Custom Photoshop brushes can provide all sorts of cool effects that can help save time and communicate an element faster — rather than painting each and every leaf in a tree or rendering every scale on a fish, cloud in the sky, or whisp of smoke trailing through the air, why not make Photoshop brushes with the right dynamics to automatically create what you need? It makes sense.
Especially for designers and professional artists who work according to deadlines and whose iterative process is enhanced with speed. For example the concept artist or keyframe artist whose primary goal is the visual communication of information rather than just wowing the beholder, there’s no need to demonstrate your fundamentals to the person sending you your paycheck by sitting and rendering each and every blade of grass. That’s what a portfolio is for.
Thus, for those on a time crunch, learning how to make Photoshop brushes that can speed up your workflow is an essential skill.
Why Custom Photoshop Brushes Are Not Useful

That said, for those focused on skill-building, fancy particle brushes and beautifully textured traditional paint imitation brushes can seem like the answer. You want to paint like Craig Mullins, Hugh Pindur or Ahmed Aldoori, sure, and you see the rich textures that their custom brushes seem to bring out of their canvas.
But having John Park’s fancy chalk brush won’t get you painting like John Park the same way using Karl Kopinski’s pencil won’t have you sketching like Karl Kopinski.

Nice textures and fancy dynamics are, mostly, just icing on a cake made of deeply-rooted, fully-internalized fundamentals. The artists and designers you worship can paint incredible works of art with the default hard round brush because they understand light, form, perspective, and color in a way that underpins every decision they make. The brushes are just pixel-stamps that provide a minor edge to the fundamentally-sound foundation of their imagery.
If you’re looking to build your skills and paint like your favorite artists, one of the worst things you can do is fixate on brushes; sometimes you should sit and render every leaf if you’re trying to learn lighting or — better yet — learn to see less, simplify, and paint with an economy of brushstrokes.
You want tools, not crutches.
How to Make Photoshop Brushes
Now that you know the pitfalls of custom brushes the dangers of relying on them as shortcuts, you can — hopefully — use that knowledge to employ custom Photoshop brushes responsibly. It might sound like we’re making custom brushes out to be highly addictive hard drugs, and we don’t mean to; Custom brushes are useful, but it’s like that saying goes about teaching a man to fish. If you’re going to use them, learning how to make Photoshop brushes work for you is the way to go.
So, without further ado, let’s take a look at how to make Photoshop brushes.
First, How Digital Brushes Work

Before you really start digging into the finer details of making custom brushes in Photoshop or any other software package, it’s important to understand how digital brushes work. At its core, a digital brush is really just a stamp — a stamp that’s repeated continuously, giving the appearance of a stroke.
You have probably noticed this yourself while fooling around in Photoshop, Krita, or Procreate, that shapes are being repeated within the stroke. All of the fancy brush dynamics that come later, from jitter and scatter, only change the manner in which that simple stamp, well, stamps.
1. Create a Blank Document

The first step in creating your custom Photoshop brush is to open up a blank canvas so we can design the brush tip or “stamp”. The maximum size for any brush tip is 5000×5000 pixels — which is pretty dang big.
You can create your brush on a smaller canvas, something as low as 500 x 500 is perfectly adequate for nearly all general uses considering few artists and designers frequently require a brush tip numbering in the many hundreds of pixels. Some have found creative uses for the higher resolution, such as perspective grid stamps and other quick shortcuts, but for this tutorial let’s focus on general-use brushes.
2. Design Your Brush Tip

Once you have your canvas open, you will, quite fittingly, paint the shape of your brush tip. This will be the “stamp” that repeats itself along the stroke. Think about what kind of brush you’d like to make — do you want a triangle brush that can create a messy, organic look when modified with dynamics or something squarish/rectangular for harder edges? Feel free to design your shape using other brushes or the lasso tool — and be prepared to experiment.
But before you start experimenting, make sure to design in grayscale and keep the background white. It is important to know how Photoshop reads your image and turns it into a stamp according to value — how dark or light the image is. The darker the pixel, the more “paint” that tip will get. Everything that is white will be read as negative space, and anything between gray and black will be read as a brush tip. This applies to colors and their respective values as well. Putting down a red with an 80% value will be read as an 80% gray.

The actual value doesn’t matter if you’re going the hard brush route, as the pure shape will be recorded. But, take notice of how an airbrush works — the brush tips fade from black to gray as it moves from the center. They paint that way because Photoshop reads it that way.
So just remember, darker pixels get more “paint”. And don’t worry about getting it perfect — designing brushes is a back-and-forth process, so feel 100% free to get wacky with it. Experimentation is the best way to learn.
Once you’ve settled on the shape you want, head up to Edit > Define Brush Preset, give your brush a name, and your brush tip will automatically be assigned the image of the canvas.
3. Play With Photoshop Brush Dynamics

You’ll notice immediately the silhouette of your brush tip has changed but giving it a few strokes produces a hard, opaque stroke. How do we go from these hard-edged, unfeeling streaks to vibrant and flexible brushstrokes?
Through Brush Dynamics.

You can get into the Brush Settings by looking for it in your workspace, going to Window > Brush Settings, or pressing F5. This next part is where the Photoshop Brush rabbit hole deepens, and you can spend hour after hour having fun, tweaking brushes, and experimenting with different modifiers to bring your perfect custom Photoshop Brush to life.
There are innumerable ways to tweak your brush with variables at your disposal in Brush Dynamics, but we’ll walk you through the most important features to get you started.
What to Know First: Jitter and Control
Before diving into any particular brush dynamic, it should be important to understand a few key terms: “Jitter” and “Control. Jitter essentially refers to “how much” a specific dynamic is applied relative to a variable like pressure or tilt. Control is that variable.
Thus, when we talk about Opacity Jitter set to Pen Pressure Control, we’re talking about how much opacity is applied according to how hard you’re pressing with your stylus. Understanding just those two terms should open your eyes to most of the levers you can pull under the hood of Brush Dynamics.
Transfer

Transfer determines, in simple terms, how much “paint” is delivered through the stamp based on variables like pen pressure, tilt, or the stylus wheel. Adjusting Opacity will determine the maximum/minimum amount of pigment your brush stroke will deliver relative to its pressure range.
Flow, on the other hand, determines the rate at which the pigment is delivered, unrelated to the minimum/maximum opacity on its own. Fiddling with flow allows you to somewhat alter the pressure curve of that specific brush without changing the pressure curve of the stylus in your respective tablet software.
Shape Dynamics

Shape Dynamics are similar to Transfer in that they allow you to, unsurprisingly, change the shape of the brush tip according to set controls. The first dynamic you’ll probably be inclined to play with is Angle Jitter, which offers a wider variety of controls than Size or Roundness. Experiment with it, see how different controls can apply to your strokes, and think of how each setup can be used to solve specific problems.
Texture

We talked about the allure of texture at the beginning of the article and why, in the grand scheme of things, it’s probably the least important aspect of any custom brush. That said, texture can be a wonderful finish that gives character and tone to an image that would otherwise be lost with artificially smooth brush strokes — though sometimes expressly flat strokes might be exactly what you’re looking for!
After you’ve determined the shape of your brush tip, you can have Photoshop apply specific textures inside the silhouette that will reflect in the stamp and stroke of your brush. You can change the texture by clicking on the small window at the top of the menu which will already have a texture swatch inside it.
Photoshop comes with a few default textures, but since you’ve come this far we might as well look at how to import textures into Photoshop to help make custom brushes.

First, you’re going to want to find a quality texture online — preferably something seamless and with high contrast. You can use typical textures like wood, canvas, sand, water, smoke etc but don’t be afraid to experiment with anything and everything; as an artist or painter will tell you, all images are just a mapping of value (and hue) so don’t let the subject matter deter you from experimentation.

Once you’ve found your texture, drag and drop it onto your canvas. Higher resolution textures are better overall but you don’t want to apply too large a section otherwise it may lose the desired character — remember, it has to fit onto your brush tip.
Using the marquee tool, select a square region of your texture with the sort of value map you’d like to see applied and go to Edit > Define Pattern. This will automatically add the pattern to your Photoshop’s pattern library.
Don’t forget to fiddle with dynamics like Contrast and, importantly, the blend modes to bring out the exact texture you want in your brush.
Photoshop Brush Tips

Study Photoshop Brushes You Like
If you’re reading this article, you probably know already that the internet is flooded with wonderfully customized Photoshop brushes, free and paid. Any tour through Gumroad will show you a cornucopia of brush packs to choose from — brush packs you can use to learn from.
Brushes like Ahmed Aldoori’s can be a great place to learn how you can harness textures and brush dynamics to create distinct brushstrokes that can add life to your painting (just remember that brushes are nothing next to the fundamentals!). Now what you understand what the important dynamics are inside a Photoshop brush, you can study the brushes you like and import some of that information into your own. Kind of like a master study.
Photoshop Brushes Can Be Imported into Procreate
A nifty benefit of iOS’ biggest painting app is that Procreate can import ABR files (Photoshop Brushes) into its own engine to be used for painting, straight out of the box. So any brush packs you download or Photoshop brushes you make can be used on your iPad!
Another thing to note about Procreate is that its brush engine is similar to Photoshop (with some significant differences of course) so you can feel free to use what you’ve learned here to explore Procreate and see what you can come up with on there.
Minimize the Number of Brushes Per Painting
This is more along the lines of artistic advice rather than technical know-how — but it’s easy as a beginner artist to go crazy with many dozens of brushes for a painting. In-line with our advice at the top of the page to avoid letting custom Photoshop brushes become a crutch, stray away from finding the “perfect” brush to solve every problem in a painting.
If you’re looking to stamp material effects onto everything, you’re essentially doing a poor-mans version of Photobashing and the overall aesthetic of the image will suffer from the textural dissonance being created.
Concept Artists have more leeway when it comes to speeding up workflows with special brushes for common elements like leaves, clouds, grass, etc. because their job is more to communicate an idea than it is to produce a purely artistic image. But rest assured those artists can paint the hell out of those elements using a single brush.
Whenever you’re tackling a new piece, try to find the right brush for the whole job, rather than attacking it with forty different brushes and ending up with a confusing, discombobulated quilt of textures.
And there you have it. The essential guide on how to make brushes in Photoshop, so you can finally stop haranguing your favorite artists in their comment sections and live chats about the brushes they use. Because it does annoy them. Feel free to shoot any questions at us, however, because we live to answer them.


