
Google Classroom is a lifesaver for educational institutes trying to keep their syllabus going amid the social distancing protocols currently in place. The web application allows teachers a host of customization with regard to their classroom activities, from creating their own questionnaire to grading assignments, all within Google Classroom.
PDFs or Portable Document Formats are a type of file format originally created for read-only files. This means that a PDF document cannot be edited as easily as a .doc or a simple text file.
However, a number of online educational resources are distributing their material in PDF formats. Luckily there is a way to convert these PDFs into editable documents and use them in your Google Classroom.
Enable PDF editing
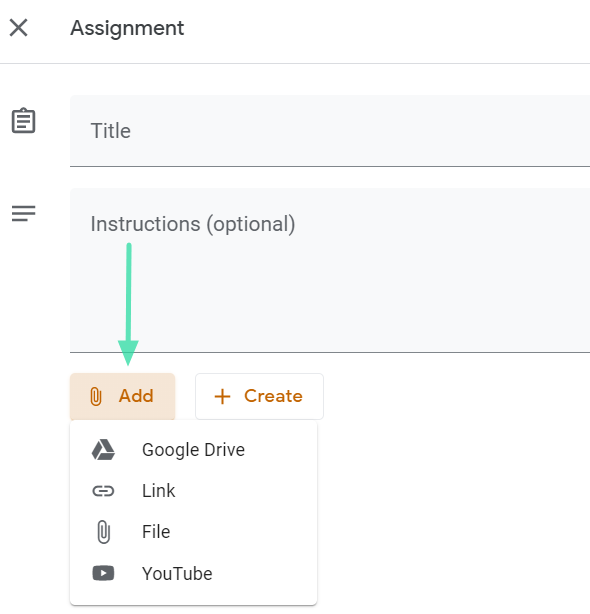
Teachers can use the ‘Classwork’ tab to create assignments for their students. If you would like to use a PDF document in your classwork, you must select the ‘Assignment’ option when you create a new piece of classwork.

Click the ‘Add’ button, and depending on where the file is located, choose ‘File’ (for your local storage) or ‘Google Drive’.
Once the file is uploaded, click the dropdown arrow to the right of the file. Here you can choose whether you want all the students to edit the same file, or each student to make changes on their own copy of the file.
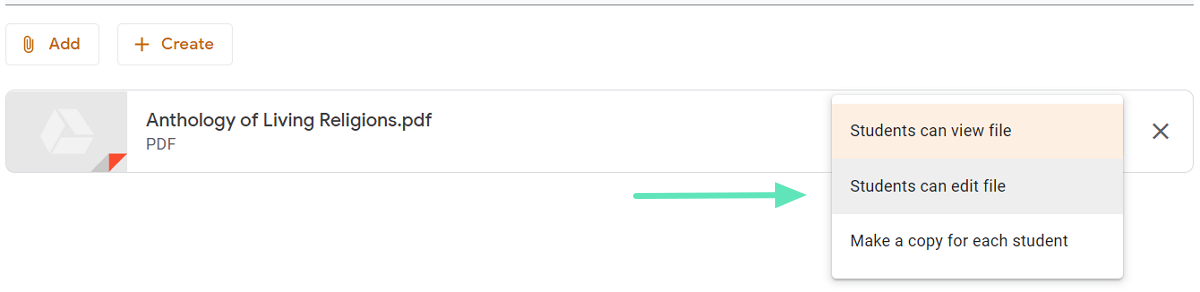
If you want students to be able to make changes to the file, make sure ‘Students can view file’ is not selected.
Now, that you have enabled editing on PDF file, you can use the two methods we have listed below for letting the students edit the file: using either of Google Drive and Google Slides. Let’s check out these two methods.
► How to use Bitmoji in Google Classroom
Make it editable using Google Drive
Depending on the age and understanding of the students, you may decide to allow them to edit a PDF as they wish. If this is the case, you must first convert the PDF to an editable Google Document. Then, using the guide above, simply upload the PDF document and allow students to edit the file.
Head over to your Google Drive web application and sign in. In the top right corner of the app click the settings icon and select ‘Settings’.
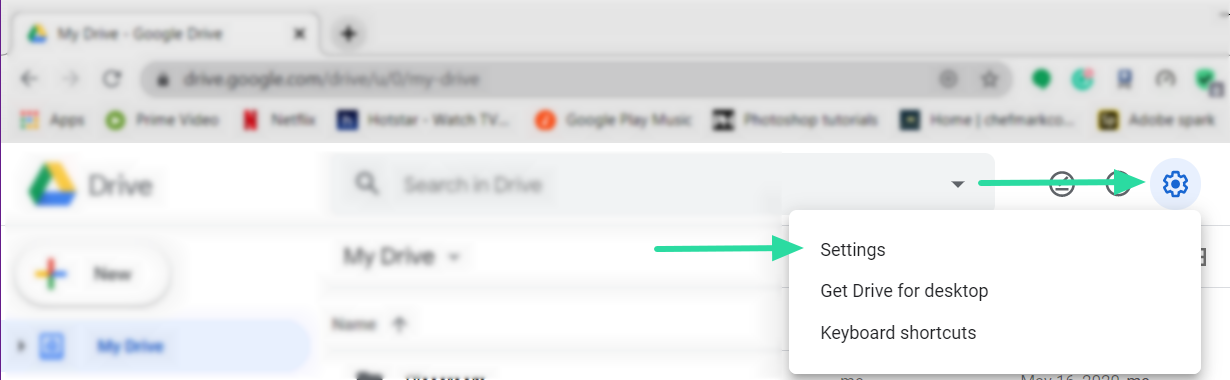
Check the box next to ‘Convert Uploads’ in the ‘General’ tab and click ‘Done’.

Now upload your PDF file to your Google Drive. The File will be converted to an editable Google Document.
Head over to your Google Classroom, and create a new assignment. Select ‘Google Drive’ to add the newly uploaded PDF. Locate the PDF on your Google Drive and hit ‘Enter’. Make sure you allow the document to be edited using the guide above.

Students will now get a notification when they open to document, asking them if they would like to open it in Google Docs.
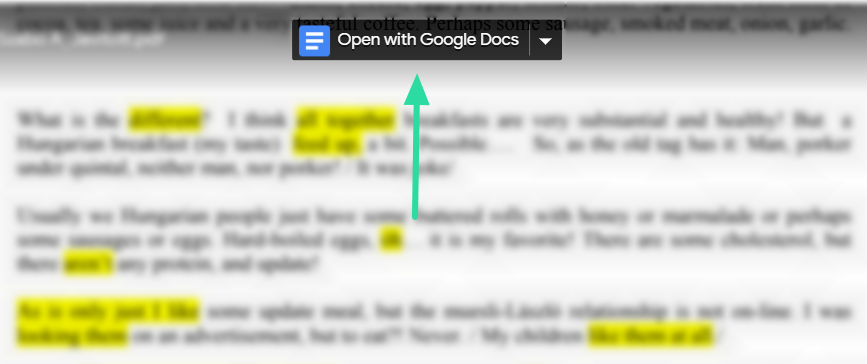
When they select this option, they will be able to edit the PDF document as they would any text document. It must be noted, however, that once they edit the document, they will have to submit it by generating a link to the Google Document. Since this is a little complicated, the below method is more suited for younger students.
Make it editable using Google Slides
If, however, your students are not capable of adding information to the PDF on their own, and you would like to provide areas for them to type in, the above method will not be best suited.
Using Google Slides, you can convert a PDF first to an image file and then upload it to a Google slide. Once on a Google slide, you can indicate areas that need to be filled on the PDF.
Convert a PDF to PNG in Slides first:
PNG is a portable image format that is widely used in many applications because of its lossless compression properties. To convert a PDF to an image format, first open the PDF.
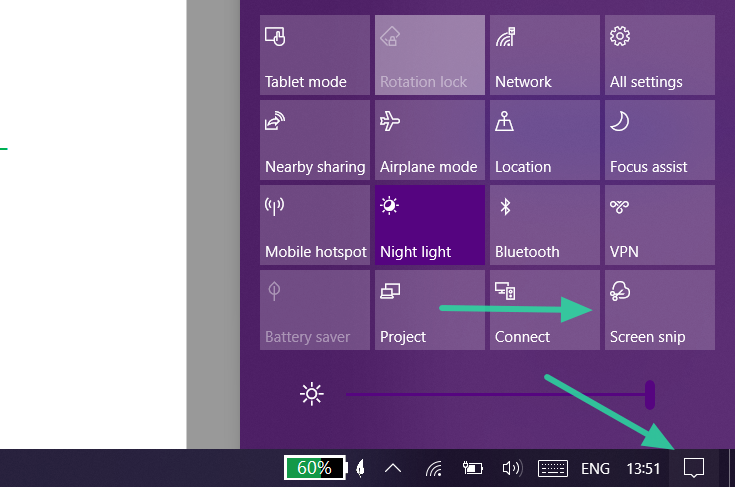
Now, using Microsoft Window’s we are going to take a screengrab on the page. Select the page that you would like to create an editable copy of, and pull up the Windows Screen Snip application. This application can be found in the notification panel on the Taskbar. Alternatively, you could hit the Windows key and search for ‘Screen snip’.
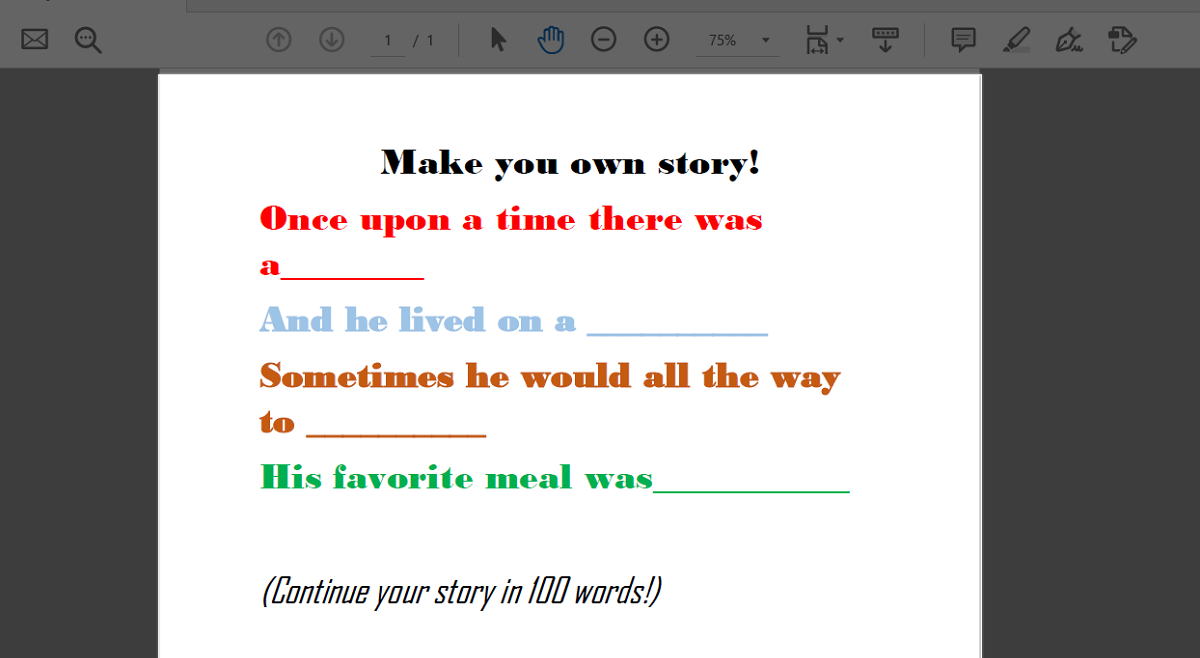
Click and drag your cursor over the PDF, selecting that part that you would like to copy. Once you release the cursor, the cropped portion will appear in the Screen snip application.
Simply hit ‘Save’ and you have a PNG image of the PDF document page! Go ahead and create as many image files of the PDF document as you need. Remember to scroll down the document before taking a screengrab.
Turn a Google Slide into a PDF:
Now that you have an image file of the PDF, head over to Google Slides, and create a new presentation. If you want the image to be vertical, change the layout of the slide accordingly. If the screengrab is wider horizontally then there is no need to change the layout.
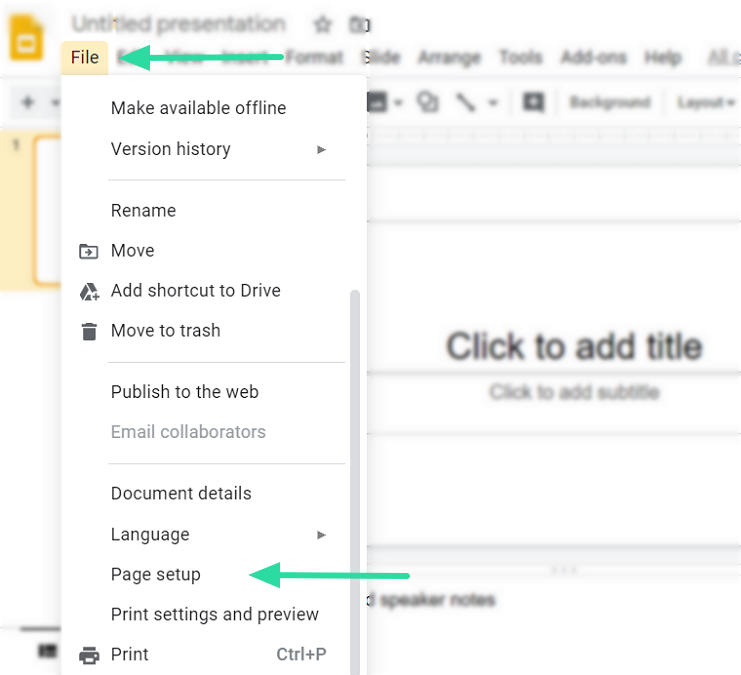
Since we want the document to fit as a regular PDF would, we are going to change the layout of the slide. To do so, go to File > Page setup.
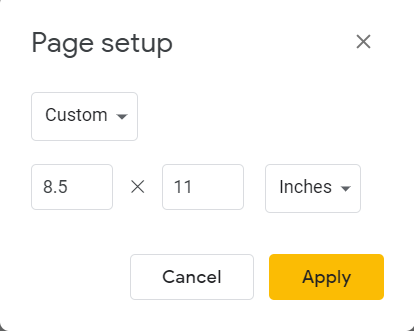
Here click the dropdown arrow and select ‘Custom’. You want to make the page 8.5 x 11 inches. Make sure to check that the measurements are in inches and not ‘cm’. Of course, depending on the PDF, you can change the dimensions of the slide to better fit the image.
Now that the page is ready, click on ‘Background > Choose image > Upload. Locate the image on your device and hit ‘Upload’.
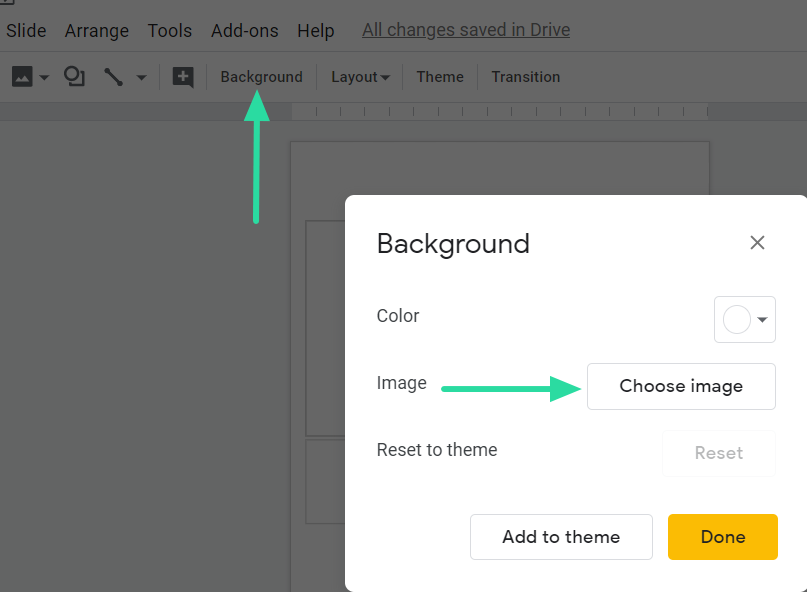
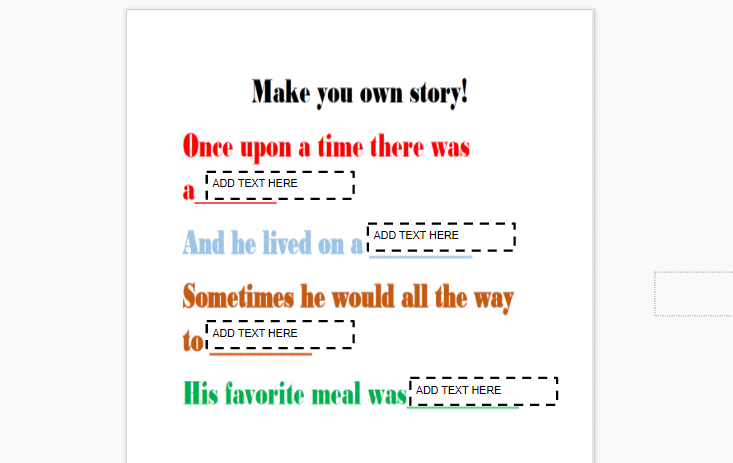
You should see the PDF set as the background of the slide. If you want to allow students to add text to PDF, add a text box over the area. You can add instructions like ‘Type text here’ to specify where you would like the students to fill in the form.

Customize the textbox by adding a fancy border or changing the color of the box; its completely up to you. Create a new slide for each page of the PDF. You now have a PDF document that you can edit and add text to!
When you add the file to your assignment make sure to add the newly created slides and not the original PDF or all your work will be in vain!
Using PDFs have the added advantage that students cannot change what is already on the page; a problem that teachers have with using Google Slides since students can easily claim that they simply deleted a question.
The above methods allow you to use PDFs and still have students add text or even draw on them! Which method did you like better? Let us know in the comments below.


One response to “How to make PDF editable in Google Classroom”
Very useful guide, thank you.