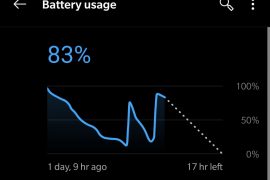
A number of factors contribute to poor battery on your Android phone. While the latest developments have made phones slimmer, features like 90Hz display, bulkier software, and faster internet speeds are taking a toll on the already insufficient power units on your phones. No longer do companies manufacture swappable batteries nor are the phones draining lesser power, which brings us to a question: How do you save battery on your Android smartphone?
In this guide, we’ll help you some of the very simple ways to make the most of your phone without needing adding any physical accessories.
- Install Greenify
- Disable Usage Statistics within System settings and Apps
- Limit location access to when using only
- Replace live wallpaper with static wallpaper
- Allow in-built battery optimization wherever possible
- Use Dark mode on System and compatible apps
- Download music or videos offline for longer period of use
- Adjust your display settings
- Turn Radio OFF whenever possible
- Restrict Data for certain apps
- Uninstall unnecessary apps
- Completely disable an app or service in background
Install Greenify
Greenify is an extension to Doze mode which was introduced on Android by Google in 2015. Doze would put a phone in a low-power state by blocking apps from waking up and would activate only for these three reasons – when the phone screen is off, disconnected from the charger and hasn’t physically moved for a while. Greenify, instead gives the user the ability to force doze inactive apps without a waiting period and tracks those apps which wake up your phone the most.
How to set up Greenify:
-
- Install Greenify from the Play Store for free. If you wish to block pre-installed or system apps on Greenify, then you might need the Greenify (Donation Package).
- After installing the app, press Open.
- You’ll be greeted with the “Welcome to Greenify” screen. Click on Next.

- Choose the working mode for the app. Check “My device is NOT rooted” if your phone is not rooted. If rooted, click on the second option. In case you don’t know its state, click on “I’m not sure”.

- Tap on Next.
- Grant the required permissions to allow Smart Hibernation and click Next.

- Greenify is now ready for use.
- Press the Plus (+) sign at the top right.

- Select the app you want to hibernate. You can make multiple selections.
- Click the tick mark on the bottom right.

- Your apps are ready to be hibernated. In case some apps don’t hibernate automatically:

- Select the app.
- Click on the 3-dot icon at the bottom.
- Check on Ignore background-free and now try to hibernate.
- Check on Ignore working state, only if the previous step doesn’t work.
- Now create a shortcut for manual hibernation:
- Tap the 3-dot icon at the top right.
- Select Create Hibernation Shortcut.
- Choose your shortcut.
Greenify is fully ready for use and you can see the changes for yourself.
Disable Usage Statistics within System settings and Apps
By default, OEMs enable Usage Statistics on your smartphone to collect statistics on your use of various product functions by stating to improve their services. This data primarily benefits the brand while you will be on the losing end in terms of battery loss and higher unaccounted data consumption. Thankfully, users can opt out of it right using the Settings app on their phone. You can do so by following the instructions given below:
- Open the Settings app on your Android phone.
- Locate the Search bar at the top or scroll up to find it.
- In the search bar, search for these keywords – “usage“, “User“, “experience“, “statistics“, and “program“.
- The results will be different on different phones.
- Open the results for each of these keywords and check if there’s a setting that you might not need (like uploading data to the company’s servers).
- You can disable more than one of these features in certain smartphones.
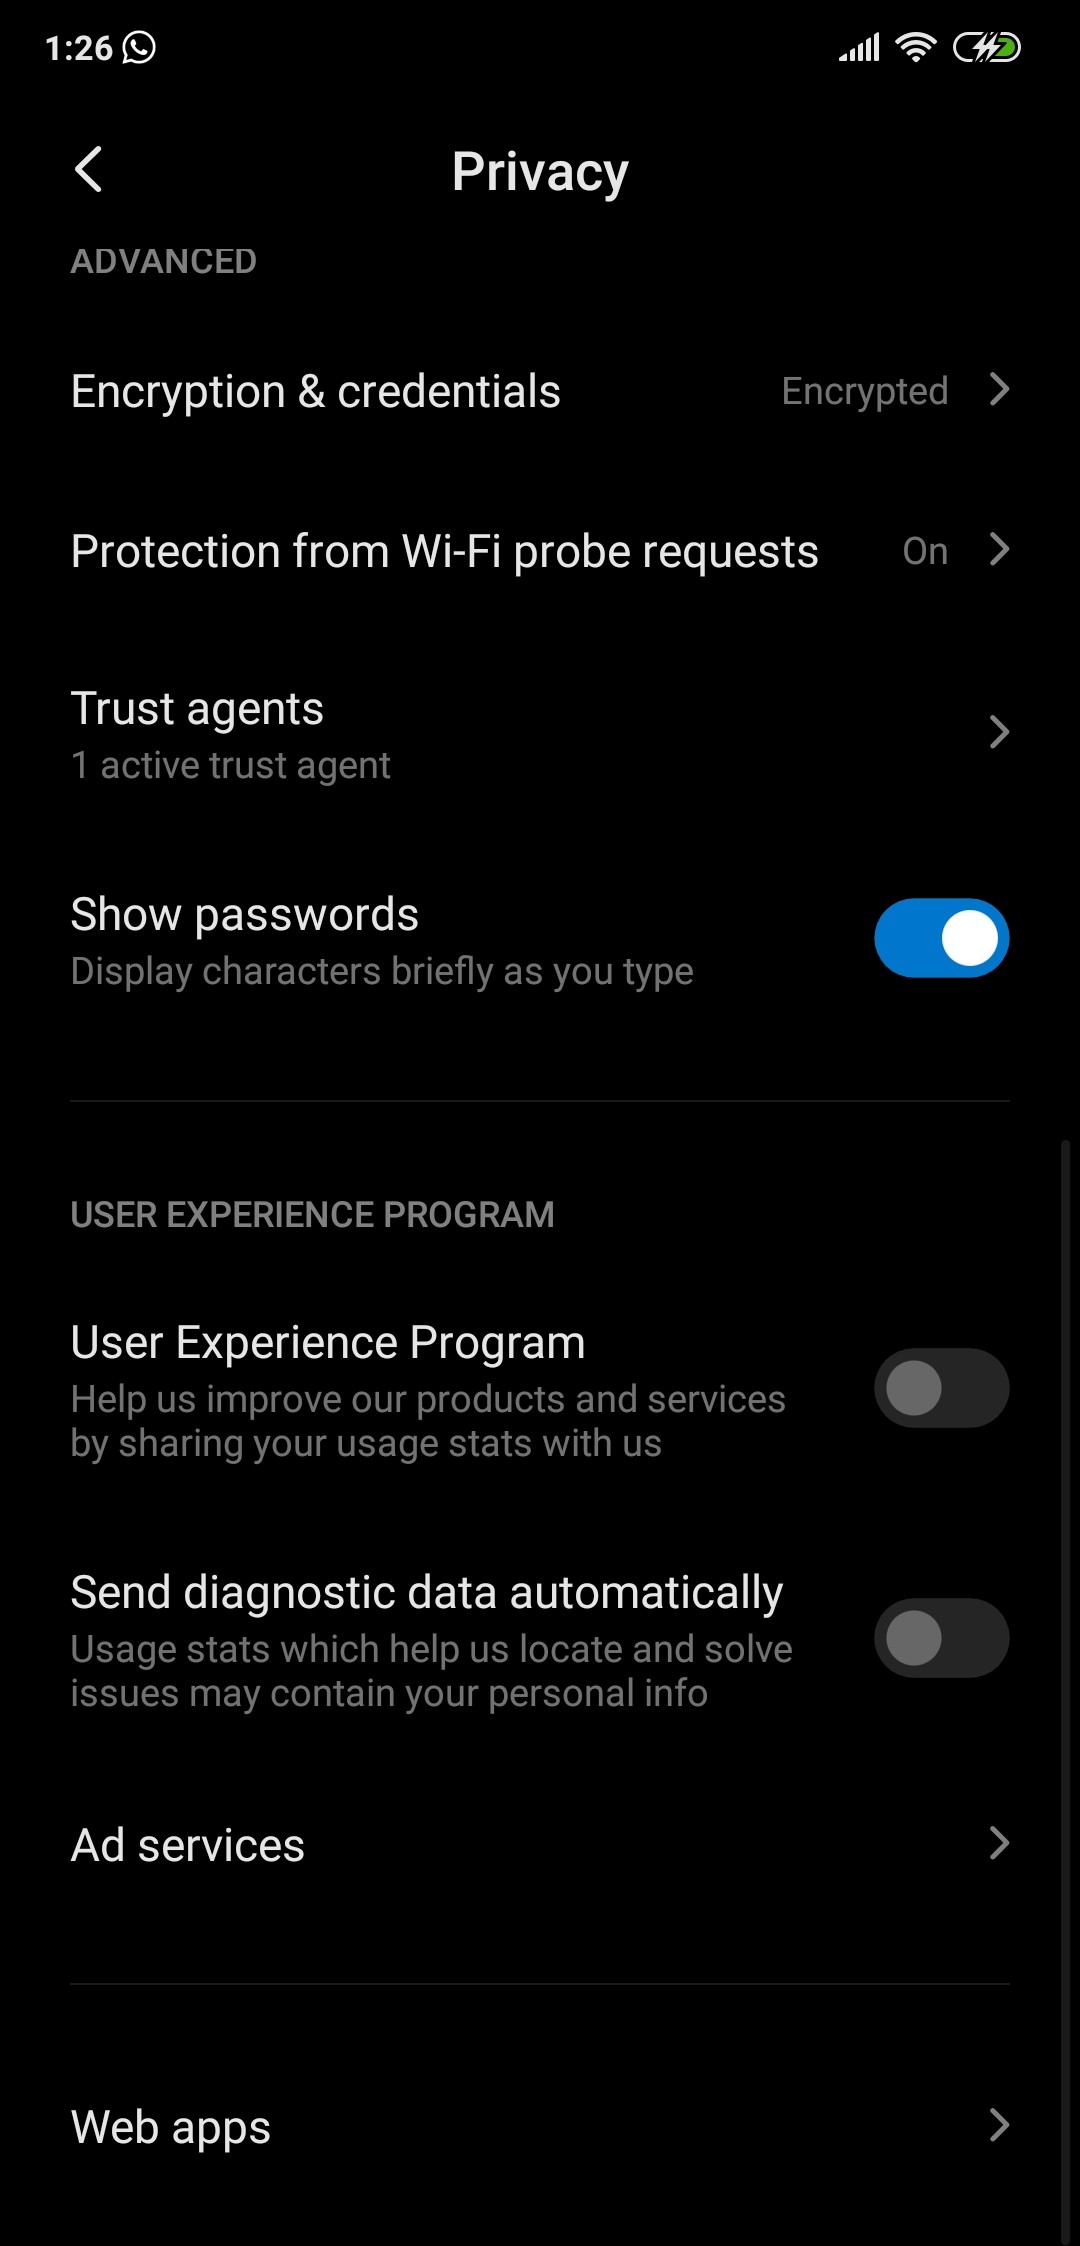
Here’s what we found on a Xiaomi phone, for example.

Limit location access to when using only
With the introduction of Android 10, the way location permissions are handled has also changed. Users on Android 10 now have the ability to choose whether they want to share their location for the app when it’s running in the background. This setting not only boosts user privacy but can also help improve the battery life of the phone since your location is no longer shared continuously.
How to limit location access on Android 10
- Open Settings.
- Head over to Apps & notifications.
- Click on Advanced, then Permission Manager.
- Select Location and you’ll see a list of apps and services which access your location.
- Click on an app to modify its location access. You can choose from
- Allowed – for always sharing your location. Not advisable.
- Denied – for never sharing your location. Also not advisable.
- Allowed only while in use – shares your location only when the app is in active use.
- Select Allowed only while in use for saving battery while using the same service.
- Repeat for different apps.
You can also use the Permission Manager for limiting permissions to “Allowed only while in use” for conserving battery.
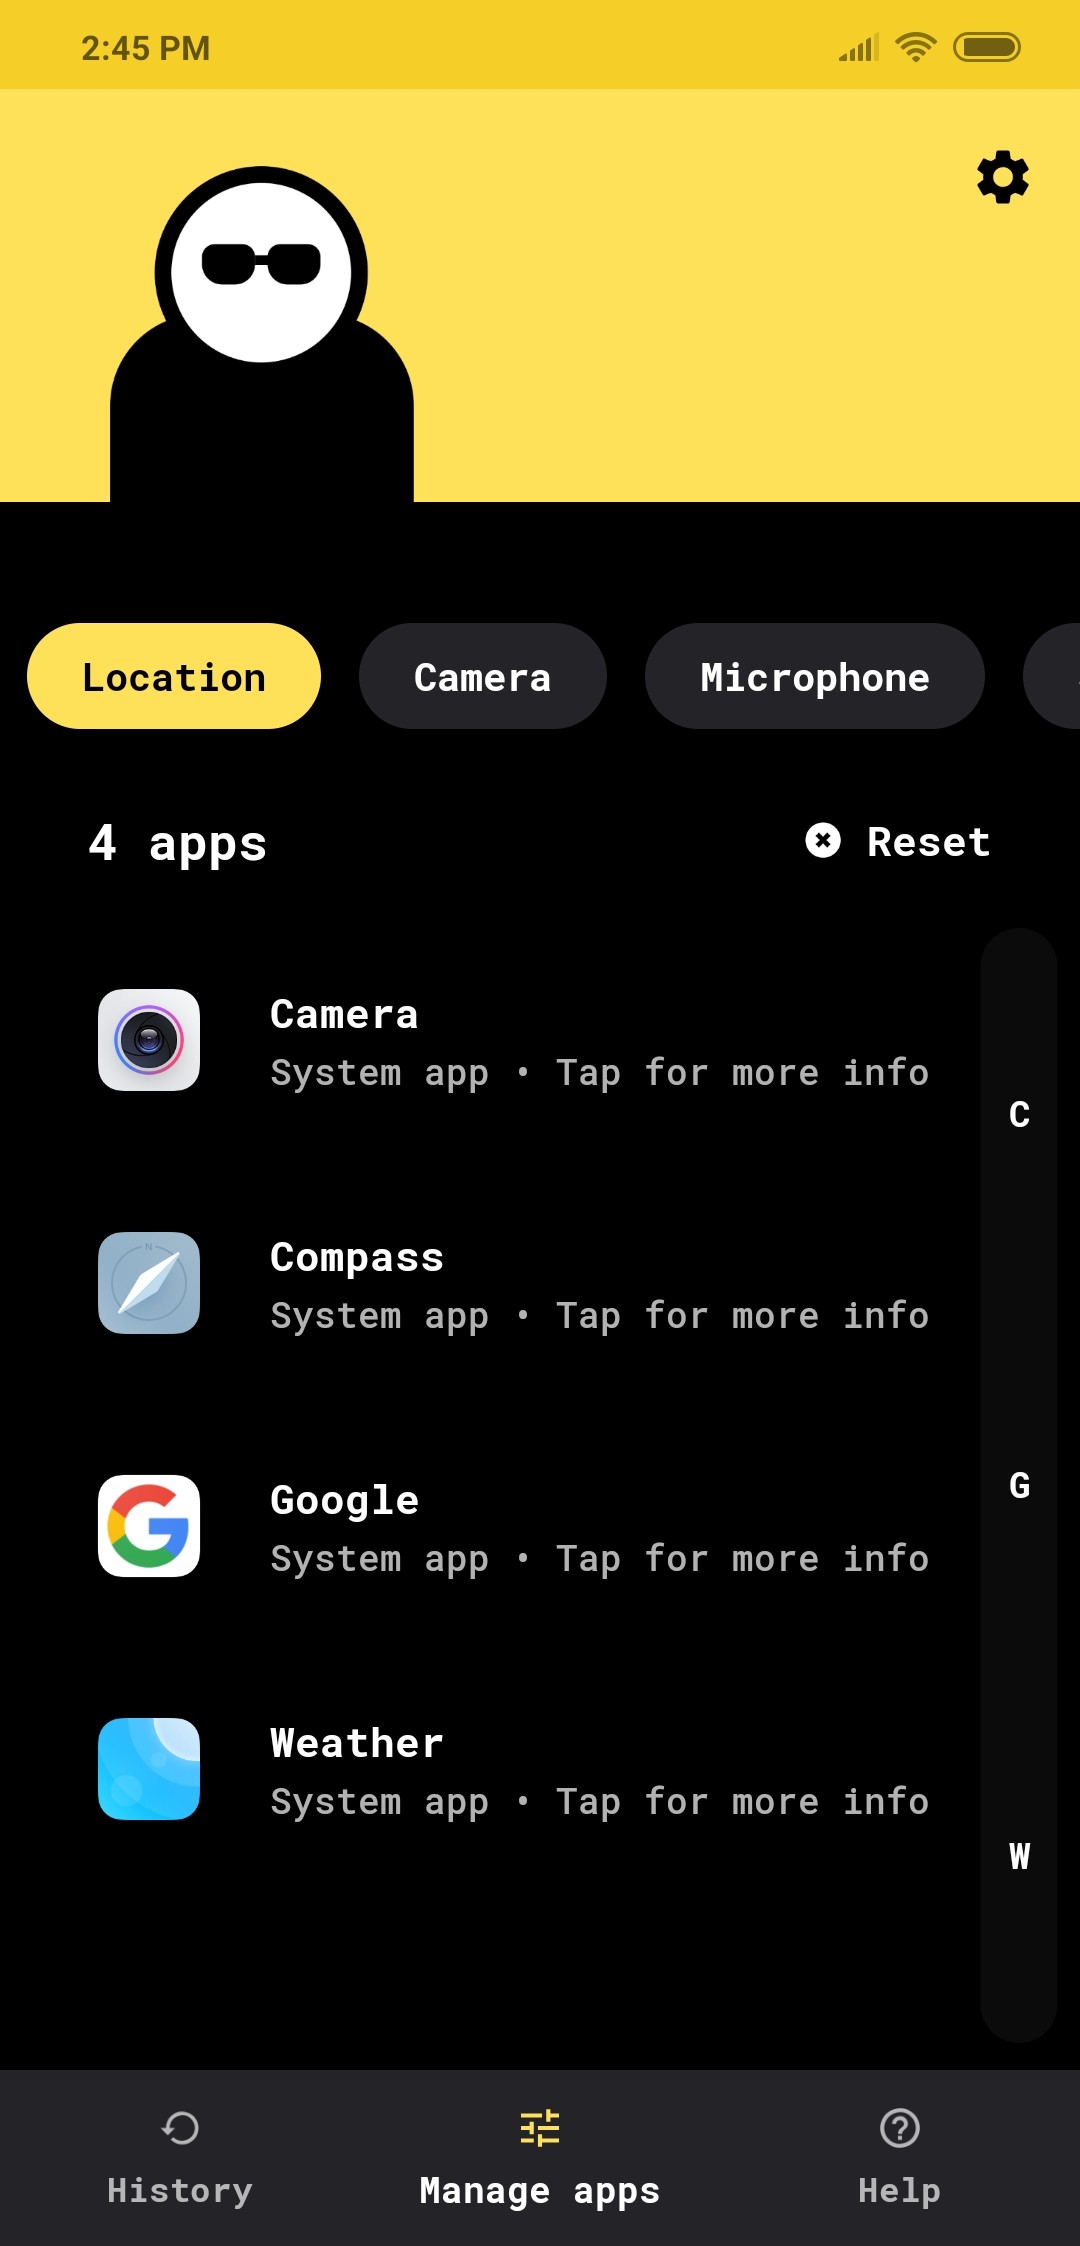
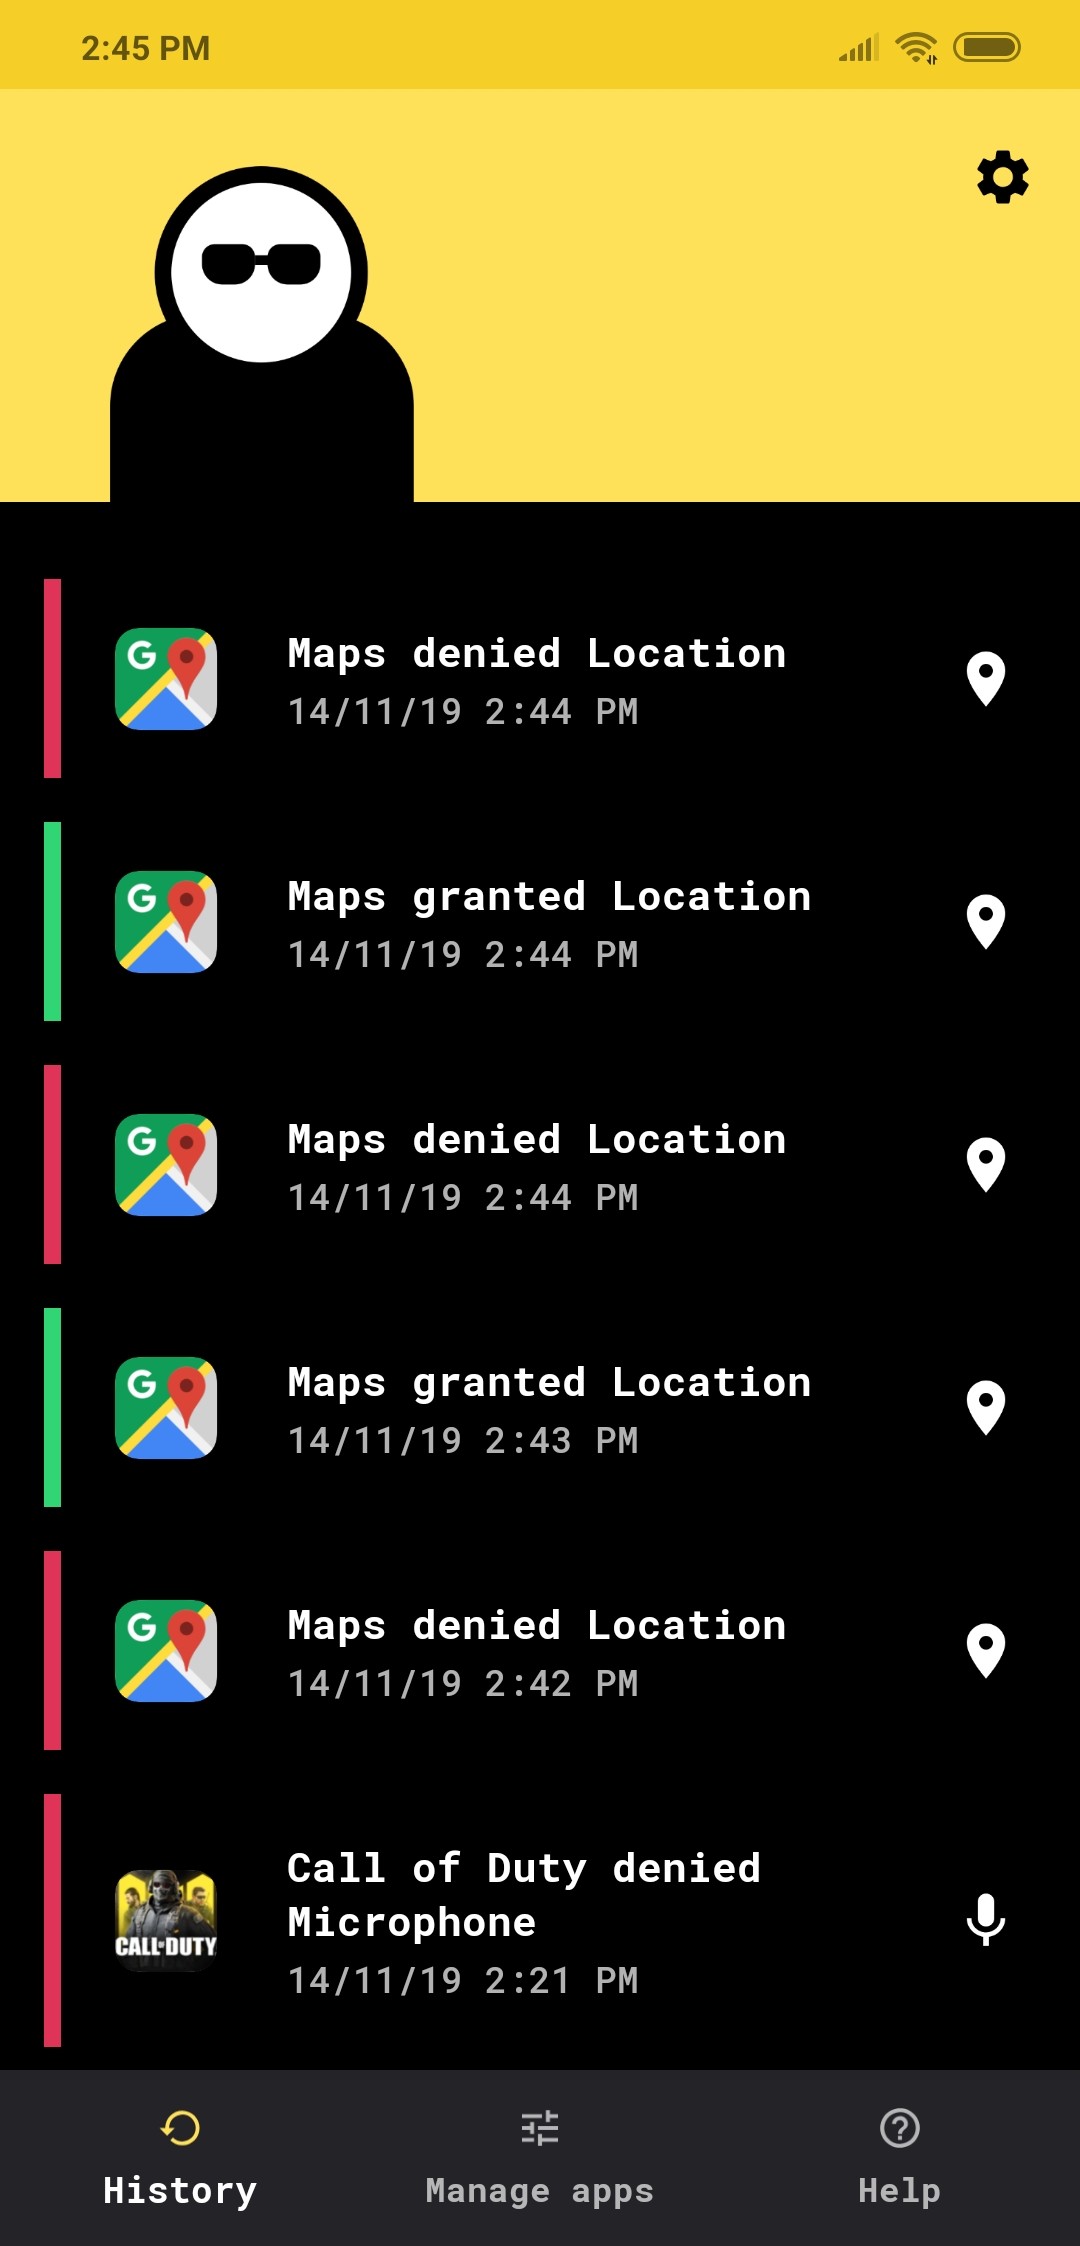
How to limit location access on older Android devices (Android 7.0 or higher)
There’s an app named Bouncer on the Play Store which emulates Android 10’s Allow only while in use settings and with that, you can approve permissions for an app for only a short time. Bouncer will automatically toggle OFF those permissions later when you’re no longer using an app.
- Install Bouncer from the Google Play Store.
- After installation is done, click on Open.
- Set up Bouncer for the first time by following the instructions on the app.
- Enable Accessibility settings for Bouncer inside Settings.
- Bouncer will reset permissions for all apps, excluding System apps.
- Disable battery saver from closing Bouncer in the background.
- Allow Bouncer to autostart on certain devices.
- After the initial setup is done, open any app which will require additional permissions.
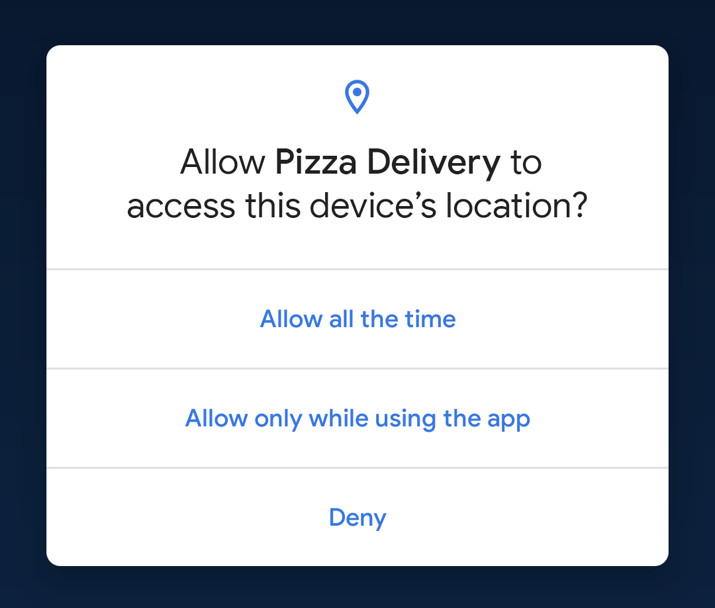
- If the app needs access to your location, you will be prompted to choose Allow or Deny.
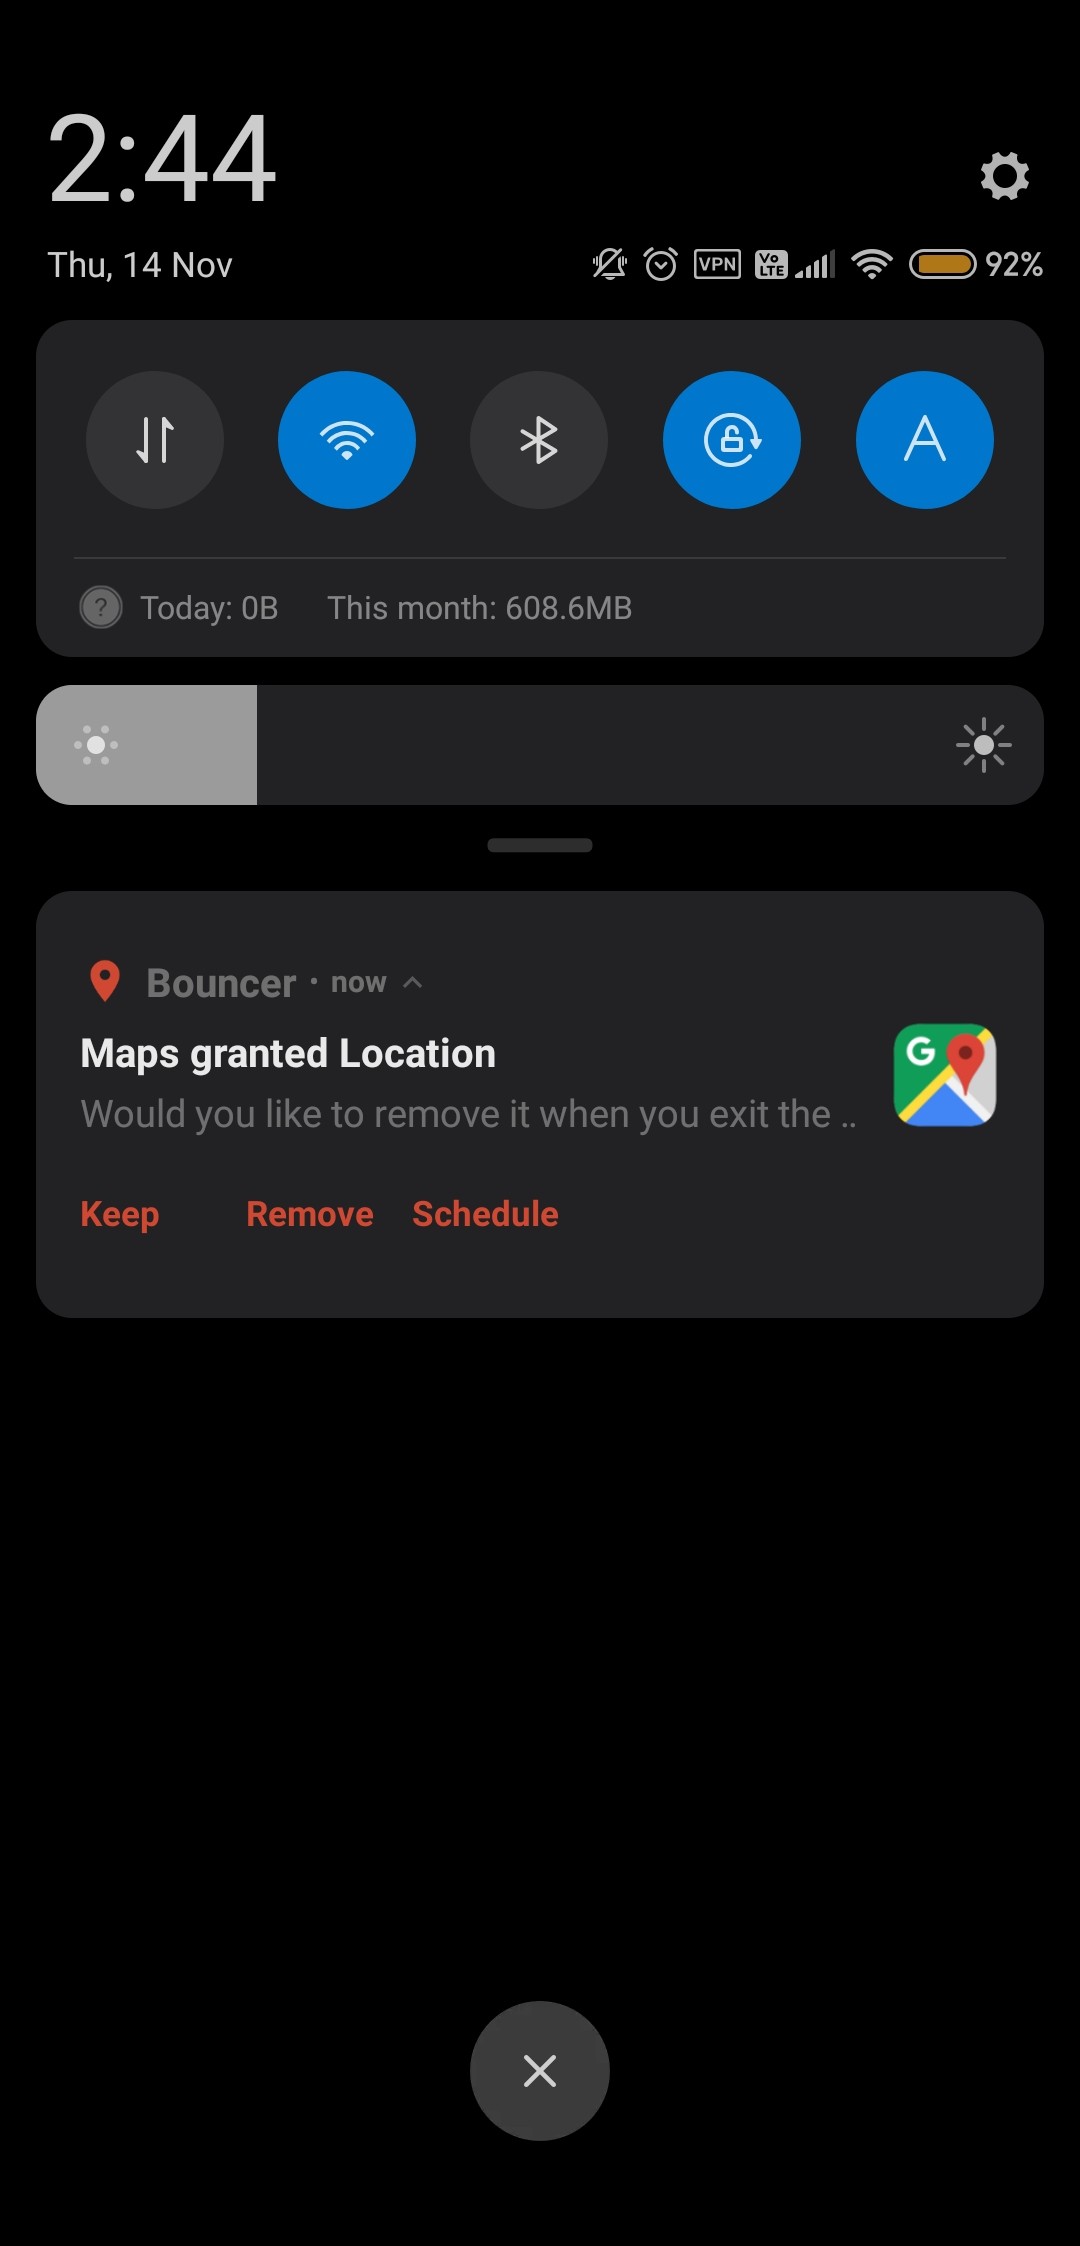
- Once you allow the permission, Bouncer will notify you with three options for the individual app:
- Remove – will remove permission when you go to the home screen.
- Keep – Keep the permission granted permanently.
- Schedule – Keep the permission granted for a certain duration, after which Bouncer will remove it.
- Choose your preferred permission.
- Repeat the steps for every single app.
You’re all set!
Replace live wallpaper with static wallpaper
Live wallpapers are great but can impact the battery life of your phone in a significant amount. Static wallpapers are not only battery friendly, but if you have an AMOLED display, setting a completely black background will save your battery life severalfold.
Allow in-built battery optimization wherever possible
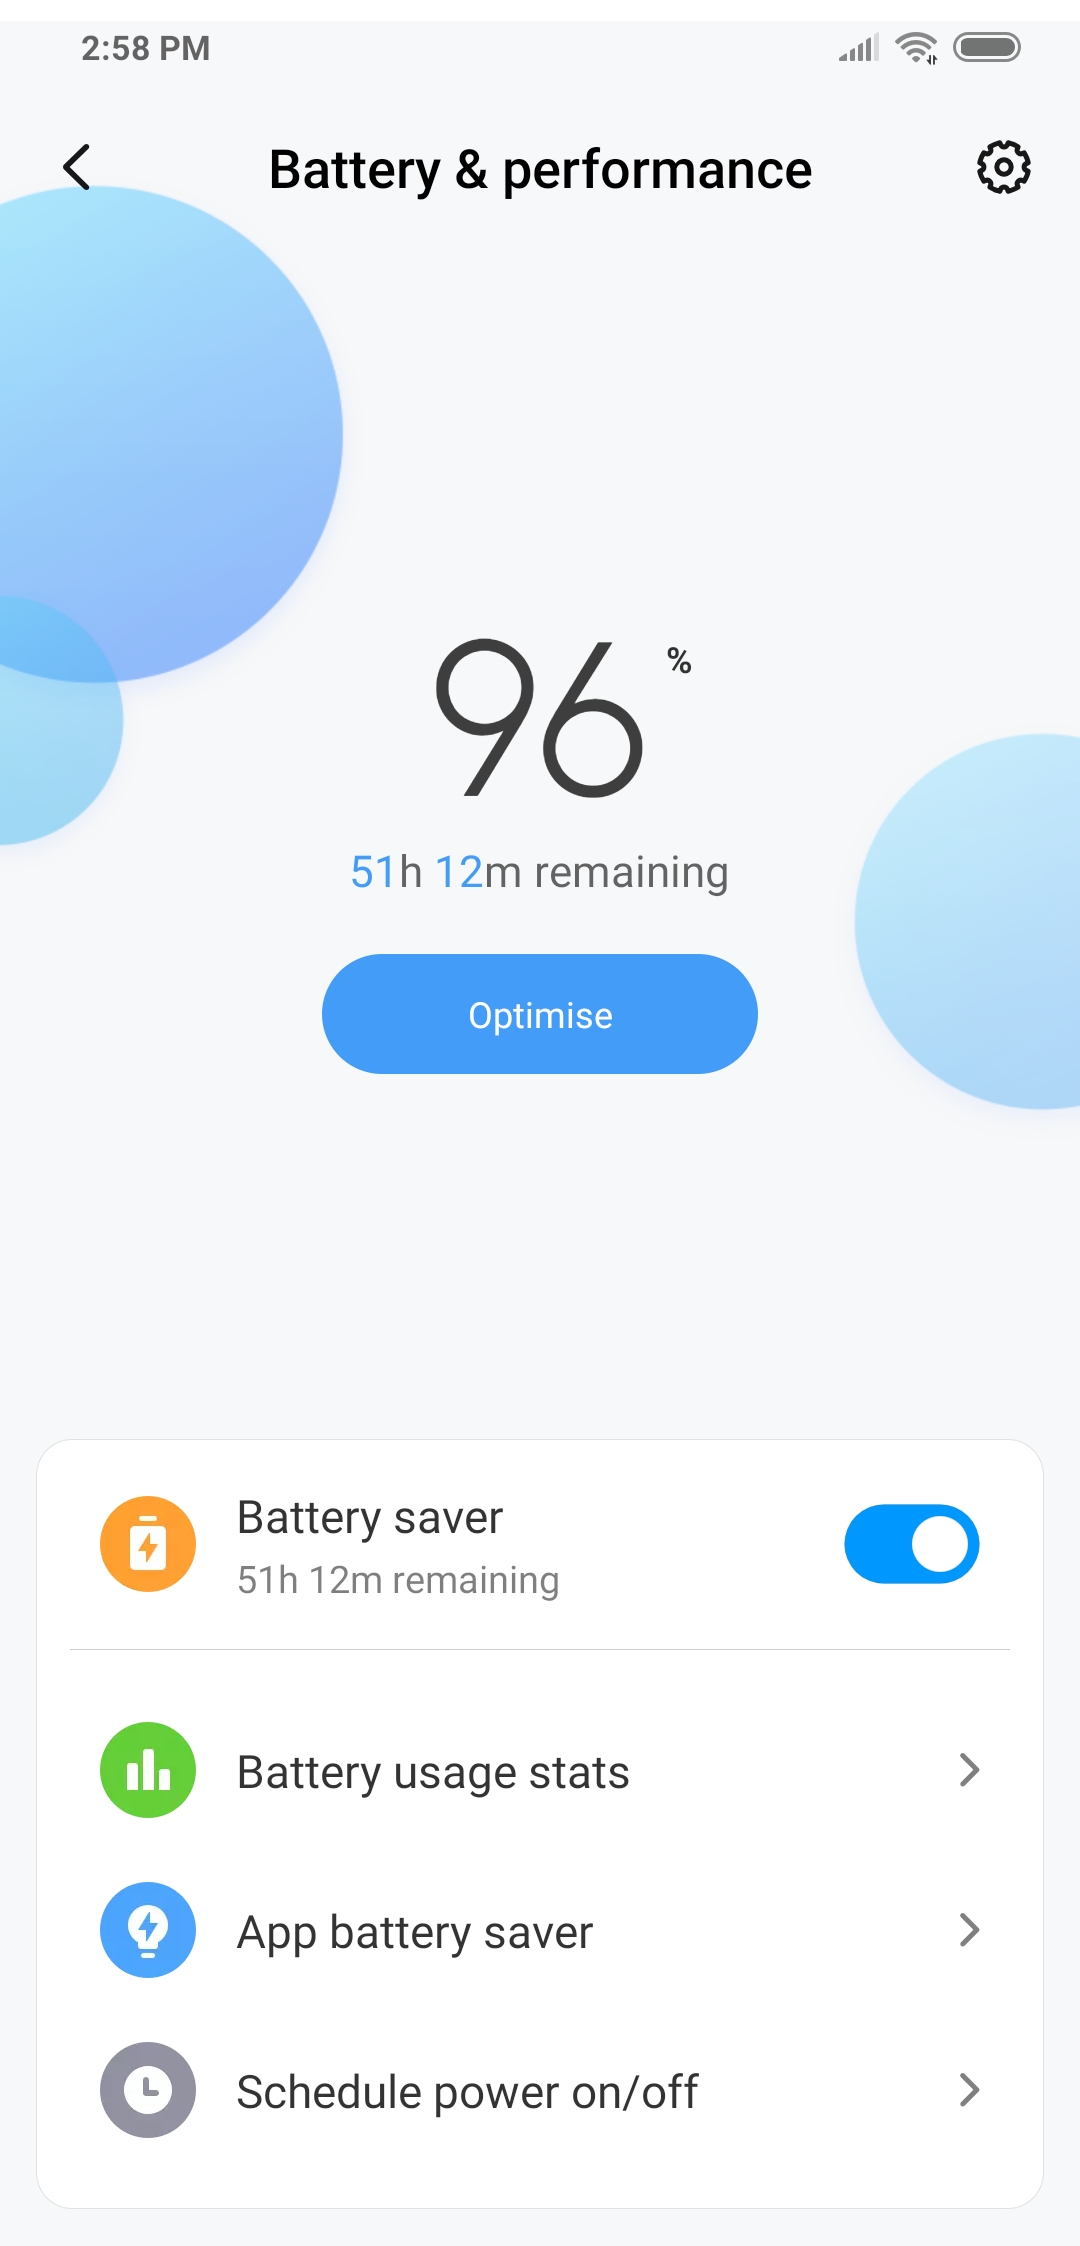
Several smartphone companies pack a battery saver mode on their devices to help improve battery life. This will substantially get you more power from your smartphone as the power saver mode ensures non-essential services and features are disabled when not in active use. Turning on Battery saver is different on different phones.
How to turn on Battery Saver mode
- Open Settings.
- Click on Battery (Battery and Performance on some).
- Switch on Battery saver.
Battery saver can also be switched on inside Android’s quick settings section.
You can also restrict battery usage for some apps and disable autostart on select apps to gain more juice.
Use Dark mode on System and compatible apps
Android Apps with dark mode can help you save battery life to a large extent. With Android 10, you can enable Dark mode by heading over to Settings > Display and switch ON Dark theme. On devices running Android 9 Pie, enable dark mode through Settings > Display > Advanced > Device Theme > Dark.
You can read more on Dark mode and supported apps here.
Download music or videos offline for longer period of use
It’s true that mobile data consumes more battery than WiFi but to bring down the battery consumption even further, it’s best to leave the internet switched off when not in use. However, most of the content that we consume is through streaming, meaning your phone has to stay connected to the internet for the time that you watch a video. To save some battery life, it’s suggested that you download content for offline use when on the go or away from a charging point. You can download content for offline use on YouTube, Netflix, Prime Video, Prime Music, Spotify and more.
Adjust your display settings
A vivid bright display might be good to look at, but in case you don’t know your screen is what consumes the most part of your battery. In order to minimize battery consumption through your phone’s screen, you need to
- Turn Adaptive brightness OFF: Adaptive or Auto brightness makes adjustments to the display brightness by detecting the light intensity around you. However, it drains battery significantly. Turn this off by heading over to Settings > Display > Adaptive (or auto) brightness and switching it OFF.
- Set a short Sleep timeout: Your phone screen is awake for a short period of time before it goes to sleep. Keep your display sleep timeout to a very minimum (15 seconds) by going to Settings > Display > Advanced > Sleep.
- Reduce Screen resolution: Some high-end smartphones come with Quad HD screen resolutions and sometimes OEMs allow the device to run at a lower resolution to save battery. Keep the resolution of the screen at 720p for best results.
- Limit refresh rate: Smartphones lately have started popping up with high refresh rates of 90Hz (OnePlus 7 Pro, OnePlus 7T and Pixel 4) and 120Hz (Asus ROG II and Razer phone 2). While high refresh rates make your screen look super smooth in transition, they drain a whole lot of battery. To save battery, it’s advisable to set the default refresh rate to 60Hz.
Turn Radio OFF whenever possible
Turn off radio features like NFC, Bluetooth, Mobile Internet, and Wi-Fi when not necessary. Use individual tiles to turn them ON/OFF when needed. Prefer WiFI over mobile networks and when WiFi is active, switch Mobile Internet off. Turn off WiFi and Bluetooth scanning as well.

Restrict Data for certain apps
Some apps consume data in the background but you can restrict the usage between WiFi and Mobile data. This way, you can enable the app to access data when at home and disable if you step out (when using mobile data).

To restrict data usage, do this:
- Go to Settings on your phone.
- Tap Apps.
- Locate the app you want to restrict data of. Tap on the App’s name to enter its ‘App Info’ page.
- Tap Restrict data usage.
- Select Mobile data and/or Wi-Fi options as per your needs.
- Tap OK.
Uninstall unnecessary apps
It doesn’t hurt to do a routine check on the apps that you have on your phone and if you really need them. Go through the apps in your app drawer and uninstall those which you no longer need.
Completely disable an app or service in background
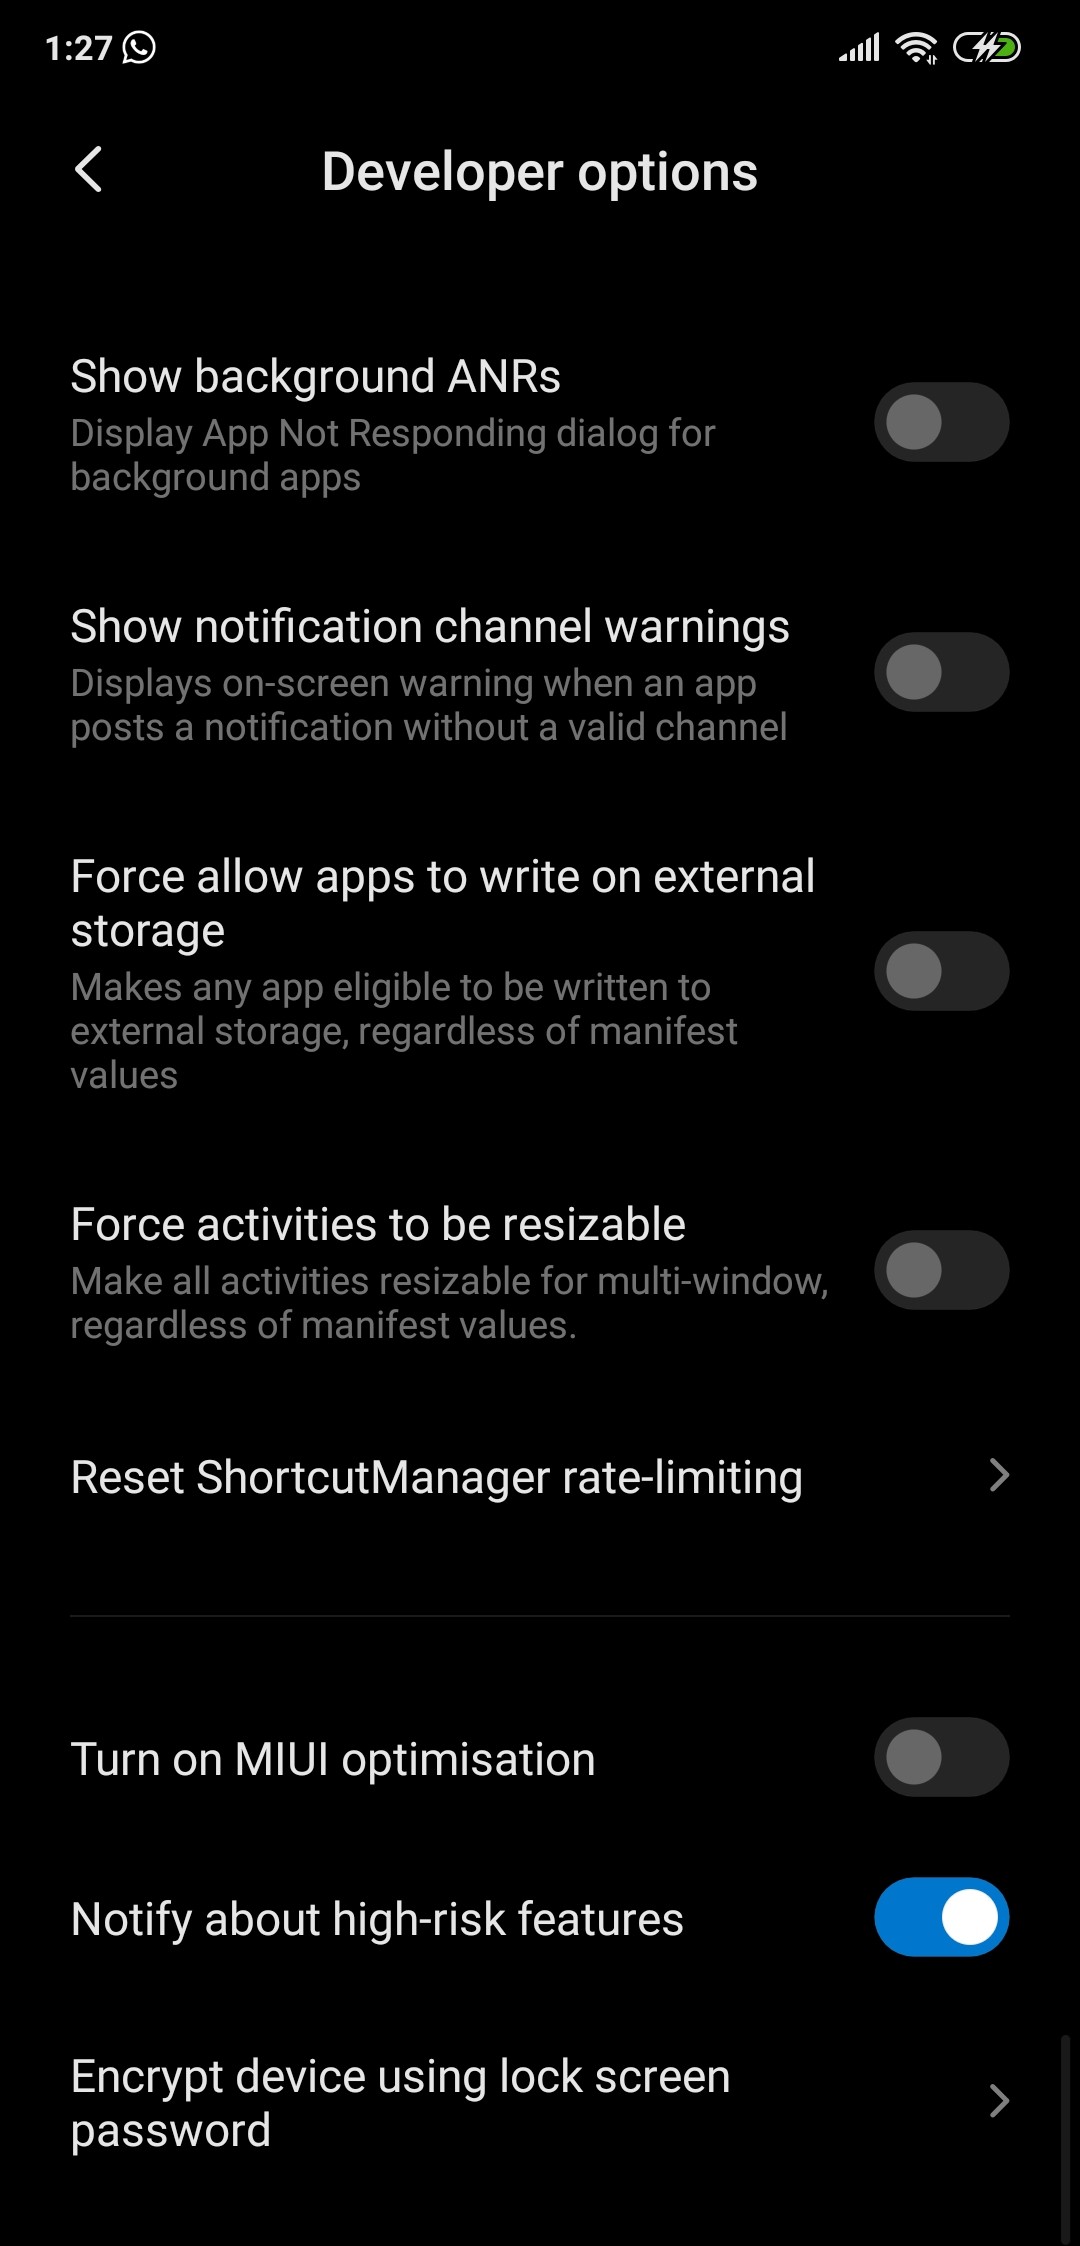
Well, if uninstalling an app isn’t a convenient option for you, then you can consider completely disabling the app or all the apps from running in background so that there is no battery drain caused by those apps.
No matter how much of a battery drainer an app is, if you have disabled it in background, it simply can’t cause any battery drain until you open it. Using the developer options menu on the page above, you can disable background activity for all the apps, thus greatly improving the battery life.
Let us know which trick helped you the most? Or if there is any tip that you want us to include here, do give us a shout in the comments section below.