Learn how to get the Gearmelt Confectionary Pack in Crimson Desert by finding Drywind Valley’s abandoned confectionery, solving its machinery puzzle, and unlocking steady healing snacks early.
The Gearmelt Confectionery Pack is a backpack you unlock by clearing and repairing the abandoned Gearmelt Confectionery in Drywind Valley — once equipped it passively churns out healing snacks, giving you a near-endless early-game food supply.
It is one of the most useful early gadgets in Crimson Desert precisely because it keeps working while you do other things. Wear it and a bar slowly fills on the pack until a cacao snack drops straight into your inventory, and those snacks double as healing items and as gifts for building NPC trust. The catch is that getting it means working through a multi-step machinery puzzle buried under the confectionery, so it pays to know the full sequence before you drop in.
What the Gearmelt Confectionary Pack is
The pack is a backpack-slot gadget that generates food on its own. After you equip it, it fills a progress bar over time and then deposits a snack into your inventory, over and over, with no farming or buying needed. Players also call it the “infinite food” or “chocolate backpack” because of how reliably it tops up your consumables.
Importantly, this is a free completion reward, not a shop item. There is no Sheckle, silver, or premium-currency price documented anywhere for it — you earn it by taking over and repairing the confectionery itself. If you are hunting for a vendor that sells it, you will not find one; the only “cost” is clearing the camp and solving the puzzle inside.
Where to find the Gearmelt Confectionery
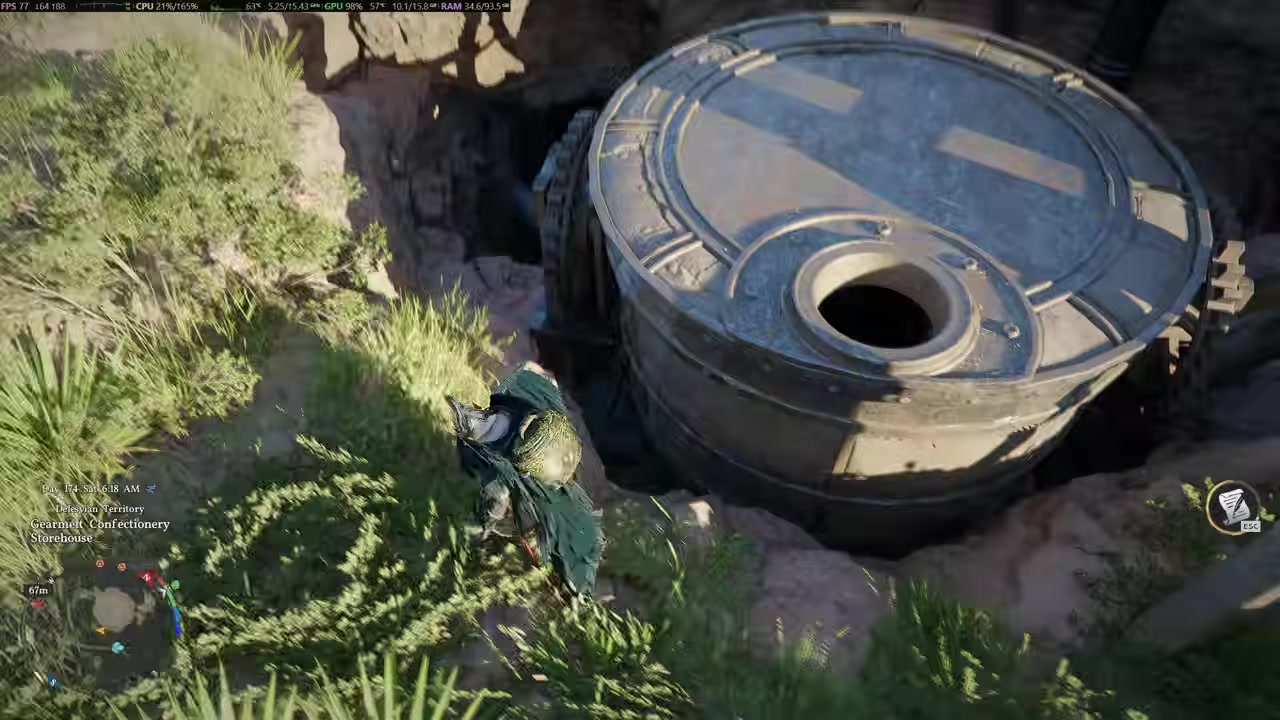
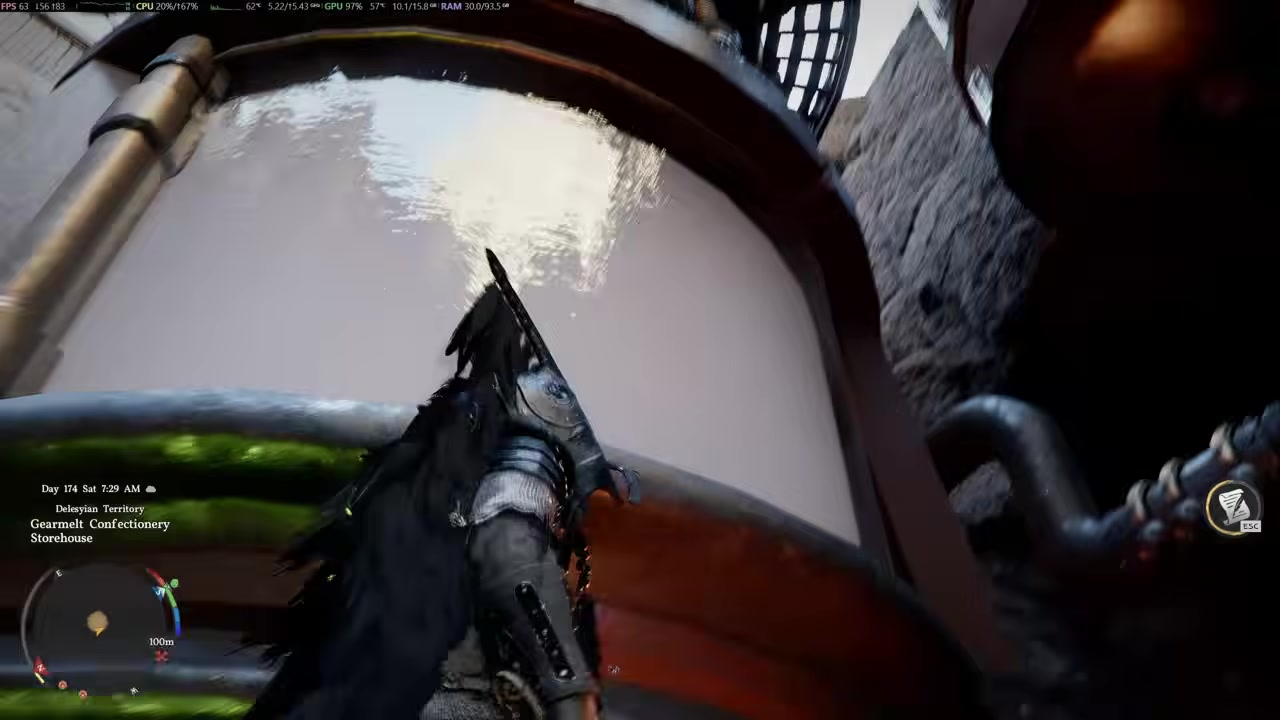
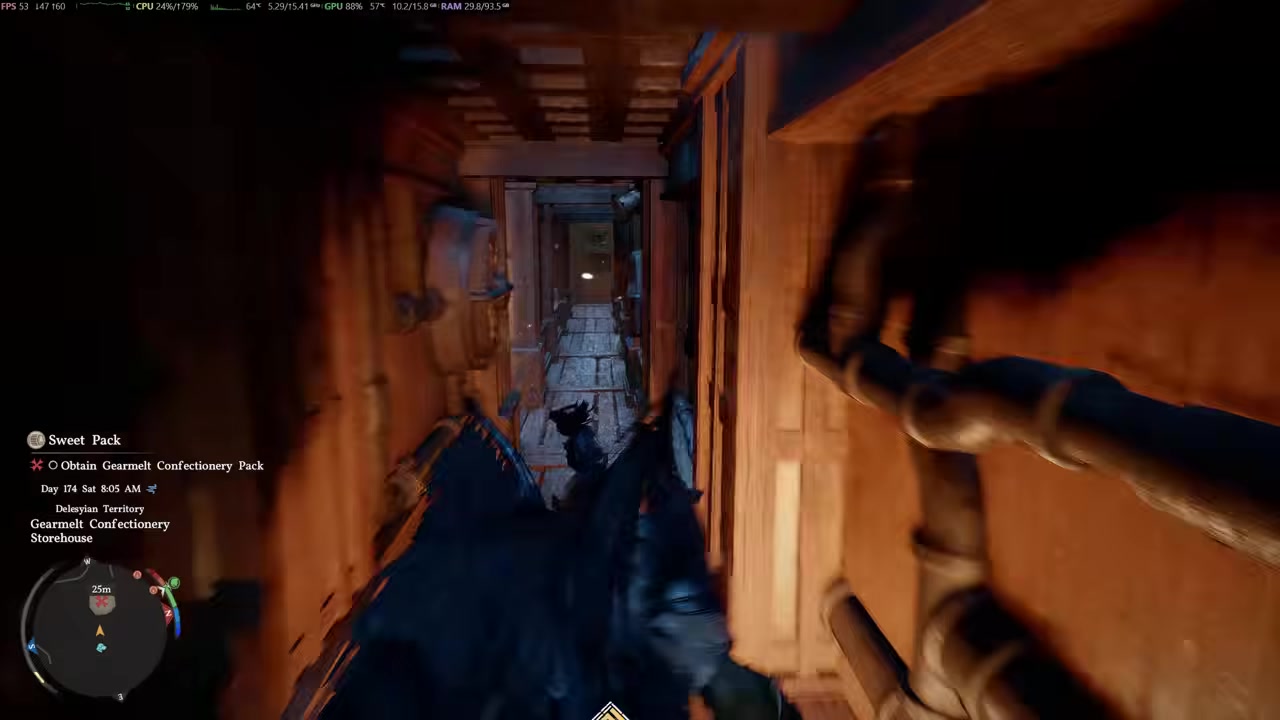
The confectionery is shown sitting in Drywind Valley, and that is the location to head for since it is the demonstrated, on-screen source. You will recognize the site by the cacao trees scattered around it and, more tellingly, by the machinery sticking up out of the ground near those trees — that hardware is the entrance to the underground puzzle.
That said, the region name is not fully settled. Written community posts variously place the same confectionery in Delesyia, or describe it as being north of Gorthak and slightly northeast of Demeniss. Treat Drywind Valley as your primary heading and the others as cross-checks; no exact map coordinate has been published, so navigate by the cacao-farm landmark rather than a pin. Before you can do anything with the machinery, you also have to clear out the enemies occupying the camp to free it.
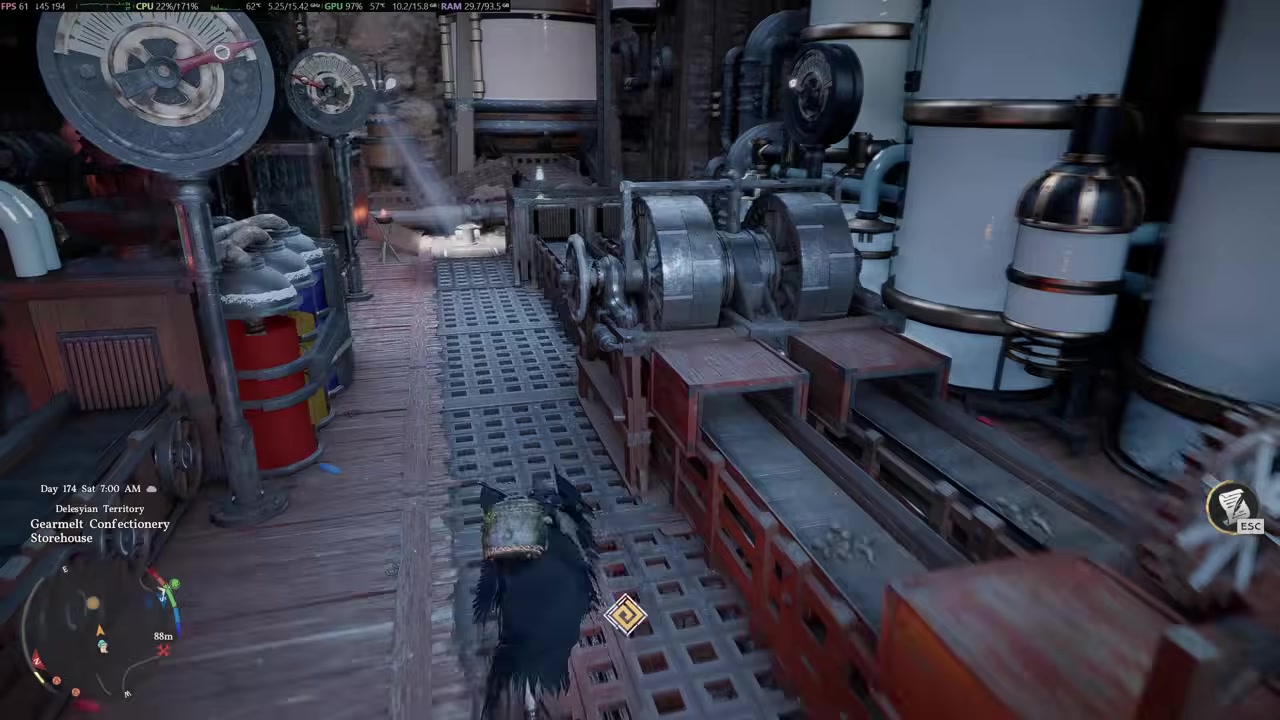
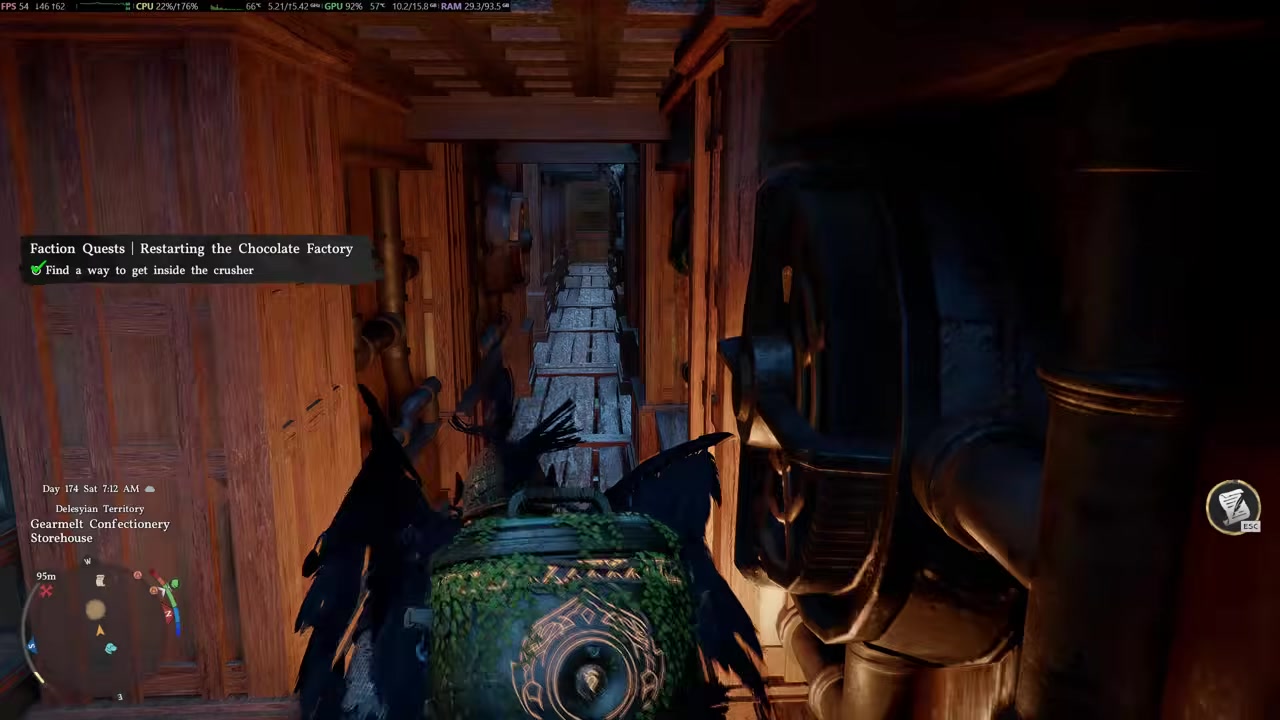
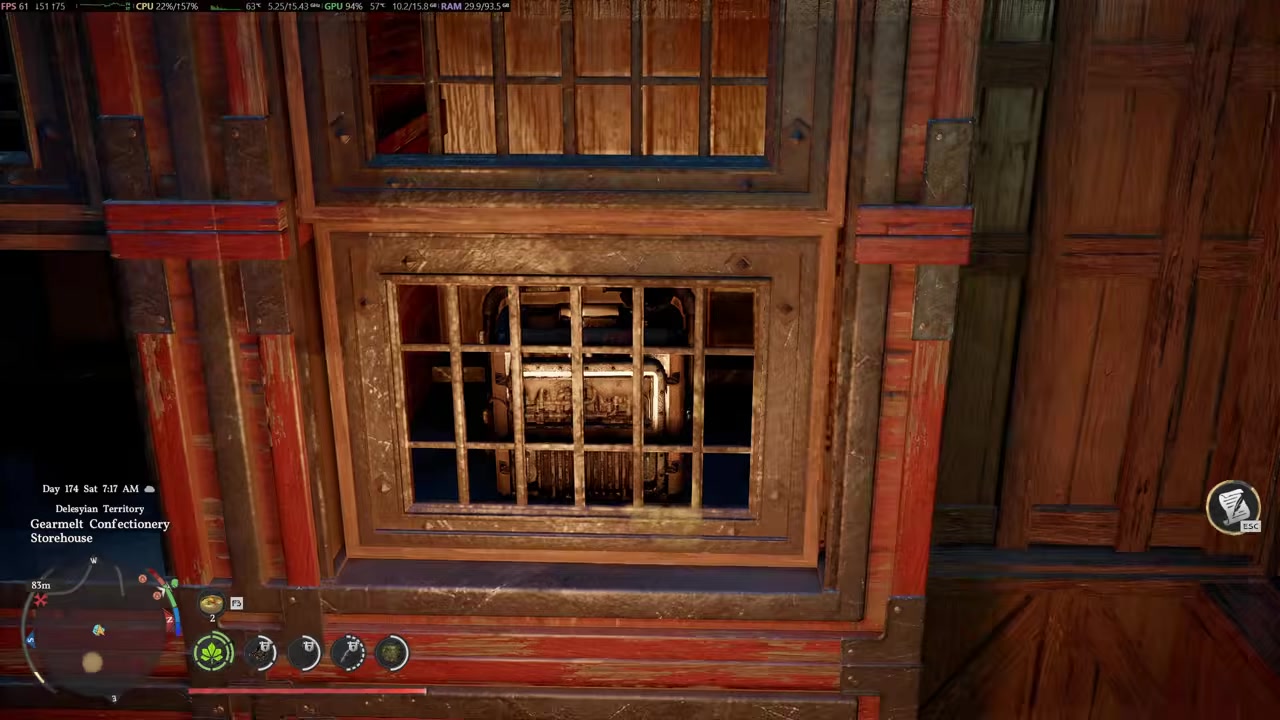
How to solve the cavern machinery puzzle in Crimson Desert
STEP 1/12
Drop in and follow the spotlight
Drop into the underground chamber and look for the spotlight shining on whichever machine you need to use next.
STEP 2/12
Crank the first handle
Rotate the first handle to the right until the crank in the middle drops down, then step in and turn that center crank as well to lock it into place.
STEP 3/12
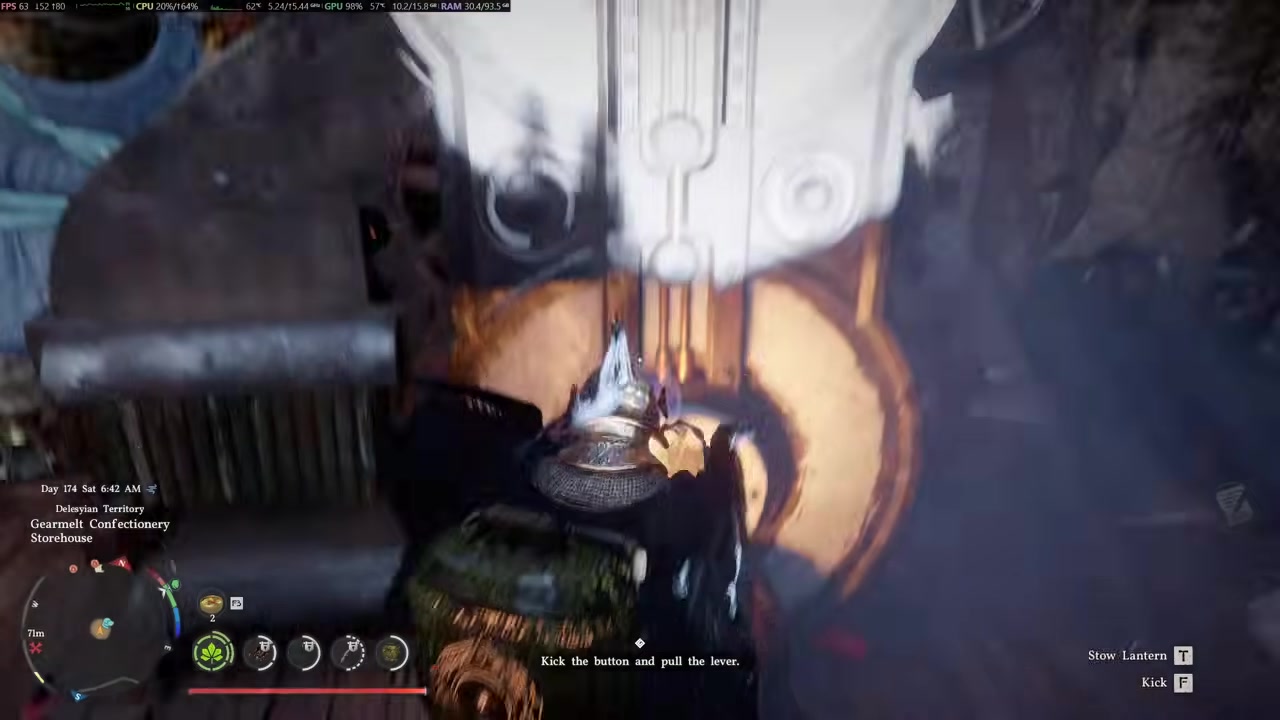
Kick the floor button and ride the handle
Aim at the button on the floor and pressure-kick it to drop a handle, then grab on and ride it down to trigger the next stage.
STEP 4/12
Turn the corner crank
Round the corner to the next lit crank and keep turning it to the right until it stops.
STEP 5/12
Jump the floor button to open a hatch
Jump up and down on the floor button until the handle pops all the way up and flips round, then grab and turn it to open a hatch in the floor.
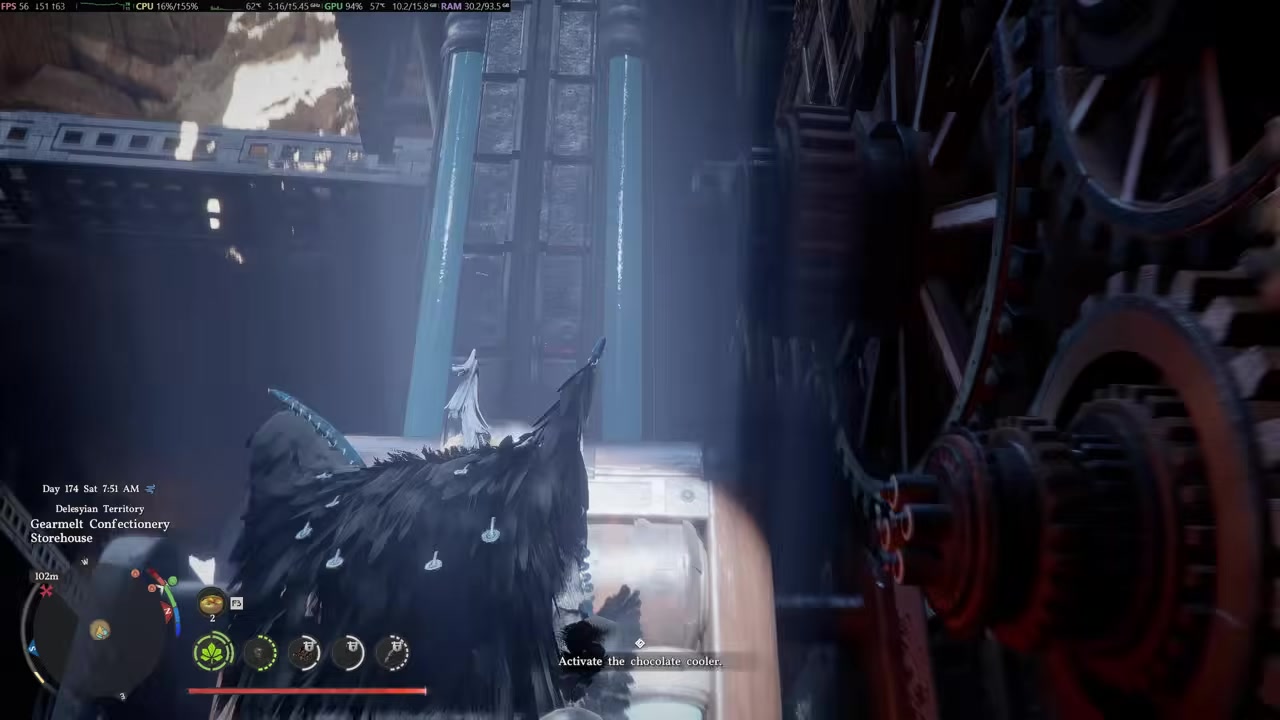
STEP 6/12
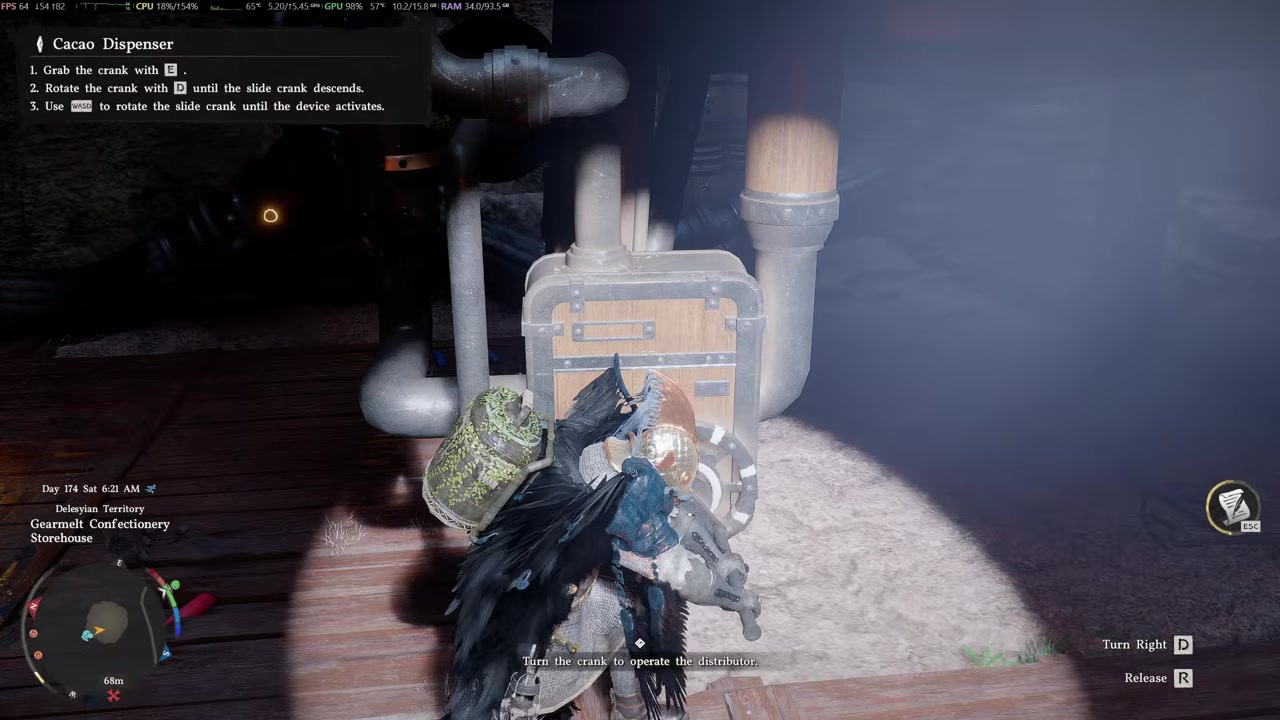
Drop down and grab the lubricant sprayer
Drop into the corridor, read the note on the desk, and pick up the lubricant sprayer (you can also craft one at the blacksmith).
STEP 7/12
Spray the broken machine
Take the sprayer halfway back down the corridor, equip it from the weapon wheel, and spray the machinery until it starts turning and reports as repaired.
STEP 8/12
Climb up high and turn the top handle
Head back out of the hatch and climb the stack of ladders all the way to the top, then turn the handle waiting there.
STEP 9/12
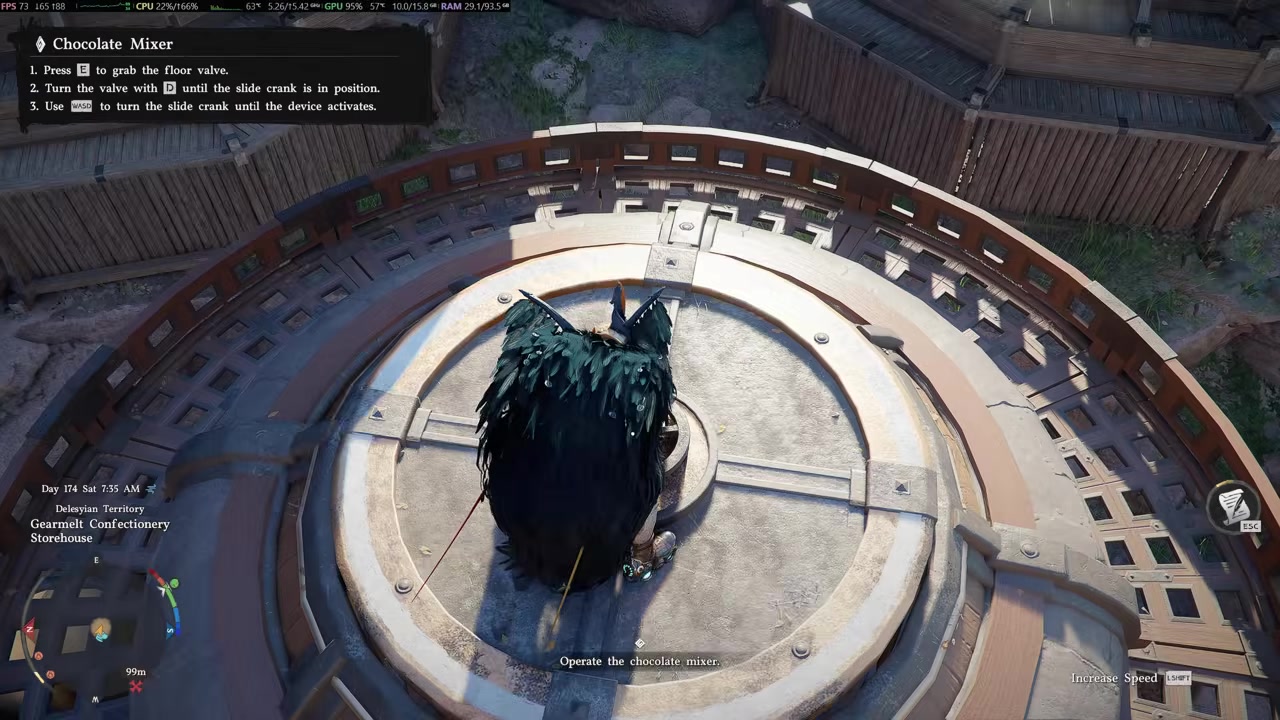
Turn the wheel clockwise for the mixer
Drop down to the next wheel and push it clockwise until it locks, activating the chocolate mixer.
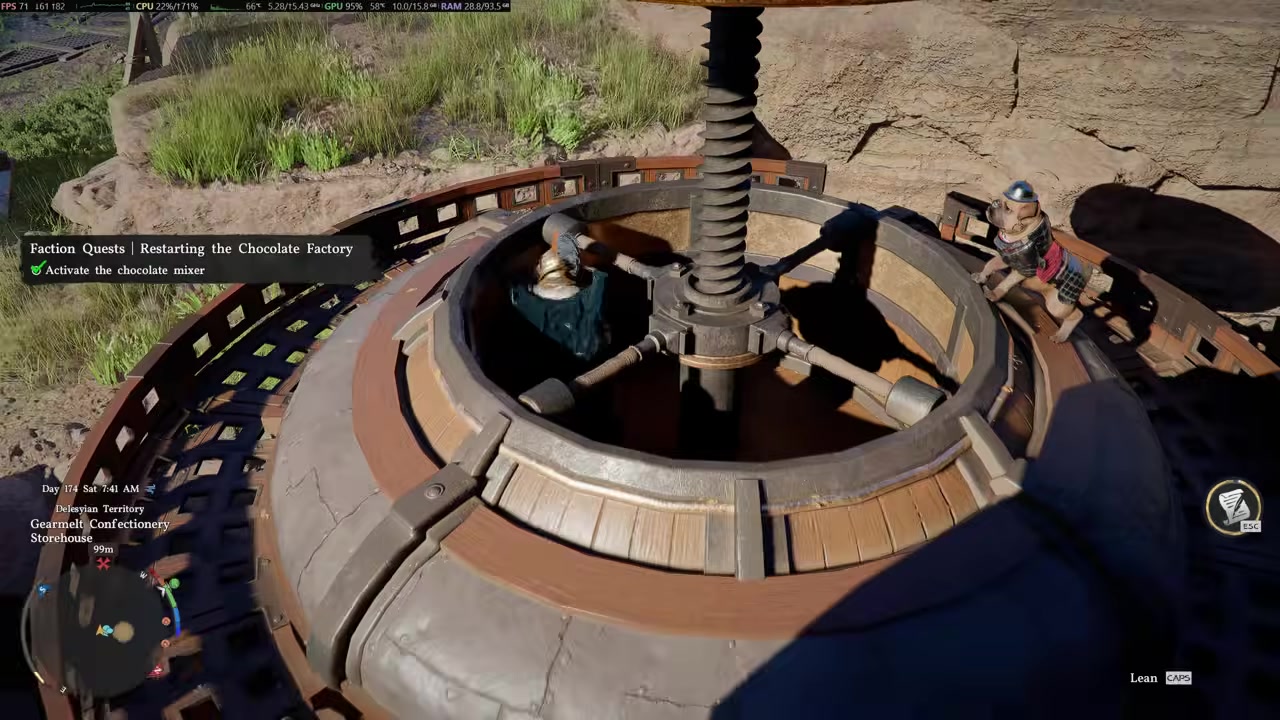
STEP 10/12
Pump the handle until the lever breaks
Return to the pump handle right by the hatch and pump it until the lever above you snaps off and drops down.
STEP 11/12
Pierce and shake the broken lever
Climb up and pierce — not stab — the spot slightly over where the handle broke, then shake it (Shift on PC) to drop it into place.
STEP 12/12
Claim the Confectionary Pack
Drop back into the hole, run down the corridor, and open the newly revealed hatch holding the Gearmelt Confectionary Pack.
Video help
Equipping and using the snack pack
Once the pack is yours, open your equipment / weapon wheel and equip it onto your back like any other gear. There is one reported gotcha that trips people up: your bag slot has to be empty for it to go on. If the pack refuses to equip, clear whatever is occupying that slot first and try again.
With it worn, it simply works in the background — a bar on the pack fills, and when it tops out a snack appears in your inventory. You select and eat snacks from the wheel as you go. If you want to mass-produce them rather than wait, you can send greymanes out on a snack-gathering run. Early figures put that haul at around 54 snacks per outing but requiring roughly 8 to 10 greymanes to pull off; treat those as single showcase numbers rather than confirmed values.
If the pack won’t equip, empty your bag slot first — it refuses to go on while that slot is occupied.
Why the pack is worth using
| Food source | Healing | How you get it |
|---|---|---|
| Pack snacks (cacao snacks) | ~120 HP, flat (reported) | Passive output from the equipped pack |
| Chocolate | ~50% of health (reported) | Crafted from cacao + milk |
The core value is sustain. You get a steady, free source of food and healing for both exploration and combat without ever stopping to farm ingredients or buy consumables — which is exactly why it earns its “near-endless food” reputation in the early game. The snacks it makes are cacao snacks, and they pull double duty: beyond healing, you can hand them to NPCs as gifts to raise trust levels (players note this works well with dyers), right alongside money pouches and other offerings.
It is worth weighing the snacks against chocolate, the other food item tied to this area. Chocolate reportedly restores a much larger chunk of your health, but it is harder to come by because you have to craft it from cacao and milk. The pack’s snacks are weaker per bite but effectively free and automatic. All of the health figures below come from a single showcase run and have not been independently confirmed, so treat them as ballpark rather than exact.
Other loot around the confectionery site worth grabbing
Since you have already cleared the camp, the surrounding area is worth a sweep before you leave. The freed site doubles as a cacao farm — those trees feed chocolate crafting, and you can send greymanes out to harvest cacao for you on missions. Watch the mini-map for points of interest while you are here.
Nearby there is a hole in the ground leading to a wall you can break with a focused force palm. Smashing through reveals a treasure chest, a pile of grapes (good for eating, cooking, and harvesting grape seeds to replant), and the Liberator’s leather boots — level-one abyss gear with a food effect that, maxed out, reportedly reaches around 30 attack and 18 defense. Just outside the farm, a hidden cave behind the waterfall holds another chest containing a helmet for Damian with its own abyss gear and decent maxed stats.
At the bottom of that waterfall sits an abyss puzzle that catches people out. The trick is the force field: pull the power cell out of its socket to drop the field, reseat the loose cell where it belongs, then climb up and rotate the dials so power flows from the center out to every edge tile until they all light up. Solving it raises the structure and unlocks the Ether Fragment abyss fast-travel point plus an abyss artifact. Crafting the chocolate itself is its own separate process — worth a look as a follow-up once you have the pack churning out snacks.
Frequently Asked Questions
Where exactly is the Gearmelt Confectionery located?
It is shown in Drywind Valley, which is your best heading. Written posts instead place it in Delesyia, or describe it as north of Gorthak and slightly northeast of Demeniss, so the region name is not fully settled. No exact map coordinate has been published — look for the cacao trees and the machinery poking out of the ground.
How much does the pack cost, and do you buy it?
You do not buy it. There is no documented currency price of any kind — it is a free reward for taking over and repairing the confectionery. Anyone looking for a vendor selling it is on the wrong track.
Why can’t I equip the pack?
Almost always because your bag slot is occupied. The pack only goes on when that slot is empty, so clear it first and the pack should equip from your equipment wheel.
Is the Gearmelt Confectionary Pack connected to Grow a Garden or Roblox?
No reliable source confirms any such link. Some posts loosely tie the pack to a “Grow a Garden” theme, but there is no verified Roblox crossover, code, or login reward that grants it. The only confirmed way to get it is in-game, by clearing and repairing the confectionery in Crimson Desert.
How much health do the snacks restore?
A single showcase run claims roughly 120 health per snack, but no reliable text source confirms that exact figure. Treat it as a reported number rather than a settled stat.
More questions⤵
Can greymanes produce the snacks for me?
Yes — you can send greymanes out to gather snacks in bulk after you have the pack. Early figures suggest around 54 snacks per run but needing roughly 8 to 10 greymanes and some time, and those numbers are unconfirmed beyond a single demonstration.