Edits that show a special penchant for manipulation of time or reality never go out of style. But, a masterpiece springs from the union of a maestro’s adeptness in using the instrument at his disposal.
And for TikTok creators, it is a competent editing app like CapCut that paves the shortcut to success for them in creating impressive videos.
So, it is time to step up your game and join the world of TikTok trends with your own Velocity video and we gathered here everything you need to know to make it work.
- What is the velocity trend on TikTok?
- How to do the velocity trend using CapCut in 5 steps
- Step 1: Optimizing the original video
- Step 2: Adding music to the video
- Step 3: Match cut the sound to set the beat to the video
- Step 4: Adding velocity speed curve to the video
- Step 5: Adding effects to the video
- Custom versus Preset Velocity Speed: How to choose?
What is the velocity trend on TikTok?
The Velocity trend on TikTok is the result of TikTokers finding creative ways to warp time with a blend of slow-mo and sped-up frames and embellishing them with stunning flash effects to produce a short video that makes the viewers feel giddy and maybe even a little trippy.
@ruth_prashant 🥵❤️#edit #trendingsong #foryoupage #loosingsupport🥺 #ruth_edit #goviral #alightmotion #velocityedit #newtrending #fypシ #capcut #hot #philippines
You can do it too if you know how to cut the frames, when to slow them down, when to gear it up a bit, sync it to the beat and how to dash the right amount of flash and contrast effects. And it can all be done in one place with the CapCut video editing app which is available on both Play Store and App Store for free download and use.
End of preface. We are starting the game now.
Related: How to Blur on CapCut: Step-by-Step Guide
How to do the velocity trend using CapCut in 5 steps
Velocity trend videos can be explained as a whole that is greater than the sum of its parts. You need to split videos, apply speed effects, attune them to the rhythm and then bring them all together. But to get create a wholesome impact, you need to learn how to make flawless parts and make them come together organically.
Step 1: Optimizing the original video
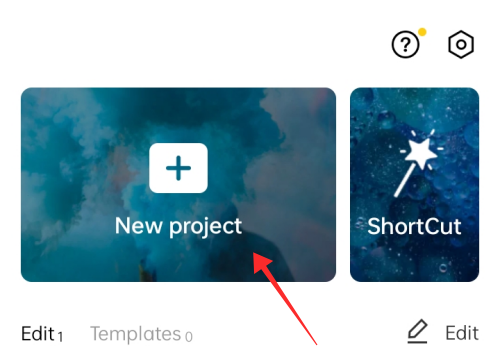
Launch CapCut on your device and tap New project to start a new edit.
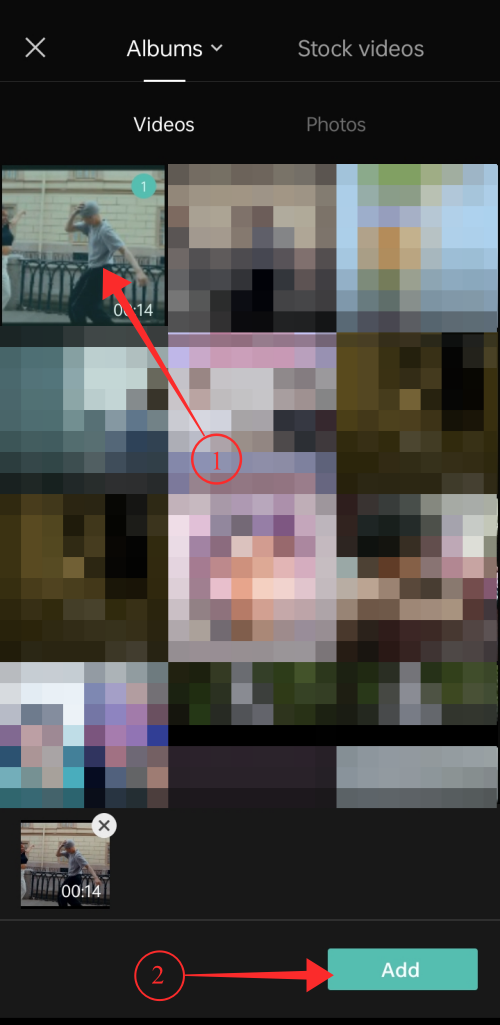
Select the video(s) you want to edit from the Albums or Stock videos and hit Add at the bottom right corner of the page.
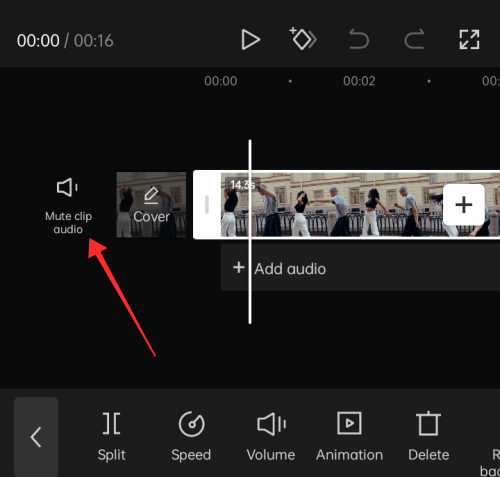
In the editor, tap Mute clip audio if you do not wish to keep the original sound in the video clip. You can add music during the next phase of editing even if you mute the original audio.
Now, drag the slider at the start of the video to the right on the timeline to trim unwanted frames from the beginning portion of the video.
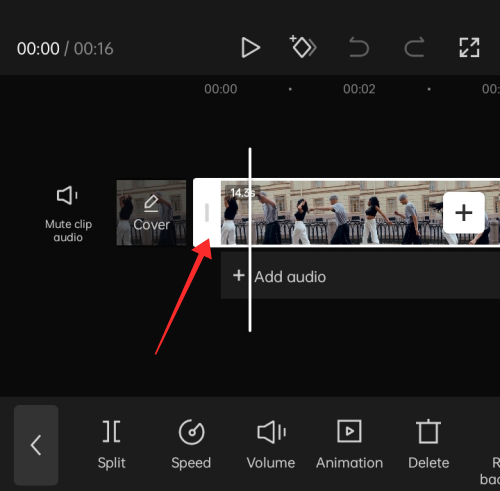
Similarly, drag the slider at the end of the video to the left to trim out unwanted portions from the ending of the video. You can even use the SPLIT tool to edit out portions anywhere in the video.
Now that you have prepped the video length, you can chop-chop to the audio-visual syncing process.
Step 2: Adding music to the video
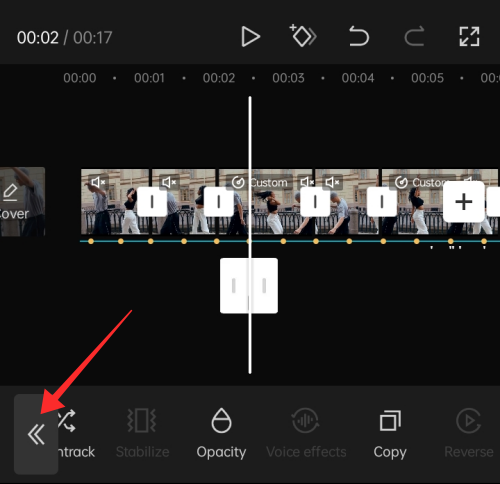
Tap the arrow button on the extreme left of the toolbar at the bottom to return to the main toolbar.

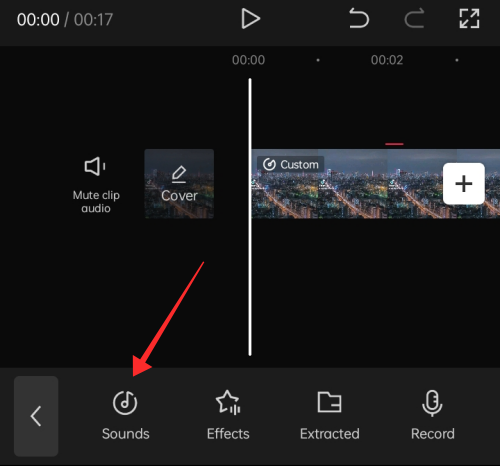
Tap Sounds on the tools bar.
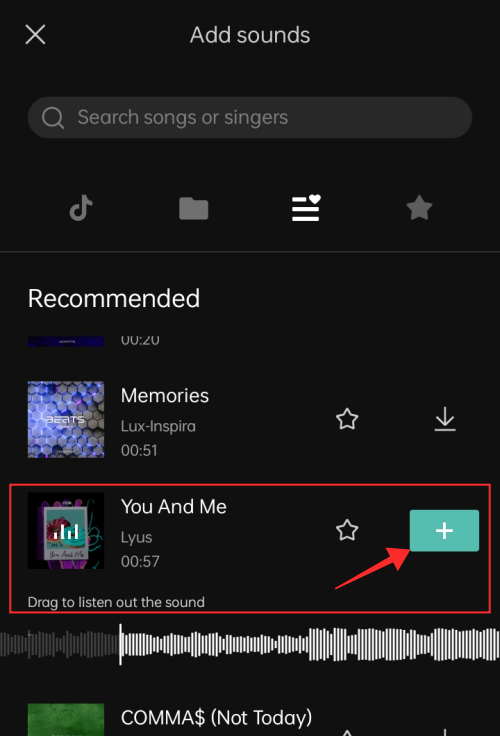
On the Add sounds page, you can either search for a song using the search feature or tap a genre title (eg: R & B, Promising, etc. featured at the top to view the categorized songs lists.
In addition, you will see the following tabs at the bottom half of the page– Sign in with TikTok to sync your favored sounds, Your sounds, Recommended, and Favorite sounds.
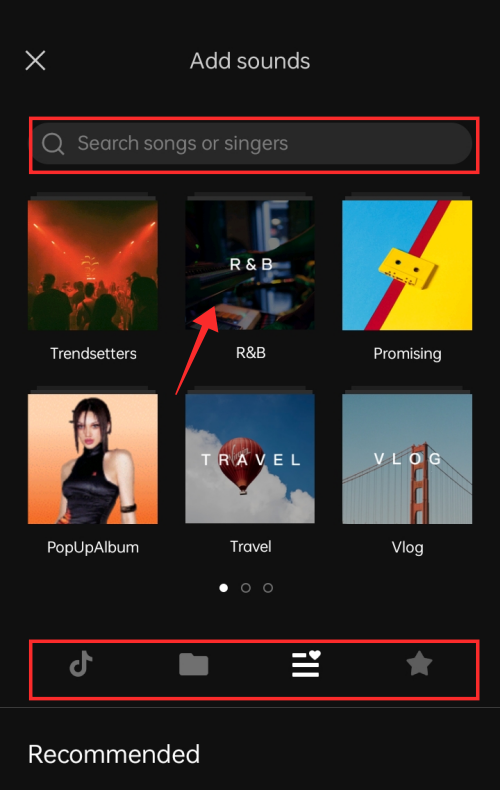
For demonstration, we shall go with Recommended. Tap a sound to select it and hit the “+” plus button to import it to your editor.
Step 3: Match cut the sound to set the beat to the video
On the editor, tap the timeline of the audio to view the audio edit tools.
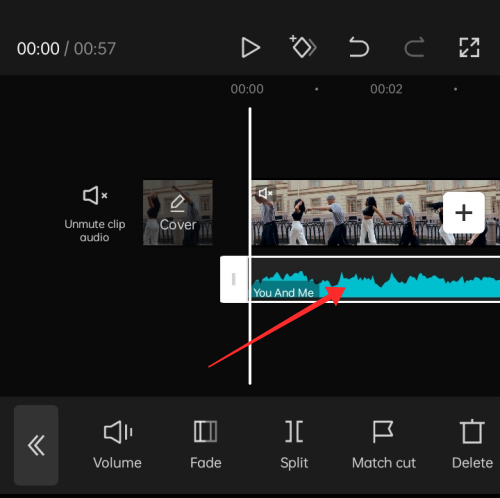
Seek the point that you want to crop out from the sound by bringing the white progress line to the point.

Drag the slider to the point to trim the sound.
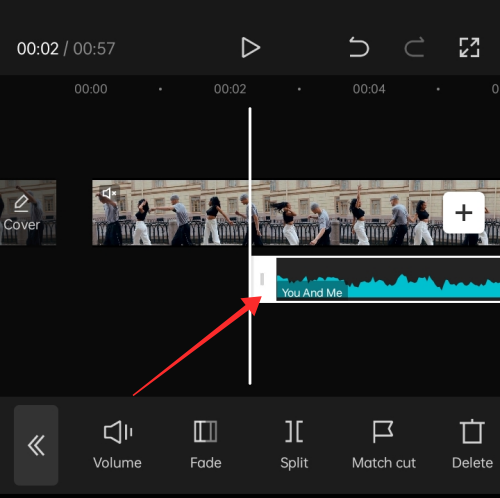
Now, long press and drag the audio slide on the audio timeline to align it with the video clip (to the beginning of the sound clip which was snipped) and hit Match cut on the tools bar at the bottom of the page.

If you want to add new beats manually, tap + Add beat. If you toggle on Auto-generate, the app will add beats according to the rhythm it has detected for the sound based on the 2 beat rhythm presets — Beat 1 and Beat 2 — already available in the app.
Beat 2 is recommended as it gives a more closely-arranged set of beat nodes than in Beat 1. This is helpful to add effects to the video later. Tap the tick symbol at the bottom of the panel to apply the edit.
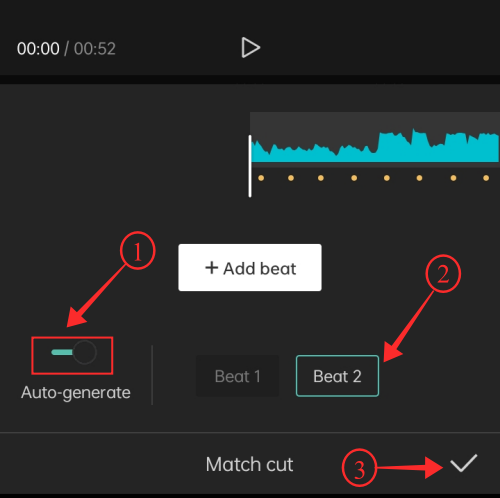
These beats show up on the main editor on the audio timeline as regularly paced yellow dots for you to sync your video to the beat.

To sync the video, you can use the split tool to segment the clip and trim out unwanted frames or even speed up a clip to sync to make it meet the pace of the music.
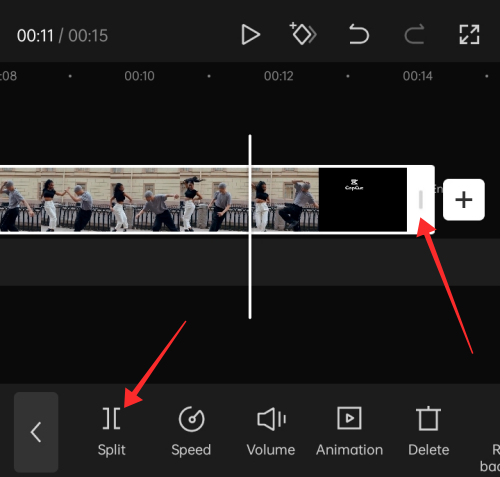
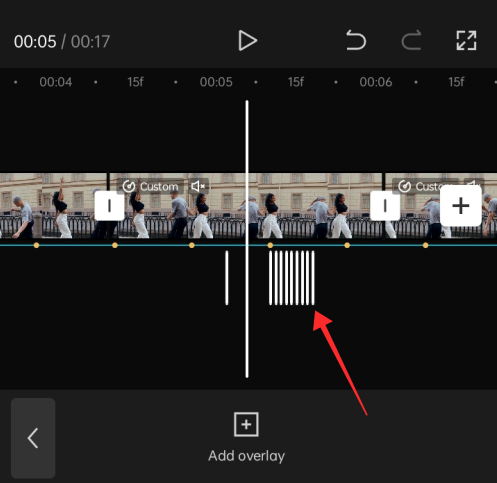
Split the video based on every other yellow dot indicated by the Match cut function. Bring the progress line to the yellow dot and hit Split on the tools bar at the bottom.
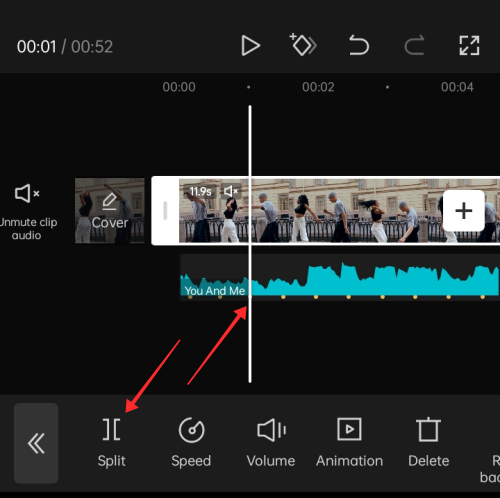
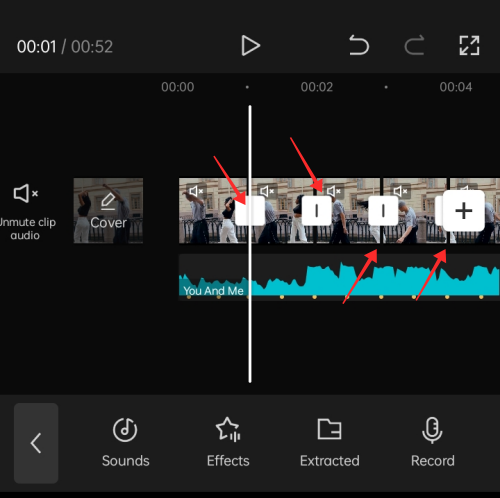
Repeat the process at every other yellow dot point to set a regular rhythm for the video as shown below.
Now, you are about to use the velocity curve on each of these clips.
Step 4: Adding velocity speed curve to the video
Tap a clip on the video timeline to select it and hit Speed on the toolbar at the bottom of the page.
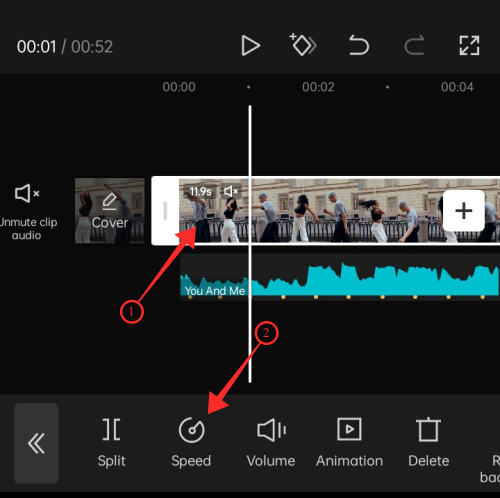
You will 2 options — Normal and Curve. Normal is the tool to apply uniform speed change (increase or decrease speed) as done traditionally, but you don’t want that today.
So, hit Curve to get the velocity speed change feature.

Under the Curve tools, you will see the following options — Custom, Montage, Hero, Bullet, Jump Cut, Flash In, and Flash Out.
You can choose any of the presets but they might mess with the rhythm you have set up for your video with the Match cut function and video trimming follow-up in the previous phase; hence it is recommended to go for Custom.

You will see a horizontal line with 5 nodes on it — these are beat nodes that you can manipulate to increase or decrease the speed in different zones in the same video clip.
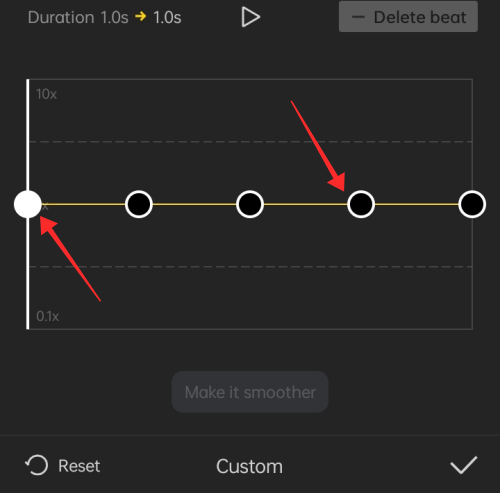
Drag a node to bring it up to increase the speed of the designated portion of the video and drag another to bring it down and slow down the speed of another portion of the same video clip.
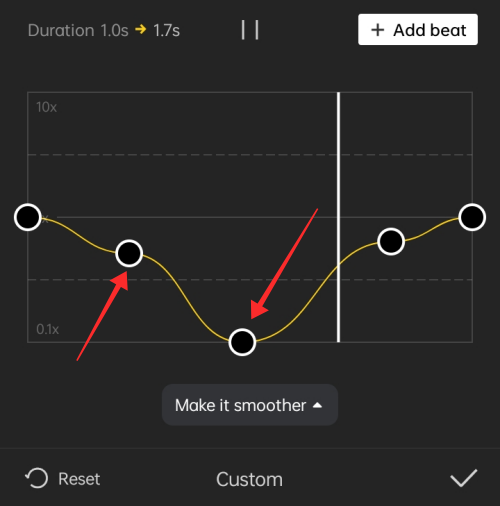
You can drag them up or down in any order as needed for the video concept, however, you cannot increase or decrease the speed of the points represented by the nodes at the beginning and end of the line.

You can even add or delete new beats to the clip. To add a new beat, go to any point within the 2 beats on the extreme ends of the line, and hit +Add beat at the top right corner of the pane.

To delete a beat, bring the progress slider to any beat (other than the ones at the beginning or end of the line) and hit Delete beat at the top right corner of the panel.

Tap the tick symbol at the bottom right corner to apply the custom velocity curve settings.

Repeat the process for all the other clips that need velocity effect.

Step 5: Adding effects to the video
Flash effect is one of the highlights of the videos in the Velocity trend and there are 3 ways to implement it.
- Using a stock effect
- Using a stock white video
- Adjusting video contrast
Method 1: Create a flash effect using a stock effect
In the editor, tap the arrow button on the extreme left of the toolbar at the bottom of the page to return to the main toolbar.
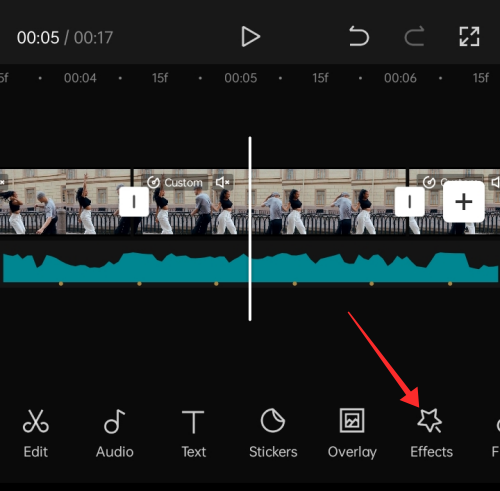
Bring the progress line to the point where you wish to add a flash effect and tap Effects on the toolbar at the bottom.
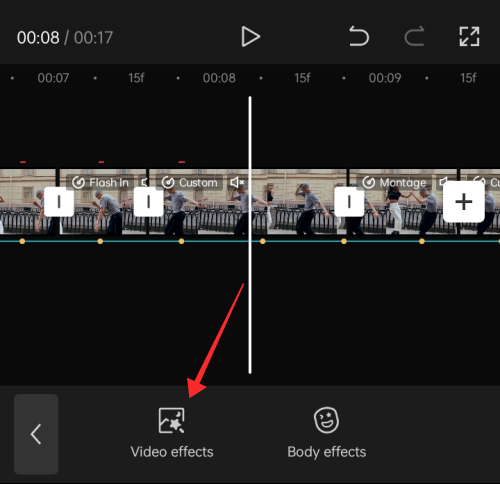
You will see 2 options — Video effects and Body effects. Tap Video effects.
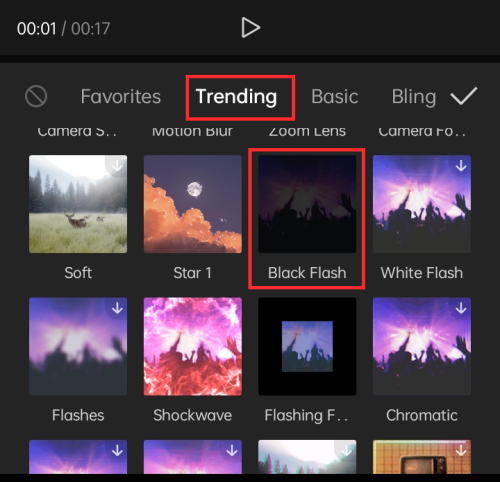
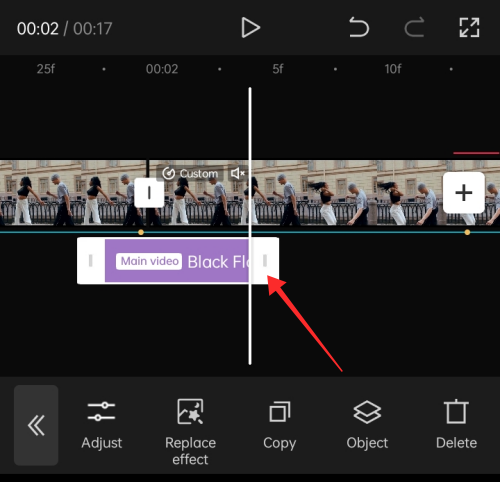
You will see a row of tabs titled Favorites, Trending, Basic, Bling, etc. Tap Trending. scroll down till you see an effect called Black Flash. Tap Black Flash.
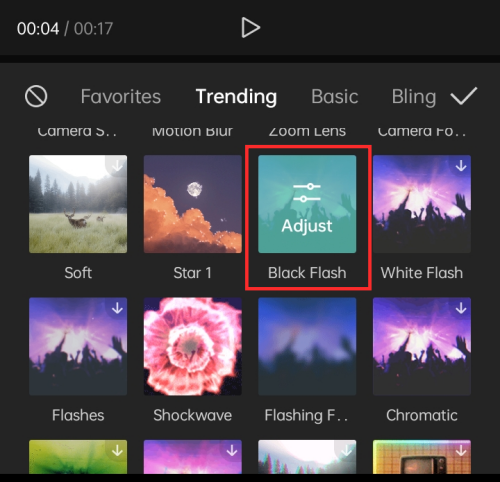
To adjust the speed of the Black Flash effect, tap the effect title again.
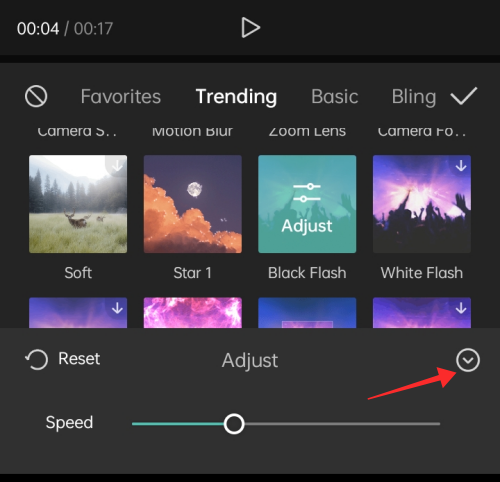
A popup with a slider to adjust the speed will show up at the bottom of the page. Drag the slider to the left or right to increase or decrease the speed of the effect.

The default speed is fast enough, but you can adjust the speed according to the requirements of the video. Tap the arrow down button at the top right corner of the popup to minimize it.
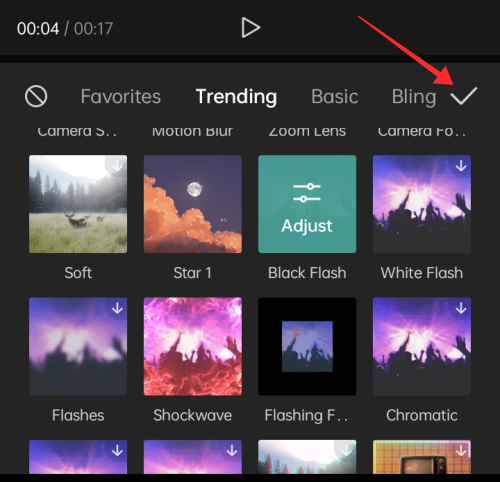
Tap the tick symbol at the top right corner of the Effects panel to apply the effect and return to the main editor.
On the effects timeline, drag the slider of the Black Flash effect to adjust its duration. Flash effect is best applied when kept to minimal duration (Eg: 0.1- 0.2 seconds of consecutive frames).
After adjusting the duration, tap Copy on the toolbar at the bottom to create a duplicate of the effect.

Another effect overlay will appear right next to the original effect overlay on the overlay timeline.
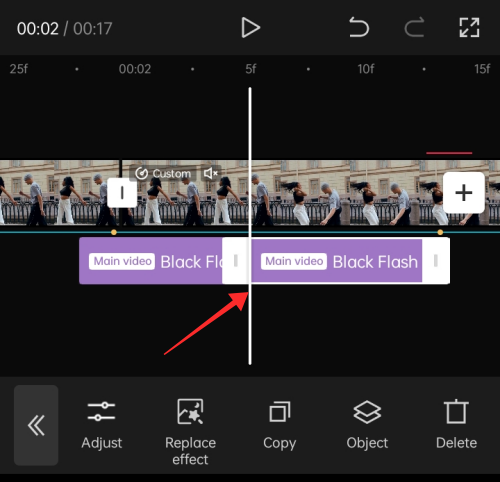
Drag and reposition the effect overlay to a different point where you wish to add the flash effect in the video.
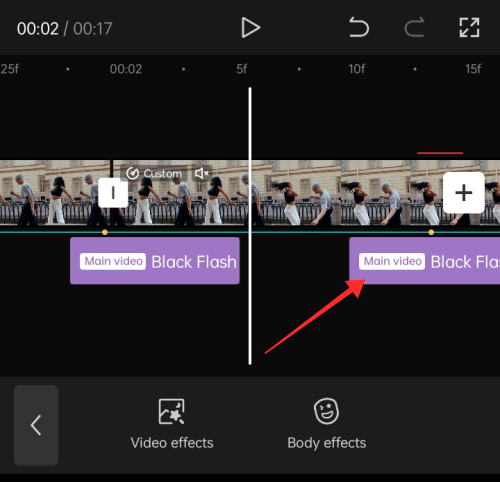
Repeat the process to add the flash effect everywhere else in the video.
Method 2: Create flash effect using white stock video
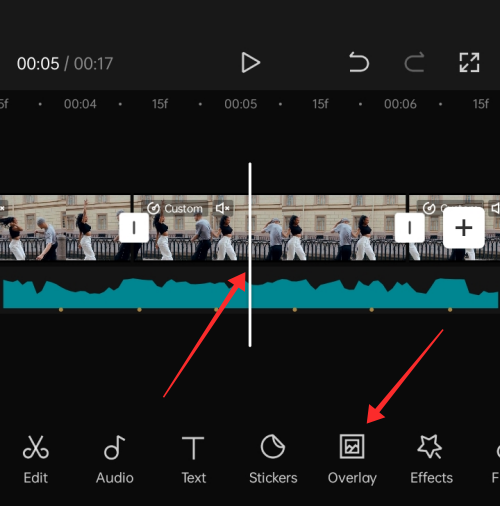
Bring the progress line to the point where you want to insert the flash effect. If you do not find a specific point in a glance, every yellow Match cut beat dot shall be used as a point and other spots shall be intermittently dotted with stock white video to intensify the effect.
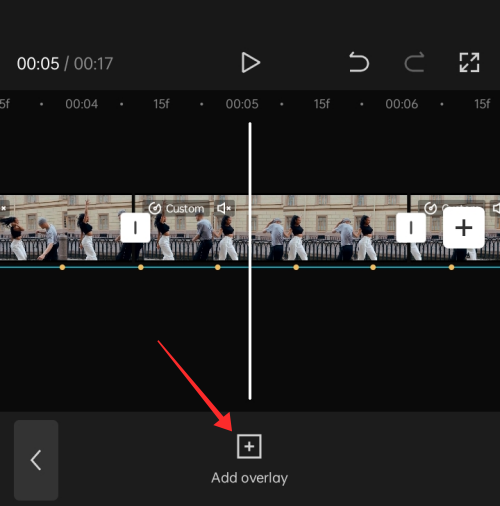
Find the frame on the timeline and tap Overlay on the toolbar at the bottom.
Tap Add overlay.
Under Stock videos, tap the selection box against the white screen video.

Tap the selection box at the top right corner of the page and hit Add at the bottom right corner.

The stock white video is 5 seconds in length. Drag the slider to trim it or use the split tool to cut off the excess length of the video and shorten it to 0.1 or at most 0.2 seconds.
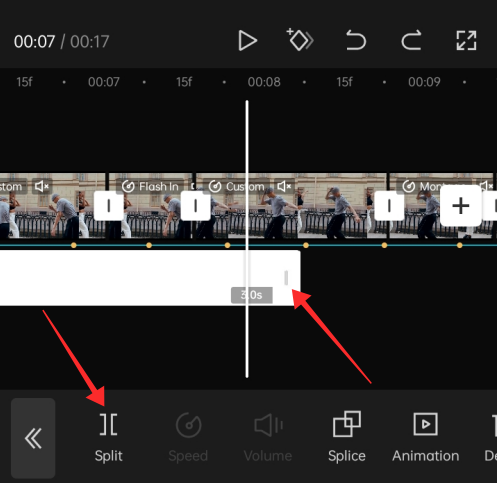
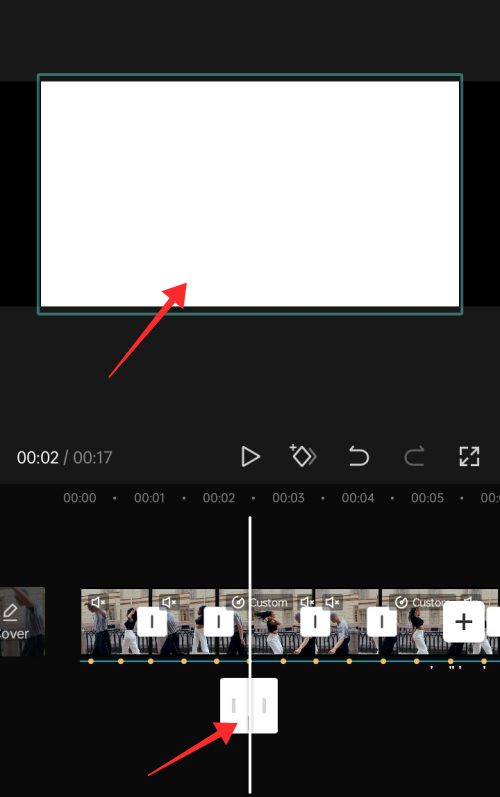
In this case, we have dragged the slider at the end of the stock video clip on the overlay timeline and trimmed the video short to 0.2 seconds.
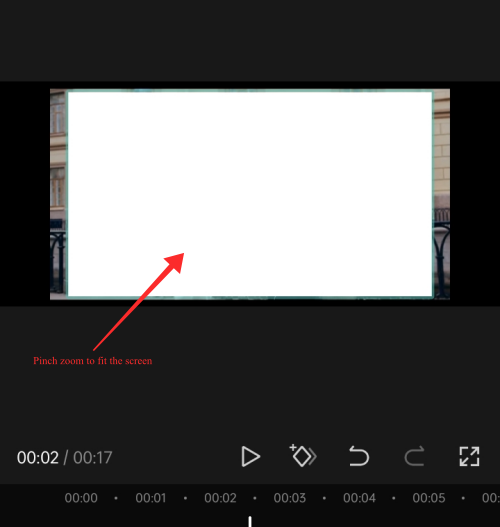
Pinch-zoom on the white overlay on the preview screen to fill or fit the screen.
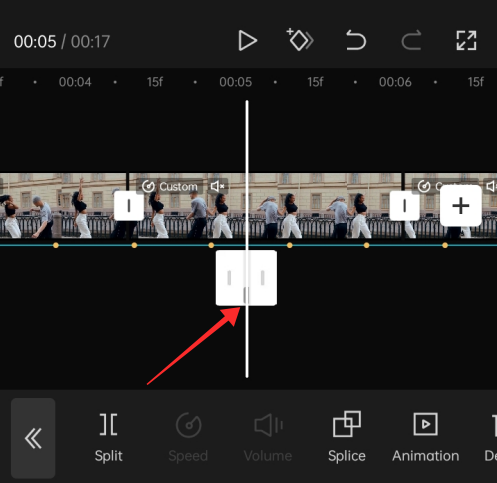
A small tip — in case you lose selection of the overlay after trimming it short, use the progress line to track the overlay point and tap the white overlay on the preview box to select it. You can also pinch-zoom on the overlay timeline to find and select it.
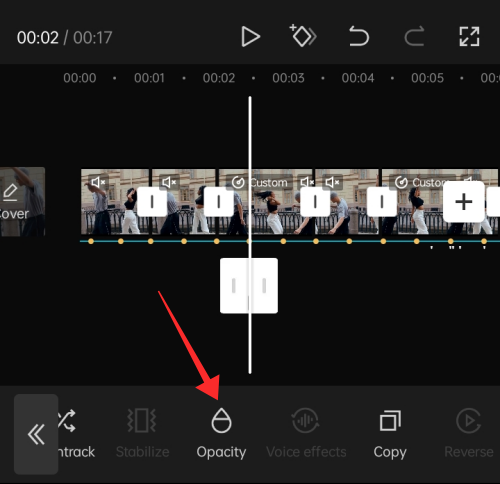
After selecting the overlap, swipe left on the toolbar to find the Opacity function. Tap Opacity once you locate it.
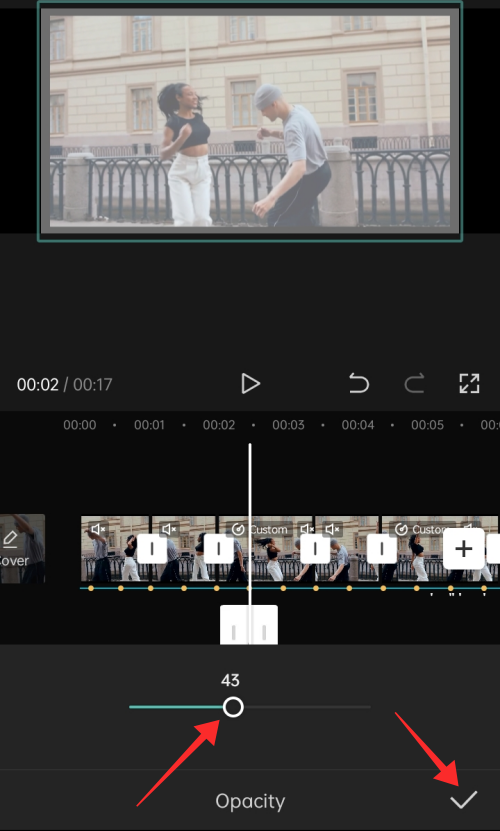
Set the Opacity to a medium range. We have set it to 43. Tap the tick symbol at the bottom to apply the settings.
Now, tap Copy on the toolbar to duplicate the overlay.
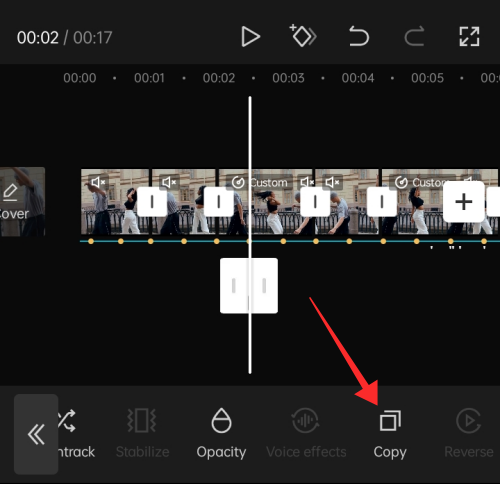
A duplicate of the white overlay will appear next to the original one. Tap Copy enough times to create duplicates of the white overlay.
Drag the duplicate white overlays and position them at varying points that need a flash effect highlight. For better precision, pinch zoom on the overlay timeline.
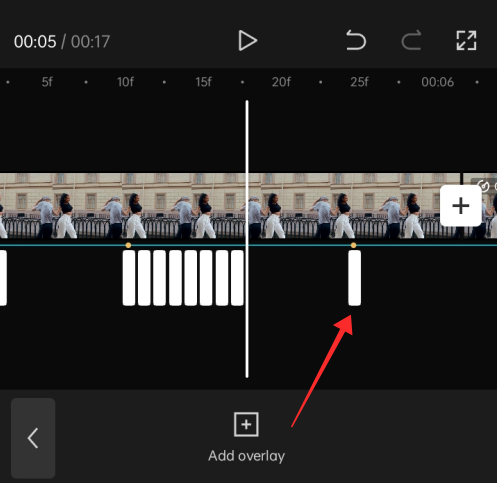
You can either limit them to the yellow beat dots or stack white overlays multiple times in a row for amplifying the flash impact.
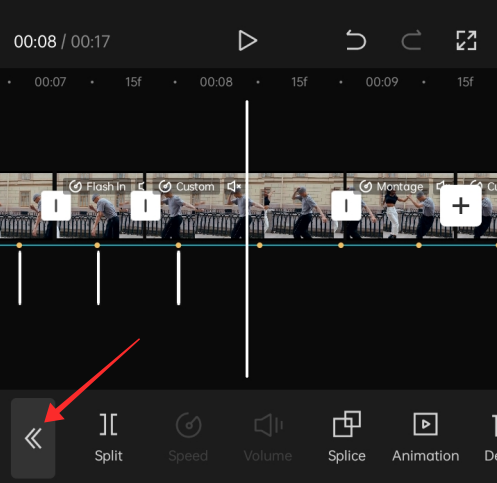
Hit the arrow button on the extreme left of the toolbar to apply the changes and return to the main toolbar.
Method 3: Create a flash effect by adjusting video contrast
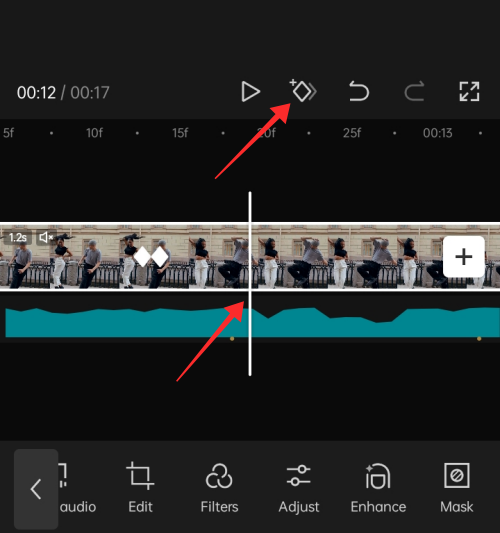
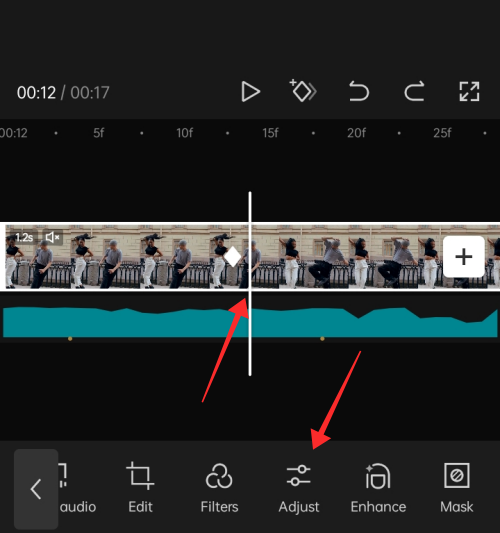
Tap a clip on the video timeline to select it. Bring the progress line to the point where you want to add a flash effect and tap on the “diamond” (keyframe) symbol on the tools panel above the timeline to add a keyframe.
Bring the progress line to a point past the keyframe and tap Adjust on the toolbar at the bottom.
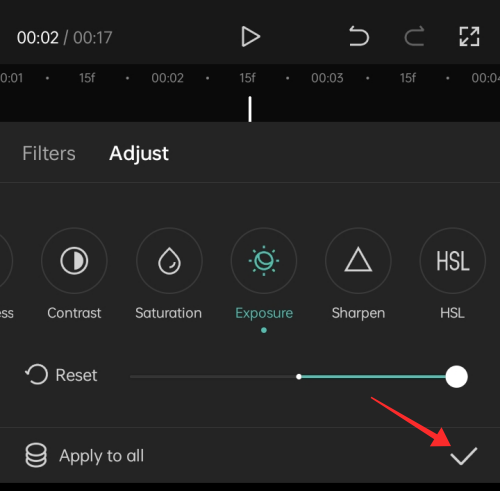
Under Adjust, tap Exposure and drag the slider to the maximum to set the exposure to the highest degree. The frames in the clip following the keyframe show a flash effect due to the exposure setting applied to them.

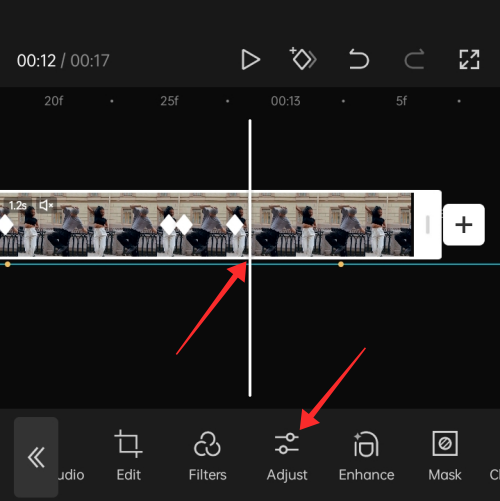
Now, bring the progress line to a point not too further away from it and tap the keyframe symbol on the tools panel above again to add another keyframe. This keyframe will be used as the closing point for the exposure effect.

Bring the progress line to a point past the keyframe and tap Adjust on the toolbar at the bottom.
Under Adjust, tap Exposure and drag the slider to 0. Hit the tick symbol at the bottom right corner to apply the change.

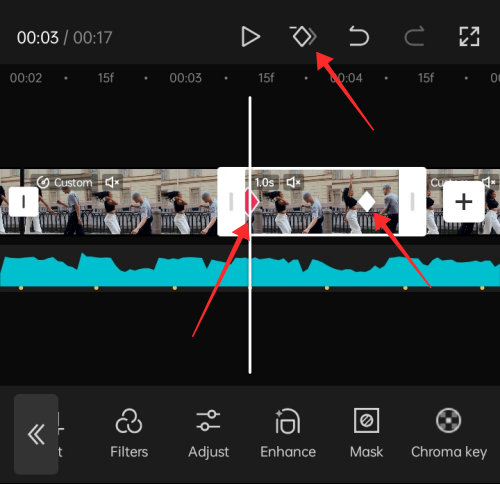
The keyframes will be marked on the video timeline with a white diamond symbol. To remove a keyframe, bring the progress line over the symbol. The symbol upon selection will turn red on the timeline. Now, tap the keyframe symbol on the toolbar above.
Tap the tick symbol at the bottom right corner of the panel to apply the settings.
That’s it! Once you are happy with the preview, hit the upward-pointing arrow button at the top right corner of the page to save the video to your device.

Custom versus Preset Velocity Speed: How to choose?
Customizing the beats gives you the liberty to manipulate the pace of the frames in the video according to your preference. To create Velocity trend videos, using a Custom speed curve is preferable if you have a very detailed design in mind about how your clips should behave.
On the other hand, presets are the way to go if you want to use some of the most popular speed curve patterns. For instance, the Flash In preset gives a very impactful punch-like motion to the selected clip.
To be blunt, going with presets saves a lot of time you’d otherwise spend adjusting the beat nodes under the Custom mode. But, presets could mess up the sync of the video with the sound used in the background, hence, you might also have to expend some effort to edit the arrangement of beats on preset curves as well. Which to choose is of course a matter of what is demanded by the video.
Hope this guide has been of help to create your own Velocity trend video! Share your thoughts with us in the comments!
RELATED