So you downloaded and installed VMware Workstation Pro for free. Now, the only thing left to do is to create a virtual machine so you can use it as a sandbox for testing complex systems, software, games, etc. Here’s everything you need to know to create a virtual machine with VMware Workstation Pro.
How to create a new virtual machine on VMware Workstation on Windows
Here are all the steps you need to follow to create a virtual machine on VMware Workstation Pro.
Get Windows 11 ISO
Step 1: Go to Download Windows 11 page. Click on the dropdown under ‘Download Windows 11 Disk Image (ISO) for x64 devices’ and select Windows 11.
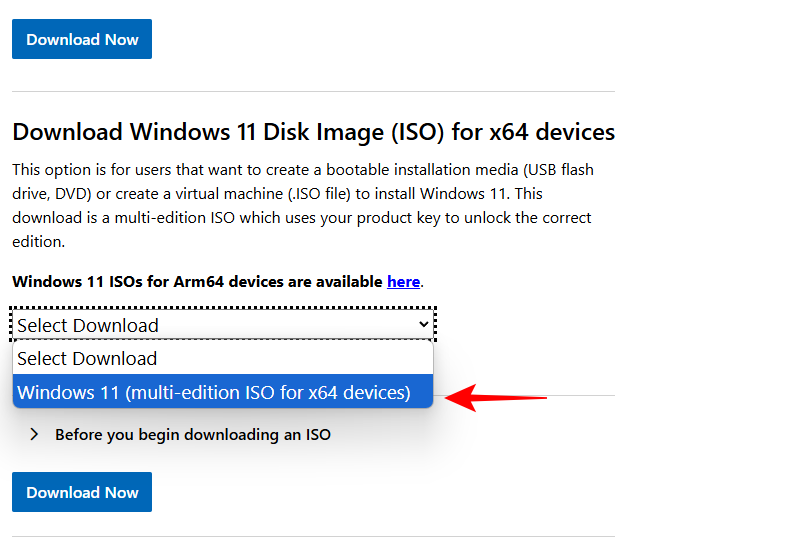
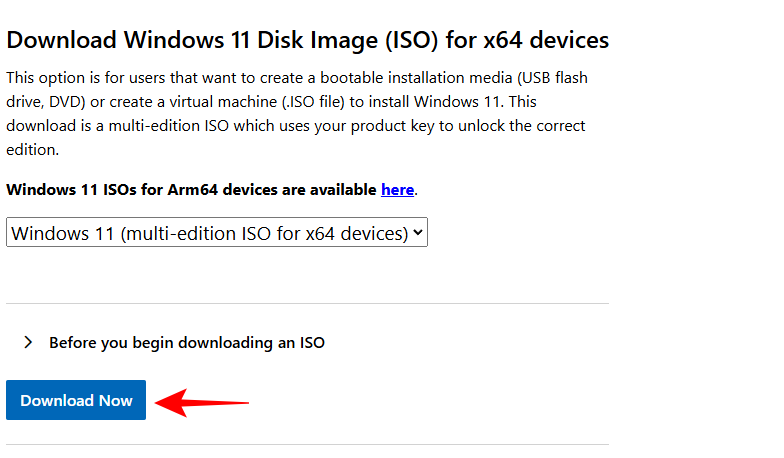
Step 2: Click Download Now.
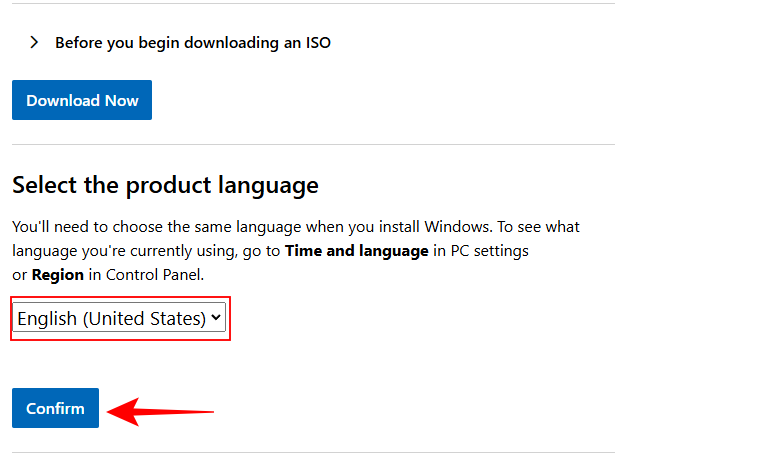
Step 3: Select Product Language and click Confirm.
Step 4: Click on the link under Download – Windows 11.
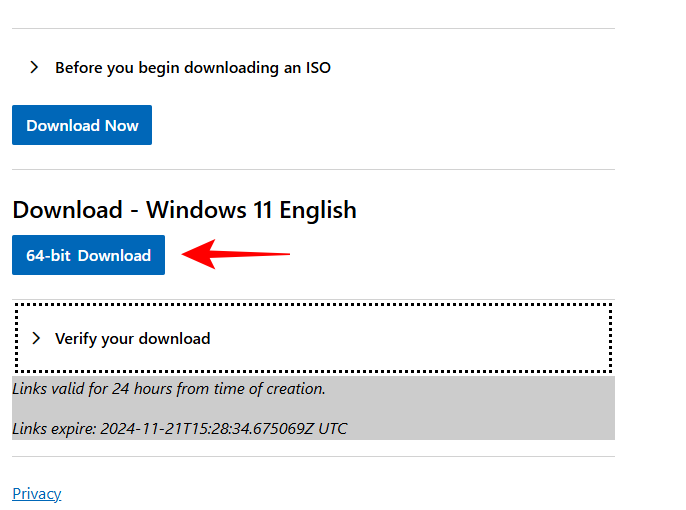
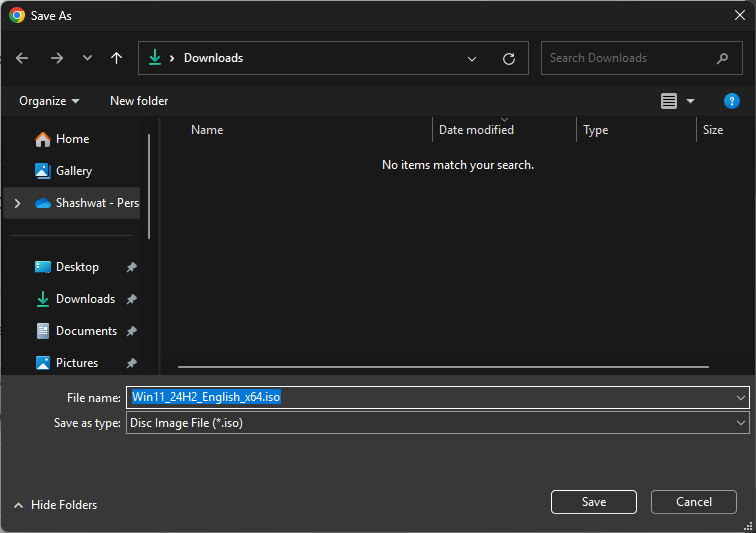
Step 5: Save the ISO.
Set up a new VMware workstation
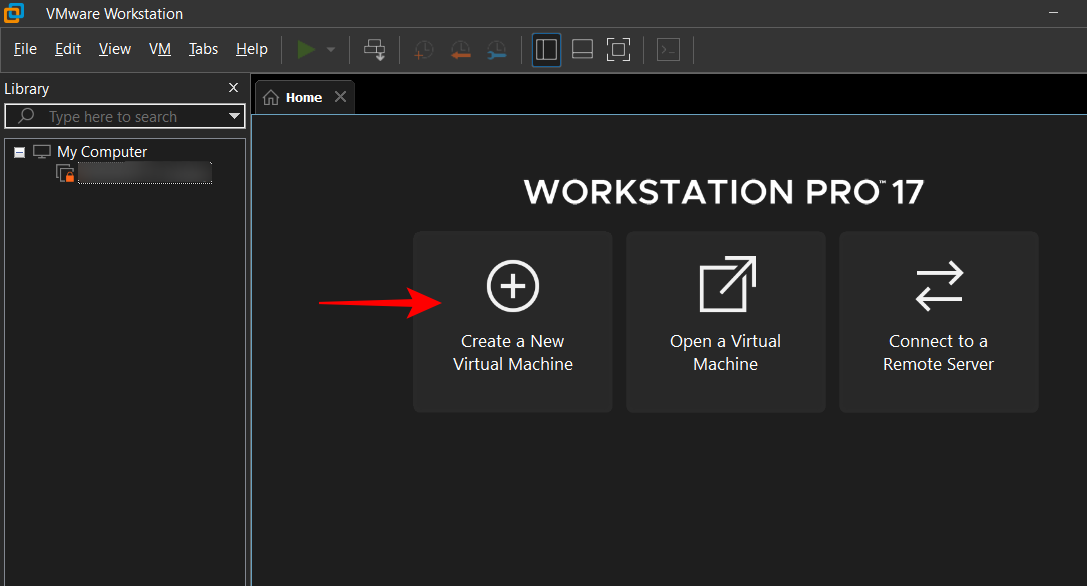
Step 1: Launch VMware Workstation Pro.
Step 2: Click on Create a New Virtual Machine.
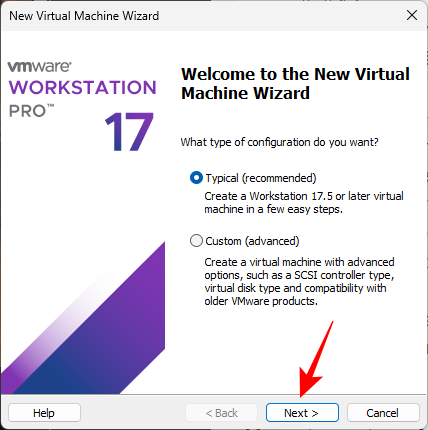
Step 3: Use the Typical (recommended) configuration. Then click Next.
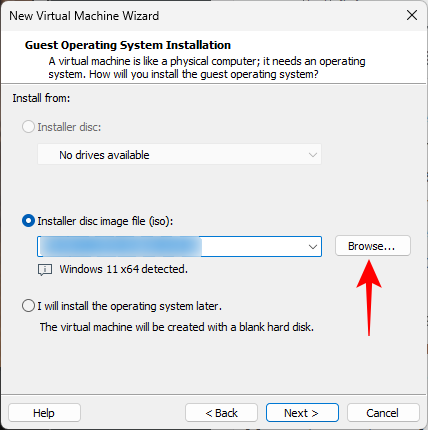
Step 4: Click on Browse to select the download ISO file.
Step 5: Select the Windows 11 ISO file and click Open.
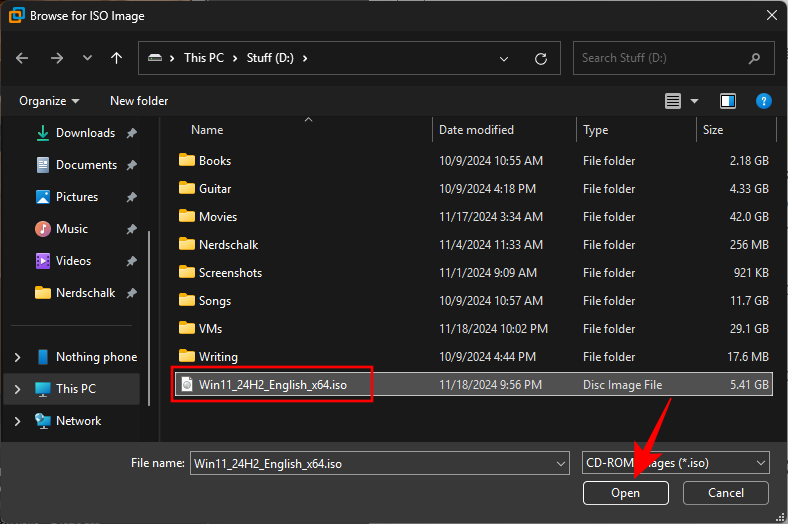
Step 6: Click Next.
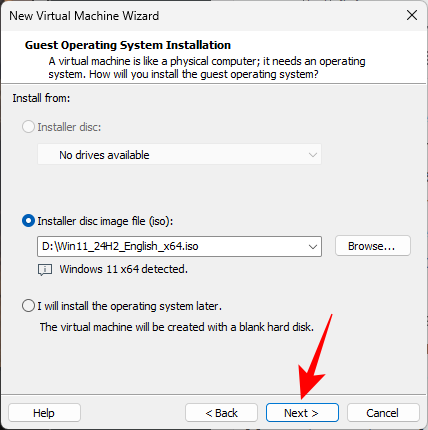
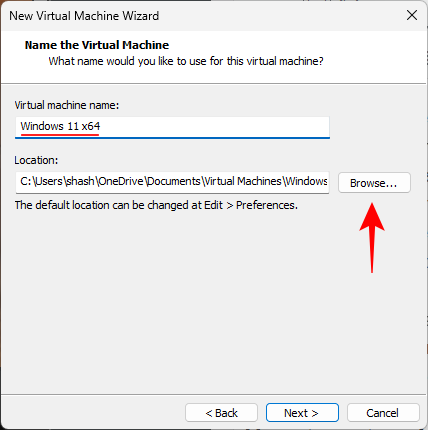
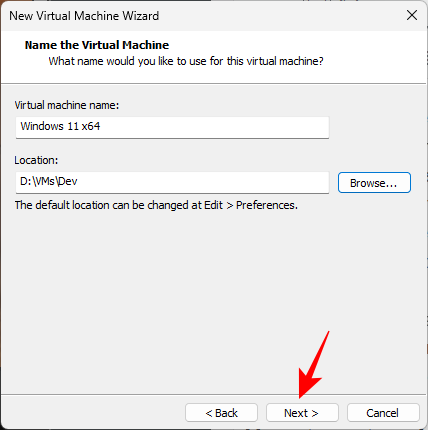
Step 7: Give the Virtual machine a name, if you like. By default, the virtual machine will be created in the C drive. If you want to change this, click on Browse.
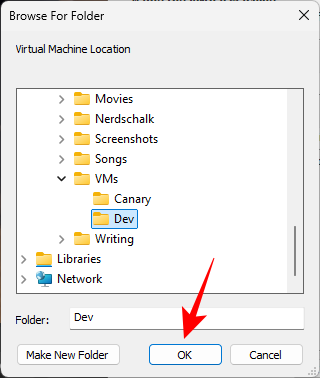
Step 8: Select your location and click OK.
Step 9: Click Next.
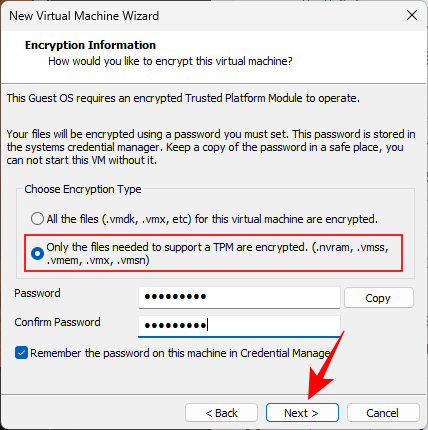
Step 10: Use the default encryption type Only the files needed to support a TPM are encrypted. Then enter a password and click Next.
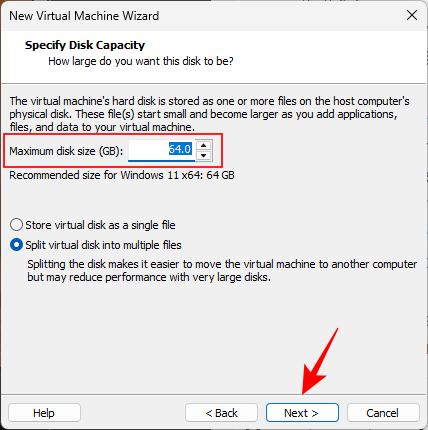
Step 11: Select the size of your virtual disk. Click Next.
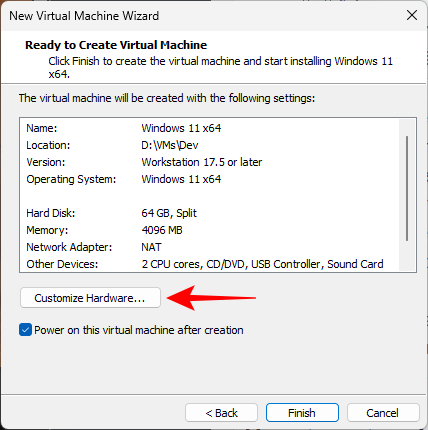
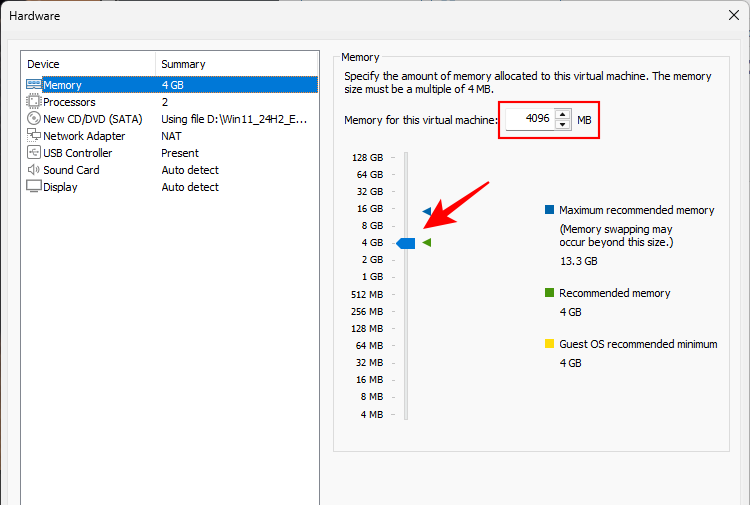
Step 12: To customize RAM, select Customize Hardware.
Step 13: Use the slider to choose how much RAM to give to this virtual machine. Then close the window.
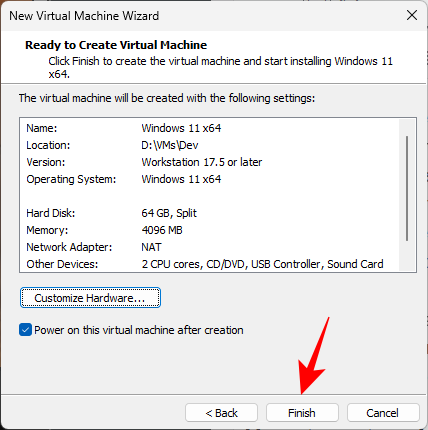
Step 14: Finally, click Finish.
Install Windows
Once you create your virtual machine, it should launch automatically. Follow the steps below to overcome any difficulties you come across while installing Windows.
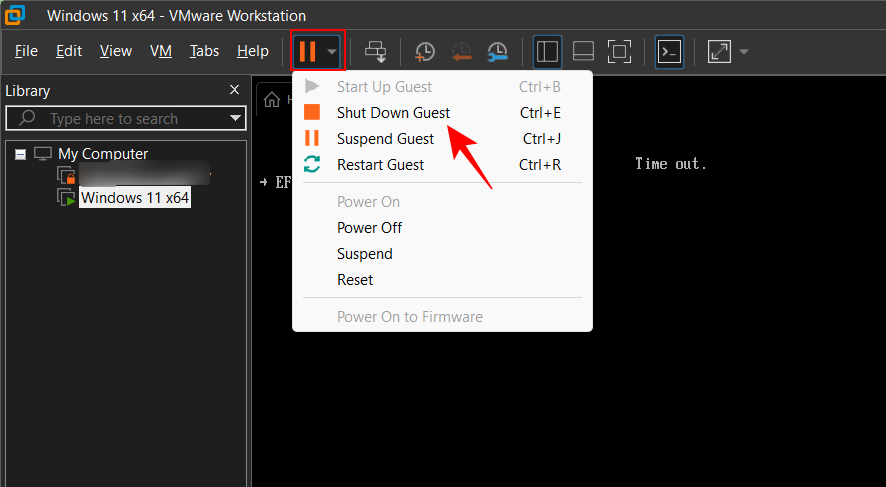
Step 1: You may get a Time out screen at first. To get around it, click on the pause button at the top and select Shut Down Guest.
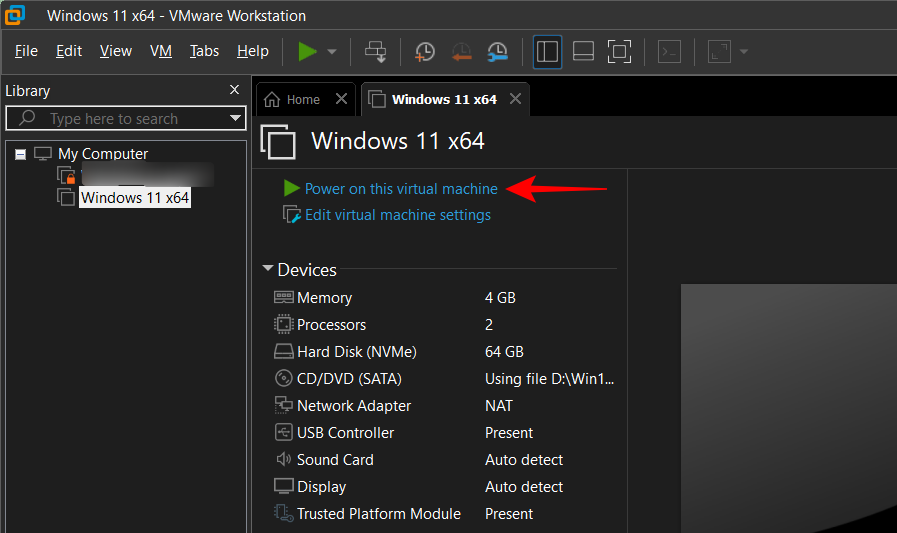
Step 2: Now click on Power on this virtual machine (effectively restarting it).
Step 3: When you see the “Press any key to boot from CD or DVD” message, click inside the virtual machine and hit a key (before you’re timed out again).
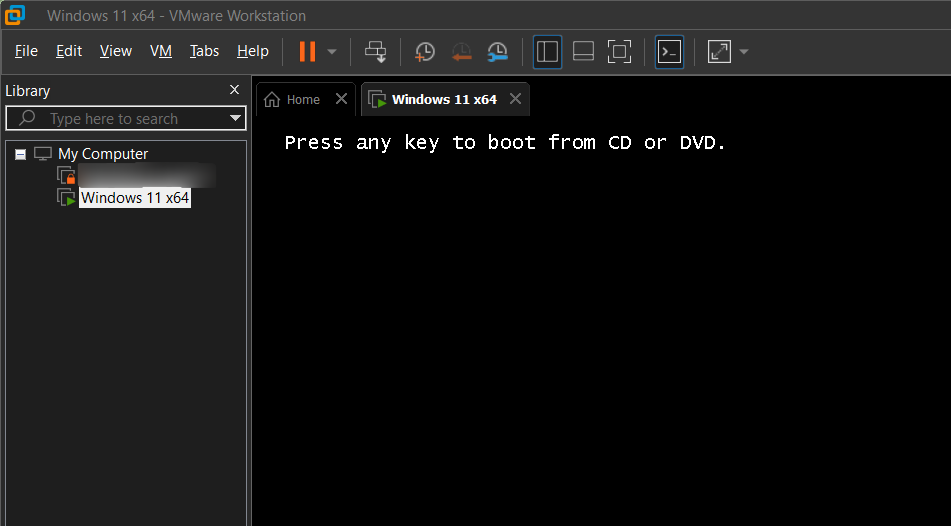
Step 3: Now continue with the Windows 11 installation process.

Edit virtual machine preferences, hide VMware toolbar and tips
There are a few things you may want to adjust before you can start using your virtual machine like a proper Windows machine.
Change screen resolution and go full screen
When you first start using your virtual machine, you may notice that the screen resolution is quite low. Change this from Settings > System > Display > Display resolution.
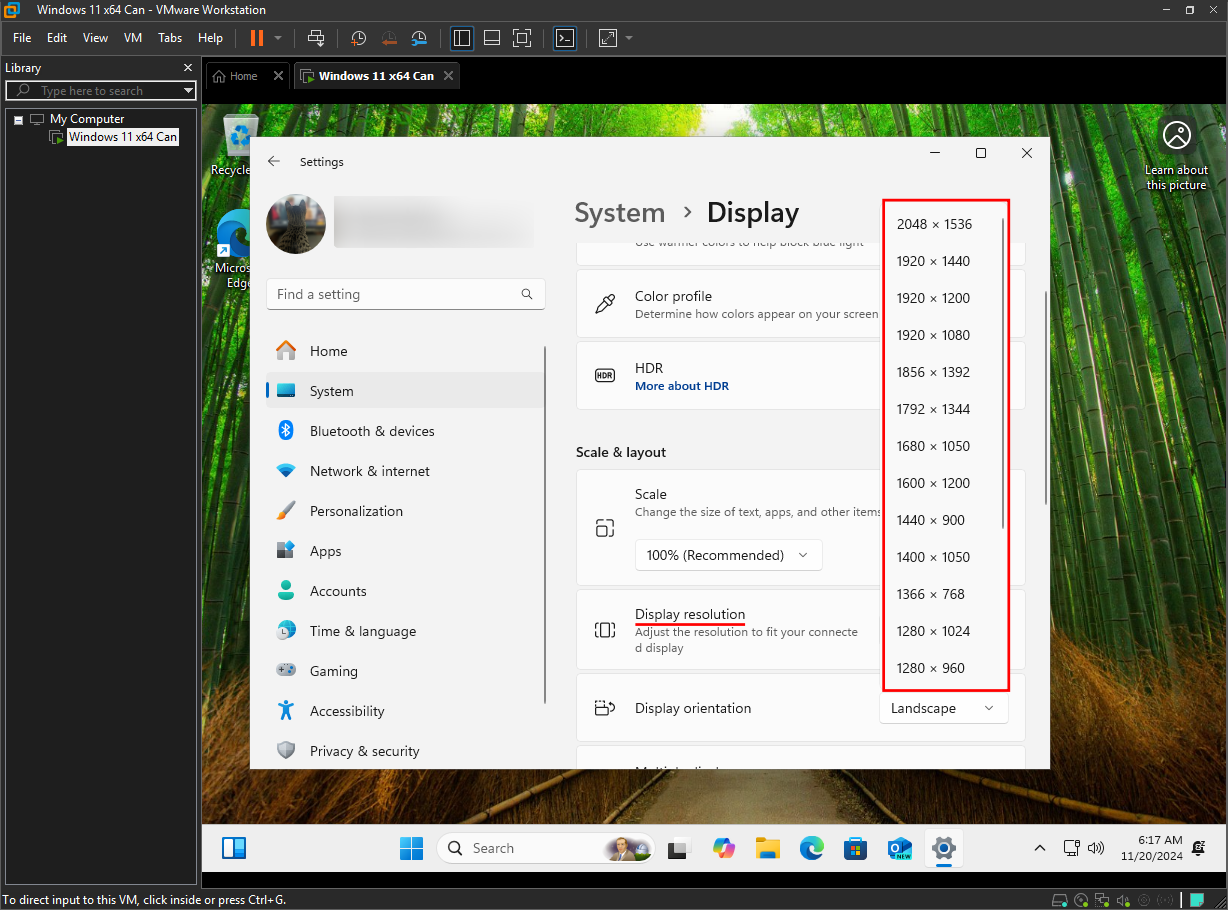
To go full screen, click on the full screen icon in the VMware Workstation toolbar.
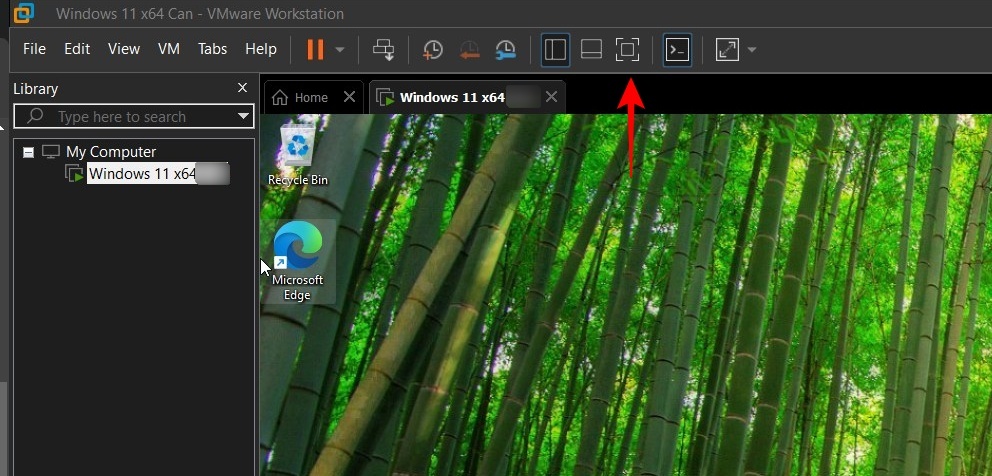
Hide VMware top toolbar
If you see the VMware toolbar on top, here’s how you can hide it for good.
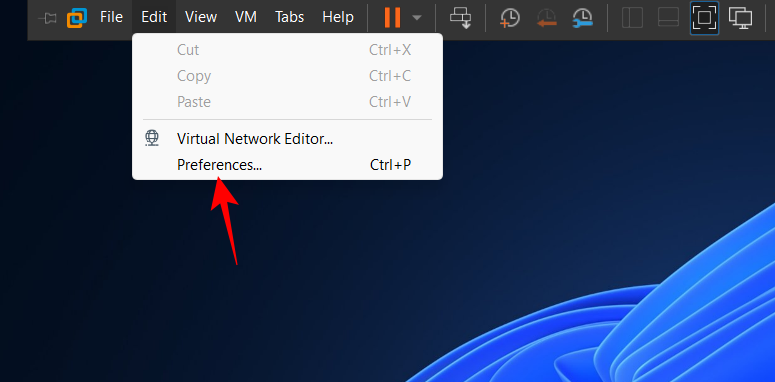
Step 1: Click on the pin icon at the extreme left and unpin it. This will hide the toolbar unless you hover over the top edge again.
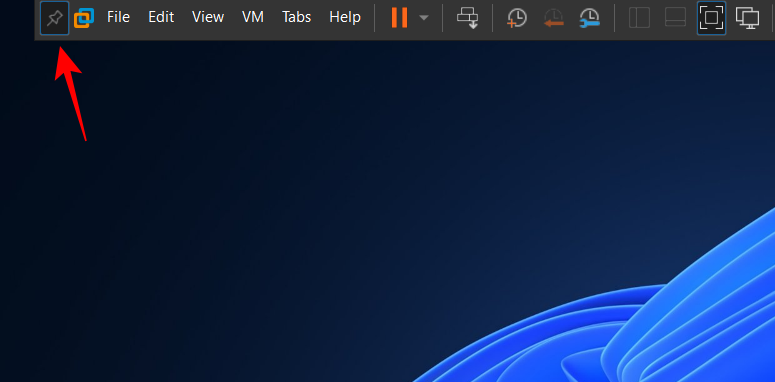
Step 2: If you want to also hide the edge of the toolbar at the top, click on Edit > Preferences.
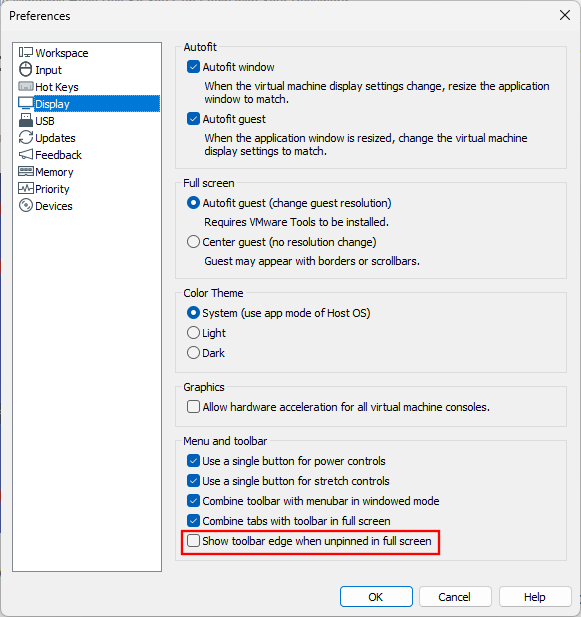
Step 3: Go to Display. Then uncheck Show toolbar edge when unpinned in full screen. Then click OK.
Hide VMware hints
You may see a few hints at the top, reminding you that ‘To release input, press Ctrl+Alt’. Though good to know at first, these can get annoying after a while because they never seem to go away. Fortunately, these are hidden as soon as you install VM Tools. Here’s how to do so:
Step 1: Go to the VMware toolbar, click on VM and select Install VMware Tools…
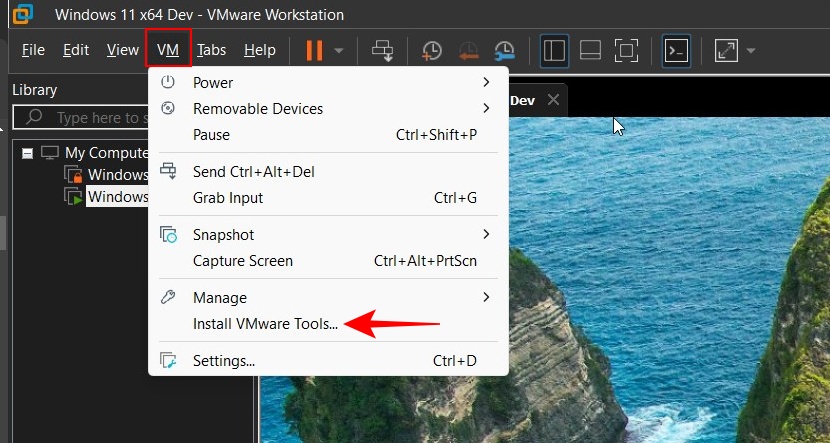
This will mount the VMware tools image.
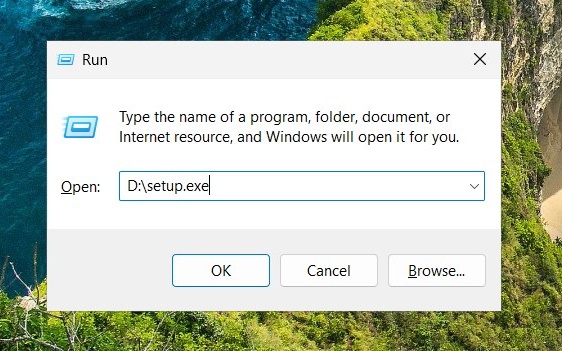
Step 2: Then press Win+R and open the RUN box. Then type D:\setup.exe (where D: is the drive where VMware Tools is mounted) and hit Enter.
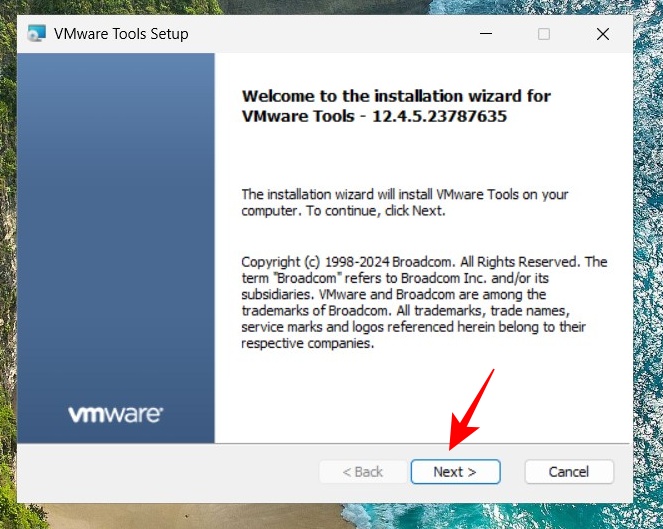
Step 3: Click Next.
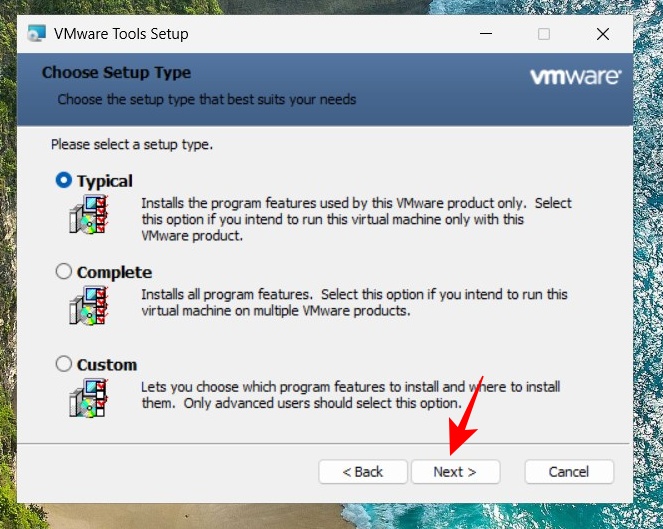
Step 4: Select the Typical installation and click Next.
Step 5: Finally, click Install.
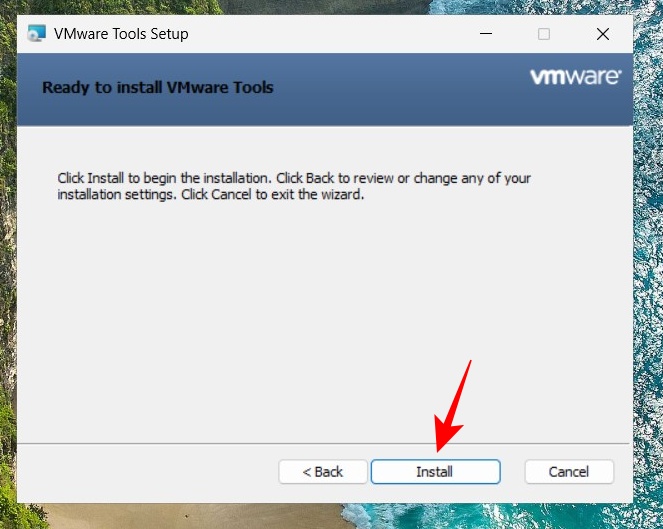
You’ll be asked to restart the virtual machine. Once you do so, you should stop seeing these annoying VMware toolbar hints and tips.
Fix ‘Could not create anonymous paging file’ error
While turning on your virtual machine, you may sometimes receive the error “Could not create anonymous paging file for MB: Insufficient system resources exist to complete the requested service”.
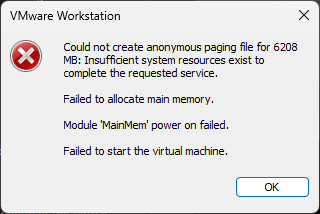
Here’s how you can fix it:
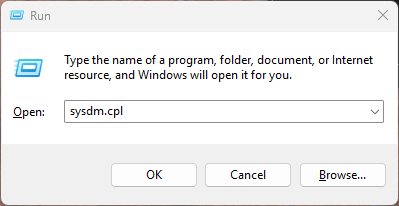
Step 1: Open the RUN dialog box with the Win+R shortcut.
Step 2: Type sysdm.cpl and hit Enter.
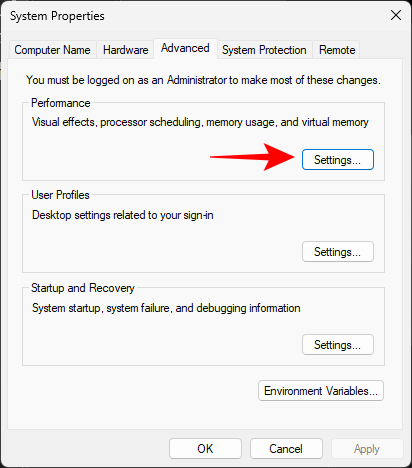
Step 3: Go to the ‘Advanced’ tab and select Settings in the ‘Performance’ section.
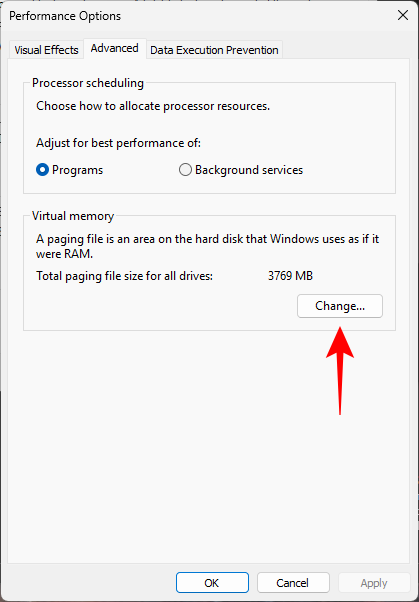
Step 4: Go to the ‘Advanced’ tab again and click on Change in the ‘Virtual memory’ section.
Step 5: Here, uncheck Automatically manage paging file size for all drives.
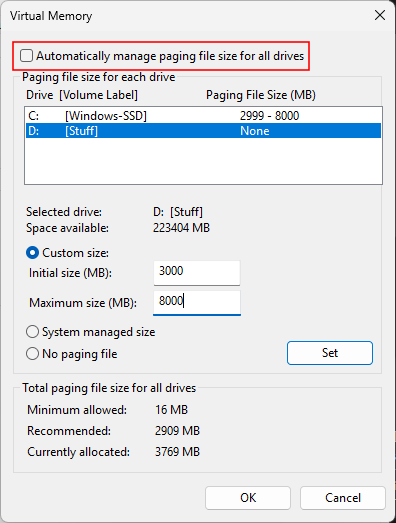
Step 6: Select the drive where you’ve created the virtual machine.
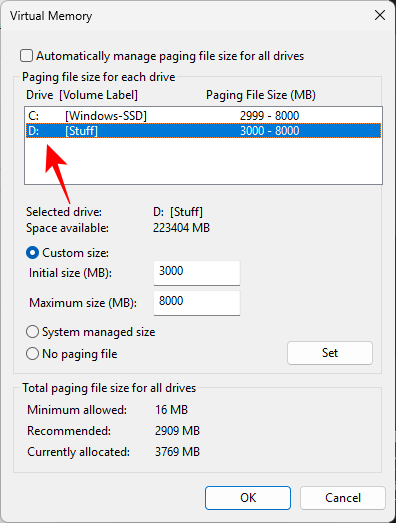
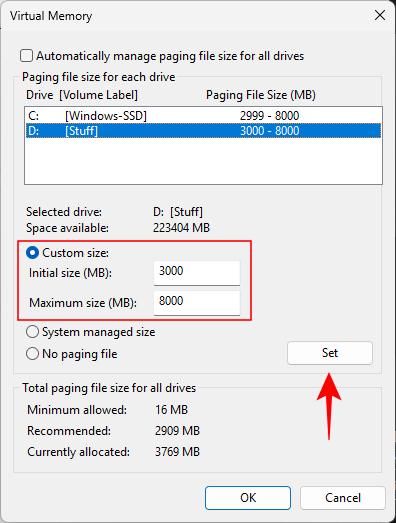
Step 7: Then select Custom size and enter ‘Initial size’ and ‘Maximum size’. Make sure the upper limit is more than what’s required for the paging file (as shown in the error). Then click Set.
Step 8: Click OK.
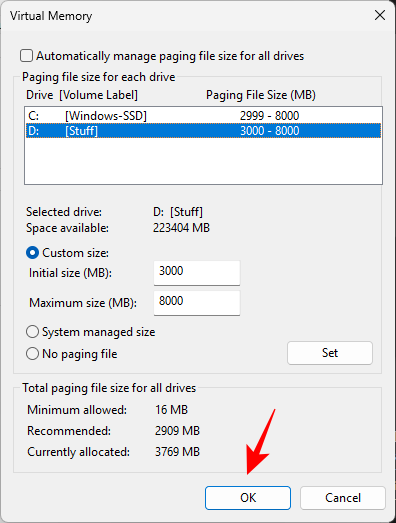
You should now be able to run your VM workstation without any hiccups.
We hope you were able to create a virtual machine on VMware Workstation Pro, install Windows on it, as well as configure it to remove all annoying barriers that break the illusion of using Windows on a virtual machine.


