The reason why Windows 11 is so popular amongst developers and users alike is the level of customization that is possible with it. Apart from allowing for external service-level changes, it also leaves enough room for developers to craft some refreshing visual packs to change the look and feel of Windows.
If you want to make your personal computer truly yours, there’s nothing better than trying out a few icon packs as these are the little things on our PCs that we interact with the most. Here’s how you can change the different icons on Windows 11.
Related: How to Remove Microsoft Account From Windows 10
Download icons for Windows 11
There are a few additional icon sets that come in-built in Windows 11. But there is an ever-expanding list of icons and icon packs that you can get online so it doesn’t make sense to use the ones that come with Windows. Some of the platforms where you can download icons for free include the likes of Iconfinder, DeviantArt, Flaticon, GraphicBurger, and IconArchive. You can also pay for some premium icon packages if they catch your fancy.
Once you find a pack that appeals to you, download it and save it in a permanent location. If they are in a Zip file, extract them so that they are all inside one folder.
Before we begin, make sure that you keep all these icon images in one place and not move them once they’re applied. If things go wrong, you would want them to be all in one place so that they can be reapplied with ease. So, to reiterate, save the icons in one place and don’t move them.
Related: How To Mute an App on Windows 10
Change PNG images to ICO icons
Though most sites will provide the icon files in the ICO format (which is the format Windows uses for its icons), you may find that some sites will offer icon files in PNG format. But don’t worry, you can easily convert these PNG images to ICO files and use them as icons.
There are a bunch of PNG to ICO converters out there that you can use to get your ICO files, such as Cloudconvert, IcoConvert, and ConvertIco. Simply visit any of these or just do a simple Google search, visit any of the sites, and get your PNG files converted.
Once you have your ICO files, save them all in one folder.
Related: How to Reset Taskbar in Windows 10
Change Desktop icons
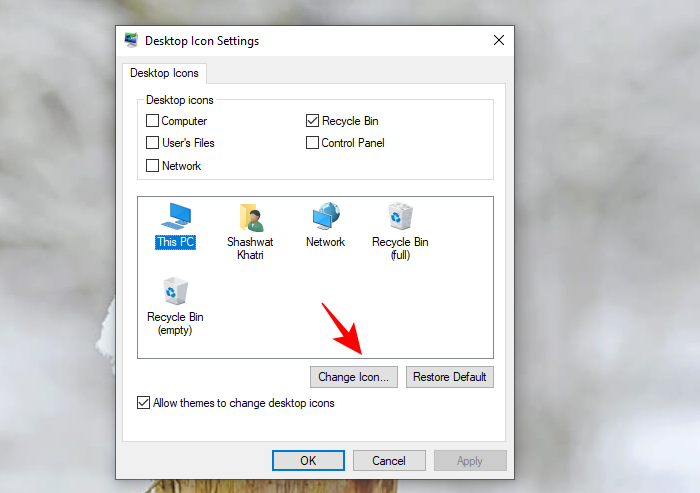
Now, first up, let’s change the desktop icons. These icons include My Computer, Recycle Bin, Network, and the like, and are a cinch to change. Here’s how you can do so:
- Right-click anywhere on your desktop and click on Personalize. Then go to Themes.
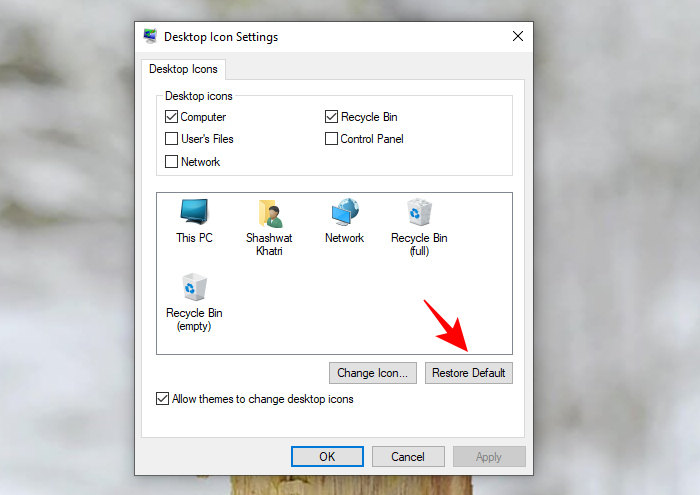
- Then, under ‘Related Settings’, click on Desktop icon settings.
- Now, select the icon that you want to change and then click on Change icon.
- In the next window, you can select from amongst the extra built-in icons. But since you’ve already downloaded (and converted) icon packs, it’s better that you use those. For that, click on Browse.
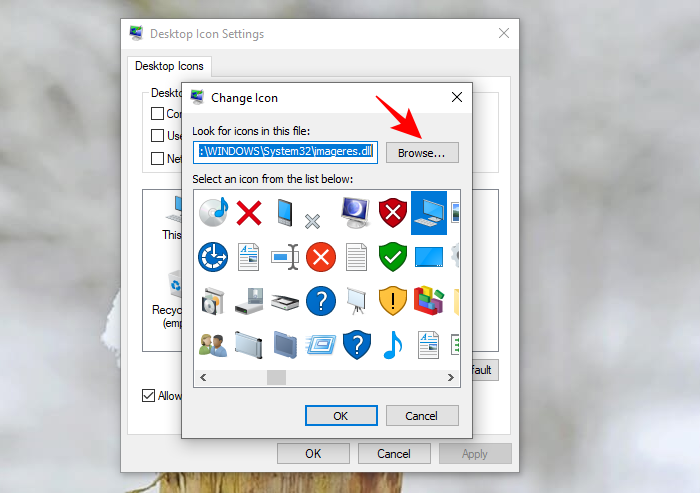
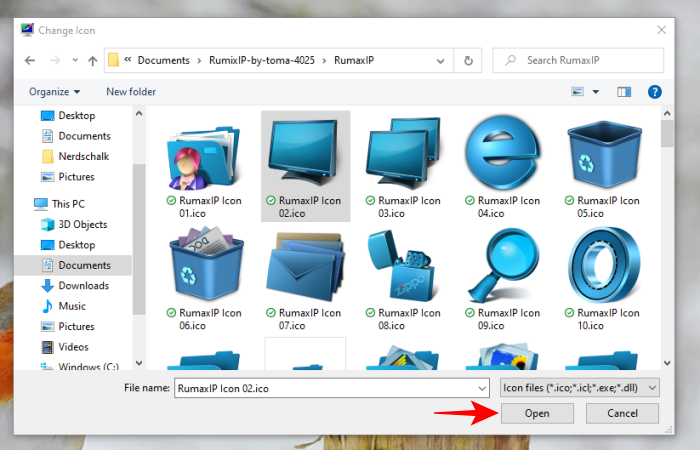
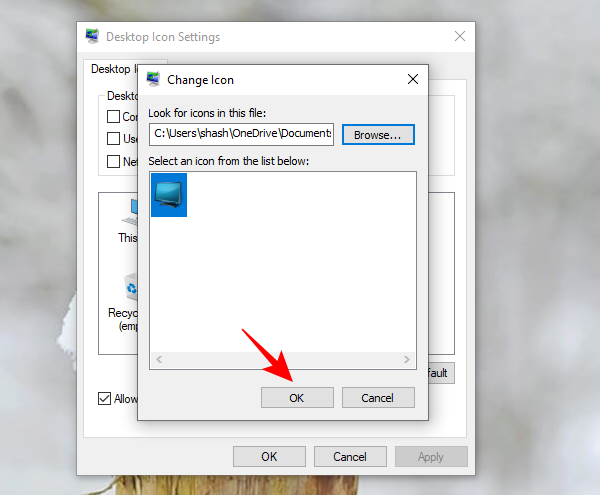
- Look for the folder where you saved your ICO files. Then select the one that you want to use for a particular icon and click Open.
- Click OK on all open windows.
- Once the changes are made, the new icon will appear in File Explorer, as well as the Desktop and the Taskbar when it is open.
- Didn’t like your new icon? Simply go back to the “Desktop Icon Settings”, select the icon, and click on Restore Default.
Related: How To Right-Click With Keyboard Windows 10
Change Program icons
Changing program icons is ridiculously easy on Windows. But you can only change the shortcut icon, not the main .exe file icon. So, in order to change a program icon, you will have to create its desktop shortcut first (if one is not on your desktop already). Here’s how you can do so:
- Click on the Start menu and search for an app. In our example, we’re choosing Google Chrome. Right-click on the app and click on Open file location.
- In the folder, right-click on the program and click on Send to, and then Desktop (create shortcut).
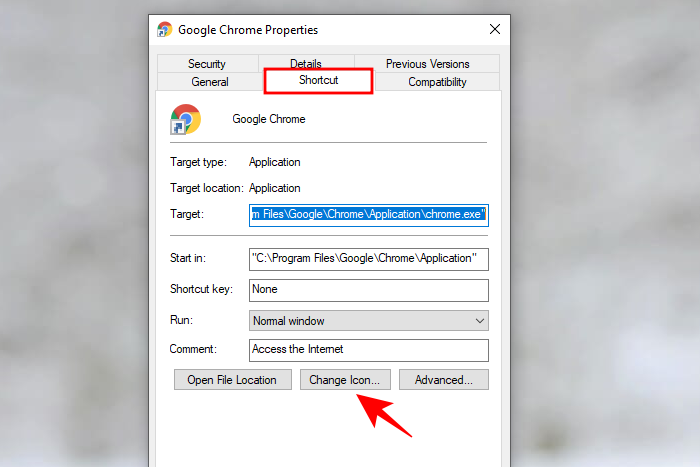
- The app shortcut will now appear on the desktop. Right-click on it and select Properties.
- In the resulting window, under the “Shortcut” tab, click on Change Icon.
- You will see a few icon options. You can either choose from among these options or click on Browse and go to the folder where you saved the downloaded ICO files.
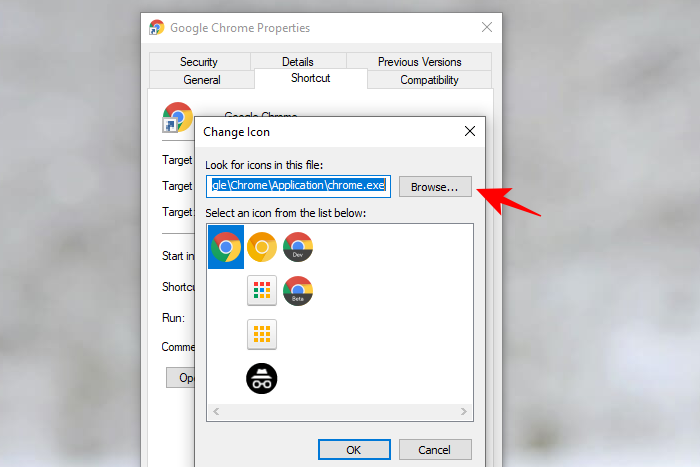
- Choose the icon that you want for the app, then click Open.
- Click OK on all open windows.
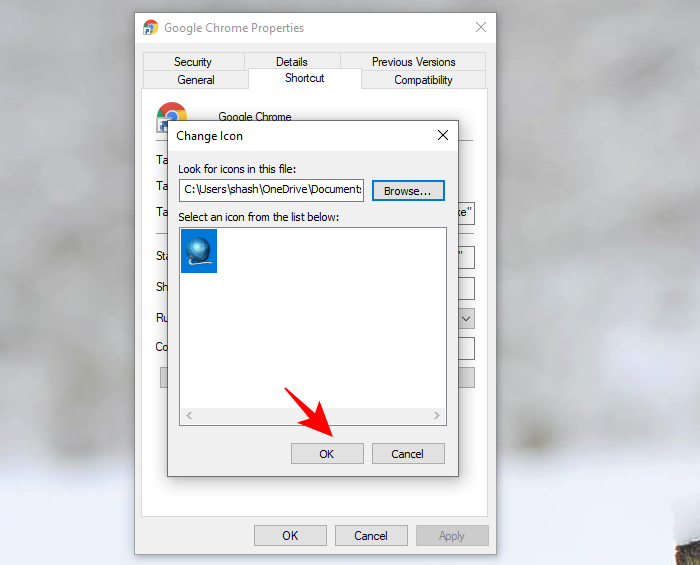
- Your new icon will now be applied to the program.

Change Folder icons individually
You can change folder icons individually in the same manner. Doing so will make a folder stand out distinctly from other folders, making it easier to find. Here’s how you can do so:
- Find a folder whose icon you want to change, right-click on it and choose Properties.
- Click on the Customize tab and then select Change icon.
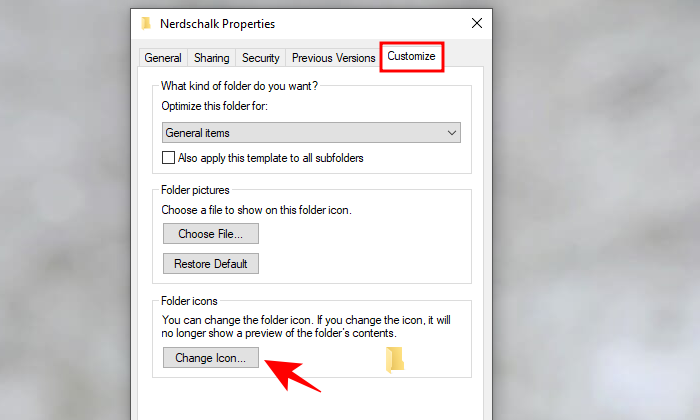
- Here too you will find a bunch of icons provided by Windows, but most of them have an outdated appearance. Instead of picking one of these, click on Browse.
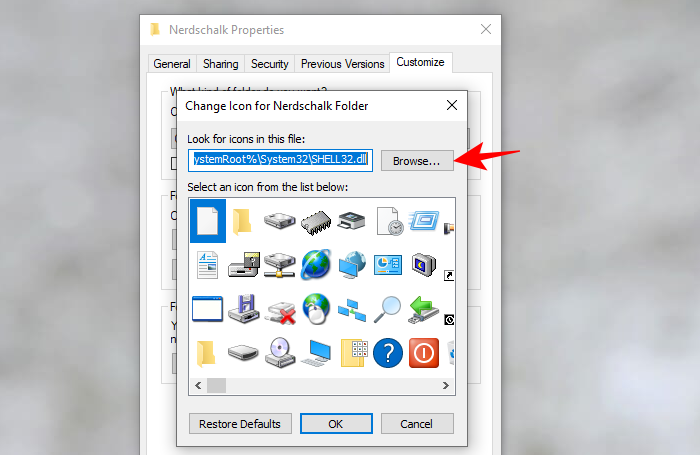
- Then find the icon you want to apply to this folder from your icon pack. Click on Open.
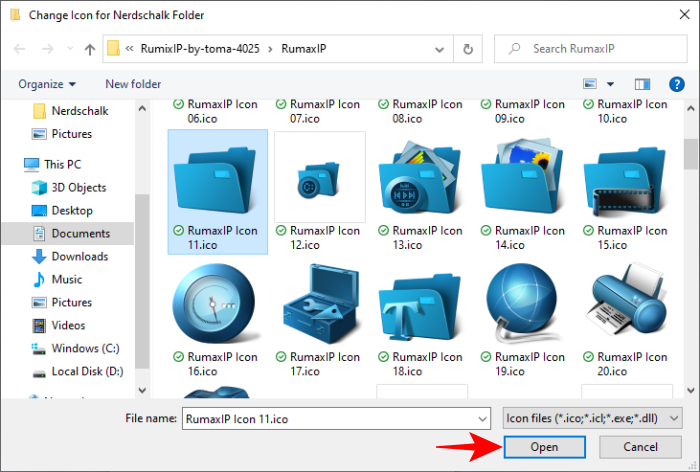
- Then click OK on all open dialog boxes. Your folder icon change will now be applied.

Related: How to Stop Discord From Opening on Startup on Windows 10
Change Folder icons all at once
If you want to change your folder icons throughout your system, it is unfeasible, to say the least, to do it one at a time. Instead, you have to get into the registry and make the changes there. Here’s how you can change folder icons all at once.
- Press Start, type “Registry editor” and click on Run as administrator.
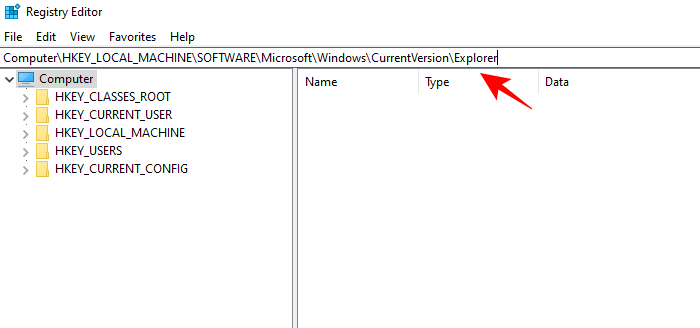
- Once the registry editor opens, navigate to the following location:
HKEY_LOCAL_MACHINE\SOFTWARE\Microsoft\Windows\CurrentVersion\Explorer
Or you can simply copy the above location, paste it into the registry, and hit Enter.
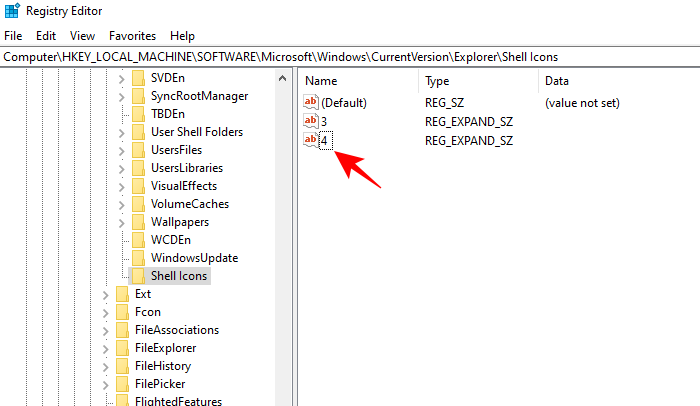
- Now, in the left panel, right-click the Explorer folder and click on New, then Key.
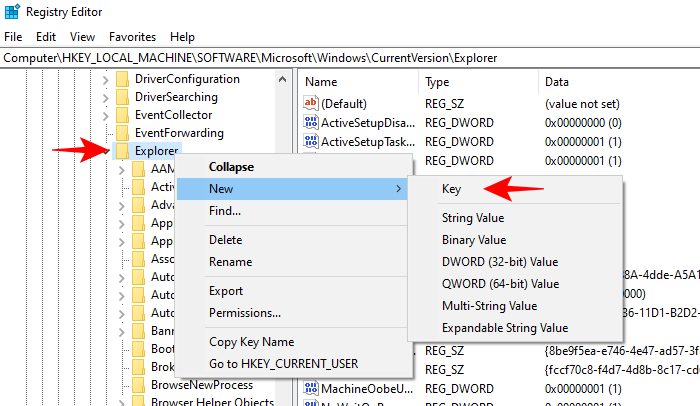
- Name this folder as Shell Icons and select it. On the right, right-click in the blank space and select New, then Expandable String Value.
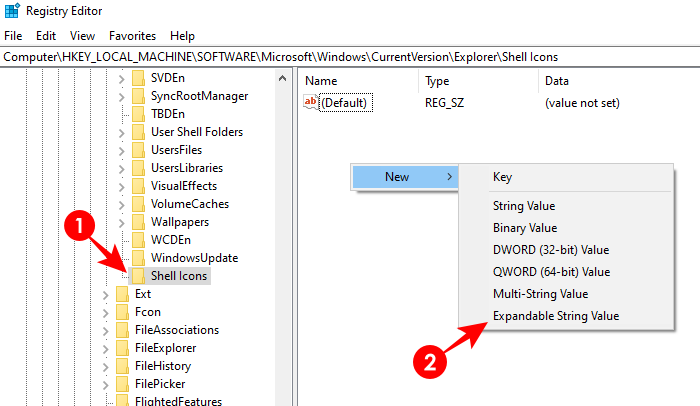
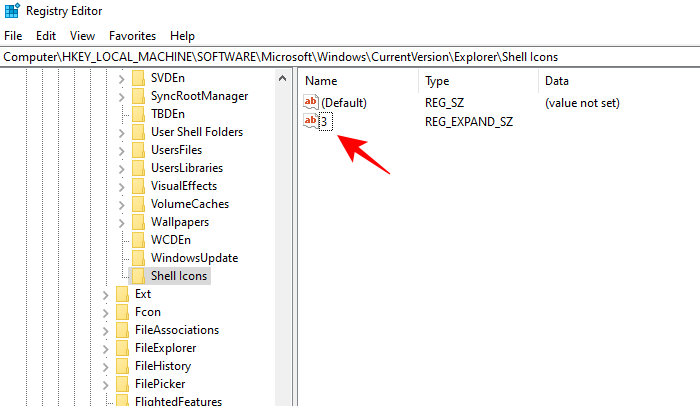
- Name this string 3.
- Repeat the process and create a string 4.
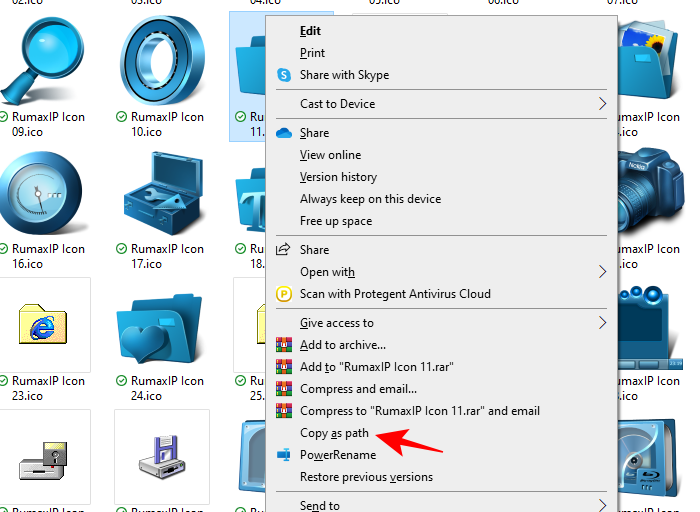
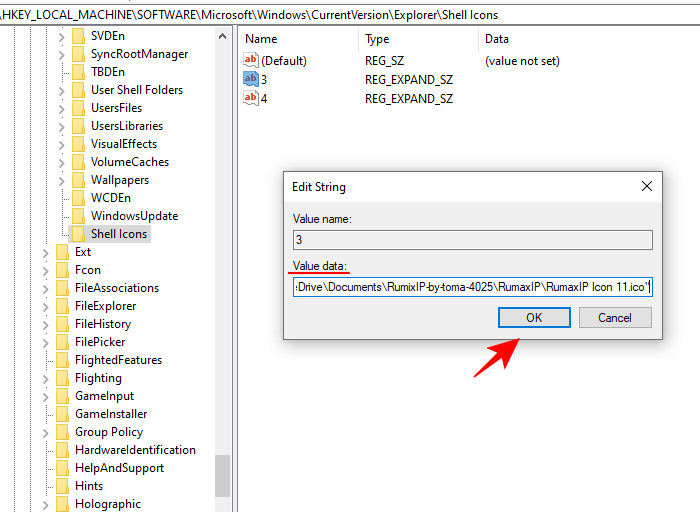
- Now, double-click the 3 string. You will be required to enter the location of the folder icon under “Value data”. To simplify the task, right-click the folder ICO file and select Copy as path.
- Then paste it inside the “Value data” field if string 3 and click OK.
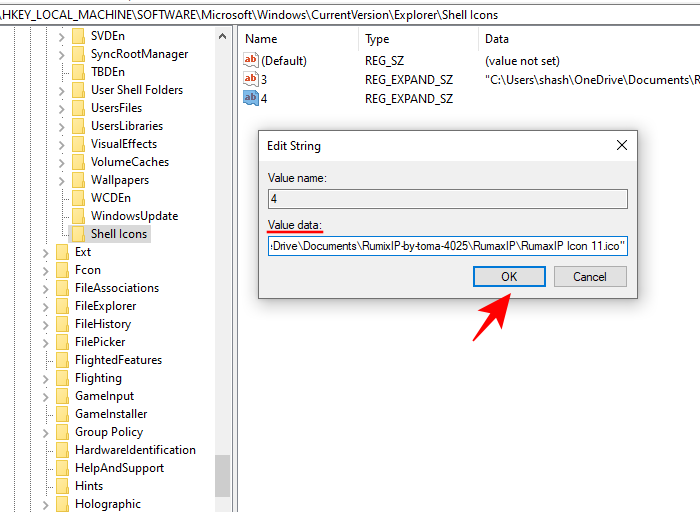
- Do the same for string 4 as well, and click OK.
- You should see the changes take effect once you exit the registry. If that doesn’t happen, you may have to restart Windows Explorer. To do so, right-click on the taskbar and select Task Manager.
- Then, under the Processes tab, right-click Windows Explorer and select Restart.
- The icons for all your folders in your system will now change.
- If you want to revert the process and get back the default folder icons, simply go to the same registry address and delete the Shell Icons key.
So this is how you can change your Windows 11 icons on your personal computer. Windows 11 makes it super convenient to change the appearance of program shortcuts, folders, and desktop icons so your PC looks and feels truly yours.
Given the amazing icon developer community that we have, you are really spoilt for choices when it comes to selecting an icon pack. So, find icon packs that appeal to you, download them, and apply them as we’ve shown you in this article. Don’t worry if you don’t like them at first; you can easily revert to default Windows 11 icons from within the same windows.
RELATED