What to know
- To attach a photo to an email using the Mail app, open the Mail app > Compose > Compose email > Photos icon above keyboard > Select Photos > Send.
- To Attach a photo to an email in Gmail, open the Mail app > Compose > Compose email > Attachment > Tap and hold on image > Select multiple images > Send.
- You can attach a photo to an email using native or third-party apps on the iPhone as well. Follow the step-by-step guides below for each app.
Sharing pictures via email on your iPhone is easy, and there are different ways to do it. This guide will help you understand how to attach photos in popular email apps like Mail, Gmail, and Outlook. We will also take a look at how you can attach images directly from the Photos and Files apps on your iPhone. If you’re looking to send images as an attachment specifically, we will also take a look at how you can convert inline images as attachments on your iPhone. These options should help you share images with someone easily using an email from your iPhone. Let’s get started!
How to attach a photo to an email on an iPhone
Here’s how you can attach a photo in an email on your iPhone. Find the email app you prefer to use in the sections below and then follow along with the process. Let’s get started!
In Mail
If you use the default Apple Mail app, then here’s how you can add images as an attachment to your mail. Follow the steps below to get you started!
Open the Mail app on your iPhone.

Tap on Compose icon in the bottom-right corner.
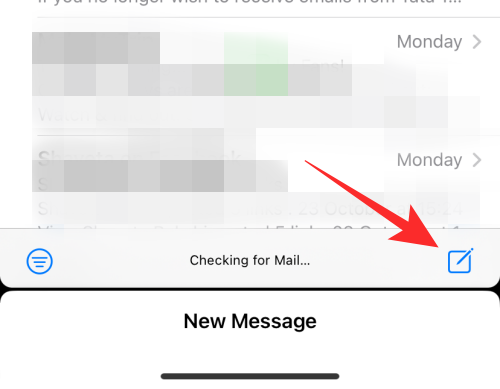
Now, add the concerned email address beside To: at the top and compose your email as needed.

Tap on the Photos icon above your keyboard to attach images.
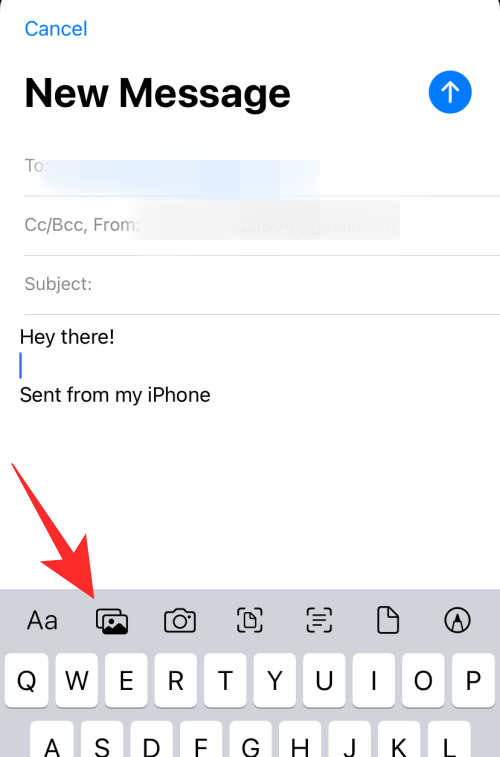
Select the photos you wish to add to the email by tapping on them at the bottom.
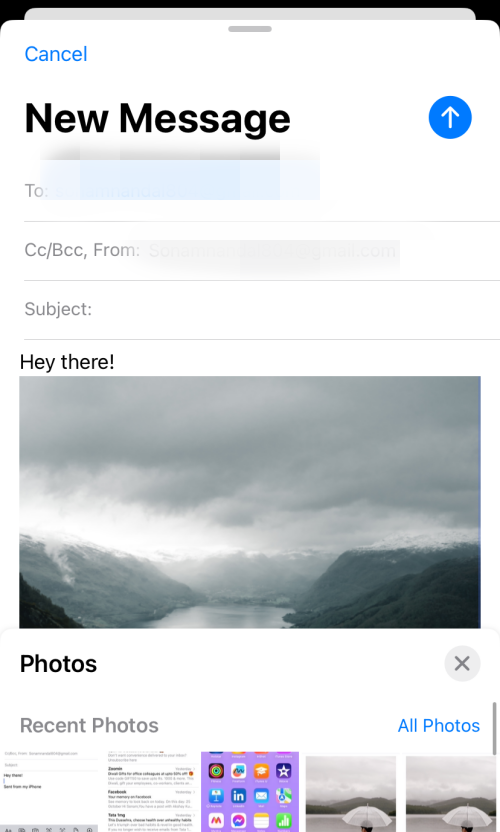
Once you are done, tap on the Send icon in the top-right corner.

And that’s how you can attach and send emails when using the default Mail app on your iPhone.
In Gmail
If you’re a Gmail user, then here’s how you can attach and send images in an email on your iPhone. Follow the steps below to help you along with the process.
Open Gmail on your iPhone.

Now tap on Compose in the bottom-right corner.

Add the necessary email address beside To at the top and compose your email as needed. Once you are done, tap on the Attachment icon in the top right corner.
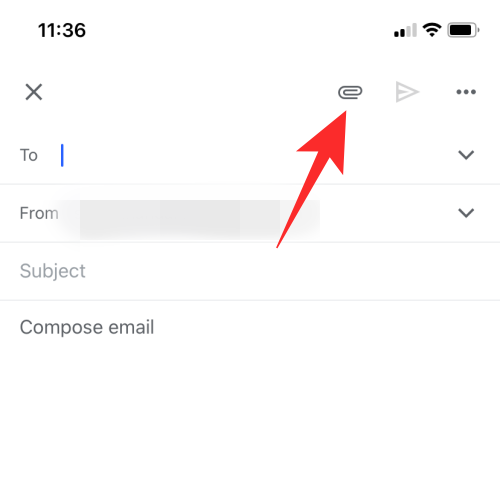
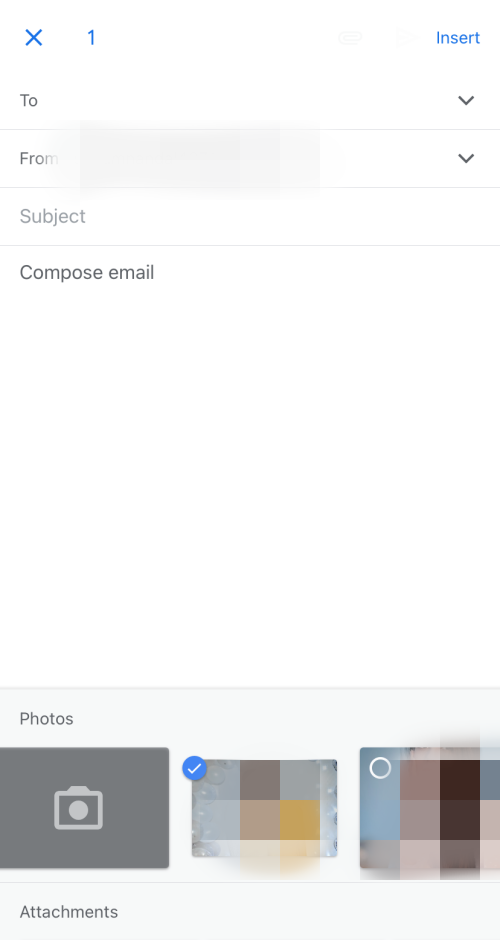
Tap and hold to select the concerned image. If you wish to select multiple images, you can do so by tapping other images once you’ve selected the first one.
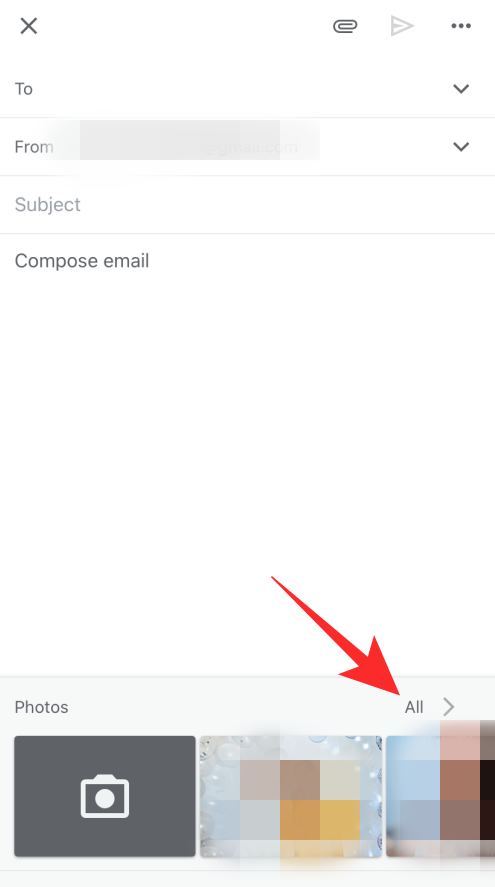
If the image you wish to attach is not available in your recent images, you can tap on All to view all images.
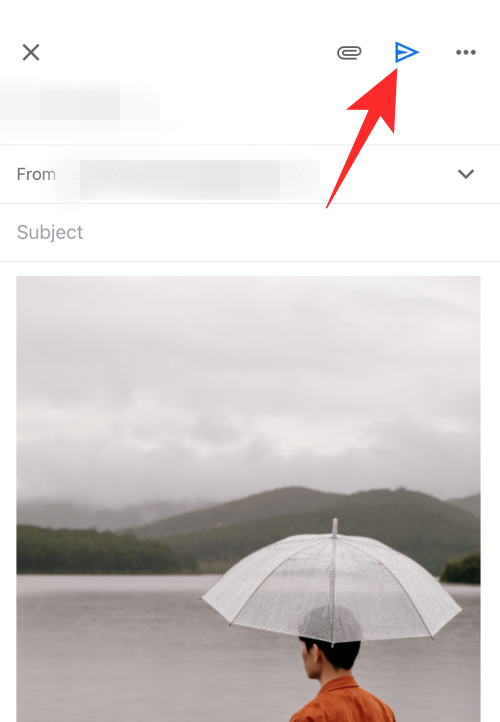
Tap on the Send icon once you have attached all the images to send the email.
And that’s how you can attach and send images in an email in the Gmail app on your iPhone.
In Outlook
If you’re an Outlook user, then you can use the steps below to attach and send images in an email. Let’s get started!
Open Outlook.

Tap on New Email in the bottom-right corner.

Compose your email as needed. Once you’re done, tap the Attachment icon right above the keyboard.

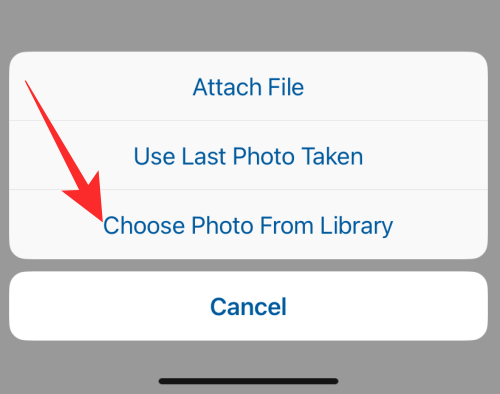
Select Choose Photo From Library.
Tap and select the images you wish to attach.
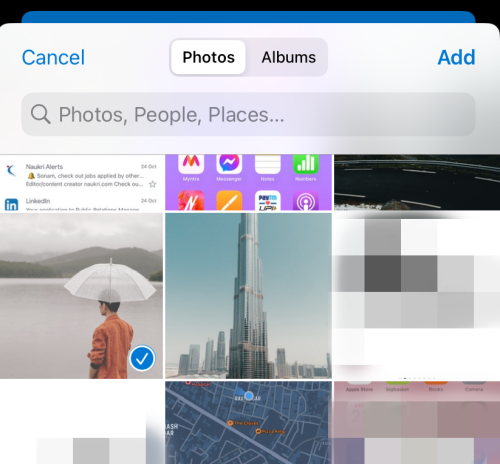
Once done, tap on Add.

The images will now be attached to your email. Tap on the Send icon.

And that’s how you can attach and share images in an email when using the Outlook app on your iPhone.
Attach images from the Photos app
You can also attach images you wish to share directly from the Photos app. This can make the process easier if you have a lot of images and are facing issues when trying to find the concerned images in your mail app. Follow the steps below to help you along with this process.
Open the Photos app on your iPhone.

Select the album from which you wish to share images.

Tap and select the image you want to send.
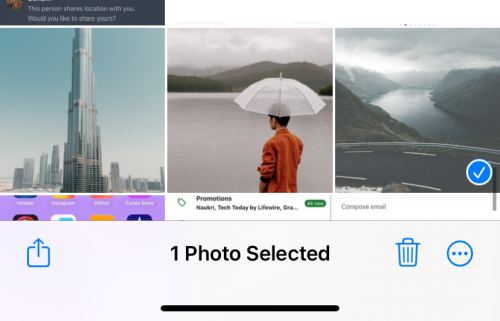
If you wish to share multiple images, tap on Select in the top right corner of your screen.

Now tap and select multiple images.
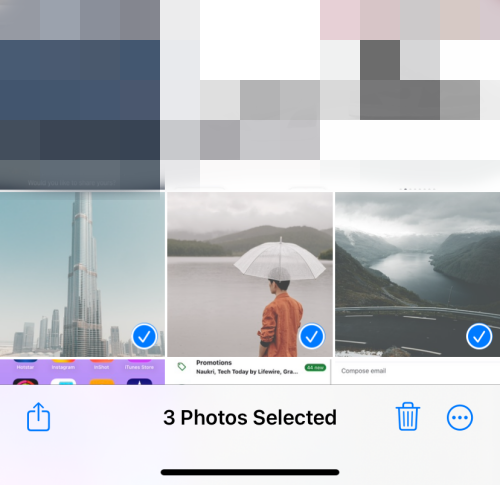
Once done, tap on the Share icon in the bottom-left corner.
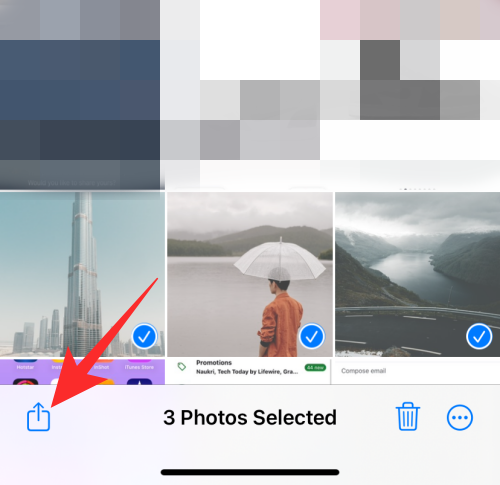
Tap and select your preferred email app.
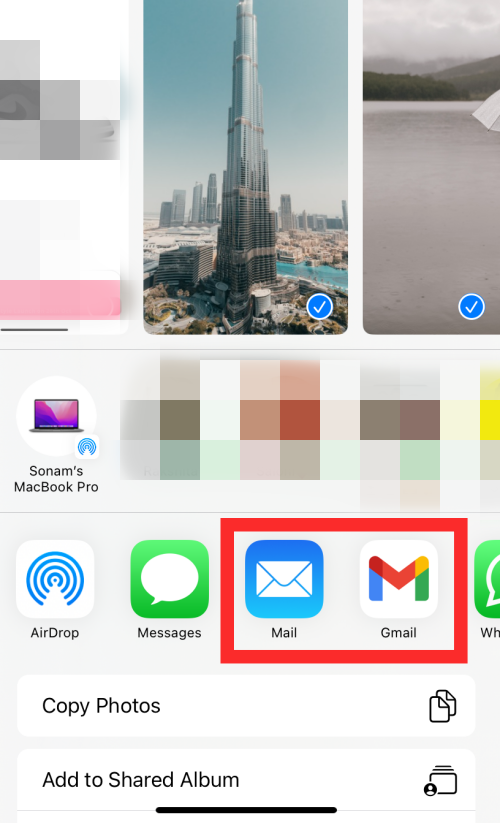
Compose the email as needed and tap on the Send icon.

And that’s how you can attach and directly share images using an email from the Photos app.
Attach images from the Files app
If the images you wish to attach and share are stored in the Files app, then you can attach them directly in an email without having to save them in the Photos app first. Follow the steps below to help you along with the process.
Open the Files app on your iPhone.

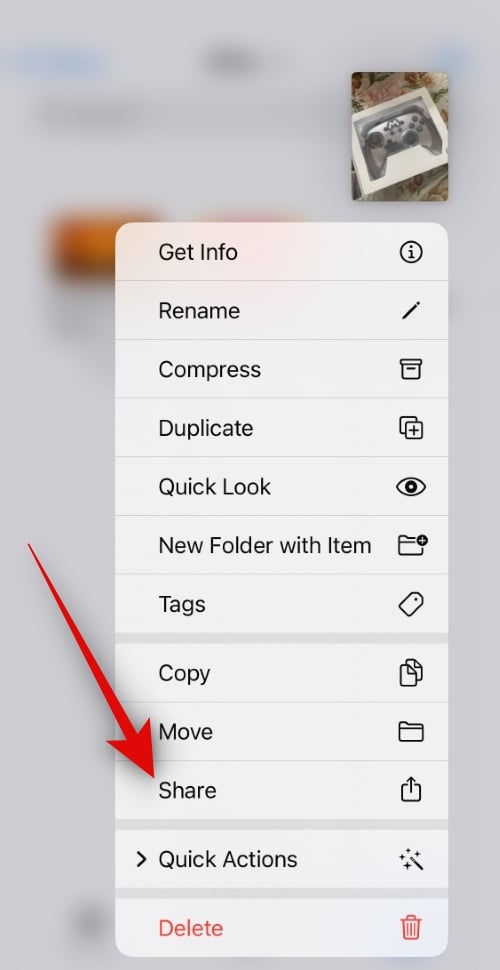
Navigate to the image you wish to share and tap and hold on it.

Tap on Share from the context menu.
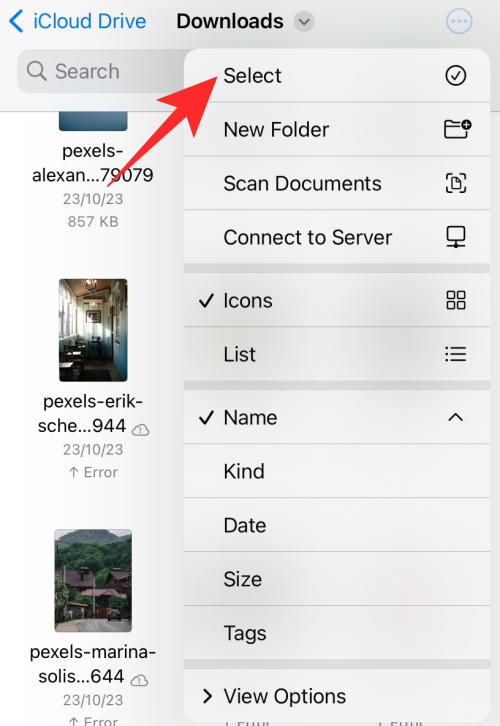
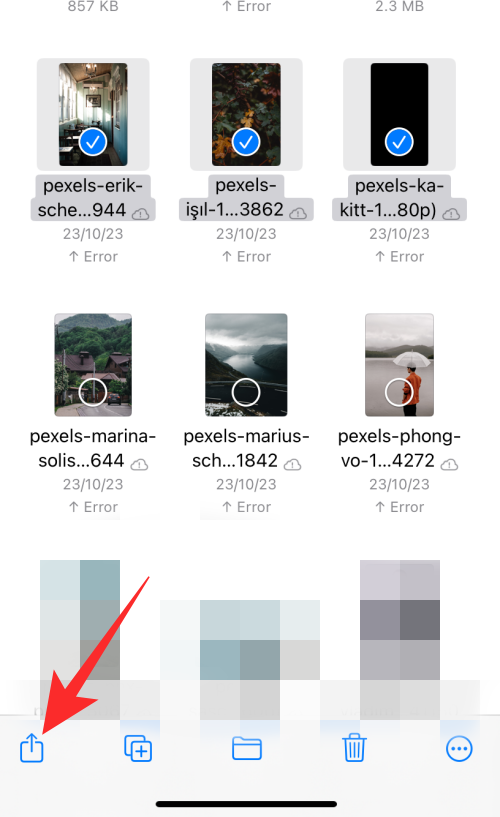
If you wish to share multiple images, tap on the Ellipsis icon in the top right corner of your screen.

Now tap on Select.
Tap and select the multiple images that you wish to share.
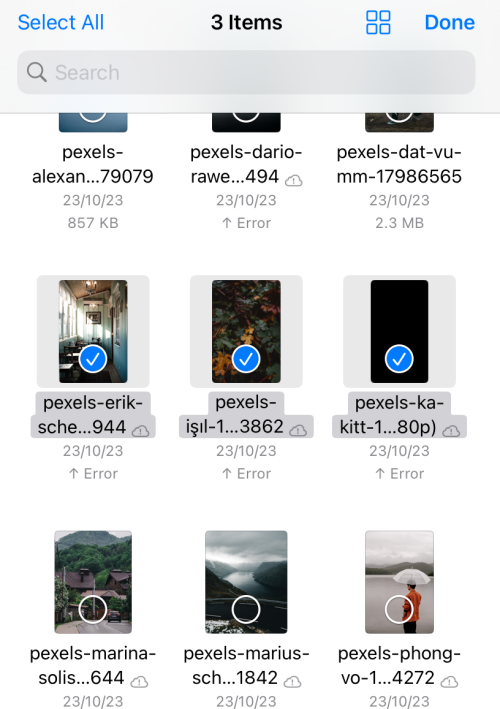
Next, tap on the Share icon in the bottom-left corner.
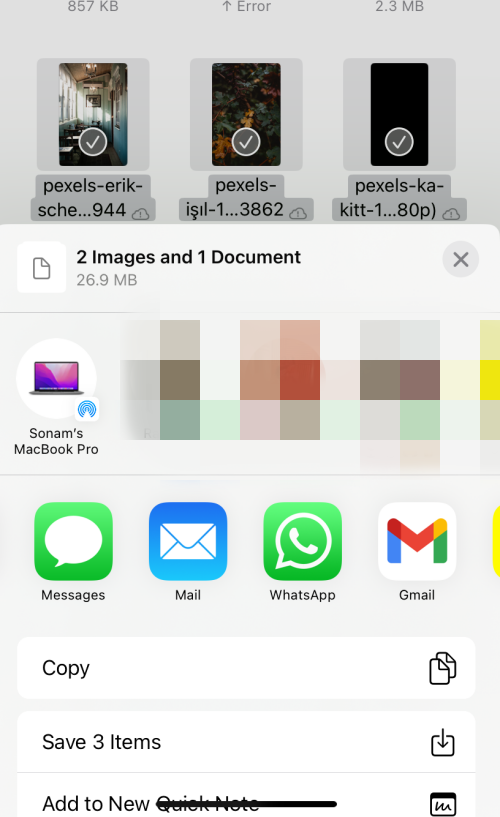
Tap and select your preferred email app from the share sheet.
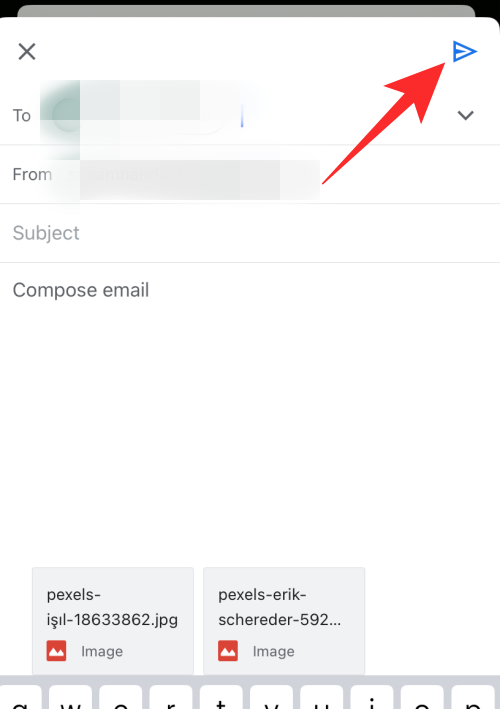
Compose email as needed and tap on the Send icon in the top right corner to send your email once you’re done.
And that’s how you can directly attach and share images from the Files app on your iPhone.
Attaching images from third-party apps
If you want to share pictures from third-party apps, it can be different depending on the app you’re using. Sometimes, those apps don’t allow you to share pictures directly. So, you might have to save the picture to your phone first, usually in the Photos or Files app. After that, you can easily share it using one of the methods discussed above. Please keep in mind that when it comes to social media platforms, most don’t allow you to download and share images. In such cases, we recommend using the relevant link as images on social media platforms may be subject to copyright, and you might be violating someone’s privacy if you download and share them using a third-party service.
How to make sure images are not inline and an attachment instead
Images that are attached as inline will be added to the email body. This is useful when you’re creating proposals, etc, where you want images to appear side by side with your text. But if you don’t prefer your images attached to the email body and want to send images simply as attachments if it is not a proposal, brochure, etc., then you can follow these steps. Here’s how you can share the images as attachments in different Email apps on your iPhone.
In Mail
If you’re using the default Mail app, then you don’t need to worry. Every image you attach or add to your email will be sent as an attachment. You don’t need to make any changes when using the default Mail app to send your images as an attachment instead.
In Gmail
Gmail is a bit finicky when it comes to inline attachments. If you attach a single image or attach images one by one, then they will be added as inline images in the email body. However, if you add multiple images at once to an email, then they will be sent as attachments. This doesn’t mean that you can’t send a single image as an attachment. You simply need to convert it once it has been added in the email body. Follow the steps below to help you do the same on your iPhone in the Gmail app.
Open the Gmail app on your iPhone.

Now tap on Compose in the bottom-right corner.

Compose the email as needed, and tap on the Attachment icon when you’re ready to attach your image.

Tap and select the concerned photo, which will be instantly added to your email’s body. Once the image is added, tap and hold on the photo to view the context menu. Now tap on >.
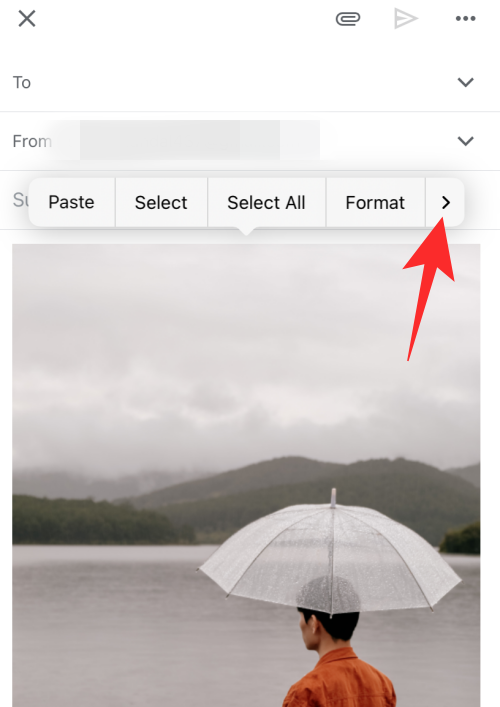
Select Send as attachment instead.

Compose other parts of your email as needed and tap on the Send icon.
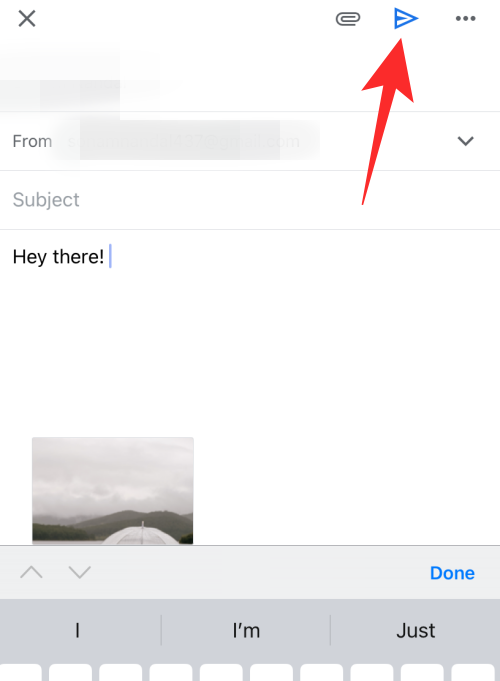
The selected image will now be converted and sent as an attachment in the current email instead, on your iPhone.
In Outlook
If you’re an Outlook user, then you’re in the clear. Whether you attach single or multiple images in an email when using the Outlook app, all images are converted to attachments and sent as attachments instead. So, when using the Outlook app, you don’t need to worry about images being sent in your email body instead.
Sending images as an attachment using other email apps
If you are using third-party email apps, most of them attach all types of files, including images and documents, as regular attachments. You will typically have the option to switch an inline image to an attachment by tapping and holding the image as we did for Gmail in the guide above.
We hope this post helped you easily attach and share images in an email on your iPhone. If you face any issues or have any more questions, feel free to reach out to us using the comments section below.


Hiii Nerds chalk
Hiii Giv mi aderas &foto