
![How to extract files in Windows 11 [AIO] [2024]](/content/images/size/w2000/format/webp/wp-content/uploads/2023/01/extract-files.png)
File archiving is a boon for Windows users looking to cram multiple files into a single file in order to save space. Not only does it clear up storage but also makes it convenient to share multiple files as one. But that’s only one side of the story. You also need to extract the files from the compressed or archived file to gain access to the contents.
But given the sheer number of archived file types that are out there, how does one go about extracting files? Depending on the compressed file that you want to extract, the answer to that can vary. Here’s everything you need to know about how to extract files in Windows 11, both through native as well as third-party applications.
Related: How to use 7-Zip on Windows 11
Native ways to extract files on Windows 11
Windows can extract files from a variety of archive formats. These include ZIP, 7z, RAR, TAR, TAR.GZ, TAR.BZ2, TAR.ZST, TAR.XZ, TGZ, TBZ2, TZST, and TXZ.
If you have an archive file that is in one of the aforementioned formats, you don’t need to install anything. Windows’ own built-in tools can do the job for you. There are three ways in which you can extract files on Windows using its native tools.
Method 1. Using the File Explorer (Level: Easy)
Windows has a very convenient file extraction option built into File Explorer itself. Although that is the only archive format that it supports, the convenience of being able to extract zipped files right from File Explorer cannot be disputed. If your compressed file has a .zip extension, here’s how to use File Explorer to extract its files.
- Press
Win+Eand open File Explorer. Navigate to your zipped file and select it. Then click on Extract all in the pane above.
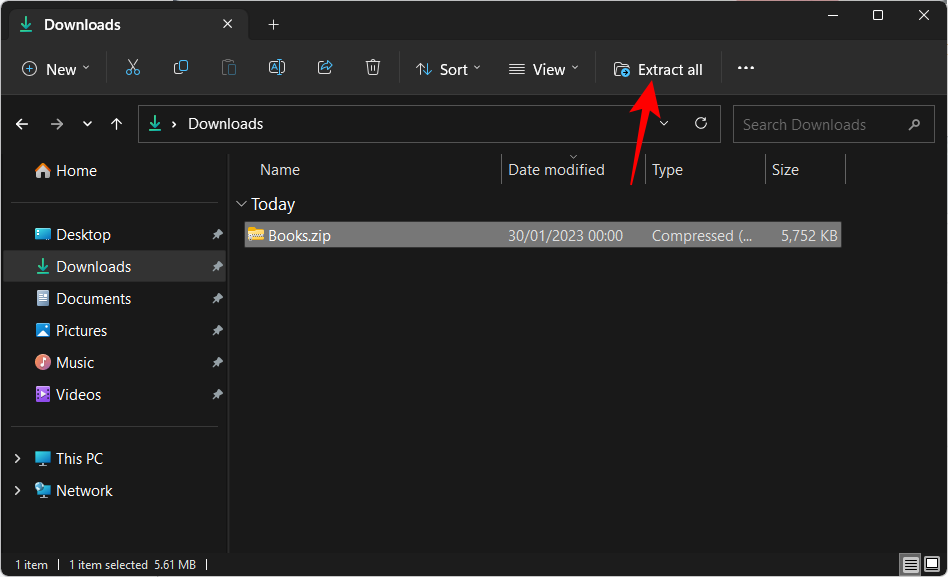
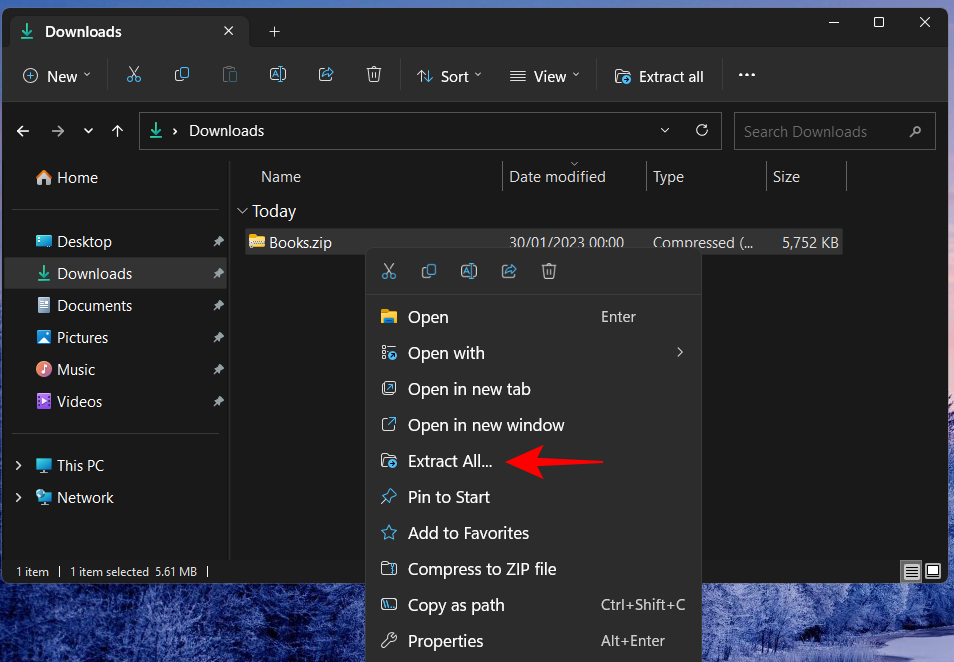
- Alternatively, right-click on it and select Extract all.
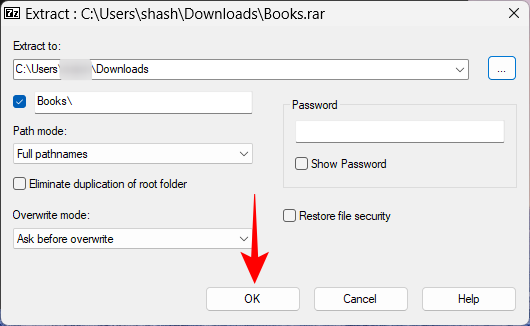
- In the extraction wizard, click on Browse to change the extraction path.
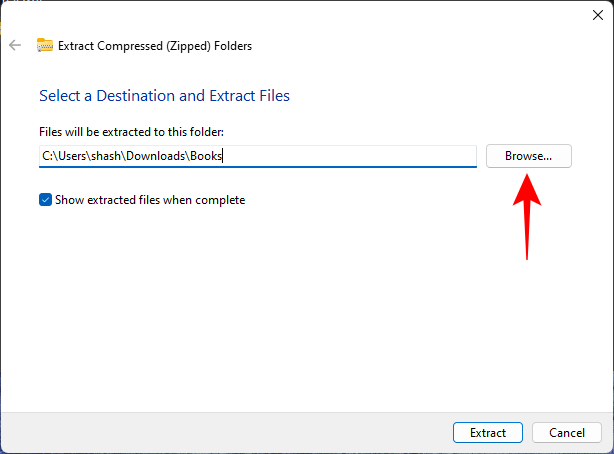
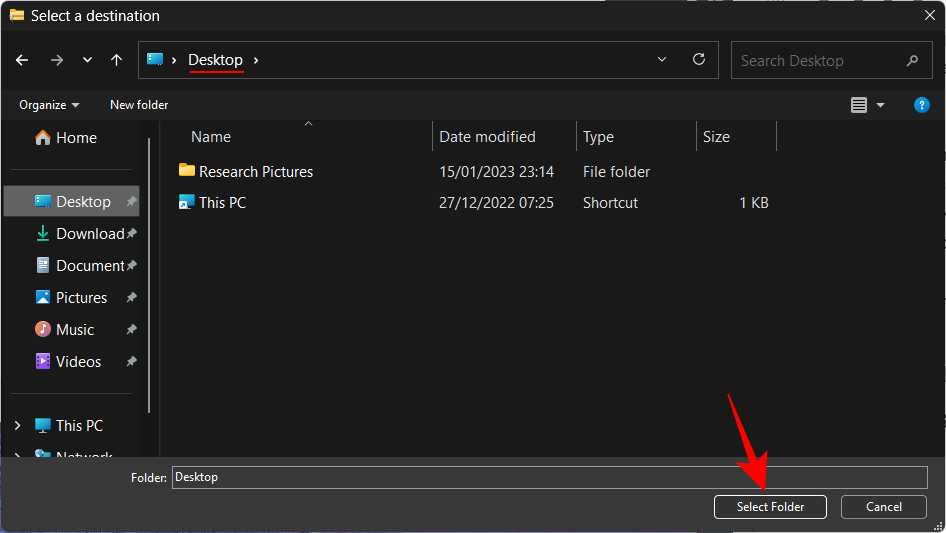
- Select your folder and then click on Select folder.
- Click Next.
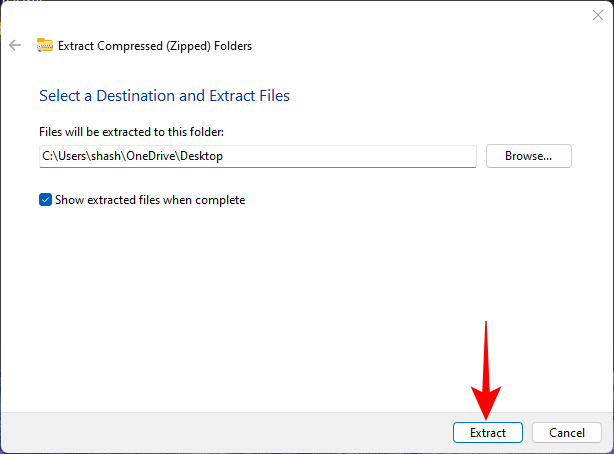
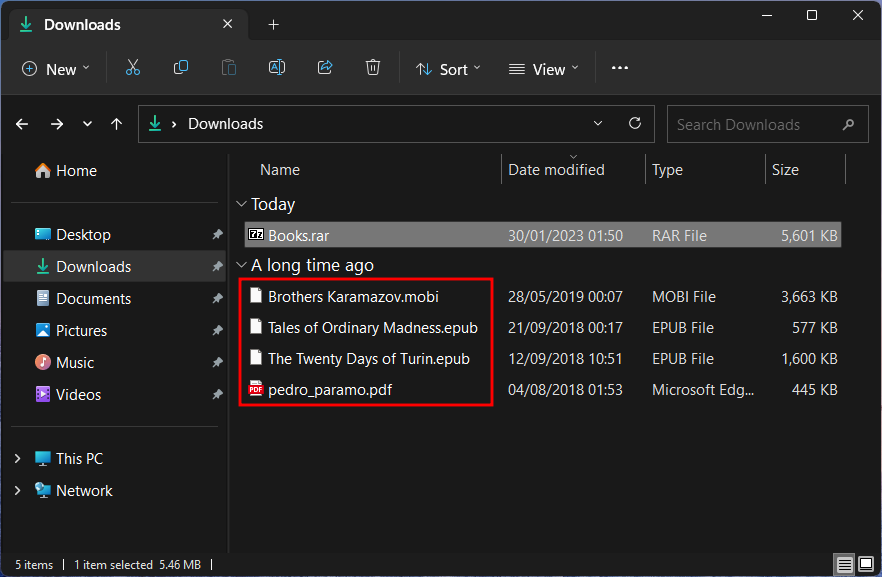
- The files will now be extracted and available at your selected destination.

Related: 7 ways to open ZIP files on Windows 11
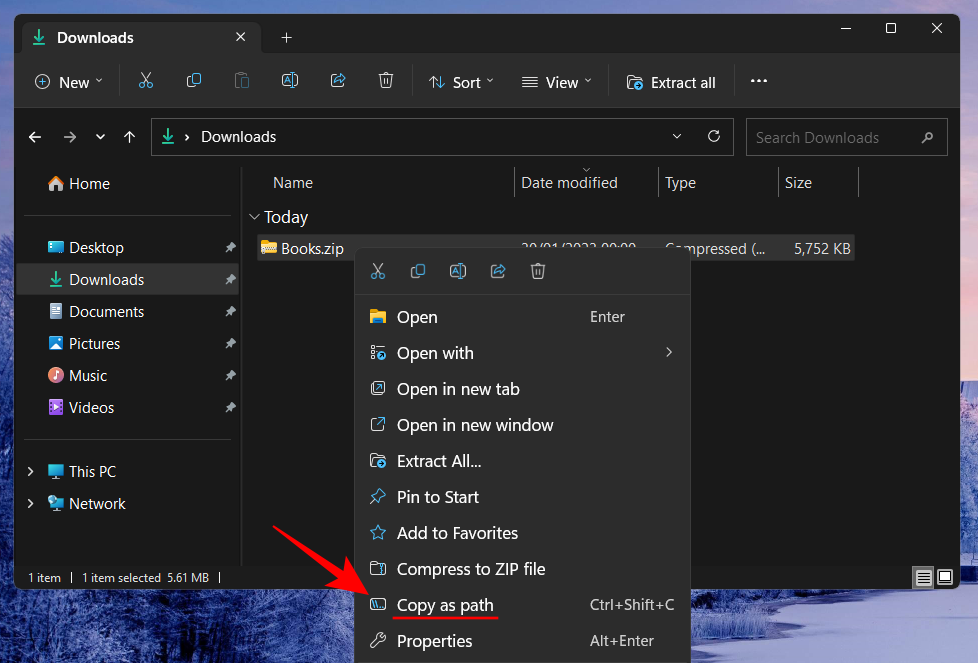
Method 2. Using the Command Prompt (Level: Hard)
Windows’ command terminals such as the Command Prompt can also be used to extract files. In 2018, Windows added the TAR command tool to the command prompt so users can extract files with a single command. Here’s how to use it to extract files on Windows 11:
- Open the File Explorer and navigate to your zipped file. Then click inside the address bar and press the
Deletebutton to clear the address bar.
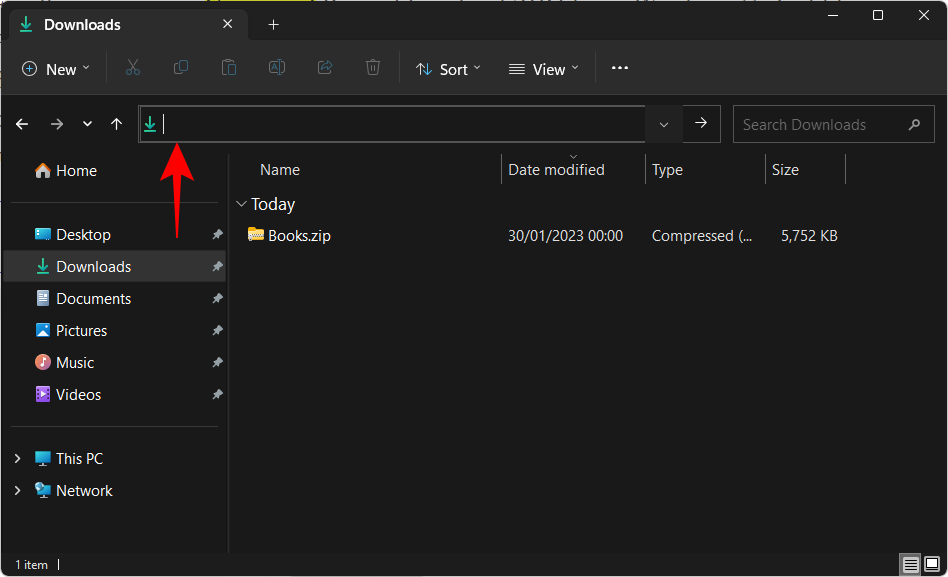
- Here, type cmd, and then hit Enter.
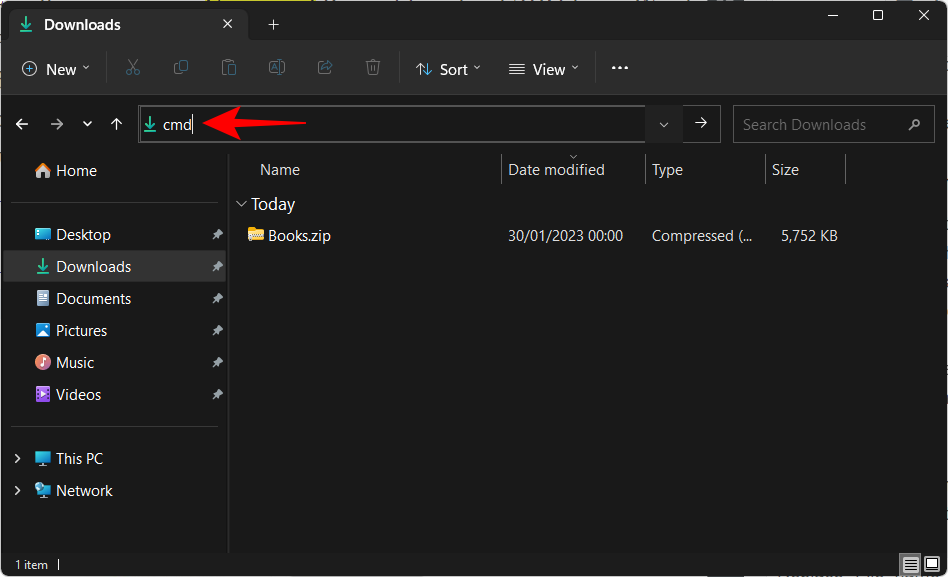
- This will open the command prompt with the folder as the directory. Here, type the following command:
tar -xf File_name.zip
Replace “File_name” with the actual name of your zipped file.
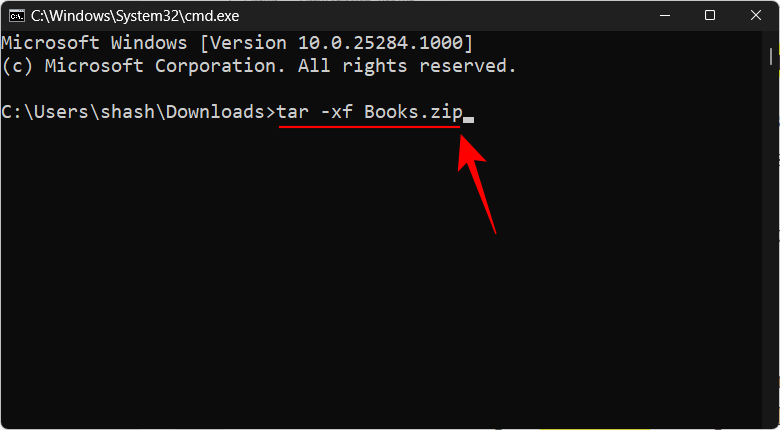
- Then hit Enter. Your files will be extracted in the same folder as the zipped file.
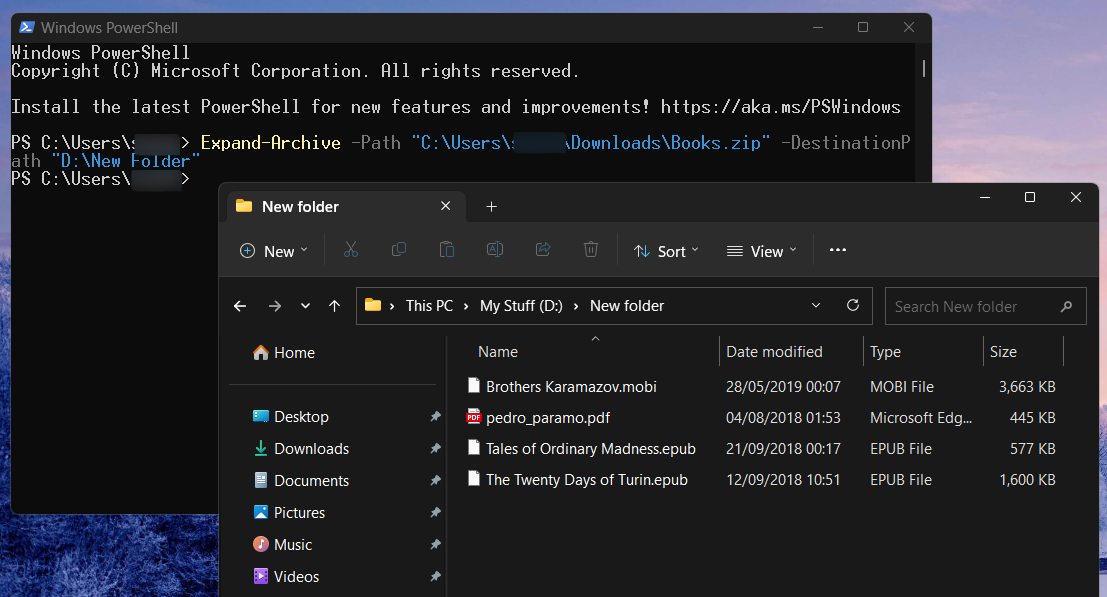
Method 3. Using PowerShell (Level: Hard)
PowerShell can also extract your files with just a single command on Windows 11 though you will have to input the source and destination path for the files. Here’s how to go about it:
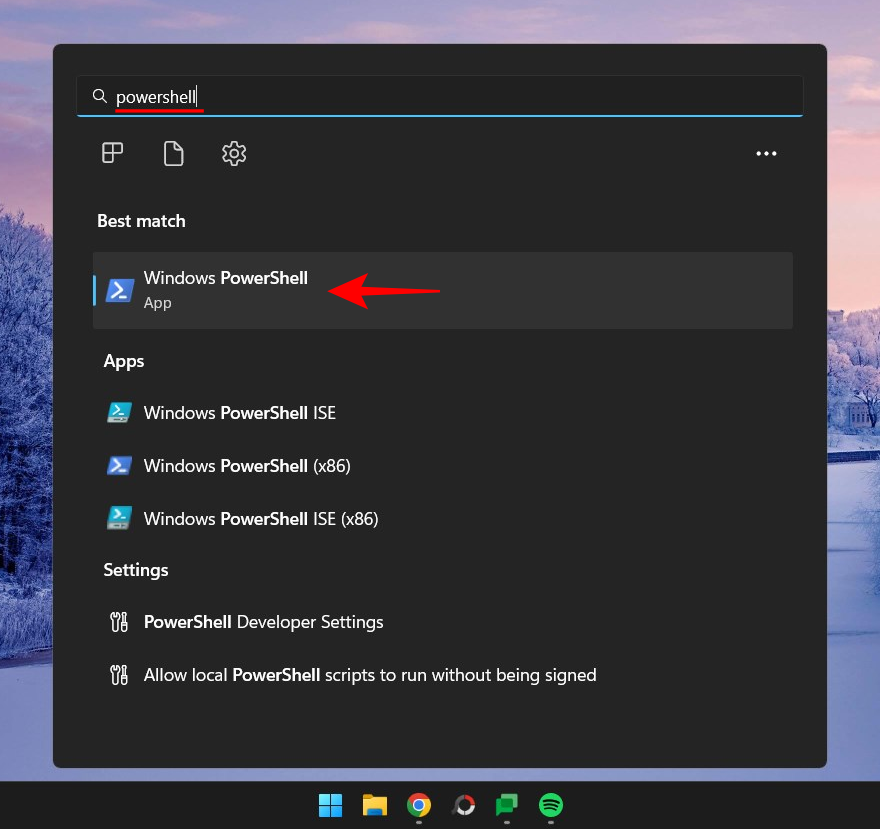
- First up, navigate to your zipped file, right-click on it and select Copy as path.
- Now press Start, type powershell, and hit Enter.
- Type the following command:
Expand-Archive -Path "zip-file-path" -DestinationPath "destination-path"
Replace zip-file-path with the actual path of the zip file by pasting what you copied earlier (pressCtrl+V). Then, instead of destination-path, add the location where you want the files to be extracted.
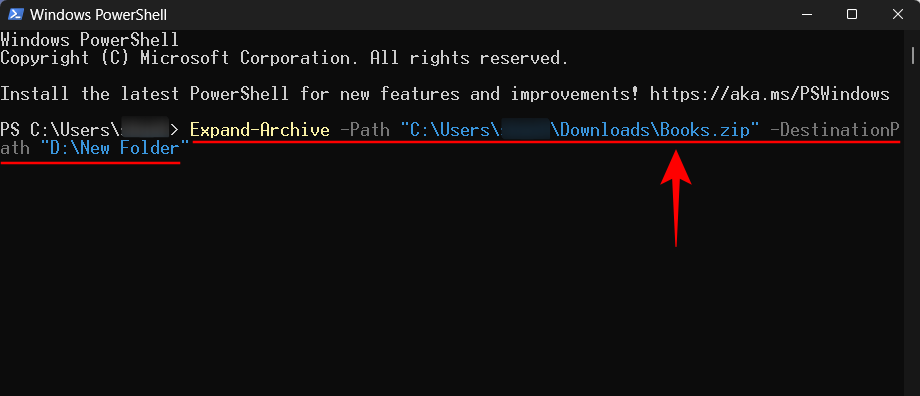
- Then hit Enter. Your files will be extracted to the destination folder.
Extract files using third-party apps on Windows 11
So far we’ve only looked at how to extract zip files on Windows 11 using built-in tools. But if you have any other archived file format that you want to extract files from, you will without exception have to rely on a third-party app. Such apps are a dime a dozen and provide all the necessary tools to archive as well as extract from any number of compressed file formats.
But there are a few names that do trump the rest and are widely used by thousands if not millions of users, thanks to the compression and extraction options that they provide. So, without further ado, let’s take a look at some of the best file extractors that you can get, and how to use them to extract files on Windows 11.
Method 1. Using 7-Zip
When it comes to delivering the complete archiver cum extractor package at no cost whatsoever, there are not many that compete with 7-Zip. Here’s how to install and use it to extract files:
- 7-Zip | Download Link
- Click on the link above to go to 7-zip’s download page. Then click on the first Download link.

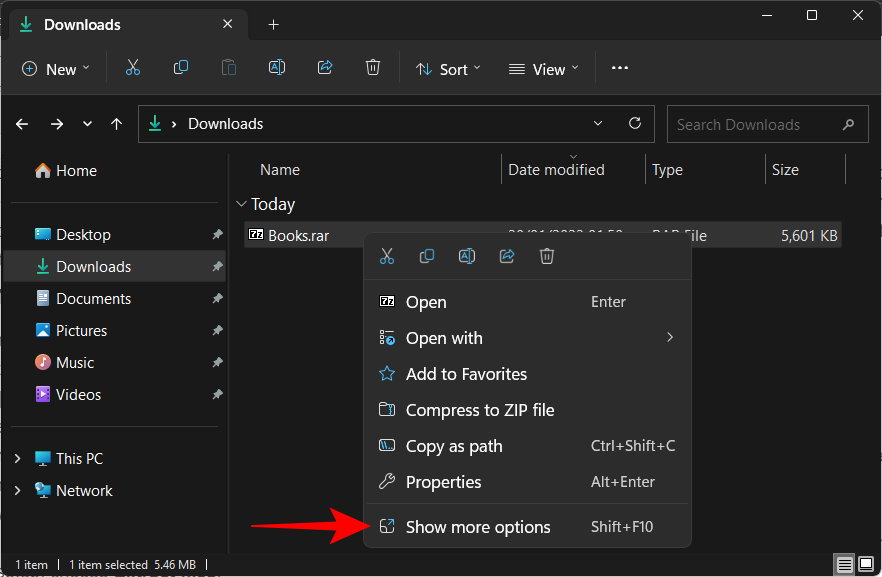
- Once downloaded, run the setup and follow the on-screen instructions to install 7-Zip. Now, right-click on your archived file and select Show more options.
- Then hover over 7-Zip. Here, you will see a bunch of options but the ones to focus on are “Extract files”, “Extract Here”, and “Extract to…”.
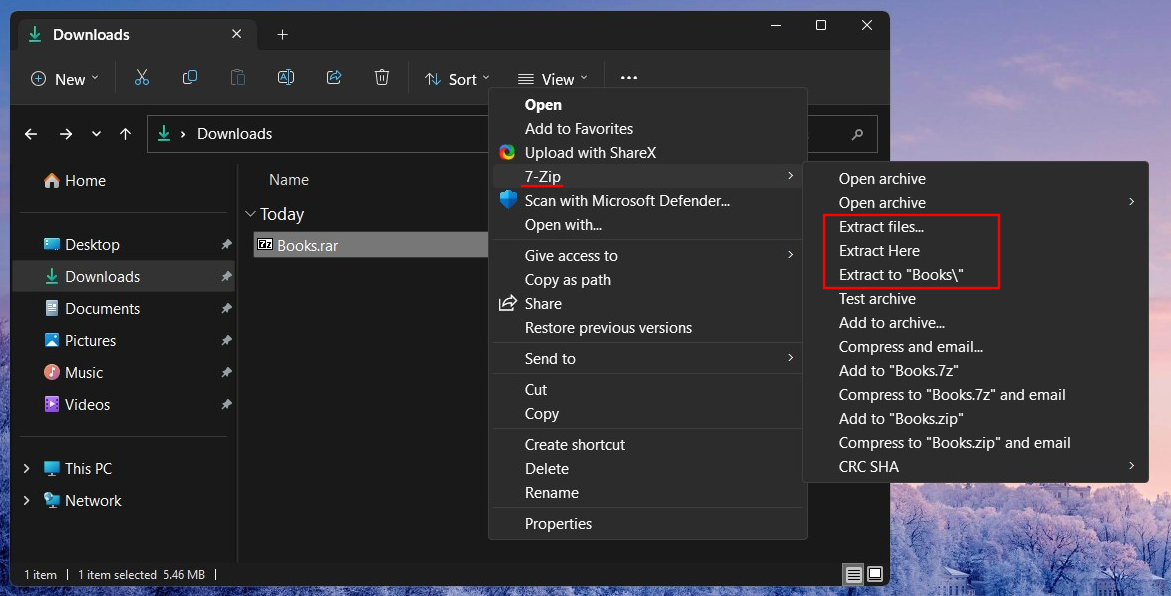
- All three of these will extract your files for you. But depending on where you want them extracted, you can choose differently. For instance, if you want to get the basic extraction setup, choose “Extract files”. In the extraction window, you will be able to change the destination folder by clicking on the three-dot button next to the output path.
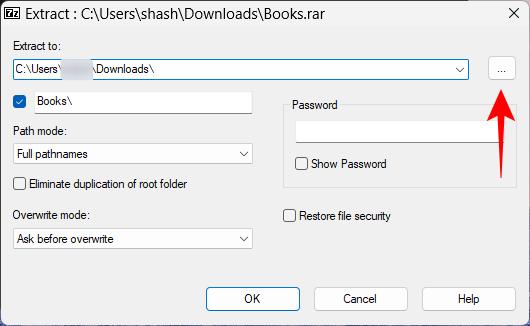
- Select your destination and click OK.
- You can also configure whether you want a separate folder for your extracted files and enter the password if it’s a password-protected file, among other things. Or simply click OK to extract.
- This was the long way to extract files. If you want to speed this up, select either Extract here or Extract to…
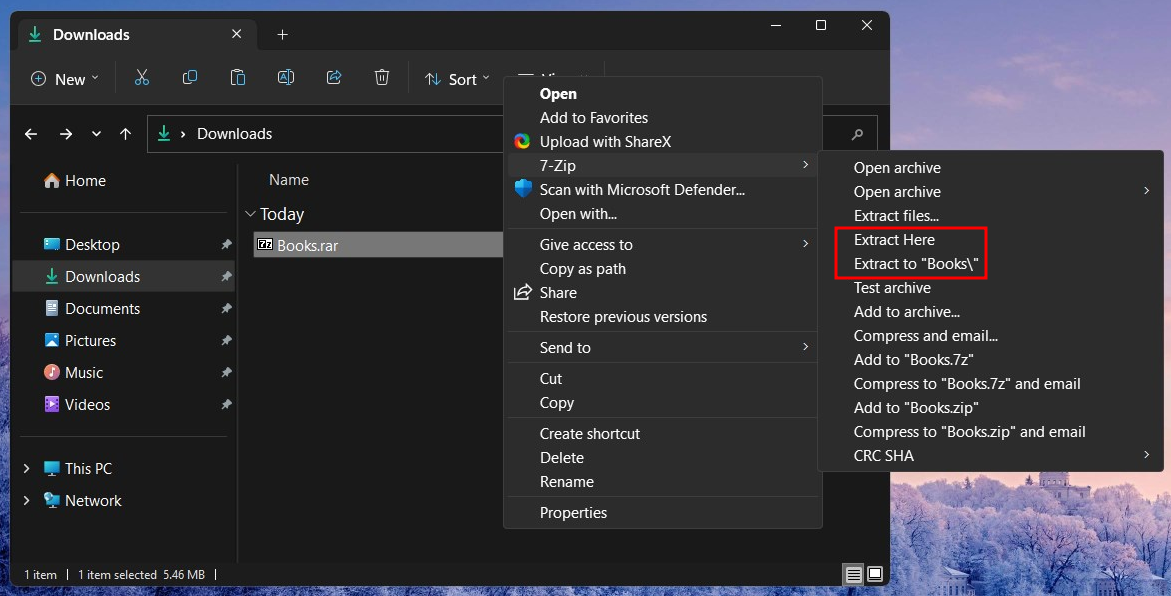
- The only difference between the two is that “Extract here” will extract your files in the same folder as the archived file.
- On the other hand, “Extract to…” will create a new folder with the same name as the archived file and extract the files within it.
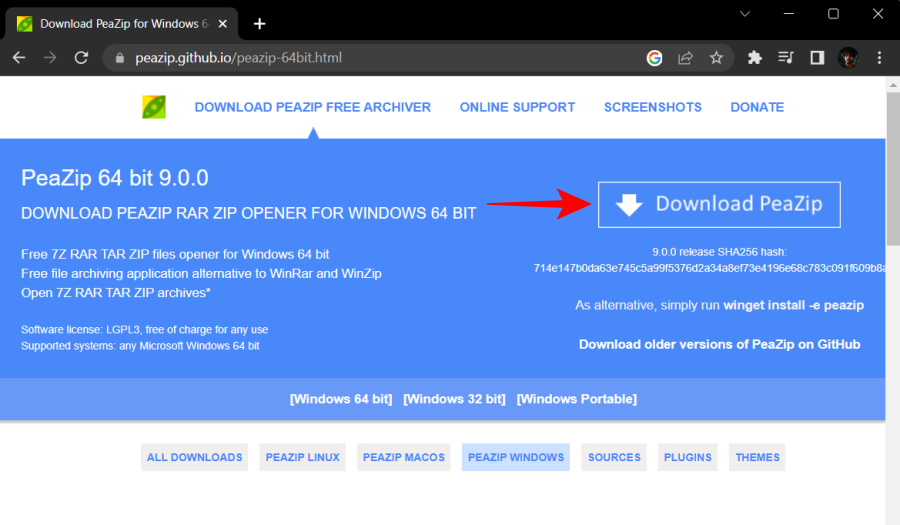
Method 2. Using PeaZip
Next up, we have PeaZip, another archive extractor worth a try. The great thing about this app is its user interface which is designed to mimic the File Explorer. This way, the user intuitively knows how to use it and all its functions. Here’s how you can use it to extract files:
- PeaZip | Download Link
- Go to the above link and click on Download.
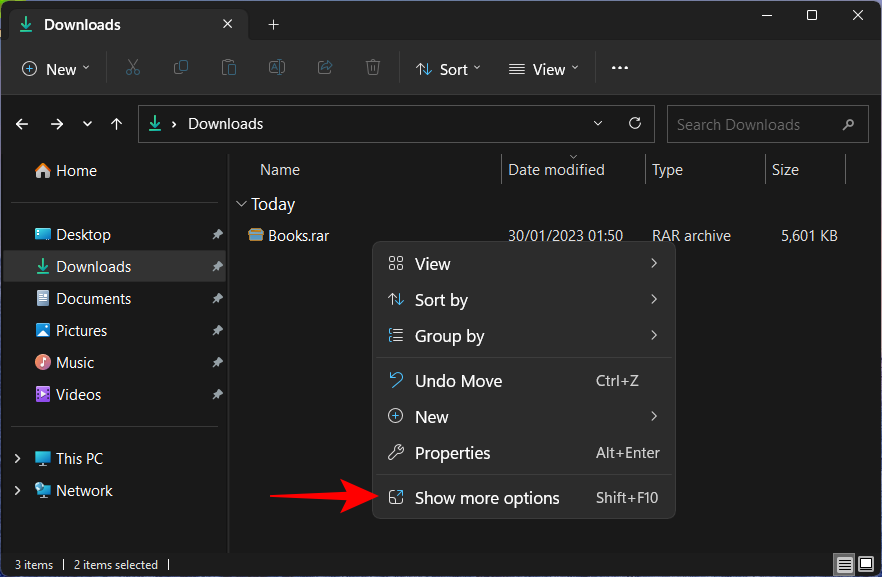
- Next, install the application using the on-screen prompts. Now right-click on your archived file and select Show more options.
- Hover over PeaZip and you will see a few Extract options at the top.
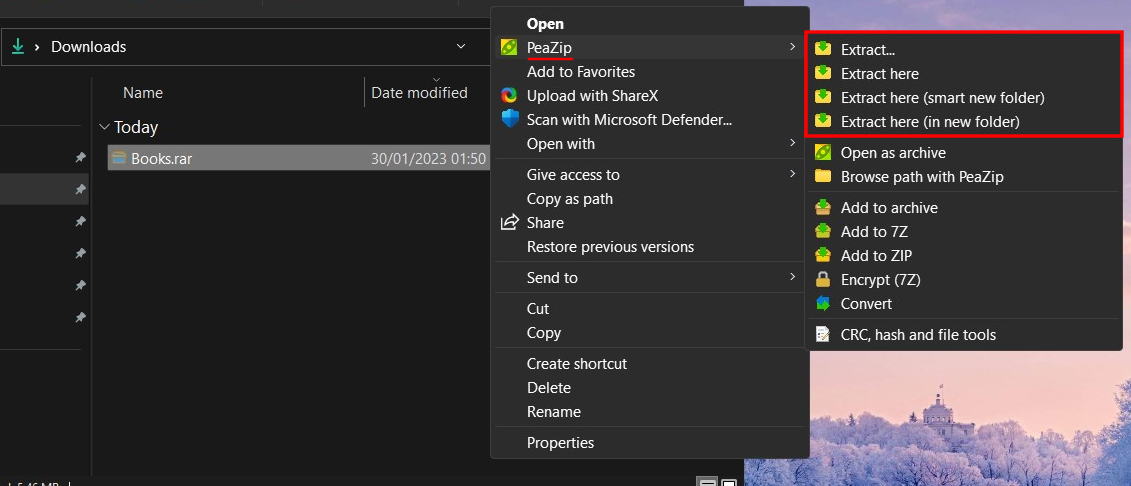
- “Extract” opens PeaZip’s extract configuration window (which we’ll see later); “Extract here” will extract the files in the same folder as the parent file; and the “Extract files (in new folder)” does what it says. Alternatively, you can open the PeaZip app.

- Right from the get-go, you will be able to tell how its File Explorer-like interface is to be used.
- Navigate to where your archived file is located. Then select it and click on Extract on top.
- This will open up the “Extract” window. From here, you can select the output destination, whether or not you want the files extracted all in a separate new folder, and a few other functions. Click on OK to start the extraction.
- Once done, the files will be available as per your configuration and will be easily accessible from the app itself.
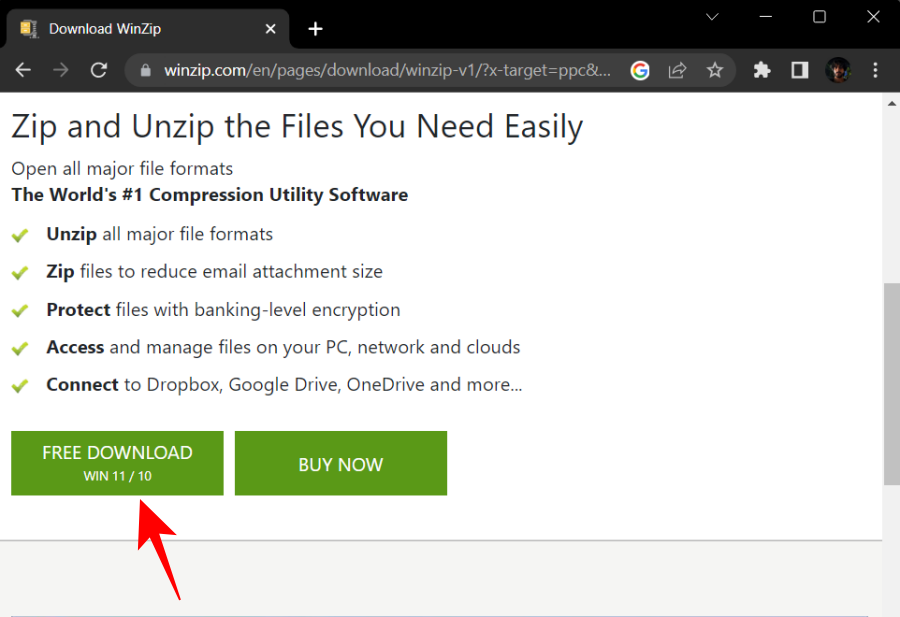
Method 3. Using WinZip Free
WinZip has been around for a while and it’s not surprising to see it available as a paid app with a three-week trial period. Here’s how to use its free version to extract files.
- WinZip Free | Download Link
- Follow the link above and click on Free Download and install WinZip using the downloaded setup file.
- Now simply right-click your archive file and you will find the WinZip option here.

- Hover over it, then on WinZip again and you will find the three standard extract options.
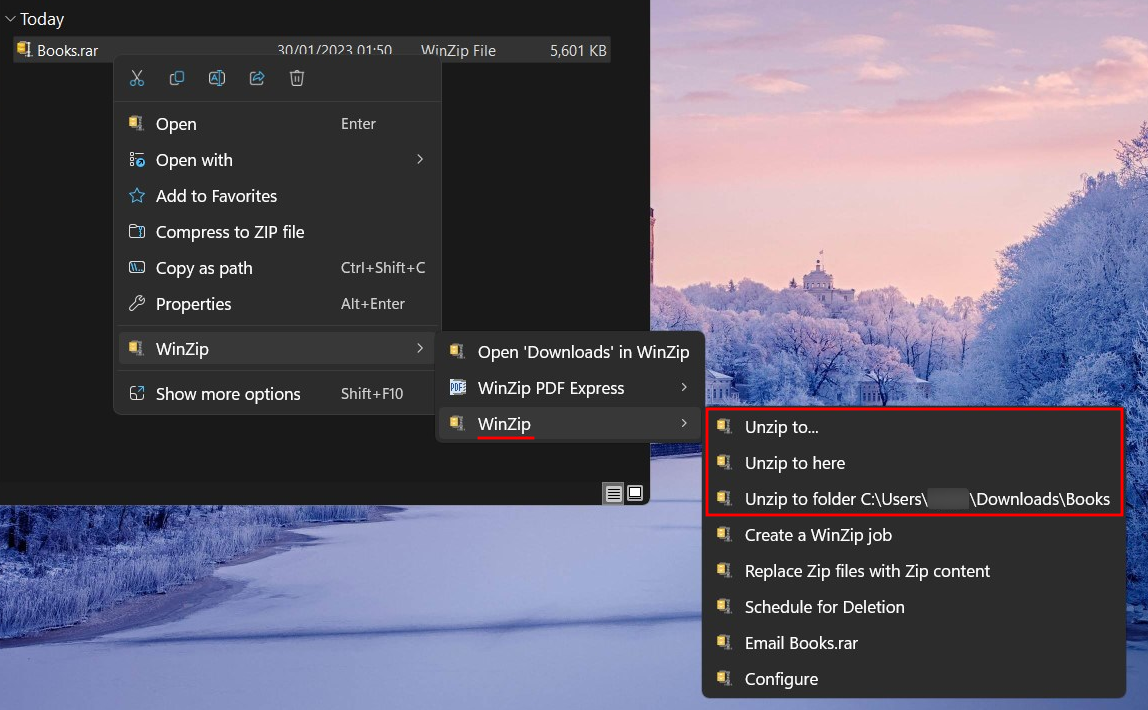
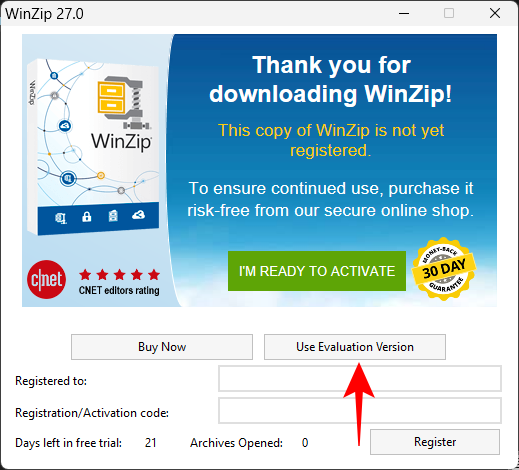
- While extracting, because it is the free version, WinZip will ask you to buy or “Use Evaluation Version”. Click on the latter to proceed.
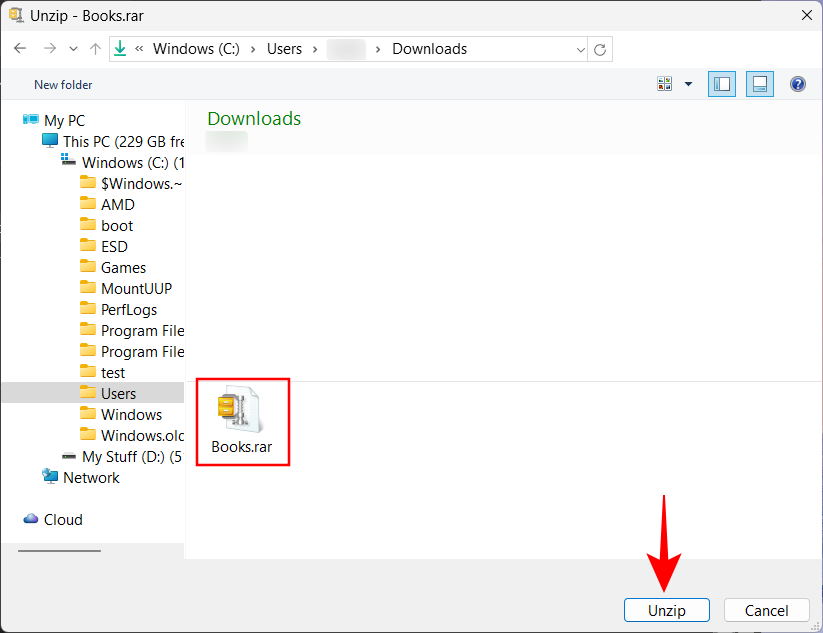
- If you had chosen the basic “Unzip” option, you will be asked to select your destination. Move to the folder where you want to extract the files. Then click on Unzip to start the extraction process.
Method 4. Using WinRAR Free
Another well-known extractor that goes for a price is WinRAR. But we don’t recommend anyone making a purchase before trying out the app first. Here’s how to use WinRAR’s trial version to extract files:
- WinRAR Free | Download Link
- Click on Download WinRAR on the download page given above and install the app.
- Then right-click on your archived file and you will find the WinRAR option from the new context menu itself, similar to WinZip.
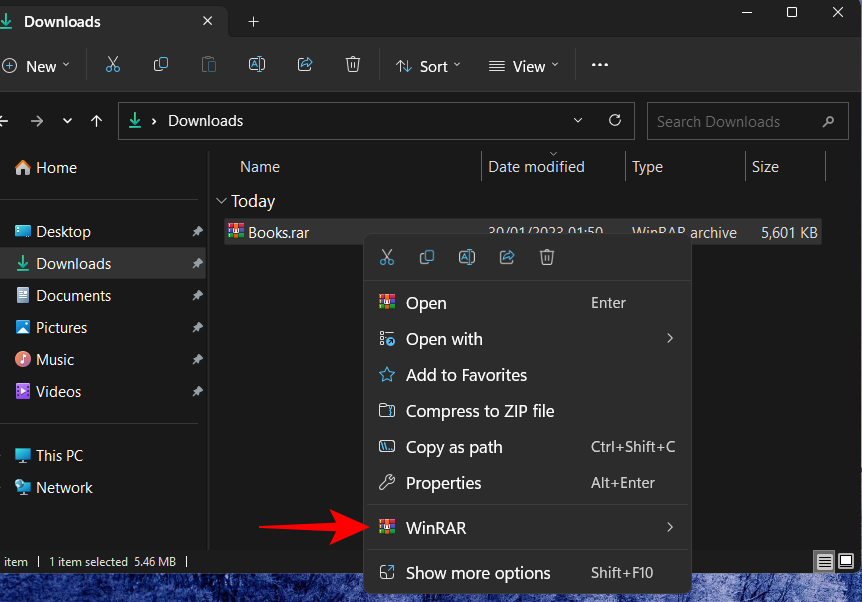
- But unlike WinZip, you can access the extract options with a step less.
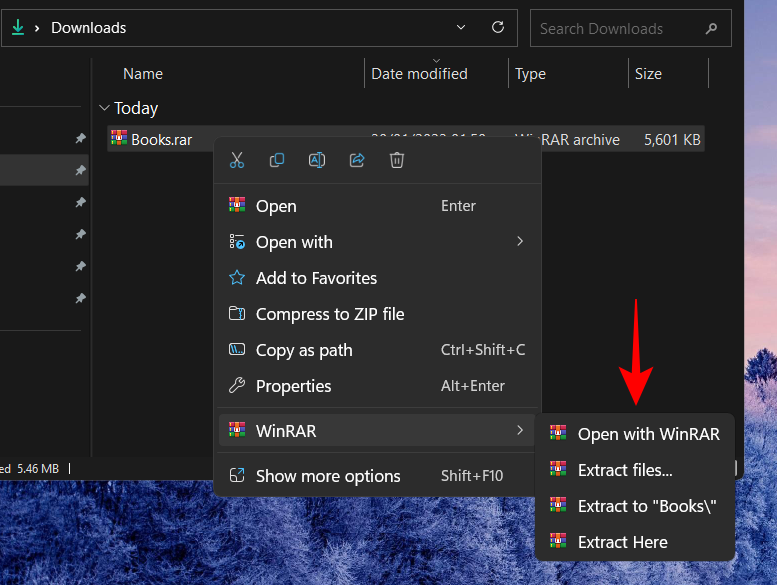
Here’s what all four options are for:
-
- Open with WinRAR – View files within the archive without extracting them.
- Extract files – Opens a new window to configure the extraction process.
- Extract to (name) – Create a new folder and extract the files within it.
- Extract Here – Extract files in the same folder as the archive folder.
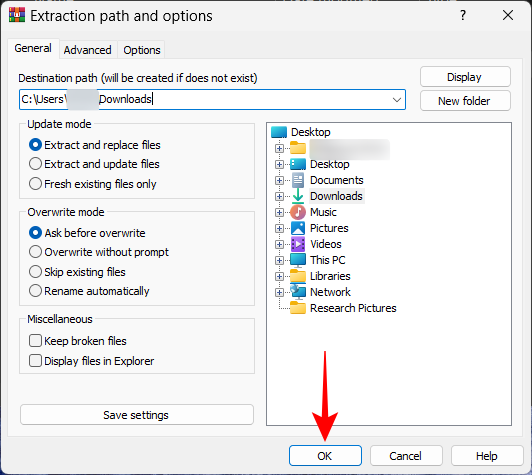
You will already be familiar with the options by now. But the configuration window for WinRAR’s “Extract files” option is different. Here’s what to do when you’re selecting the “Extract files” option to configure your extraction settings:
- Your destination path is shown at the top and can be changed from the right side.
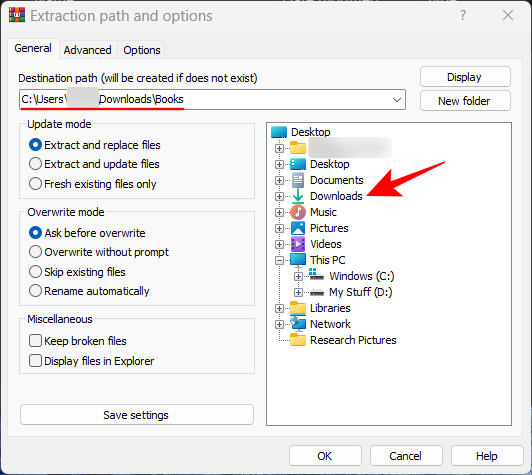
- Additional options are available from the left as well as under the “Advanced” and “Options” tabs at the top which can be utilized to change post-extraction tasks, add attributes, and overwrite files. But if you just want to extract, forego all these and simply click on OK to start extraction.
Extract files online
Third-party apps are all well and good. But if you don’t want to download one and still want to extract files without any format limitations, online extractors can come to the rescue. A quick Google search can yield a number of results.
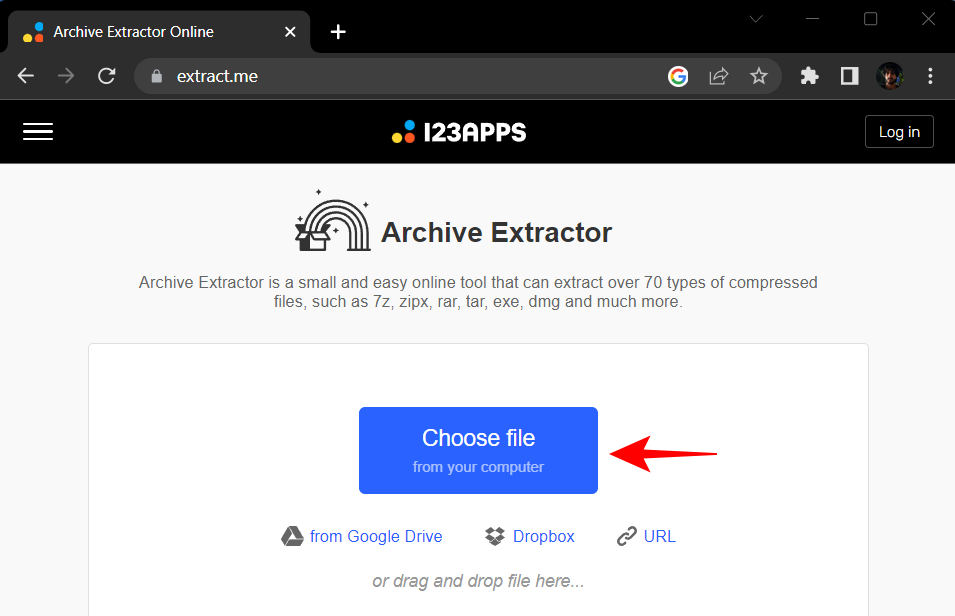
Yes, you can indeed extract a file online and then download its extracted content to save that on your PC. For demonstration purposes, we’re using extract.me.
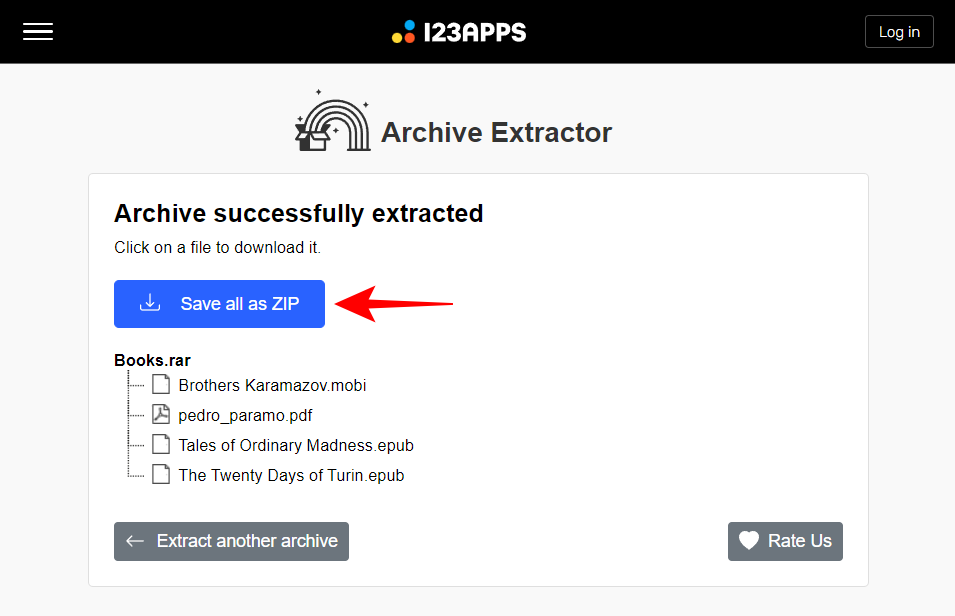
1. Extract.me
- Visit extract.me. Then click on Choose file.
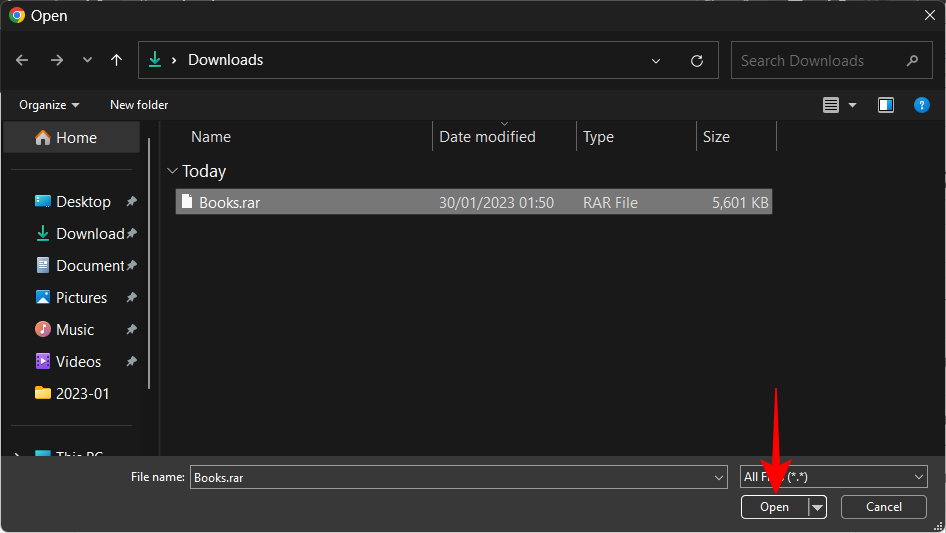
- Select your archived file and select Open.
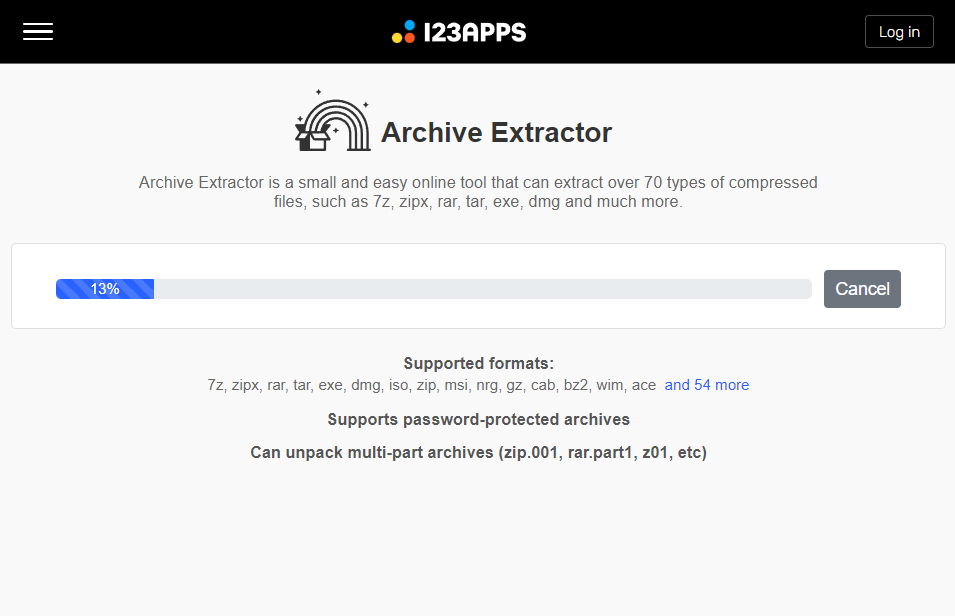
- Wait for the file to upload.
- Here, you can click on individual files to extract and download them.
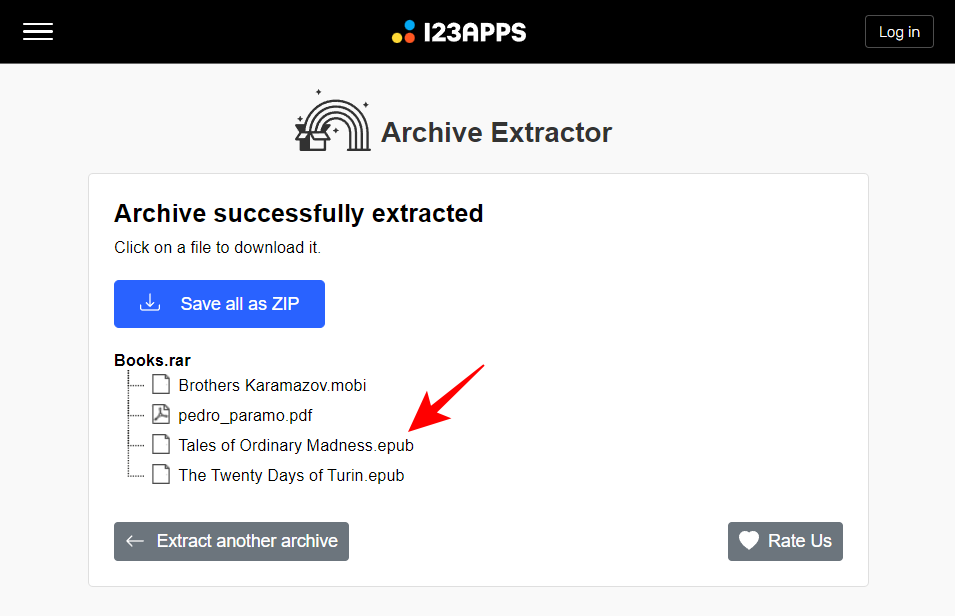
- Or click on Save all as ZIP and download the files as ZIP which can later be extracted using File Explorer itself.
Things to look for in a file extractor or archiver app
Given the similarities between the different third-party file extractors and archivers, choosing one over another becomes a matter of fine points and margins, as well as your own preferences, of course. Let’s consider some of these things that you should look for in a third-party file extractor and archiver app:
File support should be the first factor to consider. Most file extractors have no problem working with a diverse set of archive formats. However, it pays to check if the extractor you’re interested in supports the type of files you usually work with. But if you’re simply looking for a program that does that job and supports whatever’s thrown at it, pick any single program given above without a second thought.
Paid or free, depending on your needs, decide whether you want to spend a few bucks on a full-fledged file archiver/extractor with all the options and settings that you will ever need, or you are looking simply for freeware.
Convenience as a factor can never be overlooked when considering fine margins, especially in programs that provide similar functionalities. Each application offers a slightly different user interface and extraction options. Go with the one that feels convenient to use. Some apps such as WinRAR and WinZIP have a dedicated button available in the new Windows 11 context menu itself, but they are also paid apps. If you don’t want to make a purchase, you will have to settle for ones that require an additional click to get to the old context menu. Not so convenient, but certainly not the end all be all.
Archiving options are present in all file extractors. It is a two-way street after all, and your chosen app should excel at compressing and archiving files as well.
It’s best to try out a few apps and figure out which one suits your needs and means.
FAQs
Let’s take a look at a few commonly asked queries about file extraction on Windows 11.
How do you extract files on Windows?
Zip files can be extracted simply using File Explorer on Windows. If your archived file is in any other format, such as RAR or 7z, then you will need to install a third-party file archiving application, such as 7-Zip or WinRar to extract files. Refer to our guide above to know more.
Does Windows 11 have a zip program?
Yes, Windows 11 has in-built support for files with a .zip extension.
What is Extract here option in Windows 11?
The “Extract here” option lets users parse the contents of an archive file in the same folder as the archive file itself.
So these were some of the ways that you can extract files on Windows 11. Though the native options can take care of the zip file format, for everything else, you will need a third-party app. We hope you were able to find the file extractor that works best for you.
How to extract RAR, 7Z, or TAR in Windows 11?
Well, since File Explorer can handle only ZIP files, you can use a third-party app like PeaZip to extract non-ZIP files like RAR, TAR, 7Z, and many more file types.


Discussion