When it comes to unarchiving files (or extracting them as it is usually called) Windows 11 enjoys the ability to do so for a number of compressed file formats. But Microsoft is improving Windows for archiving files too. Recent changes have brought about not just an ability to compress files into formats other than ZIP, but also an advanced ‘Create Archive’ window to give users additional archiving options. Here’s everything you need to know to archive and compress files on Windows 11 without any third-party tools.
How to create TAR and 7z archives on Windows 11
The final quarter of 2023 saw Windows receive the ability to create 7z and TAR archives natively (apart from the already existing ZIP). And now, a recent update for Canary builds 26040 brings a new ‘Create Archive’ window where users will be able to choose additional compression options. Here’s how all these methods work:
Method 1: Using the File Explorer Context menu
Compressing or archiving files from the Folder context menu is still the fastest method. Here’s how you can use it:
- Select the files you want to archive.
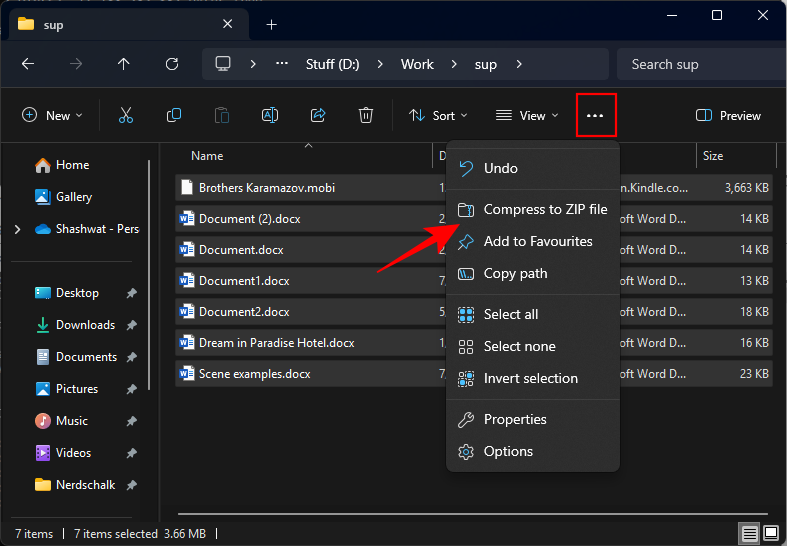
- Right-click on them and hover over Compress to…
- Then select the archive format that you want to compress your files into.
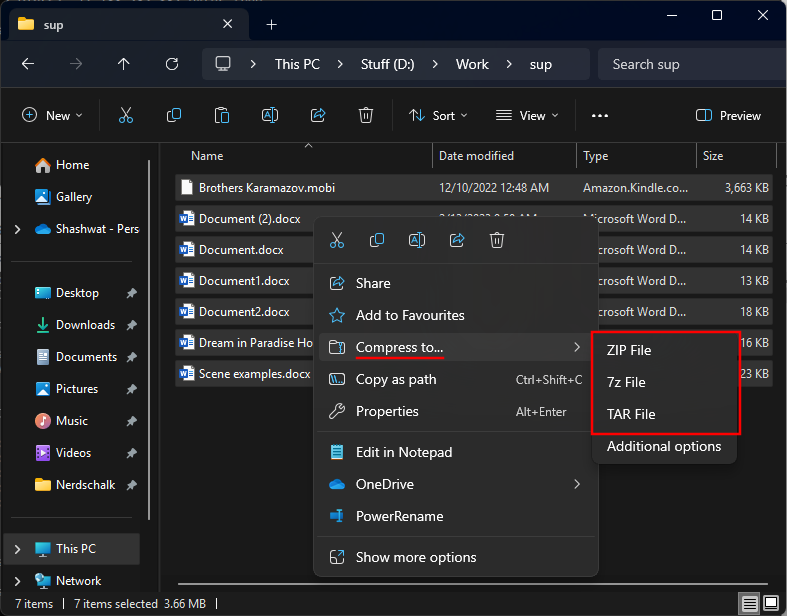
- Give the archive a name.
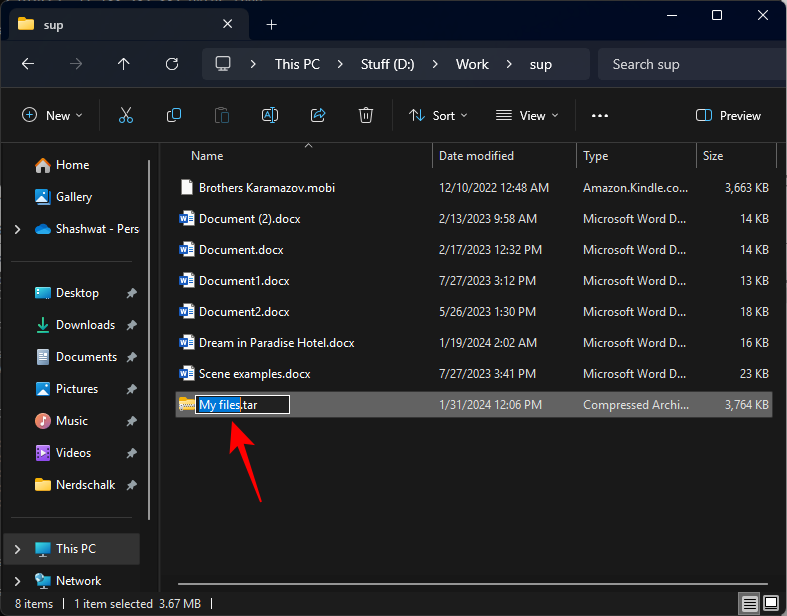
- And just like that, your files will be archived in the selected format, regardless of whether it is ZIP, TAR, or 7z.
Method 2: Using the ‘Create Archive’ window
The ‘Create Archive’ window is a new addition to Windows (only on Canary builds for now). Here’s how to use it:
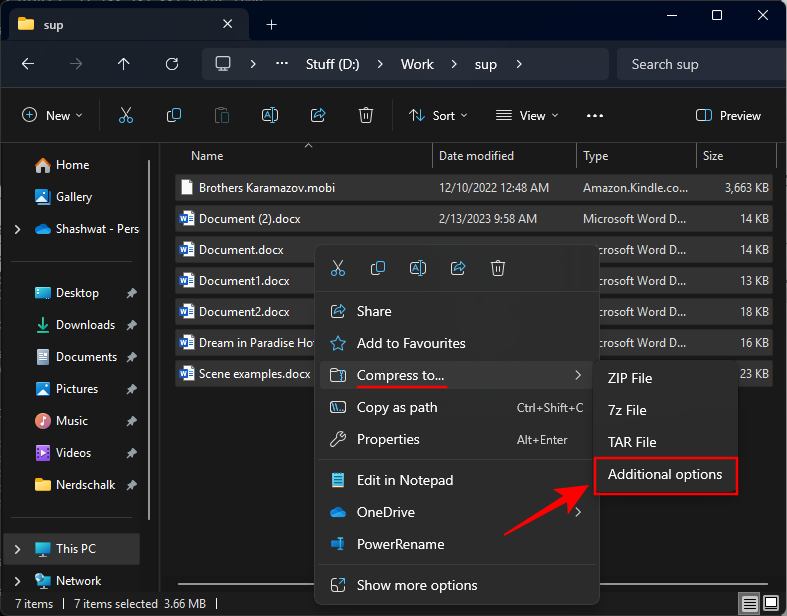
- Select the files to archive, right-click on them, and select Compress to > Additional options.
- In the ‘Create Archive’ window, give your file a name and choose a location.

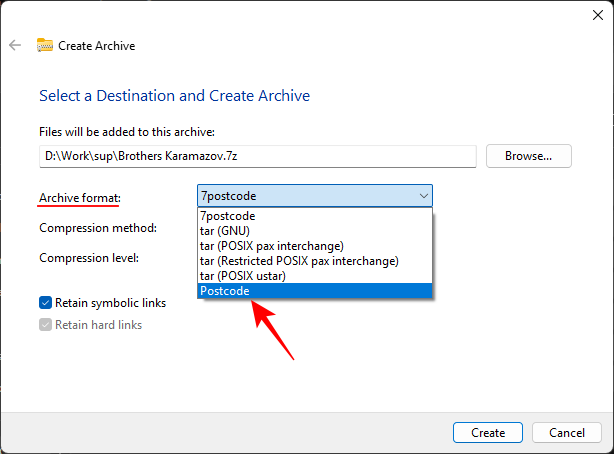
- Select the Archive format from the dropdown menu.

7postcode is 7z and Postcode is Zip. The rest are Tar. - Choose a Compression method from the dropdown menu for your selected archive format (these will be different for each format).

- If available, choose a Compression level by dragging the slider. ‘Faster’ compression will get the job done quicker but won’t shrink the size of the files too much; a ‘Smaller’ compression will shrink the files but can take some time to finish creating.

- If available, choose whether you want to retain ‘symbolic links’ and ‘hard links’.

- Finally, click Create.

- And your archive will be created with your chosen preferences.

How to create a ZIP archive on Windows 11
Since ZIP has enjoyed deeper integration into Windows for quite some time, it can be compressed natively in a few ways. Here’s how:
Method 1: From the File Explorer
- Select the files you want to zip, right-click on them, and select Compress to > Zip file.

- Alternatively, click on the three-dot icon in File Explorer’s toolbar, and select Compress to ZIP file.
- You can also create an empty ZIP folder by clicking on New > Compressed (zipped) folder.

- Then simply drag and drop your files into it.

Method 2: Using the Create Archive Window
With the ‘Create Archive’ compression wizard, you get more granular control over the compression method and level for your ZIP archive. Here’s how to use it:
- Select the files you want to zip, right-click, and select Compress to > Additional options.

- From the ‘Archive’ dropdown menu, select Postcode.
- Choose a ‘Compression method’.

Note: ‘Store’ lets you only put files in an archive file. To get compression level options, choose ‘Deflate’. - Use the slider to determine the ‘Compression level’.

- Click Create.

Method 3: Using PowerShell
Here’s how to create ZIP archives using PowerShell:
- Open PowerShell.
- Type the following command:
Compress-Archive -Path C:\Source\File\Path\* -DestinationPath C:\Destination\File\Path\ZippedFile.zip

Make sure to change the source and destination file path. The * tells the command prompt to zip all the files within that folder. - And just like that your files will be archived into a ZIP format.

Method 4: Using the Command Prompt
Here’s how to use the command prompt to create ZIP archives:
- Open the command prompt as administrator.
- Then change the directory with this command:
cd (folder_path)

Make sure to replace (folder) with the address of the folder that contains the files. - If you’re changing to a different drive, you’ll need to include ‘/d‘ after cd.

- Type dir and press Enter.

This will list the files in the folder (directory). - Now type the following command:
tar -a -c -f Compressed.zip *.FileExt

Change the title ‘Compressed’ to whatever you wish the filename of the zipped file to be. And make sure to replace ‘FileExt’ with the extension of the files to zip. - If there are multiple file extensions that you want to zip, simply add them at the end of the command, like so:
tar -a -c -f Compressed.zip *.FileExt *.FileExt(2) *.FileExt(3)

- If you only want to compress a single file, remove the * and enter the name of the file (with its file extension), like so:
tar -a -c -f Compressed.zip filename.FileExt

FAQ
Let’s consider a few commonly asked questions about creating archive files natively on Windows 11.
Which file formats can Windows 11 archive natively?
Currently, you can create only ZIP, TAR, and 7z archive files natively on Windows 11.
Can you archive files into RAR on Windows 11 natively?
No, RAR is not one of the archive files that you can create natively on Windows 11.
Can you create password-protected archive files on Windows 11 natively?
Unfortunately, even though Windows 11 lets you create archives using a Compression Wizard, it doesn’t let you password-protect your files yet. You’ll still have to use third-party options to create password-protected archives.
We hope you were able to archive files natively on Windows 11 using the different methods given in this guide. Until next time!


One response to “How to Create Archive Files (Natively) on Windows 11”
>7postcode
Another Microsoft localization fall. Some Windows 11 build 22621 delta revisions in April – May last year also have “Compress to ZIP files” translated as “Compress to postcode file” in en-GB. At this point you might want to set en-US as the Windows display language (the best way is to either perform an in-place upgrade or a clean installation starting your computer from the installation media).